









In this article
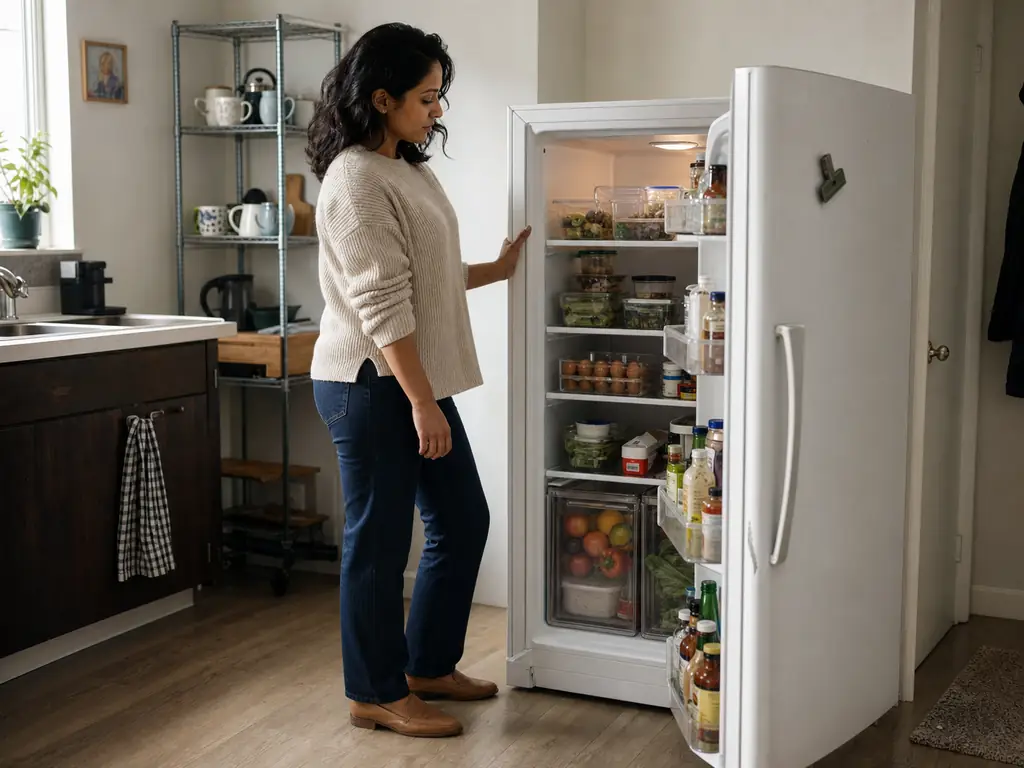
The bins arrive, you spend a Sunday afternoon loading them, and the fridge looks incredible for about four days. Then one rushed Tuesday, a bag of shredded cheese gets wedged between two of them, and by the second grocery run the whole thing is overstuffed again. The reason isn’t the bins. It’s that they were bought before anyone worked out what each part of the fridge is actually good at, and a container can’t fix a placement problem. Your refrigerator isn’t one cold box with shelves in it, it’s five or six fridge zones running at different temperatures and humidity levels, and that map is food-safety mechanics the FDA and USDA already publish. So the real answer to how to organize a refrigerator starts with clearing it out, reading the zones, assigning shelves and drawers, and only then deciding whether you need to buy anything at all.
Quick Answer
Organize a refrigerator by temperature zone, not by container. Empty it, wipe it, then place raw meat on the bottom shelf, dairy and eggs in the middle, leftovers on top, and condiments in the door. Set crisper humidity by produce type, keep food in clear containers, and add bins only where you have named the problem first.
Empty the Whole Thing First (Yes, All of It)

Nobody wants to do this part. The temptation is to work shelf by shelf, tidying around whatever is already in there, and that is exactly how you end up building a careful system around a jar of capers from two winters ago. The clean-out isn’t a chore bolted onto the project. It’s the audit that tells you how much space you actually have.
Pull everything onto the counter
Everything, at once, not shelf by shelf. Working in sections lets you keep items you would have discarded the moment you saw them lined up next to each other. Three near-identical bottles of mustard look reasonable when they’re spread across two shelves and absurd when they’re side by side on the counter.
Sort into three piles as you go. Keeps, discards, and a third pile for the things you buy every month and never finish. That third pile is the most useful data in the whole process, because it tells you what your fridge is being asked to store versus what it’s actually being asked to hold until it goes bad.
Wipe it down and count what’s left
Empty shelves are the only easy shelves to clean, and fridge cleaning is a two-minute job now versus a scraping job later. Pay attention to the drawer housings and the shelf under the raw protein, because drips from the bottom shelf are the reason placement rules exist at all.
This is also the whole of odor prevention, and it’s simpler than the internet suggests. Smells come from three places: an uncovered container, a spill nobody found, and produce breaking down out of sight. Sealed lids and a wiped shelf handle all three, and the open box of baking soda is a backstop for what’s left, not a substitute. Removable shelf liners are worth a mention here too, since a liner you can pull out and rinse turns the next spill into a thirty-second job, though they also trap crumbs underneath if you never lift them.
Then count what survived the sort. Most people are surprised at how few items genuinely live in the fridge full time (condiments always inflate the feeling more than the count), and that number decides everything downstream. If you have eighteen permanent residents and four shelves, you do not have a storage problem and you probably don’t need bins. If you have sixty, you need grouping. The back of the middle shelf is where things go to be forgotten, and nobody ever discovers what’s back there until the shelf is empty.
Your Fridge Is Not One Space
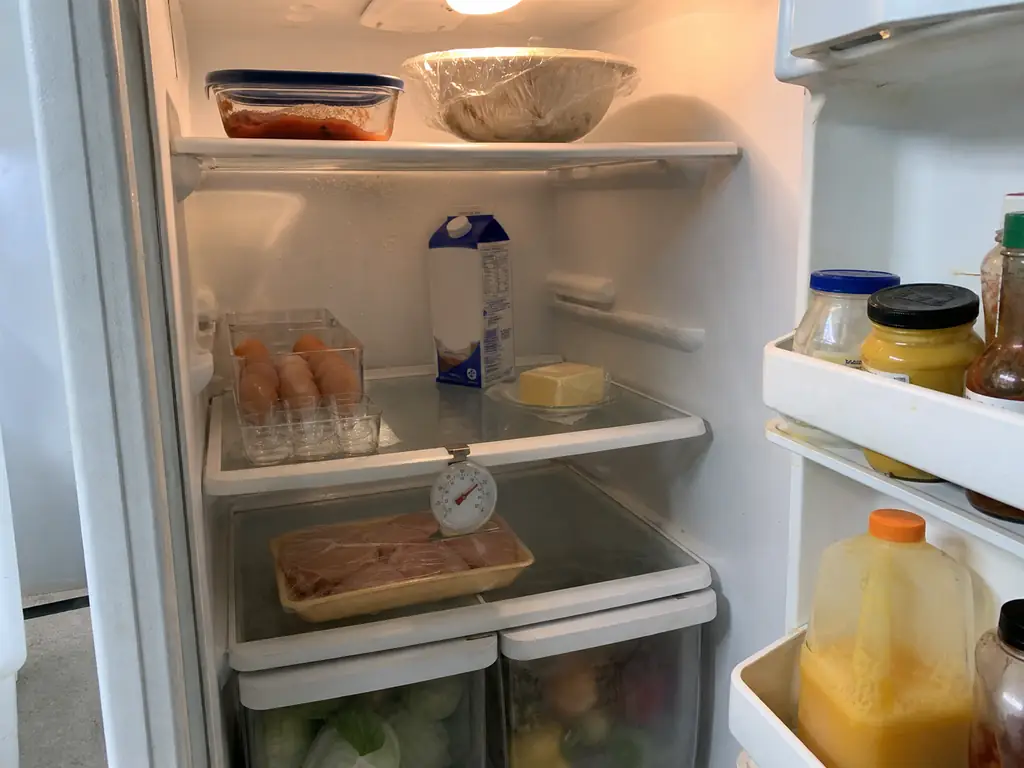
This is the section that reframes everything else. Most people treat the refrigerator as one uniform cold environment with shelves for convenience. It isn’t, and learning to read its temperature zones is the part of how to organize a fridge that nobody teaches. Cold air sinks, the door swings into a warm kitchen a dozen times a day, and the crisper drawers are sealed compartments with their own adjustable airflow. Once you can picture that map, half the placement decisions answer themselves and you stop needing a rule for every individual food.
Cold sinks, the door swings
The bottom shelf and the rear of the fridge are the coldest, most temperature-stable real estate in the appliance. Nothing you put back there gets much of a swing. The top shelf and the front of every shelf run warmer, because that’s where room air rushes in each time the door opens.
The layout of your specific unit shifts how pronounced this is. A top-freezer refrigerator puts its coldest air right under the freezer compartment, so the top shelf runs colder than people expect. A side-by-side refrigerator gives you tall narrow columns where the vertical gradient is gentler but every shelf is shallow. A French door refrigerator spreads the fridge section wide and low, which makes the back of the middle shelf the deepest dead zone in any layout. A counter-depth refrigerator trades that depth away entirely, which is genuinely good news for organization even though it costs you volume.
The refrigerator door is the warmest zone in the whole unit, and it isn’t close. It has the most exposure to ambient kitchen air and the least protection from it. That makes it a temperature-swing problem, not a space problem, which is why the fix is never a better door bin. It’s moving the wrong things out of the door entirely.
The dial is a setting, not a reading
Here’s the part that catches almost everyone. The number on the front panel is what you asked the appliance for, not what it delivered. Plenty of units run several degrees off, and you will never know from the display. A basic free-standing appliance thermometer, a genuinely budget-friendly piece of equipment, is the only way to confirm your real fridge temperature is at or below 40°F. If you want the reasoning straight from the source, the FDA’s guidance on refrigerator thermometers is worth five minutes.
There’s a practical tell you can read without any equipment. If items stored on your door shelf go off noticeably faster than the same items stored on a middle shelf, that’s the temperature map making itself visible in your own kitchen.
Clip the thermometer to a middle shelf toward the front, not the back. The back is the coldest spot and will always read fine. The front-middle is where the number tells you something useful, because that’s where the warm air actually reaches.
This zone-first thinking is the same approach that works for kitchen cabinets, where reach and height do the job that temperature does here. Map the space before you shop for it.
What Goes Where on Each Shelf and in the Door
Now that the zones make sense, the placement rules get short. One of them is genuinely rigid and the rest are optimization.
The one rule worth being strict about
Raw meat storage belongs on the bottom shelf, poultry and seafood with it, in a sealed container or on a rimmed tray. Coldest zone, and if anything leaks it leaks onto the drawer housing rather than onto food you’re about to eat without cooking. This is cross-contamination control, not preference, and USDA food safety guidance on cold storage treats it that way.
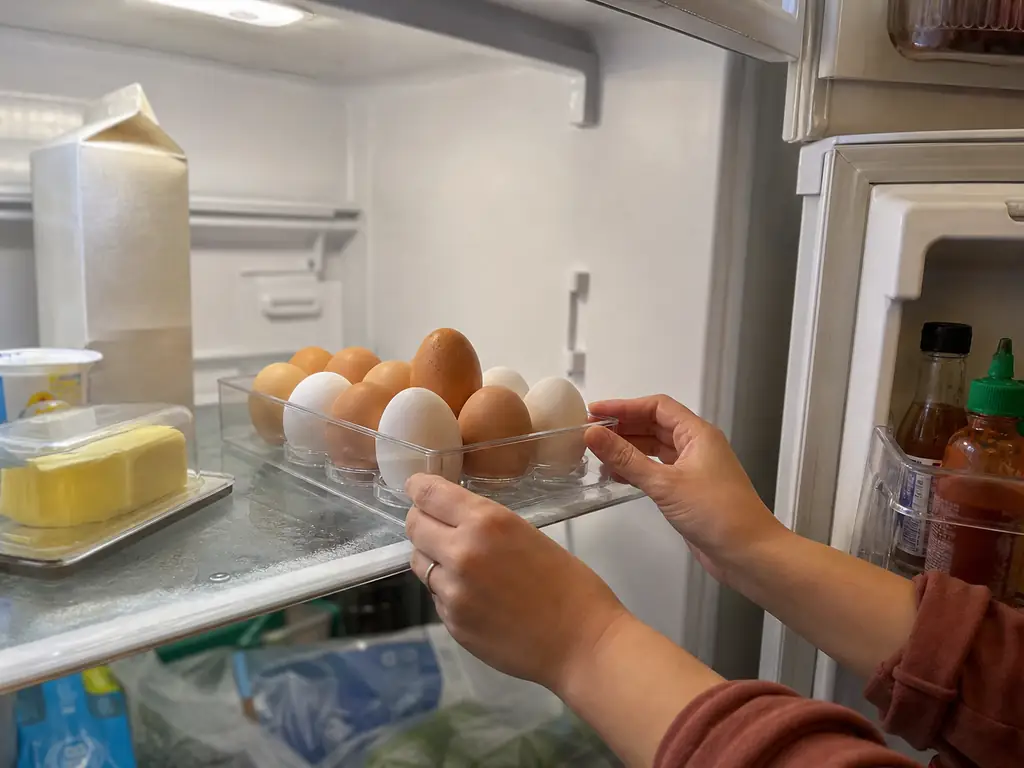
Everything above that follows the temperature gradient. Middle shelf for dairy storage and egg storage, where the cold is steady and the reach is easy. Top shelf for leftovers and anything already cooked, which is also where the eat-first spot belongs, at eye level where you can’t pretend not to see it. The deli drawer, if your unit has one, takes sliced meats and cheeses that would otherwise slide to the back of a shelf and resurface in a month.
Get the milk and eggs out of the door
The gallon door bin, that shaped slot sized exactly for a milk jug, is the most convincing piece of bad design in a modern refrigerator. It looks like an instruction. It isn’t one. Milk is the thing in your fridge that spoils fastest and the door is the warmest place in it. Same story with eggs, which handle steady cold well and temperature swings poorly.
What the door is actually good at: condiment storage, juice, beverages, butter, and anything heavily preserved or finished quickly. Once the milk and eggs leave, there’s usually more door space than you expected.
A loose egg carton on a middle shelf works perfectly well, blocks light, and costs nothing, so start there. If you want the shelf depth back, the iDesign Clear Plastic Egg Holder holds 21 eggs in a flat tray you can stack something on top of, which a carton can’t do. The trade-off is that you have to move the eggs over by hand every time you shop, and some people find that a chore they quietly stop doing by week three.
If your door shelves are still crowded after the milk moves out, the side of the fridge is unclaimed vertical space. A magnetic spice rack on the side of the fridge pulls the smallest, most annoying containers out of the door entirely.
Crisper Drawers, Decoded
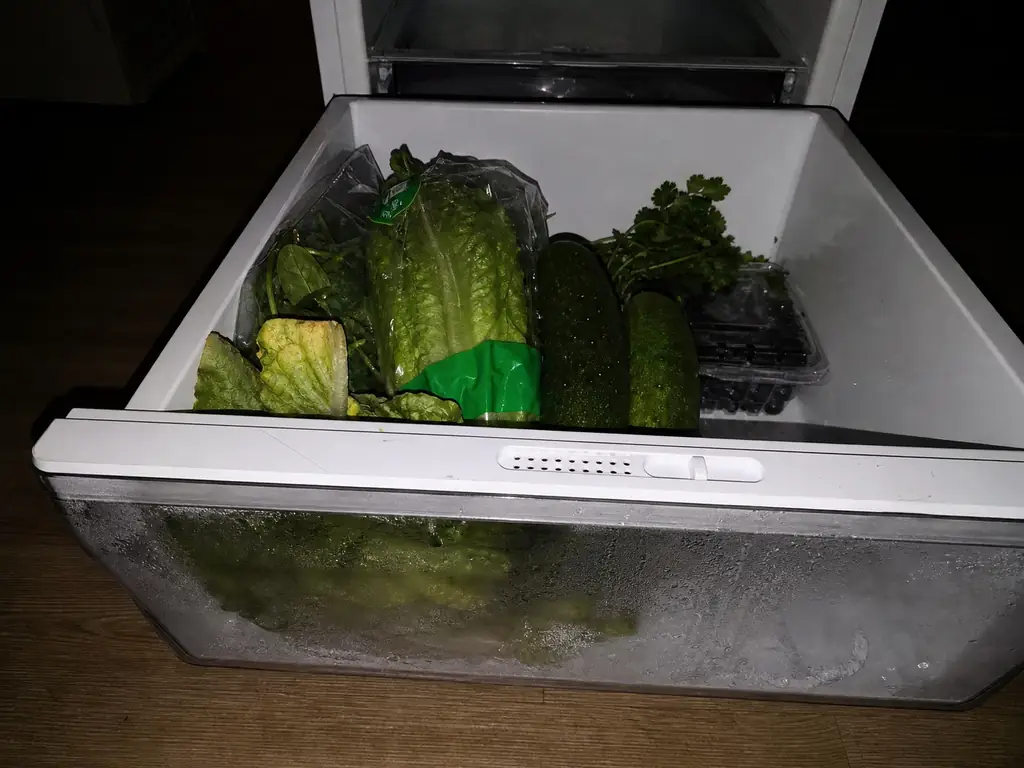
Almost nobody moves that slider. It has been sitting wherever the factory left it since the fridge was delivered, and produce has been going soft against it ever since. The mechanism takes one paragraph to explain, and the part that nobody explains is the one that matters most.
The slider is a vent, not a thermostat
It doesn’t change temperature. It opens and closes a vent that controls how much outside air gets into a sealed drawer. Closed means high humidity, moisture stays trapped. Open means low humidity, moist air escapes.
The high humidity drawer is for thin-skinned produce that wilts: leafy greens, spinach, broccoli, herbs, berries, cucumbers. These are your ethylene-sensitive produce, and they need moisture held in. The low humidity drawer is for thick-skinned produce that rots in trapped moisture, and for the ethylene-emitting produce that speeds up everything around it: apples, pears, avocados, stone fruit.
That separation is the actual reason your fridge has two drawers. Not a fruit drawer and a produce drawer, but an emitter drawer and a sensitive drawer.
How full the drawer is matters as much as the setting
This is the variable nobody publishes, and it explains a lot of failed produce. A crisper drawer performs best at roughly two-thirds full. Packed to the lid, airflow stops entirely and the humidity setting has nothing to work with, so the drawer becomes a sealed box no matter where the slider sits. Nearly empty, produce sits in too much circulating air and dries out from the other direction.
Which means dumping an entire grocery haul into one drawer isn’t just untidy, it’s a spoilage cause on its own. If the greens are going slimy inside a week while the apples in the same drawer are perfectly fine, you have both categories in the high-humidity setting and the greens are sitting in trapped moisture they can’t shed.
Splitting a deep drawer
A deep drawer that’s become one undifferentiated pile has a dead zone at the back that nothing gets pulled out of. Before buying anything, a dish drainer laid flat or a shoebox base with the lid removed will section it off for free, and plenty of people run that setup for years.
When you want something purpose-built, the LALASTAR Refrigerator Organizer Bin with Pull-out Drawer stacks inside the drawer and slides forward, so the back of the drawer stops being a place things disappear into. The caveat is real, though: every bin wall you add costs volume, so this earns its place in a deep drawer and gets in the way in a shallow one.
If you only ever fill one crisper drawer, set that one to high humidity and store your thick-skinned fruit on an open shelf instead. Apples and pears are far more forgiving of shelf conditions than greens are, so give the sealed compartment to the produce that actually needs it.
Containers, Bins, and Labels That Survive Real Use
This is where the anti-sell earns its keep. The single best container upgrade most people can make costs nothing, and the most common reason a bin purchase fails has nothing to do with quality.
Clear beats opaque, every time
Call it the visibility principle: you do not eat what you cannot see. A meaningful share of the food waste leaving a refrigerator was never spoiled when it was forgotten, it was just invisible inside an opaque takeout container or its original packaging. Decanting into repurposed containers you already own, jars, washed deli tubs, any clear lidded thing in the cupboard, solves more waste than any organizer set will.
I used to recommend buying a matched container set as step one. After enough versions of the same story in organizing threads, where the new set gets used for two weeks and then the old mismatched tubs creep back in, I flipped the order: use what’s in the cupboard first, and only buy once you know which sizes you actually reach for.
When you do buy, the Rubbermaid Brilliance Food Storage Containers 10-Piece Set is the reliable version of this: fully clear, an airtight container seal on every lid, and mid-size pieces that stack in a single flat column on a top shelf instead of sprawling. They take up more cabinet space than silicone storage bags or other reusable food bags when they’re empty, which is the honest trade, and glass containers beat them on stain resistance if weight isn’t a concern. If the lids are your real problem, how to get the lids under control covers that separately.
Measure before you buy, then subtract
“Fits standard refrigerator doors” is a marketing phrase, not a measurement. Door shelves vary widely by model, and the only number that matters is the one from your own fridge.
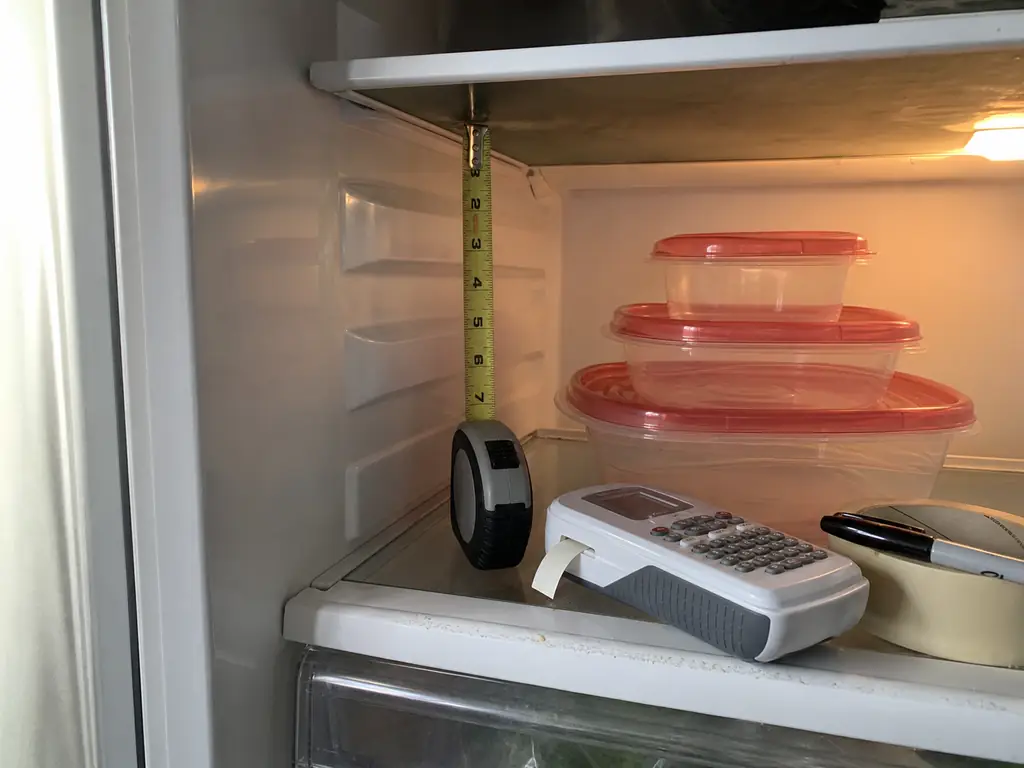
Measure three things with an actual tape measure: width, depth, and vertical clearance to whatever sits above. Vertical is the one people skip, and it’s the one that turns a correctly sized bin into a bin that won’t go in. Then subtract at least half an inch from each measured dimension when you choose, so there’s room for handles and for the thing to slide without jamming against the shelf lip or fouling the door seal.
Narrow French-door and side-by-side units are the sharp edge of this. Some need door bins under five inches wide, which is narrower than most universal organizer sets assume. Check the narrowest listed dimension before ordering anything. A useful physical benchmark: a lot of drawer inserts land near the footprint of a shoebox lid, so hold one against your drawer opening and see whether the drawer still closes.
Label for dates, not for looks
A labeling system in a refrigerator has one job, and it isn’t matching fonts. A note carrying the cook date or the use-by date is what stops the Thursday sniff test and the reflexive discard that follows it. Masking tape labels and a permanent marker do this expiration tracking for free and always have.
The upgrade case is specific: households where the label has to be legible to somebody other than the person who wrote it. Shared fridges, families, anyone whose handwriting on tape gets politely ignored. The Brother P-Touch PTD220 Label Maker produces labels that peel cleanly off plastic containers, which matters when the date changes weekly. It’s a want, not a need, and if the tape is working, keep the tape.
Fridge Organizer Types at a Glance
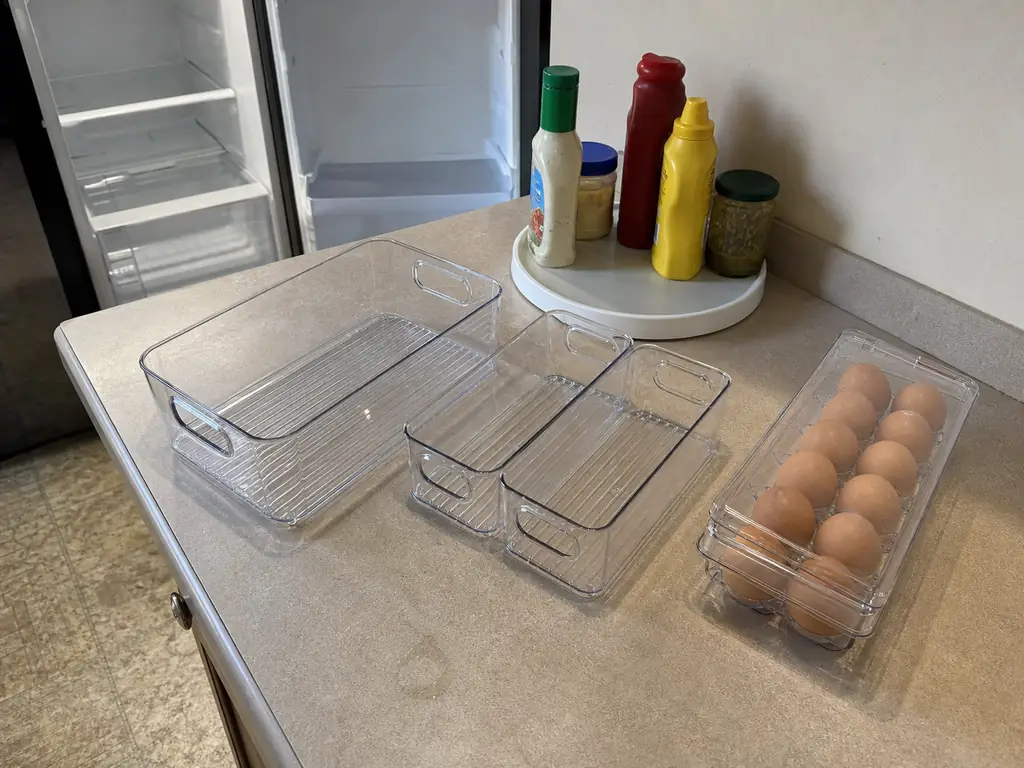
By now you know your zones and you’ve measured. This is the survey of what exists, framed the only useful way: don’t buy a category until you can name the problem it solves in your fridge.
Five categories and what each one fixes
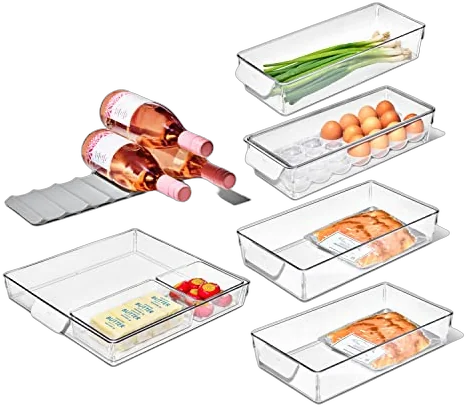
- Clear storage bins group loose items by category, and stackable bins reclaim vertical air on tall shelves. The workhorse of all fridge organizer bins, and the category most often over-bought.
- Turntables, still sold everywhere as a lazy susan, fix the condiment cluster that gets pushed to the back and forgotten. A reach problem, not a space problem.
- Egg holders, the shallow produce bin, and the vented berry bin make awkward packaging stack and stop shape-specific items wasting depth.
- A drawer insert organizer or a set of drawer dividers splits one deep drawer into sections so the back stops being dead space.
- A drink dispenser or can rack pays off only if your household drinks canned things in volume. Otherwise it’s a tax on shelf depth.
- A wire storage basket is the odd one out here, and mostly a mistake in a fridge. The open weave that makes it breathe in a pantry lets small items fall through and drips reach the shelf below.
The turntable is worth a specific note on size. The Copco Non-Skid Turntable 9-inch is fridge-appropriate at nine inches across, where the 12-inch versions people bring over from pantry advice swallow the entire shelf depth and block whatever sits behind them. The non-skid base earns more here than it does in a cabinet, because a fridge shelf gets a small shove every time the door swings shut. If you’re weighing plastic against glass for the bins themselves, which container materials hold up and which don’t goes deeper than this survey needs to.
Modular beats monolithic
An eight-piece set is rarely eight pieces you need on day one. The recognizable failure of this whole category is the fridge full of half-empty bins, and those bins didn’t fail. They were bought for a fridge nobody had mapped yet. Buying one or two shapes and adding as real gaps appear is how you avoid that outcome, which is also why sets built from separate pieces beat single moulded trays.
Small, Shared, and Rental Fridges
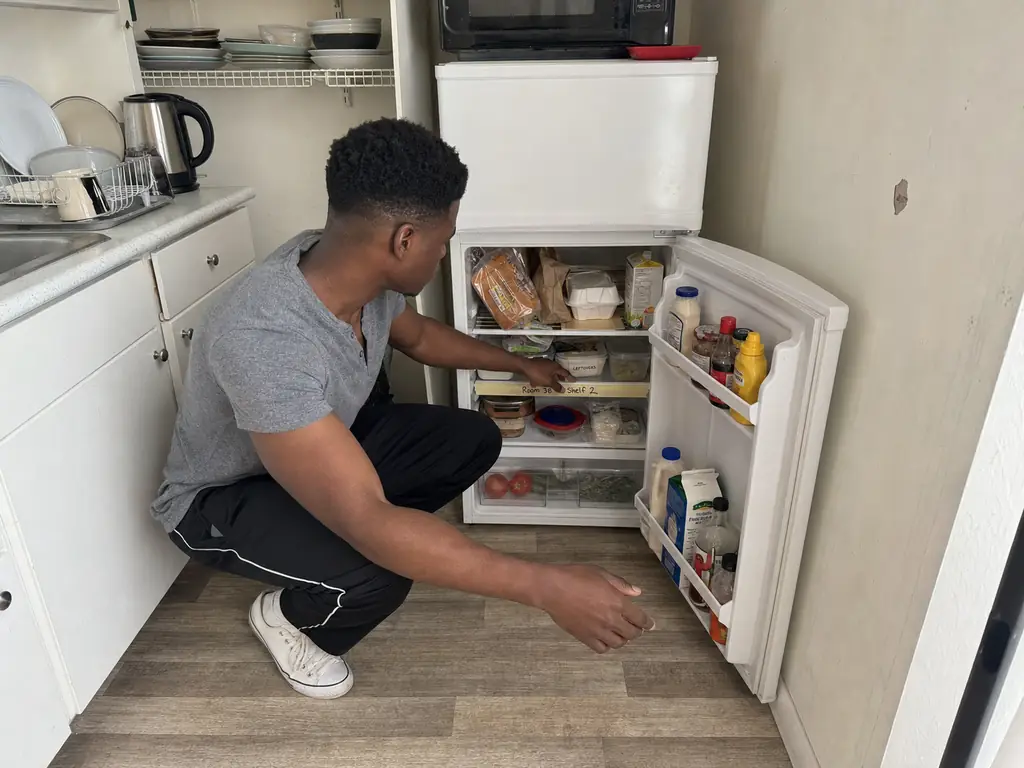
Nearly every refrigerator organization guide assumes a full-size unit in a house you own. That isn’t who most people are. In a compact fridge or an apartment unit you didn’t choose, the zone map still applies. There are just fewer zones and the trade-offs get sharper.
The most renter-friendly category in the house
Here’s something nobody says out loud: fridge organization is the easiest win a renter has. Every solution in this guide is no-drill by default, with no adhesive strips that pull paint, no mounting-weight math, and no arguing about what comes off the deposit. Bins sit on shelves that already exist and leave with you when you move. Every other room in a rental has a permission problem attached to it. This one doesn’t, and that alone makes it a sensible place to start.
Fewer zones, sharper trade-offs
In a dorm fridge or a standard apartment fridge, the six-zone map collapses to two or three. Coldest at the back and bottom still holds. The door is still the warmest place. You just have less room to be precise, so prioritize hard: raw protein low, ready-to-eat high, and accept that the rest is negotiable.
Small fridges also punish bins harder than large ones. Every bin wall costs usable volume you can’t spare, so in a compact unit favor low-sided trays and shallow shape-specific holders over tall walled boxes. A full organizer set in a mini fridge can genuinely leave you with less storage than you started with.
Shared fridges fail on ownership, not containers
The roommate fridge breaks for a structural reason that no organizer set addresses, and it’s the same reason a shared kitchen never stays tidy. Groceries are bought individually while shelf and drawer space is shared, and only condiments and drinks get treated as genuinely communal. So the fix isn’t better bins, it’s assigning zones to a person rather than to a category. One shelf each, named, and the drawer split the same way.
If you’re the only person in the house following any system, shrink your scope instead of fighting for the whole appliance. Claim one shelf and one drawer, run it properly, and leave the rest alone. A system that works in a third of the fridge beats a failed one across all of it. The tell that this is an ownership problem and not a tidiness problem: the chaos comes back every time someone new moves in, no matter how good the previous setup was.
Setting Up for Grocery Day and Meal Prep
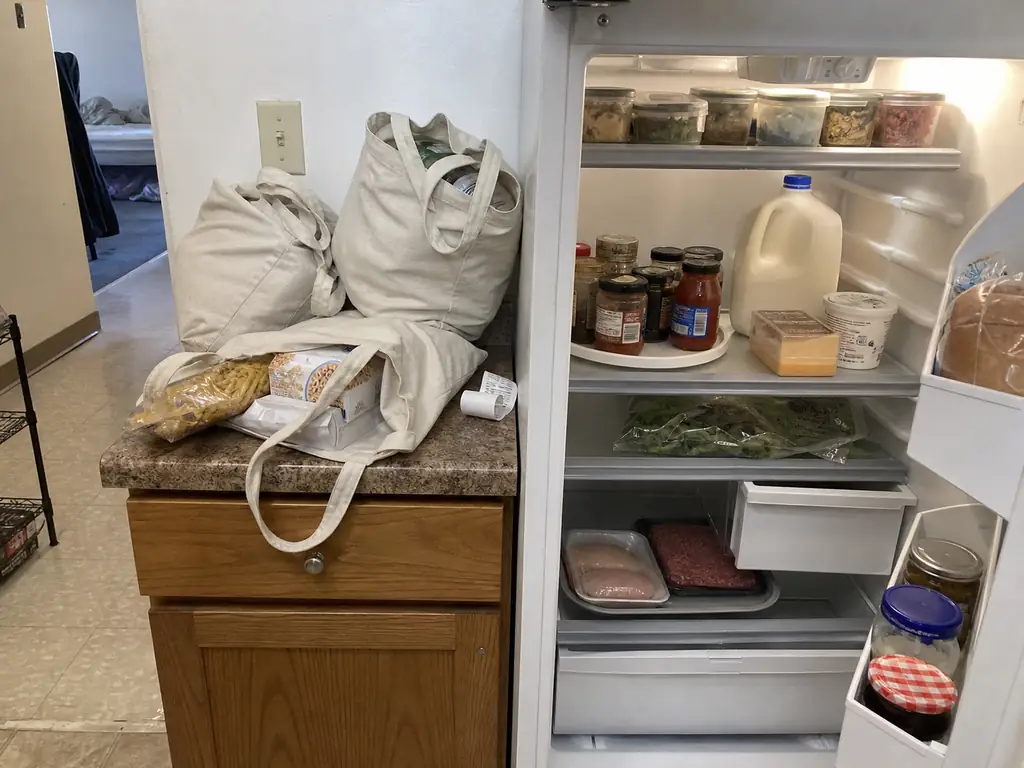
Every fridge system gets designed on a quiet Sunday and then tested by a Tuesday with six bags on the counter. Unpacking is a speed activity and organizing is a precision activity, which is exactly why the two collide. The system has to accommodate speed or it loses.
Unpack cold-first and rotate as you load
Raw protein, dairy, and deli go in before anything shelf-stable gets touched. Perishables need to be refrigerated within two hours of getting home, and one hour when it’s genuinely hot out, which the FDA’s two-hour rule for refrigerating perishables lays out plainly. “I’ll do the fridge last” is how that window quietly gets missed.
Rotate in the same motion. New items go behind the old ones as you put them away, not as a separate FIFO pass you’ll never come back to do. If rotation is its own step, it doesn’t happen.
Keep a grab-and-go tier
One shelf or one grab-and-go bin of things that require zero decisions: cut fruit, yogurt, string cheese, prepped containers. This is the single feature that determines whether the system survives a rushed weekday morning, because a rushed person doesn’t browse. They grab whatever is at the front and leave.
Batch cooking storage works on the same logic, one level up. Uniform footprints beat a mixed set, because containers that stack flat in a single column go away in one motion, and a mismatched pile has to be re-fitted every week. This is also where the eat first bin pays for itself, since anything that drifted toward its date during the week gets moved forward at eye level on grocery day.
Do the ten-minute reset before you shop, not after you unpack. Clearing space first means grocery day is pure loading, and you get an accurate read on what you already have while you’re still writing the list.
Why Fridge Systems Fail by Week Two
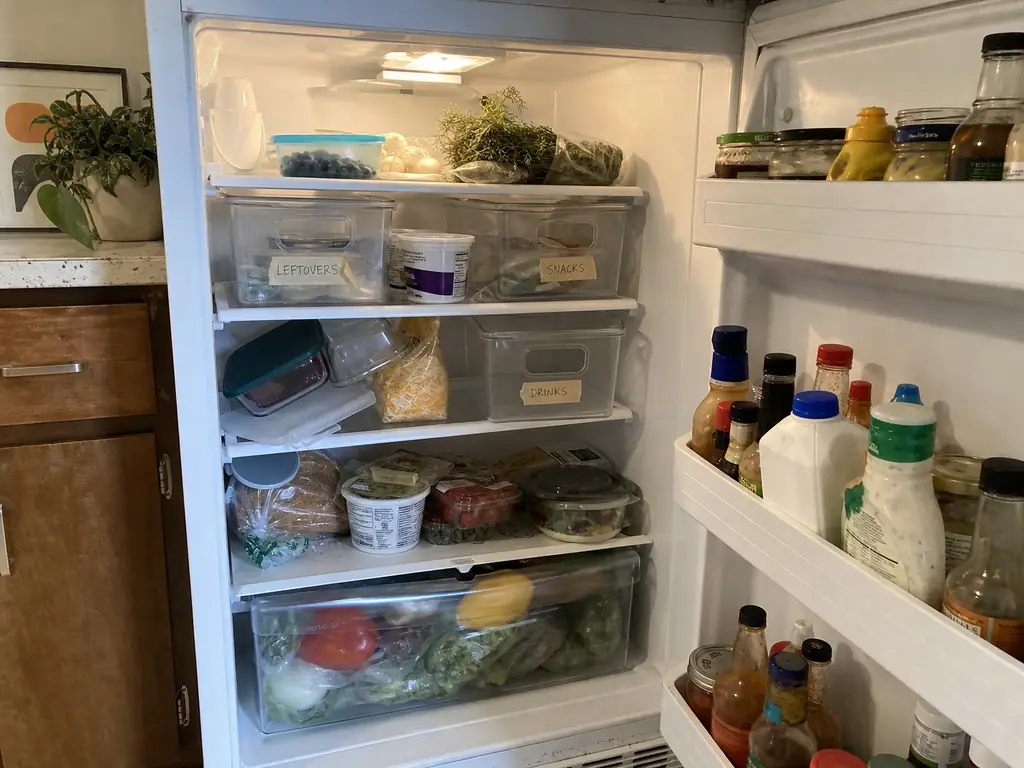
Every guide gestures at this and none of them explain it. “Things get pushed to the back and forgotten” is a symptom, not a cause. The cause is that the first uncorrected deviation compounds.
The mechanism, plainly
One item goes back in the wrong spot on a rushed Tuesday. Nothing bad happens. That non-event teaches everyone in the household, including you, that the zone is a suggestion rather than a rule. The next person to be in a hurry improvises in the gap that item created, and improvised placement spreads faster than the original system ever did. By the following week there’s no system, just a memory of one.
And the correction window is days, not weeks. Put the drifted item back the same day and the boundary holds. Leave it and the boundary dissolves, because a zone only exists as long as people can see where it starts.
The weekly reset is the whole maintenance plan
Ten minutes, once a week, timed just before you shop. Call it the grocery day reset: pull anything that has drifted out of its zone, move whatever is aging toward its date to the eat-first spot, wipe one shelf. That’s the entire routine and it doesn’t need to be longer.
The conventional advice is a deep clean every month. In practice the monthly clean is the thing people skip, while a ten-minute weekly pass survives because it’s short enough to do badly and still work. As household maintenance goes, frequency beats thoroughness here by a wide margin.
The Three-Month Test
A system that requires explaining will fail. In any household with more than one person, the setup has to be legible to somebody who wasn’t there when you built it, which is the real argument for labels and for zones that make intuitive sense rather than optimal ones. The version that lasts three months is the one a rushed roommate follows without thinking about it.
Which brings this back to where it started. You can run every system in this guide with containers already in your kitchen, a roll of masking tape, and ten minutes a week. The bins are optimization on top of a working system, never the system itself. If you want the same reasoning applied to the room next door, the same weekly reset that keeps a pantry from reverting uses an identical framework.
Putting It Together
Three things carry the most weight. Map the zones before you buy anything, because placement fixes more than containers do. Measure width, depth, and vertical clearance, then buy a half inch under, because fit is where bin purchases fail and quality rarely is. And build the version that’s legible rather than the version that’s optimal, because legible is what survives contact with a rushed household.
In three months, open the door and look at what has drifted out of its assigned spot. Whatever moved is telling you that zone was inconvenient, and the fix is moving the zone, not scolding the people using it.
Start with the door. Take the milk and the eggs out of it, put condiments in their place, and watch what happens over the next two weeks. If those items last noticeably longer, you’ve just proven the zone map to yourself in your own kitchen, and everything else in this guide gets easy.
Frequently Asked Questions
01What is the best way to organize your refrigerator?
Work by temperature zone, not by container. Raw meat on the bottom shelf, dairy and eggs in the middle, leftovers and ready-to-eat food on top, condiments in the door. Set the crisper drawers by humidity, keep food in clear containers, and add bins only after the zones are working.
02What are some common mistakes to avoid when organizing a fridge?
The three that waste the most food are storing milk and eggs in the door, packing produce into whichever crisper drawer has room, and buying organizer bins before measuring the shelves. Leaving food in opaque original packaging is a close fourth, since invisible food is food nobody eats.
03What is the best organizer for a fridge?
Category matters more than brand, because each type solves a different problem. Stackable clear bins for grouping and vertical space, a turntable for the condiment cluster that gets pushed to the back, drawer inserts for a deep drawer, and shape-specific holders for eggs and berries. Buy one or two pieces, not a full set.
04How often should you clean out your refrigerator?
A ten-minute pass once a week, timed just before grocery day, handles most of it. Pull anything drifting toward its date, move it forward, wipe one shelf. A full empty-everything clean every three months is plenty if the weekly reset is actually happening.
05Do I need to buy bins to organize my refrigerator?
No. Every system here runs on containers already in your kitchen plus masking tape and a marker. Bins solve two specific problems, grouping loose items and reclaiming vertical air on tall shelves, so buy them once you have hit one of those and measure your shelves first.