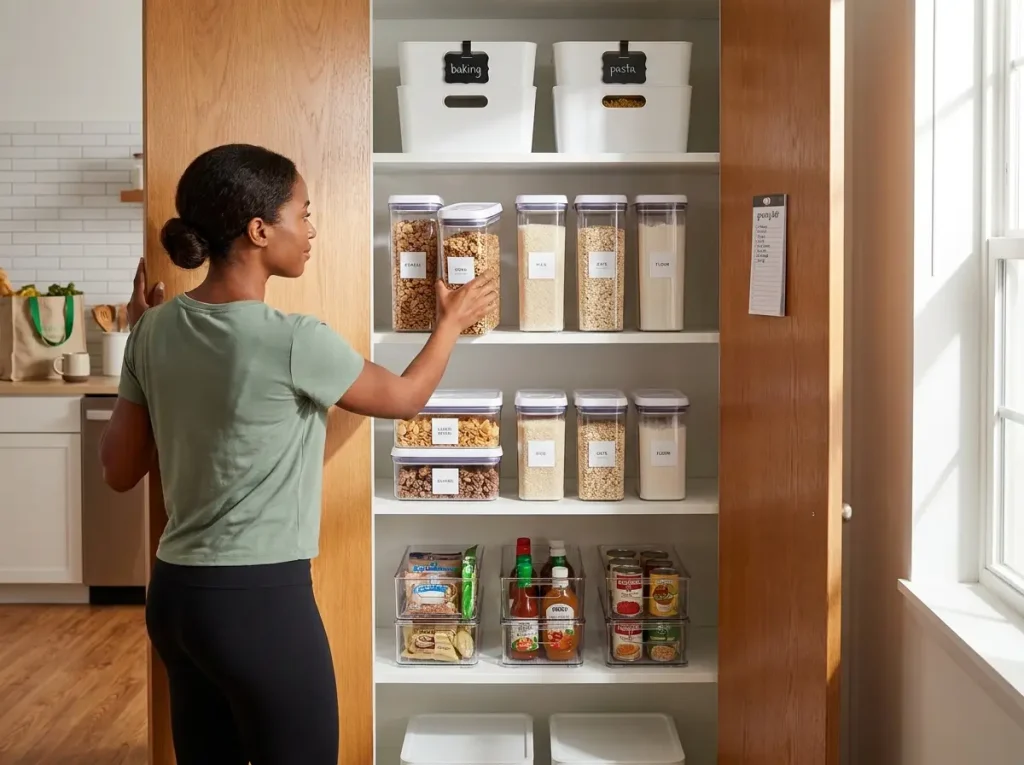
You reorganized your pantry last month. Pulled everything out, wiped the shelves, bought matching bins, spent a Saturday afternoon getting it right. It looked amazing.
And now, three weeks later, the cereal box is shoved sideways behind the pasta, someone put the chips where the canned goods go, and there are two bottles of soy sauce because nobody saw the first one. Sound familiar?
The problem is almost never motivation. It’s that most pantry organization advice focuses on the setup and ignores everything that happens after. This guide covers the full system — from measuring your shelves before you spend a dollar, to the ten-minute weekly reset that keeps the whole thing running months later.
Quick Answer: To organize your pantry so it stays organized:
- Measure shelf depth and spacing before buying anything
- Group items into zones based on how you cook and eat
- Use clear containers for dry goods and opaque bins for messy items
- Label everything — including expiration dates
- Add door storage and turntables to reclaim dead space
- Do a ten-minute weekly reset to maintain the system
Why Most Pantry Systems Fall Apart (and What to Do Differently)
The Setup-Only Problem
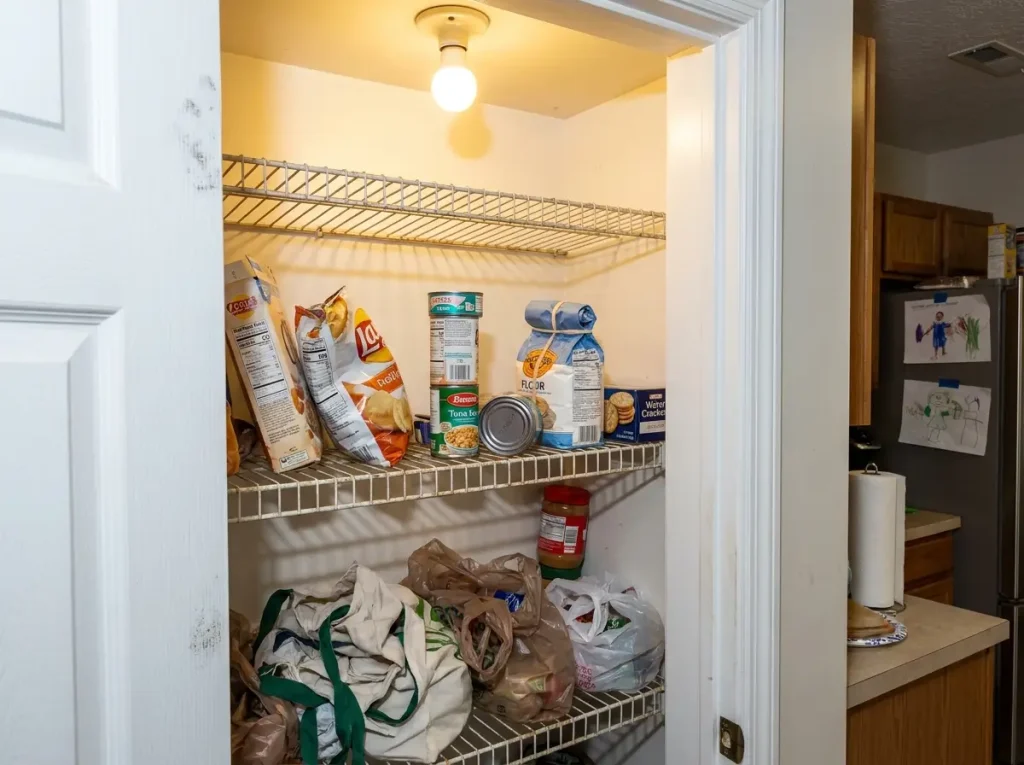
Most pantry content stops at the “after” photo. You see the matching containers, the clean labels, the perfectly arranged shelves — and then nothing. Nobody tells you what happens on Tuesday night when the grocery delivery arrives and your partner shoves everything back in without reading a single label.
The system falls apart because it was designed for the photo, not for the Wednesday-morning-scramble-for-lunch-supplies version of your life. A pantry that only works when one person maintains it is not organized — it’s staged.
The Three Reasons Pantries Revert
The first reason is invisible rules. If you’re the only one who knows that canned goods go on shelf three and snacks go on shelf two, the system has a single point of failure — you. Every other person in your household is guessing.
The second is no restocking protocol. Grocery day is the biggest threat to an organized pantry. New items get shoved wherever they fit instead of into their assigned zones. Within two grocery trips, the zones are meaningless.
The third is products that don’t fit. People buy bins and containers based on how they look online, not based on the actual dimensions of their shelves. A container that sticks out past the shelf edge by half an inch means the door won’t close properly. That’s when you start stacking things on top of it, and the system unravels.
What to Do Instead
Build the system assuming other people will use it imperfectly. That means visible labels on every shelf edge, not just on the containers. It means measuring before buying. And it means a weekly reset that takes less time than making coffee.
Know Your Pantry Before You Buy Anything
Measure Three Things First
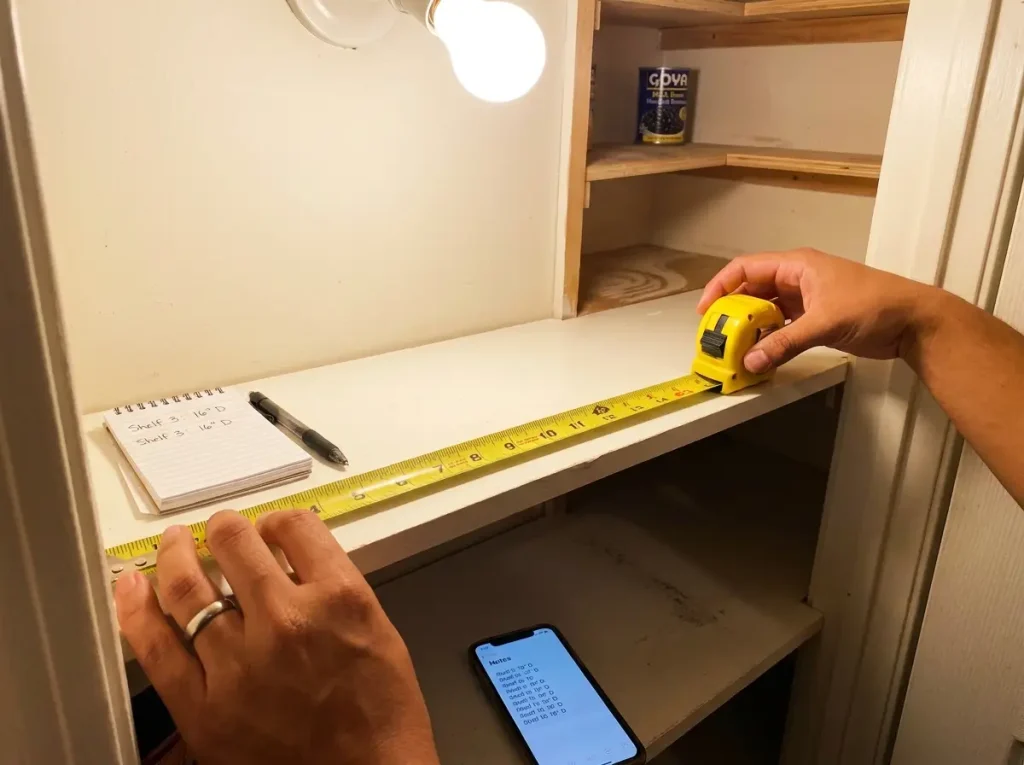
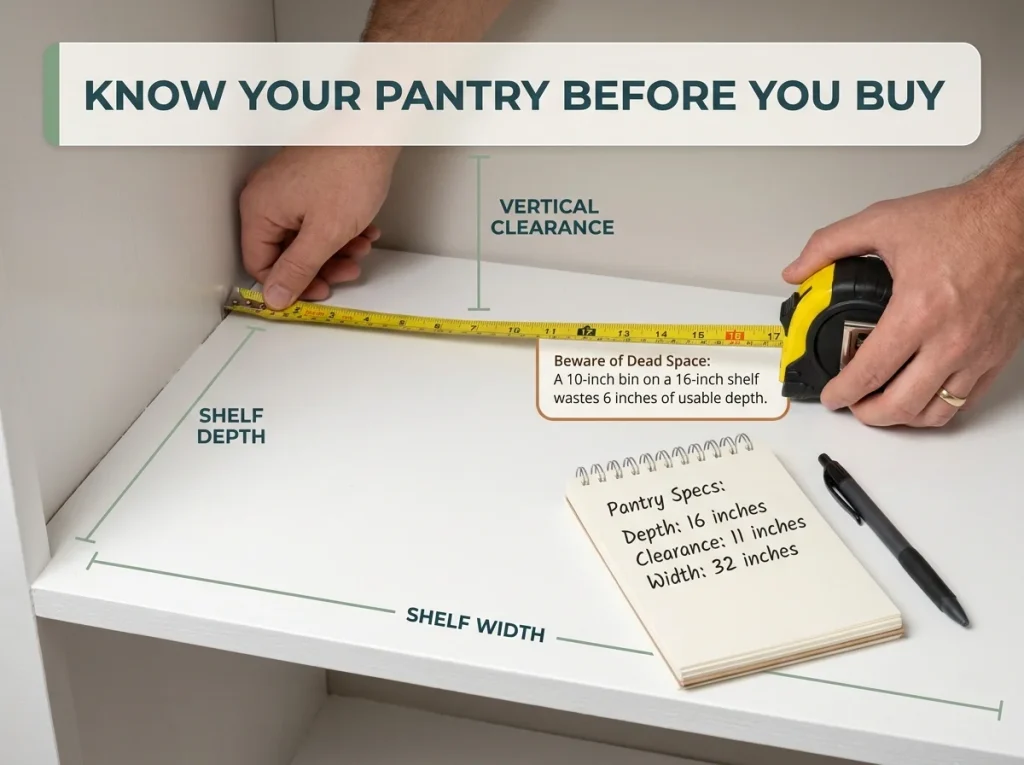
Grab a tape measure before you open Amazon. You need three numbers: shelf depth (front edge to back wall), vertical clearance between shelves, and the width of each shelf.
Standard pantry shelves run 14 to 20 inches deep, with 16 inches being the most common in kitchens built after 1990. The vertical spacing between shelves is where most people get surprised — it ranges from 10 to 16 inches depending on whether the previous owner cared about fitting cereal boxes or canned goods. Write all of this down.
Why These Numbers Matter More Than the Brand
That popular container set you saw on Instagram? It’s 13 inches tall. Your shelf spacing is 11 inches. It won’t fit.
This happens constantly, and it’s the number one cause of pantry organization returns on Amazon.
The shelf depth matters just as much. A 10x6x5 bin on a 14-inch shelf leaves 8 inches of usable depth behind it — dead space you can’t see and won’t use. On a 20-inch shelf, that same bin wastes 14 inches. Knowing your depth tells you whether to buy shallow bins and use risers, or deeper bins that actually fill the space.
Map Your Current Inventory
Before you pick a single container, pull everything out and group it on your kitchen counter by how you actually use it — not by category from a blog. Group by meal context: breakfast items together, snacking items together, baking supplies together, dinner staples together. The groups you naturally create become your zones.
Pro tip: Take a photo of the groups on your counter before putting anything back. This is your zone map. You’ll reference it when you assign shelf positions.
The Zone System That Actually Keeps Working
Assign Zones by Frequency, Not Category
The most common mistake is organizing by food type — all cans together, all boxes together, all bags together. This looks neat but fails in practice because you’re reaching into three different zones every time you make dinner.
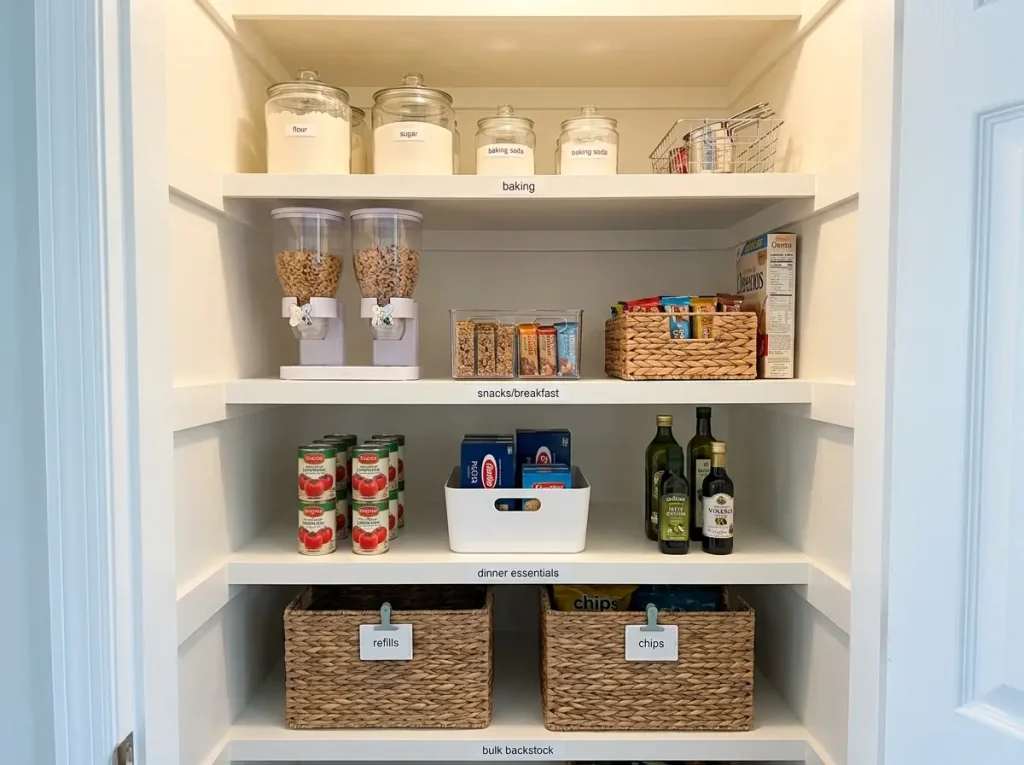
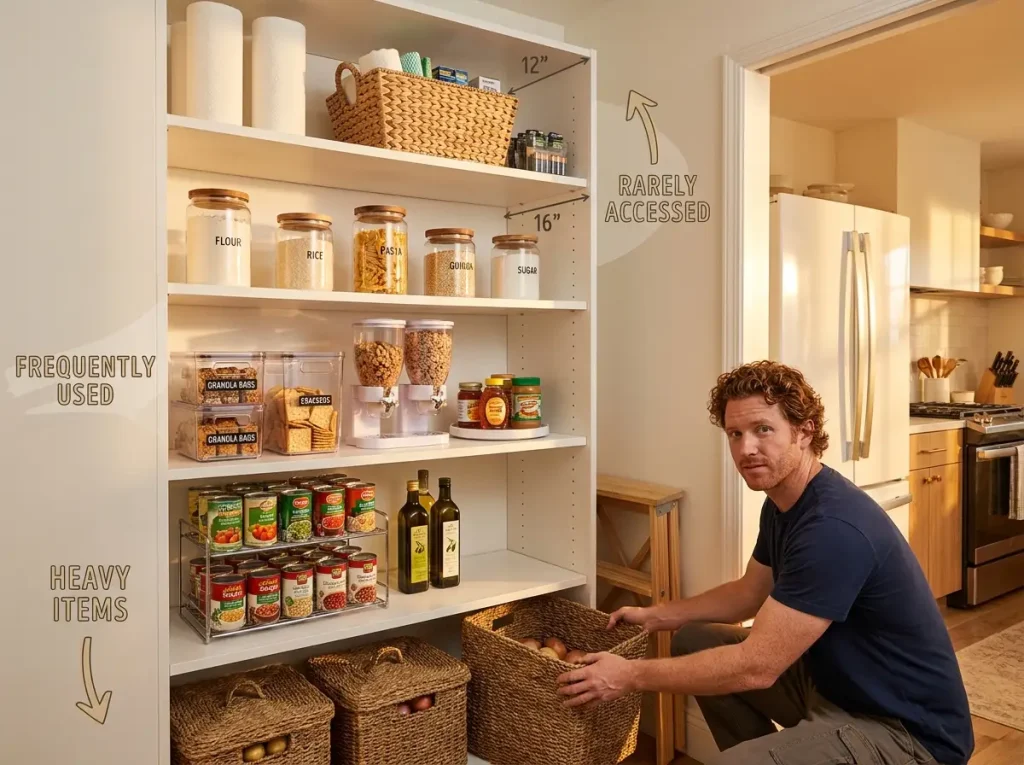
Instead, assign zones by meal context and frequency. The shelf at arm height gets your daily items: breakfast cereal, snack bars, coffee, and whatever you grab most often. The shelf below gets dinner staples: pasta, canned tomatoes, rice, cooking oils.
The top shelf holds things you use once a week or less: baking supplies, specialty ingredients, extra stock. The bottom shelf gets heavy and bulky items: large bags, bulk refills, and paper goods. Professional organizers — including members of the National Association of Productivity and Organizing Professionals — call this frequency-based zoning, and it’s the single most effective layout change you can make.
Make the Zones Visible to Everyone
This is the step nobody talks about, and it’s the reason pantry systems fail in multi-person households. Label the shelf edge, not just the containers. A small strip of chalkboard tape or a simple adhesive label on the front edge of each shelf that says “snacks,” “dinner,” “baking” does more for long-term maintenance than matching containers ever will.
When your ten-year-old opens the pantry looking for a granola bar, they see “snacks” on shelf two and go straight there. When your partner unloads groceries, they see “dinner staples” and put the canned tomatoes in the right spot without asking you. The system runs on visibility, not memory.
The Kid Zone Solution
If you have children, dedicate the lowest easy-reach shelf to kid-approved snacks. Use clear bins so they can see what’s available without pulling everything out. This reduces the “I’m hungry” interruptions by about half — and more importantly, it means they stop rummaging through your baking shelf looking for fruit snacks.
Pro tip: Put a small sign or sticker on the kid shelf that says how many snacks per day. It doesn’t eliminate negotiations, but it gives you something to point at instead of repeating yourself.
Containers and Bins Worth Your Money (and the Ones That Aren’t)
The Container Decision: Clear vs. Opaque
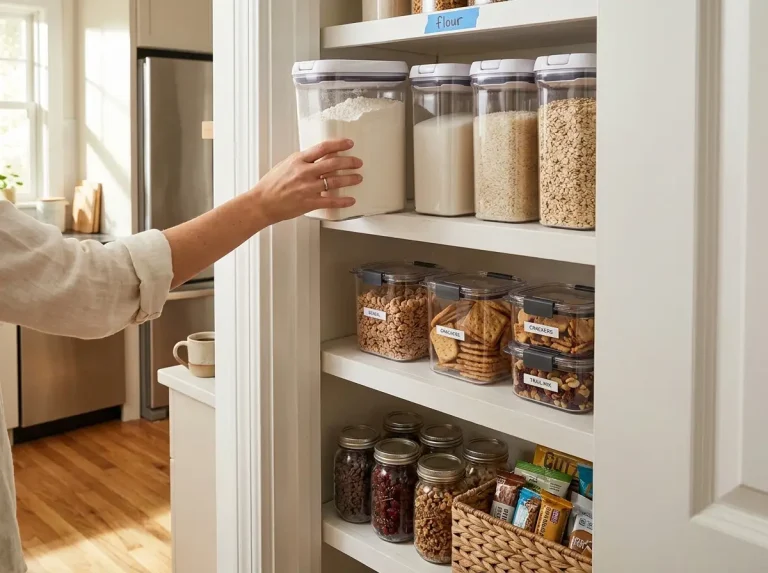
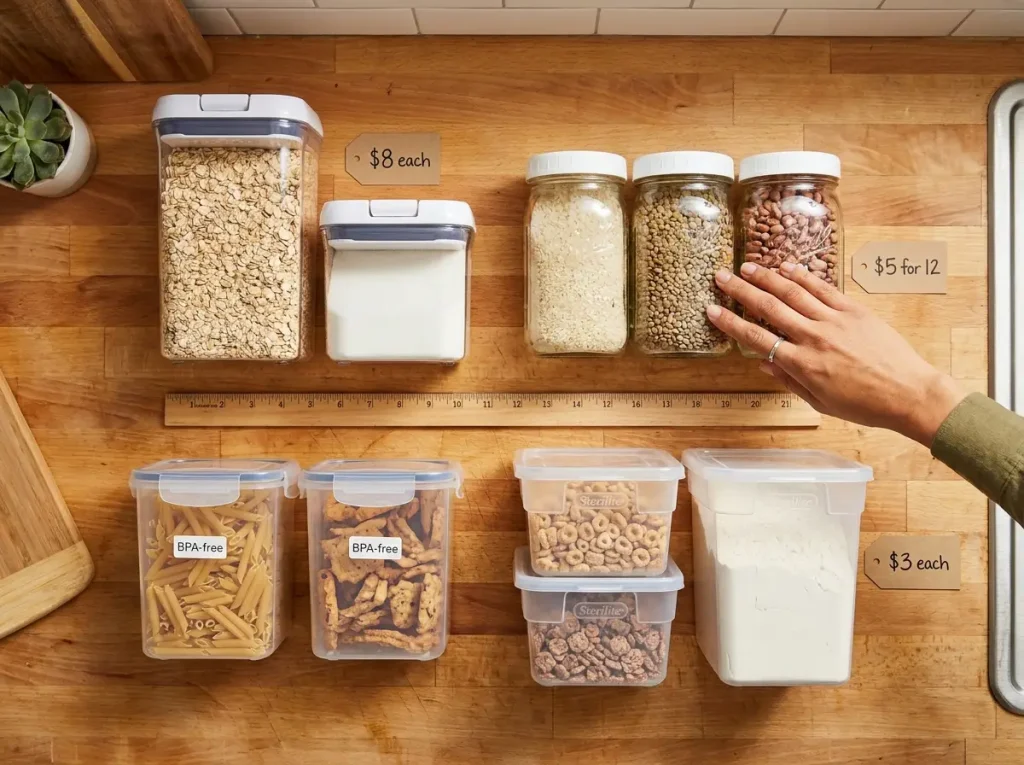
Use clear containers for anything you need to see the level of — flour, rice, cereal, oats, pasta. If you can’t tell when it’s running low without opening the lid, it belongs in a clear container. Use opaque bins (white plastic, woven baskets) for items that stay in their original packaging — snack bar boxes, sauce packets, tea bags. These items don’t need visibility; they need containment.
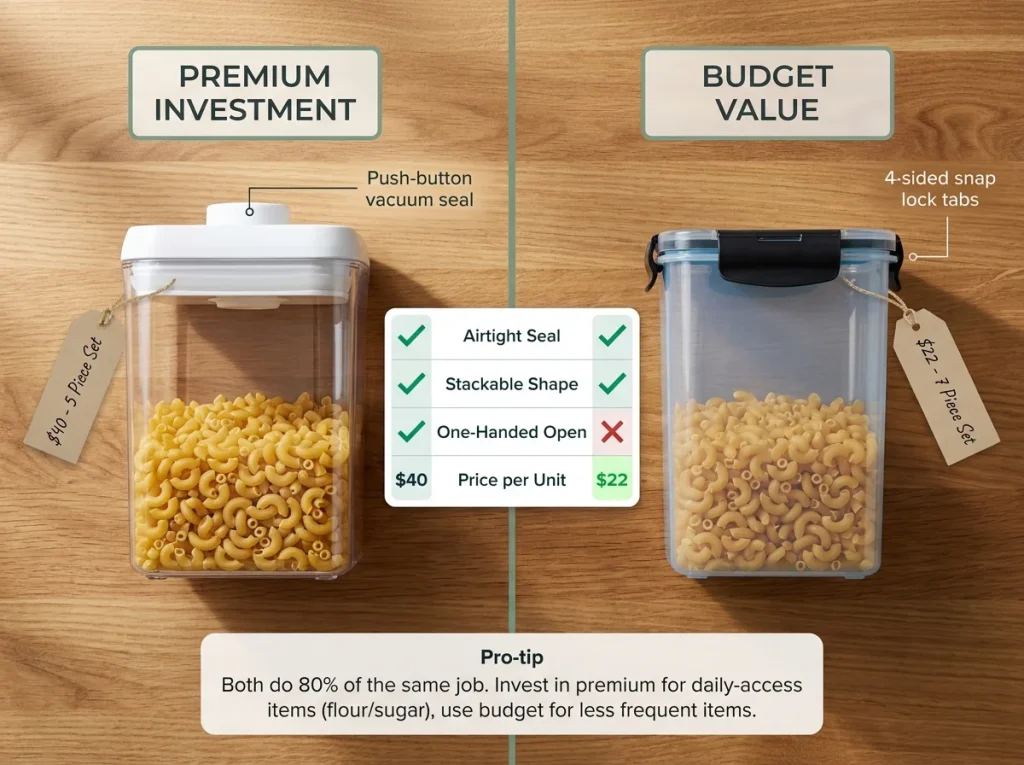
The OXO Good Grips POP Container Set ($40-50 for a 5-piece) is the benchmark for airtight dry goods storage. The push-button seal works one-handed, the square shape stacks without wasting shelf space, and each container fits a standard 16-inch deep shelf. The downside: they’re not cheap, and you’ll want more than five.
If $40 per set isn’t in the budget, the Utopia Home Airtight Containers ($22 for a 7-piece) do 80% of the same job. The seals aren’t quite as tight, and the lids feel flimsier, but they’re BPA-free, clear, and they stack. For most pantries, they’re plenty.
The Bins That Hold Up (and the Ones That Don’t)
The mDesign Stackable Bins ($22 for a 4-pack, 10x6x5 inches each) are the all-purpose workhorse for zone organization. They fit standard cabinet shelves, they’re clear enough to see contents, and they stack two high without bowing. After two years of daily use under a kitchen sink, the ones in my house haven’t cracked or warped.
Dollar Tree bins ($1.25 each) work for light items like tea bags or seasoning packets, but they flex under the weight of canned goods or full bags of rice. Use them for low-weight zones only.
For nuts, seeds, and dried fruit, glass mason jars are hard to beat. Wide-mouth quart jars with white storage lids cost about $18-22 for a 12-pack at most hardware stores. They’re airtight, dishwasher-safe, and last decades.
The budget alternative: save your pasta sauce and salsa jars, wash them, and relabel. Free, functional, and surprisingly good-looking lined up on a shelf.
What Not to Waste Money On
Skip the decorative woven baskets for food storage. They look great in photos but collect crumbs, can’t be wiped clean, and hide what’s inside. Use them only for packaged items you grab by feel — chip bags, bread loaves, paper goods.
Skip the ultra-tall cereal dispensers unless you’ve confirmed your shelf spacing fits them. A 13-inch tall dispenser on a shelf with 11 inches of clearance is a $25 mistake.
Pro tip: Before buying any container, check its dimensions against your shelf measurements. Not the product photo — the actual dimensions listed on the Amazon page. This saves more returns than any other step.
How to Organize Every Shelf From Top to Bottom
Top Shelf: Light, Infrequent, Out of the Way
The top shelf should be shallower (10-12 inches deep if adjustable) and reserved for items you access once a week or less. Baking supplies, extra stock, bulk refills, and paper products live here. Use a small step stool if needed — this shelf earns its keep by freeing up prime real estate below.
Middle Shelves: The Daily Drivers
Your arm-height shelves get the items you use every single day. Breakfast containers, snack bins, coffee, cooking staples. Everything here should be visible and reachable without moving anything else out of the way. If you have to move one container to reach another, the layout needs adjusting.
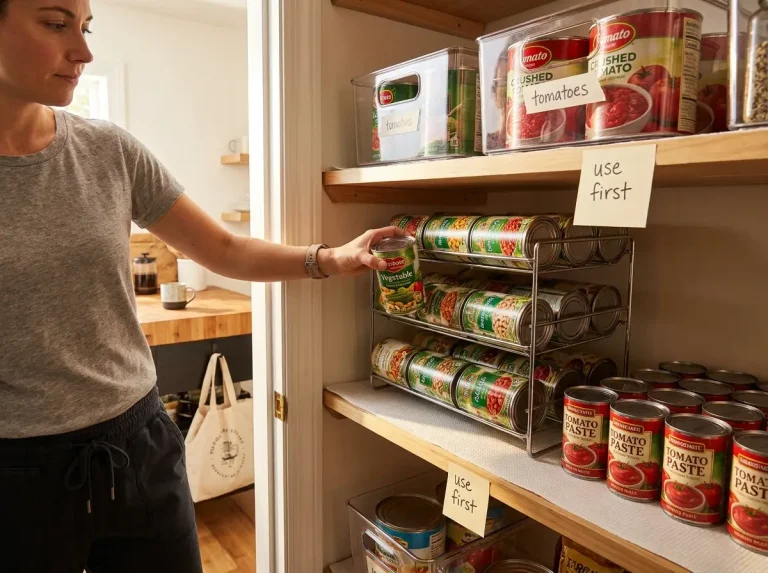
For canned goods, stop stacking them three deep. You’re wasting 15 inches of shelf depth because your cans are only 3 inches wide. The SimpleHouseware 3-Tier Can Rack ($16) holds 36 cans in a gravity-fed FIFO layout — newest cans go in the back, oldest roll to the front.
It fits a standard pantry shelf and eliminates the “three cans fell out when I opened the door” problem. The budget alternative: angle a small piece of cardboard as a ramp and let gravity do the sorting for free.
Bottom Shelf: Heavy, Bulky, Backstock
The lowest shelf gets everything heavy: large bags of rice or flour, cases of canned goods, bulk Costco purchases. Use large baskets here — woven seagrass or sturdy fabric — to corral bags that won’t stand upright. Label these baskets “refills” and “bulk” so you know exactly where to look before a grocery run.
Keep a folded step stool on this shelf too if your pantry has high shelves. It lives here, it’s always accessible, and it prevents the chair-from-the-dining-table detour.
Door Storage, Risers, and Turntables That Earn Their Spot
The Pantry Door Is Free Real Estate
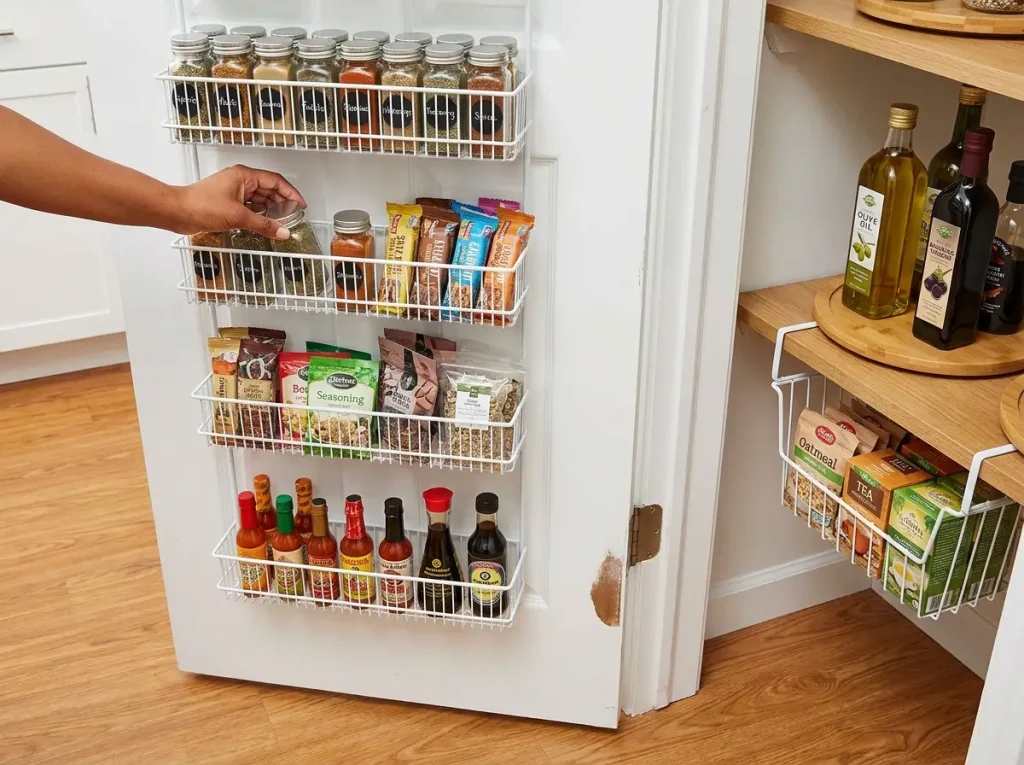
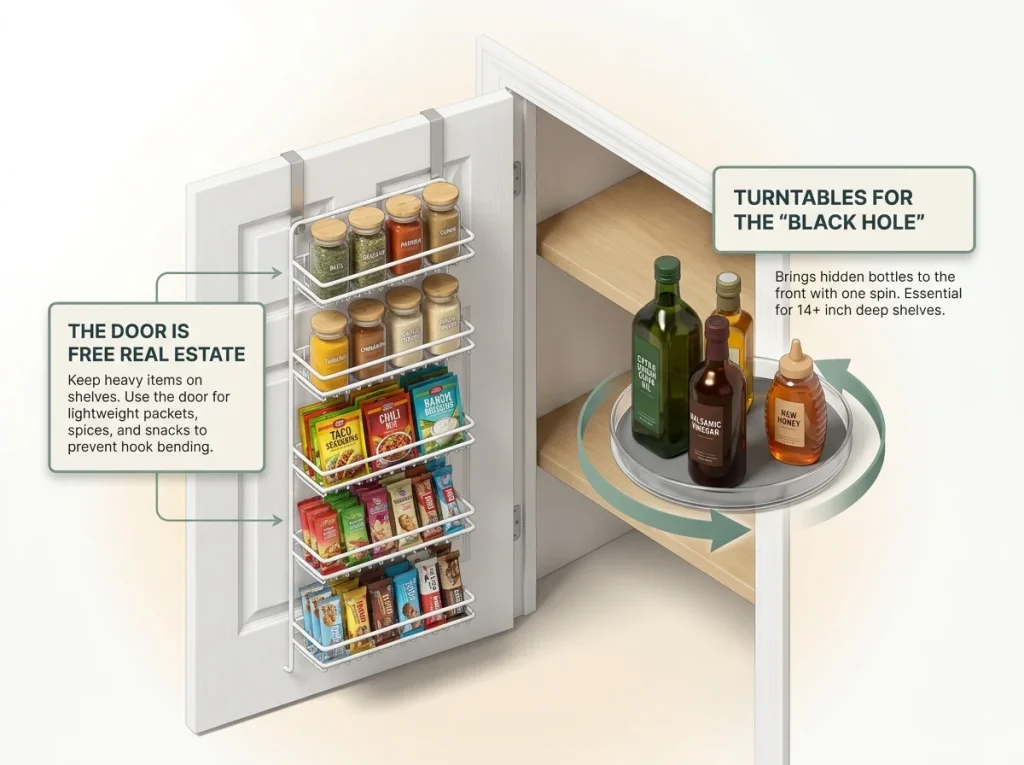
An over-the-door pantry organizer adds storage without using a single inch of shelf space. Five-tier models run about $20-25 and hold spices, seasoning packets, snack bars, and small bottles. They hook over the door — no screws, no drilling, renter-safe.
One caveat that every product listing buries in the fine print: check your door thickness and material. Standard interior doors are 1.375 inches thick. Hollow-core doors (the lightweight ones common in apartments) can handle an organizer loaded with spices and packets, but fill all five tiers with heavy bottles and the hooks start bending within a month. If your door feels light when you knock on it, keep the heavy items on shelves and reserve the door for lightweight packets and spice jars.
The budget alternative: a fabric shoe organizer hung with Command strip hooks ($8-10 total). Not as sturdy, but the clear pockets hold small pantry items surprisingly well.
Turntables for the Items That Disappear
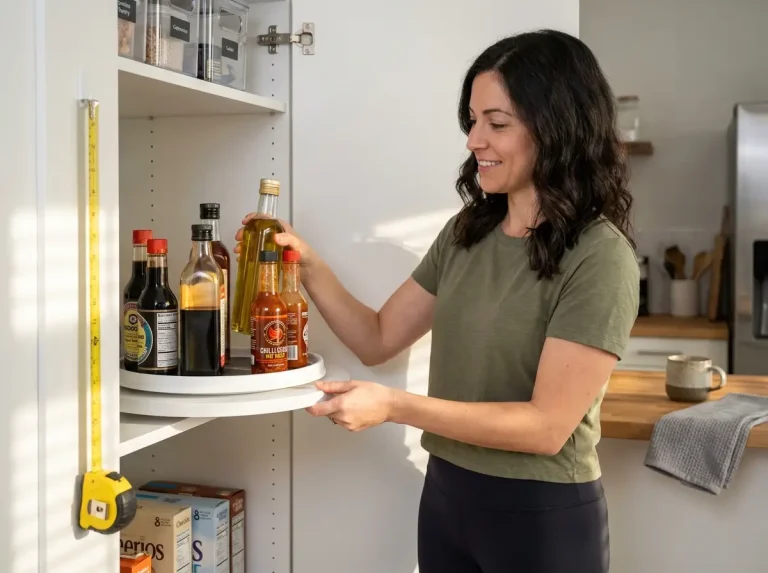
Cooking oils, vinegar, honey, hot sauce — these bottles get pushed to the back of the shelf every time someone reaches past them. A turntable brings everything to the front with a spin.
The Copco Non-Skid Turntable ($10-12, 12-inch diameter) has a rubberized base that prevents the whole thing from sliding when you turn it. It fits shelves 14 inches deep or more. One turntable per pantry is usually enough. Put it on the shelf where you keep cooking essentials — the items you reach for every time you cook dinner.
Under-Shelf Baskets and Risers
If you have wasted vertical space between shelves (more than 4 inches above your tallest item), an under-shelf hanging basket reclaims it. These wire baskets slide onto the shelf above and hang down, creating a second tier for small flat items: tea bags, seasoning packets, instant oatmeal.
Tiered shelf risers work the same principle in reverse — they create a second level on top of the shelf for items like spice jars or small cans. Either way, the goal is the same: turn dead air space into usable storage.
Pro tip: Under-shelf baskets work best on solid shelves. On wire shelving, the clips don’t grip consistently. If you have wire shelves, go with risers instead.
Labels and Expiration Tracking That Your Family Will Follow
Label Everything Twice
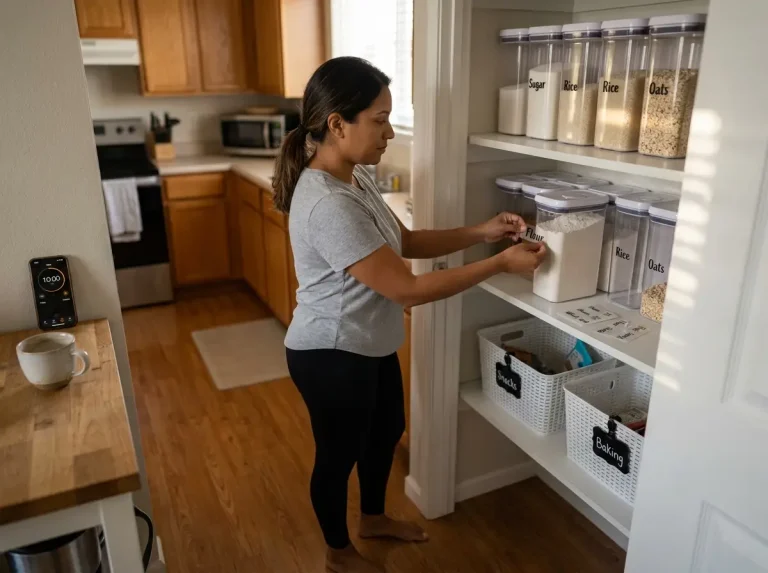
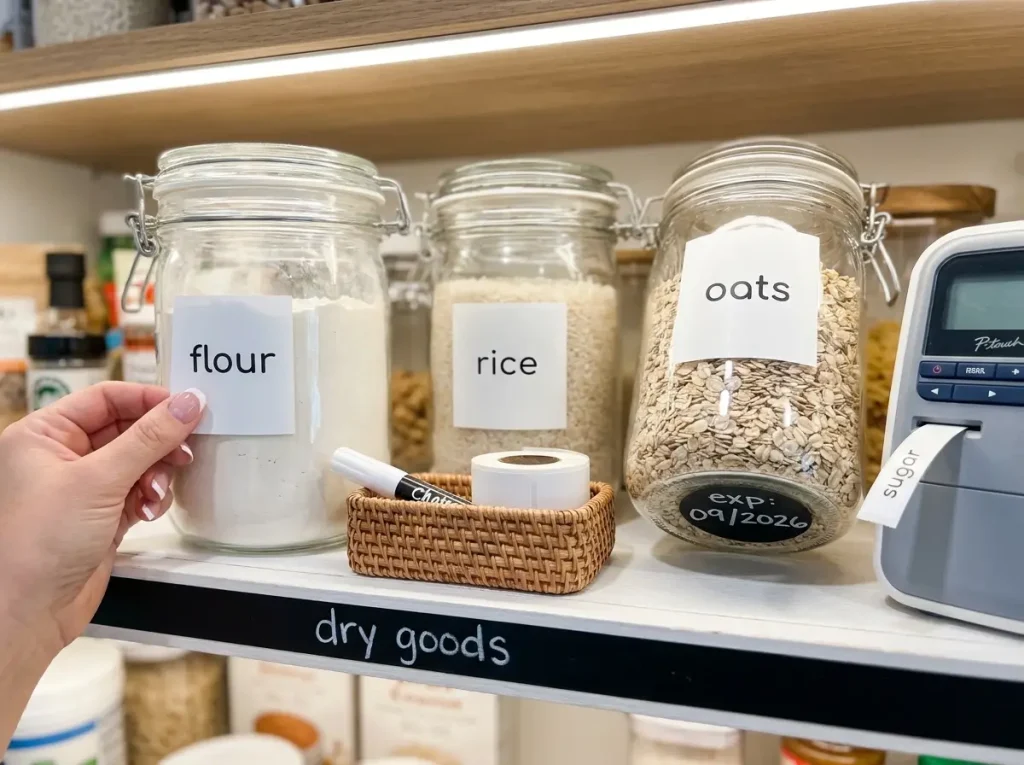
Label the container AND label the shelf. The container label tells you what’s inside after you’ve decanted it from the original packaging. The shelf label tells everyone in the household where things belong — especially during the grocery unload, which is when pantry entropy peaks.
For containers, minimalist white vinyl labels work well and wipe clean. A basic label maker or pre-printed pantry label set ($8-12) covers most households. For shelf edges, chalkboard tape with a chalk marker lets you rename zones as your cooking habits change without peeling off adhesive labels.
Expiration Dates: The System Nobody Uses (Until They Should)
Write the expiration date on the bottom or back of every clear container using a white chalk marker. It washes off with a damp cloth when you refill. This takes about ten seconds per container and prevents the situation where you discover six-month-expired flour because it looked fine through the clear walls.
The USDA FoodKeeper app provides recommended storage times for over 400 food items — including pantry staples like flour, spices, and canned goods. It’s free, and it sends notifications before items reach the end of their recommended storage window. Worth installing on your phone if you’re serious about reducing waste.
For original-packaging items stored in bins, small expiration date sticker labels ($5 for a roll of 500) let you tag each item as it goes in. Place the sticker where you’ll see it when reaching into the bin — front face, not the bottom.
The Family Buy-In Step
Once the labels are up, walk everyone in the household through the system once. Point to each zone, name it, and explain the one rule: put things back where the label says. This five-minute walkthrough has more impact on long-term organization than any product you’ll buy. The pantry works when everyone can read it, not when everyone remembers your mental map.
Renter-Friendly Pantry Fixes That Need Zero Holes
The Wire Shelf Problem (and the $12 Fix)
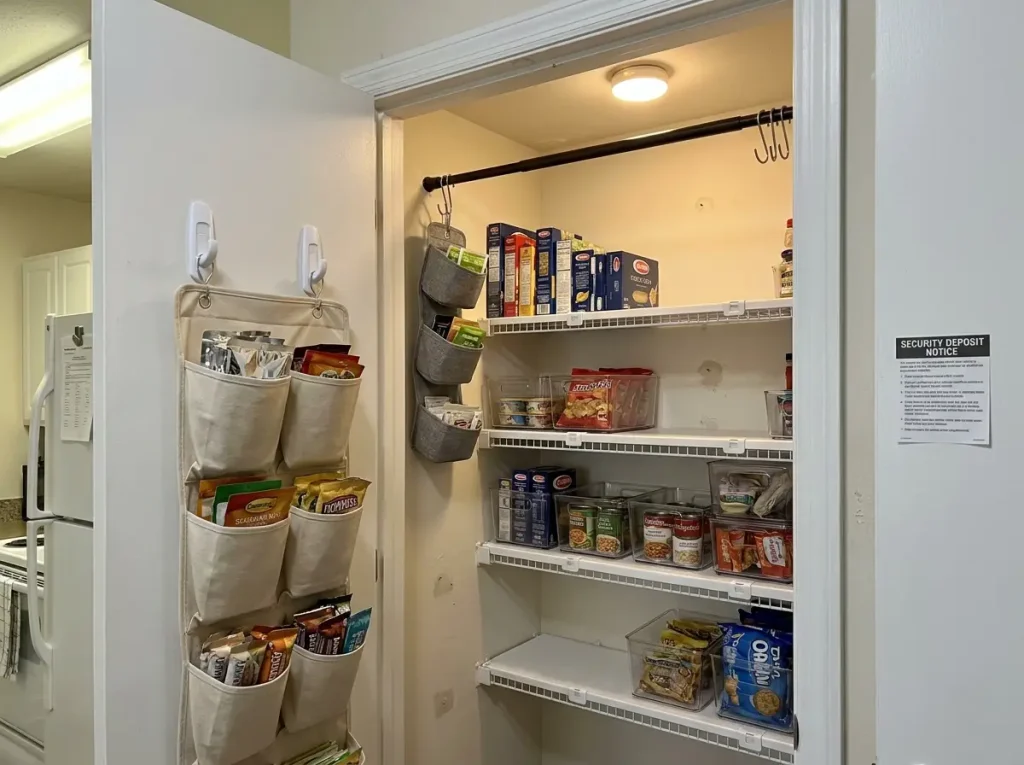
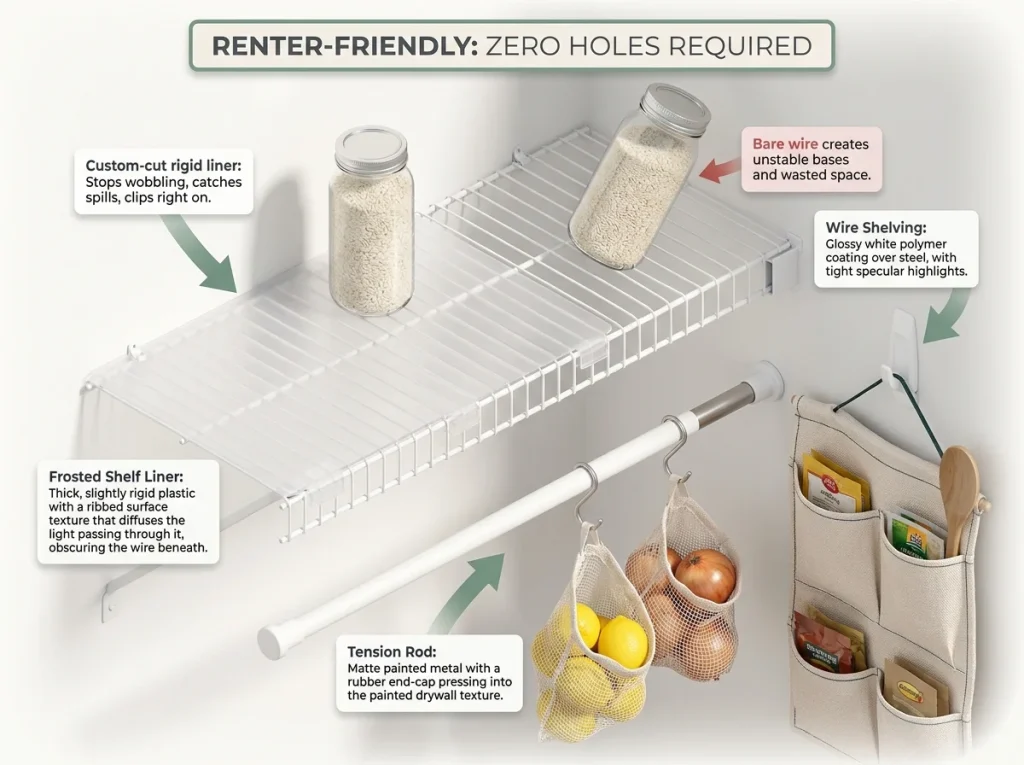
If you’re renting, your pantry probably has builder-grade wire shelving. Everything tips, slides, and falls through the gaps. Containers with narrow bases wobble. Bags of flour sink into the wire grid.
The Gorilla Grip Shelf Liner ($12-15 for a 17.5″ x 10 ft roll) fixes this in under twenty minutes. It clips directly onto wire shelves with locking tabs — no adhesive, no modification, fully removable when you move out. The result is a smooth, flat surface where bins actually sit level. This is the single highest-impact renter upgrade for any pantry.
The budget alternative: cut thick cardboard to size and lay it on the wire shelves. It works, but it sags under weight after a few months and doesn’t wipe clean.
No-Drill Door and Wall Storage
Command strips and adhesive hooks handle more weight than most people expect — the large strips hold up to 7.5 pounds per pair. Use them to mount a fabric pocket organizer on the inside of the pantry door, or to hang lightweight baskets on the wall inside the pantry.
Tension rods work horizontally between the side walls of a pantry closet. Hang S-hooks from the tension rod for lightweight hanging storage — small fabric bins for tea bags, seasoning packets, or snack bars.
Puck Lights for Dark Pantries
Most rental pantries have either no light or a single dim bulb. Adhesive LED puck lights ($10-15 for a 3-pack) stick to the underside of a shelf with no wiring. Press to turn on, press to turn off. Being able to actually see your pantry shelves is not a luxury — it’s the difference between finding the cumin and buying a second bottle because you couldn’t see the first one behind the paprika.
The Weekly Reset That Keeps It All Working
The Ten-Minute Sunday Reset
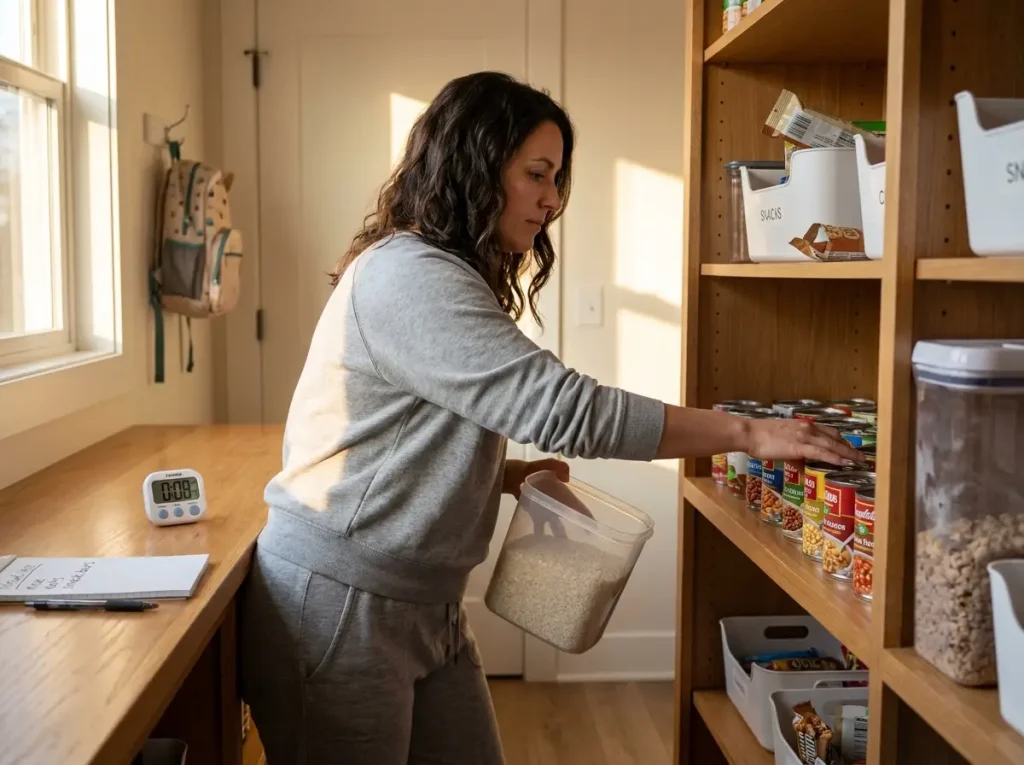
Set a timer for ten minutes. Open the pantry. Push everything to the front of each shelf. Check container levels — anything below a quarter full goes on the grocery list.
Put anything that migrated to the wrong zone back where it belongs. Wipe up any crumbs or spills. Done.
This is not a deep clean. This is maintenance. The goal is to prevent the slow drift from organized to chaotic that happens when nobody touches the system between grocery runs. Ten minutes a week is less time than you spend deciding what to order for dinner.
The Post-Grocery Protocol
The second-biggest threat to pantry organization is what happens right after the grocery run. Bags get dumped, items get shoved wherever they fit, and the zones collapse in under five minutes.
The fix: unpack directly into the pantry instead of onto the counter first. Open the pantry, read the zone labels, and put each item in its zone as you pull it from the bag. Refill containers before putting overflow in the backstock basket. This adds about three minutes to your grocery unload and saves you from a full reorganization later.
If other people help with groceries, point them to the shelf labels. “Canned goods go where it says canned goods” is a complete instruction.
The Three-Month Audit
Every three months, do a deeper check. Pull out anything expired. Look at your zones — are they still matching how you actually cook?
If you stopped buying oatmeal two months ago but still have an oatmeal container taking up space, reassign that spot. Check if any containers are cracked, warped, or not sealing properly. Replace them.
This audit takes about twenty minutes and resets the system back to fresh. Think of it as an oil change for your pantry — small maintenance that prevents a big breakdown.
Pro tip: Schedule the audit on your phone’s calendar with a quarterly repeat. If it’s not scheduled, it won’t happen. The same brain that forgets to check the pantry will forget to check the pantry three months from now.
Conclusion
Three things keep a pantry organized long-term: zones that match how you actually eat, labels that everyone can read, and a ten-minute weekly reset that catches problems before they compound.
The container you buy matters less than whether it fits your shelf. The labeling system matters less than whether your household knows the rules. And the “after” photo matters far less than what the pantry looks like on a random Wednesday three months from now.
Three-Month Check: Revisit your zones in three months. If you’re consistently putting items back in the wrong spot, the zone logic doesn’t match your cooking habits — rename and rearrange.
Start with one shelf. Get it right. Live with it for a week. Then do the next one.
Q1 How do I organize my pantry step by step?
Start by measuring your shelves, then empty everything and group items by how you cook — breakfast, dinner, snacking, baking. Assign each group a shelf zone, buy containers that fit your shelf dimensions, label everything, and set up a weekly ten-minute reset to maintain it.
Q2 What is the best way to organize a small pantry?
Focus on vertical space. Use shelf risers and under-shelf baskets to create extra tiers, add an over-the-door organizer for small items, and use clear containers so you can see everything without pulling items out. Every inch of depth and height needs to earn its place.
Q3 How do you organize a pantry on a budget?
Repurpose glass jars from pasta sauce and salsa as free storage containers. Use Dollar Tree bins for lightweight items. Cut cardboard as a shelf liner for wire shelves. The most impactful budget move is labeling with a $3 chalk marker on masking tape — it costs almost nothing and does more for maintenance than expensive bins.
Q4 What containers are best for pantry organization?
Airtight containers with clear walls work best for dry goods like flour, rice, and cereal — the OXO POP line is the gold standard but costs $8-10 per container. For zone grouping, the mDesign stackable bins ($22 for four) fit most standard shelves. Match the container dimensions to your shelf depth before ordering.
Q5 How often should you clean out your pantry?
Do a quick ten-minute reset weekly: push items forward, check levels, return misplaced items. Do a deeper audit every three months: remove expired items, reassess zones, and check for container damage. This schedule prevents the slow slide from organized to chaotic that most pantries experience.
Disclaimer: ClutterlessNest is a participant in the Amazon Services LLC Associates Program. As an Amazon Associate we earn from qualifying purchases. This article may contain affiliate links — if you buy through them, we may earn a small commission at no extra cost to you. We only recommend products we have tested or genuinely believe in.