The cable nest behind every TV stand. The three remotes nobody can find. The gaming controller on the floor because the shelf is full of boxes nobody opens anymore. If you’ve organized your entertainment center once and watched it fall apart within a month, the problem isn’t effort. It’s that you organized around the devices you had, not the system you needed.
After organizing ten different TV setups across studios, apartments, and family living rooms, I’ve landed on a method that actually holds up past the first week. This guide covers everything from choosing the right TV stand to a monthly reset that keeps cable creep from undoing your work.
Quick Answer: Here’s the system that keeps a TV and entertainment setup organized long-term:
- Choose a TV stand with built-in cable routing ports and proper ventilation
- Label every cable before bundling or routing anything
- Bundle cables with velcro ties, never zip ties
- Hide wires with adhesive raceways or furniture routing for renters
- Assign every device and accessory a labeled zone
- Run a 10-minute monthly check to catch cable creep before it takes over
Choose a TV Stand That Organizes for You Before You Plug In Anything
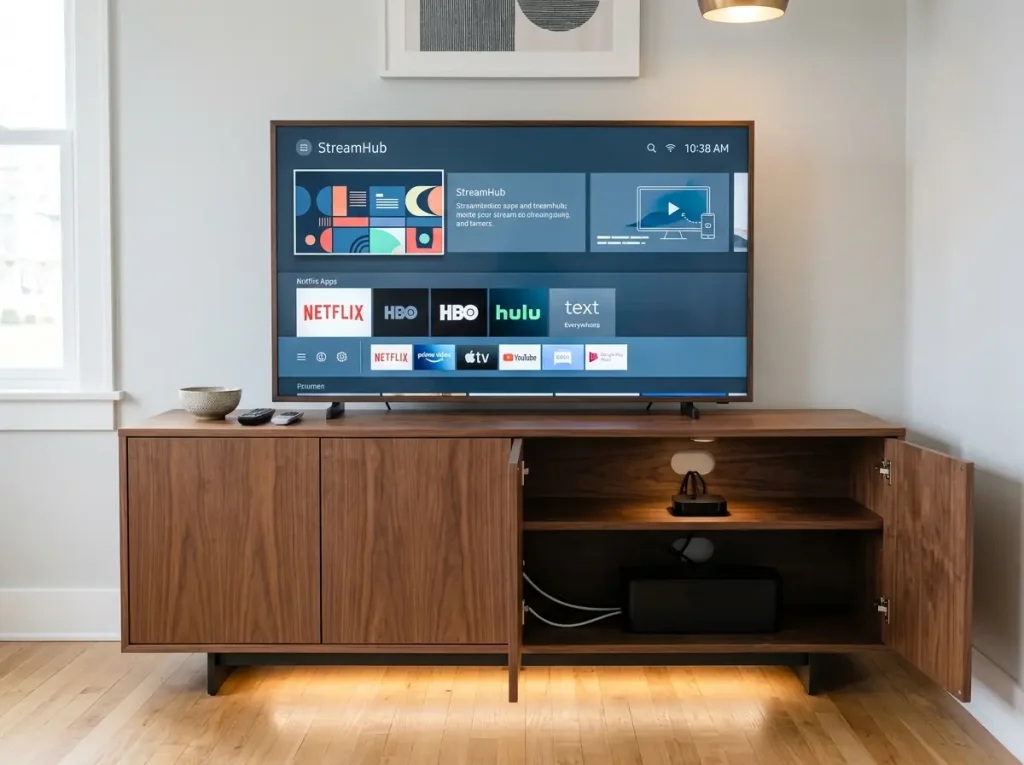
Most people pick a TV stand based on how it looks in a listing photo and then try to retrofit an organization system onto it. That approach fails because the stand’s physical features dictate whether organizing is easy or a constant fight. Shelf depth, cable ports, door type, and ventilation matter more than finish color or style.
The Sizing Math for a Stable, Organized Setup
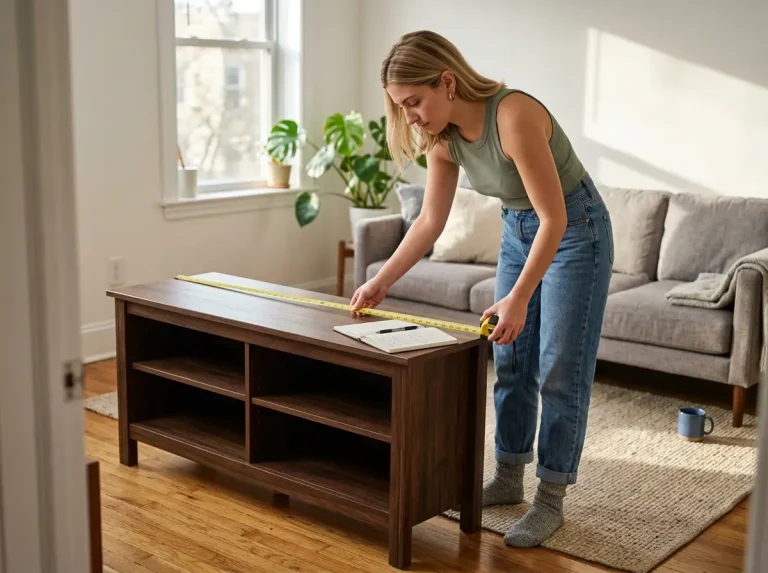
Your TV stand should be 2 to 4 inches wider than the TV on each side. For a 65-inch TV, that means a stand at least 69 inches wide. For a 75-inch TV, you’re looking at 79 inches minimum. Anything narrower makes the TV look top-heavy and puts the base too close to the edges.
Height matters too. TV eye-level when seated is typically 42 to 48 inches from the floor, measured at the center of the screen. A 20-inch tall stand plus a 65-inch TV puts the center at about 52 inches, which is slightly high for most seating heights. Know your numbers before buying, especially if you’re thinking about how it fits into the overall room layout.
Closed vs. Open Storage and the Ventilation Problem
Closed doors hide clutter. They also trap heat. Gaming consoles like the PS5 (15.4 x 10.2 x 4.2 inches) and Xbox Series X (11.85 x 5.94 x 5.94 inches) need 4 inches of clearance on all sides per manufacturer specs. Put either inside an enclosed shelf without ventilation and you’ll notice performance drop within an hour of heavy use. The console throttles itself to avoid overheating, fans get loud, and the hardware’s lifespan shortens.
The practical layout: gaming consoles go on top of the stand or on an open shelf. Cable boxes generate moderate heat even in standby and can share a closed shelf if there’s a ventilation gap or mesh door. Streaming sticks plug directly into the TV’s HDMI port and generate almost no heat. They can go anywhere.
Cable Management Features That Actually Matter
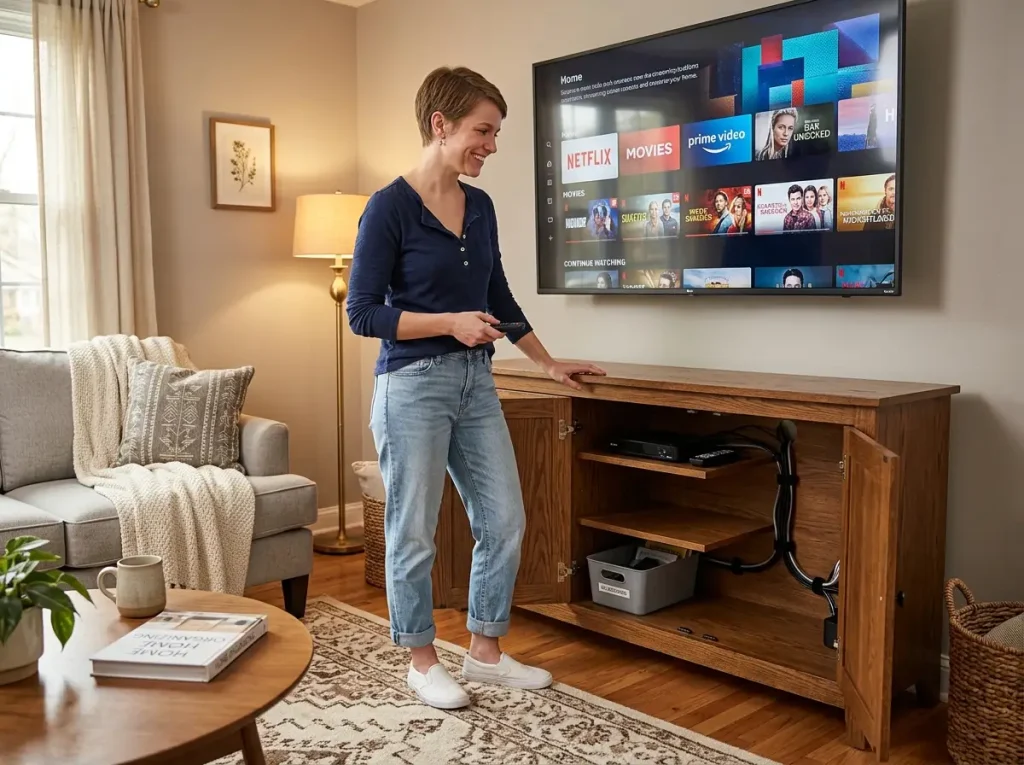
The feature to look for isn’t just “open back.” An open-back stand still lets cables hang in full view. What actually works: back panel cutouts positioned at shelf level, routing channels along the vertical sides, and tie-off points inside the cabinet. These let you run cables vertically and invisibly instead of letting them drape in every direction.
The Bestier 70 Inch LED TV Stand has cable management ports at each shelf level and LED lighting inside the cabinet so you can actually see what you’re connecting. It fits TVs up to 75 inches. One thing to know: the LED lights run on a separate cord, so you’re adding one more cable to manage. If you’re on a tight budget, an IKEA KALLAX with a TV bracket on top gives you open-cubby storage for significantly less, though you lose the built-in cable routing.
Pro tip: Before buying any TV stand, count your devices and their cables. If you have more than 5 active cables, you need a stand with at least two cable routing ports per shelf level. Most budget stands have one cutout in the back and call it done.
Cable Management: Label First, Bundle Second, Route Last
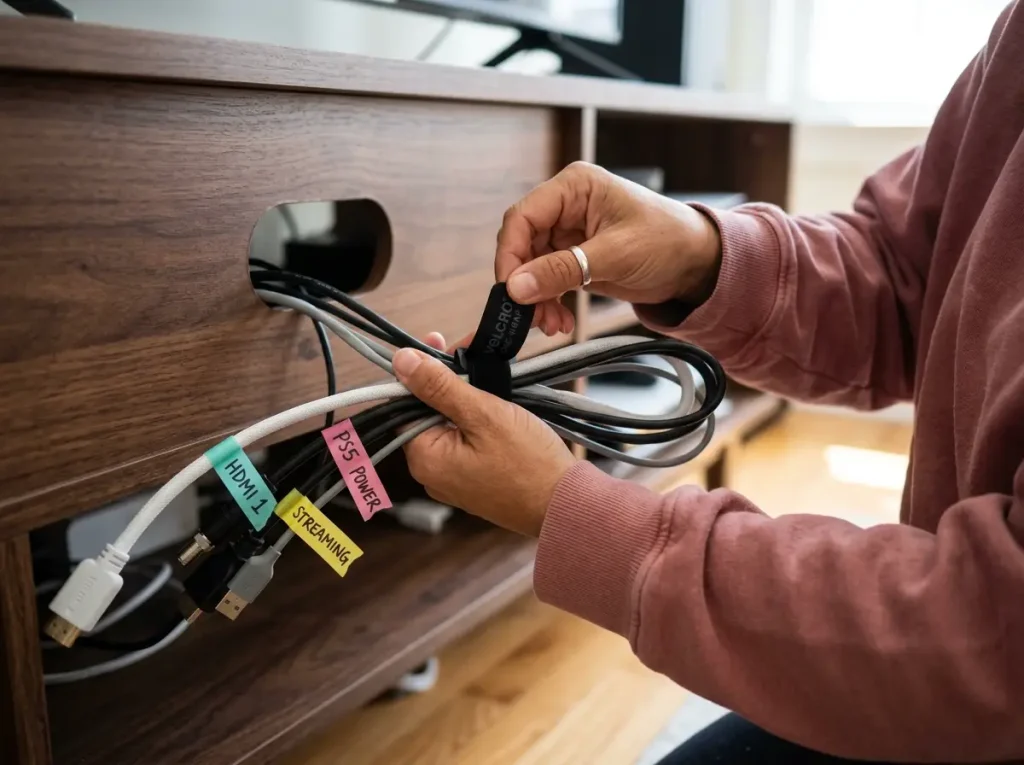
Everyone bundles cables. Almost nobody labels them first. Six months later, when you need to unplug the streaming box, you’re pulling each cable one at a time to figure out which one it is. Labeling first sounds backwards, but it’s the step that makes every other step maintainable.
The Label-First Rule (Why Most People Skip It and Regret It)
Before you plug in or bundle anything, label each cable at both ends: the device end and the plug end. Washi tape wrapped in a small flag around the cable, written on with a fine-tip pen, works for years and costs almost nothing. Brother P-Touch label maker tape is more durable for permanent setups. Pre-printed cable ID labels exist if you want the fastest option.
This one step saves you from the “which cable is this” mystery every time you add, remove, or troubleshoot a device. It takes ten minutes to label everything the first time. It saves hours over the life of the system. This applies to any setup where multiple cables converge in one spot, including the same cable management principles that apply to desk setups.
Velcro Ties vs. Zip Ties — The Maintainability Difference
Zip ties lock the system in place permanently. When a new streaming device arrives three months later, you need to cut through the entire bundle to add one cable. Most people cut the zip ties, add the new cable, and never re-bundle. That’s the single biggest reason entertainment center cable management systems fall apart over time.
The VELCRO Brand ONE-WRAP Cable Ties 100-pack opens in two seconds and closes again without cutting. Each tie is 8 inches long and half an inch wide, which bundles up to about 1.5 inches of cables per tie. A 100-pack covers any home entertainment center setup with plenty left over for future devices. The one downside: they’re slightly bulkier than zip ties, so they’re more visible in tight spaces. But the trade-off is a system you actually maintain instead of one you abandon.
The Cable Management Box for the Surge Protector
The surge protector is the cable nest anchor. Every device’s power cord converges there, and the resulting tangle accounts for most of the visible cord chaos behind a TV stand. Hiding it in a ventilated cable management box cleans up the mess in one step.
A shoebox with ventilation holes punched in the sides will hold a surge protector fine if you’re testing the concept. For something that looks finished and has proper ventilation, the D-Line Cable Management Box Small measures 12.75 x 5 x 4.5 inches, fits most standard 6-outlet power strips, and has a ventilated grid bottom that prevents overheating. Side openings let you route cables out cleanly. Leave one or two outlets open for future devices. If you plug every slot and then add a device next month, you’ll end up running a second power strip outside the box. That defeats the entire purpose.
Pro tip: The “clean” solution isn’t having fewer cables. It’s having all your cables running in the same direction. Even ten cables bundled together and routed vertically look organized. Ten cables fanned out in different directions look like chaos regardless of how few there are.
No-Drill Wire Hiding for Renters and Apartment Dwellers
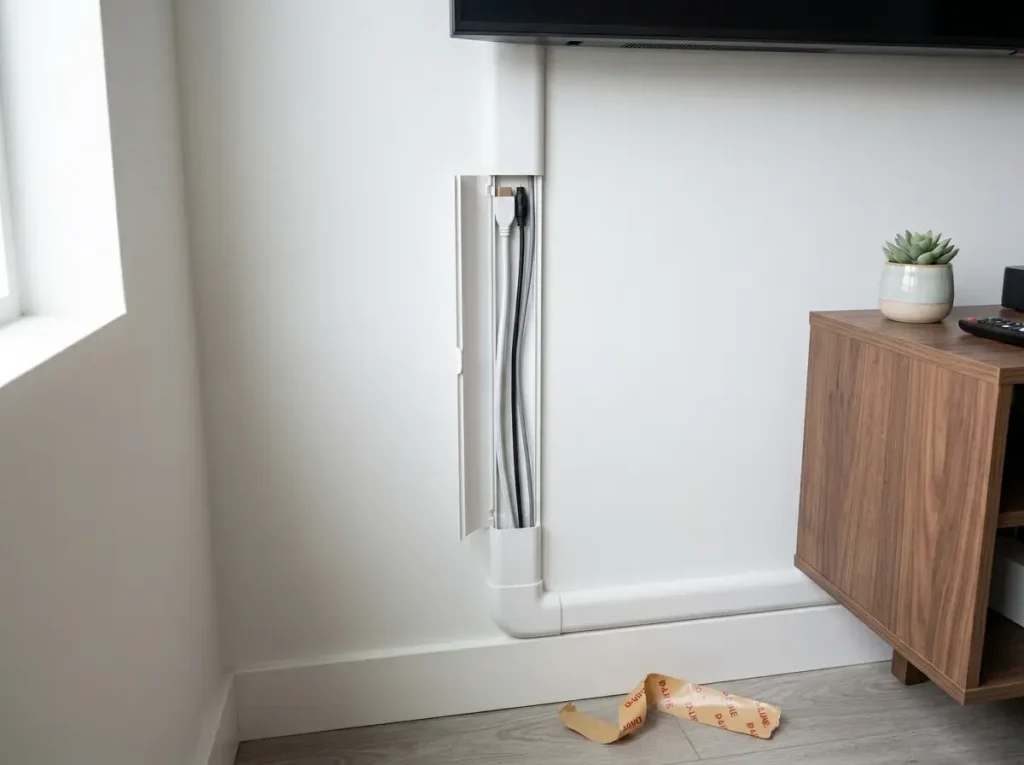
Most cable management guides tell you to run cables through the wall as the premium solution. For the roughly 36 percent of US households who rent, that advice is useless. You can’t cut into drywall in an apartment. But you also don’t have to live with cables running down your wall in full view. There are three no-drill approaches, ordered by how much wall contact they require.
Adhesive Cable Raceways Along the Baseboard and Up the Wall
Adhesive cable raceways stick to drywall with a pressure-sensitive adhesive similar to Command Strips. They hold the cable inside a half-round channel that can be painted to match your wall color. When it’s time to move, pull at a low angle slowly and the adhesive releases without taking paint with it.
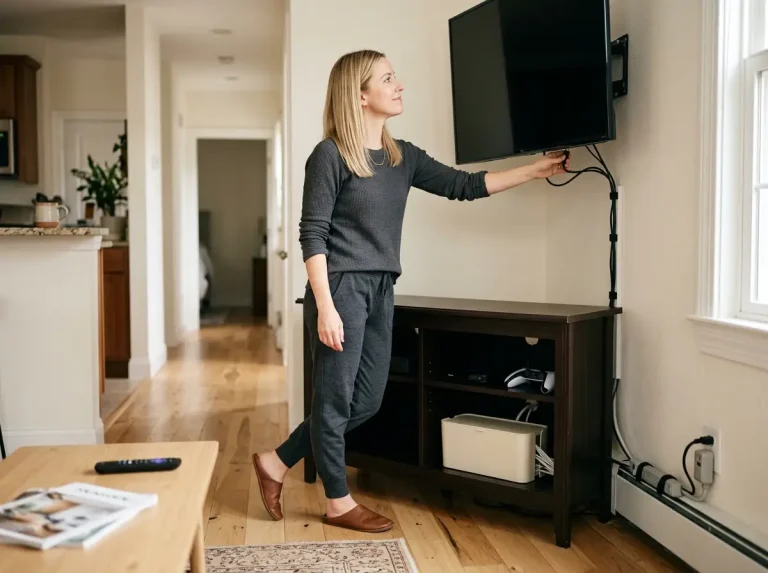
The D-Line Cord Hider Kit gives you 13.12 feet of raceway coverage. Each channel is 1.18 inches wide, 0.59 inches high, and 39 inches long (four pieces per kit). For a wall-mounted TV about 6 feet off the ground, you need about 72 inches of vertical raceway to reach the baseboard. One kit covers this run with room to spare for the horizontal section along the baseboard.
To install: clean the wall surface, peel the adhesive backing, press firmly for 30 seconds per section. Cut to length with scissors or a utility knife. Paint with latex paint, two coats, and the raceway nearly disappears against a white or light-colored wall.
One warning: textured walls and painted brick give inconsistent adhesion. If your walls aren’t smooth drywall, test a small piece behind the TV stand first. If it doesn’t hold after 48 hours, skip the raceway entirely and use the furniture-route method below.
The Furniture-Route Method (No Wall Contact at All)
If wall adhesion is uncertain or you don’t want anything touching the walls at all, route every cable behind and under the TV stand. Clip binder clips to the back edge of the furniture (the metal clip grips the edge, and you thread each cable through the wire handle loop). Space them about 12 inches apart. This keeps cables running vertically down the back of the stand instead of hanging in random directions.
This method works with any TV stand, including floating-mount furniture. The cable management box sits at floor level behind the stand, hiding the transition where cables reach the wall outlet. Total cost: a pack of binder clips from any dollar store. The trade-off is that cables are visible if you pull the stand away from the wall, but from the viewing angle, everything looks clean.
Understanding how renters arrange living room furniture around the TV can help you position the stand to hide cable routes naturally.
The Wall-Mounted TV Problem Without Drilling
Here’s the honest answer: if your TV is wall-mounted, hiding cables inside the wall requires cutting drywall and running an in-wall cable plate. That’s not renter-compatible.
The surface raceway alternative gets you about 80 percent of the result. A painted D-Line raceway running from the bottom of the TV mount to the baseboard is visible if someone looks for it, but blends into the wall when painted to match. From couch distance, most people won’t notice it.
If your landlord asks, the raceway is applied with removable adhesive, similar to Command hooks. No holes, no anchors, no wall modification. It peels off when you move out. This is the same adhesive technology that millions of renters already use for picture hanging, just shaped into a cable channel.
Pro tip: Before committing to a full raceway run, stick a 6-inch test piece on a hidden spot behind the TV stand. Wait 48 hours, then peel it off at a low angle. If the paint stays clean, you’re good for the full installation. If it pulls paint, use the furniture-route method instead and avoid the wall entirely.
Device Organization: Every Port Gets a Zone
Most entertainment centers have more connected devices than anyone can name from memory. Streaming stick, cable box, gaming console, soundbar, old Blu-ray player that’s still plugged in “just in case.” Before you organize hardware, you need to know what you actually have and what you can unplug for good.
The Device Audit (What’s Plugged In vs. What’s Actually Used)
Pull out every device and sort into three categories. Active: used at least weekly. Occasional: used one to two times per month. Dormant: hasn’t been turned on in three months or more. Dormant devices get unplugged and stored in a labeled box in a closet, or donated.
The average US living room now has 5 to 10 connected devices. Most people can’t list all of them from memory. The audit usually turns up at least one device that’s been drawing standby power for months without anyone touching it.
Streaming Devices and Their Space Requirements
A streaming stick (Fire Stick, Roku Stick) plugs directly into the TV’s HDMI port and takes zero shelf space. A streaming box (Apple TV 4K, Nvidia Shield) needs a shelf spot and a power cable. For small TV stands with limited shelf real estate, a stick frees up an entire shelf that a box would claim.
If you own both a streaming box and a streaming stick, ask whether you actually use both. Most households default to one device and the other collects dust.
Remote Control and Accessory Storage
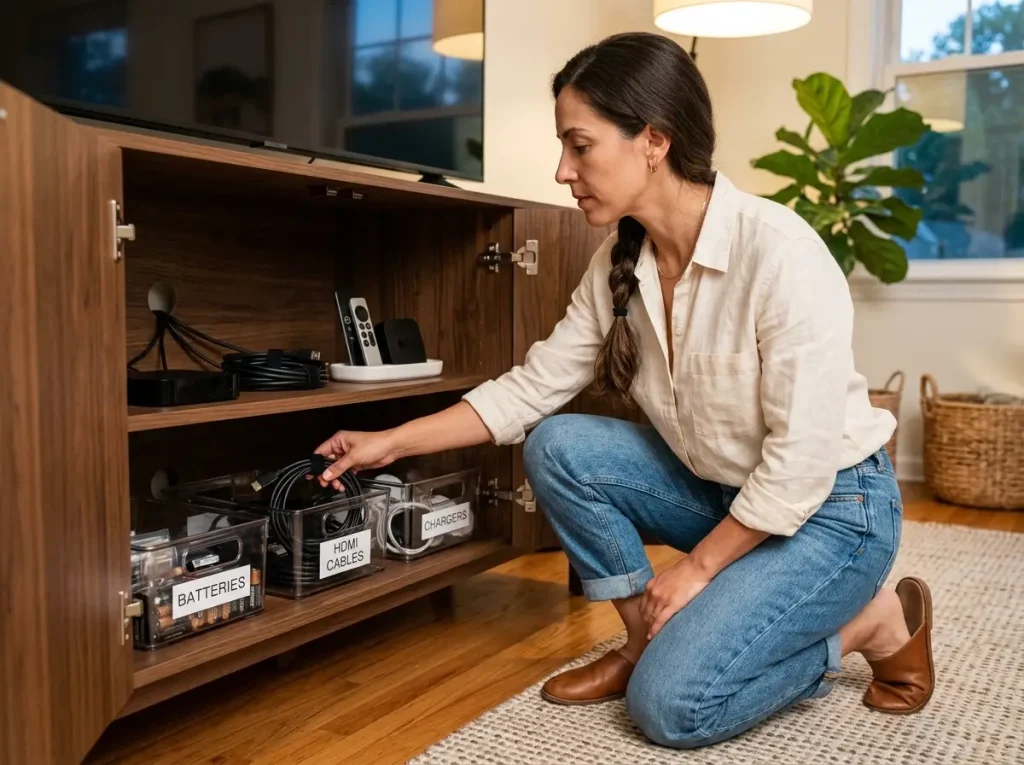
The remote control problem has one reliable fix: a small tray or divided bin that lives on the TV stand shelf. Not on the coffee table, not in a drawer, not wedged into the couch cushions. The tray needs to be visible and within arm’s reach from the main seating position. If it requires opening a door or walking across the room, nobody will use it.
For accessories like spare HDMI cables, batteries, and chargers, if you can find clear bins at a dollar store that fit your shelf depth, those work perfectly well. For something stackable that fits standard TV stand shelves, the mDesign Stackable Plastic Storage Bins 4-pack stacks two high without tipping. One bin per category: batteries in one, cables in another, chargers in a third. Nothing loose. The container doesn’t matter nearly as much as the rule. It’s the one-category-per-container rule that works in every room.
Gaming Console and Controller Storage
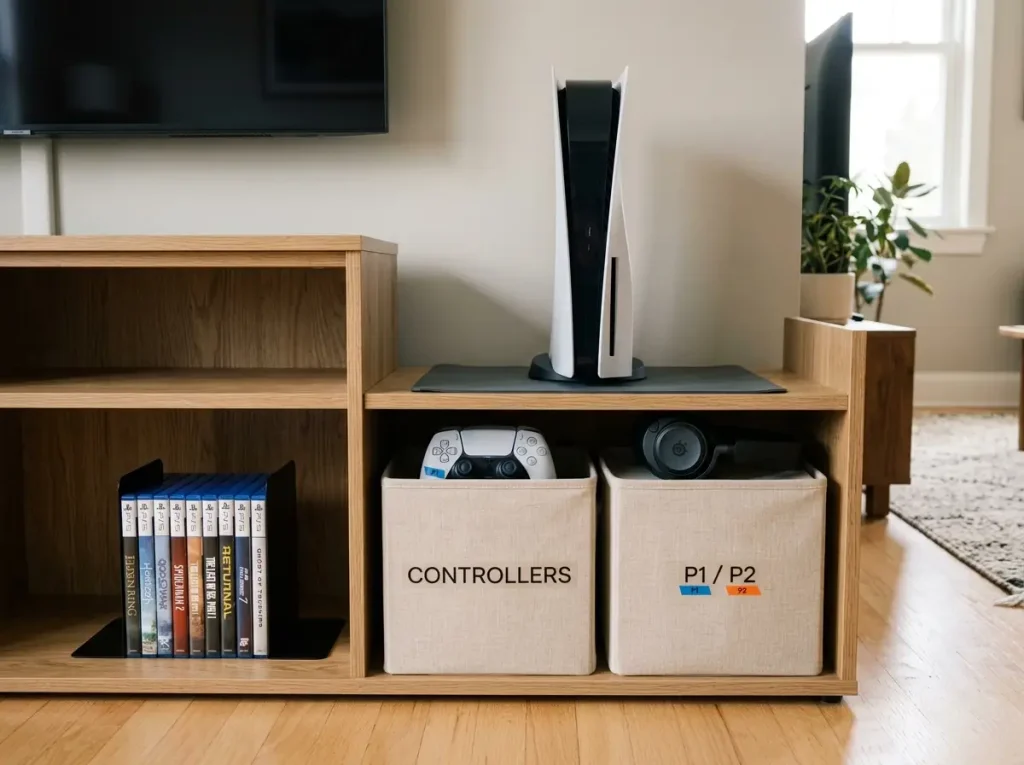
Gaming setups are the fastest-growing source of entertainment center clutter. Controllers multiply (one per player, per console), cables multiply, and the consoles themselves keep getting larger. The PS5 is over 15 inches tall. That’s not fitting inside a standard TV stand shelf.
Where the Console Actually Goes (The Heat Management Rule)
The PS5 needs 4 inches of clearance on all sides. So does the Xbox Series X. This is a manufacturer specification, not a suggestion. Put either one in a closed cabinet without ventilation and it will thermal throttle within an hour, slowing itself down to avoid overheating. Performance degrades, fans get loud, and the console’s lifespan shortens.
Three placement options that actually work: on top of the TV stand (most common and most effective), on a dedicated stand or shelf unit beside the TV furniture, or on an open shelf with full air circulation on all sides. Closed cabinets with mesh doors can work, but solid-door cabinets are a hard no for gaming consoles.
Controller Storage That Your Whole Household Will Use
The most maintainable controller storage is wherever controllers naturally get put down. That’s usually the couch, the coffee table, or the floor in front of the TV. A fabric bin sitting on an open shelf within arm’s reach of the couch works because it’s in the natural put-down path. Wall-mounted controller hooks look great in photos but only get used if they’re directly in that same path.
The Fabric Storage Bins with Labels, Set of 6 fit standard 12-inch cube organizer shelves and hold multiple controllers plus a headset comfortably. For multi-person gaming households, label each bin by person instead of by device. “Alex’s controllers” is more maintainable than “PlayStation controllers” because it assigns ownership. Mixed-bin systems where everyone’s gear goes in the same bin fail because nobody takes responsibility for keeping it sorted. A cardboard box with a handwritten label works just as well if aesthetics aren’t a concern. The label is what makes it work, not the bin.
Game Media — The Physical vs. Digital Audit
Physical game collections take significant shelf space for something you may never replay. If a game has a digital license, you can re-download it anytime. The case is artwork, not access. Store cases you want to keep in a slim media sleeve or binder. Games without digital licenses: stand them vertically in a bin like books, spines out, sorted alphabetically.
Most collections can be reduced by half or more without losing access to a single game. The space you clear from half a shelf is worth far more than the trade-in value of games sitting unplayed for years.
The Monthly Reset That Keeps the System from Breaking Down
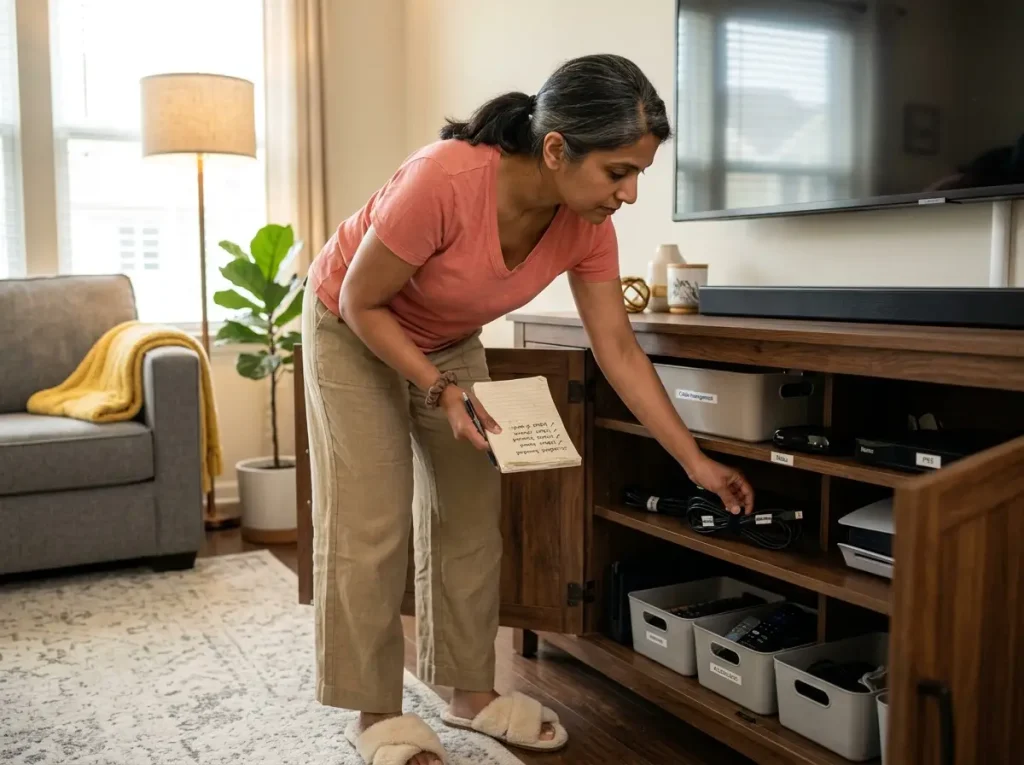
The entertainment center you organize today will look different in three months. That’s not a failure of your system. It’s what happens when people actually live with it. New devices arrive. Cables multiply. Controllers migrate to the couch and stay there. The difference between a system that lasts and one that doesn’t isn’t a better initial organization. It’s a maintenance protocol.
New Device Syndrome — Why Entertainment Setups Fall Apart After 3 Months
Here’s exactly how it happens. You organize everything perfectly. Three months later, a new streaming device or gaming console arrives. You plug it into whatever port is available. The cable bundle needs to be partially undone to route the new cord, but if you used zip ties, you’d have to cut the whole bundle apart. So you don’t. The new cable just hangs loose alongside the bundled ones. The new device sits in front of or on top of other equipment because there’s no designated spot.
After two or three new devices, the original system is gone. This isn’t carelessness. It’s a design flaw in the original setup.
The fix: when you build the system initially, leave two extra open outlets on the surge protector, two extra velcro ties pre-attached loosely to the cable bundle, and one open shelf zone for the next device that shows up. Build for two extra from the start. That one decision is what separates systems that survive from systems that look great for a month and degrade into the same cable nest you started with.
The 10-Minute Monthly Check
Set a recurring reminder for the first weekend of each month. Four questions, each takes about thirty seconds to check:
- Are all active devices still in their assigned zones?
- Are all cables still bundled and running in the same direction?
- Is anything sitting in a “I’ll put it away later” spot?
- Have any new cables been added outside the bundle?
If the answer to questions 3 or 4 is yes, do a quick reset. Re-bundle the strays, assign the new device a zone, and clear whatever landed in the “temporary” spot. The whole thing takes under ten minutes and prevents the gradual slide that makes every entertainment center look messy by month six.
These checks follow the same principles that make any decluttering system stick long-term. Small, frequent maintenance beats a massive reorganization project every time.
The Seasonal Device Audit
Once per quarter (January, April, July, October), run the three-category device sort again: Active, Occasional, Dormant. Any device that drifted from Active to Dormant in the last three months gets a decision: store it in a labeled box in a closet, donate it, or sell it.
Electronics accumulate faster than most people realize. A household that adds one new device per year and never removes anything has a serious cable and space problem within three years. The quarterly audit catches this before it spirals. And since the CPSC recommends proper ventilation for electronics to reduce fire risk, fewer devices also means less heat buildup in enclosed shelves and lower risk overall.
Pro tip: The households with permanently organized entertainment centers aren’t better at organizing. They just do the 10-minute check consistently. There is no “set it and forget it” cable management. Accept that and you’ll stop being frustrated when things drift slightly between resets.
Conclusion
Three things determine whether your TV and entertainment organization lasts or falls apart:
- The TV stand comes first. Cable routing ports, ventilation for consoles, and proper shelf depth decide whether the rest of the system works or fights you. Pick the stand for its organizational features, not just its finish.
- Label before you bundle and use velcro, not zip ties. These two decisions are the difference between a system you maintain and one you abandon the first time a new device arrives.
- Build for two extra devices from day one. Leave open surge protector outlets, extra velcro ties, and one empty shelf zone. The system breaks when new hardware shows up and there’s no plan for it.
Three-month check: Are all cables still bundled? Are all devices in their zones? Has anything new arrived without a designated spot? If yes to any of those, run the monthly reset before cable creep takes over.
Start here: Get a cable management box and a pack of velcro ties. Get the cables behind your TV stand under control first. Everything else builds from there.
Q1 How do I organize cords and cables behind my TV?
Label every cable at both ends with washi tape, bundle them together with reusable velcro ties, and route them through the TV stand’s back panel cable ports. A cable management box hides the surge protector and all cord tails in one step. The key is labeling first so you can identify any cable without tracing it.
Q2 What is the best way to hide TV wires without drilling?
Adhesive cable raceways like the D-Line Cord Hider Kit stick to drywall and peel off cleanly when you move. Paint them to match your wall and they nearly disappear. If your walls are textured, use the furniture-route method instead: run cables behind the TV stand with binder clips on the back edge. Zero wall contact.
Q3 How do I organize my entertainment center on a budget?
Start with what you have. Washi tape for cable labels costs almost nothing. Binder clips from any dollar store route cables along furniture edges. A shoebox with holes cut in the sides works as a cable management box. Velcro ties are the one item worth buying new because they keep the system maintainable long-term.
Q4 How you manage cables with a wall-mounted TV?
A surface-mount cable raceway painted to match the wall runs from the TV down to the baseboard. One 13-foot kit covers most TV-to-baseboard runs. It’s not invisible, but from couch distance it blends in. The raceway uses removable adhesive, so it works for renters who cannot cut into drywall for an in-wall cable plate.
Q5 What should I keep in my entertainment center?
Only devices you use at least once a month. Run a device audit: Active (weekly use), Occasional (monthly use), and Dormant (unused for 3+ months). Dormant devices get unplugged and stored elsewhere. Most living rooms have at least one device drawing standby power for months without anyone touching it.
Disclaimer: ClutterlessNest is a participant in the Amazon Services LLC Associates Program. As an Amazon Associate we earn from qualifying purchases. This article may contain affiliate links — if you buy through them, we may earn a small commission at no extra cost to you. We only recommend products we have tested or genuinely believe in.