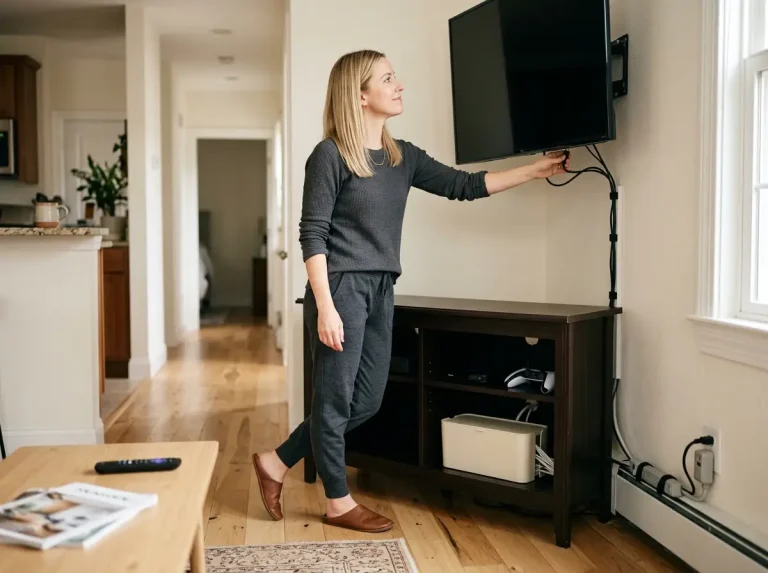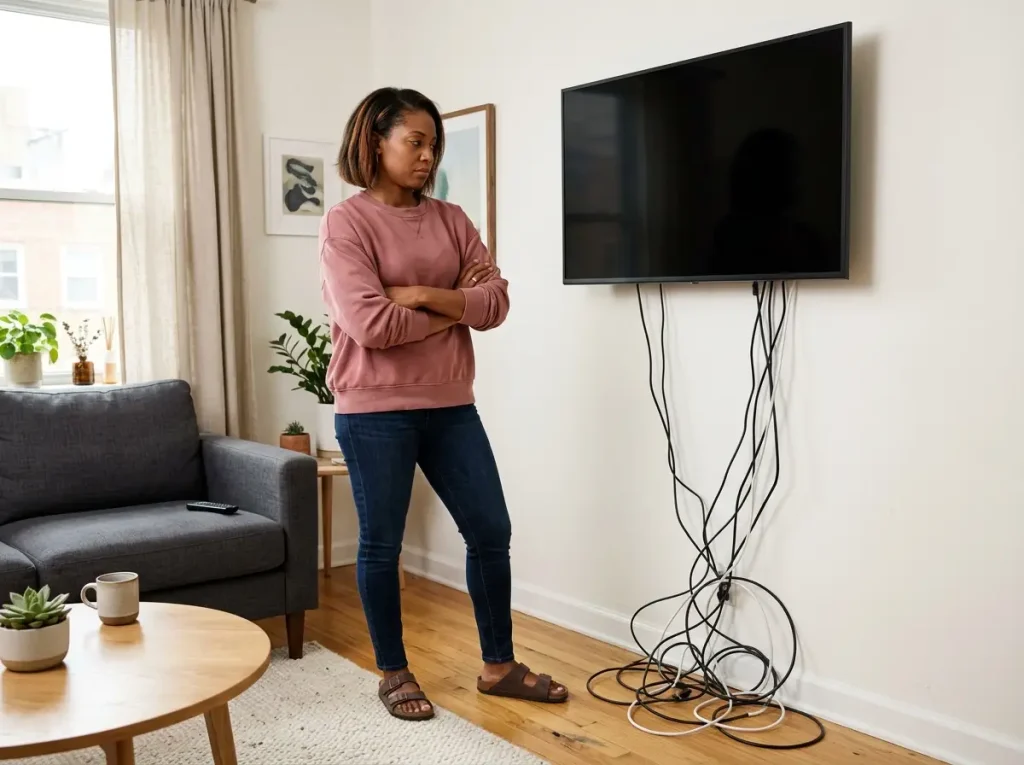
Your TV is on the wall. It looks great for about three seconds, until your eyes drift down to the six cables hanging from behind it like the world’s least attractive curtain. That tangle of HDMI cords, power cables, and the ethernet line you’re not even sure is plugged into anything is what most wall-mounted TV setups actually look like once the mounting excitement fades. I’ve sorted through this exact mess across more living rooms than I can count, and the fix is the same every time: a raceway system that covers the wall run, routes along the baseboard, and hides the power strip at the bottom. No drilling, no landlord calls, no special tools.
Quick Answer: Here’s how to hide TV wires without drilling:
- Count your cables first — most raceway kits are sized for 2–3 wires, but a typical setup has 6–10
- Install a paintable cord raceway from the TV mount straight down to the baseboard, then along the baseboard to the outlet
- Cut raceway pieces at 45-degree angles at every direction change for a flush, professional look
- Use a cable management box at the endpoint to hide the power strip and adapter pile
- Prep the wall with isopropyl alcohol before mounting — adhesive on flat paint fails without this step
- For rentals, apply painter’s tape as a barrier layer between the raceway adhesive and the wall
Count Your Cables Before You Buy a Raceway
The Modern TV Setup Has More Cables Than Most Raceway Kits Expect
You went to Amazon, typed “TV cord cover,” bought the first kit with good reviews, and installed it. Then you tried to feed in all your cables. The cover wouldn’t close. Or it closed, but one cable stuck out at the bottom like a loose thread on a sweater. This happens because raceway marketing shows a single cable running neatly inside a clean white channel, and your actual setup has six.
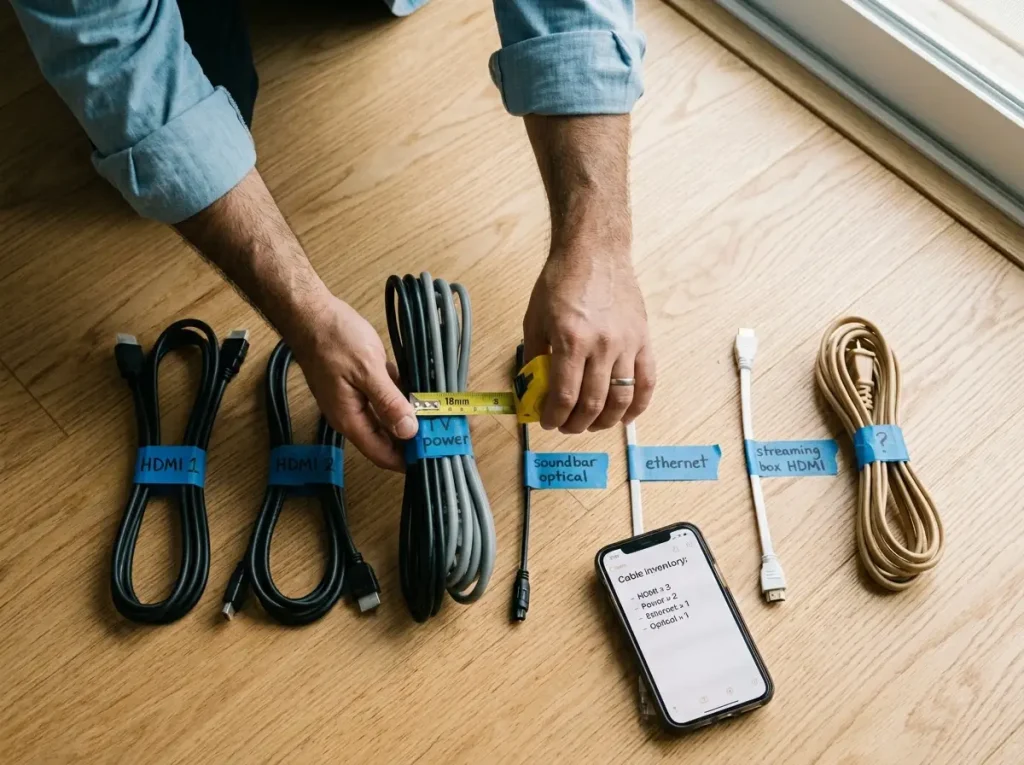
A standard wall-mounted TV in 2025 with a soundbar, streaming box, and gaming console generates 6–10 cables: 2–4 HDMI (one per connected device), the TV power cord, the soundbar power cord, an ethernet cable if you hardwire your connection, and an optical audio cable for the soundbar. That’s the reality of a current entertainment setup, not the one-cable fantasy on the raceway box.
And here’s the spec detail that actually determines what you buy: HDMI 2.1 cables (the kind you need for 4K/120Hz gaming) are roughly 7mm in diameter each. They’re noticeably thicker than the older HDMI 1.4 cables most raceway kits were designed around. Bundle six HDMI 2.1 cables together and they will not physically fit inside a standard raceway channel rated for “TV cords.”
The raceway’s capacity comes down to its channel height — the H dimension. A D-Line half-round raceway at 0.59 inches high holds 2–3 standard cables comfortably. The wider 1.18-inch version holds 3–5 mixed cables. Once you pass five cables, you need a wider channel, full stop.
Buying the wrong raceway width is the single most common reason these installations fail in the first week. The cover won’t snap shut, or you force it and the plastic clips crack. You’ll hear the snap from across the room.
Pro tip: Before you buy anything, spread all your cables on the floor, bundle them together by hand, and wrap a tape measure around the combined diameter. That number is the minimum channel height your raceway needs. Write it down. This takes two minutes and saves you a return.
The Cable Count Sizing Guide
Here’s the sizing breakdown based on cable count:
- 1–3 cables (simple TV + one streaming device): the D-Line mini raceway at 0.59 inches high handles this without issue
- 4–5 cables (TV + soundbar + streaming box + one console): the standard D-Line 1.18-inch wide raceway fits comfortably
- 6+ cables (full entertainment system with multiple consoles or a receiver): step up to wider channels like the A+ ELECTRIC 26ft kit or a 1.5-inch wide raceway
Before you finalize the count, check for dead cables. That HDMI from the DVD player you haven’t turned on in three years? The component cables from a console you sold two apartments ago? They’re still plugged in, still taking up space in the bundle.
Remove dead cables before you route anything. You might drop from six cables to four, which changes the raceway size you need entirely and saves you from buying the more expensive kit.
This is the step every competitor guide skips. They jump straight to “buy a raceway” with no guidance on which one, and then you’re standing in your living room with a channel that’s too narrow and an open return window that’s about to close.
If Your TV Isn’t Wall-Mounted Yet: The Zero-Product Solution
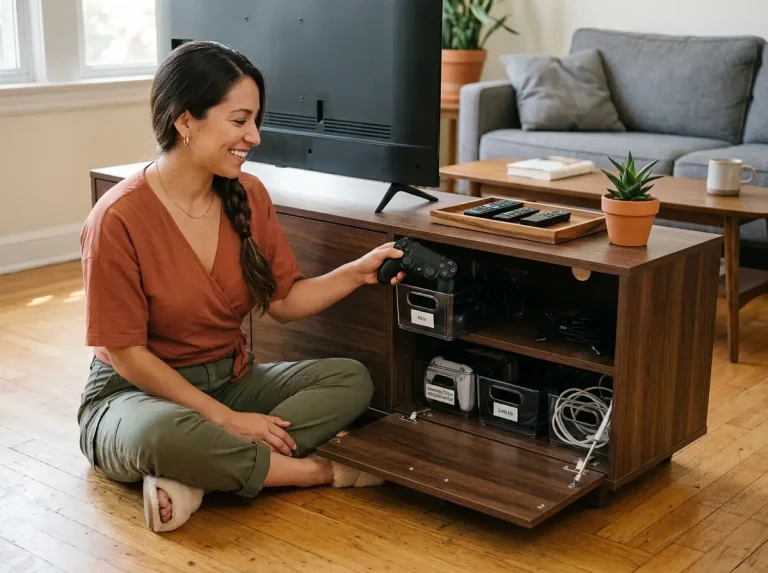
If you haven’t mounted your TV on the wall yet, stop here and reconsider. A media console or TV stand with back-panel cable grommets keeps every cable behind the furniture — no wall contact, no adhesive, no raceway purchase at all. Push the stand within 12–18 inches of the wall, route all cables through the rear grommets, and tuck the power strip on the bottom shelf. The full approach is part of a no-hardware entertainment setup that requires zero products and zero deposit risk.
The catch: this only works if you’re OK with a TV stand. Once the TV is wall-mounted with open space beneath it, the exposed cable run from mount to outlet is exactly what the raceway fixes. But if you haven’t committed to wall-mounting yet, the stand is the cheapest and most renter-friendly option you can choose. No one ever lost a security deposit over a TV stand.
The Three-Zone Raceway Install
Zone 1 — The Wall Run (TV Mount to Baseboard)
The raceway looks simple in the box. It is simple — until you’re standing in front of the wall trying to figure out where to start, how straight “straight” needs to be, and whether the adhesive is actually going to hold on your apartment’s flat white paint. Here’s the process that works on the first attempt.
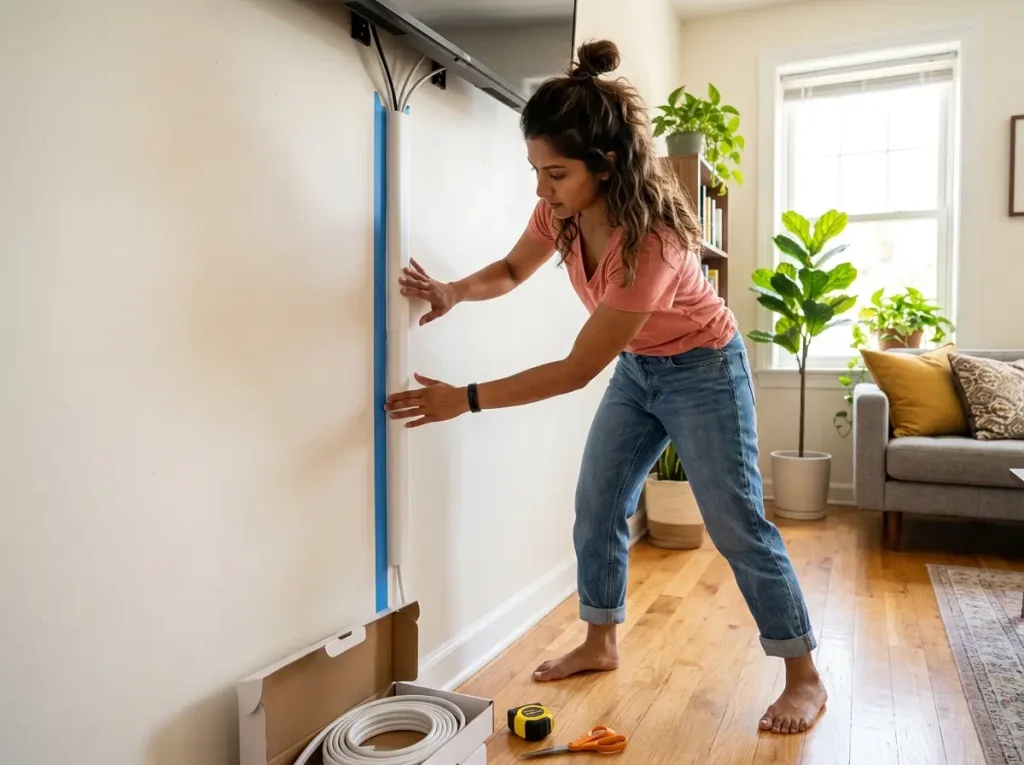
Start by measuring the drop from just below the TV mount cable exit point to about 1–2 inches above the baseboard. That measurement is your Zone 1 length. Mark the route with a strip of blue painter’s tape and use a level. Even slightly off-vertical is visible from across the room, and you’ll notice it every single time you sit down to watch something.
Before you peel any adhesive backing, wipe the wall area with isopropyl alcohol on a clean cloth and let it dry for five minutes. This step removes the invisible chalk and dust layer on flat-painted walls that causes adhesive failure — there’s a full breakdown of why in the last section. Then peel the backing, position the raceway on the tape guideline, and press with firm palm pressure for 60 full seconds per section.
Do not route your cables yet. The adhesive needs 24 hours to reach full bond strength. Feeding cables in immediately while the glue is still soft is the number one reason sections pop off in week one.
The D-Line Cord Hider Kit 13.12ft comes with four 39-inch sections at 1.18 inches wide by 0.59 inches high, totaling 13.12 feet of coverage — enough for a standard 8–9 foot ceiling drop plus about 1.5 feet of baseboard routing in one purchase. The plastic is paintable, so you can color-match it to your wall with a single coat. D-Line uses a moderate-tack foam adhesive that releases cleanly with a heat gun at move-out, which matters if you’re renting. Generic Amazon raceways use permanent tape that strips paint on removal — more on that below.
For setups with four or more cables where the D-Line channel feels tight, the A+ ELECTRIC Cord Cover Full Kit 26ft provides 20 snap-on channels with enough width for 3–4 cables per channel, plus corner connectors and joiners in the box. That 26 feet of coverage handles the wall run plus a longer baseboard route without needing a second purchase.
Zone 2 — The Baseboard Run (Corner to Outlet)
Where the wall run meets the baseboard is where most DIY installs start looking rough. The transition from vertical to horizontal requires a corner cut (covered in the next section), and the horizontal run itself has a placement detail most people miss.
Run the baseboard raceway just above the baseboard, not on the baseboard itself. Mount it on the wall surface right where the wall meets the top edge of the molding trim. This way the raceway reads as part of the wall, not as something stuck to the floor molding.
The visual difference is real: raceway on the baseboard looks like a cable taped to the trim. Raceway just above the baseboard looks like architectural trim.
For longer runs where the outlet is on the far side of the room, use the joiners that come in the D-Line or A+ ELECTRIC kit rather than trying to cut a single piece to span the full distance. Joiners keep each section short enough to press firmly during install and make future removal much easier. You take down one section at a time instead of wrestling a six-foot piece off the wall.
Pro tip: Measure the baseboard run from the corner to the outlet, then add about 15% for waste and the small offcuts from miter cuts. On a 6-foot baseboard run, that’s roughly 11 extra inches, about one extra raceway section.
The Professional Corner: The 45-Degree Miter Cut
The gap at direction changes is the single most visible sign of a DIY raceway install. A straight cut meeting another straight cut at a corner leaves a V-shaped gap that announces “this was done in twenty minutes.” A 45-degree miter at each direction change, where the wall run meets the baseboard or where the baseboard turns a room corner, makes the joint flush. It takes about 10 extra seconds per corner and is the difference between a raceway that looks intentional and one that looks temporary.
Hold the raceway section at the corner, mark the angle with a pencil, and cut with sharp kitchen scissors or a utility knife. The PVC plastic cuts cleanly — no miter box, no saw, no trip to the hardware store. For inside corners (where the wall meets the baseboard), cut both pieces at 45 degrees inward so they meet at the point. For outside corners (baseboard wrapping around a fireplace surround or protruding wall), cut both at 45 degrees outward.
You’ll know you got it right because the two pieces meet with no visible gap when pressed together. If you see a gap, one of the cuts isn’t at a true 45 — trim a sliver off and test-fit again. This corner is at eye level when you’re sitting on the couch. It’s worth getting right.
The Cable Management Box — Hiding the Power Strip Pile
Why the Power Strip Pile Undoes the Whole Raceway
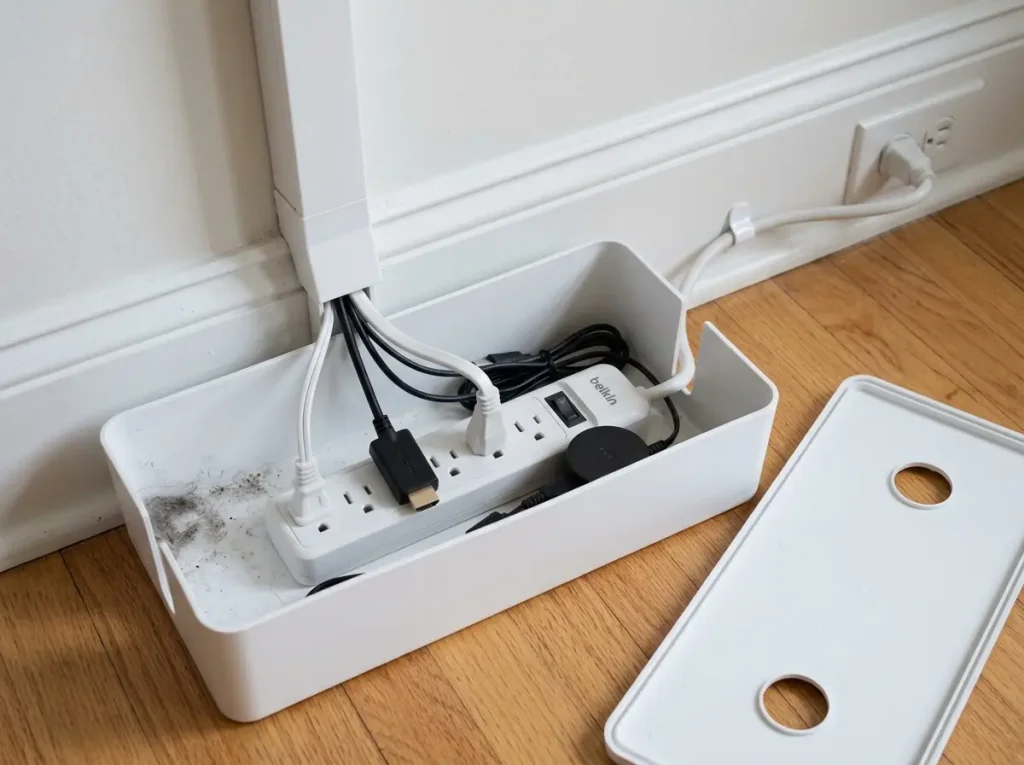
The raceway looks clean all the way down the wall, along the baseboard, perfectly routed. Then your eye hits the bottom and there’s a power strip with four adapter bricks, a coil of excess cord, and the one cable that didn’t fit in the channel just sitting on the floor like you gave up at the finish line. The raceway gets all the visual credit, but the power strip pile is what people actually notice when they scan your living room.
A cable management box converts that pile into a single rectangular object that looks like it belongs there. The raceway feeds into one end, the power strip sits inside, and the only thing visible is the box itself, which in white reads as trim against the baseboard.
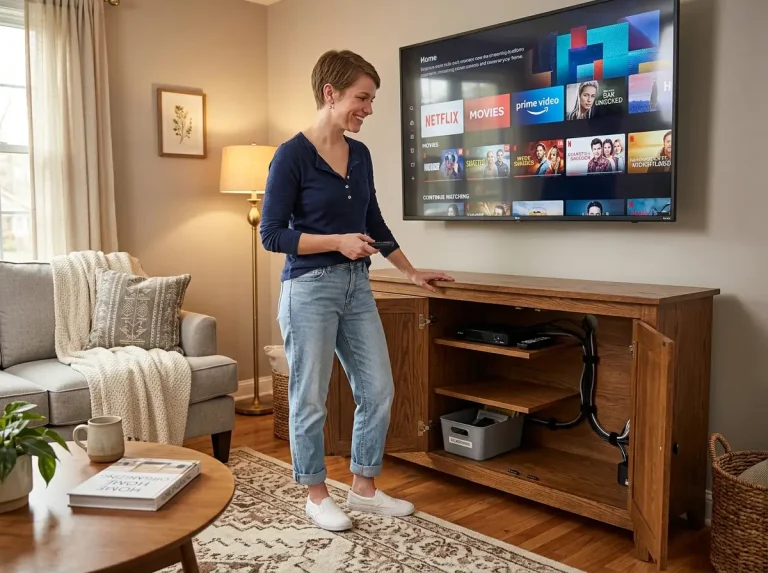
That said, if your TV stand has a lower shelf or drawer, you don’t need a management box at all. Route the cable bundle into the furniture and let the stand contain the power strip. The box solves a specific problem: wall-mounted setups with open space beneath the TV where the power strip pile has nowhere to hide. If your living room doubles as a tight space, media consoles with built-in cable routing solve both the storage and cable problems without any wall-mounted hardware.
Sizing the Box to Your Power Strip
Measure your power strip before buying the box. Standard 6-outlet power strips run 10–14 inches long and 1.5–2.5 inches tall. The D-Line Cable Management Box (12.75″ × 5″ × 4.5″) fits strips up to 12 inches long with room for adapter bricks and excess cord coils. It comes in white to match the D-Line raceway, and the cable exit slots on the front, sides, and rear let you route cables out without the sharp bends that stress connectors over time.
If your adapter bricks are bulky — soundbar power adapters and gaming console power bricks tend to be tall — the NTONPOWER Cable Management Box (12.2″ × 5.4″ × 5.1″) gives slightly more vertical clearance inside. Both sit flush against the baseboard.
The width dimension matters more than people realize. The box sits at floor level against the wall and protrudes into the room. At 5 inches deep, the D-Line box extends about the same distance as a standard baseboard.
Barely noticeable. Go wider than 6 inches and the box starts looking like something that doesn’t belong on the floor of a living room.
Finishing the System: What “Done” Actually Looks Like
At this point the three-zone system is in place: cables inside the wall raceway, baseboard run inside the channel, and the power strip contained inside the management box. The only visible cable left is the power strip’s own power cord running from the box to the wall outlet — usually a stretch of 3–8 inches along the floor.
For that last stretch, use an adhesive cord clip or a small piece of baseboard raceway to tuck the cord flat against the trim. Do not run it under a rug or carpet, even for a few inches. The Consumer Product Safety Commission estimates 4,000 cord-related injuries occur annually, and cords under rugs are a fire risk that no amount of cord management makes worth taking.
The few inches of visible power cord from box to outlet, clipped flat against the baseboard, is the one compromise in this system. It’s also essentially invisible from normal viewing distance across the room.
Pro tip: Don’t completely seal the cable management box. Leave one exit slot slightly open for airflow. A sealed box around a power strip and multiple adapter bricks generates heat, and heat inside an enclosed space with no ventilation is a hazard you can avoid by leaving a quarter-inch gap.
Why Your Raceway Falls Off (and How to Keep This System Working)
The Flat Paint Problem
You did everything right. Measured, cut the corners at 45 degrees, pressed firmly, loaded the cables. The raceway looked clean for six weeks.
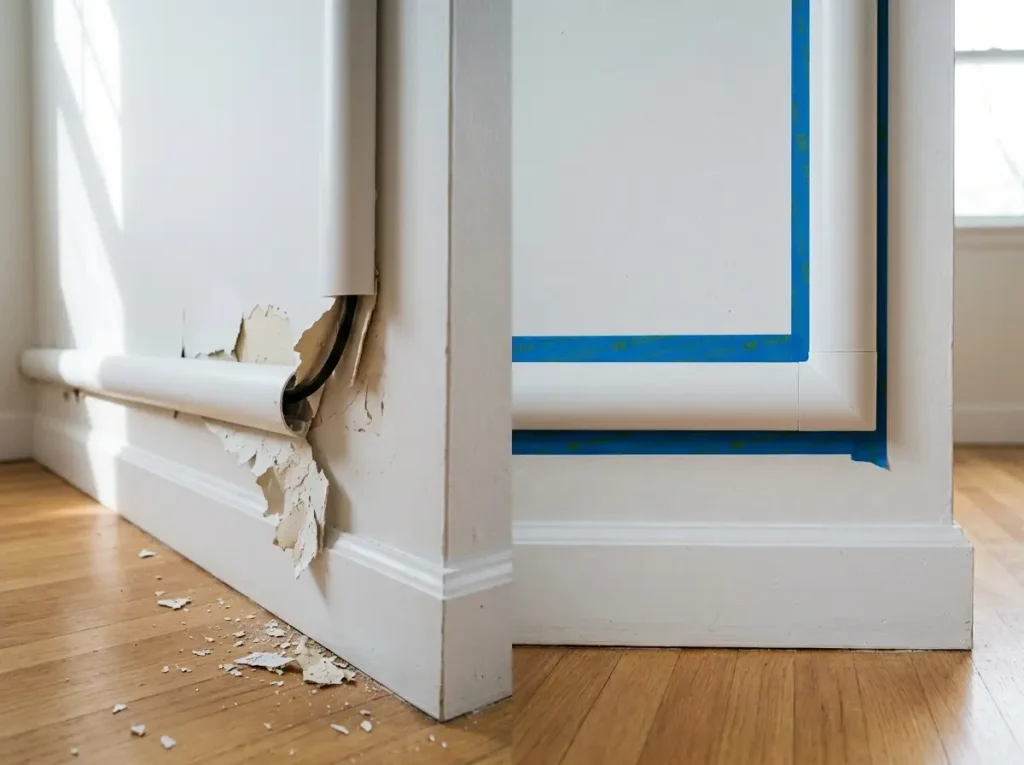
Then you came home and one section was hanging off the wall with a strip of paint still stuck to the adhesive backing. This is the most common raceway failure, and it’s not a product defect. It’s a paint chemistry problem.
Most rental apartments have flat or matte paint — the low-sheen finish that hides drywall imperfections and is cheap to reapply between tenants. Flat paint has fewer polymer chains at the surface per square inch compared to eggshell or semi-gloss finishes. The raceway adhesive bonds to the paint film, not to the wall underneath it.
On flat paint, two things happen: either the adhesive slowly loses grip on the sparse paint surface and the section droops off after a few months, or the adhesive bonds so firmly to the paint molecules that removing the raceway later pulls the paint off in sheets. Both failures come from the same root cause — the adhesive is interacting with the paint layer, not the wall.
Here’s how to tell what paint you have: hold a flashlight at a 45-degree angle to the wall. Flat paint shows zero reflection — the surface looks chalky and dry. Eggshell reflects faintly. Satin and semi-gloss reflect clearly. The understanding of adhesive weight limits on different wall surfaces applies here the same way it applies to no-drill shelving and wall hooks in rentals.
If you have flat paint — and if you’re renting, you almost certainly do — the prep protocol below is not optional. It’s the difference between a system that holds for years and one that peels off in month three.
The Prep Protocol That Prevents Both Failure Modes
This four-step process takes five minutes and prevents both adhesive failure and paint stripping at move-out.
Step 1: Wipe the full mounting area with 70% isopropyl alcohol on a clean cloth. This dissolves the chalk-like mineral layer that flat paint develops on its surface — the layer that prevents the adhesive from making real contact with the paint polymer beneath it.
Step 2: Let the wall dry completely. Five minutes minimum. Alcohol evaporates fast, but the paint surface needs to be fully dry for the adhesive to grip at full strength.
Step 3: Peel the adhesive backing, position the raceway section on your marked route, and press firmly with your palm for 60 full seconds per section. Not a quick push — sustained pressure. The foam adhesive needs that compression to activate properly.
Step 4: Wait 24 hours before feeding cables into the raceway. The adhesive reaches full bond strength slowly, and this is the step most people skip because the raceway feels solid right after pressing it on. It is solid — for the first hour. Feed six cables into a freshly mounted section and the weight will pull it away from the wall overnight.
If your wall has a texture pattern — knockdown, orange peel, or the bumpy texture common on apartment ceilings that sometimes extends to upper walls — the alcohol prep alone may not be enough. The texture creates tiny air pockets under the adhesive strip where the tape can’t make full contact. In that case, add the painter’s tape barrier method below.
The Painter’s Tape Barrier Method (Maximum Deposit Protection)
For renters who don’t know their wall paint type and want zero risk of losing their deposit over a cord cover, this is the safest approach. Cut strips of blue painter’s tape to the length of each raceway section. Press them firmly against the wall along the mounting route. Then press the raceway’s adhesive backing against the tape, not against the wall paint.
The logic is straightforward: the raceway adhesive grips the painter’s tape. The painter’s tape is engineered to release cleanly from painted surfaces — that’s its entire purpose.
At move-out, you pull the raceway off the tape, then slowly peel the painter’s tape at a low angle. The wall stays clean. No touch-up paint. No deduction from your deposit.
The trade-off is about 1/16 inch of added thickness between the raceway and the wall. From across the room, it’s invisible. From six inches away, barely noticeable. The tape edge might peek out slightly on either side of the raceway channel — trim it flush with scissors after pressing the raceway down.
When to use this method: always if you have flat or matte paint and care about your deposit. Optional if your walls are eggshell or satin, which hold and release adhesive more predictably. If this approach sounds familiar, it’s because the same deposit-safe principles apply across all no-drill adhesive installations. Whether it’s a closet shelf, a wall hook, or a cable raceway, the painter’s tape barrier works the same way.
The Quarterly Clip Check (How This System Stays Working)
Here’s what happens after three months: someone in the household gets a new streaming device. That means another HDMI cable. They open the raceway to add it, stuff it in next to the existing cables, and the clip won’t close properly anymore. The section stays slightly ajar. Then someone bumps it while vacuuming. Then it droops.
This is cable creep — the slow, predictable growth of the cable bundle as your entertainment setup evolves. It happens to every raceway install eventually.
The fix is a 10-minute quarterly check. Run your palm along the entire raceway route and press each section firmly against the wall. Test each clip — it should snap shut cleanly with no gap visible at the edges. Look at the corner joints for gaps that have opened up from thermal expansion or cable pressure pushing from inside.
If a section is overstuffed, pull it off the wall, take the cables out, and bundle them tightly with a velcro cable tie before re-seating them in the channel. The velcro tie compresses the bundle and lets the cover close flush. If a section has pulled away from the wall, re-prep the surface with alcohol before re-adhering. The existing adhesive is usually still usable if the section wasn’t repeatedly peeled and reattached.
For renters using D-Line raceways, heat gun removal at move-out is the clean exit. Set the heat gun to 150–200°F and pass it over each section for 2–3 seconds. The moderate-tack foam adhesive softens and the section releases without pulling paint.
This is specific to D-Line’s adhesive formulation — generic permanent-adhesive raceways don’t respond to heat the same way. If you bought a generic raceway with permanent tape, the painter’s tape barrier method from above is your only real move-out insurance.
The three things that keep this system looking good long-term:
- Count cables first. The raceway width decision is the one everything else depends on. Get it wrong and nothing downstream works.
- Treat the three-zone install as one system, not three separate fixes. Skip the management box and the power strip pile at the bottom undoes the clean look you just spent an afternoon building.
- The adhesive prep step — alcohol wipe plus 24-hour cure — is what turns this from a temporary fix into a permanent setup that stays flat against the wall.
Three-Month Check: Walk the full raceway route with your palm at the three-month mark. Press each section, check each clip, look for gaps at the corners. That 10-minute pass is what separates a system that lasts from a fix that quietly reverts.
Start here: Spread all your cables on the floor. Count them. Note the thickest ones. That cable audit takes two minutes and tells you exactly which raceway to buy — the one decision you can’t undo once the adhesive is on the wall.
Q1 Can you hide TV wires on a wall without drilling into the wall?
Yes. Self-adhesive cord raceways mount directly to the wall with foam tape — no holes, no anchors, no tools beyond scissors. The raceway channel covers the cables from the TV mount down to the baseboard, and a cable management box hides the power strip at the endpoint.
Q2 What is the best way to hide TV cables on the wall for renters?
Use a paintable cord raceway with moderate-tack adhesive (like D-Line) and apply a strip of painter’s tape between the adhesive and the wall as a barrier. At move-out, remove the raceway, peel the tape, and the wall stays clean with no paint damage.
Q3 Will adhesive cord covers damage my wall paint?
They can, especially on flat or matte paint, which is standard in most rentals. Prep with isopropyl alcohol before mounting to improve adhesion. For maximum deposit protection, mount the raceway over painter’s tape instead of directly on the paint. Heat gun removal at 150–200°F works for D-Line’s moderate-tack adhesive.
Q4 How do you run TV wires without them showing?
Route cables through a three-zone system: a vertical cord raceway from the TV mount to the baseboard, a horizontal raceway along the baseboard to the nearest outlet, and a cable management box at the endpoint. Cut 45-degree miters at direction changes for flush joints.
Q5 How much cord cover do I need for a wall-mounted TV?
Measure the vertical drop from the TV mount to the baseboard, then add the horizontal baseboard distance to the outlet. Add 15% for waste and miter cuts. A standard 8-foot ceiling with a 4-foot baseboard run needs about 13–14 feet of raceway — one D-Line 13.12ft kit covers it.
Disclaimer: ClutterlessNest is a participant in the Amazon Services LLC Associates Program. As an Amazon Associate we earn from qualifying purchases. This article may contain affiliate links — if you buy through them, we may earn a small commission at no extra cost to you. We only recommend products we have tested or genuinely believe in.