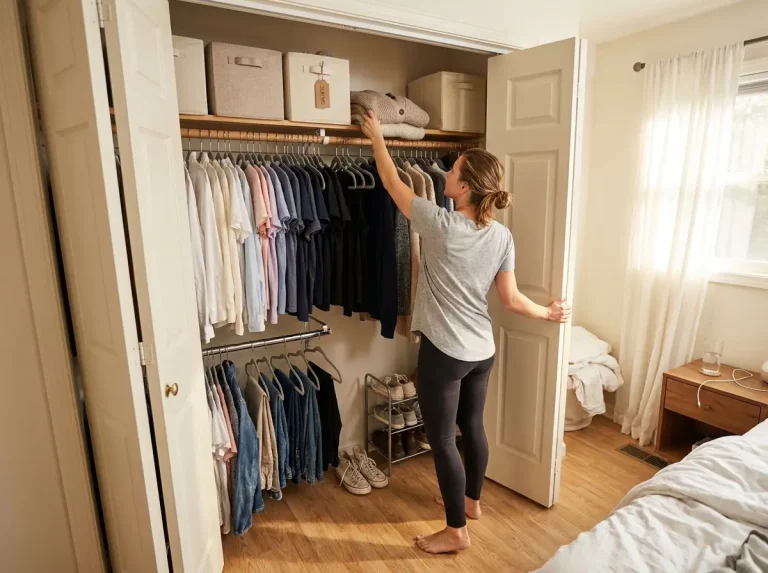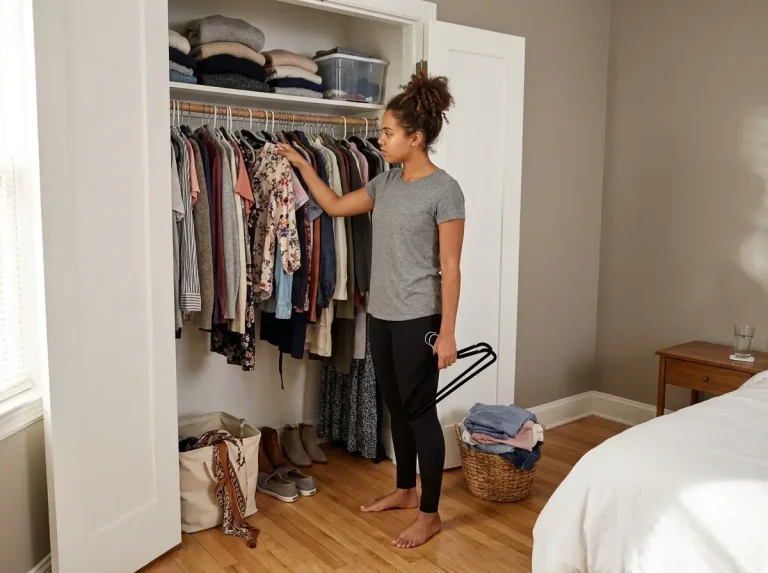
You signed the lease, opened the closet, and found the rental special: one rod, one shelf, and zero permission to drill. Every apartment closet starts this way — bare bones, limited, and designed as if nobody actually owns clothes. After organizing rental closets across multiple apartments over the years, the same pattern keeps showing up. The closet isn’t the problem. The tools you’re allowed to use are the problem.
Here’s how to build a complete no-drill closet system using tension rods, adhesive mounts, hanging organizers, and freestanding storage — without putting a single hole in the wall or risking your security deposit.
Quick Answer: To organize a rental closet without drilling:
- Measure closet depth, width, rod height, and door clearance before buying anything
- Add a tension-mounted double rod below the existing rod for instant vertical space
- Use Command strips and adhesive hooks for belts, bags, and lightweight accessories
- Hang an over-the-door organizer for shoes and small items
- Place a freestanding shelf unit on the closet floor under hanging clothes
- Build a portable kit that moves with you to the next apartment
Measure Your Rental Closet Before You Buy Anything
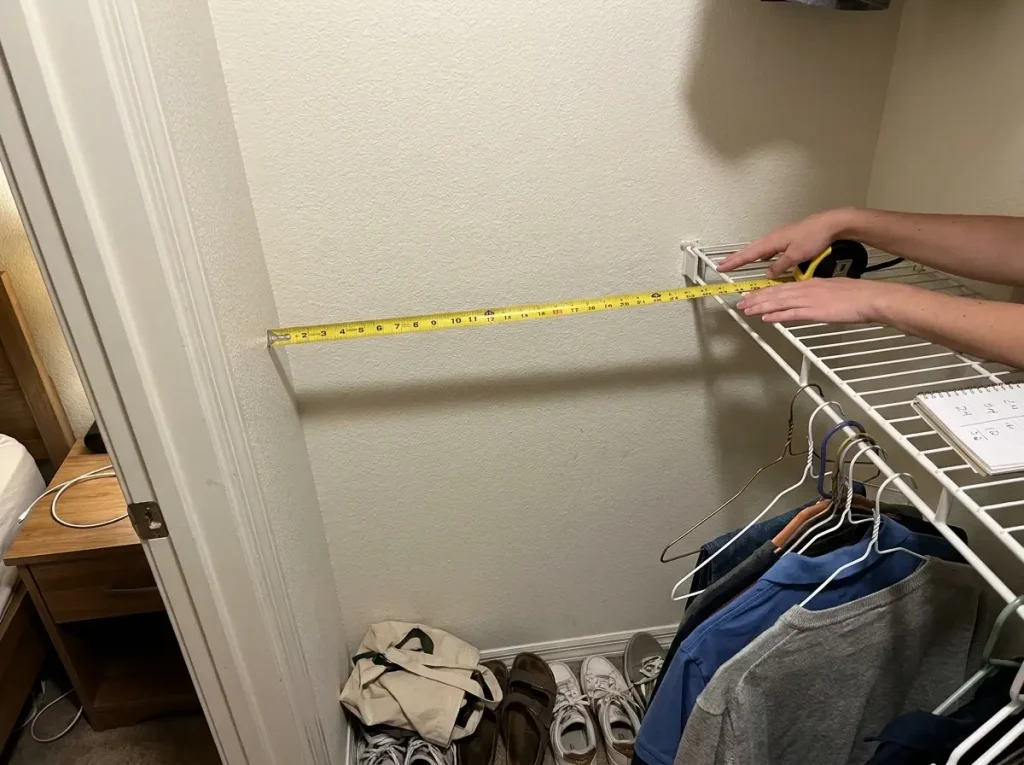
Every failed closet project starts the same way — buying an organizer online, getting it home, and discovering it’s two inches too wide for the space. Measuring first takes five minutes and prevents the most common (and most frustrating) mistake in closet organization.
Standard Rental Closet Dimensions (and Why Yours Might Be Different)
Most reach-in closets in apartments are 24 inches deep and somewhere between 36 and 96 inches wide. The rod usually sits at about 66 inches from the floor, and there’s a single wire shelf above it. That’s the standard template.
The problem is that older apartments, pre-1970s buildings, and converted spaces often deviate from these numbers. A closet might be 22 inches deep instead of 24, which means bins designed for standard depth will stick out past the door frame and prevent the door from closing. You won’t know until you measure, and by then you’ve already ripped open the packaging.
If your closet connects to a wall shared with a bathroom, check for pipes behind the back wall. They sometimes push the usable depth down to 20-21 inches, which changes everything about what fits inside. For a deeper look at standard closet dimensions and what they mean for your system, the numbers there apply to every method in this article.
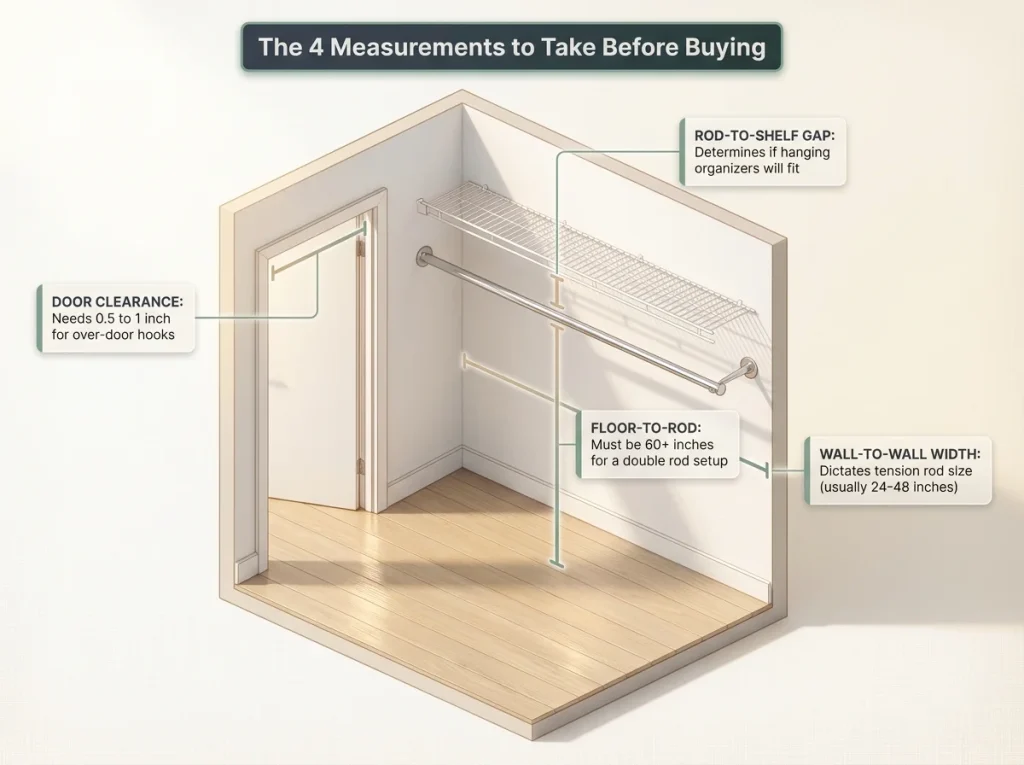
The Four Measurements That Drive Every Decision
Grab a tape measure and write these down before you open a single Amazon tab:
Rod-to-shelf gap — the vertical distance from the top of your closet rod to the bottom of the shelf above it. This determines whether a hanging organizer will fit and how many shelves it can have.
Floor-to-rod — the distance from the closet floor to the rod. If it’s 60 inches or more, you have room for a double rod below. If it’s under 55, you’ll need a shorter lower rod or a different strategy.
Door-to-shelf clearance — the gap between the top of your closet door and the door frame. Over-the-door organizers need 0.5 to 1 inch of clearance to hang properly. If your door sits flush against the frame, over-door hooks won’t fit without modifications.
Wall-to-wall width — the inside width of the closet at rod level. This determines what size tension rod you need. Most adjustable rods cover 24 to 48 inches, but wider closets need heavy-duty models or multiple rods.
Pro tip: Take a photo of your tape measure readings and save it in your phone. You’ll reference these numbers every time you shop, and guessing from memory is how you end up with returns.
Tension Rods — The Foundation of Every No-Drill Closet
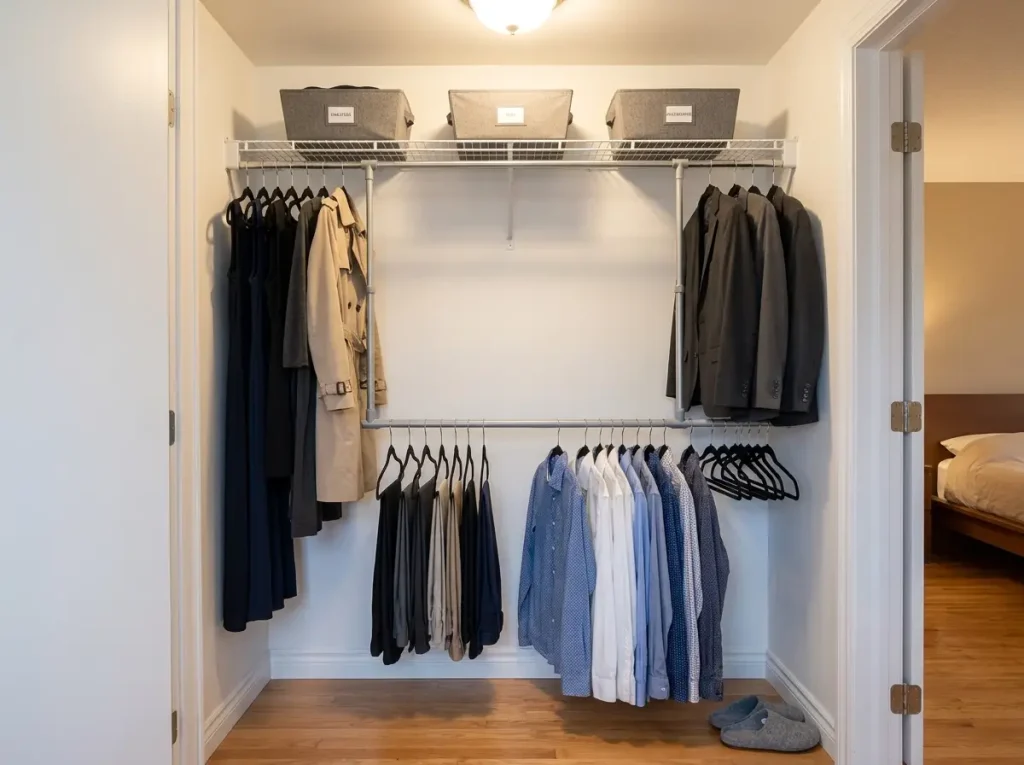
Tension rods are the single most versatile no-drill tool for closet organization. They hang between walls using spring pressure, need no tools to install, and adjust to fit different closet widths. They’re also the first thing that crashes to the floor at 2 AM if you use them wrong.
Double Rod for Instant Vertical Space
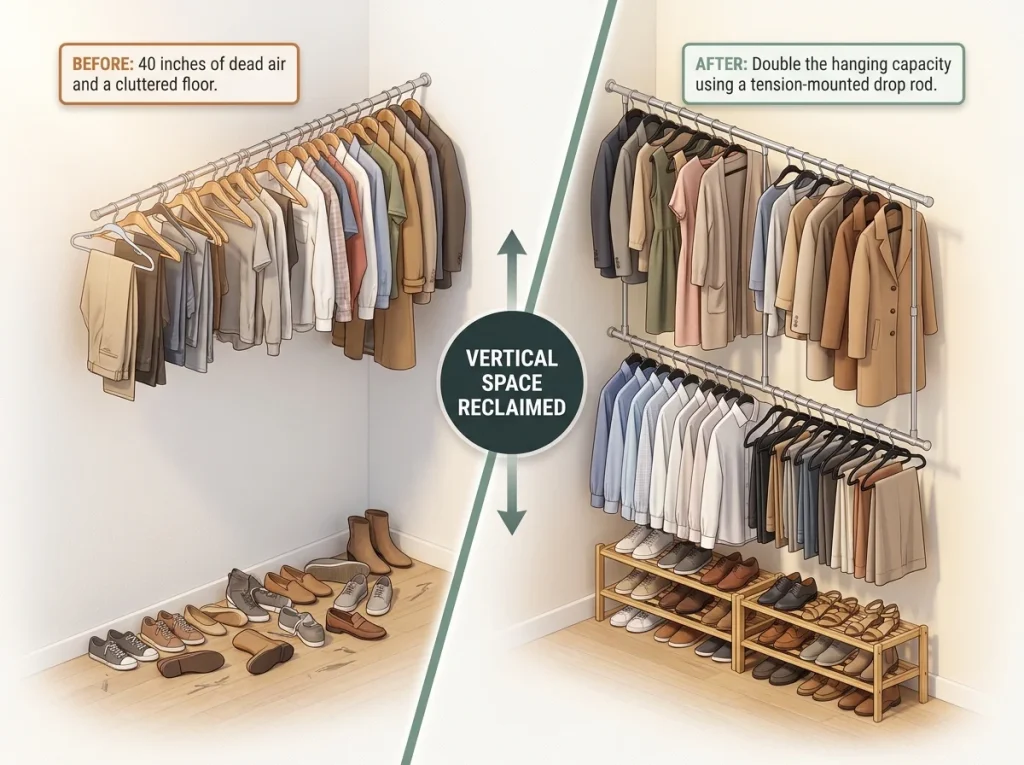
The single biggest upgrade you can make to a rental closet is adding a second hanging rod below the existing one. Most closets have 60+ inches of floor-to-rod space, but only 40 inches of that gets used by hanging shirts and blazers. The rest is dead air above a pile of shoes.
The STORAGE MANIAC Adjustable Closet Double Rod hooks onto your existing rod and drops a second bar below it, creating two full hanging levels. It holds up to 110 pounds, which is enough for a full section of everyday clothes. Hang longer items like dresses and coats on the upper rod, and shorter items — shirts, folded pants on clip hangers, skirts — on the lower one.
The critical detail: measure your floor-to-rod distance first. If it’s under 55 inches, the lower rod will sit too close to the floor and your clothes will drag. In that case, a single tension rod installed horizontally at about 36 inches works better as a dedicated short-item bar.
Tension Rod Shelves and Dividers
Beyond hanging, tension rods create no-drill shelving. A horizontal rod installed between two walls with a lightweight board laid across it becomes an instant shelf — no brackets, no screws, no wall damage.
The Home in Bold Tension Rod Shelving takes this further with an expandable shelf that slides in and locks using tension pressure alone. No tools, no contact with the wall surface. It works well for folded items, bags, and accessories that don’t need hanging space.
You can also install tension rods vertically between an existing shelf and the closet rod to create divider slots. This is one of the best ways to store purses, clutches, and small bags upright instead of letting them collapse into a pile.
Pro tip: Standard tension rods hold 5-10 pounds. Heavy-duty rods (usually labeled “shower” or “closet” grade) hold up to 20 pounds. Always check the weight rating before loading a shelf — distribute weight from the center outward, never pile everything on one end.
Why Tension Rods Slip (and How to Fix It)
If you’ve had a tension rod crash in the middle of the night, you already know the sound. It happens for three predictable reasons, and all of them are preventable.
Smooth or glossy paint reduces grip. The rubber ends of the rod need friction to hold, and high-gloss walls don’t provide enough. Fix: cut two small squares of rubber shelf liner and place them behind each rod end. The added friction doubles the hold strength.
Overtightening is the less obvious problem. When you crank a tension rod too hard, the rubber ends compress the drywall and create small dents. Over time, the dents deepen and the rod loses its press-fit. Tighten until the rod is firm and doesn’t spin freely — then stop. If it doesn’t move when you push it gently, it’s tight enough.
Uneven weight distribution causes torque. If all your heaviest clothes hang on one side of the rod, the loaded end drops while the light end lifts. The rod twists, breaks its seal, and falls. Hang heavier items near the center and lighter items toward the ends.
Adhesive Mounts and Command Strips — What Actually Holds
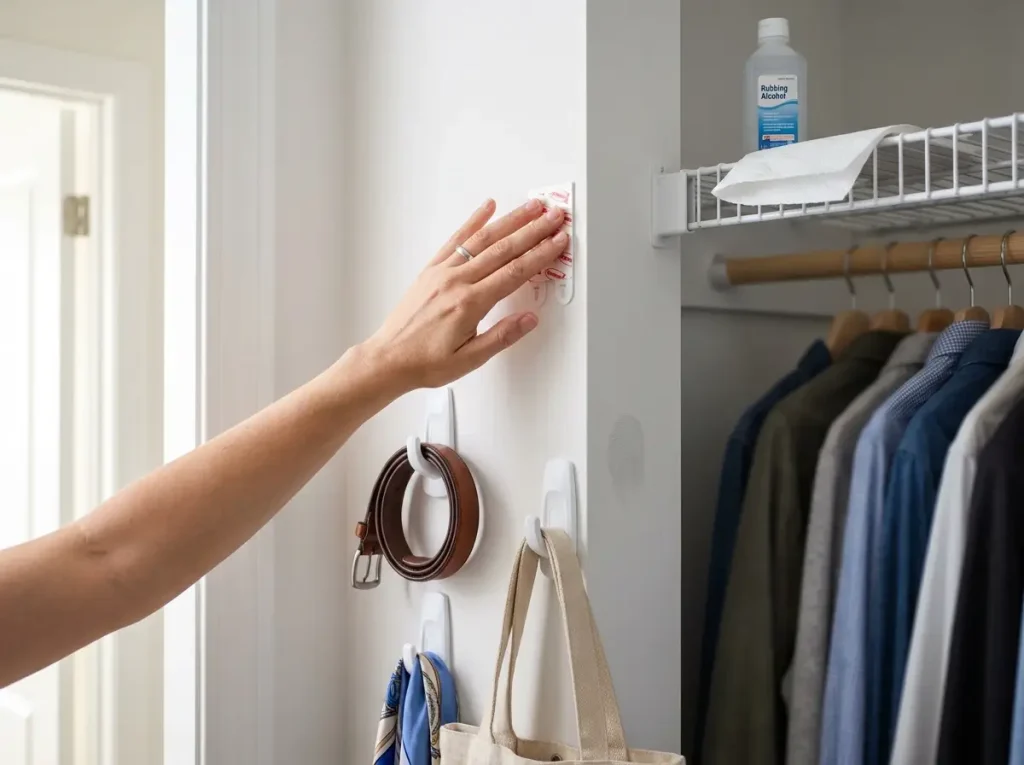
Command strips are the renter’s universal mounting tool, and they work well — until they don’t. The difference between a strip that holds for years and one that drops your stuff on the floor in three months comes down to three factors: weight, surface, and humidity.
Weight Limits by Strip Type (The Numbers That Matter)
Not all Command products hold the same amount, and most people grab whatever’s on the shelf without checking the rating. Here’s what actually matters for closet use:
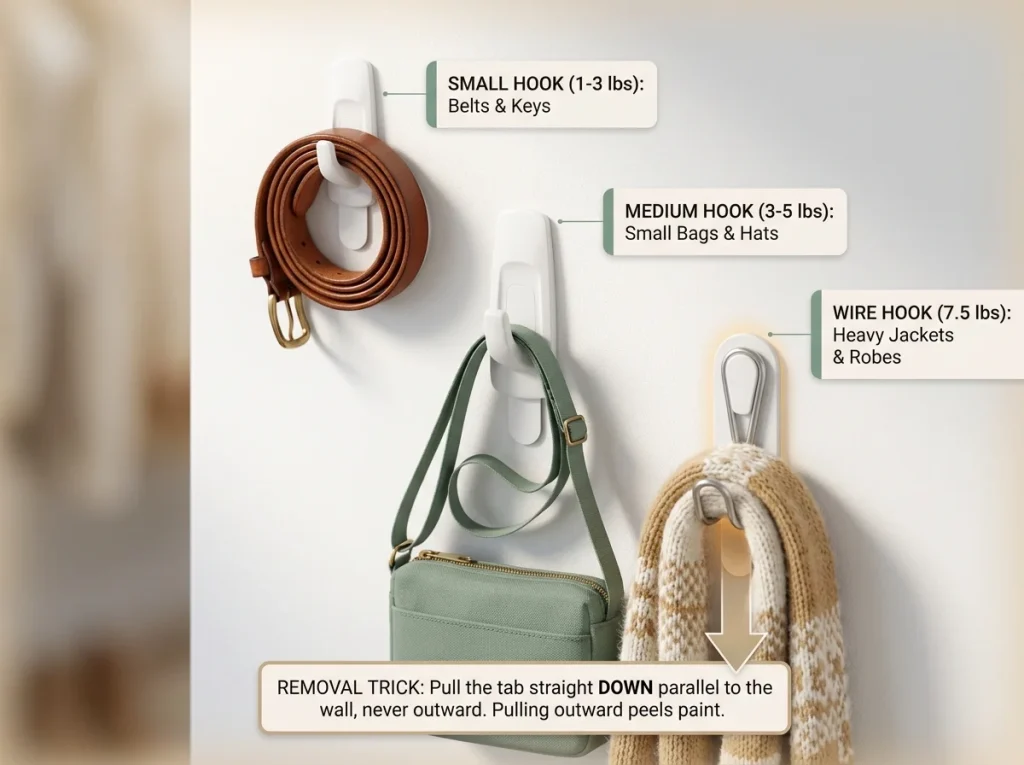
Small hooks hold 1-3 pounds — enough for a single belt, a small bag, or a set of keys. Not enough for anything heavier.
Medium hooks hold 3-5 pounds — good for a purse, a hat, or a bundle of scarves.
Large picture hanging strips hold up to 16 pounds per set — these are the ones that can support a lightweight shelf bracket or a tool holder. Use two sets for anything you’re mounting flat against the wall.
Wire hooks hold 7.5 pounds — designed for closets and work well for robes, aprons, or a single heavy jacket.
These ratings come from 3M’s own testing on smooth surfaces. Deviation from those conditions — texture, humidity, temperature — cuts the effective hold.
Surfaces That Reduce Adhesive Life (and What to Do)
The biggest reason Command strips fail isn’t weight — it’s the wall surface. Textured paint, wallpaper, and freshly painted walls (under 7 days old) all reduce adhesive grip. The strip might hold for the first week, then slowly release as the adhesive fails to bond properly.
Humidity is the silent adhesive killer in closets. If your closet shares a wall with a bathroom, has no ventilation, or sits in a humid climate, the adhesive degrades over months. You’ll come home one day and find everything on the floor.
The fix is simple but non-negotiable: clean the surface with rubbing alcohol first. Wipe it with a dry cloth, let it dry completely, then press the strip firmly for 30 full seconds. Wait at least one hour before hanging anything. Most failures happen because people stick and load immediately.
The Removal Trick That Saves Your Deposit
When it’s time to move out, pull the Command strip tabs straight down — parallel to the wall, not away from it. Pulling outward peels paint. Pulling down stretches the adhesive and releases cleanly.
If a pull tab breaks (common when strips have been up for over a year), aim a hair dryer at the strip for 30 seconds on medium heat. The warmth softens the adhesive. Then slide a piece of dental floss behind the strip and saw gently until it releases. Never pry with a knife or scraper — that’s how you gouge drywall and lose part of your deposit.
Pro tip: Before mounting anything permanent, test one Command strip on an inconspicuous spot inside the closet — behind the door, near the baseboard. Leave it for 48 hours, then remove it. If it pulls off paint, you know this wall surface isn’t compatible and you can switch to hooks that hang from the rod instead.
Over-the-Door and Hanging Organizers — Using Dead Space
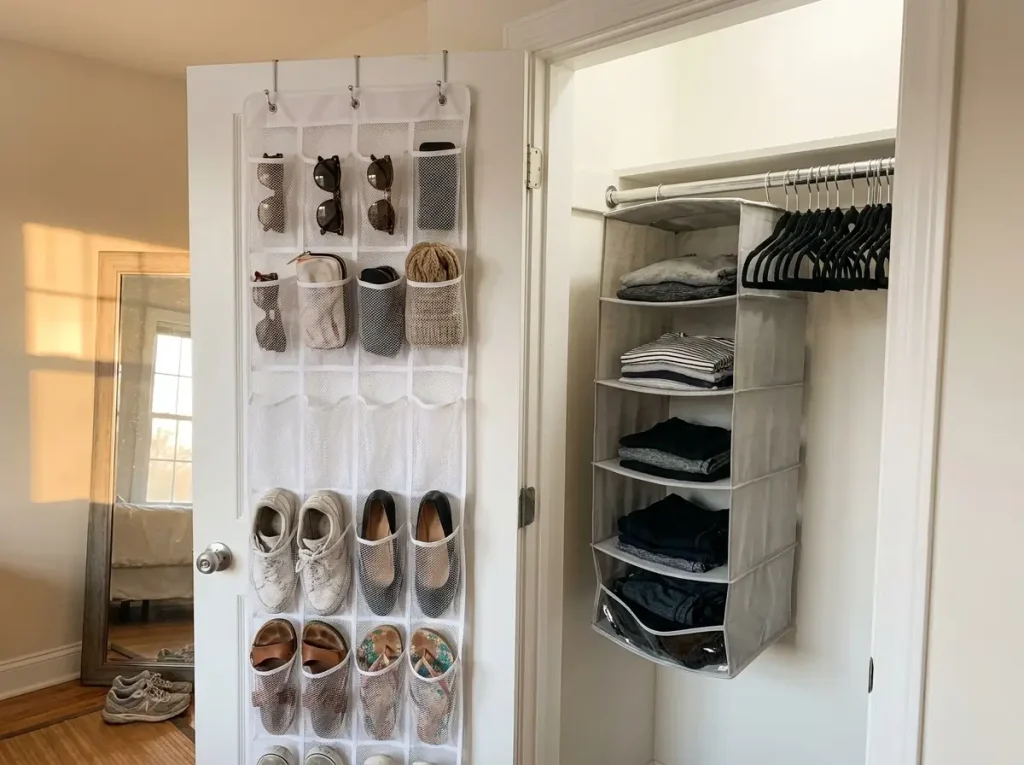
The back of your closet door and the space below your hanging clothes are the two largest unused storage zones in a rental closet. Both can be activated without drilling a single hole.
Over-the-Door Shoe Organizers (Check Door Clearance First)
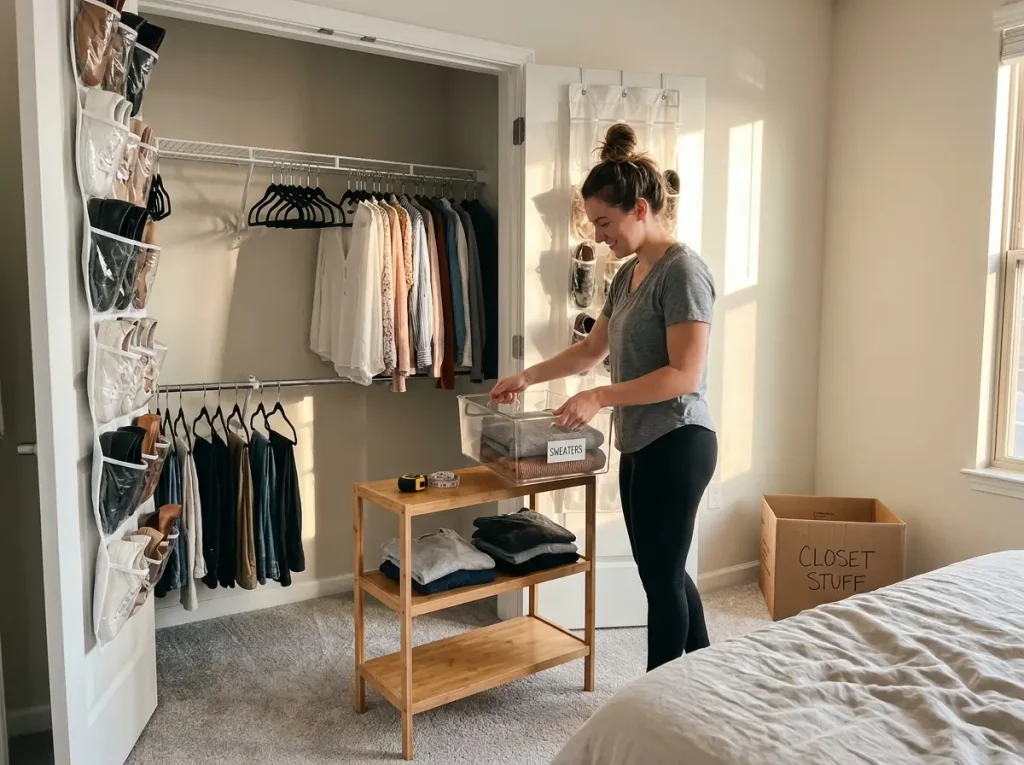
The SimpleHouseware Over-the-Door Shoe Organizer with 24 clear pockets is the standard renter solution for a reason — it hooks over any standard door, holds pairs of shoes from the top pockets to the bottom, and removes without a trace.
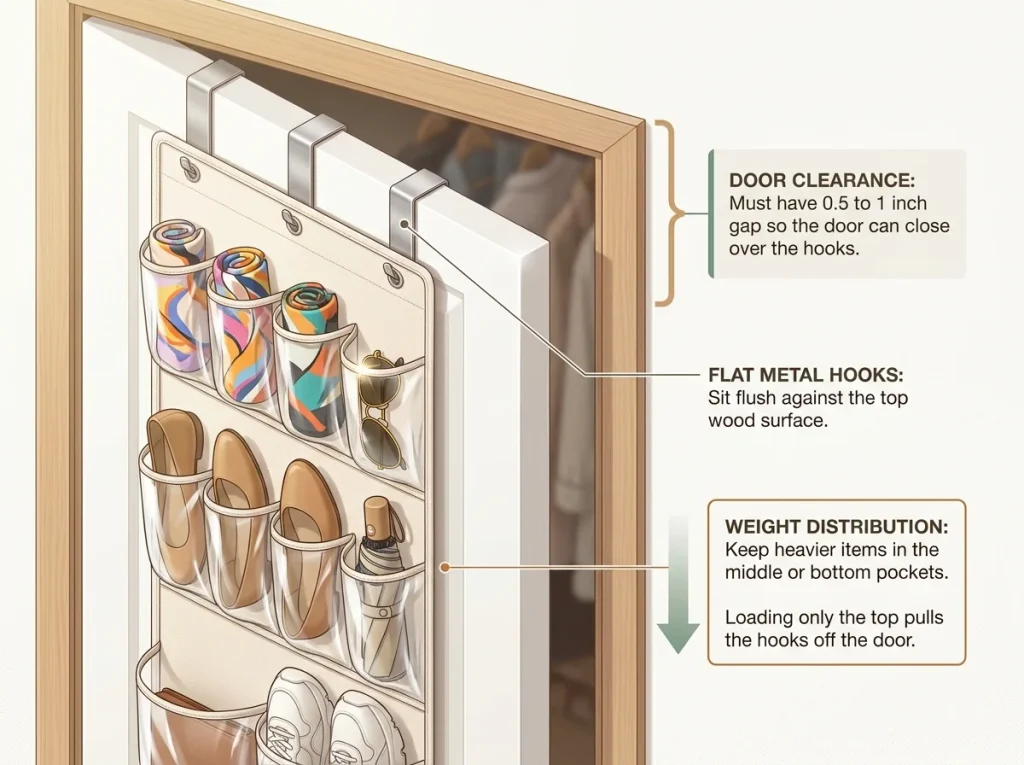
But before you buy one, check your door clearance. The metal hooks that drape over the door top need a gap of 0.5 to 1 inch between the door and the frame. If your door sits nearly flush, the hooks won’t fit and the door won’t close properly. Measure the gap first.
The other detail people miss: hollow-core doors (standard in most apartments) can handle these organizers, but only if you distribute the weight evenly across all pockets. Loading only the bottom pockets creates a pendulum effect that pulls the top hooks off the door. Fill from top to bottom and keep heavier items in the middle rows.
Use the pockets for more than shoes. Rolled scarves, sunglasses, small accessories, and even cleaning supplies fit perfectly. If your closet organization when you have too many clothes is overflowing onto the door, that’s a signal to purge before you organize.
Hanging Fabric Shelves (and Why They Sag)
The SimpleHouseware Crystal Clear Hanging Closet Organizer at 12 inches wide, 12 inches deep, and 44 inches tall attaches to your closet rod via metal hooks and creates six instant shelves. The clear front panels let you see contents without pulling everything out, which matters more than you’d think when you’re getting dressed in a rush.
The reason this model works where cheap fabric organizers fail: rigid shelf inserts. Most budget hanging organizers use fabric-only shelves that sag within two to three months under the weight of folded clothes. The shelves go concave, items slide to the center, and the whole organizer becomes a fabric tube full of chaos. Rigid inserts distribute weight across the full shelf surface and maintain their shape.
Even with rigid inserts, these organizers are best for lightweight items — folded t-shirts, workout clothes, accessories, bags. Don’t load them with jeans or heavy sweaters. Those belong on shelves or in bins where they can’t pull the organizer into a droop.
Freestanding Storage — The Closet Floor Is Free Real Estate
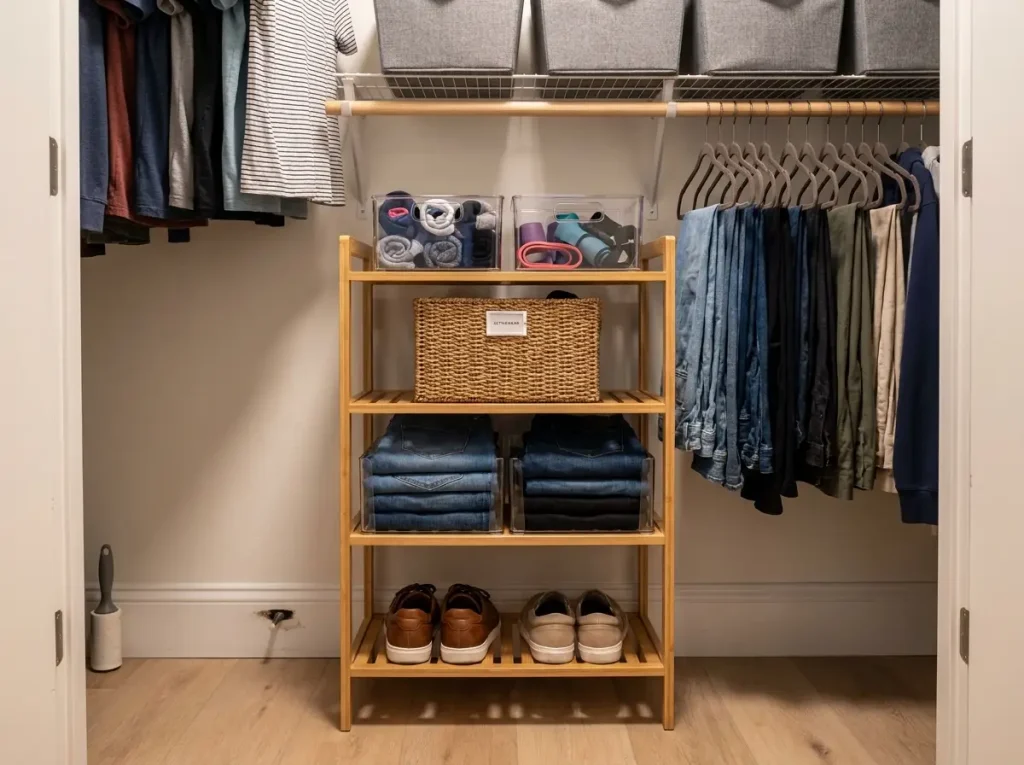
Look at your closet floor right now. There’s probably a pile of shoes, maybe a gym bag, and a lot of wasted space. The floor of a standard reach-in closet gives you 24 inches of depth and 3-8 feet of width — enough for a small shelf unit that functions like a built-in dresser, with zero wall contact.
Freestanding Shelf Units (Your Best No-Drill Investment)
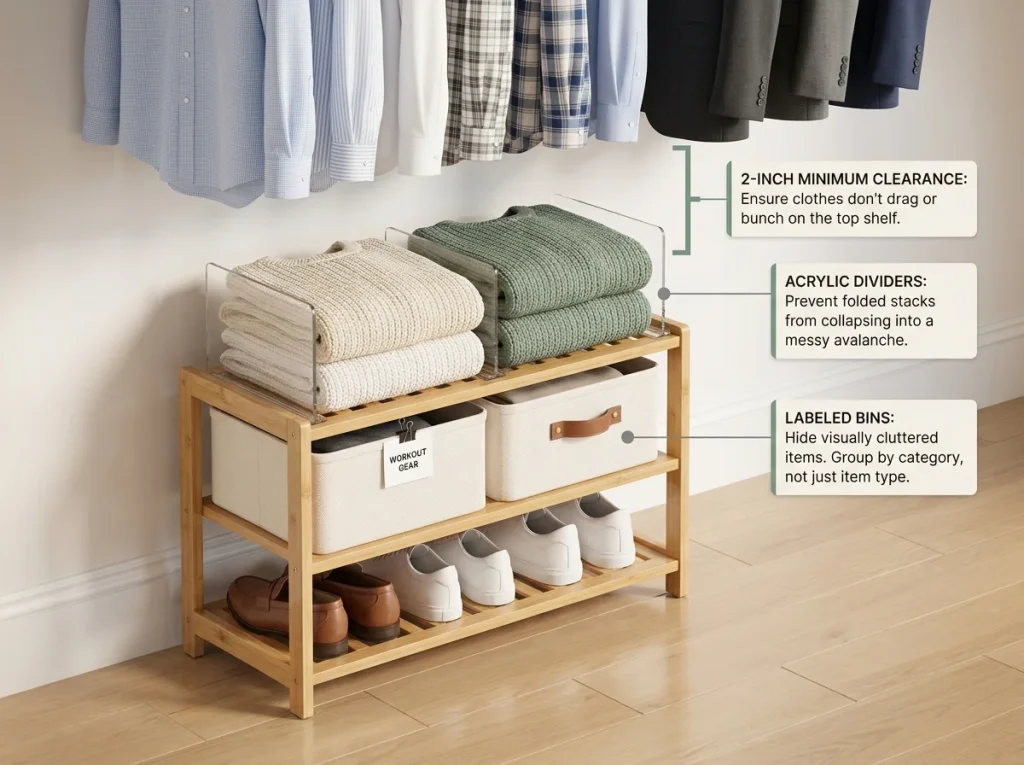
A bamboo or metal shelf unit that slides into your closet beneath hanging clothes is the single most impactful freestanding solution. Measure the height of your shortest hanging garment (usually shirts or blazers) and buy a unit that sits at least 2 inches below that. You want the clothes to clear the top shelf without bunching.
The beauty of freestanding units is portability. When you move — and renters move — the shelf comes with you. No disassembly, no patching holes, no argument with the landlord. It works in this closet and it’ll work in the next one, as long as you measured both.
For renters who want to explore closet organizer systems that actually hold up, freestanding shelving is the renter-friendly alternative that doesn’t require any permanent installation.
Shelf Organization: Dividers, Bins, and Labels
An empty shelf invites chaos. Within a month, folded stacks merge, items migrate, and the shelf becomes a flat pile. The fix is structure — dividers, bins, and labels that give every item a designated spot.
The HBlife Acrylic Shelf Dividers clip onto shelves up to 0.8 inches thick and hold 15 pounds per divider. They create vertical partitions that keep folded stacks from collapsing into each other — the “stack avalanche” that undoes most shelf organization within weeks. Because they’re transparent, they don’t block your sight lines or make the closet feel smaller.
Pair dividers with labeled bins for items that don’t stack neatly. A simple label maker (or even masking tape and a marker) turns a row of bins from “mystery boxes” into a system your household will actually follow. Label by category, not by item: “workout gear” works better than listing every sports bra you own.
Pro tip: If your closet has wire shelving (the standard in most rentals), add a layer of shelf liner before placing bins. Wire shelves have gaps that let small items fall through and cause bins to wobble. A roll of liner costs almost nothing and creates a flat, stable surface.
Build a Portable Closet System (Take It When You Move)
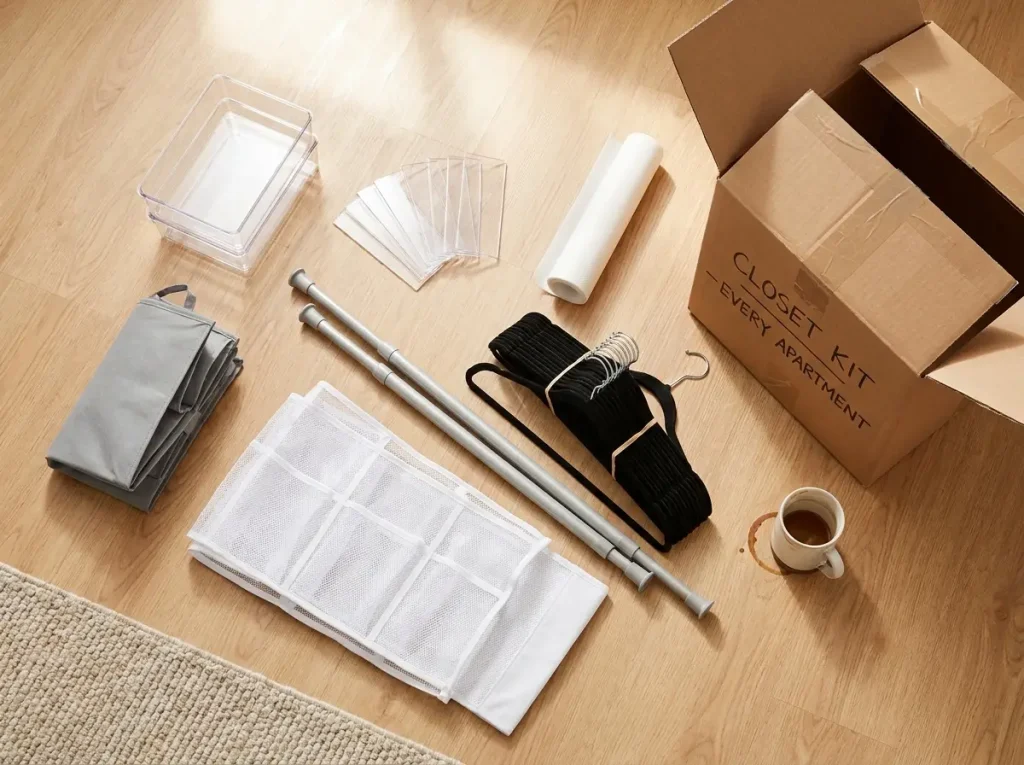
The best no-drill closet system isn’t just the one that works in this apartment — it’s the one that works in the next three apartments. Renters move every one to three years on average, and rebuilding a closet system from scratch every time is expensive and exhausting. Build it once, pack it once, set it up anywhere.
The Core Kit (What Travels With You)
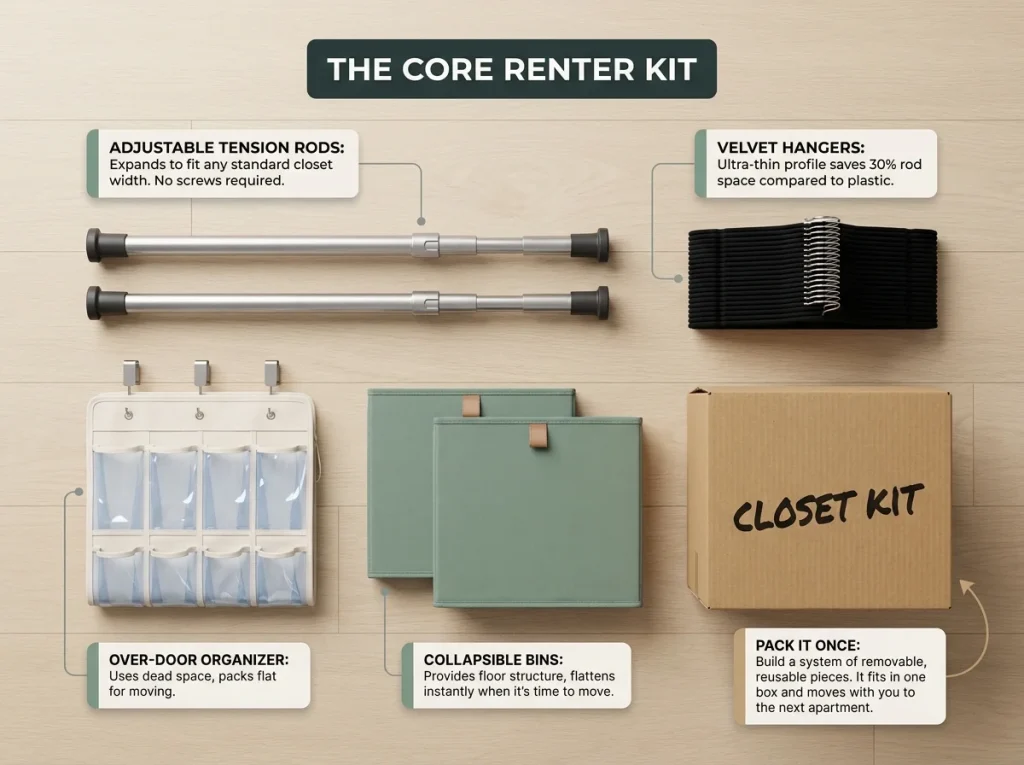
Think of your closet organization as a kit with interchangeable parts. Every piece should be adjustable, removable, and reusable.
Tension rods — buy adjustable models that expand to fit any standard closet width. Two rods cover most setups: one for a double-rod hanging system, one for a shelf or divider.
Zober Premium Velvet Hangers — the 50-pack at 17.5 inches wide and just 0.2 inches thick saves about 30% of rod space compared to plastic hangers. This is the one-time upgrade that pays for itself immediately and travels with you to every apartment. Wire and plastic hangers take up more space, break easier, and let clothes slip off. Replace them once and never think about it again.
Over-door organizer — fits any standard interior door. Hooks over the top, stores shoes and accessories, removes in seconds.
Freestanding bins or a shelf unit — two to three collapsible bins or one small shelf unit covers closet floor storage. Choose collapsible bins if you want to flatten them for moving; choose a shelf unit if you want more structure.
This kit fits in one moving box. Label it. It’s the first box you unpack at the new place.
Monthly Reset: 10 Minutes That Prevent Reversion
Every closet system drifts. Tension rods loosen as temperature changes cause walls to expand and contract slightly. Adhesive mounts weaken over months. Hanging organizer shelves develop a slight sag. Clothes migrate to the floor because folding takes effort and life gets busy.
A 10-minute monthly reset keeps the system functional instead of letting it collapse into the “before” photo. Walk through this checklist on the first of every month:
Check tension rod tightness — give each rod a gentle push. If it moves, re-tighten.
Verify adhesive mounts — press each one firmly. If any feels loose, remove and replace the strip.
Re-straighten hanging organizer shelves — push items back to center, re-fold anything that’s slumped.
Clear the closet floor — anything that’s migrated there goes back to its assigned spot or into the donation bag.
This is the step that separates a system that lasts three months from one that lasts three weeks. The system itself doesn’t fail — maintenance does.
Conclusion
Three things determine whether your no-drill closet system works or ends up as another failed attempt:
Measure first. Every product decision — tension rod size, shelf height, door organizer fit — starts with four numbers from your closet. Get them before you shop.
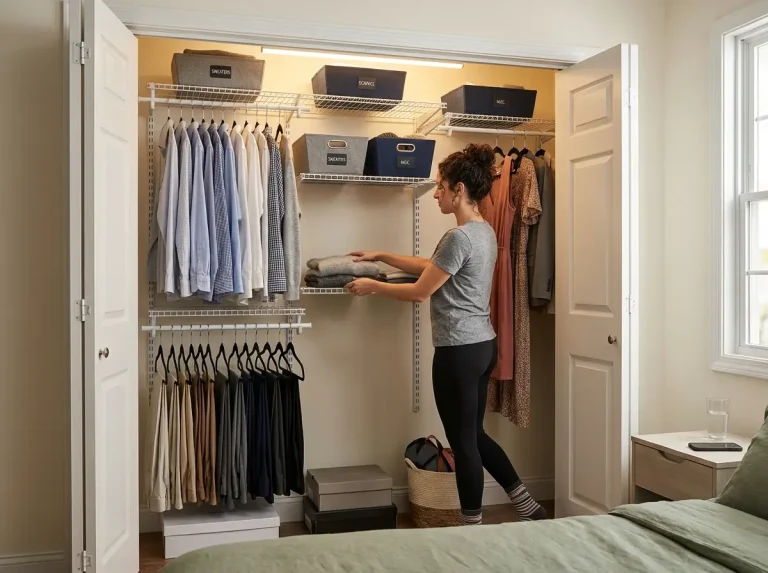
Layer methods from rod to door to floor. No single product organizes a whole closet. A double rod handles hanging, an over-door organizer uses dead space, and a freestanding shelf turns the floor into storage. Combine them and you’ve built a complete system without touching a wall.
Build a portable kit. The closet system you build today should move with you to the next apartment. Choose adjustable, removable, reusable pieces — and stop buying closet organizers you’ll have to leave behind.
Three-Month Check: Re-tighten tension rods, press-test adhesive mounts, re-fold sagging shelves. If any fabric organizer shelf is concave, it’s time to replace it before the whole thing collapses.
Start with one tension rod. Get the double-rod setup working. Then build outward — door, shelves, floor — one layer at a time.
Q1 How much weight can Command strips hold in a closet?
Standard Command hooks hold 1–7.5 pounds depending on size, and large picture hanging strips hold up to 16 pounds per set. Humidity and wall texture reduce these ratings significantly — textured paint and bathroom-adjacent closets cut effective hold strength by half or more.
Q2 Do tension rods damage rental closet walls?
Rubber-tipped tension rods leave no marks when installed correctly. Overtightening creates small drywall dents that can cost you at move-out. Tighten until the rod is firm and doesn’t spin — then stop.
Q3 What is the best no-drill closet system for apartments?
A layered approach works better than any single product: an adjustable double rod for vertical hanging, an over-the-door organizer for shoes and accessories, and a freestanding shelf unit for the closet floor. Together they cover every storage zone without touching a wall.
Q4 How do you add shelves to a closet without drilling?
Three options: tension rod shelves that press-fit between walls, freestanding shelf units on the closet floor, or adhesive shelf brackets on smooth painted drywall. Measure your closet width and depth first to match the right product.
Q5 Can you organize a closet without buying anything?
Yes. Remove everything, separate into keep, donate, and toss piles, then rehang by category using your existing hangers. A free shoe box from your last delivery works as a shelf divider. The best starting point costs nothing but an hour of your time.
Disclaimer: ClutterlessNest is a participant in the Amazon Services LLC Associates Program. As an Amazon Associate we earn from qualifying purchases. This article may contain affiliate links — if you buy through them, we may earn a small commission at no extra cost to you. We only recommend products we have tested or genuinely believe in.