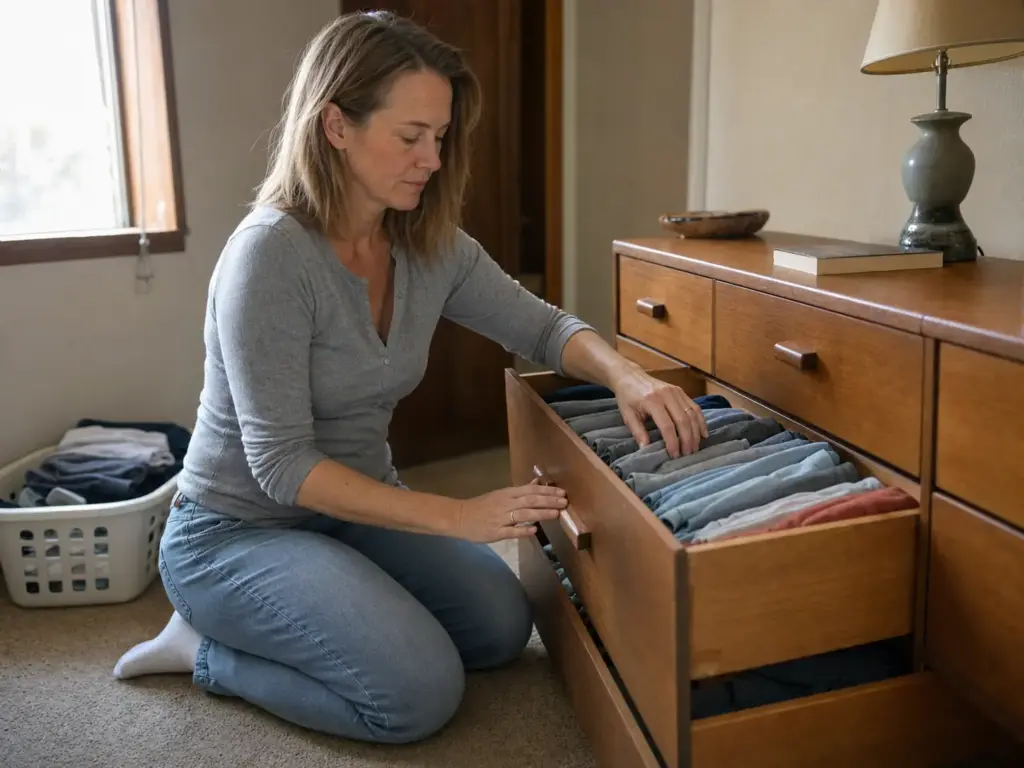
You spent a Sunday afternoon on that dresser. Every shirt folded into a neat standing rectangle, socks paired, the whole top drawer looking like something worth photographing. By Thursday it was a pile again. The frustrating part is that nothing dramatic happened in between, and that is exactly the point: dresser organization almost never collapses in one bad moment. It erodes through three ordinary laundry days in a row, and the fix is not more discipline. Knowing how to organize a dresser so it holds means building a system that survives being used badly.
Quick Answer
Organize a dresser in seven steps, in this order:
- Understand why your last system reverted
- Measure one drawer inside before buying anything
- Give every drawer one category, zoned by reach frequency
- Divide the drawer to match what you measured
- File clothes vertically so nothing hides behind anything
- Contain socks, underwear and jewelry in compartments
- Give the dresser top a boundary, then reset at the laundry basket
Why Dresser Organization Falls Apart After the First Week
Most people read a reverted dresser as a personal failure. It isn’t. It’s a design failure with a very specific trigger, and once you can name the trigger you stop blaming yourself and start fixing the actual problem.
The trigger: bulk laundry put-away
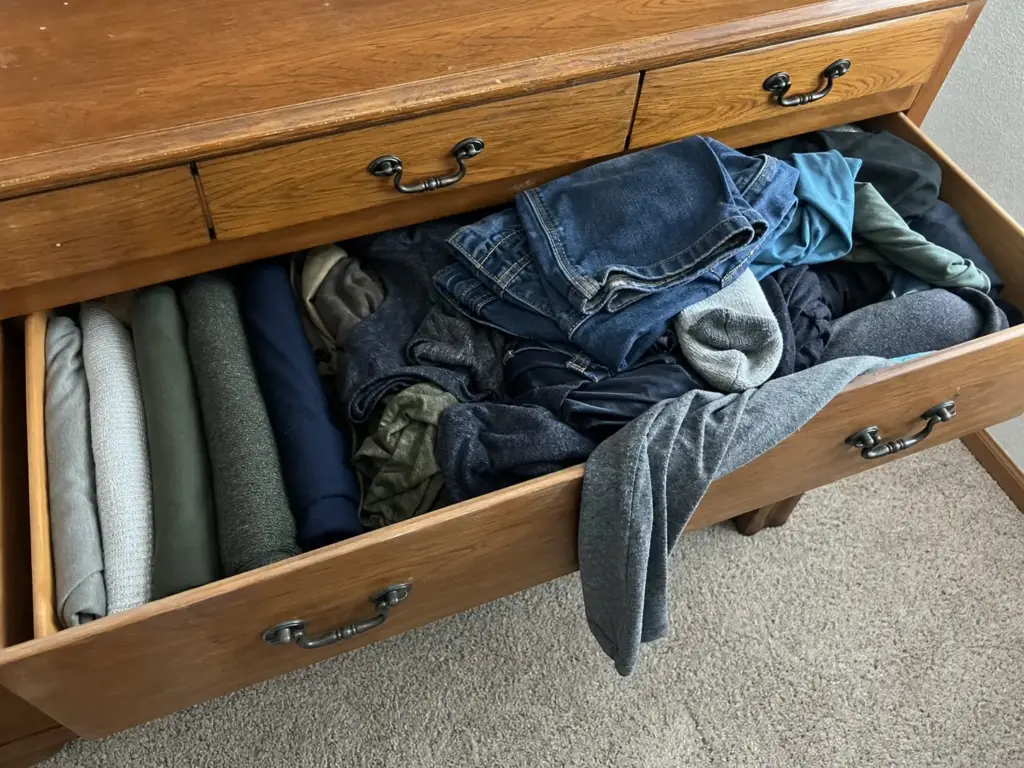
Watch what happens on the day two loads come out of the dryer at once and someone is already late for something. The person who built the zones folds by category and files by drawer. The person emptying the basket in a hurry grabs a handful and pushes it into whichever drawer has room. Both people think they put the laundry away. Only one of them maintained the system.
That single event is what undoes most dresser drawer organization, and it repeats every week. Among the professional organizer tips worth keeping, this is the one nobody leads with: a system that only survives careful put-away is not a system, it’s a photograph. Everything in this guide gets judged by one standard: does it hold up when clothes go away fast and badly?
The everything drawer
Every dresser eventually grows one drawer with no defined job. It starts as the drawer for the thing that didn’t fit anywhere else, then it becomes the drawer for anything ambiguous, and within a month it’s holding a phone charger, three unmatched socks, a swimsuit and a stack of receipts nobody wants to sort.
This is the same mechanism that produces the same thing that happens to a junk drawer in every kitchen in the country. An undefined space accepts everything, and once it accepts everything it stops being usable storage. The fix is never a bigger drawer. It’s a rule for every drawer, including the awkward ones.
If you already have an everything drawer, empty it completely before you organize anything else. Whatever comes out of it tells you which categories your current system has no home for, and that list is the real blueprint for how to zone the rest of the dresser.
Why willpower-based systems die first
There’s a pattern that shows up constantly in organizing threads: the more effort a system demands to maintain, the faster it disappears. Not because people are lazy, but because the weeks when the laundry piles highest are the same weeks you have the least attention to spend on folding technique.
A system that depends on you being careful will fail during the exact conditions it needs to survive. A system where the correct action is also the fastest action holds, because it doesn’t need you to be at your best. Every choice below is aimed at shortening the distance between “clean laundry” and “correctly put away.”
Measure Your Drawers Before You Buy Anything
Nearly every guide to how to organize dresser drawers assumes a full-size dresser in a house with generous drawers. Plenty of readers are standing in front of a narrow rental dresser, a hand-me-down from a relative, or something bought secondhand that has drawers half the depth of the ones in the photos. That mismatch is why the last organizer they bought went straight back into its box.
The three numbers to write down
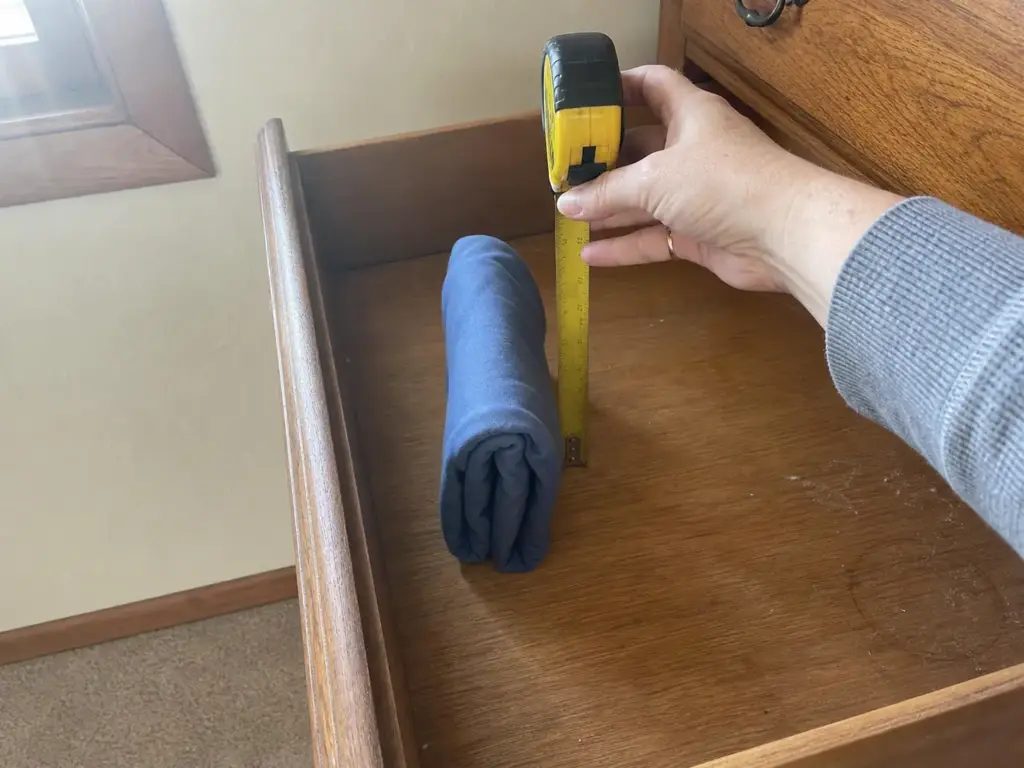
Open one representative drawer and measure three things from the inside: how deep it runs front to back, how wide it is wall to wall, and how tall the interior is from the drawer floor to the top edge. Write all three down and keep them on your phone.
For context on where yours falls, dresser depth commonly runs somewhere between eighteen and twenty-four inches, drawer interiors are frequently four to eight inches tall, and drawer widths vary enormously between a narrow apartment piece and a wide traditional one. Those ranges are useful only as a sanity check. What matters is your actual numbers, because every decision from here depends on them. This step costs nothing and takes two minutes, and it ends the buy-and-return cycle permanently.
Depth decides which fold works
Here’s the part almost nobody explains, and it comes down to drawer depth. When you file clothing vertically, the folded item becomes a rectangle standing on its edge, and the height of that rectangle is set by how you fold it. If you fold to a size meant for a deep drawer and then put it in a shallow one, the rectangle is taller than the drawer is deep. It tips forward the first time the drawer slides, and by the second day the whole row has collapsed into the mess you started with.
The test is simple. Fold one shirt the way you plan to fold everything, stand it on the drawer floor, and look at it against the drawer’s interior height. If the shirt is taller than the drawer walls, refold smaller. If it’s much shorter, you’re wasting vertical space and can fold looser. Everyone skips this and then concludes that vertical filing doesn’t work for them.
The clearance nobody checks
Drawer height decides whether filing is even possible. A shallow drawer will stand a t-shirt beautifully and will not stand a folded sweater upright no matter how you fold it, which is a sorting instruction rather than a failure.
Then there’s the problem of the dresser you can’t fully open. In a small bedroom, a dresser positioned close to the bed means the drawers never extend all the way. The back third becomes territory you can’t see or reach, so it quietly fills with things you forgot you own while the front two-thirds overflows. Before you organize a single drawer, pull each one out as far as it goes and notice whether it stops short. If it does, the fix is moving the dresser, not organizing harder.
Give Every Drawer One Job
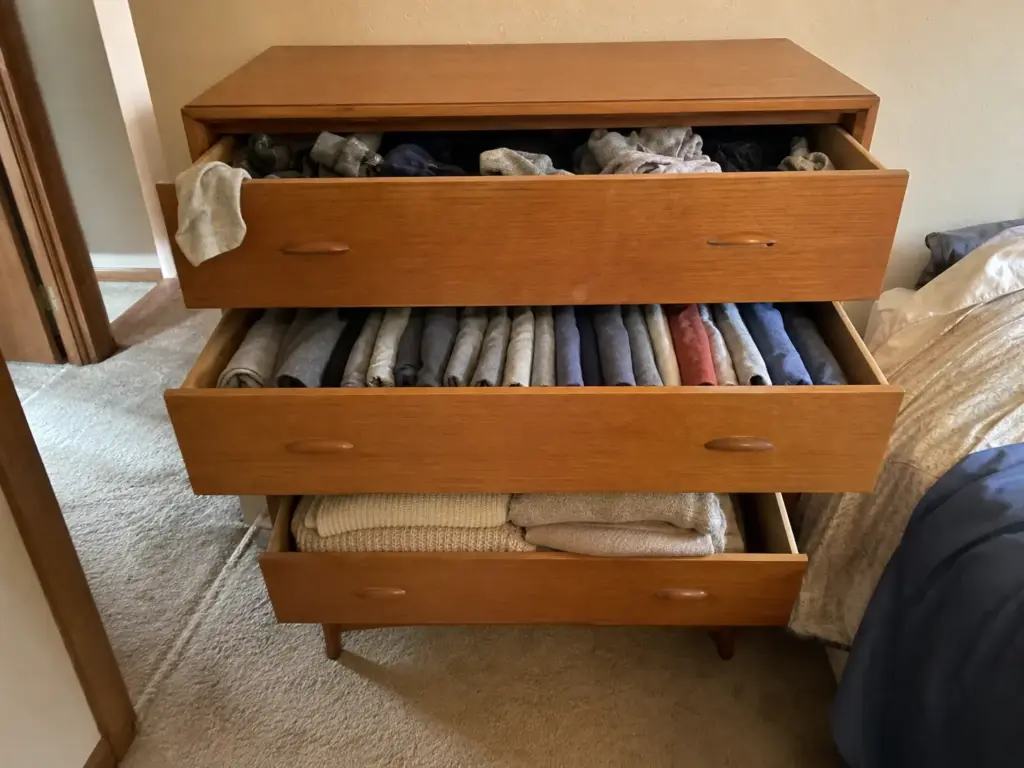
The instinct is to sort by garment type: shirts here, pants there, sweaters below. It works on paper and falls apart in practice, because it ignores the thing that actually determines whether a drawer stays organized, which is how many times a week you open it.
Zone by access frequency, not garment type
This is drawer zoning, and the sorting principle is activity level rather than fabric type. Give the top drawers, the ones at hand height, to what you reach for daily: underwear, socks, the t-shirts you actually wear. Middle drawers take the weekly items. The bottom drawer, which is the hardest to reach and the most annoying to dig through, should hold whatever you touch least, meaning seasonal pieces and the things you keep but rarely choose.
One rule holds all of it together: category drawers only, one defined category per drawer with no mixed contents. A mixed drawer has no return rule, and a drawer with no return rule is the one that reverts first. When you’re deciding what goes where, weigh garment bulk over count. Six sweaters eat more drawer capacity than twenty t-shirts, so they earn the deepest drawer regardless of how few of them there are.
One thing to do before any of this: declutter before organizing. Sorting clothes you have already decided to get rid of is wasted work, and it inflates every capacity judgment you are about to make.
Before assigning anything, open every drawer and note which one you actually opened most this week. It is often not the one you assumed. Give that drawer your highest-frequency category and the rest of the zoning arranges itself around it.
Shared and family dressers
Almost no dresser guide mentions this, and it’s the reason plenty of systems fail in occupied homes. If two people use the dresser, or if a parent puts away a child’s laundry, the person who did not build the system is the one deciding whether it survives. They put things back by guess.
So on a shared dresser the zones have to be guessable. Obvious beats labeled every time: socks and underwear together at the top, tops in the middle, bulky things at the bottom is a pattern someone can infer without being told. A layout that only makes sense if you know the logic behind it will be dismantled by the first person who doesn’t. Say the zones out loud once to whoever else uses the dresser, and reserve labeling drawers for the one category that isn’t obvious from its neighbors.
When a category doesn’t fit: where it goes instead
Every guide says don’t overstuff the drawer. Almost none of them say where the extra sweaters are supposed to go, which turns “relocate it” straight back into “cram it.” Here’s the destination list.
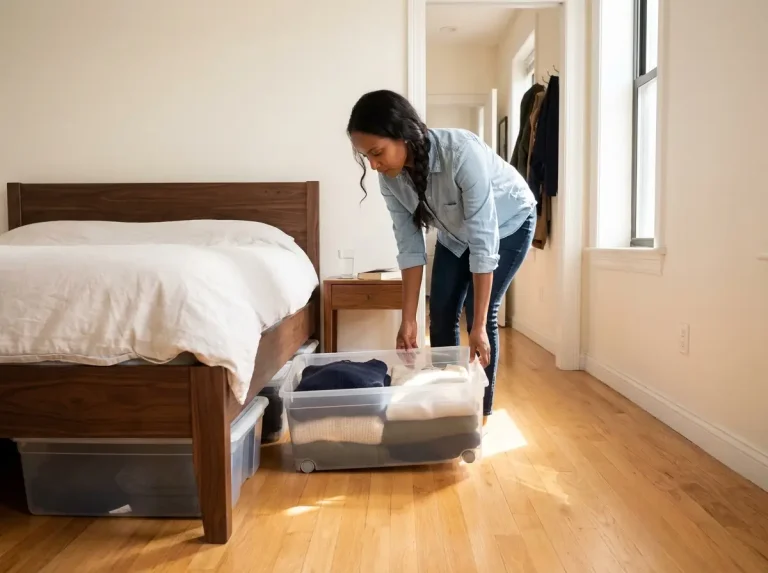
If a category still doesn’t fit after you’ve decluttered it, that’s the design telling you something, and professional organizers at NAPO recommend placing only what comfortably fits rather than forcing capacity. First out for off-season storage: seasonal clothing, bulky knits that eat volume, and anything you’ve moved out of the way twice without wearing. Under-bed storage takes that load. Fabric bins or stackable bins on a closet shelf take anything you want visible, which is also where closet overflow from a full dresser belongs. A genuine donate pile takes the third category nobody enjoys naming.
Start with what you already own. A lidded box, a plastic tub from the garage, or an old suitcase slid under the bed does this job for free, and doing it that way first tells you how much volume you’re actually storing before you buy anything sized for it. If you’d rather have something built for the space, the Superio Under Bed Storage Containers with Wheels come as a three-pack with a low profile that clears most standard bed frames, and the wheels solve the problem in the next paragraph. The tradeoff is that the shallow profile that lets them slide under a low frame also limits what fits, so bulky winter coats may still need a closet.
That reachability point matters more than it sounds. A container that requires moving the bed gets opened roughly once a year, which makes it storage rather than rotation, and things you can’t rotate might as well be donated. Worth reading before you commit: setting up under-bed storage properly covers the clearance and access side in full, and storing off-season clothes in a small space handles seasonal clothing rotation for renters with nowhere obvious to put anything.
Pick Dividers That Fit the Drawer You Actually Have
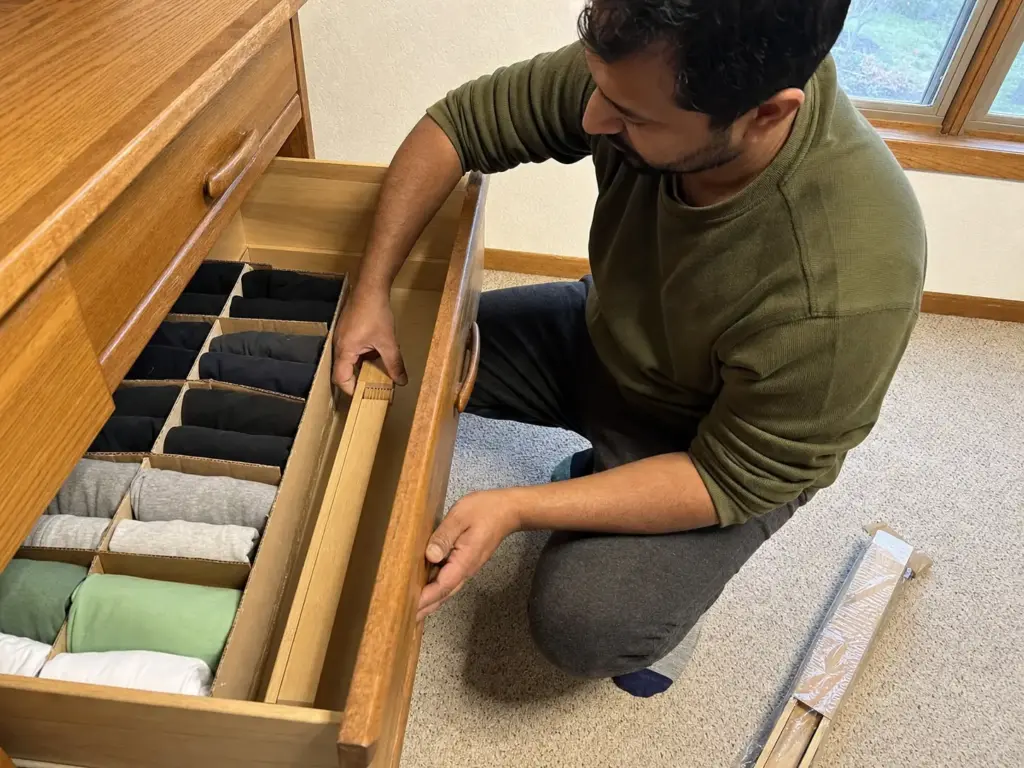
Most people reading this have bought drawer organizers before and have a cupboard of mismatched plastic trays to prove it. The product usually wasn’t the problem. The problem was buying something fixed for a space whose contents keep changing.
The free cardboard grid
Before spending anything, try cardboard. Cut strips to your drawer’s interior height, notch them halfway down, and slot them together into a grid. No glue, no tape, no measuring beyond the numbers you already wrote down. It takes about fifteen minutes with a box cutter and an Amazon box you were going to recycle.
The reason to start here isn’t only cost. Cardboard is the most renter friendly and no-drill option there is, it requires nothing permanent, and the grid you build matches what you actually own rather than what a manufacturer assumed. When your contents shift you cut new strips instead of buying a new product. One of the most repeated complaints in organizing threads is people ending up with fixed organizers in a space that keeps changing, and cardboard is the direct answer to that. Keep the spare flattened box on top of the closet and reorganizing later costs you minutes and nothing else.
I used to recommend going straight to a proper divider set for anyone starting out. After enough threads full of people describing drawers of unused plastic trays bought for a dresser they no longer own, I flipped it: prove the layout with cardboard first, buy only once you know the layout is stable and correct.
Standard-depth drawers
Once the categories have held steady for a few weeks and you want something that looks finished, a bought divider earns its place. What a divider actually does, and this gets lost in the styling photos, is stop filed clothing from tipping sideways and collapsing as the drawer opens and closes. That’s structural, not decorative.
For a standard-depth dresser drawer, the SpaceAid Bamboo Drawer Dividers are expandable drawer dividers that work through spring tension against the drawer walls, so they hold without hardware and adjust to fit rather than requiring your drawer to match a fixed size. The set includes small inserts that double as compartments for the accessory drawer covered further down, which means one purchase covers two jobs. The limitation is real though: bamboo dividers only span a specific range, and if your drawer is narrower than that range they simply will not tension properly.
Adjustability matters more than material. A spring-loaded or expandable divider absorbs the seasonal shift in what a drawer holds, while a fixed tray sized perfectly for July becomes the thing you fight with in November. Buy for the range, not for the current contents.
Narrow and rental drawers
This is the gap almost every dresser article leaves open. Rental furniture, apartment-sized dressers and older narrow pieces have drawers well under the width that standard dividers are built for, and buying the wrong range is the single most common return in this category.
For those, the Lifewit Adjustable Drawer Dividers span a narrower range and come as an eight-pack, so you can divide several small drawers rather than one large one. These are plastic dividers rather than bamboo, which is exactly why they sit at the budget drawer organizers end of the shelf and why they look less finished. In a small bedroom dresser or a rental you expect to leave within a year or two, that tradeoff is usually the right one. If you want the deeper comparison before deciding, a full comparison of drawer organizer inserts breaks down the options by drawer type.
Fold So You Can See Everything at Once

File-folding gets sold as an aesthetic, all matching colors and perfect rows. That framing does it a disservice, because the reason it works is mechanical and it applies whether or not your drawer photographs well.
Why vertical beats stacked
In a flat stack, the shirt you want is under four others. Getting it out means lifting, digging, and disturbing everything around it, so the stack degrades a little every single time you use it. Two weeks of that and it’s a pile.
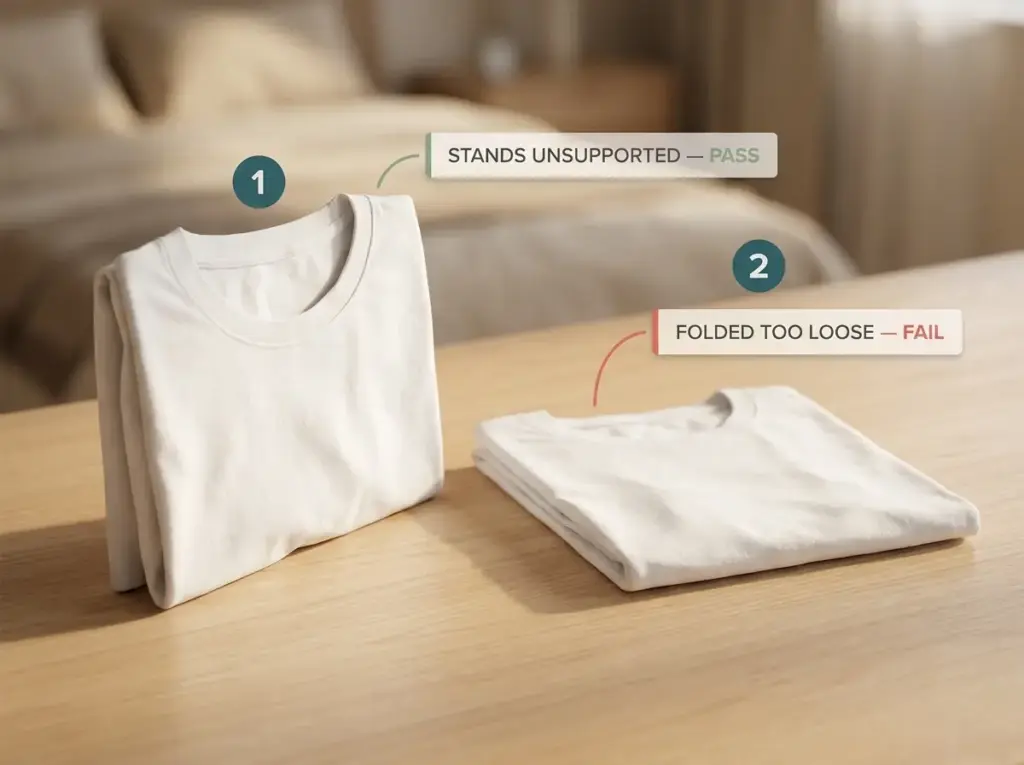
With vertical folding, every item stands on its folded edge in a row, so you can see all of them at once and pull one without touching its neighbors. The system doesn’t degrade with use, which is the entire point. Marie Kondo’s official folding instructions put the file fold principle plainly: fold each garment into a compact rectangle that can stand on its own edge. That’s a pass/fail test, not a style preference. If the folded item won’t stand unsupported on a flat surface, it’s folded wrong for this system and it will tip the first time the drawer moves. For the tidying method applied across the whole house rather than one dresser, including the spark joy sorting step that comes before any folding, the full KonMari method walkthrough covers the wider approach.
Roll or file, per garment
The fold vs roll question has no single answer, and the mistake is adopting one method for everything. Rolling wins for soft forgiving fabrics: workout clothes, pajamas, t-shirts you don’t mind creasing. It also wins in shallow drawers where a filed rectangle would be too tall to stand, because a roll is stable at any height.
File folding wins for anything you want to see in a row and choose between, which is most of what lives in a dresser. The practical version is to file the drawers you open daily and roll whatever is soft enough not to care. Deciding per garment rather than per method takes an extra thirty seconds during the initial setup and saves you from fighting the system afterward.
What should never be filed
Chunky knits and heavy sweaters do not belong on their edge. Standing them upright under the pressure of their neighbors stretches the shoulders and sets creases along the fold line, and knitwear holds those creases far longer than woven cotton does. Those go flat, in a low stack, in the deepest drawer, and that’s the correct answer rather than a compromise.
Realistically, nobody keeps a perfect system in every drawer. File the ones you open every morning where the payoff is daily, and accept a plain flat stack in the bottom drawer nobody sees. A system you half-run every week beats a perfect one you run twice and abandon.
Corral the Small Stuff Before It Takes Over a Drawer
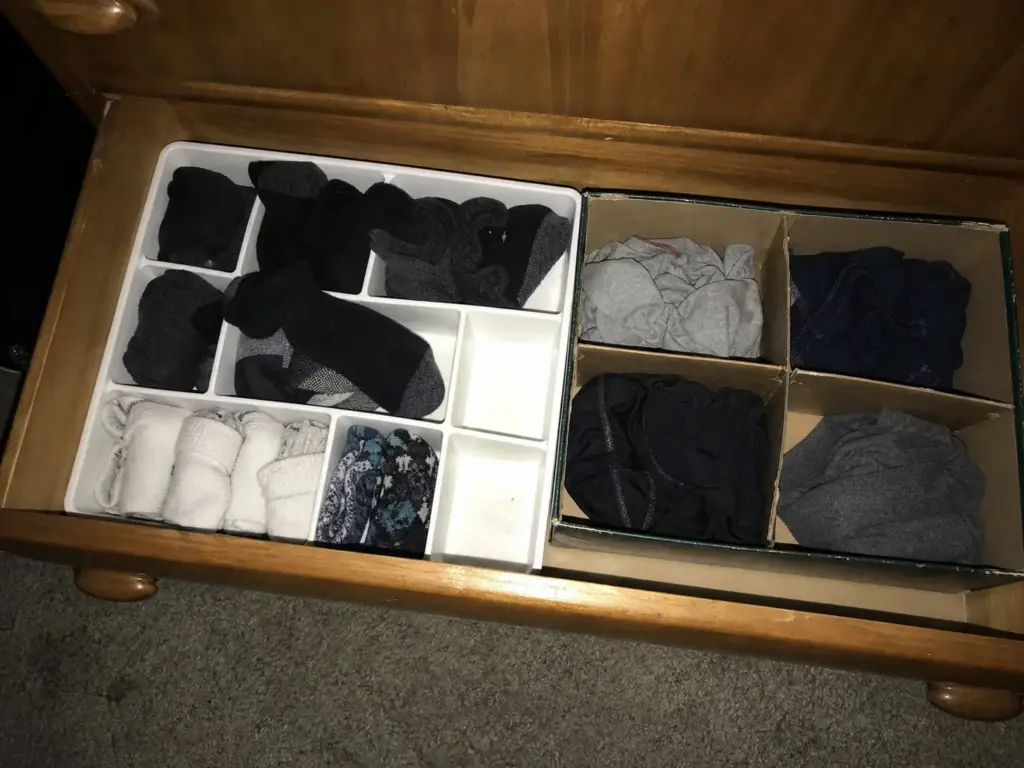
Loose small items are the one category you cannot fold into submission. Socks migrate. Underwear spreads. An unpartitioned sock drawer is a bin of loose fabric within a week no matter how carefully you started, because these things have no structure of their own and nothing holds a boundary except a physical wall.
Socks and underwear
Try the free version first and you’ll learn something the product can’t teach you. A shoebox with cardboard strips slotted in, or a cereal box cut down to drawer height, creates four to six compartments in about ten minutes. Run it for two weeks and you’ll know exactly how many categories you actually sort into, which is almost never the number you’d have guessed.
Then, if you want something that lasts, the ZEXALOR Socks Underwear Drawer Organizer gives you sixteen compartments with removable dividers and a lid, and the removable part is what matters. Your sock count shifts seasonally, and a tray you can’t reconfigure becomes the next thing that stops fitting. One caution: sixteen compartments is a capacity, not an instruction. Use them as six or seven zones with room to spare. Sixteen compartments treated as sixteen separate rules will not survive a rushed Tuesday, and a rule nobody follows during a hurried put-away is worse than no rule at all.
Jewelry gets its own tray
Jewelry mixed into fabric compartments is a losing arrangement. Chains catch and tangle against fabric, earrings separate from their pairs, and small pieces migrate under everything else where you’ll find them in six months. It needs a hard, shallow, divided surface rather than a soft one.
The free version is a shoebox lid lined with a scrap of felt or an old t-shirt, laid flat inside the drawer. That improvised jewelry tray works genuinely well and costs nothing. If you have enough pieces that one layer isn’t enough, the Velvet Jewelry Drawer Organizer Trays stack in four layers with removable dividers, so a single drawer holds jewelry separately from everything else without dedicating a whole drawer to it. The stacking is the tradeoff: anything in the bottom layer requires lifting the layers above it, so put daily pieces on top and the rest below.
Match compartment count to how many categories you actually sort into, not to how many compartments the tray offers. Every empty compartment is fine. Every compartment that requires a decision you would not have made on your own is a place where the system leaks.
The free shoebox version
Worth stating plainly, because the anti-sell here is the honest position: cardboard and improvised clothes boxes do the functional job of every product in this section. They look worse. They don’t last as long. They handle a spilled drink badly. Those are the only differences.
Buy the tray when you’ve proven the layout works and you want it to survive a few years of use, or when the drawer is visible enough that appearance matters to you. Buying first and figuring out the layout afterward is the sequence that fills cupboards with unused plastic.
Treat the Dresser Top Like a Zone, Not a Landing Strip
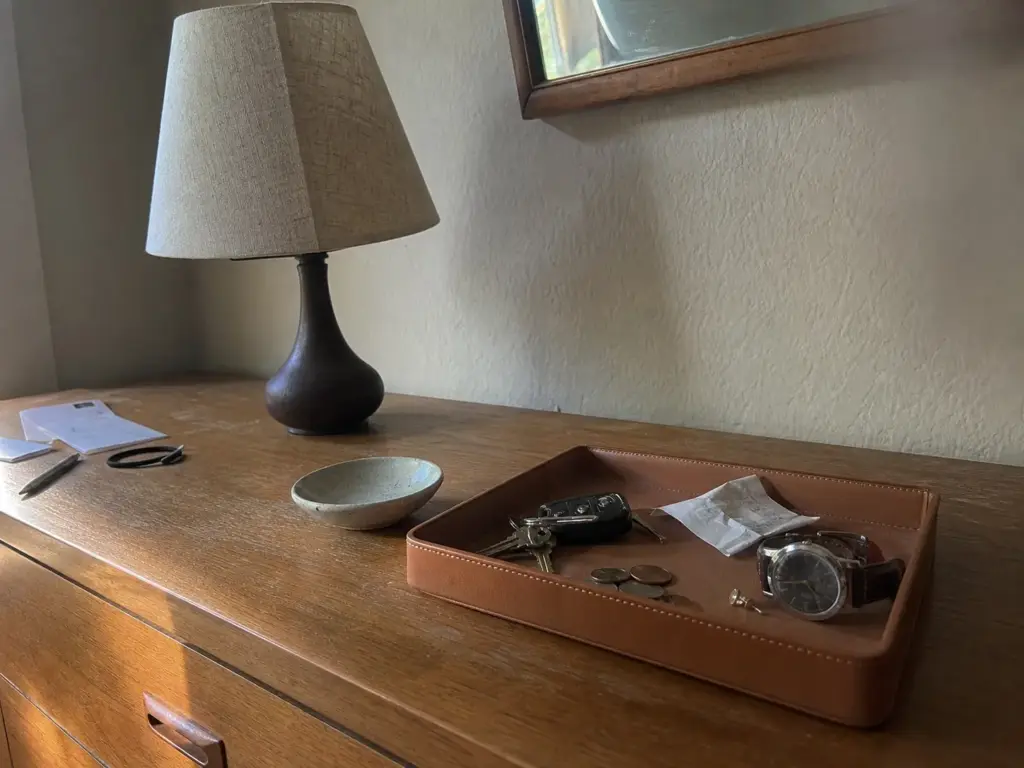
The drawers can be immaculate and the dresser will still read as messy, because the top collects the day. Dresser top organization gets almost no attention in dresser guides, which is strange given that it’s usually the first thing you see when you walk into the room.
Why the top collects everything
It’s the first flat surface at hand height between the bedroom door and the bed. Whatever is in your hands when you walk in at the end of the day gets set down there because setting it down is easier than deciding where it goes. Keys, phone, mail, receipts, an earring you took out while talking to someone.
That’s a traffic-pattern problem, not a tidiness problem, and it explains why willpower never fixes it. You are not going to stop having things in your hands when you walk into your own bedroom. The surface is doing exactly what its position in the room dictates.
One container, one boundary
The fix is a boundary rather than a ban. Give the daily catch one defined container and the clutter has an edge instead of spreading across the whole surface. Psychologically it stops reading as mess the moment it’s contained, even when the contents are identical.
Any ceramic bowl, an empty candle jar, or a small dish already in the house does this. It costs nothing and works immediately, so try it before buying. If you want the surface to look intentional rather than improvised, the CASIRENA Faux Leather Valet Tray Organizer has the rectangular footprint and shallow walls that suit a dresser top, and it holds keys, coins and a watch without the contents sliding off. The limitation is capacity: it’s a catch tray, not storage, so if you’re routinely filling it the answer is emptying it more often rather than sizing up.
Keep the total object count low while you’re at it. A tray, a lamp and one decorative object read as intentional. Six small objects read as clutter no matter how neatly they’re arranged, which is why surfaces with a few deliberate things always look calmer than surfaces with many careful ones.
The weekly empty
A catch-all only works if it gets emptied. Otherwise it’s a raised pile with a nicer border, and within a month the overflow starts colonizing the surface around it again.
Attach it to something you already do weekly. Sunday evening, or whenever you change the sheets, take ninety seconds and clear the tray: keys back on the hook, coins into a jar, mail to wherever mail goes, jewelry into the drawer tray. If your setup doesn’t include a dresser at all, organizing a bedroom without a dresser at all works through the same surface problem in a different configuration.
Conclusion
Everything above is setup. What decides whether the dresser looks like this in three months is the return path, and it’s worth being blunt about where that path actually starts: at the laundry basket, not at the drawer.
Sort into zones while the clothes are still in the basket, before anything goes into a drawer. Fold by category, stack the piles by which drawer they belong to, then put them away in one pass. It sounds like more work and it’s less, because you handle each item once instead of pulling the drawer open and rearranging what’s already in there. The wider principle: make the return path shorter than the wrong path. If the sock compartment is where your hand already goes, socks land there without a decision. If putting them away correctly costs one extra step, the pile wins, every time.
Then give it a 10-minute reset once a month. Pull the single drawer that has drifted furthest, refile it, and stop. That is the entire maintenance routine: full-dresser resets get planned and never done, while one drawer is small enough to actually happen. And if someone else puts away the laundry in your house, remember that they are the one deciding whether the system holds, which means the zones need to be guessable rather than documented.
Three things to carry out of this:
- Measure the drawer before buying anything, because depth and height decide whether the fold and the divider will work at all.
- Give every drawer one job, zoned by how often you reach for it, with a real destination for whatever doesn’t fit.
- Build the reset into laundry day, since that’s the moment the system either survives or quietly dies.
The three-month check: open the bottom drawer. It always drifts first, and refiling it takes ten minutes if you catch it before it turns into the new everything drawer. Expect the daily drawers to have held and the dresser top to still need its weekly empty, which is what a working system looks like rather than a failing one. The same drift shows up in the same three-month drift that hits a capsule wardrobe, for the same reason.
Start with the drawer you open every morning. Get that one right and leave the rest alone for a week. If it’s still holding on Friday, do the next one.
Frequently Asked Questions
01What is the best way to organize a dresser?
Give every drawer one defined category, zoned by how often you reach for it, and file clothes vertically so you can see everything without digging. The step that decides whether it lasts is sorting into zones at the laundry basket, before anything goes into a drawer.
02Are dresser organizers worth it?
They are worth it once your categories are stable. Before that, cardboard strips cut to your drawer’s interior height do the same job for free and adapt as contents change. The common regret is a fixed tray sized for a drawer you do not have, so measure first.
03What is the KonMari method for drawer organizing?
KonMari folds each garment into a compact rectangle that stands on its own edge, then arranges them vertically in a row instead of stacking flat. If a folded item cannot stand unsupported, it is folded wrong for this system and it will tip the first time the drawer opens.
04What are the different types of dresser organizers?
The main types are adjustable dividers that split a drawer into columns, compartment trays for loose small items like socks, shallow stackable trays for jewelry, and a catch-all tray for the dresser top. Match the type to the zone and the size to your measured drawer.
05How do you organize a small or narrow dresser?
Zone by access frequency rather than garment type, since a narrow dresser gives you fewer drawers to work with, and choose adjustable dividers built for the narrow range. Anything bulky or off-season leaves the dresser for under-bed storage so the overflow has somewhere to go.
Disclaimer: ClutterlessNest is a participant in the Amazon Services LLC Associates Program. As an Amazon Associate we earn from qualifying purchases. This article may contain affiliate links — if you buy through them, we may earn a small commission at no extra cost to you. We only recommend products we have tested or genuinely believe in.