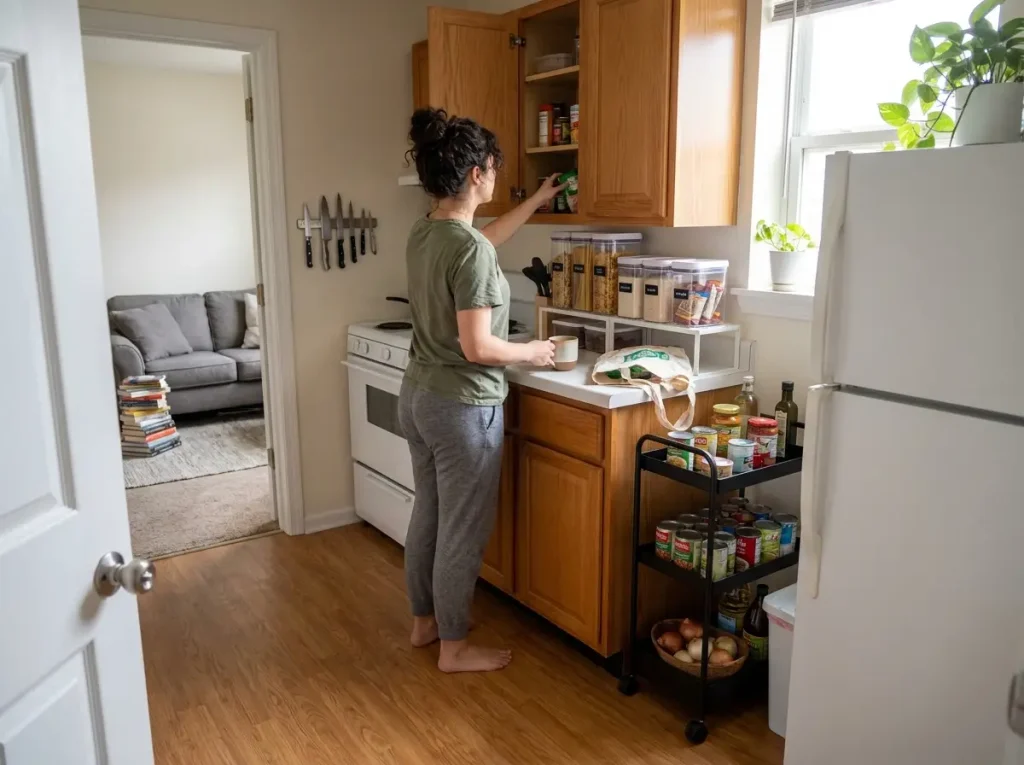
You moved into the apartment, opened the kitchen cabinets, and realized something: there’s no pantry. Not a small one. Not a cramped one. None. Just three or four cabinets that are supposed to hold everything from cereal to canned beans to that bag of flour you use twice a year. I’ve organized kitchens in apartments where the total cabinet space was less than a single shelf in a suburban pantry, and the pattern is always the same — the system works for about a week before everything collapses back into chaos.
The reason isn’t you. It’s that most pantry organization advice assumes you have an actual pantry. This guide is for apartment kitchens that don’t.
Quick Answer: Here’s how to organize food storage in an apartment with no pantry:
- Measure every cabinet — depth, width, shelf spacing — before buying anything
- Create a pantry zone outside the kitchen using a slim rolling cart or freestanding shelf
- Zone your cabinets by meal frequency, not food category
- Add shelf risers and turntables to double usable space in standard cabinets
- Use every door and wall with no-drill organizers
- Run a 10-minute weekly reset to keep the system from reverting
Why Apartments Break Standard Pantry Systems
The Cabinet Math Problem
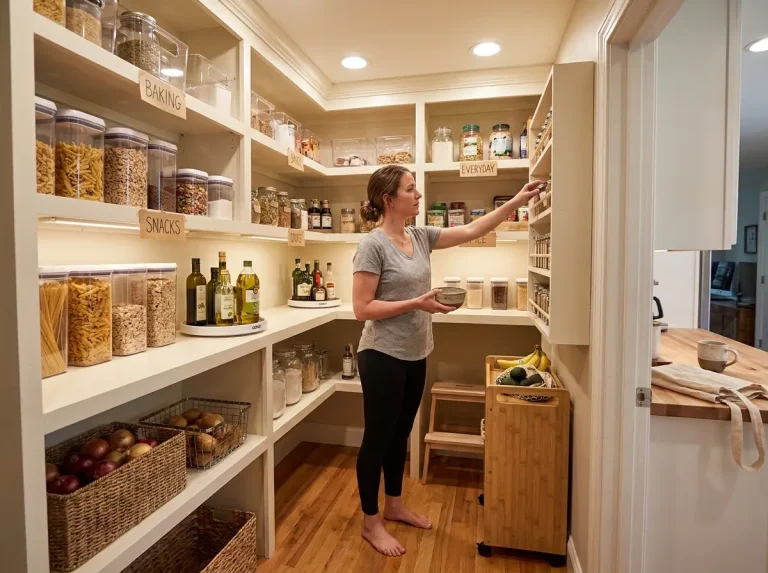
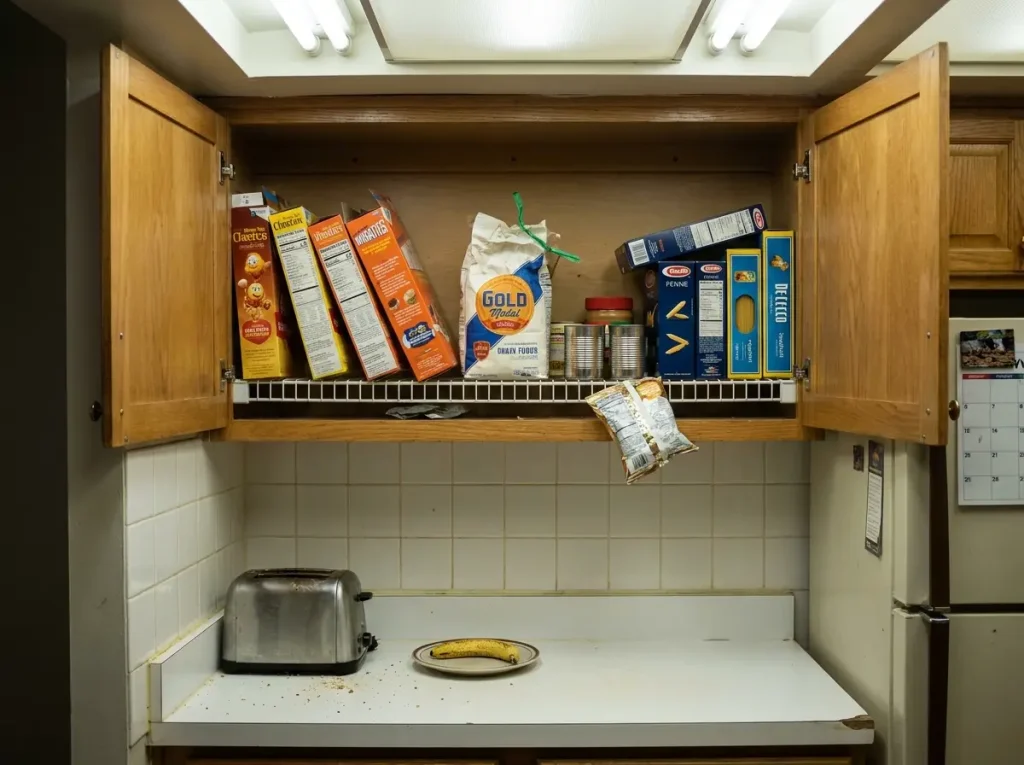
Most apartment kitchens have between three and six upper cabinets. Each one is about 12 inches deep and 30 inches wide, with two adjustable shelves spaced 10 to 12 inches apart. That’s your entire food storage — roughly 10 to 15 square feet of shelf space total. Compare that to a walk-in pantry organization setup that gives you 30 to 50 square feet across multiple shelves at different heights.
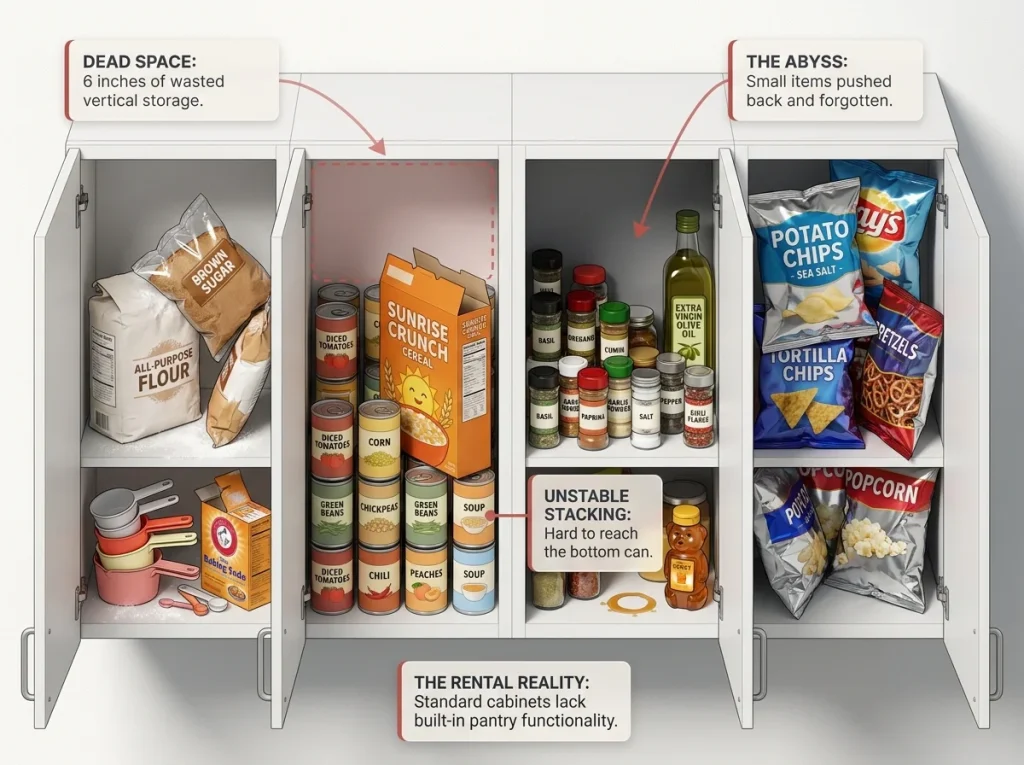
The gap isn’t just size. A dedicated pantry lets you see everything at once. In cabinets, you’re working blind: you open a door, see the front row, and forget what’s pushed behind the cereal box three inches from the back wall. This is why you buy a second jar of cumin every month.
Rental Restrictions Change Everything
If you rent, you can’t drill into walls, install pull-out drawers, or mount heavy-duty shelving. That eliminates about half the advice you’ll find online. Every solution in this guide is renter-friendly unless specifically noted — no holes, no permanent modifications, no security deposit risk.
The Shared Kitchen Factor
Apartments often mean roommates, and roommates mean someone else putting the olive oil back in the wrong spot every single day. Any system that depends on one person’s memory will fail the moment a second person uses the kitchen. Your system needs to be obvious enough that anyone can follow it without instructions on the fridge.
Map What You Actually Have
Measure Before You Spend
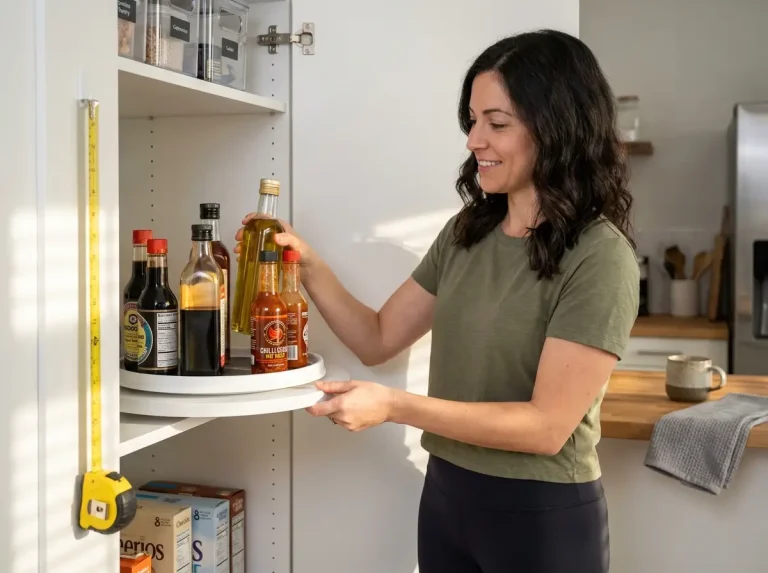
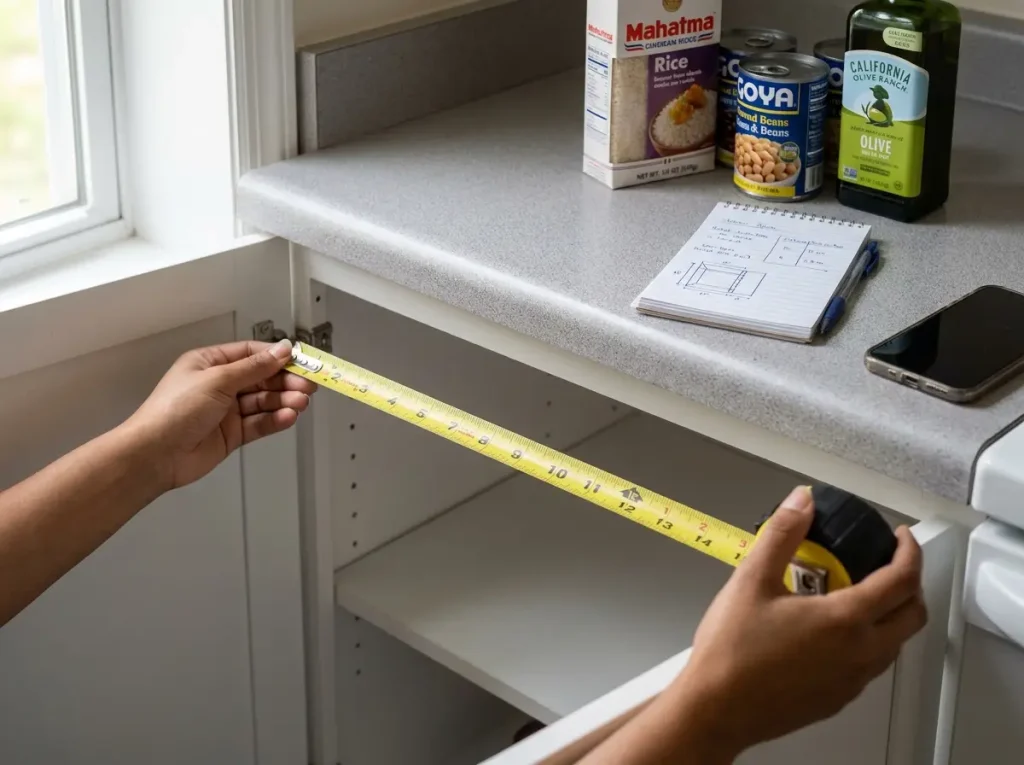
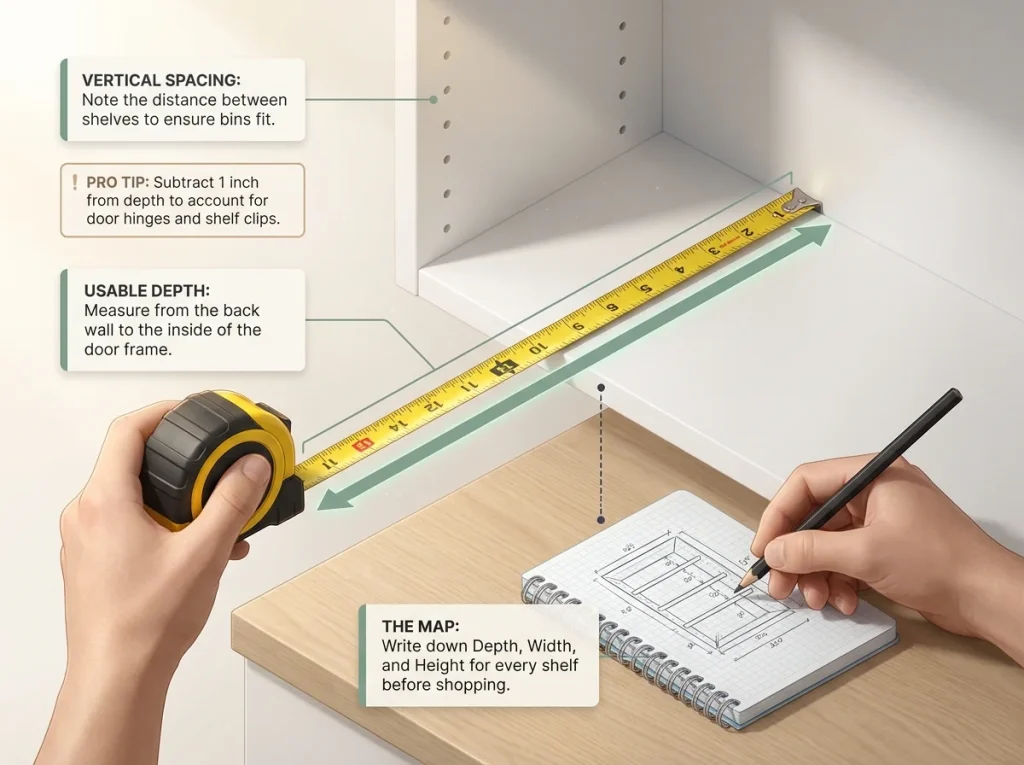
Grab a tape measure and a pen. Open every cabinet and record three numbers: depth (front to back), width (side to side), and shelf spacing (bottom of one shelf to top of the one below). Write them down. You’ll use these numbers before buying a single bin.
Standard apartment upper cabinets are 12 inches deep. Base cabinets run 18 to 24 inches. But “standard” is generous — I’ve measured rental cabinets that were 11 inches deep, which means most 12-inch bins stick out past the shelf edge. Knowing your actual measurements saves you from the most common organizing mistake in apartments: buying products that don’t fit. If you do have a small reach-in pantry rather than zero pantry, the approach to organizing a small pantry is different — that guide assumes you have dedicated shelves to work with.
Pro tip: Measure the inside of the cabinet, not the outside frame. The usable depth is usually 1 to 1.5 inches less than the door-to-wall measurement because of the shelf support clips.
Take a Food Inventory
Pull everything out of every cabinet. Put it all on the counter or table. You’ll find expired items, duplicates you forgot about, and things you bought once for a recipe you never made again. Get rid of those first. What’s left is your actual food inventory — the stuff your system needs to store.
Identify Your Dead Space
Look at the gaps. Most apartment cabinets have 4 to 6 inches of dead space between the top of your tallest items and the next shelf. There’s usually a gap between the fridge and the wall — sometimes 3 inches, sometimes 8. The backs of cabinet doors hold nothing. The space above the fridge holds nothing. These gaps are your expansion territory.
Create a Pantry Where There Isn’t One
The Slim Rolling Cart Fix
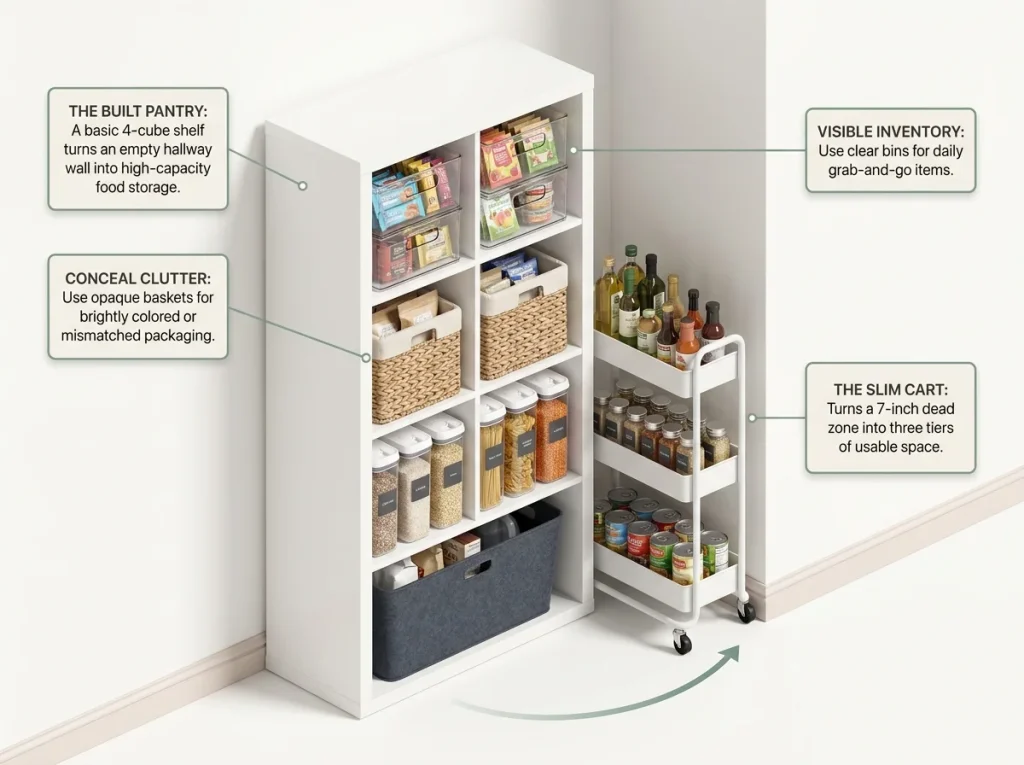
The gap between your fridge and the wall or counter — almost every apartment kitchen has one — is wasted space right now. A slim rolling cart that’s 5 to 8 inches wide turns that gap into three tiers of food storage. You pull it out when cooking and push it back when you’re done.
The Slim 3-Tier Rolling Storage Cart (~$30) fits gaps as narrow as 7 inches and holds canned goods, oils, spices, and small dry goods across three tiers. It’s the single highest-impact purchase for an apartment with no pantry because it creates storage where literally none existed.
If you don’t want to spend anything, a stacking set of dollar store bins on the floor beside the fridge does 60% of the same job. Not as clean, but functional.
Convert a Closet or Hallway Nook
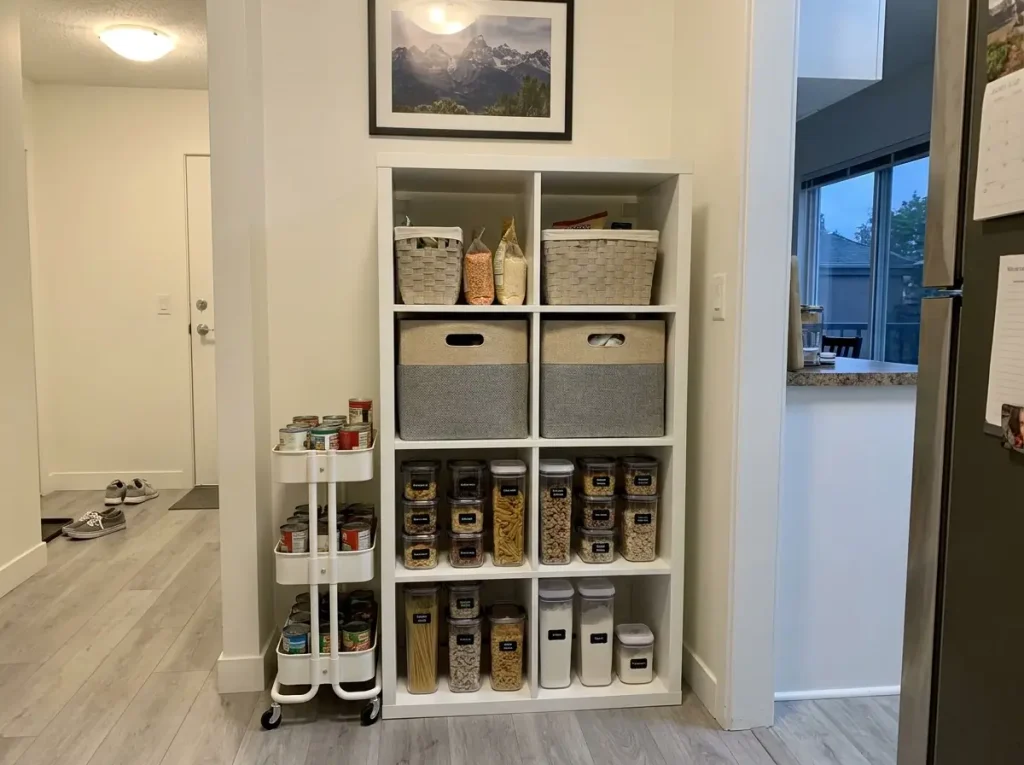
If you have a coat closet near the kitchen that holds three jackets and a pile of shoes, you have a potential pantry. Pull out the coats, hang them on an over-door hook on your bedroom door, and use the closet for food storage. Two freestanding shelf units or an IKEA KALLAX 4-cube vertical unit ($45 for the 16×58-inch size) turns a coat closet into a functional pantry in twenty minutes. Once you have actual shelves, apply the same full pantry organization system you’d use in a built-in pantry — zones, containers, labels.
Hallway nooks work the same way. If you have a 16-inch gap next to the kitchen doorway, a narrow freestanding shelf fits there. You’re not wasting the space — you’re reassigning it from “dead air” to “food storage.”
Pro tip: Put a battery-powered motion-sensor LED strip inside a closet pantry. You’ll actually use the back of the shelf if you can see it. A two-pack runs about $12 and lasts months on a charge.
The Above-Fridge Zone
That dusty space above the fridge holds more than you think. Standard fridges leave 12 to 18 inches between the top and the ceiling. Use a flat storage bin up there for items you buy in bulk but don’t use daily — extra paper towels, large bags of rice, backup cooking oil. You’ll need a step stool to reach it, which is fine — you’re not accessing this zone every day.
Organize Inside the Cabinets You Do Have
Zone by Meal Frequency, Not Food Category
Forget the standard advice that says “put all baking together, all canned goods together, all snacks together.” In an apartment kitchen with limited cabinets, zone by how often you use things.
Daily items go in the cabinet closest to the stove at eye level: cooking oil, salt, pepper, the spices you use three times a week, the pasta you eat twice a week. Weekly items go in the next most accessible cabinet: canned goods, rice, sauces. Monthly items go high or low — the cabinet above the fridge, the back of a base cabinet, anywhere that requires reaching or bending.
This works because you stop opening three different cabinets to make a single meal. Everything for your Tuesday dinner is in one spot.
Stack Vertical with Shelf Risers
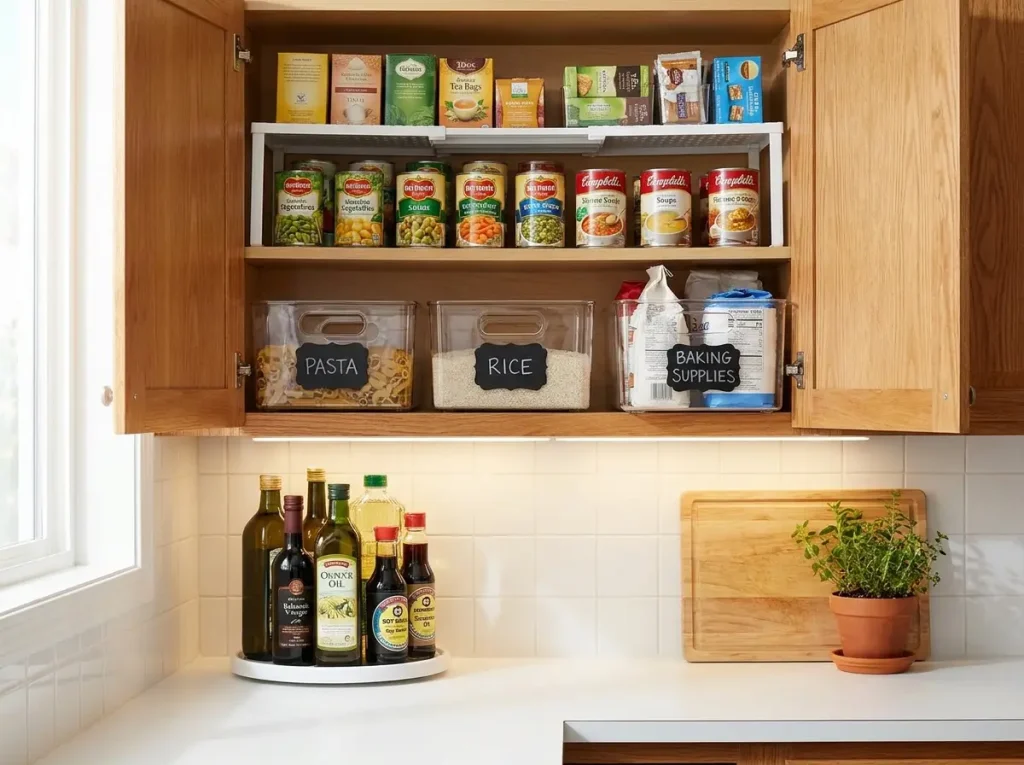
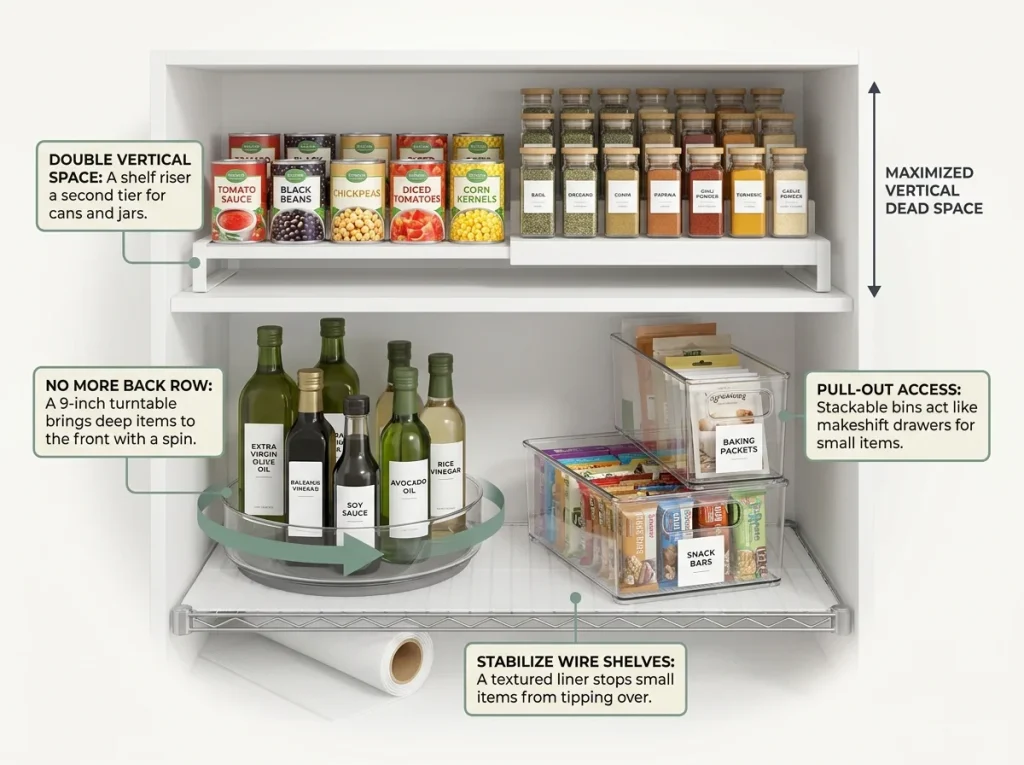
Most apartment cabinets waste 4 to 6 inches of vertical space between the top of your items and the next shelf. The SimpleHouseware Expandable Shelf Rack (~$18) expands from 12 to 20 inches wide and creates a second level inside a single cabinet shelf. Put cans on the bottom, boxes or spice jars on the raised level behind them.
Before you buy one, measure your shelf spacing. If you have less than 10 inches between shelves, a riser won’t leave enough clearance for items on the lower level. In that case, adjust the shelf position first — most apartment cabinets have pegs every inch.
Fix the “Pushed to the Back” Problem
In a 12-inch deep cabinet, small items migrate to the back and vanish. A Copco Non-Skid Turntable 9-inch (~$10) fits inside a 12-inch upper cabinet with room to spare. Put oils, vinegars, or spice bottles on it and spin to find what you need instead of reaching blindly past three other bottles. If you want to go deeper on turntable organization, we have a full guide on sizing and placement.
For the cabinets where you’re storing food in containers or bins, the mDesign Stackable Plastic Storage Bins ($25 for a 4-pack, each bin 10×6×5 inches) fit a standard 12-inch shelf with 2 inches of clearance. Pull the whole bin forward to access what’s behind it. Dollar Tree has similar bins for about $1.25 each — they’re smaller and thinner plastic, but they work. For a deeper comparison of what to store in which type of container, see our guide on choosing the right pantry containers.
Convert Wire Shelving
A lot of apartment cabinets and any freestanding metal shelving you add will have wire shelves. Small items tip, jars wobble, and bags of rice fall through the gaps. The Gorilla Grip Shelf Liner (~$12 for a 20-foot roll) cuts to fit any wire shelf and gives you a flat, grippy surface. If you don’t want to spend anything, cut a piece of cardboard to size. It works until it gets wet, at which point it warps — but it buys you time.
Pro tip: When you line wire shelves, cut the liner 1 inch shorter than the shelf on all sides. If the liner hangs over the edge, bins catch on it when you slide them in and out.
Use Every Door and Wall Without Drilling
Cabinet Door Organizers
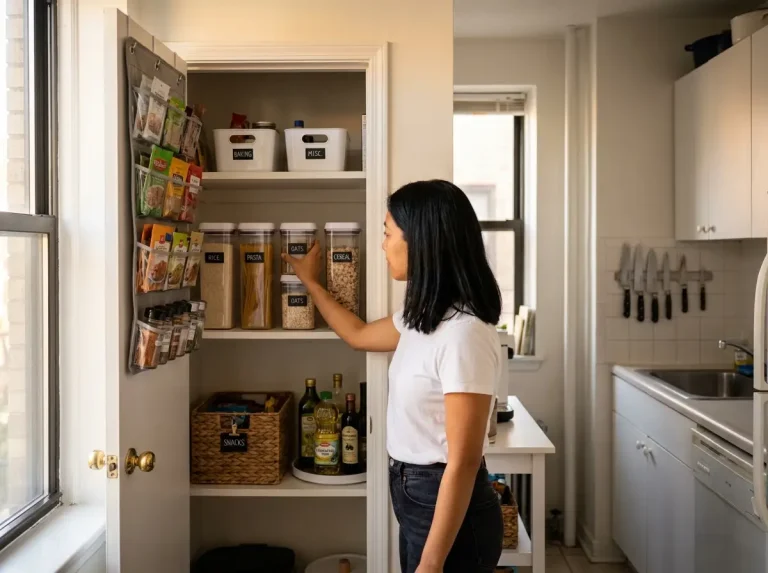
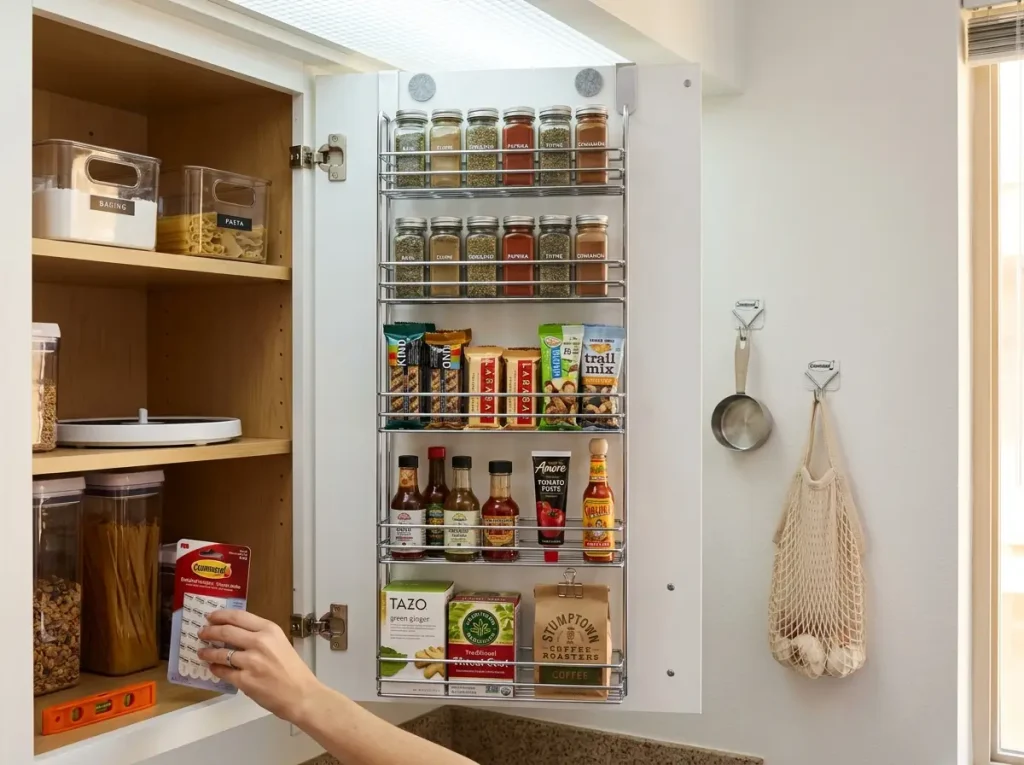
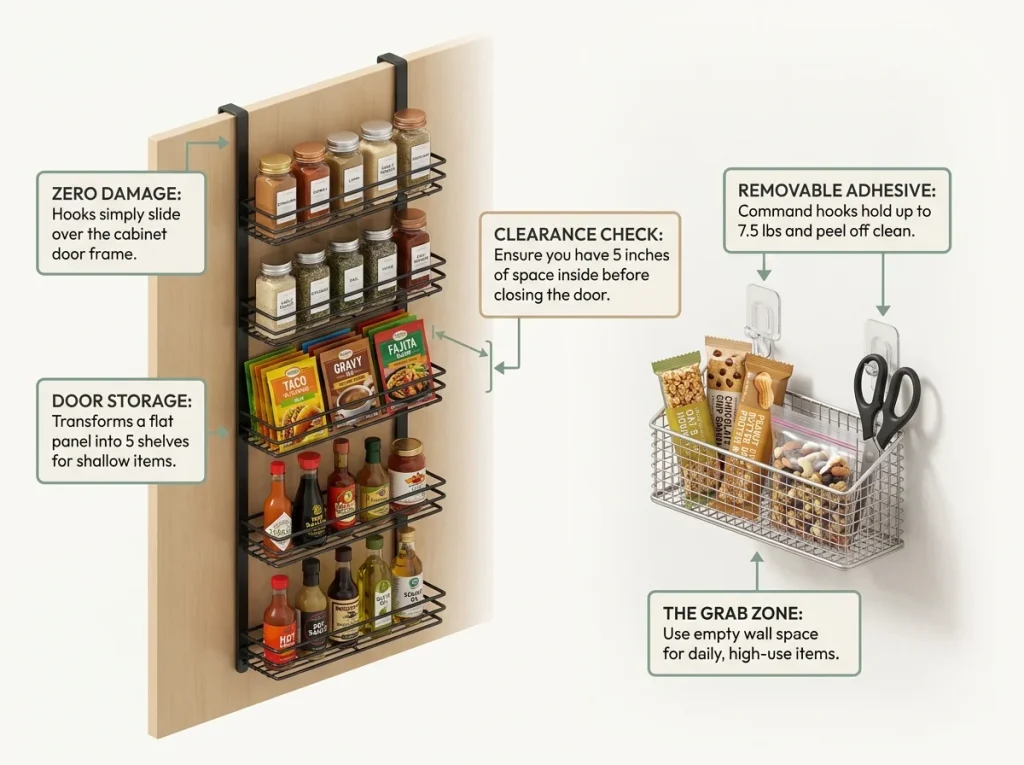
The inside of every cabinet door is unused space. A SimpleHouseware Over-The-Door Organizer 5-tier (~$20, 14.5×5×53 inches) hooks over the top edge of a standard cabinet door and holds spices, snack packets, sauce bottles, and small items across five wire tiers. For a full breakdown of weight limits by door type and more door organizer options, we tested several models in that guide.
Before you buy one, check your door-to-shelf clearance: open the cabinet and measure how much space exists between the inside of the door and the front edge of the shelf when the door is closed. You need at least 5 inches of clearance for a wire organizer, or it will push the door open and the whole thing swings every time you try to close the cabinet.
If the clearance is tight, adhesive-mount spice clips or magnetic strips are thinner alternatives. They add about 1 inch of depth and hold small jars flat against the door.
Command Strips and Hooks for Walls
Command strips hold up to 7.5 pounds per pair. That’s enough for a small wire basket holding snack bars, a magnetic knife strip, or a mesh produce bag hung from a hook. Mount them on the wall next to the fridge, on the side of a cabinet that faces the kitchen, or on any flat surface you’re not using.
Two hooks and a small wire basket give you a “grab zone” right next to the cooking area — the place where you toss the things you reach for every single day. It’s not pretty, but it works and it comes off clean when you move. If you’re working with a tight budget, our guide on budget pantry organization has more solutions in the $0 to $15 range.
The Back of the Kitchen Door
If your kitchen has a door (some apartment kitchens open to a hallway), the back of that door is prime territory. An over-the-door rack holds cleaning supplies, extra pantry overflow, or a shoe organizer repurposed as a snack wall — each pocket holds a snack bag or small packet. It sounds odd, but it’s one of the best renter tricks for apartments with truly no cabinet space.
The Weekly Reset That Keeps It Working
The 10-Minute Sunday Check
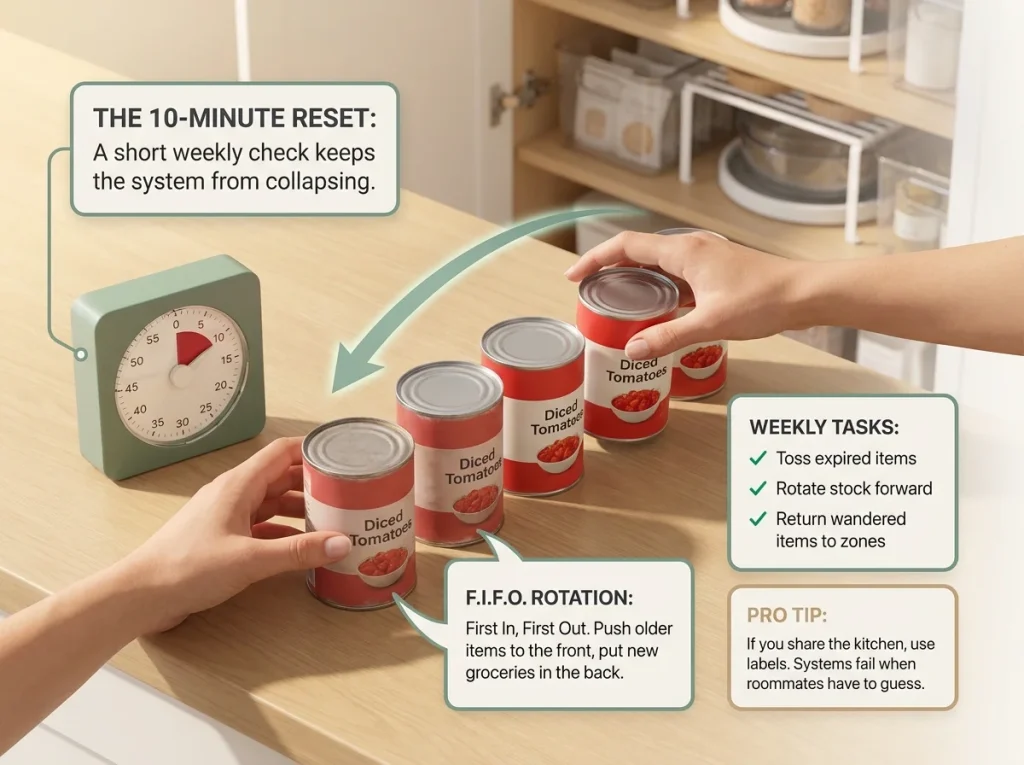
Every system falls apart without maintenance. In an apartment kitchen, it takes about two weeks for items to migrate back to the wrong cabinet, for bins to get half-empty, and for new groceries to get shoved wherever they fit.
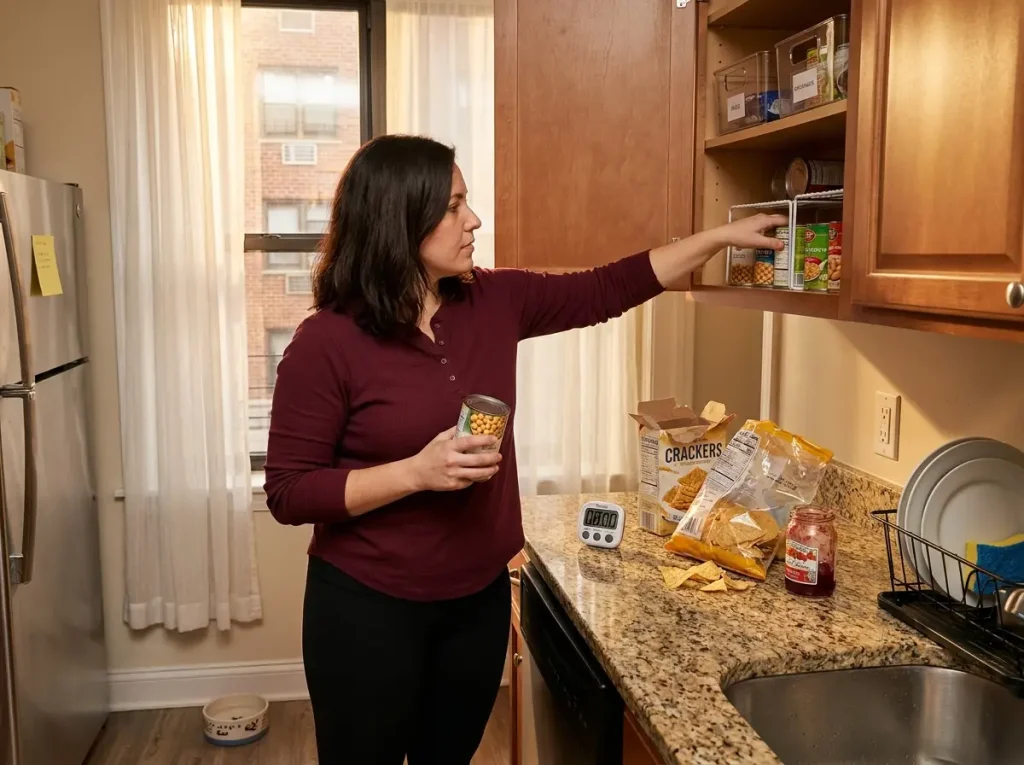
Set a timer for 10 minutes once a week. That’s it. Walk through every cabinet and your rolling cart or closet pantry if you set one up.
Do three things: pull expired items, push newer items to the back and older items to the front (FIFO rotation), and put anything that wandered back into its correct zone. If you do this weekly, your system lasts months. If you skip it, expect to redo the whole thing in about six weeks.
The Roommate Protocol
If you share the kitchen, the system has to survive someone who didn’t set it up. Two rules make this work: label everything, and keep the zones simple enough to explain in one sentence. “This cabinet is daily cooking stuff, that cabinet is weekly stuff, the cart is overflow” is a system a roommate can follow. “The spices go alphabetically on the turntable, baking is in the second bin from the left, pasta goes in the tall container but only if it’s long pasta” is a system that dies the first time your roommate unloads groceries.
Labels do the heavy lifting. A strip of masking tape and a marker on each bin costs nothing and saves you the conversation about where the rice goes. If you want something more durable, check our guide on how to label pantry containers — chalkboard vinyl lets you relabel when you change what’s inside.
The Three-Month Check
At the three-month mark, evaluate whether your zones still match how you actually cook. Eating habits change — maybe you started meal prepping and need more space for containers, or you stopped buying canned goods. Move things around. The point of zones is to match your life, not to lock you into the system you designed on day one.
Conclusion
Three things determine whether your apartment pantry organization lasts or collapses: measuring before buying anything, creating food storage outside the kitchen cabinets (rolling cart, closet conversion, hallway shelf), and running a short weekly reset that catches drift before it becomes chaos.
At three months, check whether your zones still match how you eat. Move daily items closer if your cooking habits changed. Swap bin sizes if something doesn’t fit right. The system is supposed to adapt to you, not the other way around.
Start with the gap next to your fridge. If a slim cart fits there, you just created a pantry that didn’t exist an hour ago.
Q1 How do I organize food in an apartment with no pantry?
Use your existing cabinets plus at least one external storage zone — a slim rolling cart, a converted coat closet, or a freestanding shelf in a hallway nook. Zone cabinets by meal frequency (daily, weekly, monthly) and add shelf risers and turntables to double the usable space inside each cabinet.
Q2 What is the best way to store food in a small apartment?
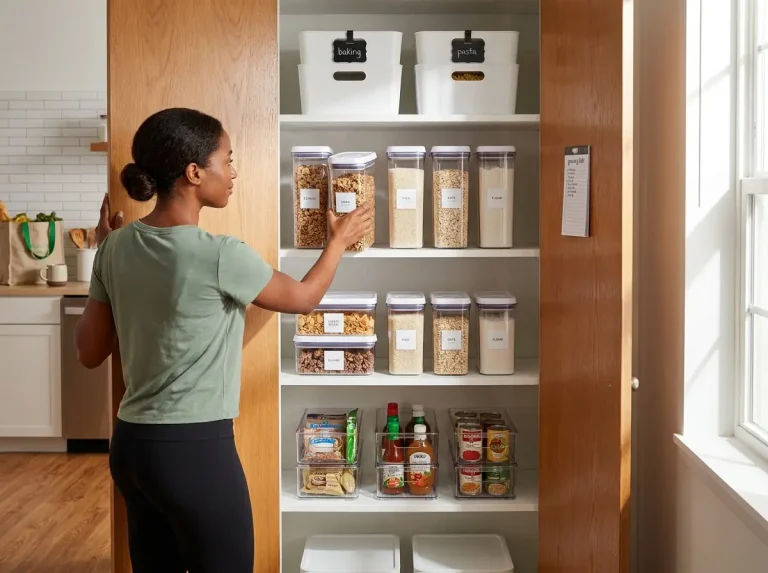
Measure your cabinets first, then buy bins and containers that actually fit. Most apartment upper cabinets are 12 inches deep, so look for bins under 10 inches deep. Use clear containers so you can see what’s inside without pulling everything out, and label every bin so the system survives more than one person using the kitchen.
Q3 How do I maximize kitchen storage in a rental?
Focus on no-drill solutions: over-the-door organizers, Command strip hooks, slim rolling carts for gap spaces, shelf risers inside cabinets, and freestanding shelving units for closets or hallway nooks. All of these install without holes and come off clean when you move out.
Q4 How often should I reorganize my apartment kitchen?
Run a 10-minute weekly reset to rotate stock and fix items that migrated to the wrong spot. Do a full evaluation at three months to check whether your zones still match your cooking habits. A full reorganization should only happen when your eating routine changes significantly — not every few weeks.
Q5 Is it worth buying matching containers for a small apartment kitchen?
Matching containers look clean but cost more and often don’t fit non-standard apartment shelves. Prioritize fit over aesthetics: measure your shelf depth and buy containers that leave at least 1 inch of clearance on all sides. A mix of sizes that fits your actual shelves works better than a uniform set that forces you to waste space.
Disclaimer: ClutterlessNest is a participant in the Amazon Services LLC Associates Program. As an Amazon Associate we earn from qualifying purchases. This article may contain affiliate links — if you buy through them, we may earn a small commission at no extra cost to you. We only recommend products we have tested or genuinely believe in.