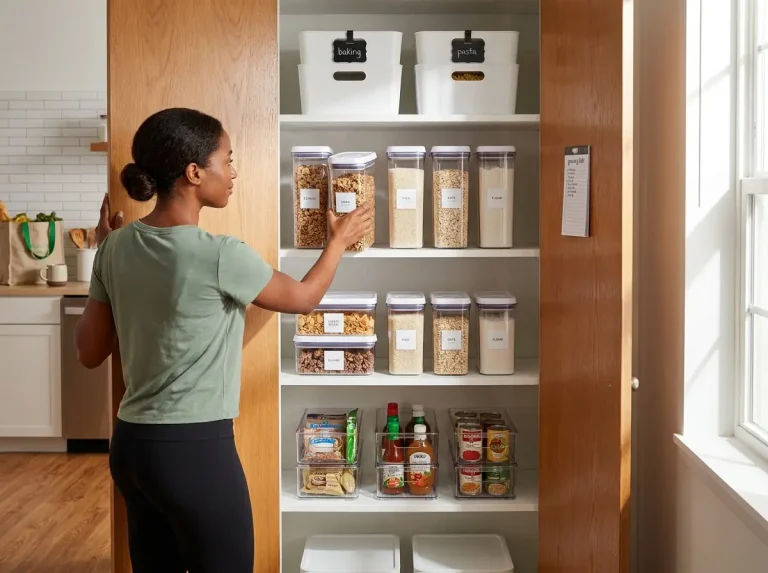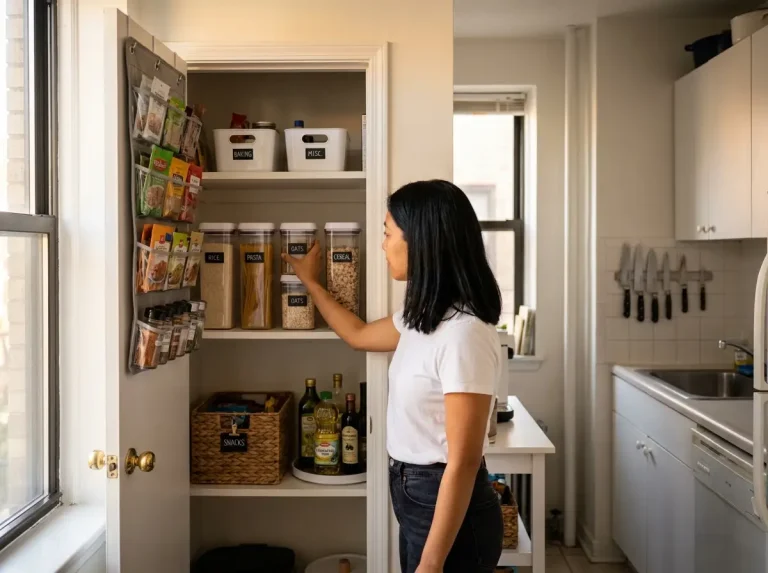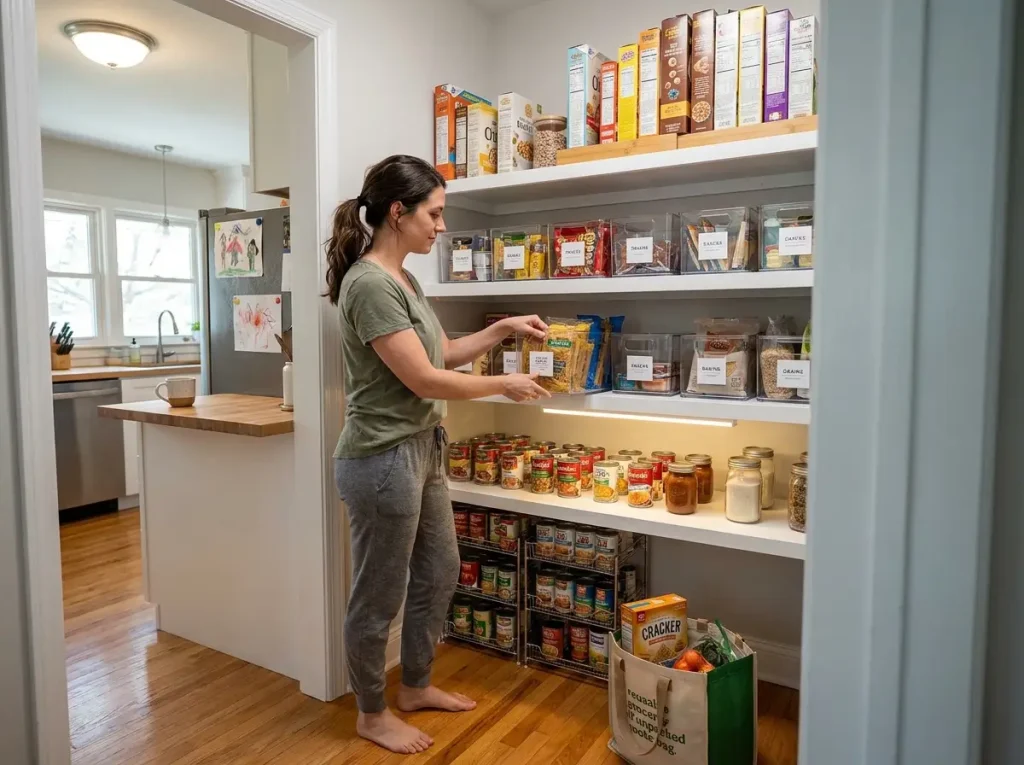
You cleaned out your pantry last month. Pulled everything off those deep shelves, wiped them down, put things back in neat rows. And right now, the back 8 inches of every shelf has turned into a food graveyard again — expired cans, duplicate jars of things you forgot you owned, and that one box of rice from who-knows-when jammed sideways against the wall.
That’s not a discipline problem. It’s a depth problem. Your shelves are deeper than your arm can comfortably reach, and no amount of willpower fixes physics. I’ve reorganized pantries with 24-inch shelves enough times to know that the fix isn’t “try harder” — it’s changing how the shelf works so the back stays usable without effort.
Here are seven fixes built for deep pantry shelves specifically, each one tested past the honeymoon phase.
Quick Answer: The best pantry organization ideas for deep shelves focus on bringing back-shelf items forward.
- Line wire shelves with shelf liner to create a stable surface
- Use full-depth bins with handles as pull-forward drawers
- Arrange items in stadium seating — short front, tall back
- Add adhesive pull-out drawers for renter-friendly access
- Install shelf risers and tiered racks to recover vertical space
- Mount LED motion sensor lights under each shelf’s front edge
- Run a 10-minute monthly sweep of the back 8 inches
Why Deep Pantry Shelves Turn Into a Food Graveyard
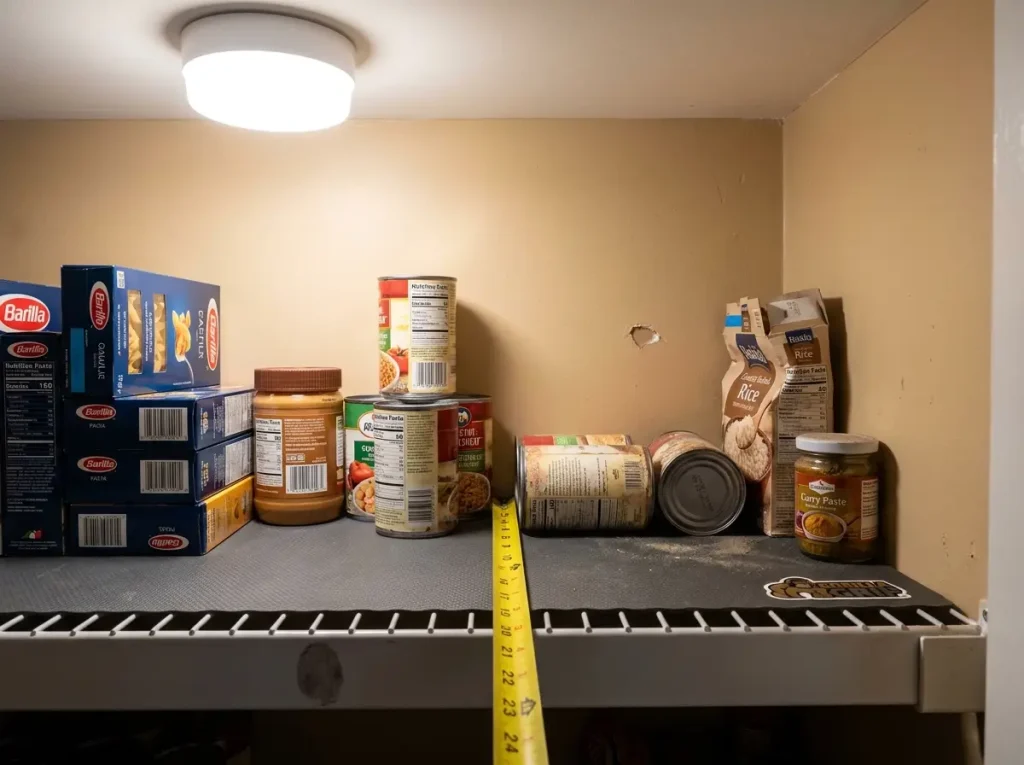
The Math Behind the Mess (Standard vs. Deep Depth)
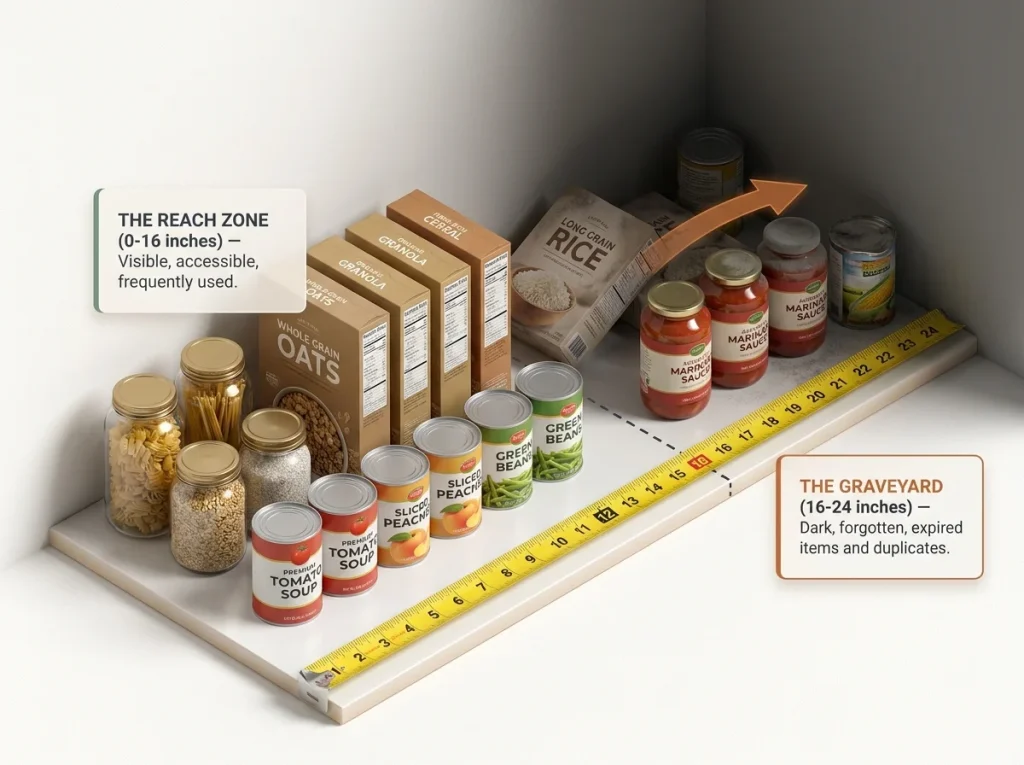
A standard pantry shelf runs 14 to 16 inches deep. That’s about as far as you can comfortably reach while standing in front of it. Your arm extends roughly 16 inches from your body before you have to lean — and leaning into a pantry to grab a can of chickpeas is something you’ll do exactly twice before you stop bothering.
“Deep” pantry shelves start at 20 inches and go to 24, sometimes 30. According to standard pantry storage depths, NKBA kitchen planning offers builders two pantry cabinet depth options: 12 inches (shallow, for canned goods) or 24 inches (flush with base cabinets). There’s no in-between. If your builder chose 24 to keep the cabinet line flush, you got deep shelves whether you wanted them or not.
That extra 8 to 10 inches past comfortable reach is where food goes to expire. It’s not laziness. It’s architecture.
What Happens in the Back 8 Inches
The back zone of a deep shelf follows a predictable pattern. Week one after organizing, everything is in its place. By week three, new groceries get shoved wherever they fit because the shelf is deep enough that there’s always room somewhere. By month two, you’re buying a second jar of cumin because you can’t see the one wedged behind the cereal boxes. By month three, you clean it out and find three jars of the same curry paste — each one bought because the previous one was invisible.
Professional organizers — including those certified through the National Association of Productivity & Organizing Professionals — recommend a full pantry audit every 90 days. But with deep shelves, the problem isn’t how often you audit. It’s that the back zone defeats visibility, and no organizing session fixes that permanently. A full pantry organization system covers the complete approach from zones to maintenance — but deep shelves need specific fixes before any system can hold.
Wire Shelves Make It Worse
If your deep pantry also has wire shelving, you’re dealing with a double problem. Wire shelves lose roughly 15 to 20 percent of their usable surface to gaps between the wires. Small items — spice jars, seasoning packets, small cans — tip over, fall through, or slide to the back where you’ll never see them again.
The Gorilla Grip Shelf Liner (~$10 per roll) converts wire shelves to a stable, flat surface. Cut it to your shelf dimensions, lay it down, and the non-slip backing keeps it in place. If your pantry has wire shelves, this is step zero — do it before anything else on this list. A $10 roll of liner changes what you can actually store on those shelves.
Pro tip: Before buying liner, lay a piece of cardboard on your wire shelf to test whether a flat surface actually solves your specific items’ stability issues. If it does, the liner is worth it. If your items are too tall and top-heavy regardless, the problem is spacing, not the shelf surface.
Bring the Back Forward With Pull-Out Bins
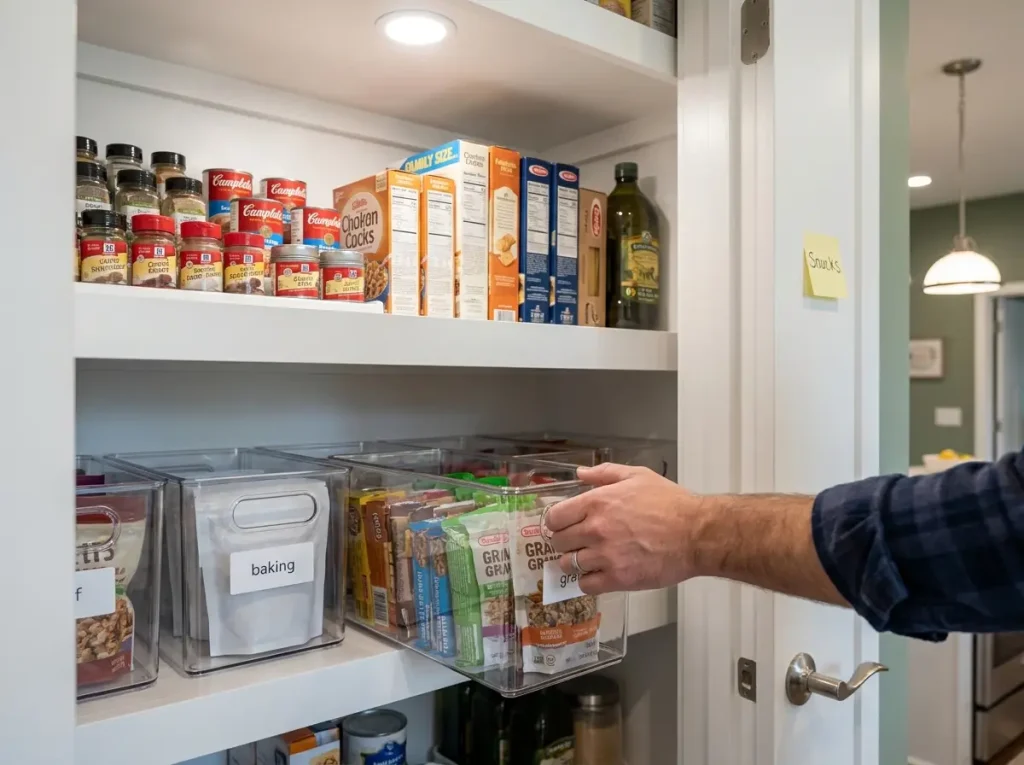
Full-Depth Bins That Slide Like Drawers
The simplest fix for a deep shelf is a bin that’s long enough to span most of the depth. You pull the bin forward by its handle, grab what you need, push it back. No reaching, no leaning, no forgetting what’s in the back.
The key dimension is bin length. On a 24-inch deep shelf, you want bins at least 14 to 16 inches long so they cover the dead zone without sticking past the shelf front. The mDesign Stackable Plastic Storage Bins (~$20 for a 4-pack) are 10 inches long — not full depth, but they stack two deep on a 24-inch shelf with a couple inches to spare. Clear sides let you see contents, and the front handle makes the pull-forward motion easy with one hand. If you want something cheaper to test the layout first, Dollar Tree bins at $1.25 each do the same job with less durability.
Line up two or three bins side by side across the shelf, and each one becomes a category: baking, snacks, canned goods. Pull the “baking” bin forward when you need flour, push it back when you’re done. The shelf stays organized because the bins enforce their own zones.
The Stadium-Seating Alternative (No Hardware)
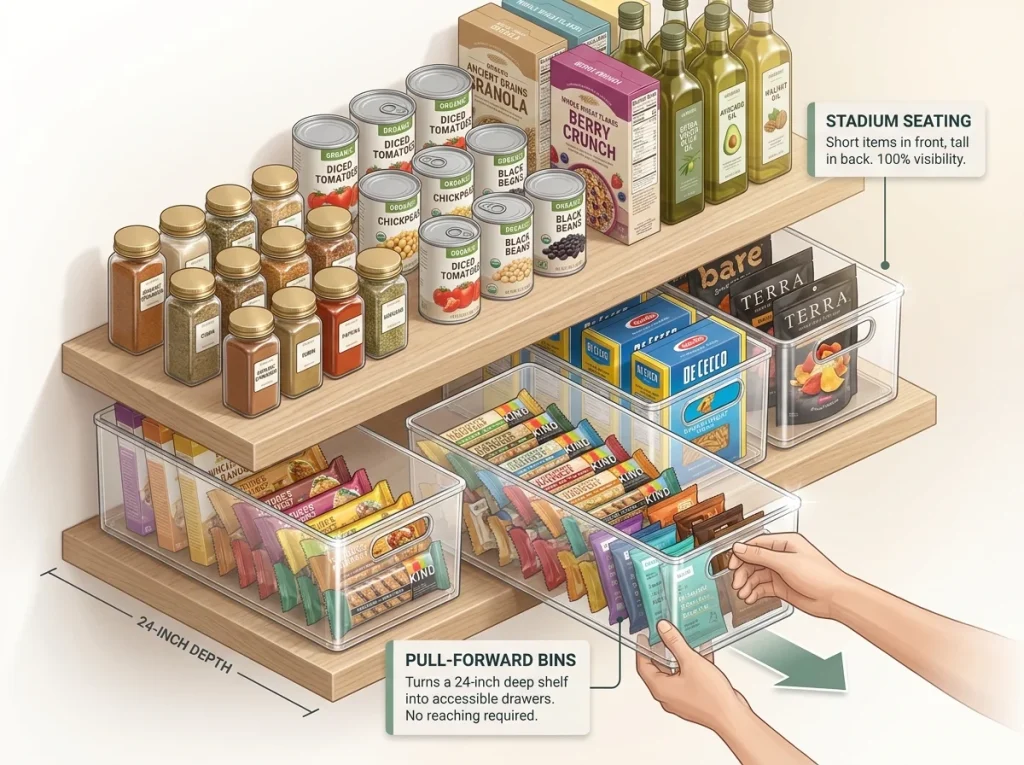
If you don’t want bins at all, the stadium-seating approach works on deep shelves without any products. Arrange items in rows by height: shortest in the front, tallest in the back. Think of it like stadium seating — everyone can see the stage because each row sits higher than the one in front.
On a 24-inch shelf, you can fit two to three rows comfortably. Front row: spice jars, small cans, tea boxes — anything under 5 inches tall. Middle row: cereal boxes, pasta boxes, medium jars. Back row: tall bottles, large containers, bulky items. Everything stays visible because nothing blocks the row in front of it.
This costs nothing and works immediately. The limitation: it only holds up if everyone in your household understands the height rule. If someone shoves a tall bottle into the front row, the system breaks. For families, bins with labels tend to survive longer than height-based arrangements. If you’re working with a small pantry with limited shelves, the stadium approach works especially well because it maximizes visibility without adding any bulk to already tight shelves.
Renter-Friendly Adhesive Pull-Outs
If you want actual sliding drawers but can’t drill into your shelves, adhesive pull-out organizers exist now — and they actually work. The Adhesive Pull-Out Cabinet Organizer (~$25–35, expandable from 12 to 20 inches wide) uses nano adhesive film to stick to your existing shelf. No screws, no drill, no damage. Full-extension slides let the drawer come all the way out so you can see and reach everything.
One important limitation: the adhesive works on smooth, non-porous surfaces — melamine, MDF, laminate, smooth painted wood. It does not hold reliably on raw wood, textured surfaces, or wire shelving. Clean the surface with rubbing alcohol before applying, press firmly, and wait 24 hours before loading. These hold 15 to 25 pounds, which covers most pantry items but not heavy appliances or full sets of dishes.
Pro tip: If you’re not sure about the adhesive, test it on one shelf first. Load it with about 10 pounds of canned goods and wait a week. If it holds, do the rest. If it peels, your shelf surface isn’t compatible — switch to the bin method instead.
Use Vertical Space That Deep Shelves Waste
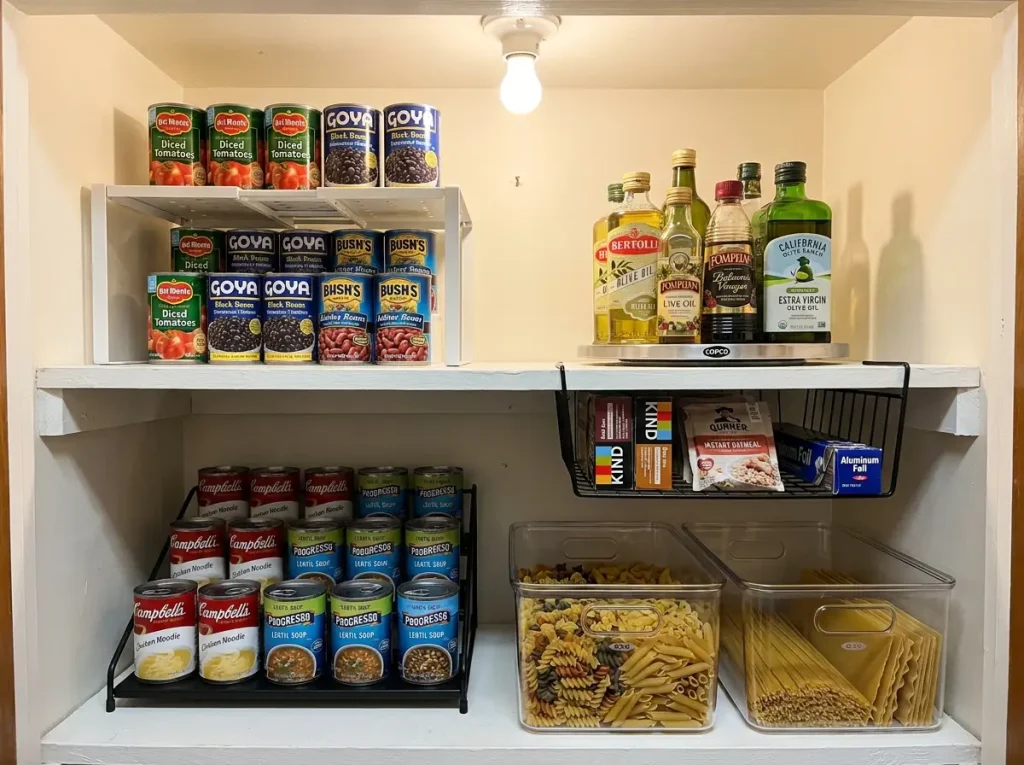
Shelf Risers and Tiered Racks on Deep Shelves
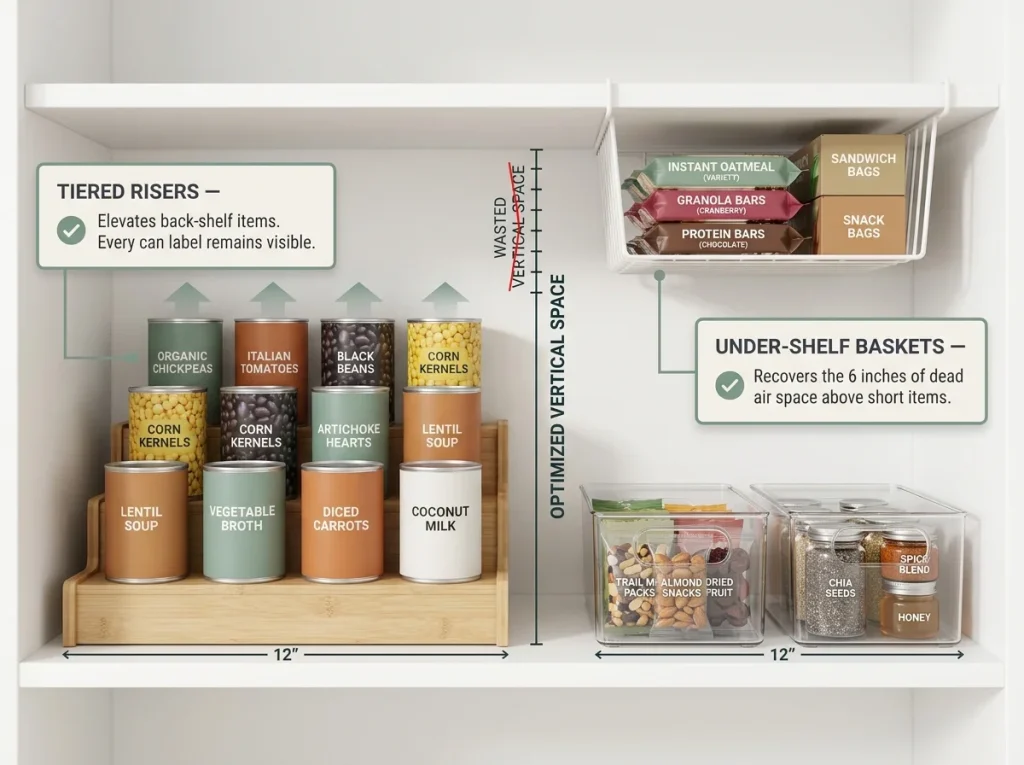
Deep shelves waste vertical space as much as they waste depth. If your shelf-to-shelf gap is 12 to 14 inches but your tallest items on that shelf are 8 inches, you’ve got 4 to 6 inches of air above everything. Multiply that across five shelves and you’re losing two feet of usable storage to empty air.
A shelf riser creates a second tier on a single shelf. Place it in the back half of a deep shelf and you get natural stadium seating — the riser elevates items in the back so they’re visible over the items in front. Measure your shelf-to-shelf height before buying any riser. The most common mistake: people buy a riser, load items on top, and realize the total height exceeds the gap to the next shelf. Now nothing fits above it and you’ve created a new problem.
Start with a piece of cardboard or a small box to mock up the height. If it works, then get a riser that fits.
Under-Shelf Baskets for the Vertical Gap
Under-shelf baskets hang from the shelf above and use the dead air space between shelves. They’re ideal for flat items that waste shelf surface when laid down: packets of oatmeal, snack bars, aluminum foil rolls, sandwich bags.
On deep shelves, an under-shelf basket also breaks up the visual “tunnel” effect where everything blends together at eye level. Having items hanging below the upper shelf creates a visual boundary that separates the zones on the shelf below.
These baskets slide onto most shelf edges — wire or solid — and hold 5 to 10 pounds depending on size. No installation needed. If the basket slides around, a small piece of shelf liner under the hooks keeps it in place.
Can Racks That Use Back-Shelf Depth
Deep shelves are actually ideal for tiered can racks because the rack needs depth to work. The SimpleHouseware 3-Tier Can Rack Organizer (~$15) sits in the back of a deep shelf and angles cans forward so you can read every label from the front. Gravity feeds cans down as you take one from the front row.
This solves two problems at once: canned goods stop rolling around in the back (a common complaint on deep shelves), and you can see every can without pulling anything forward. Pair it with a Copco Non-Skid Turntable 12-inch (~$12) on the front portion of the same shelf for oils, vinegar, and condiments. The turntable spins everything into view without rearranging, and the non-skid base keeps it from sliding when you rotate it.
Pro tip: Reserve turntables for items you use frequently — cooking oils, vinegars, hot sauces. Putting rarely used items on a turntable just creates a spinning junk pile. The turntable works because the items on it rotate through regular use, not because it looks organized.
Light the Back So You Actually See What’s There
Where to Place Lights on Deep Shelves
Every deep pantry article says “add lighting.” None of them tell you where to mount it for deep shelves specifically. The placement matters more than the light itself.
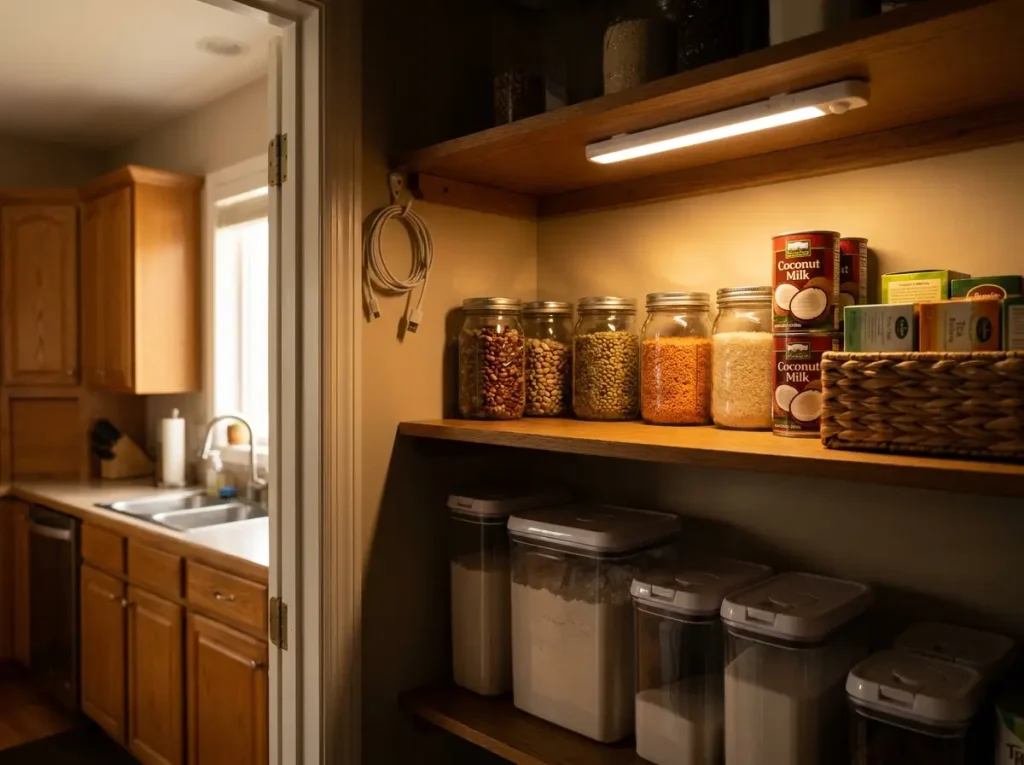
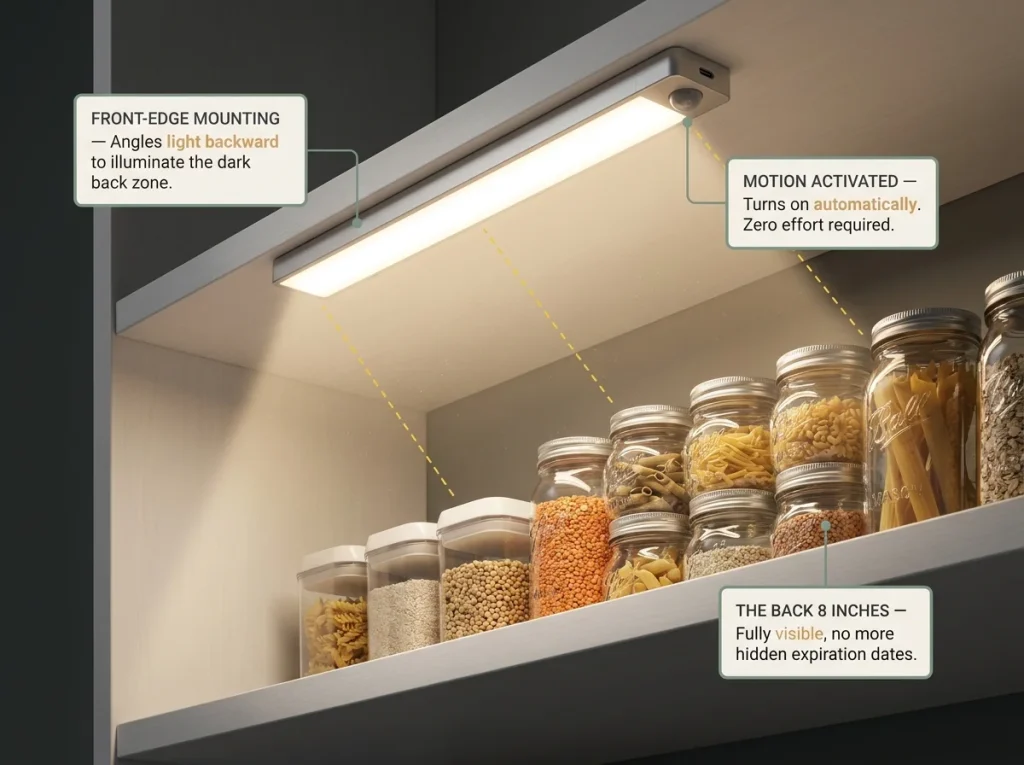
Mount the light under the front lip of each shelf — not on the ceiling, not on the wall, not on the back of the shelf. The front-edge position angles light backward and downward, illuminating the back 8 to 12 inches of the shelf below. That’s the exact zone that overhead kitchen lighting doesn’t reach because the shelf above blocks it. A ceiling-mounted light helps the top shelf and nothing else. A front-edge light under each shelf solves every level independently.
This is the detail that separates “I read about pantry lighting” from “I’ve actually installed lighting in a pantry with 24-inch shelves.” The geometry of deep shelves creates a shadow zone in the back, and only under-shelf front-edge mounting addresses it.
Battery vs Rechargeable vs Hardwired
Skip battery-operated puck lights. They cost $4, they’re always on (no sensor), and the batteries drain in two weeks. You’ll replace the batteries once, maybe twice, then leave the dead light stuck to your shelf for a year. Ask anyone who’s tried it.
The Rechargeable LED Motion Sensor Light Bar (~$15–20 for a 2-pack) charges via USB-C and lasts 15 to 40 days on a single charge depending on how often the pantry gets opened. Hang the USB-C cable from a small hook inside the pantry door — when the light dims, plug it in overnight without removing it. No battery replacements, no trips to the store for AAAs.
Hardwired under-cabinet lights are the best permanent solution, but they require an electrician and a power source inside the pantry. For most people — especially renters — the rechargeable option hits the right balance of cost, effort, and durability.
Motion Sensors Change the Behavior
The motion sensor is what makes pantry lighting actually work long-term. Without it, you have a light you need to remember to turn on and off. With it, the light activates when you approach the pantry and turns off 15 seconds after you leave.
A 10-foot sensor range with a 120-degree angle means the light turns on when you walk toward the pantry, not when you’re already reaching into it. By the time you open the door, the back of every shelf is lit. By the time you walk away, it’s off again. You never think about it, which means you never stop using it.
That’s the behavioral shift: if the light requires effort, you’ll stop using it within a month. If it requires zero effort, it becomes invisible infrastructure that keeps the back of your deep shelves visible every time you open the door.
The Ten-Minute Monthly Reset That Keeps It Working
The Back-Eight Sweep (Monthly)
Every organization system works on day one. The question is whether it works on day 90. For deep shelves, the answer depends on one habit: the Back-Eight Sweep.
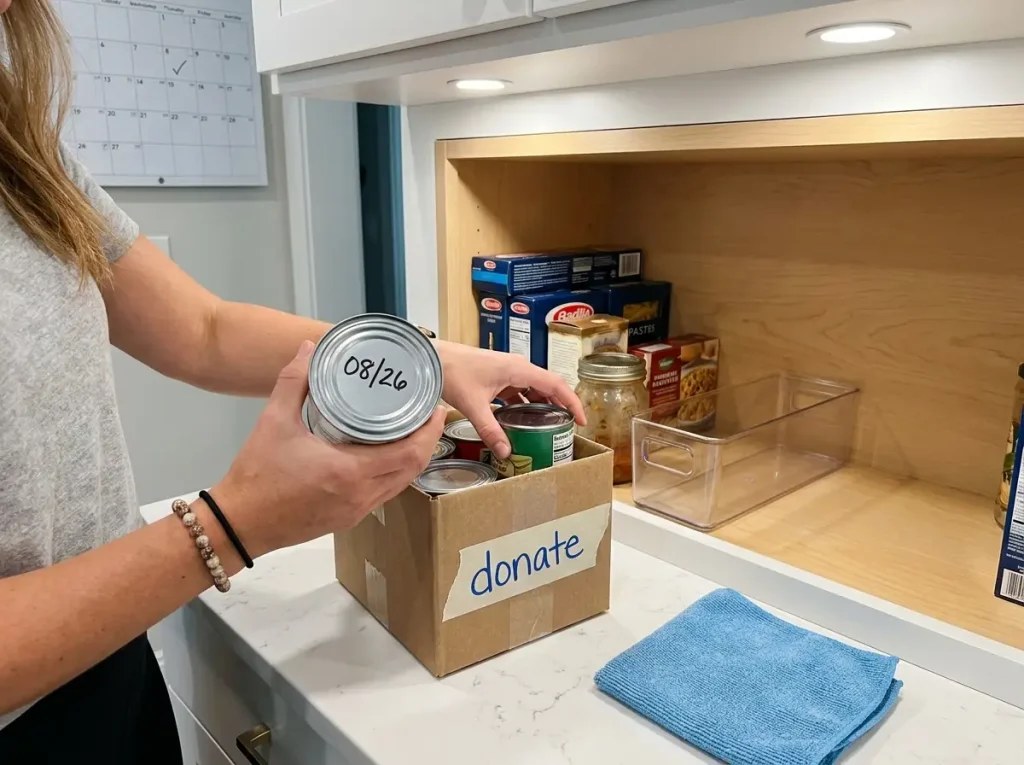
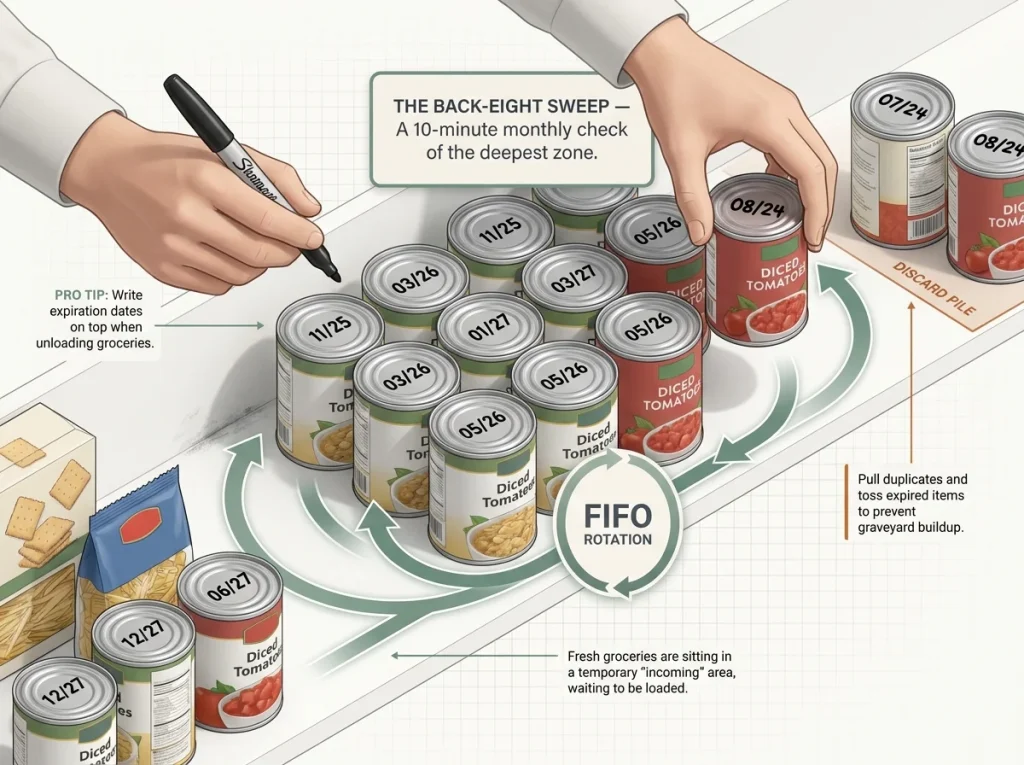
Once a month, pull every item from the back 8 inches of each shelf. Check expiration dates, consolidate duplicates (you will find them), and put everything back in its correct zone. This takes about 10 minutes for a standard pantry with 5 to 7 shelves. That’s it. No full reorganization, no emptying everything, no three-hour project. Just the back 8 inches — the zone where deep shelves always revert.
If you find expired items more than once during these sweeps, the system upstream needs adjustment. Either your bins aren’t deep enough to reach the back, your lighting isn’t revealing what’s there, or your zones aren’t clear enough for everyone who uses the pantry.
Expiration Check and FIFO Restock
FIFO — first in, first out — is the restocking method that prevents the pantry graveyard from reforming. When you bring groceries home, new items go behind older items. The older stock stays front-accessible, the new stock waits its turn in the back.
Write expiration dates in Sharpie on the top of cans and boxes as you unload groceries. This takes about 30 seconds per shopping trip and eliminates the need to rotate every can to check the label during your monthly sweep. A quick glance at the top of each item tells you what’s approaching expiration.
The real friction with FIFO isn’t knowing how to do it — everyone understands the concept. The friction is that it takes an extra 30 seconds per grocery trip, and on a busy Tuesday night you’ll skip it. If that happens consistently, switch to the simpler rule: just keep new groceries in a separate “incoming” bin on the counter and put them away properly the next morning.
Quarterly Audit — When to Rethink the System
Every three months, evaluate whether your zones still match what you’re actually buying. Eating habits change — you started meal prepping, your kid stopped eating granola bars, you discovered a new cooking style that needs different ingredients. Your pantry layout should adapt.
The quarterly audit is different from the monthly sweep. The sweep maintains the existing system. The audit questions whether the system itself still fits your life. If the “baking” bin has been half-empty for two months, it should become something else. If the snack zone overflows every week, it needs more space. As professional organizers recommend, the best systems evolve with the household rather than fighting against changing habits.
A deep pantry gives you more room to rearrange than a shallow one. Use that depth as flexibility, not just storage. When a zone stops working, you have the physical space to redesign it without removing everything from every shelf.
Conclusion
Three things to take away. First, deep shelves fail because of reach, not because of disorganization — fix the depth problem before you buy a single bin. Second, pull-forward bins plus back-zone lighting solve 80 percent of deep-shelf frustration for under $50 total. Third, the monthly Back-Eight Sweep is the only maintenance habit that keeps a deep pantry working past the first week.
In three months, pull everything from the back 8 inches of one shelf. If you find expired items, revisit your bin layout and lighting placement — the system needs adjustment, not another full reorganization.
Pick the deepest shelf in your pantry — just one. Measure it, clear the back, and set up one pull-forward bin. Get that shelf working before you touch the rest. One shelf done right teaches you more than five shelves done fast.
Q1 How deep should pantry shelves be?
Standard pantry shelves are 14 to 16 inches deep, which keeps most items within comfortable arm’s reach. Shelves deeper than 20 inches create the back-zone visibility problem that requires pull-forward bins or stadium seating to manage. If you’re building new, 16 inches is the practical sweet spot.
Q2 What is the best way to organize a pantry with deep shelves?
Use full-depth bins with handles as pull-forward drawers, arrange items in height-graduated rows for visibility, and mount LED motion sensor lights under each shelf’s front edge. These three changes address the root cause — you can’t reach or see the back — instead of just rearranging items.
Q3 How do you reach items at the back of deep pantry shelves?
Pull-forward bins are the simplest solution: pull the bin out by its handle, grab what you need, push it back. For a no-product approach, stadium seating with short items in front and tall items in back keeps everything visible. Adhesive pull-out drawers work for renters who can’t install permanent slides.
Q4 Are pull-out pantry shelves worth it for renters?
Adhesive pull-out organizers with nano-film mounting hold 15 to 25 pounds and require no drilling. They work well on smooth surfaces like melamine, MDF, and laminate, but not on raw wood or textured shelves. Test one shelf first before committing to the full pantry.
Q5 How often should you reorganize a deep pantry?
Don’t reorganize the whole pantry regularly — instead, sweep the back 8 inches of each deep shelf monthly (10 minutes) and do a full zone audit quarterly. If you find expired items in the back more than once, adjust your bin depth or lighting rather than reorganizing again.
Disclaimer: ClutterlessNest is a participant in the Amazon Services LLC Associates Program. As an Amazon Associate we earn from qualifying purchases. This article may contain affiliate links — if you buy through them, we may earn a small commission at no extra cost to you. We only recommend products we have tested or genuinely believe in.