You vacuumed out a season’s worth of clothes, slid the bags under your bed, and felt like you’d finally solved the storage problem. Six weeks later they were puffy again. The thing is, the bag probably isn’t defective.
Almost every vacuum storage bag failure under a bed comes down to one of four things: wrong contents, wrong bag size for your clearance, poor packing technique, or a valve issue that takes two minutes to fix. I’ve run through all four — sometimes in the same bag. Here’s what actually causes the problem and how to fix each one.
Quick Answer: Vacuum storage bags fail under beds for these reasons — and each has a fix:
- Wrong contents: Wool and down don’t recover from long-term compression. Stick to cotton, polyester, and fleece.
- Clearance mismatch: Platform beds (4–7″ clearance) need thin bags with light loads. Metal frames (7–9″) have more room. Measure first, buy second.
- Poor packing: Bags packed unevenly or overfilled re-inflate faster because air pockets stay trapped. Fold flat, fill to 60–70% of rated capacity.
- Valve leak: Press the bag. If you feel a slow exhale near the valve, the cap is loose or the valve needs replacing — not the whole bag.
- Puncture from slats: Metal bed frame slats with exposed edges will slowly pierce bags stored on top of them. A yoga mat between the slats and the bags fixes this permanently.
What Actually Belongs in a Vacuum Storage Bag (and What to Leave Out)
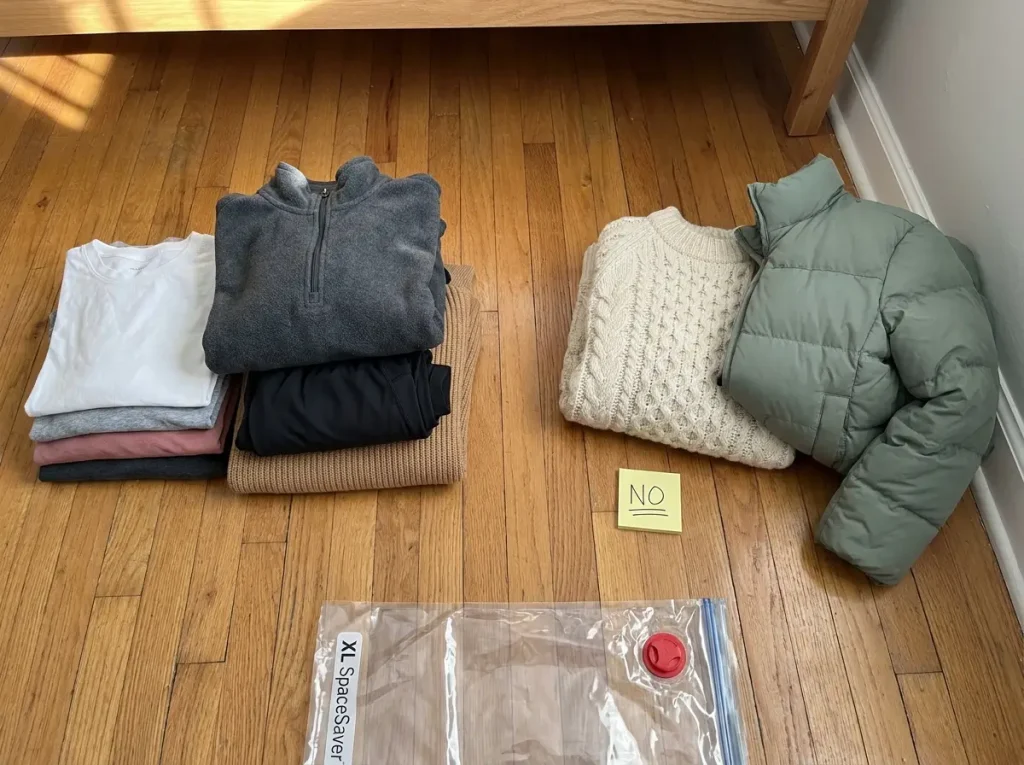
The Safe List: What Compresses Well
Cotton, polyester, fleece, and acrylic synthetics are the workhorses of vacuum storage. These fabrics compress cleanly, hold compression for months, and — this is the part that matters — return to their original shape when you unpack them. T-shirts, jeans, fleece pullovers, polyester athletic wear, cotton bedding and pillowcases: all of these are fair game. The rule is simple: if the garment was made to be washed in a normal machine cycle and dried in a dryer, it can probably handle compression.
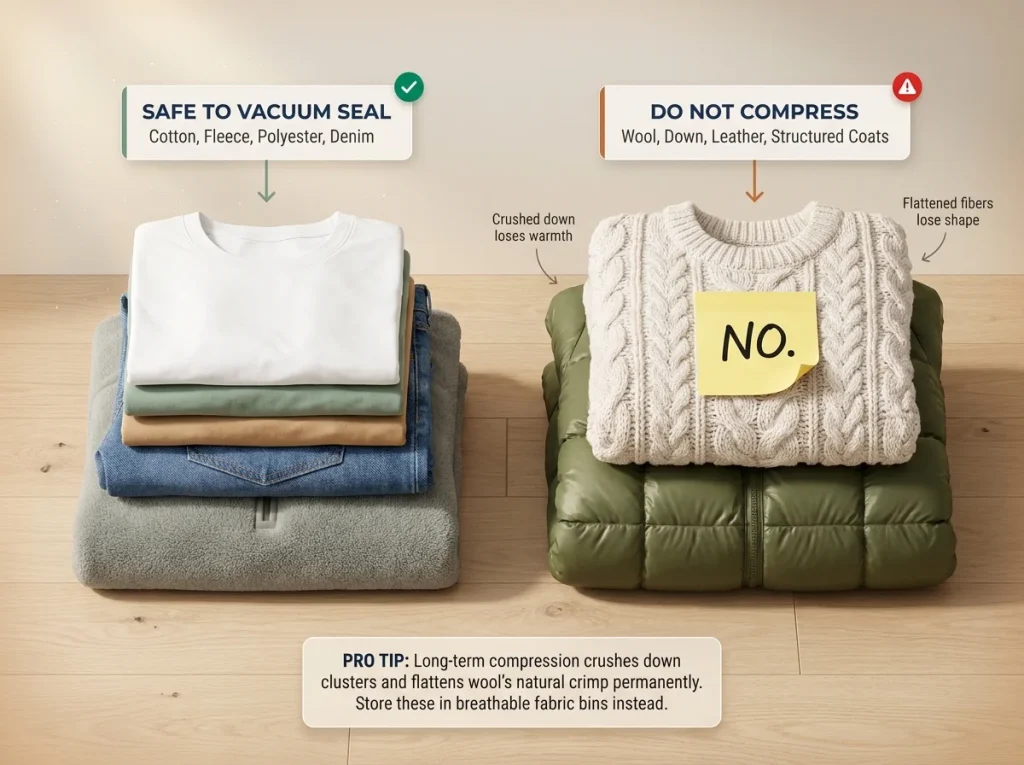
Bulky items in these fabrics are where vacuum bags earn their reputation. A fleece blanket that takes up half a shelf compresses to a 1-inch slab. Three cotton sweaters that barely fit in a drawer come out the other side fitting under any low-clearance platform bed.
What You Should Never Vacuum-Seal
Wool and down are the big exceptions — and almost no competitor article explains why. Wool fiber is a three-dimensional crimped structure. That crimp is what gives wool its warmth and its ability to recover shape. Vacuum compression collapses those crimped fibers flat.
For a short trip (two to four weeks), the fibers spring back. Compress a wool sweater for an entire season — three months or more — and you will flatten the fiber structure permanently. When you unpack it, it’ll feel thinner, less warm, and oddly stiff.
Down works the same way. Down clusters are three-dimensional structures that trap air to create warmth. Long-term compression crushes the clusters.
A down puffer jacket that went in full and lofty can come out looking limp and patchy. No amount of shaking brings all of it back.
The same applies to structured garments — blazers with shoulder padding, coats with interfacing, anything with a built-in shape that relies on construction to hold it. Compression distorts the structure and pressing doesn’t fully fix it.
Store wool and down in breathable fabric bags or cedar-lined bins instead. If you’re building out a full under-bed storage system for seasonal clothing, vacuum bags handle one category and fabric bins handle the other.
How Long Is Too Long in a Vacuum Bag
Short-term compression — under a month — is generally safe for most fabrics, including light wool blends. The damage threshold for most fibers is around the 90-day mark. After three months, you’re past the safe zone for anything with natural fiber content.
For a standard seasonal rotation (summer clothes stored October through March, winter clothes stored April through September), you’re looking at five to six months of continuous compression. That’s firmly in the permanent-damage range for wool and down. Cotton, polyester, and fleece have no documented compression damage at any typical storage duration.
Pro tip: Before you seal a bag, do the squeeze test. Grab a handful of the item through the bag and compress it with your hand. If it springs back instantly, it’s probably safe. If it stays flat, the fibers already don’t have much recovery — compression probably won’t hurt it more, but it won’t help either.
Measure Your Bed Clearance Before You Buy a Single Bag
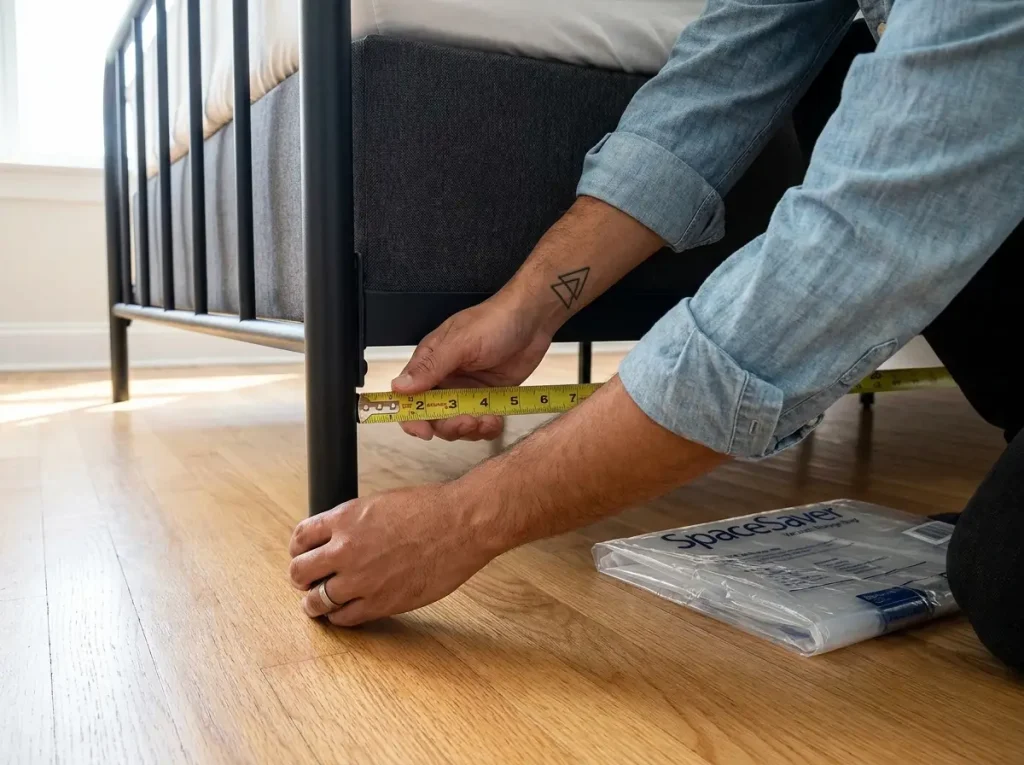
This is the mistake that causes most of the buying regret in vacuum storage. People buy jumbo bags, fill them with winter coats, compress them, and discover the bags are 4 inches thick and their platform bed has 5 inches of clearance — and one of those inches is already taken up by the slight bow in the floor. The bag doesn’t fit, the edges won’t slide under, and you’re back to plan B.
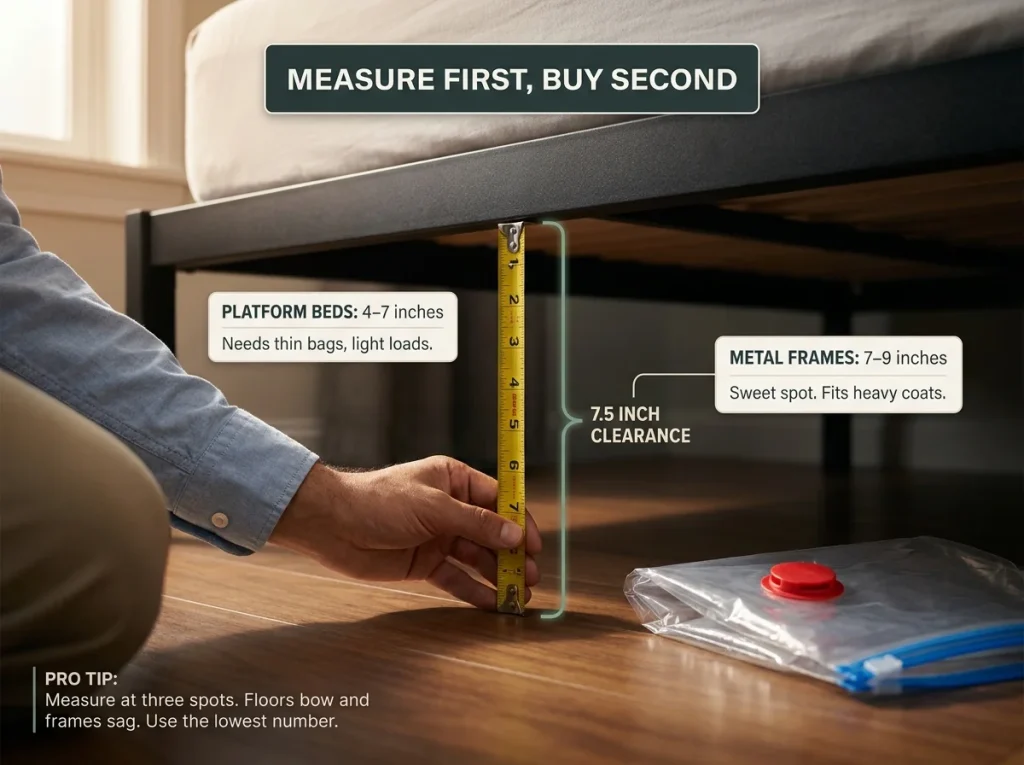
Platform Beds: The 4–7 Inch Challenge
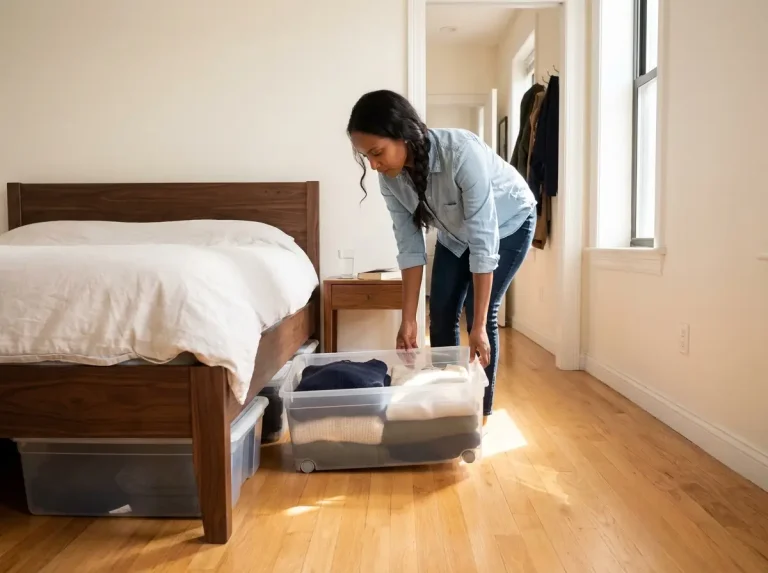
Platform beds sit at roughly 4 to 7 inches of clearance between the floor and the bottom of the frame. That range sounds workable until you compress a bag full of winter coats and realize it’s still 3.5 inches thick. You have maybe an inch of margin.
For platform bed storage, the only thing that works reliably is light, compressible fabrics in medium or large bags — not jumbo. Think cotton t-shirts and lightweight knits, not parkas. Fill each bag to about half its capacity, not full. The goal is a 1 to 1.5 inch sealed thickness that slides under without resistance.
If your clearance is under 5 inches, vacuum bags are a tight fit regardless of what you put in them. At that point, flat-profile fabric storage solutions often work better. Check out the best under-bed storage containers for low beds for the specific flat containers that work at those dimensions.
Metal Frame Beds: The 7–9 Inch Sweet Spot
Metal bed frames with a separate box spring typically give you 7 to 9 inches of usable clearance. That’s enough room for properly packed vacuum bags without having to be surgical about fill levels. A jumbo bag with two winter coats comes out around 2 to 3 inches thick when sealed — you have several inches of margin.
The risk with metal frames is a different one: exposed slat edges. Box spring frames often have wooden slats or metal cross supports with edges that face downward. A vacuum bag sitting on top of one of those edges for six months will eventually develop a small puncture. The bag doesn’t fail all at once — it just slowly re-inflates over three to four weeks and you can’t figure out why.
The Sealed-Bag Thickness Math
Here’s the practical way to predict whether a bag will fit before you buy it. A fully compressed vacuum bag sealed with household items runs roughly:
- Lightweight items (t-shirts, thin knits, shorts): 0.5–1 inch per layer of 4–6 items
- Medium items (jeans, fleece, cotton sweatshirts): 1–1.5 inches per layer
- Heavy items (coats, thick sweaters, heavy blankets): 2–3 inches even after full compression
Fill a bag to 60–70% of its rated capacity and it’ll compress to roughly half the depth of what you put in. Fill it to 100% and you’ll get a bag that bulges at the ends and doesn’t slide flat.
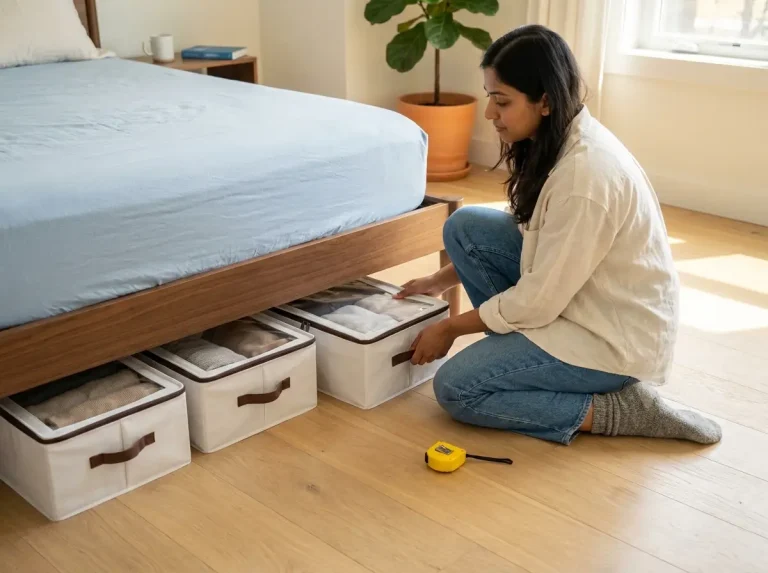
Pro tip: Take your tape measure and physically check your clearance at three spots — both sides of the frame and the center. Most beds aren’t perfectly level and one side of the frame often sits slightly lower than the other. The lowest measurement is your real clearance.
How to Pack and Seal Vacuum Storage Bags That Stay Flat
The Fold-Flat Method (Why Tossing Stuff In Doesn’t Work)
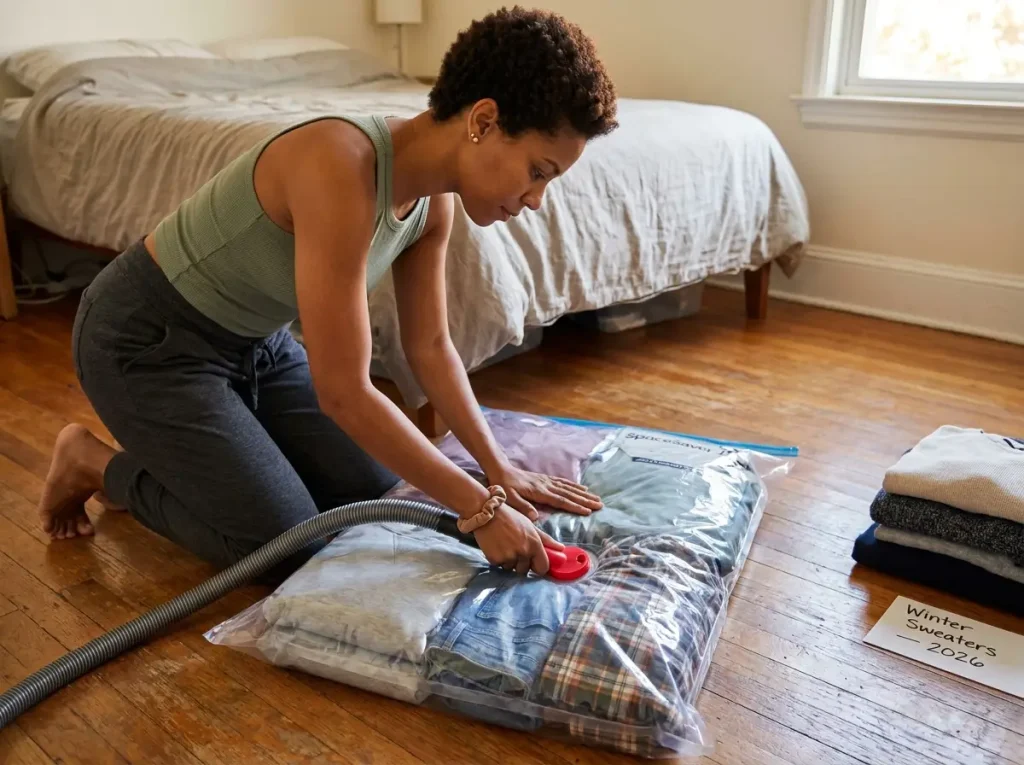
Most bags re-inflate faster than they should because they were never packed flat in the first place. If you fold a cotton sweater into a rough ball and drop it in, the fibers stay bunched and air gets trapped between them. The vacuum removes the easy air, but those pockets of trapped air between compressed fabric sections slowly work their way to the valve over the next few weeks and re-inflate the bag from the inside.
The fix: fold each item as flat and square as you would stack it in a suitcase. Layer items like pancakes — flat piece on flat piece. When everything in the bag lies in the same plane, compression is even across the entire surface and there’s nowhere for air pockets to hide.
Limit each bag to two or three items of similar fabric weight. Mixing a down jacket with two cotton t-shirts creates uneven compression — the jacket doesn’t fully compress, the t-shirts get over-compressed, and the bag develops a lumpy profile that doesn’t slide flat.
Vacuum vs. Hand Pump: Which Gets Better Results Under a Bed
A vacuum hose creates faster, deeper compression. Most bags seal to their minimum thickness when you use a vacuum. For metal frame beds with enough clearance, vacuum compression is usually the right call — you get the thinnest possible profile.
A hand pump gives you control over the final thickness. For platform beds where you’re trying to hit a specific clearance target, pumping until you reach your thickness goal and stopping beats vacuuming to maximum and ending up with a bag that just barely fits but tears along the seam when you try to slide it in.
The hybrid approach: use the vacuum to get to about 80% compression, then manually press the bag flat with your hands and use the hand pump for the last few pumps. This tends to produce the most even, stable result for under-bed storage specifically.
Labeling and Slide-Out Access That You’ll Actually Use
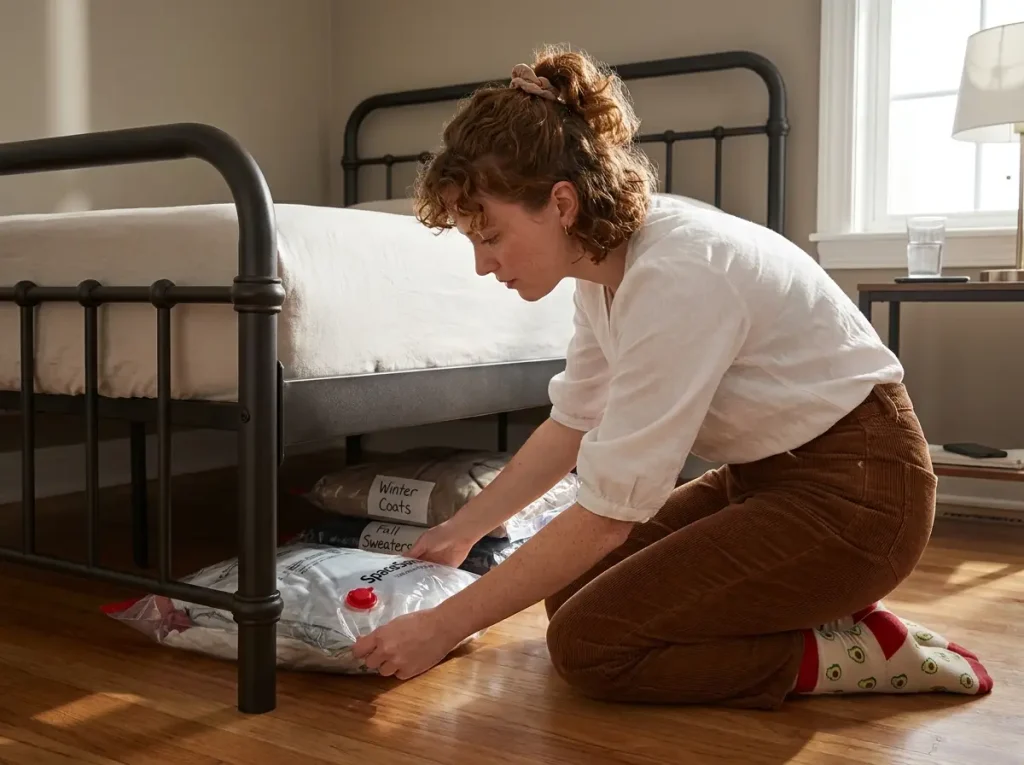
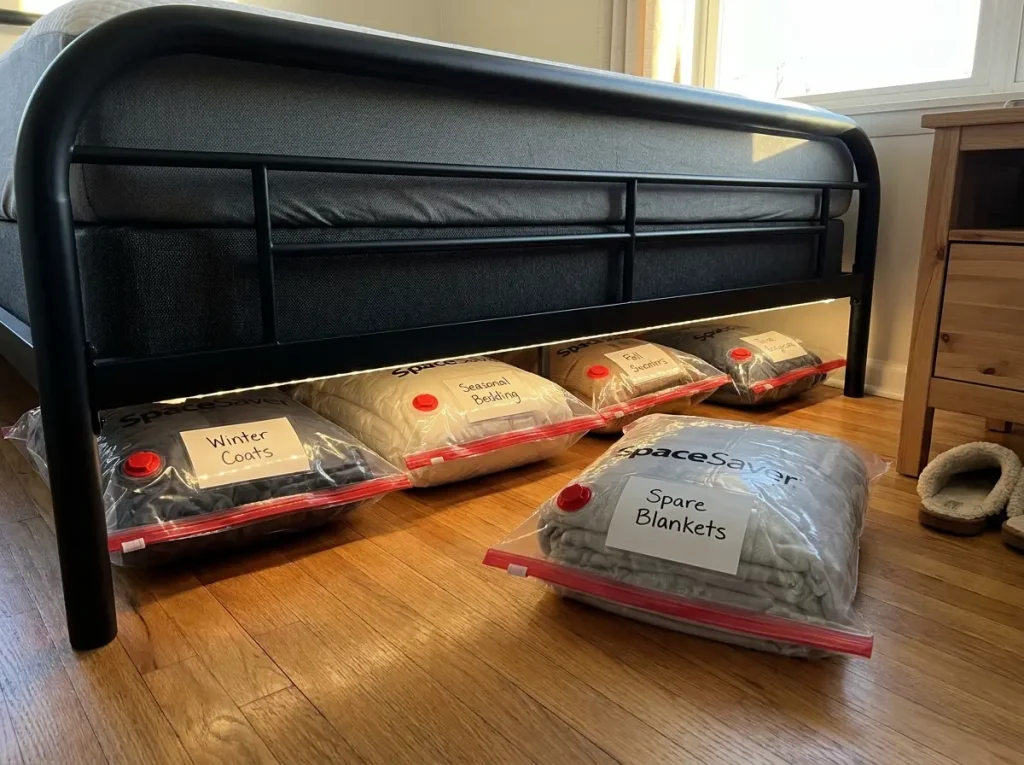
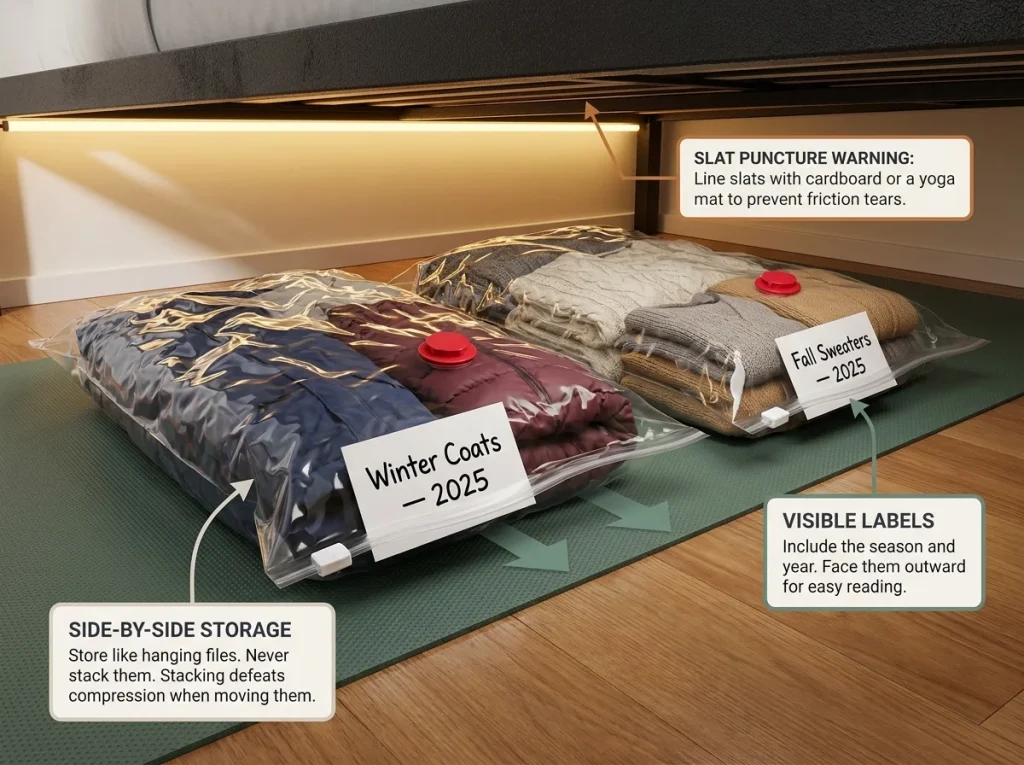
Slide a folded index card into the bag before you seal it, with the contents written on it in large black marker — visible from the outside. That way you can read what’s in each bag without pulling them all out. If your bags are stored side by side under the bed rather than front-to-back, keep the label cards facing the open side of the bed.
Don’t stack bags on top of each other. It sounds like a good idea until you need the bag on the bottom and have to move the one on top, which partly defeats the compression when you reposition it. Lay them side by side like hanging files. With jumbo bags, two typically fit side by side under a queen bed frame.
Pro tip: Write the season and year on the label card — not just “Winter Sweaters” but “Winter Sweaters — 2025.” When you’re pulling bags out in spring, you’ll know immediately which bags are from the previous season and which are older stock.
The Vacuum Storage Bags That Work Best Under Beds
For Metal Frame and Tall-Clearance Beds (7+ Inches)
The SpaceSaver Premium Vacuum Storage Bags 10-Pack is the one I keep coming back to for standard metal frame beds. The variety pack includes multiple sizes — useful because you’ll want different sizes for different contents, and buying a 10-pack means you actually have enough bags to do a full seasonal swap without running out mid-closet. The XL size handles winter coats and thick blankets; the medium and large handle separates and lighter knits.
For Platform Beds With Tight Clearance (Under 6 Inches)
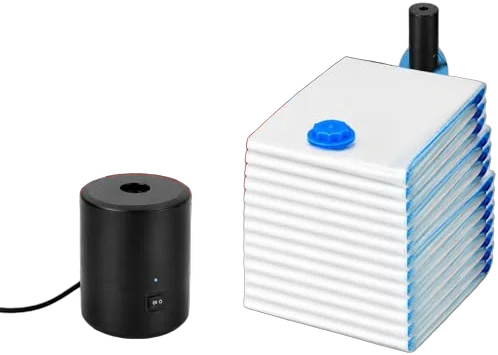
Platform beds need a different approach — you’re working with 1.5 to 2 inches of compression tolerance if you’re lucky. Two bags that tend to work here: the Ziploc Space Bag XL (6-Pack) and the Spacesaver Premium Set of 6 (mixed sizes).
The Ziploc Space Bags are notable because they work with a hand pump rather than requiring a vacuum hose — which gives you precise control over final thickness. Stop pumping when you hit your clearance target. The XL size at 21″ × 32.5″ is practical for cotton sweaters and lighter knits without overloading. The Spacesaver Set of 6 takes a similar approach but gives you a range of sizes in one purchase — useful if you’re testing the system for the first time and aren’t sure which sizes you’ll actually use.
With both options: fill to half capacity, not full. A half-filled bag on a platform bed compresses flatter and more evenly than a stuffed bag. You’ll fit more bags under the bed by loading less into each one.
The Budget Starter Option
If you haven’t used vacuum storage bags before and want to test the concept before buying a 10-pack, the ZOBER Vacuum Storage Bags Variety Pack is the right starting point. The per-bag cost is the lowest of the options here, the variety of sizes covers most use cases, and the quality is consistent enough to tell you whether this storage method works for your specific situation. If you test it and the bags fit your clearance and stay sealed, then upgrade to a larger pack for the full seasonal rotation.
The anti-sell version of this advice: if you already own a set of vacuum bags from a previous move or previous attempt at seasonal storage, try the fold-flat packing method on those first before buying anything new. The issue is often technique, not bag quality.
Why Your Bag Stops Holding Vacuum (and How to Fix It)
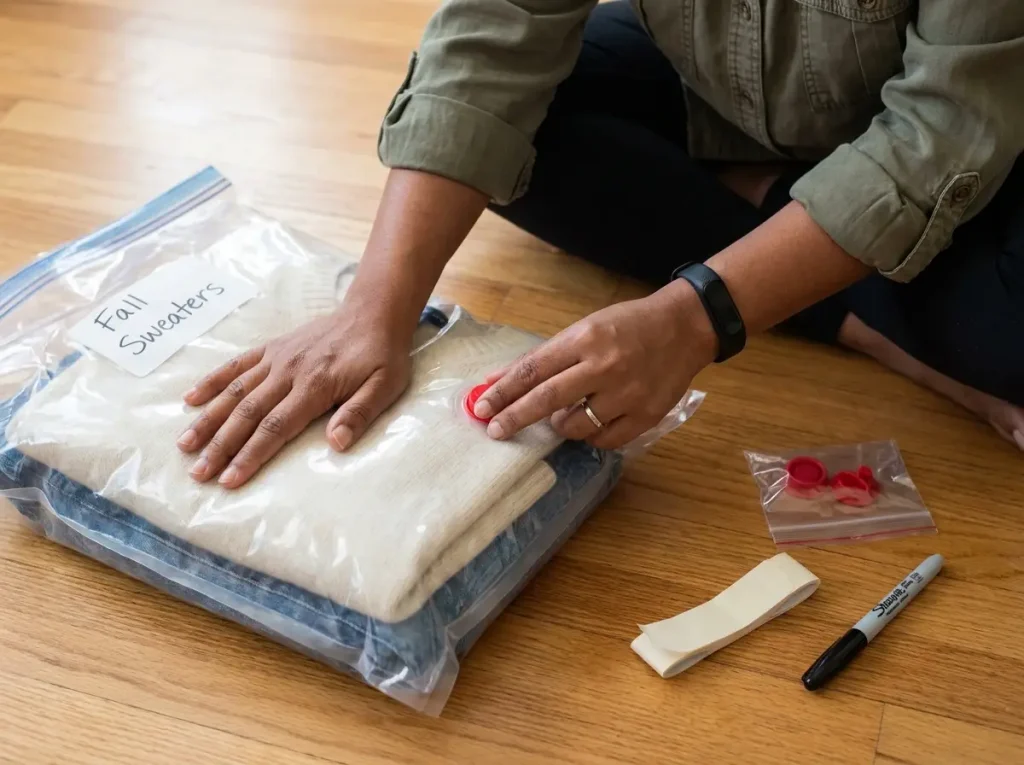
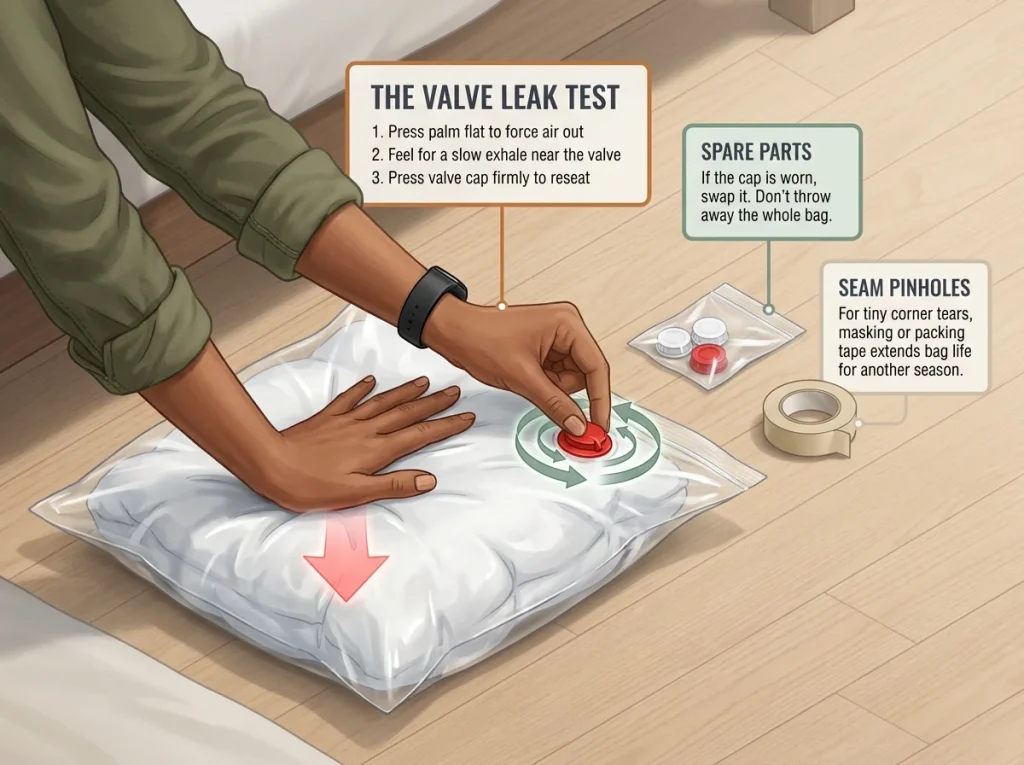
The Valve Leak Test (Do This Before Blaming the Bag)
The valve is almost always the culprit. Press both palms flat on the bag and hold them there for 10 seconds. If you feel a slow, steady exhale of air against your face when you lean in close, air is escaping.
Now press specifically around the valve rim. If the air leak stops when you push the valve cap in more firmly, the cap wasn’t fully seated — snap it on tighter and you’re done.
If pressing the cap doesn’t stop the exhale, the valve gasket may be worn. Most SpaceSaver and Ziploc Space Bag sets include a few spare valve caps in the pack. Swap it out. A replacement valve is less than the cost of a new bag.
If the leak isn’t from the valve, run your fingers slowly around the bag seam. Tiny pinholes at seam corners are the second most common failure point. A small piece of packing tape over a seam pinhole lasts through several more seasonal cycles. Only replace the bag when the seal itself fails along a long section — that’s structural.
Preventing Bed Slat Punctures
Bed slat punctures are the slow-fail version. The bag holds vacuum for three to four weeks, then gradually re-inflates over the following month. You check the valve — it’s fine. You check the seams — fine.
You can’t find the leak because it’s a hairline puncture on the bottom of the bag where a slat edge contacts the plastic repeatedly every time someone moves on the mattress.
The fix is simple and permanent: lay a yoga mat cut to width, a piece of corrugated cardboard, or a cheap felt furniture pad flat on the slats before you slide the bags in. It creates a smooth, continuous surface with no exposed edges. The bags sit on it and never contact the slats directly.
If you’re dealing with a metal frame that has welded crossbars rather than removable slats, run your hand under the frame and feel for any sharp edges before you put bags in. If you find one, wrap it with a strip of foam pipe insulation (from any hardware store) and you’re done.
The Seasonal Re-Check Routine
The most effective maintenance system for vacuum storage bags under a bed is a two-check-per-year schedule: once in spring when you swap winter clothes for summer, and once in fall when you do the reverse. At each check, pull every bag out, press it to test for re-inflation, and reseal any that have lost compression.
If a bag consistently re-inflates within three weeks of resealing, replace the valve before you replace the bag. Valve failure is a mechanical issue, not a bag quality issue — most brands sell replacement valves separately.
Pairing your bag check with your seasonal wardrobe rotation is the easiest way to make it stick. When you’re already pulling out the summer clothes anyway, checking the winter bags as you replace them takes five minutes. It’s part of the same physical process. The seasonal rotation system covered in Why Your Seasonal Closet Rotation Fails Every Time explains the broader rotation cadence — the bag check fits naturally at the same points.
Conclusion
Three things determine whether your vacuum storage bags actually work under a bed for a full season. First: only put cotton, polyester, and fleece in them — wool and down don’t recover from long-term compression. Second: measure your bed clearance before you buy, fill bags to 60–70% capacity max, and fold flat before sealing. Third: check the valve before you blame the bag — most re-inflation problems are a loose valve cap or a slat puncture, both of which take two minutes to fix.
Three-month check: pull out one bag and press it. If it’s still flat, your system is working. If it’s re-inflated, run the valve test before deciding anything.
Start with one bag, your most expendable cotton sweaters, and whatever bed frame you have right now. That test costs you nothing and tells you whether the system works in your specific space before you buy a 10-pack.
Q1 Can you use vacuum storage bags on a platform bed?
Yes, but you need the right approach. Platform beds typically have 4 to 7 inches of clearance, which leaves a tight margin for compressed bags. Use medium or large bags (not jumbo), fill them to half capacity with lightweight fabrics only, and use a hand pump for controlled compression. Bags sealed with a household vacuum and stuffed with winter coats will usually be too thick for platform bed clearance.
Q2 Do vacuum storage bags ruin wool or down?
Long-term storage in vacuum bags permanently damages wool and down by collapsing their fiber structure. Short-term compression under 4 weeks is generally safe, but compression for a full season — 3 to 6 months — will flatten wool fibers and crush down clusters in ways that don’t fully recover. Store wool and down in breathable fabric bags or cedar-lined containers instead.
Q3 How long do vacuum storage bags stay compressed?
Properly sealed bags with cotton and synthetic fabrics can stay compressed for 6 months or longer without re-inflation. The main failure causes are valve leaks (usually a loose cap), seam pinholes from sharp bed slat edges, and heat cycling that slowly releases trapped air. A seasonal re-check at spring and fall swap prevents most issues.
Q4 Why do my vacuum storage bags keep re-inflating?
The most common cause is a loose or worn valve cap — press around the valve rim and reseat the cap or replace it with a spare. The second most common cause is a hairline puncture from a bed slat edge; lay a yoga mat or cardboard on the slats before storing bags on them. If neither fixes it, check the seam corners for pinholes.
Q5 What is the best vacuum storage bag for under a bed?
It depends on your bed clearance. For metal frames with 7 or more inches of clearance, a variety-size 10-pack gives you the most flexibility for a full seasonal swap. For platform beds under 6 inches, hand-pump compatible bags in medium to large sizes give you more control over final thickness. In both cases, fill bags to 60–70% capacity and fold items flat before sealing — bag quality matters less than packing technique.
Disclaimer: ClutterlessNest is a participant in the Amazon Services LLC Associates Program. As an Amazon Associate we earn from qualifying purchases. This article may contain affiliate links — if you buy through them, we may earn a small commission at no extra cost to you. We only recommend products we have tested or genuinely believe in.