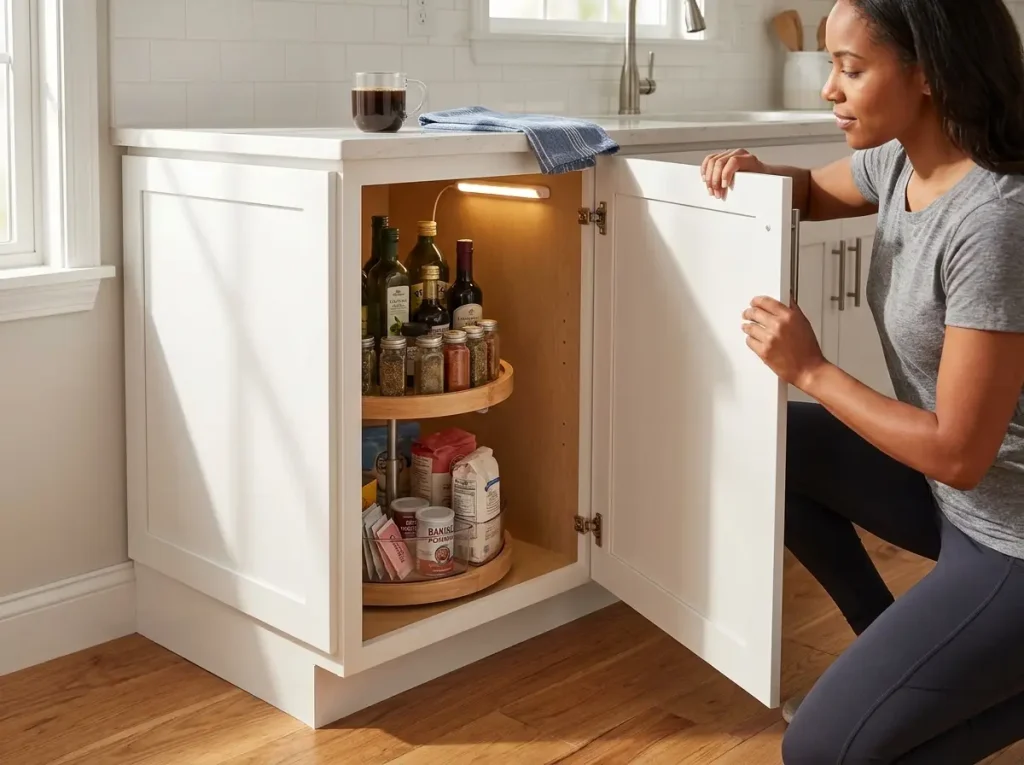
Every kitchen has one cabinet that eats things. You open it, shove something in, and three months later you find a can of coconut milk you forgot you bought — wedged behind a slow cooker you haven’t touched since Thanksgiving. That cabinet is the corner cabinet, and the reason it’s a mess has nothing to do with your habits. It’s geometry.
The space extends diagonally into the corner where your arm physically can’t reach, creating a dead zone that swallows everything you put back there. I’ve organized dozens of kitchens and the corner cabinet is always the last one anyone tackles — because most solutions that work in normal cabinets fail here. This guide covers what actually works, what doesn’t, and how to keep a corner cabinet organized past the first week.
Quick Answer: Fix your corner cabinet dead space with these steps:
- Measure the diagonal depth — most corner cabinets run 24-36 inches deep on the diagonal
- Install a turntable or lazy susan sized 2-4 inches smaller than your shelf depth
- Add wedge bins on the turntable to keep small items from sliding
- Light the back with an adhesive LED motion sensor bar
- Run a five-minute monthly reset — pull everything forward, toss expired items, wipe the shelf
Why Corner Cabinets Are the Hardest Spot in Your Kitchen
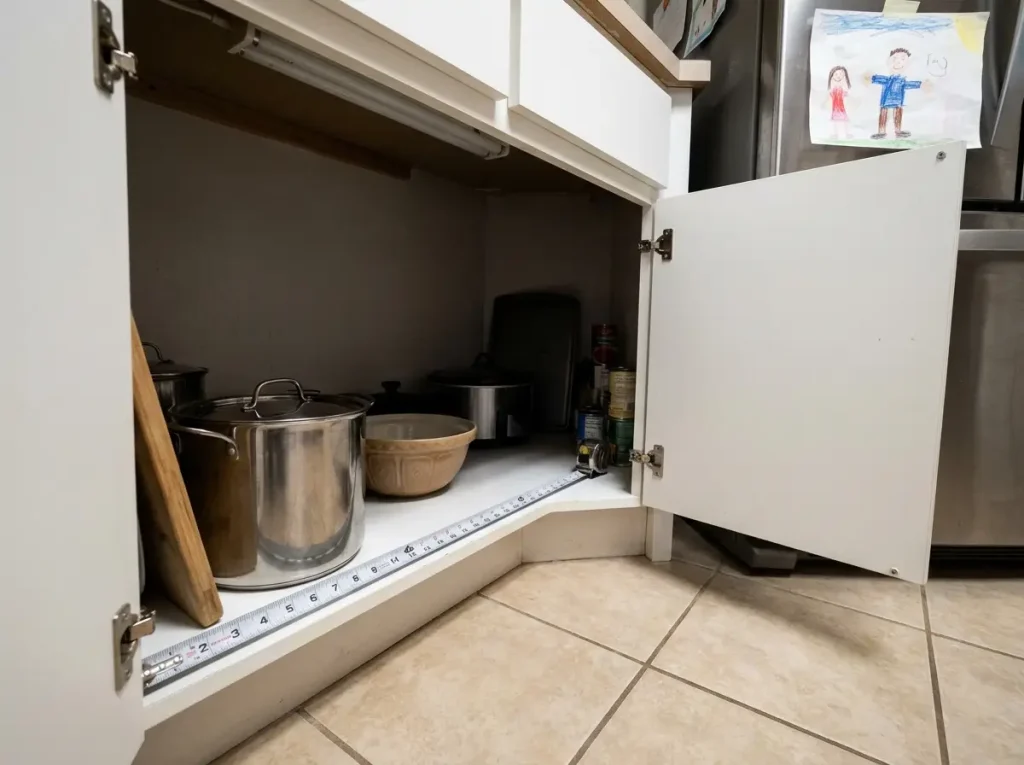
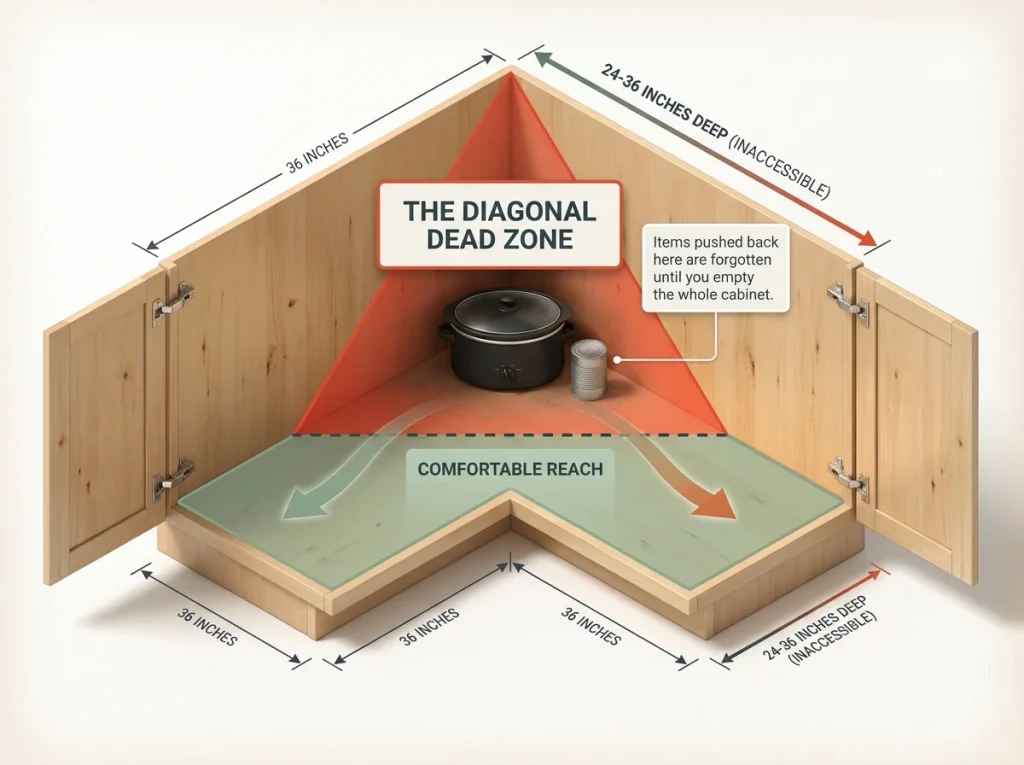
The problem with corner cabinets isn’t clutter. It’s that the usable space and the total space are two completely different numbers. A standard base corner cabinet is roughly 36 inches wide on each face — but the storage area extends diagonally into the corner, creating a depth of 24 to 36 inches depending on the configuration.
Your arm reaches about 12-15 inches comfortably. Per the NKBA kitchen planning guidelines, corner cabinets require special attention because interior walls can’t accommodate a precise 90-degree corner — the cabinet either has an angled back or sits away from the perpendicular wall, which adds even more hidden depth. That leaves a minimum of 9 inches of space you physically cannot access without crawling inside the cabinet.
This is the diagonal dead zone, and it’s the root cause of every corner cabinet organization problem. It’s not a depth issue like a deep kitchen cabinet — those are linear. You can fix a deep cabinet with pull-forward bins.
Corner cabinets have a dead zone that fans out in a triangle behind whatever you store in front. Items migrate back there over weeks, and once they’re gone, they’re gone until you empty the whole cabinet.
Upper vs. Lower Corner Cabinets
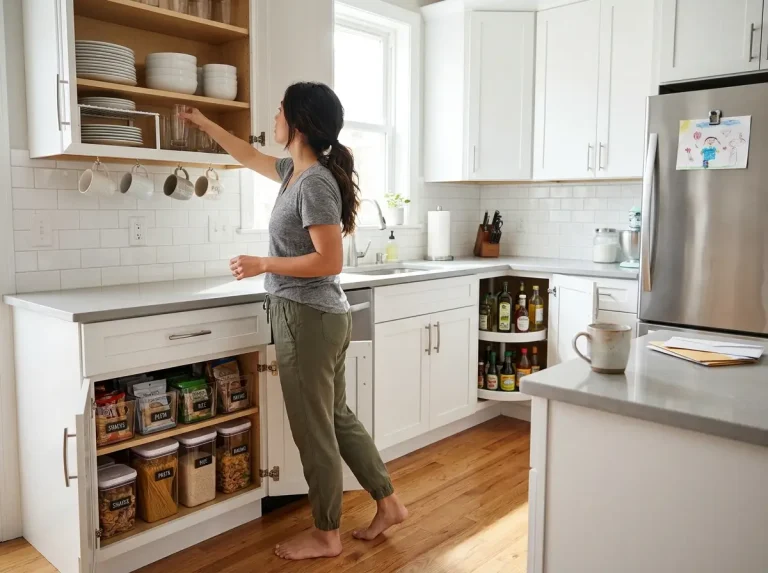
Upper and lower corner cabinets fail differently, and they need different fixes. Lower corner cabinets are usually blind corners — one cabinet face extends past the other, creating an L-shaped interior where the far side is completely hidden behind the adjacent cabinet. These are the ones that eat slow cookers and stockpots. The opening is narrow (typically 12-15 inches), but the interior can be 42 inches deep into the corner.
Upper corner cabinets are shallower (12 inches standard) but harder to see into because they’re above eye level. You’re reaching up and forward at the same time, which means anything pushed to the back becomes invisible. The fix for uppers is different — you need items that come to you (turntables) rather than shelves you pull toward you (pull-outs). We’ll cover both below.
What Makes Corner Cabinets Different from Deep Cabinets
If you’ve already organized your deep kitchen cabinets, you might think the same approach works here. It doesn’t. Deep cabinets are rectangular — the problem is strictly front-to-back. Pull-forward bins solve it because everything moves along one axis.
Corner cabinets have a problem on two axes: depth and width. Items don’t just get pushed back — they get pushed sideways into the hidden wing of the L-shape, or diagonally into the corner where no bin can follow.
The geometry also means standard shelf organizers don’t fit. A rectangular bin that fits a 24-inch deep cabinet will leave the diagonal corners completely empty. You need round solutions (turntables), pie-shaped solutions (wedge bins), or mechanical solutions (pull-outs and swing-outs) that work with the angular space instead of against it.
Turntables and Lazy Susans
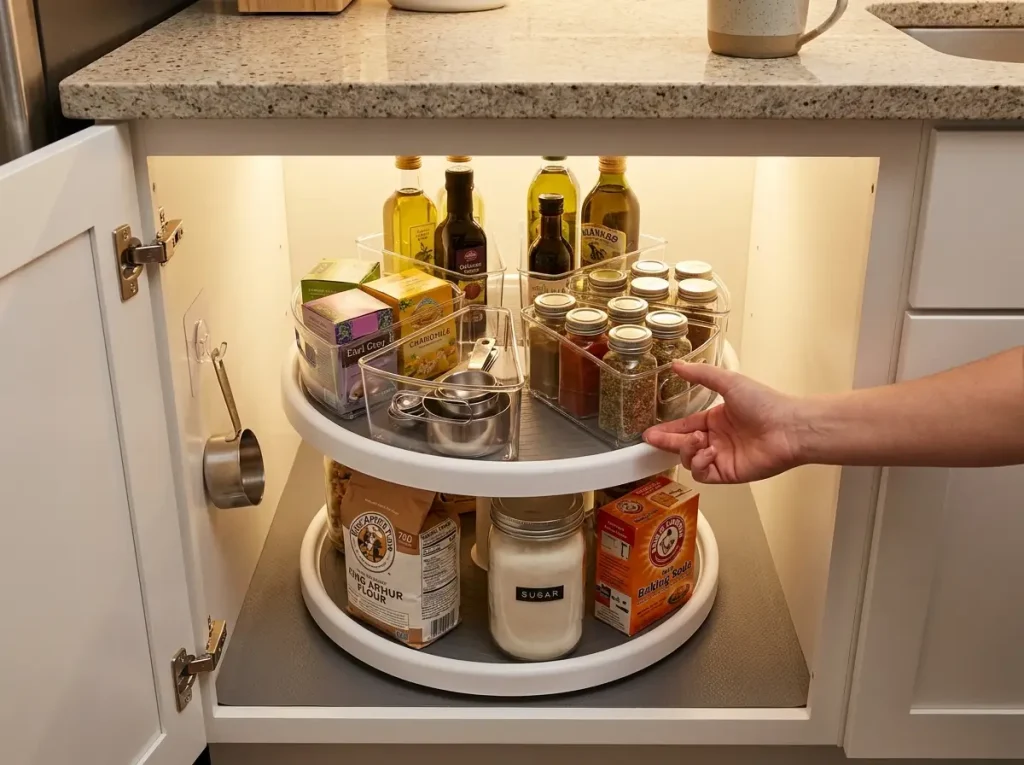
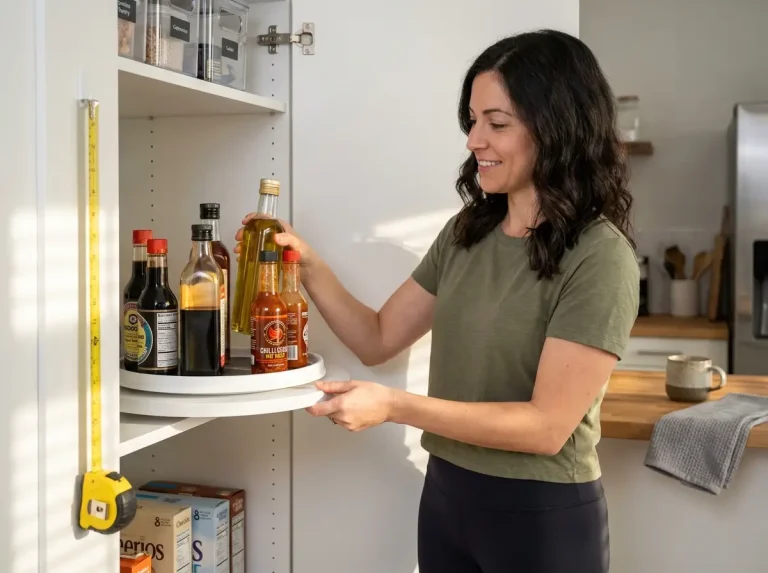
A turntable is the simplest corner cabinet fix because it turns a reach problem into a spin problem. Instead of reaching 30 inches into a diagonal dead zone, you spin the turntable and everything rotates to the front. No installation, no tools, no modification — you set it on the shelf and start loading it. For renters, this is the first thing to try.
The key is sizing. Measure your shelf depth from front to back wall, then subtract 2-4 inches. That’s your turntable diameter.
Too large and it catches on the cabinet walls when you spin. Too small and you waste the space you’re trying to reclaim.
For most standard corner base cabinets, a 12-inch turntable fits well. The Copco Non-Skid Turntable 12-inch has a non-skid base that actually stays put on shelf liner — most cheap turntables slide across the shelf when loaded, which defeats the purpose.
Pro tip: Put the heaviest items toward the center of the turntable and lighter items at the edges. This keeps it balanced and prevents it from seizing up when you spin it with cooking oil bottles stacked on one side.
Single-Tier vs. Two-Tier Turntables
A single-tier turntable works for one category of items — cooking oils, spices, or condiments. But most corner cabinets have 14-18 inches of vertical space per shelf, and a single turntable only uses 4-6 inches of that height. You’re fixing the horizontal dead zone while creating a vertical one.
A two-tier turntable doubles your accessible space in the same footprint. The YouCopia Crazy Susan Two-Tier Turntable has an adjustable second tier, so you can fit tall bottles on the bottom and short jars on top. It costs noticeably more than a single-tier Copco, but if your corner cabinet is your main spice and oil storage, the vertical doubling pays for itself in reclaimed space. If budget is tight, a single Copco at a fraction of the price gets you 80% of the accessibility — you just lose the second tier.
Wedge Bins on Turntables
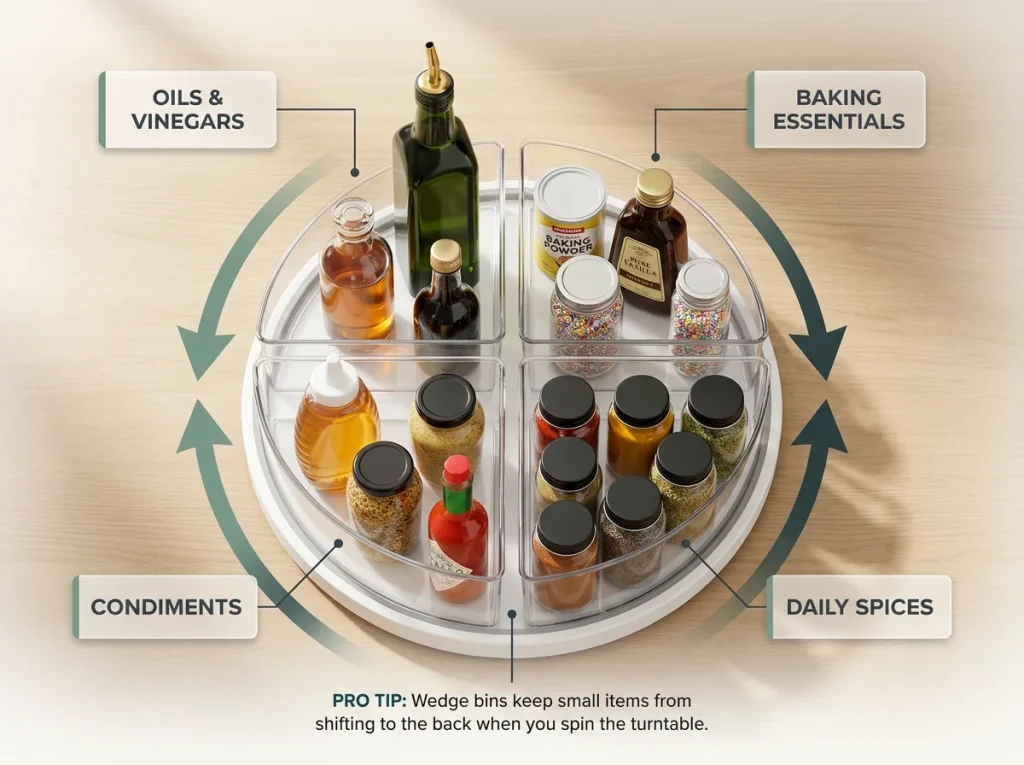
Here’s the problem nobody tells you about turntables: small items slide. You spin the turntable and three spice jars and a bottle of vanilla extract shift to the back edge. Within a week, the turntable has a ring of jumbled items around the perimeter and an empty center. The fix is wedge bins — pie-shaped containers that divide the turntable into sections.
The iDesign Linus Lazy Susan Wedge Organizer Bin fits standard turntables and creates four defined sections. One for oils, one for spices, one for baking extracts, one for condiments — whatever categories match your cooking. The walls keep items upright during rotation and the wedge shape means no wasted space between bins. If you’ve used turntables in your pantry and had the sliding problem, this is the same fix.
Pull-Out and Swing-Out Systems
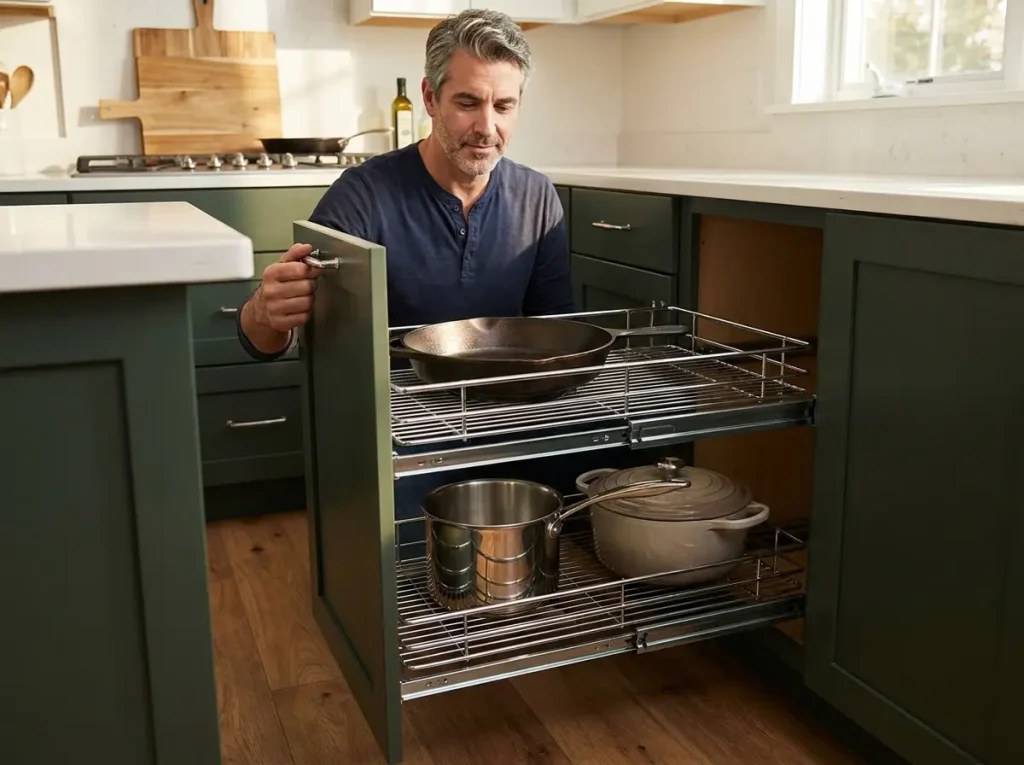
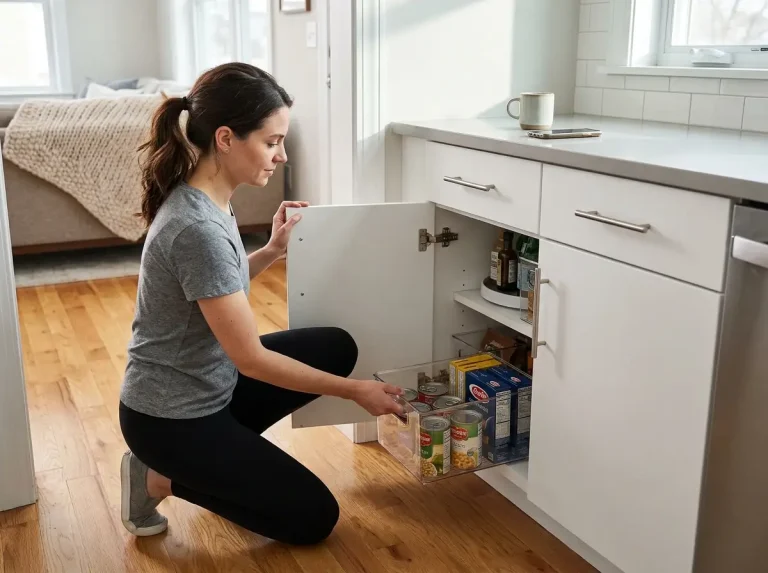
Turntables work for bottles, jars, and small containers. They don’t work for pots, pans, baking sheets, or anything that’s heavy, oddly shaped, or too tall to spin. For those items, you need a pull-out or swing-out system — a shelf or rack mounted on slides that pulls the contents out of the cabinet and into the kitchen where you can actually reach them.
Traditional pull-outs require screwing into the cabinet frame. They work well, they’re rated for heavy loads (most handle 30-50 pounds per shelf), and they transform a blind corner cabinet into something that functions like a normal drawer. If you own your home and plan to stay, a chrome pull-out shelf system is the permanent fix.
How Pull-Out Systems Work in Corner Cabinets
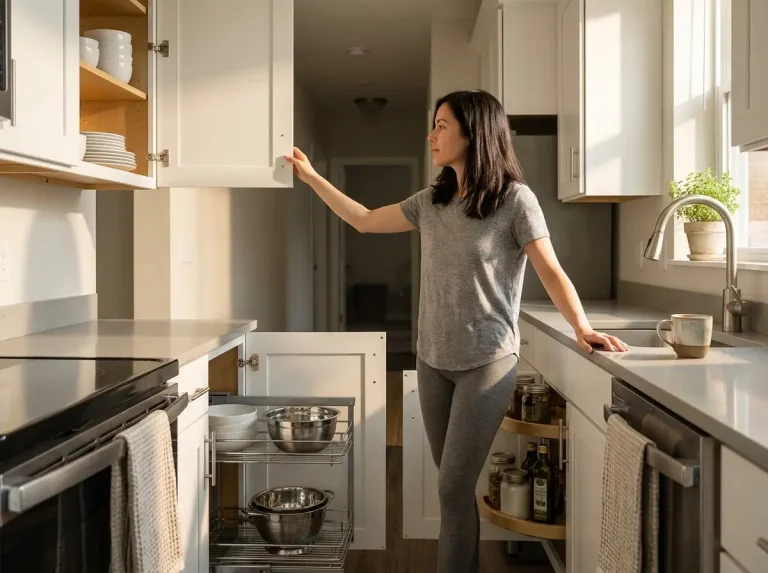
A corner cabinet pull-out is different from a standard drawer slide. The shelf pivots and swings outward through the narrow cabinet opening, then extends forward on rails. This two-motion system — swing then pull — is what lets a shelf that’s wider than the cabinet opening get in and out. It’s the same principle as a lazy susan, but for heavy items that can’t sit on a spinning platform.
Most systems come with two shelves on independent slides, so you can pull out just the top or just the bottom. This is where you put the cast iron, the Dutch oven, the stockpot — items that are too heavy for turntables and too deep for regular shelves. A good pull-out system turns the worst cabinet in your kitchen into one of the most accessible.
Renter-Friendly Pull-Out Alternatives
If you can’t drill into your cabinets, traditional pull-outs are off the table. But you’re not stuck with a turntable as your only option. The Adhesive Pull-Out Cabinet Organizer (expandable 12-20″W) mounts with heavy-duty adhesive strips instead of screws. It won’t handle a cast iron skillet — the adhesive has a weight limit — but for moderate loads like mixing bowls, lightweight pans, and baking supplies, it creates a functional pull-out shelf without any permanent modification.
Pro tip: Before mounting any adhesive organizer, clean the cabinet surface with rubbing alcohol and let it dry completely. Most adhesive failures happen because of dust or grease on the mounting surface, not because the adhesive itself is weak.
The other renter option is to skip the pull-out entirely and combine a large turntable with strategic item placement. Heavy items go on the turntable (where they anchor it in place). Lightweight items go in bins behind the turntable.
You won’t be able to reach the back bins without moving the turntable, but at least everything is categorized and findable. This isn’t the ideal setup — a real pull-out is better — but it’s a zero-modification approach that works.
Bins, Baskets, and the Round-Items Trick
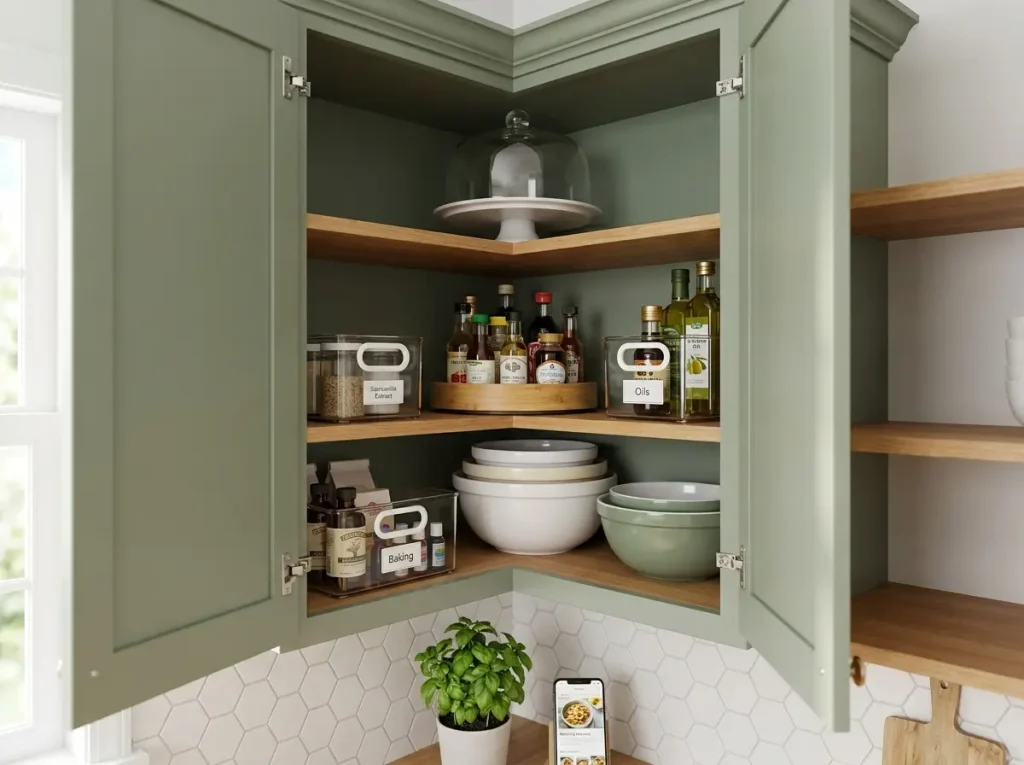
Most organization advice tells you to use bins. That advice fails in corner cabinets because rectangular bins leave triangular gaps in every corner. A 10×6 bin in a diagonal space wastes the wedge-shaped zones on either side. The bins end up floating in the middle of the shelf with dead space around them — the exact problem you started with.
The fix is matching container shapes to cabinet geometry. Round items fit corner spaces better than rectangular ones because circles don’t leave angular gaps. A nested set of mixing bowls, a round colander, a turntable — these all use the diagonal space naturally. Rectangular bins work for the straight sections of the L-shape near the cabinet opening, but the corner itself needs round solutions.
Round Items in Square Corners
This sounds counterintuitive, but round items are the most space-efficient things you can store in a corner cabinet. A mixing bowl set nested together fills the diagonal corner with almost no wasted space. A turntable does the same for small items. Even a stockpot — round, tall, and deep — sits perfectly in the back corner where nothing rectangular would fit without leaving gaps.
Store your round items in the deep corner first. Then fill the straight sections near the opening with rectangular bins or baskets for items you grab frequently. This two-zone approach — round items deep, flat bins up front — uses both the angular and linear spaces in the cabinet without fighting the geometry.
Clear Bins and Labeling
In any deep cabinet, you need to see what’s inside a bin without pulling it out. Opaque bins in a corner cabinet turn organization into a guessing game — you end up pulling out three bins to find the one with the measuring cups. Use clear bins for the front-accessible sections so you can identify contents at a glance.
Label the bins even if they’re clear. You know what’s in them now, but your partner, your kids, or future-you at 11pm won’t. A simple printed label on the front face of each bin (“baking,” “oils,” “snacks”) takes 30 seconds per bin and saves you from the slow erosion of every item ending up in whichever bin is closest. The system breaks the moment someone doesn’t know where something goes — and a label removes that excuse.
Light the Dead Zone
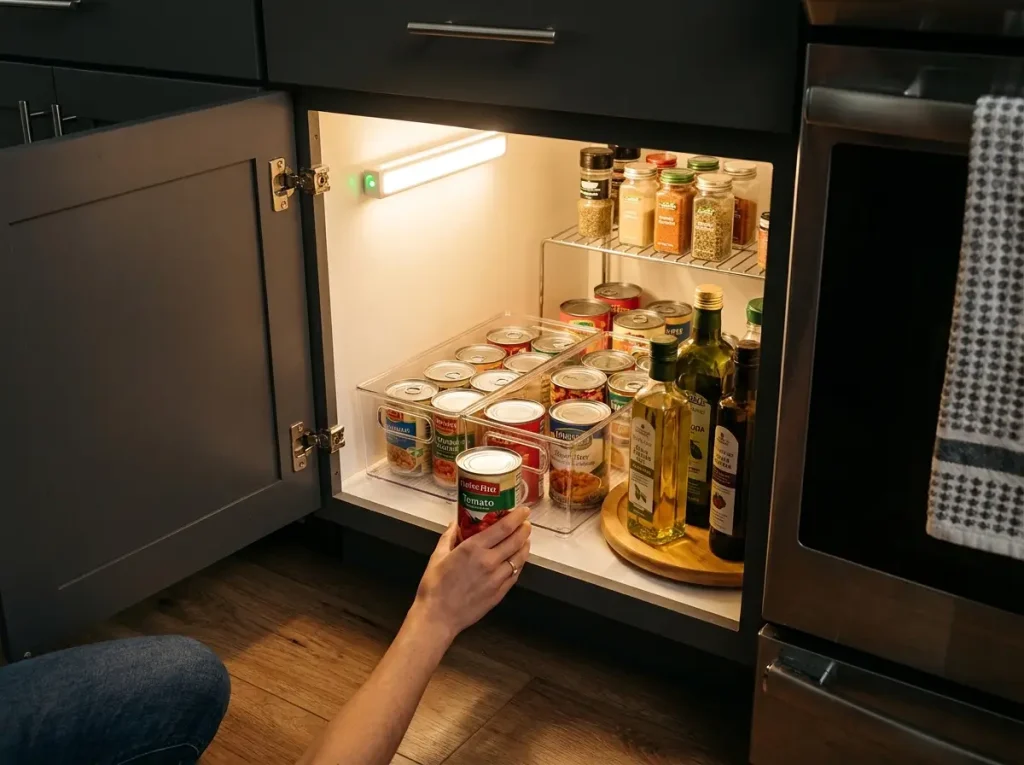
You can organize a corner cabinet perfectly and still lose things if you can’t see past the first 12 inches. Standard overhead kitchen lighting doesn’t reach into cabinet interiors — the shelf above blocks it, and the door creates a shadow when open. The deep back corner of a corner cabinet might as well be a cave. Lighting is the fix that makes every other fix work.
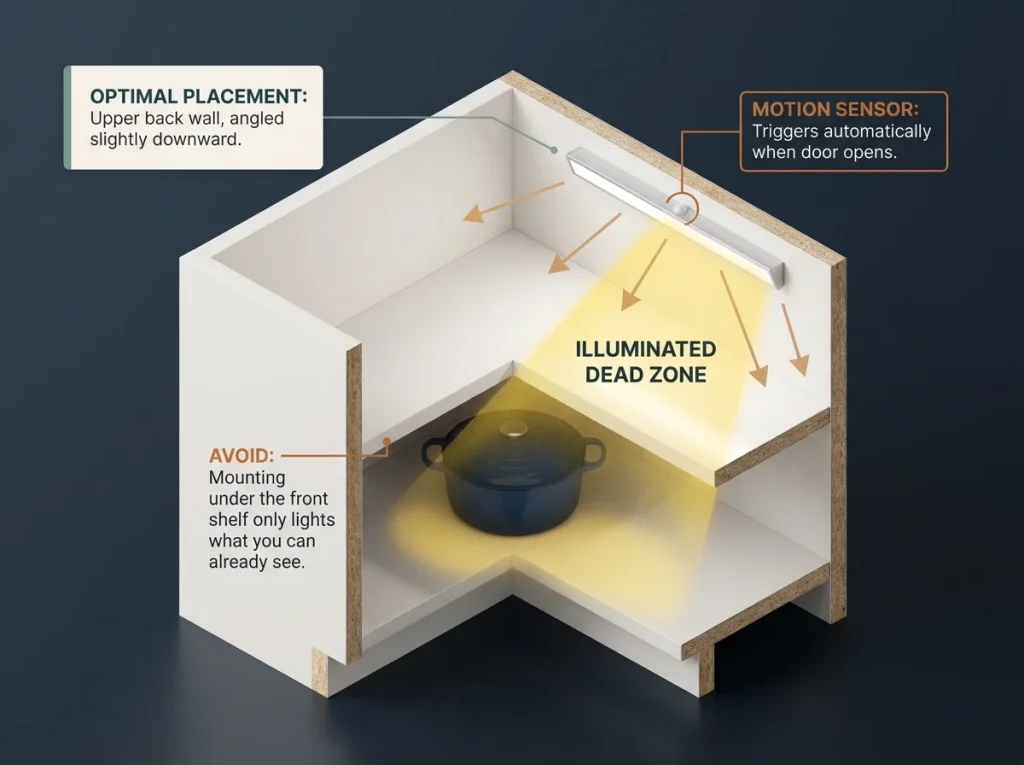
The Rechargeable LED Motion Sensor Light Bar (2-pack) mounts with adhesive on the underside of the shelf above or on the back wall of the cabinet. When you open the door, the motion sensor triggers and the interior lights up. You can see the turntable, the bins, the items pushed to the back — everything.
No wiring, no batteries to replace monthly, just charge it via USB every few months. For renters, this is completely non-invasive and removes cleanly.
Pro tip: Mount the light bar on the upper back wall of the cabinet, angled slightly downward. This position illuminates the entire shelf depth without creating glare. If you mount it on the underside of the shelf above, it only lights the front half.
Where to Place the Light
Placement matters more than brightness. A light on the front edge of the cabinet illuminates what you can already see. A light on the back wall illuminates the dead zone — the part you actually need help with.
For L-shaped blind corner cabinets, mount one light bar on the back wall of the deeper section. For standard corner cabinets, one bar centered on the back wall covers the full diagonal.
If you have a two-tier setup (turntable on bottom, items on a shelf above), you may need two light bars — one for each level. The two-pack is built for this. Mount the first bar lighting the lower turntable area and the second lighting the upper shelf. The motion sensors trigger independently, so opening the door lights both levels.
The Monthly Corner Cabinet Reset

Every organization system decays. Items migrate to the wrong bin. Expired condiments pile up behind the turntable. The wedge bins get crooked.
A corner cabinet resets faster than most cabinets because the deep spaces hide problems — you don’t notice the expired can of tomato paste until you pull everything out. This is why a monthly reset matters more here than anywhere else in the kitchen.
The reset takes five minutes. Not a full reorganization — just a maintenance check that keeps the system working. This is the step that separates an organized cabinet from a cabinet that looked organized for one Instagram photo.
The Five-Minute Reset Process
Pull everything off the turntable and out of the bins. Wipe the shelf liner — crumbs and sticky spills are the main reason turntables stop spinning smoothly. Check expiration dates on anything in the back.
Toss what’s expired, move what’s close to expiring to the front where you’ll actually use it. Put everything back in its assigned zone. Spin the turntable to make sure it rotates freely. Done.
If you find items that don’t belong in this cabinet — the random bag clip, the birthday candle, the takeout menu — move them now. Every item without a designated spot is the beginning of clutter returning. Your kitchen cabinets work best when each cabinet has a defined role and items stay in their zone.
What to Watch For
Three months in, check whether your zones still match how you actually cook. You might have put baking supplies in the corner cabinet in January, but if you haven’t baked since February, that space is better used for items you reach for daily. The turntable should hold your most-used items — if you’re spinning it twice a day for cooking oil but the oil is behind three things you never touch, rearrange.
Also check the adhesive on your LED light bar and any adhesive-mounted organizers. Most adhesive products hold for 6-12 months in kitchen conditions (heat, humidity, grease film). If anything feels loose, clean the surface and reapply with fresh adhesive strips before it falls and takes everything with it. This is a two-minute preventive step that avoids a mess at 2 AM when the organizer finally gives way.
If your under-sink cabinet and pantry are also on a monthly reset schedule, batch all three together. One 15-minute session for all the problem cabinets in the kitchen is easier to maintain than three separate reset days you’ll forget.
Conclusion
Corner cabinets fail because of geometry, not habits. Three things fix them: bring items to you with turntables and pull-outs instead of reaching into the dead zone, light the back so you can see what’s there, and run a five-minute monthly reset so the system doesn’t silently decay.
Start with the cabinet that frustrates you most — the one you avoid opening. Measure the diagonal depth, install one turntable with wedge bins, and add a light bar. That alone reclaims 60-70% of the dead space.
Three months from now, check whether your turntable zones still match your cooking habits and whether the adhesive mounts are holding. Adjust the zones if they don’t match — the system should fit your life, not the other way around.
Q1 What is the best way to organize a corner kitchen cabinet?
Install a turntable sized 2-4 inches smaller than your shelf depth, add wedge bins to prevent items from sliding, and mount an adhesive LED light bar on the back wall. Run a monthly five-minute reset to keep items from migrating into the dead zone.
Q2 How do you organize a blind corner cabinet without a lazy susan?
Use an adhesive pull-out shelf for heavy items or a two-zone approach — round items in the deep corner, rectangular bins near the opening. Light the back wall with a motion sensor LED bar so you can see everything without reaching blindly.
Q3 How do I maximize corner cabinet space?
The biggest gain comes from using the vertical space. A two-tier turntable doubles your accessible storage in one footprint. Nest round items (mixing bowls, colanders) in the diagonal corner where rectangular bins waste space. Add a shelf riser if your cabinet has more than 16 inches of vertical clearance.
Q4 Are corner cabinet pull-outs worth it?
For homeowners, yes — a pull-out transforms a blind corner into a functional drawer and handles heavy cookware that turntables can’t. For renters, adhesive-mounted pull-outs work for lighter items. If you’re not sure, start with a turntable — it’s cheaper, requires zero installation, and solves the access problem for most items.
Q5 How often should you reorganize a corner cabinet?
A full reorganization isn’t needed if you run a monthly five-minute reset. Pull everything out, wipe the shelf, check expiration dates, return items to their zones. Every three months, evaluate whether your category zones still match how you cook — swap zones if your habits have changed.
Disclaimer: ClutterlessNest is a participant in the Amazon Services LLC Associates Program. As an Amazon Associate we earn from qualifying purchases. This article may contain affiliate links — if you buy through them, we may earn a small commission at no extra cost to you. We only recommend products we have tested or genuinely believe in.