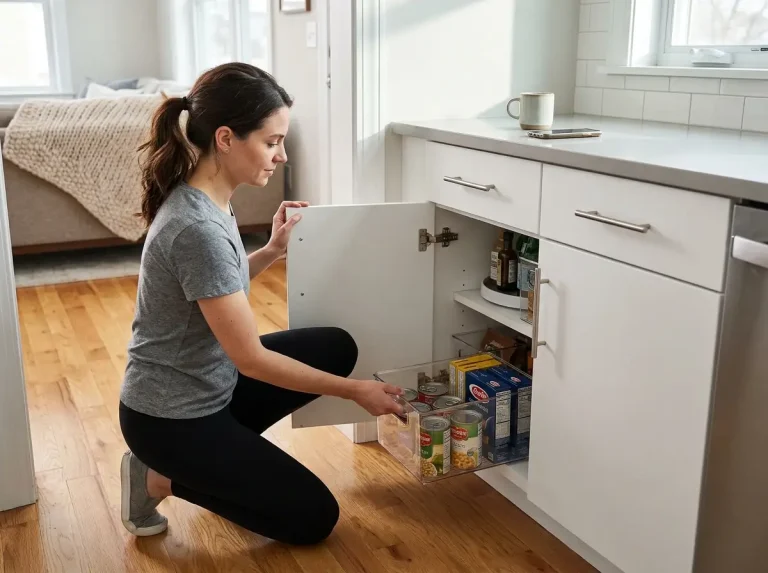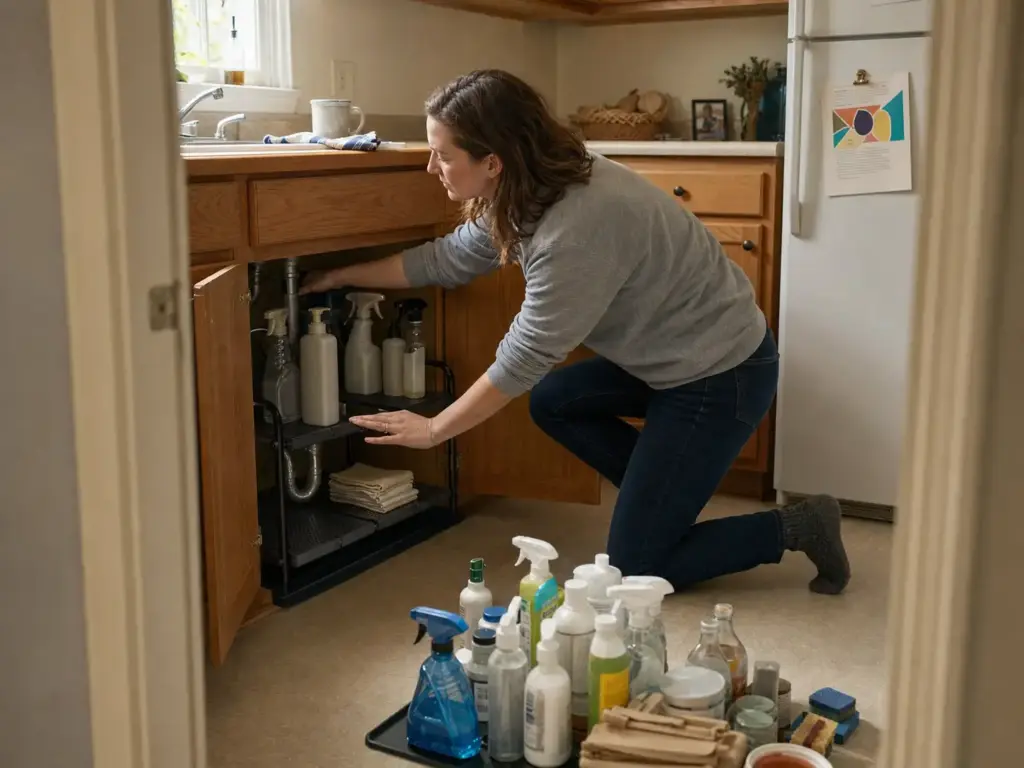
You open the under sink cabinet and two problems greet you at once. There’s the obvious one: cleaning supplies tipped over, a bag of bags, three sponges you don’t remember buying. Then there’s the one nobody warns you about, which is the soft damp patch on the cabinet floor from a drip that started sometime around last spring.
Both problems trace back to the same root cause, and it isn’t laziness. Nobody ever measured around the pipes, so nothing ever fit, so everything just got shoved in and forgotten. Good under sink kitchen organization starts with two numbers most people never take, and this guide walks you through the measuring, the zoning, the product fit, the leak barrier, the renter workarounds, and the monthly reset that keeps all of it from sliding back.
Quick Answer
Organize under a kitchen sink in six steps, in this order:
- Empty the cabinet completely and wipe the floor dry.
- Measure vertical clearance from cabinet floor to the lowest point of the P-trap or disposal.
- Measure how far the trap sticks out from the back wall, plus pipe-assembly width.
- Lay a trimmable waterproof mat down before anything goes back in.
- Split what returns into a daily-use zone at the front and a backstock zone at the back.
- Reset for five minutes monthly, checking the trap for dampness while you’re down there.
Why Under Sink Kitchen Organization Fails Where Other Cabinets Don’t
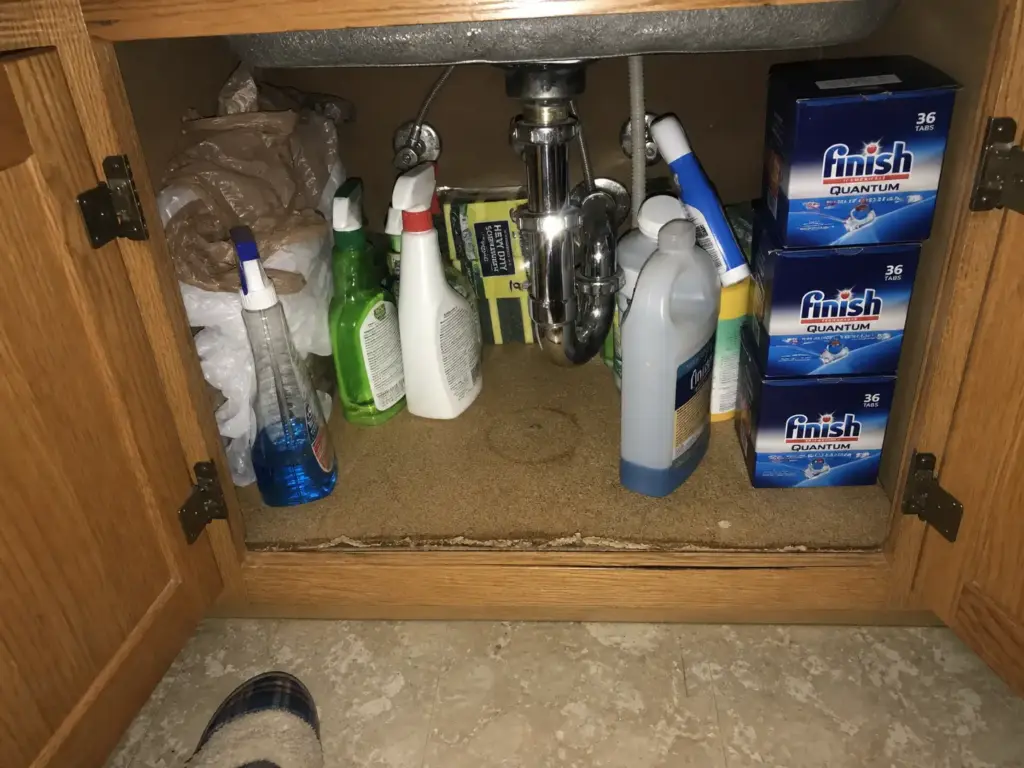
Almost everyone treats this as a normal cabinet that happens to have an inconvenient pipe running through it. It’s the reverse. This is a plumbing chase that happens to have some leftover storage around the edges, and once you flip that framing, every decision after it changes.
The zone-by-zone method that works for the rest of your kitchen cabinets assumes an empty rectangle you can divide however you like. Here, the rectangle comes pre-divided by a plumbing obstruction you can’t move.
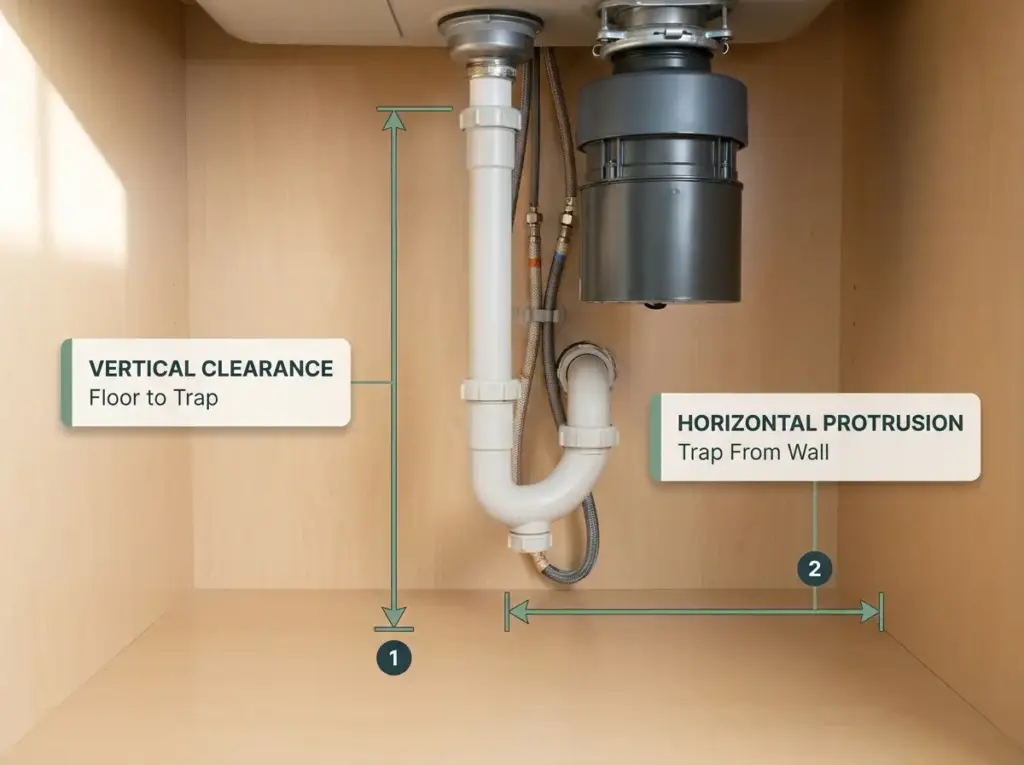
Start with the horizontal math, because that’s the part people underestimate first. A standard P-trap extends 3 to 4 inches out from the back wall, and adding a garbage disposal grows the depth eaten by plumbing to somewhere in the 6 to 8 inch range.
If your cabinet depth offers less than 12 inches of usable interior, the trap alone has claimed the back third before you’ve set down a single bottle. That’s not an obstacle you organize around with a clever bin. That’s a wall.
The vertical math is worse, because it’s the number that decides whether an organizer physically enters the cabinet at all. Vertical clearance under a kitchen sink typically runs 8 to 10 inches from the cabinet floor to the lowest point of the trap or disposal. A garbage disposal on its own can occupy 9 to 12 inches of that column. So the “tall” cabinet you’re looking at may offer less usable height than a bathroom drawer.
Here’s the detail that explains a failure almost nobody names correctly. Kitchen drains run 1.5 to 2 inches in diameter; bathroom vanity drains run 1.25 to 1.5 inches. The whole assembly under a kitchen sink is built at a bigger scale, whether you have a single bowl sink or a double basin sink, which is the root reason kitchen clearance requirements run larger than bathroom ones.
This is why the organizer that fit beautifully under your bathroom vanity, or under your friend’s, arrives at your kitchen sink and simply will not go in. It wasn’t a defective product. It was designed for smaller plumbing.
Which brings us to the failure that repeats itself in under-sink threads and product reviews with almost comic consistency: someone buys the organizer first, discovers it doesn’t clear the drain assembly, and then hammers, bends, or partially disassembles the unit to force it in. Sometimes that works. It also means the thing is now sitting flush against a pipe joint, which matters more than it sounds like it does.
And there’s a second failure mode neither of the big competing guides on this topic mentions at all. This is the highest-humidity, highest-leak-risk cabinet in your home, which makes moisture resistance a real filter on what belongs in here. The disposal, the supply lines, and the drain trap all live in this one box.
Meanwhile most under-sink cabinet floors are MDF or particleboard, which swells and then delaminates on contact with standing water. In other words, the cabinet floor itself is usually the weak point, not the stuff you’re storing on top of it. Everywhere else in the kitchen, a failed system means clutter. Here it means damage.
If your cabinet already smells faintly musty when you open the door, stop organizing and investigate first. That smell is almost always damp particleboard, and no bin arrangement fixes it. Dry the cabinet out completely before you build anything on top of it.
How to Measure Pipe Clearance Before You Buy Anything
“Measure width, depth, height” is the advice every guide gives, and it’s a big part of why people still buy the wrong thing. Those three numbers describe an empty box. Your cabinet is not an empty box. It has a pipe stack standing in the middle of it, and two extra numbers are what actually decide whether a product fits.
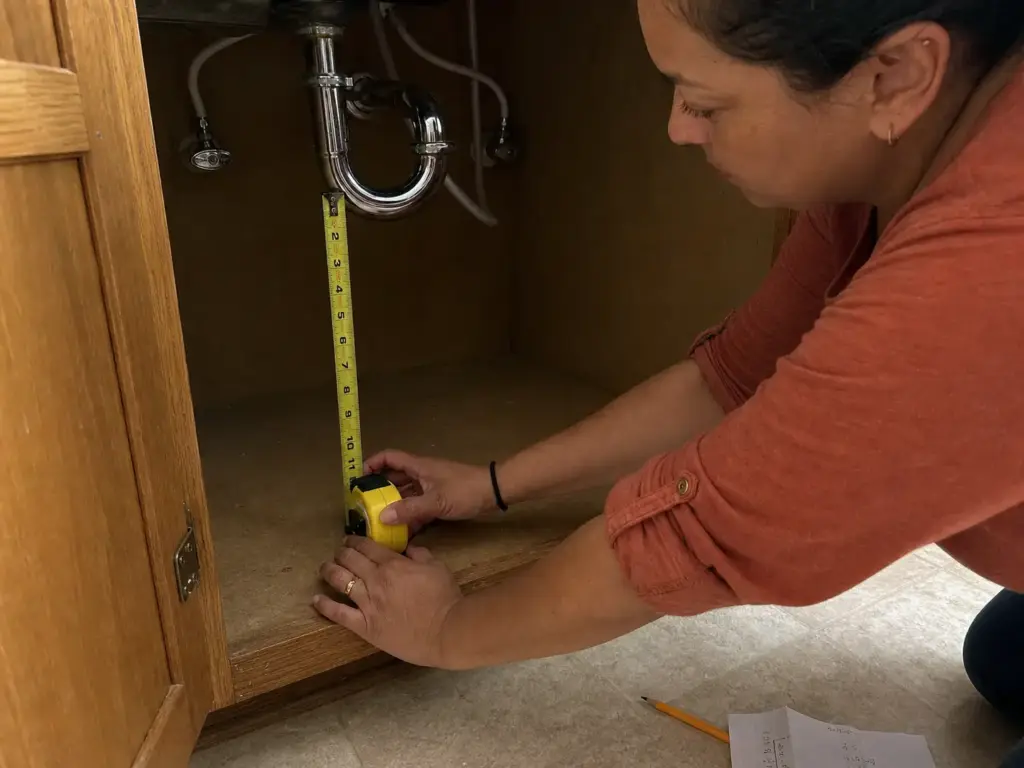
Measuring the cabinet runs in four steps and takes about ten minutes. First, clear the cabinet completely. Not mostly. Completely, down to the bare floor, because you cannot get a tape measure to the base of the trap with a bucket of sponges in the way. Second, measure vertical clearance: floor of the cabinet to the lowest point of the P-trap or the bottom of the disposal, whichever hangs lower.
Third, measure horizontal protrusion: how far the trap sticks out from the back wall, plus the total width of the pipe assembly. Fourth, test-fit with the doors closed before you commit to keeping anything. A unit that fits the interior but blocks the door hinge is a return.
Those middle two numbers are the whole game. Write them on a sticky note and shop against them. Vertical clearance and horizontal protrusion are the two specs that determine fit, and they’re the two nobody publishes on a product page, which is why you have to carry them yourself.
For context on what you’re zoning inside of: standard kitchen sink base cabinets run 30 to 36 inches in cabinet width, roughly 24 inches deep, with a pre-countertop cabinet height of 34.5 inches. Most under-sink organizers on the market are 11 to 20 inch expandable units, sized on the assumption that they’ll sit beside a centered drain in a cabinet of that class. Notice the assumption baked into that sentence.
One rule that isn’t about fit at all: leave 2 to 3 inches of clearance on either side of the drain assembly. This one isn’t a preference. Plumbing codes require enough clearance around the trap for cleanout access, which is why that side gap matters more than it looks like it should. Bins packed flush against the pipe stack mean that the day something drips, you or your landlord’s plumber has to unload the entire cabinet before a wrench can even get in there. That’s an annoyance on a Tuesday and a small disaster on a Sunday night.
I used to treat the width spec as the primary filter when recommending under-sink units. Enough “it didn’t fit and I had to disassemble it” reports in organizing threads changed my mind: the spec that saves people is an adjustable organizer with reversible or expandable mounting, not a particular width.
Most people assume their drain is centered. Off-center drains are common, especially with a disposal retrofit, and a product that can only mount one way has a coin-flip chance of being wrong for your cabinet. It’s the same measure-before-you-buy discipline that decides whether a lazy susan fits a pantry shelf, applied to a harder problem. A turntable is actually the clearest example of why, since the one thing it can’t survive is a pipe interrupting its rotation.
The Daily-Use Zone and the Backstock Zone
Under-sink cabinets revert faster than any other cabinet in the kitchen, and it isn’t a discipline problem. It’s that everything lives in one undifferentiated pile. You reach in, grab whatever sits closest to the door, and put it back in roughly the same place.
When your daily items and your bulk items share the same real estate, the bulk items win the front row eventually. Every time.
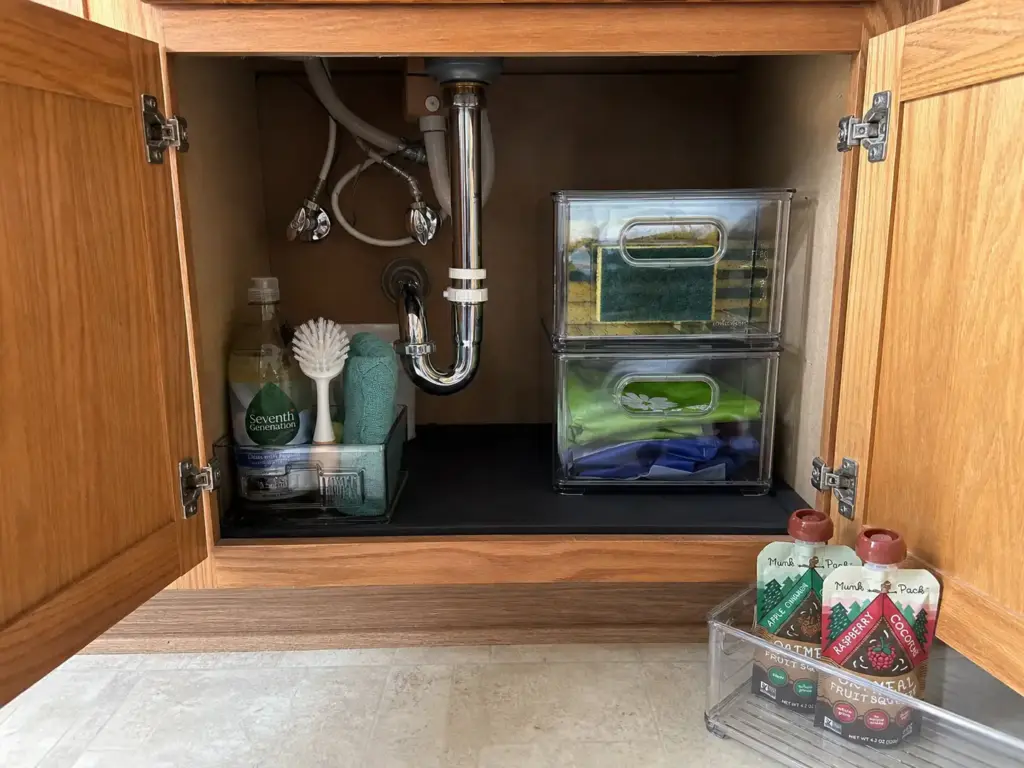
So split the cabinet in two, out loud, on purpose. The daily-use zone holds dish soap, sponges, dish pods, and the one spray you actually reach for, and it lives at the front in something you can slide out with one hand while the other hand is wet. The backstock zone holds bulk refills, reusable grocery bags, and spare sponges, and it lives toward the back in stacked, labeled bins that don’t need to move often.
That split isn’t an invention. Professional organizers at NEAT Method recommend limiting backstock under the sink to what you’ll actually use before it expires, and they pair it with the discipline that makes it hold: commit to one dish brush instead of stockpiling four. The backstock zone is supposed to be small. That’s the feature, not a compromise.
The reason it’s supposed to be small shows up in a confession that appears over and over in organizing threads: someone finally empties the cabinet and finds four boxes of the same product, plus a package of steel wool nobody knew existed. Nothing was visible, nothing had a fixed spot, so everything got re-bought. Decanting bulk cleaning products into a small number of uniform bottles fixes that for close to nothing, and it does more for the cabinet than any bin purchase will.
Now the container shape, which is the cheapest fit upgrade available in this cabinet. Use flat-bottomed square or rectangular bins, not round buckets or a hanging caddy. Square bins tuck into the leftover rectangle of dead space beside the pipe stack; round containers waste that space by geometry alone.
Before you buy anything, check whether a repurposed shoebox or a dollar-store bin already does the job, because for the backstock zone it very often does. If you want something that stacks cleanly and survives being pulled in and out wet, the mDesign Stackable Plastic Food Storage Bin is the right shape for the job at 10 inches long, with a flat base and handles that make it retrievable from the back without unloading the front. The clear walls are the point, since backstock you can’t see is backstock you’ll buy again.
One caveat before you order two: the handles add a bit of width, so measure your leftover gap beside the pipes first. And skip anything top-heavy in this zone, because a tall bin on a stack loses stability the moment you tug the one underneath it.
One last rule that saves the whole system. Less-used bins go on the bottom of a stack; daily bins never get stacked at all. Anything you have to unstack to reach stops getting used within about a month, which is the same pull-forward logic that rescues a deep cabinet anywhere else in the kitchen. If retrieving an item requires two hands and a decision, it will quietly stop happening.
Pull-Out Drawers That Work Around an Off-Center Drain
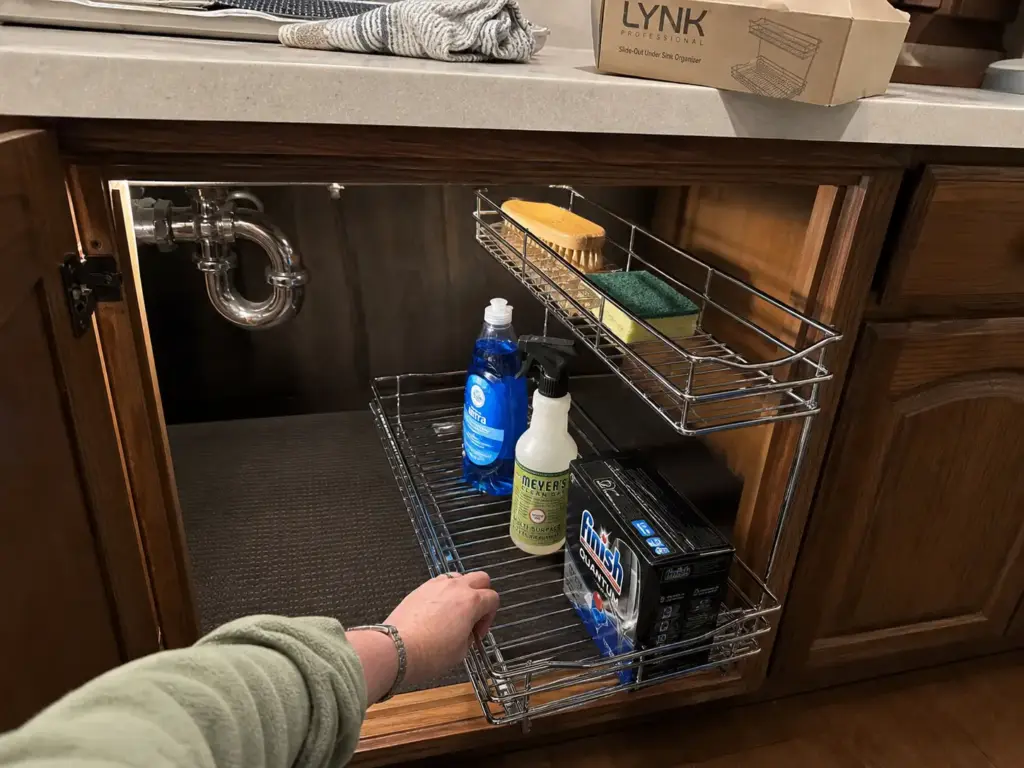
The pull-out drawer is the single biggest upgrade you can make to a daily-use zone, because it converts the back of the cabinet from “somewhere you kneel down and squint into” into “somewhere that comes to you.” Reaching past a pipe stack into a dark cabinet is precisely why the back half stops getting used. A slide-out turns that dead depth back into storage you can reach one-handed.
It’s also the format most likely to not fit, and the spec that decides it isn’t the width.
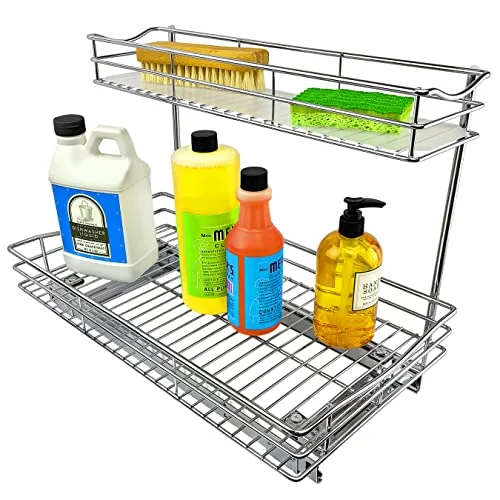
Reversible mounting is the whole ballgame. A dual-tier sliding organizer is built to mount on either the right or the left side of the cabinet specifically because drain assemblies are so frequently off-center. Buy reversible instead of fixed and the off-center-drain problem stops being a problem. Buy fixed and you’re gambling on where a plumber put your trap.
Two material notes while you’re comparing. Stainless steel and coated wire survive this cabinet’s humidity better than bare metal, so look for a corrosion-resistant finish rather than a painted one that chips at the glide rails. And mesh drawers drain instead of pooling, which matters more here than in any dry cabinet.
Two smaller specs matter almost as much. Ball-bearing glides are what you want in a cabinet you open with wet or full hands, because friction glides bind the moment anything heavy sits on them, and a drawer that sticks gets abandoned faster than a drawer that’s slightly too small. And placement: the pull-out claims the side of the cabinet with the most uninterrupted floor space, which is the number you took in step three of the protocol. The pipe side gets the vertical solutions in the next section instead.
If you want to see how pull-out organizers hold up across the rest of your cabinets before you commit to one here, that comparison goes deeper on glide quality and weight limits than this section needs to.
And if the numbers rule a sliding drawer out entirely, don’t force it. A sliding drawer that rests on the cabinet floor requires no modification at all, which makes it renter-safe, but “renter-safe” doesn’t help if it won’t physically go in. The adhesive hooks and tension rod route below does most of the same job for pocket change.
Expandable Racks and the Vertical Space Above the Trap
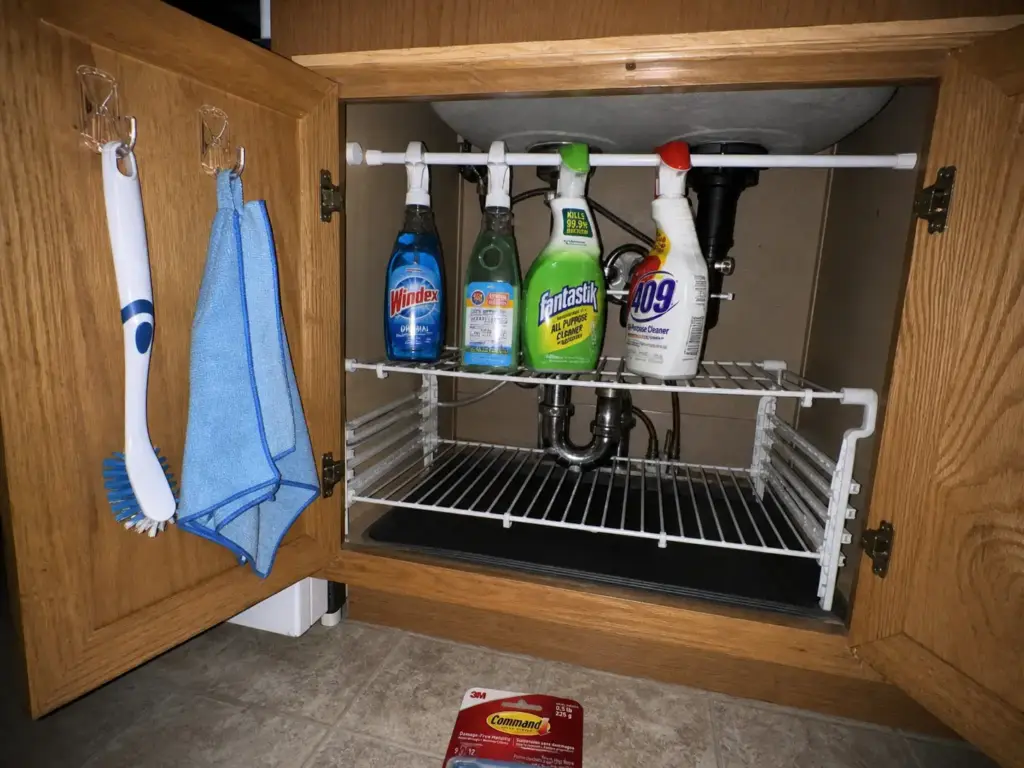
Under-sink cabinets are tall and almost entirely wasted vertically. There’s a column of air sitting above the P-trap that nothing standard fits into, and most people fill it with exactly nothing. Two cheap moves reclaim most of it, and neither one requires buying a rack.
Start with the tension rod, because it’s the one that costs almost nothing and shows up first in budget organizing threads for a reason. A rod hung horizontally above the trap holds spray bottles by their triggers, which is the cheapest vertical storage move available in this cabinet.
Your bottles come off the cabinet floor, the floor becomes wipeable, and the whole thing installs in ninety seconds with no drilling. Just size it honestly, since a rod holding six full bottles is carrying real weight and a rod that slips at 2 a.m. makes a memorable noise. It’s worth knowing how much weight a tension rod will actually carry before you load it.
The other half of the vertical grab is the inside of the cabinet door, which is where a door-mounted organizer or a few hooks earn their keep. Adhesive hooks there take the trigger bottles and the scrub brush off the floor entirely, and the door interior is space you were already paying for.
One condition, though: check that the door’s inside surface is smooth and genuinely clean before you stick anything. Grease film is the reason adhesive strips release a month later, and under a kitchen sink there’s always grease film. Wipe it with rubbing alcohol, let it dry, then mount.
Command Large Wire Hooks are the standard pick here because the wire profile holds a spray trigger without the bottle swinging into the door, and they come off cleanly when you move out. The limitation is the weight rating, which assumes a smooth surface, so painted or textured cabinet doors get one bottle per hook and no more.
Mount door hooks low enough that the hanging bottle clears whatever sits on the cabinet floor when the door swings shut. Hold a bottle on the hook, close the door slowly, and watch. Most people find out they mounted three inches too high the first time they slam the door on a bottle of degreaser.
Now the honest part: if the rod and the hooks clear your cabinet floor, you may not need a rack at all. Fit the budget-friendly solutions first, live with them for a week, then decide whether a rack is worth the splurge. Plenty of cabinets are fully solved by a rod and four hooks.
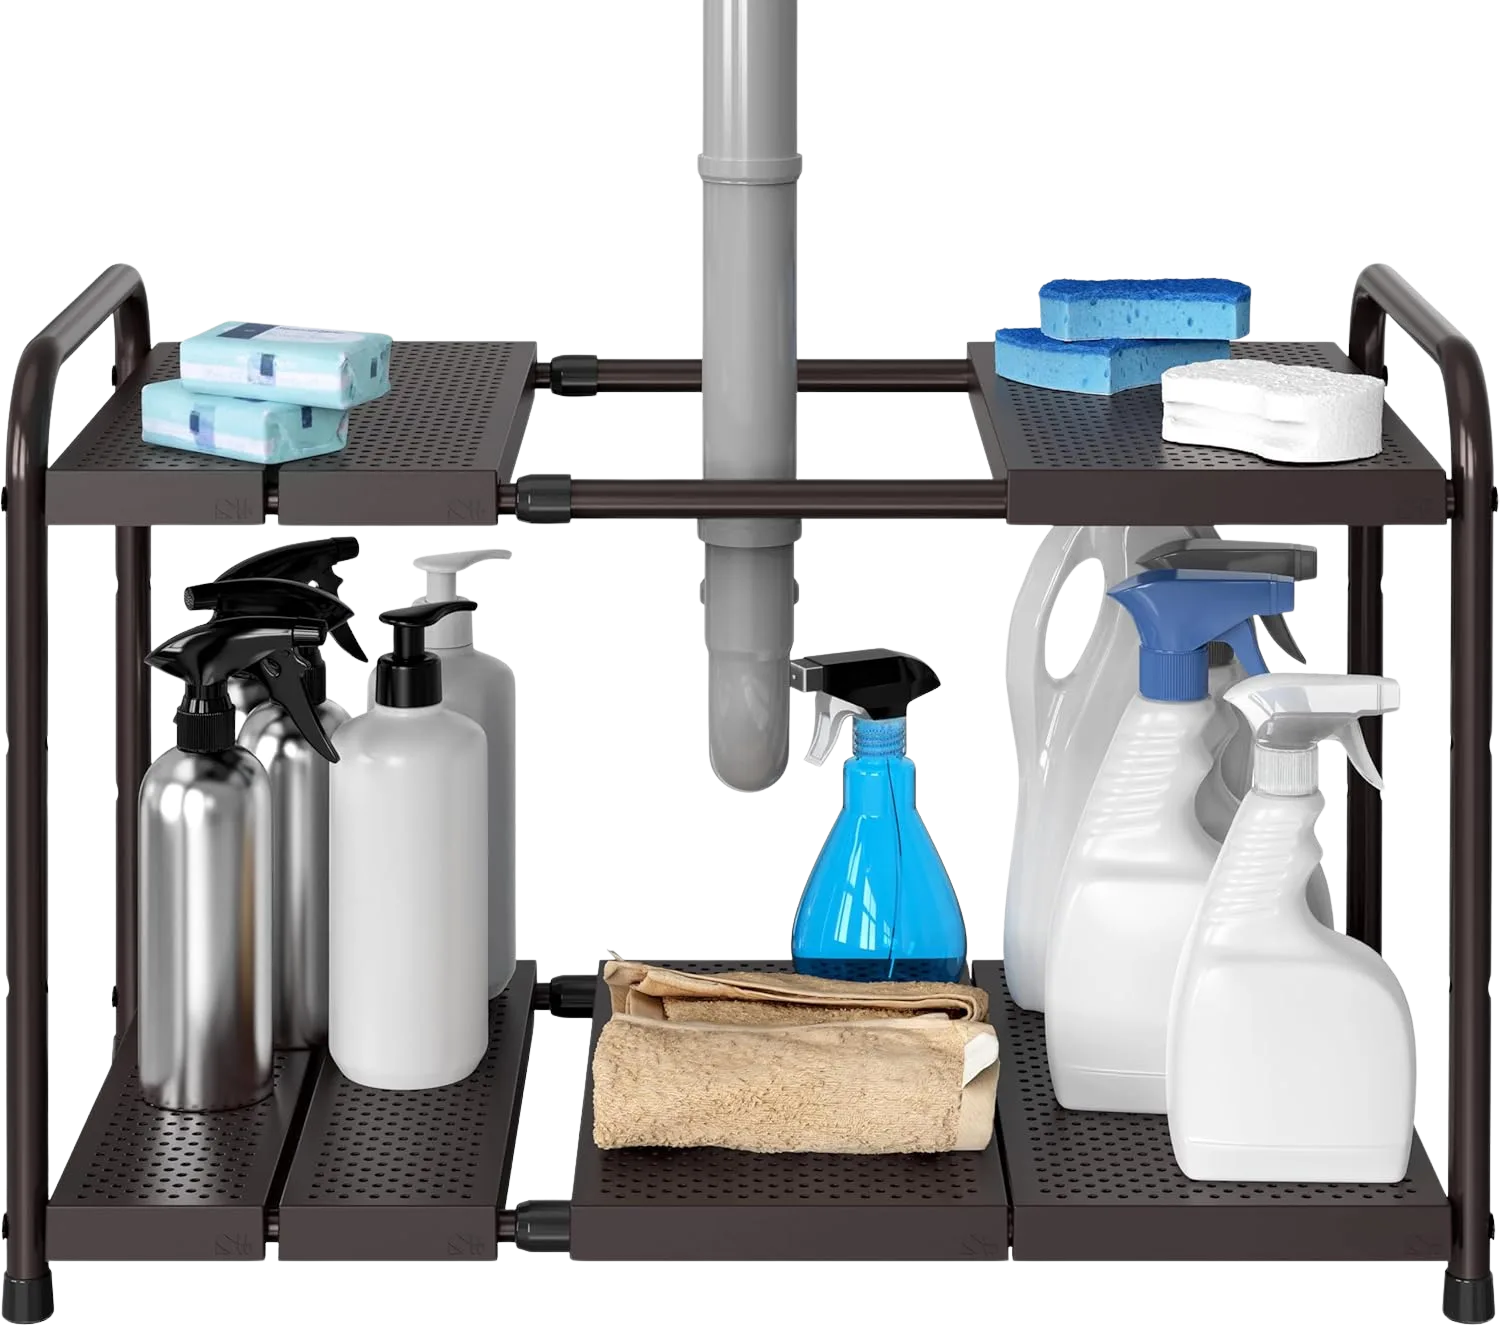
If yours isn’t, the format built for this specific problem is the expandable two-tier rack. The width adjusts so the unit’s legs straddle the plumbing instead of colliding with it, which is the entire reason expandable beats a fixed-width tiered shelf in this cabinet and nowhere else in particular.
The second tier is also where your daily-use zone gets its front row back, lifting small items above the trap into eye-and-hand range the moment the door opens. It’s the same trick a shelf riser pulls in a pantry, except here the riser has to clear a pipe instead of a can. Expect assembly required on most of them, which is a fifteen-minute tax worth paying once.
Leak Protection Is the Step Everyone Skips
This is the step that separates an under-sink cabinet from every other organizing project in your house. Everywhere else, the worst outcome is that your system reverts and you redo it on a Saturday. Here, the worst outcome is that a slow drip runs for three months underneath a row of bins and the cabinet floor turns to oatmeal. The organizing part is genuinely the easy part.
The mechanism is worth understanding because it explains why the failure is silent. Most under-sink cabinet floors are MDF or particleboard with a thin laminate skin. Water contact swells the material first, then separates the layers, and none of it is visible because your bins are sitting on top of the whole thing. By the time you notice, the repair isn’t a wipe-down.
Damp does quieter damage to what’s inside, too. Cardboard boxes of cleaning supplies soften at the corners and plastic warping shows up on thin bins that sit in a warm cabinet for a year.
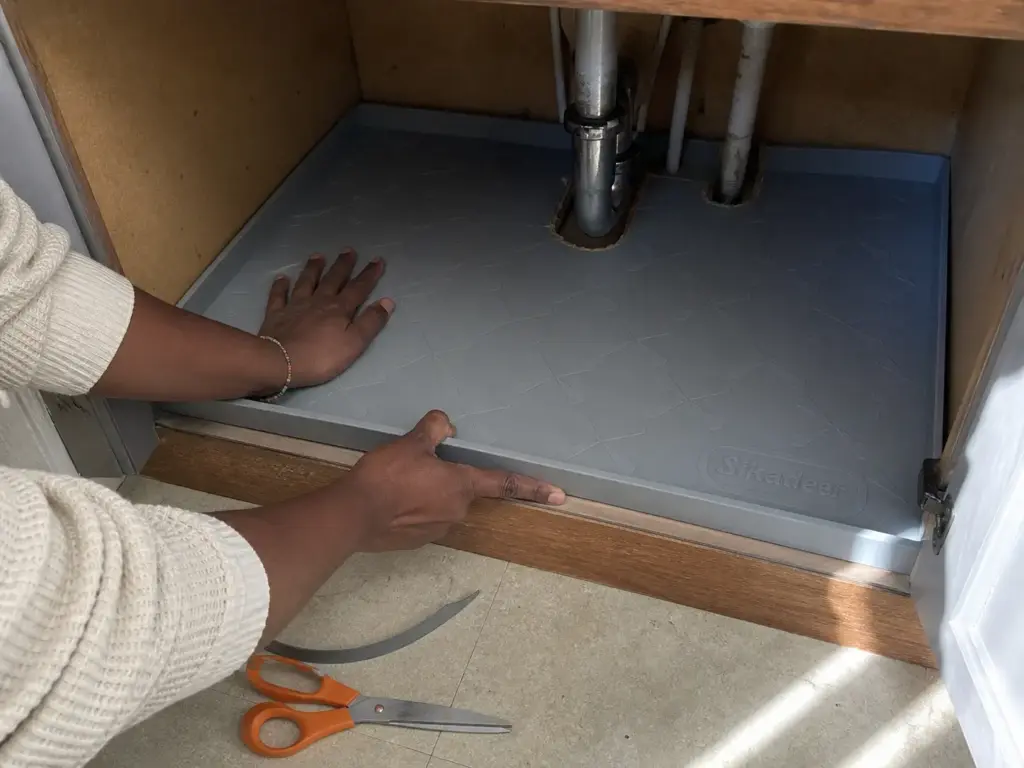
A waterproof tray or liner with a raised lip, commonly about an inch, holds roughly 1 to 3.3 gallons of drips before it overflows. Be clear about what that buys you, because it isn’t a fix.
A mat doesn’t stop a leak. It buys you the time between a slow drip starting and your next monthly check, and it turns “warped cabinet floor” into “puddle in a tray.” That’s the entire value proposition, and it’s enough.
Before you buy one, check whether a trimmed piece of vinyl shelf liner or a cut-to-size tray you already own does the job. For a cabinet with no disposal and tight plumbing, it often does. What you’re paying for with a purpose-built under sink drip mat is the raised lip and the spill-proof capacity behind it, which a flat liner can’t give you.
If you want that, the SIKADEER Waterproof Under Sink Mat runs 34 by 22 inches with a raised edge, and it’s trimmable, which is the spec that matters most here. A mat that can’t be cut around your pipe cutouts either doesn’t lie flat or doesn’t go in at all, and a mat that doesn’t lie flat funnels water toward the seam instead of holding it. Measure your cabinet interior before ordering, since 34 inches suits a wide sink base and you’ll be trimming for anything narrower.
Cut the pipe openings as a slit from the back edge rather than a hole in the middle. A slit lets you slide the mat in and out around the plumbing without disconnecting anything, which means you’ll actually pull it out and dry it during the monthly reset instead of leaving it in place forever.
Wire shelving is the one configuration where a solid mat is the wrong tool. It won’t sit flat across the wires, it sags between them, and anything that spills runs straight through. A cut-to-fit liner is what belongs there instead, and the Gorilla Grip Shelf Liner handles it because it comes as a roll you size to the shelf and it grips rather than sliding when you drag a bin across it. It won’t contain a puddle the way a lipped tray does, so on a wire setup, put your one solid tray on the cabinet floor underneath and liner on the shelf above.
The anecdote that anchors this whole section is the one that keeps surfacing in under-sink threads: someone opens the cabinet and finds a bottle with a rust ring around its base, sitting in a stain from a leak they never knew about.
Nothing was elevated. Nothing was protected. Months went by with nobody looking. Ten minutes of setup prevents the entire story.
Renter-Safe Under Sink Setups With No Drilling
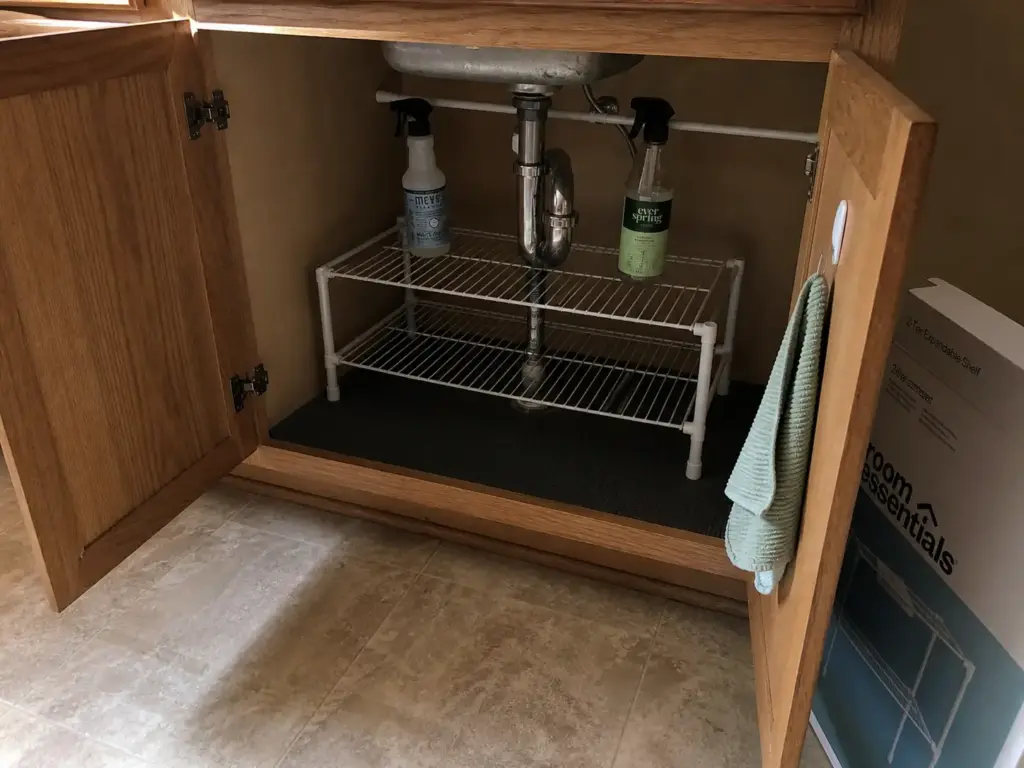
Here’s the good news about this particular cabinet: the best formats for it happen to be the renter-safe ones. Almost everything that works under a sink works because it rests on the floor or braces against the walls, not because it’s screwed to anything. The plumbing constraint and the rental constraint push you toward the same shortlist, which almost never happens.
Freestanding expandable shelf units and floor-resting pull-out drawers dominate this category precisely because they require zero modification. Horizontal tension rods cover the vertical space when nothing can be mounted around the pipe stack, and adhesive hooks handle the door interior. That’s a complete system, and none of it touches a screw.
If you want the full no-drill playbook for the rest of your kitchen cabinets, that guide goes wide across every cabinet type; this section stays narrow on the under-sink specifics.
The one place renters lose money on an otherwise clean setup is the adhesive removal, and it’s entirely avoidable. Pull the tab straight down along the surface, slowly, until the strip releases. Do not pull outward, and do not rush it, because outward and fast is how you take a chip of laminate with you. Sixty seconds of patience per hook is the difference between a full deposit and a deduction for cabinet damage.
The real renter test isn’t whether a system goes in. It’s whether it comes out clean. Everything on the freestanding route uninstalls in about the time it takes to empty the cabinet, which is the standard worth applying to any product you’re considering. Ask yourself how it leaves, not just how it arrives.
Two things to skip if you’re renting. Anything that requires screws into the cabinet side wall, obviously. And anything sized so tightly that it has to be forced past the trap, because a unit under tension against a pipe joint is a slow-motion problem you’d rather not be responsible for.
The Five-Minute Monthly Reset That Keeps It From Reverting
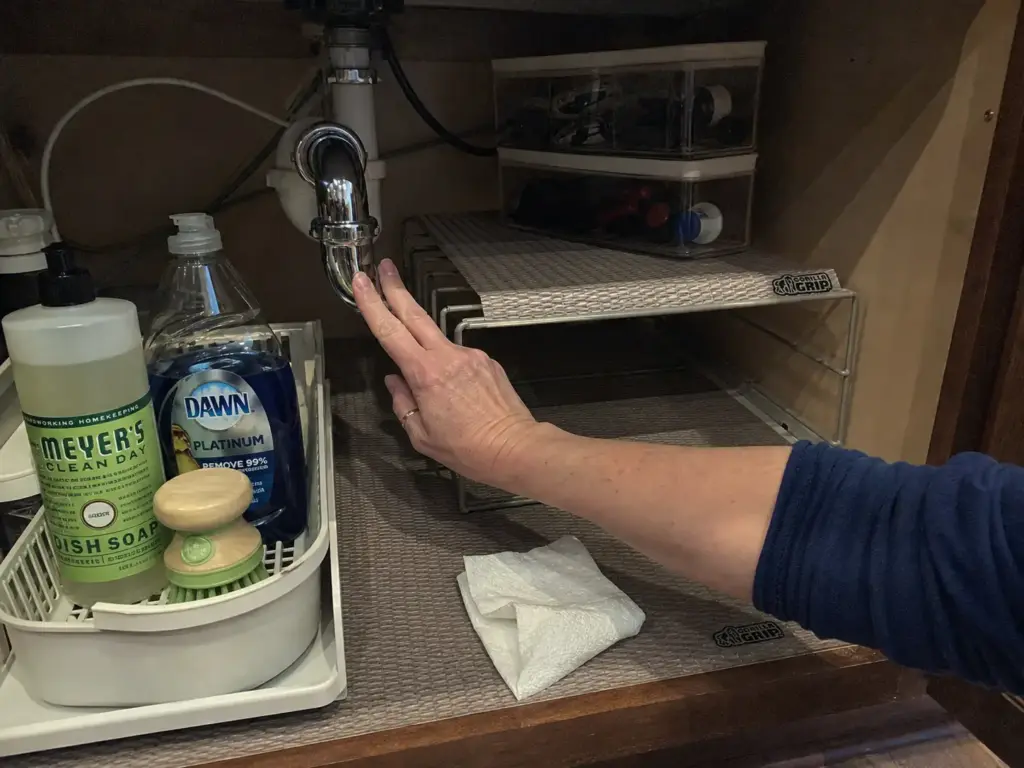
Every under-sink cabinet on the internet is photographed on day one. Nobody photographs it in week six, which is when the bulk refills have quietly migrated to the front row and there’s a damp ring under the trap that no one has looked at. The reset is deliberately short so it actually happens.
The five-minute reset runs in order: pull the daily-use bin out, run a finger along the trap and both supply-line connections checking for dampness, wipe the cabinet floor and the mat dry, and put back only what belongs in the front zone. Everything else goes to the backstock zone or out of the cabinet entirely. Five minutes, once a month.
It’s monthly rather than quarterly because it’s doing double duty. This Old House’s leak-prevention routine is the same two minutes of motion: finger-test the trap, wipe dry, and check supply lines for cracking or bubbling in the braided sheathing. You’re doing the organizing pass and the plumbing check in one trip to the floor, which is the only reason this cadence survives contact with real life.
Watch for one specific tell. If backstock has crept forward into the daily-use zone, the problem isn’t the bins and it isn’t your willpower. Either the backstock zone is too small for what you’re buying, or you’re buying more than you use. Fix the buying, not the containers, which is the same reason a pots and pans system falls apart in a month when the volume of stuff exceeds the space designed for it.
The reset is also where duplicates surface, and that’s most of its long-term value. Four boxes of the same product and a bag of spare steel wool nobody remembered come to light during the wipe-down, not during a normal week. Seeing them is what breaks the re-buying loop, because you can’t un-know that you already own three of something.
One last reversion trigger that catches people off guard: a change to the cabinet itself. A garbage disposal retrofit or a replaced trap re-measures the entire space, sometimes by several inches in the direction that hurts. When the plumbing changes, take the two numbers again. The layout has to change with it, and a system built around the old trap will fight you until you do.
Conclusion
Three things to carry out of this. Measure the two obstruction numbers first, vertical clearance to the lowest pipe and horizontal trap protrusion, because those decide fit and width doesn’t. Split the cabinet into a front daily-use zone you can reach one-handed and a small backstock zone in the back, and keep the backstock small on purpose rather than by accident. Put something waterproof under everything, because this is the one cabinet in the house where the failure mode is damage rather than clutter.
In three months, open the door and look at what’s in the front row. If it’s bulk refills instead of the dish soap you use every day, the zones have collapsed and the backstock is the thing to cut, not the bins.
Clear the cabinet out and take those two measurements this weekend. You don’t have to buy anything yet. Knowing those two numbers is the whole thing that stops you buying the wrong thing.
Frequently Asked Questions
01What is the best under sink organizer?
The best under sink organizer is whichever one clears your plumbing, which for most kitchens means an expandable-width two-tier rack or a reversible pull-out drawer rather than a fixed-width unit. Measure your vertical clearance and trap protrusion first, since those two numbers eliminate most of the market before you compare features.
02What should be kept under the kitchen sink?
Keep dish soap, sponges, dishwasher pods, trash bags, and the one or two cleaning sprays you actually use, since those are the daily-use items. Bulk refills belong in a small backstock zone at the back, and anything food-related or heat-sensitive belongs elsewhere, because this is the warmest, dampest cabinet in the kitchen.
03What are some common mistakes to avoid when organizing under sink storage?
The two biggest are buying an organizer before measuring pipe clearance, and skipping any waterproof barrier on the cabinet floor. The first ends with a unit you have to force or return; the second ends with swollen particleboard from a slow leak nobody noticed. Ten minutes prevents both.
04Will a bathroom under-sink organizer fit under a kitchen sink?
Usually not. Kitchen drains run larger than bathroom vanity drains, so kitchen clearance requirements are bigger, and a garbage disposal can occupy most of the vertical space a bathroom unit assumes is free. Measure before moving an organizer from one room to the other.
05How do I organize under the kitchen sink if I’m renting?
Stick to freestanding formats that rest on the cabinet floor, meaning expandable racks and floor-resting pull-out drawers, plus horizontal tension rods and removable adhesive hooks for vertical space. Nothing there needs a screw, and the whole setup comes out in the time it takes to empty the cabinet.
Disclaimer: ClutterlessNest is a participant in the Amazon Services LLC Associates Program. As an Amazon Associate we earn from qualifying purchases. This article may contain affiliate links — if you buy through them, we may earn a small commission at no extra cost to you. We only recommend products we have tested or genuinely believe in.