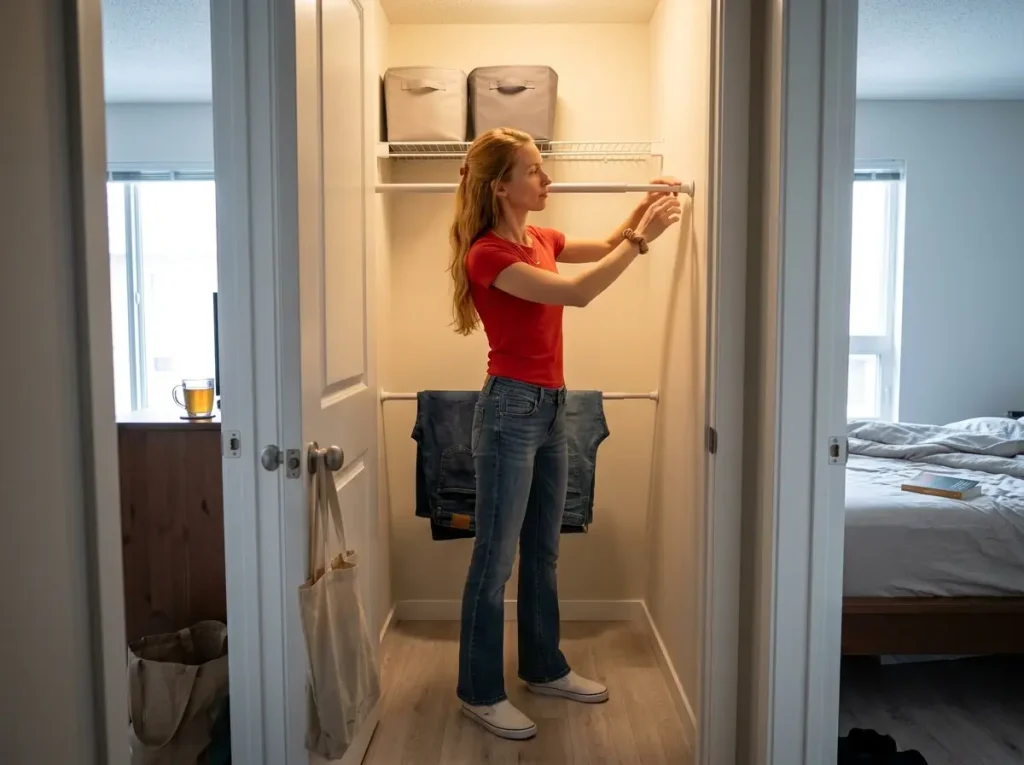
The tension rod that held a full closet in your last apartment slides an inch down the wall in this one, and you swear you didn’t do anything differently. You didn’t. The rod is the same, the load is the same, but the wall, the extension length, or the rod material quietly changed the math. Most tension rod shelving ideas online skip that math entirely, which is why so many of them end with a shelf on the floor at 2 a.m. Here are nine ideas worth setting up, each matched to the rod that actually carries it.
Quick Answer
A tension rod shelf holds when the rod suits the load and grips the surface. Five rules cover it:
- Match the material to the weight: spring holds roughly 10 to 15 lbs, aluminum around 20, heavy-duty aluminum about 30, stainless steel 50 or more.
- Extend to about 80 to 90 percent of the rod’s range, never the maximum.
- Read the surface: painted drywall and wood grip well; tile, laminate, and fiberglass are slick.
- Back a slick wall with an adhesive no-drill retainer or hook, not more force.
- Re-check the tension at the three-month mark before it slides on its own.
Match the Rod to the Load Before You Pick an Idea
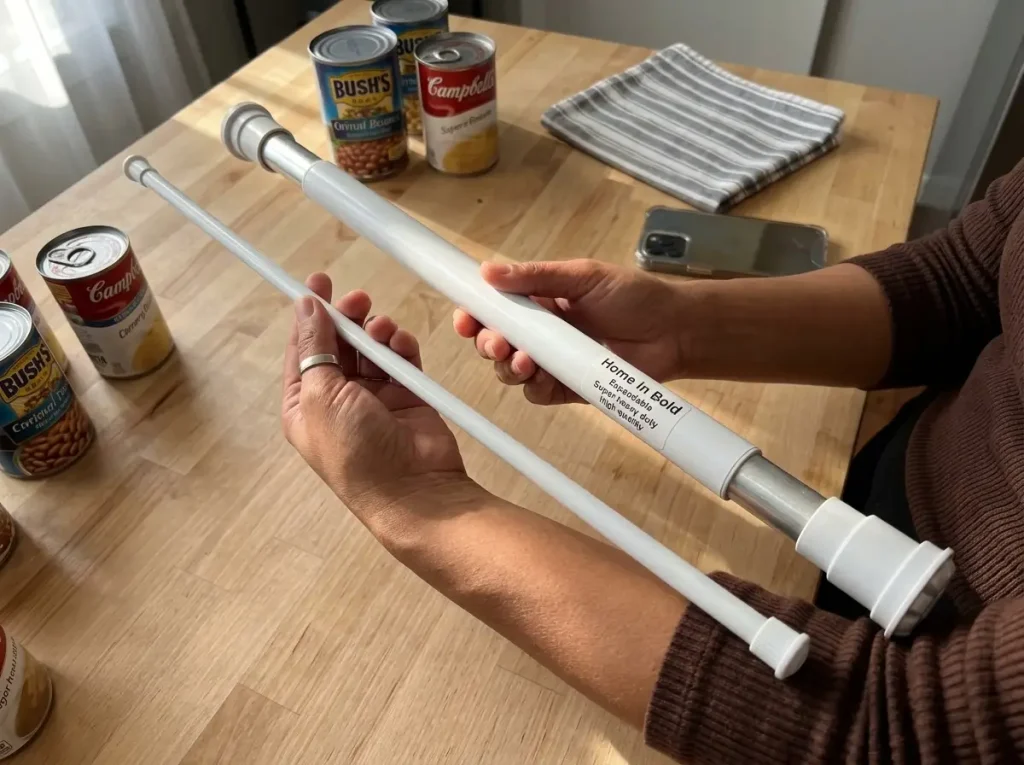
Everyone reaches for the thin rod from the curtain aisle because it’s cheap and already in a drawer, then loads it like it’s a steel beam. The rod isn’t lying to you. Nobody mentioned that the lightweight spring mechanism tops out at about two grocery bags’ worth of weight. Before any idea below works, you need to know which of four rod types you’re actually holding.
The Four Rod Types and What They Actually Hold
A spring tension rod, the lightweight curtain-style kind, holds roughly 10 to 15 pounds. That’s fine for scarves, a light basket, or hanging spray bottles, and wrong for shoes or canned goods. Standard aluminum rods carry around 20 pounds, and reinforced or heavy-duty aluminum pushes closer to 30. Stainless steel rods with a carbon-steel spring and rubber pads reach 50 pounds or more, with some thick models rated far higher. Those numbers are the rod’s real weight capacity, and the difference between a shelf that lasts and one that becomes a pile on the floor. A thin curtain rod was never load-bearing, no matter how you use it.
Here’s the part that catches people off guard: there’s no label requirement forcing any of these ratings onto the packaging. Tension rods sit outside the federal tip-over rules, which only cover free-standing clothing storage units like dressers, not shelving. The weight homework is entirely on you. If you’re building out a rental with tension shelving, it helps to know how tension fits alongside the other no-drill shelf families before you commit to it everywhere.
For most closet, pantry, and cabinet shelving, the aluminum-class rod is the sensible middle. It costs more than the flimsiest spring rod and far less than steel, and it carries what a normal shelf actually needs.
Why Diameter Is Your Shortcut
When a listing doesn’t publish a weight rating, diameter is the fastest tell. Thin rods around three-quarters of an inch cluster in the low-capacity spring class. Thick rods near an inch and a quarter are the heavy-duty end. You can eyeball this in a product photo before you read a single review, which is handy because half the cheap rods online never state a number at all.
If the rod’s rated width range is 28 to 48 inches and your opening is 47 inches, buy the next size up instead. A rod stretched to the last inch of its range holds far less than the same rod sitting mid-range, and you’ll feel the difference the first week.
The Extension Trap
Every rod works the same way: you twist to expand it until it pinches between two surfaces. But grip torque drops as a rod nears its travel limit. Push a rod to 95 percent of its length for “just a little more room” and you’ve quietly cut its holding power right when you’re asking the most of it. The rule that keeps shelves up is boring but reliable: extend to about 80 to 90 percent of the range, then stop. This is the single most common reason a rod that worked at 80 percent in one apartment fails when you stretch it to fit a wider opening in the next.
Closet Tension Rod Ideas That Reclaim Vertical Space
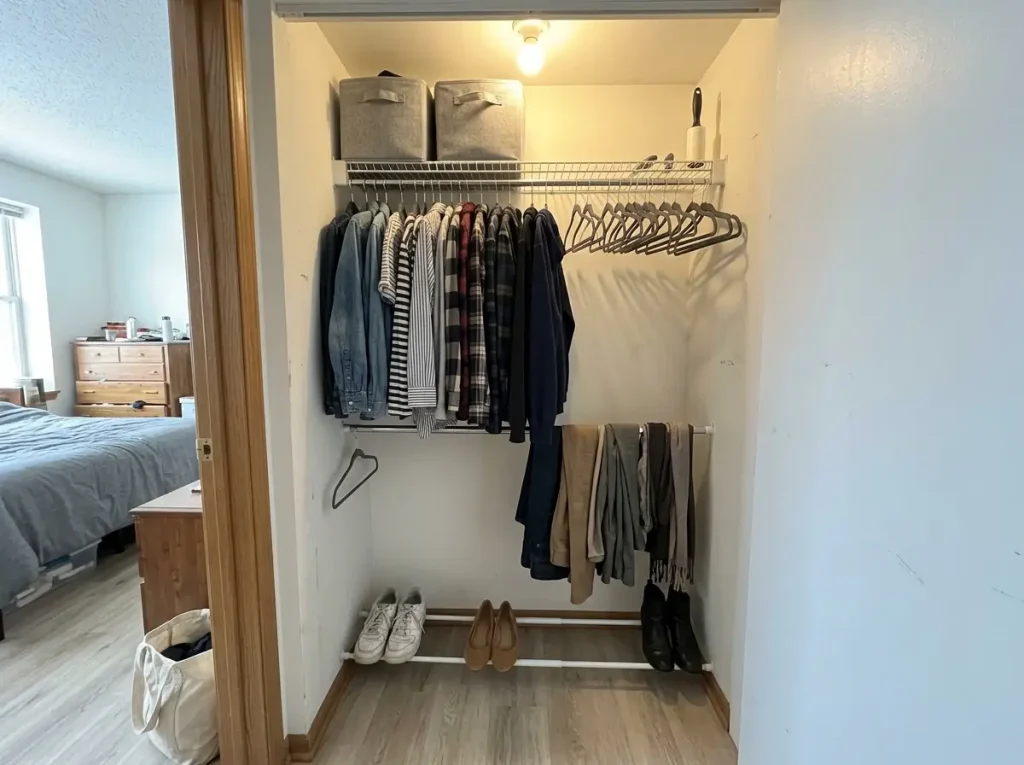
The rental-special closet is one rod, one shelf, and about twelve cubic feet of wasted air above and below. Two rod ideas fix most of that dead space, and neither costs more than lunch.
Idea 1: Add a Second Hang Rod
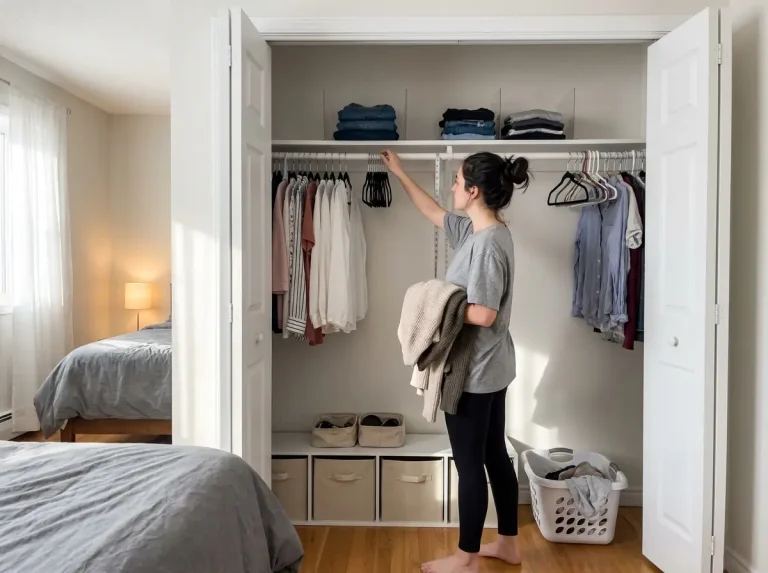
A single rod wastes the bottom half of the closet on empty air beneath your shirts. Add a second rod below the first and you double the short-hang zone for folded pants over the bar, skirts, and anything that doesn’t need full length. This is the reversible move that gets your closet floor back with zero landlord conversation. Just remember the rule from the last section: a rod carrying a season of coats needs the aluminum or steel tier, not a spring rod, or it creeps down within a week. It’s the same double-rod trick that reclaims a reach-in closet’s dead air in most standard layouts.
Idea 2: The Angled Two-Rod Shoe Shelf
Two parallel rods low in the closet make a shoe shelf, but only if you angle it right. Set the front rod about half an inch lower than the back rod so the surface tilts slightly forward. That tiny slant is the difference between shoes that sit put and pairs that slide off every time the door swings. Level the two rods and your sneakers will migrate to the closet floor by the end of the week. Angle them and they stay.
Build a Two-Rod Shelf Platform (the Idea Nobody Explains)
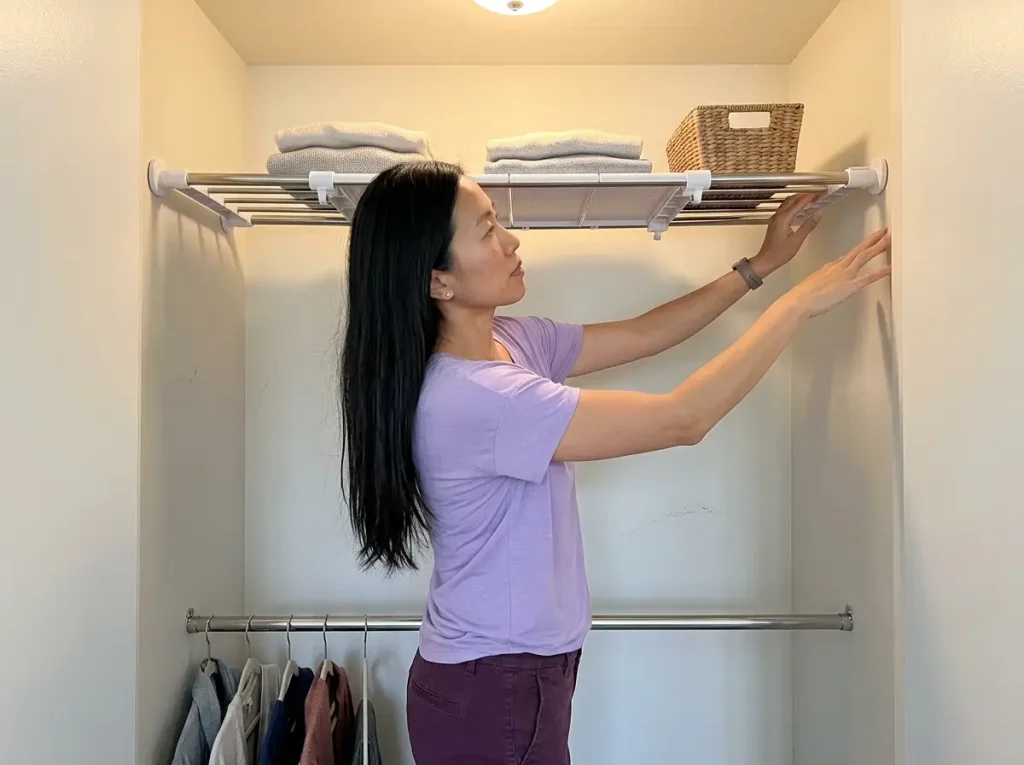
Everyone pins the “shelf out of thin air” trick and nobody dimensions it. So people space the rods by eye, the board see-saws, and the whole thing dumps its load the first time someone bumps it. The technique works fine. The numbers are what people skip.
Idea 3: The Two-Rod Bin Platform
Run two parallel rods about 12 inches apart, with the lower rod at least 16 inches off the floor, then lay a board or a leftover wire rack across them. That spacing gives you enough vertical clearance for shoeboxes or folded stacks without crowding. The platform is only as strong as its two rods, so for stacked bins both rods need to be the heavy-duty tier. Two spring rods and a board is how you end up rebuilding it a week later.
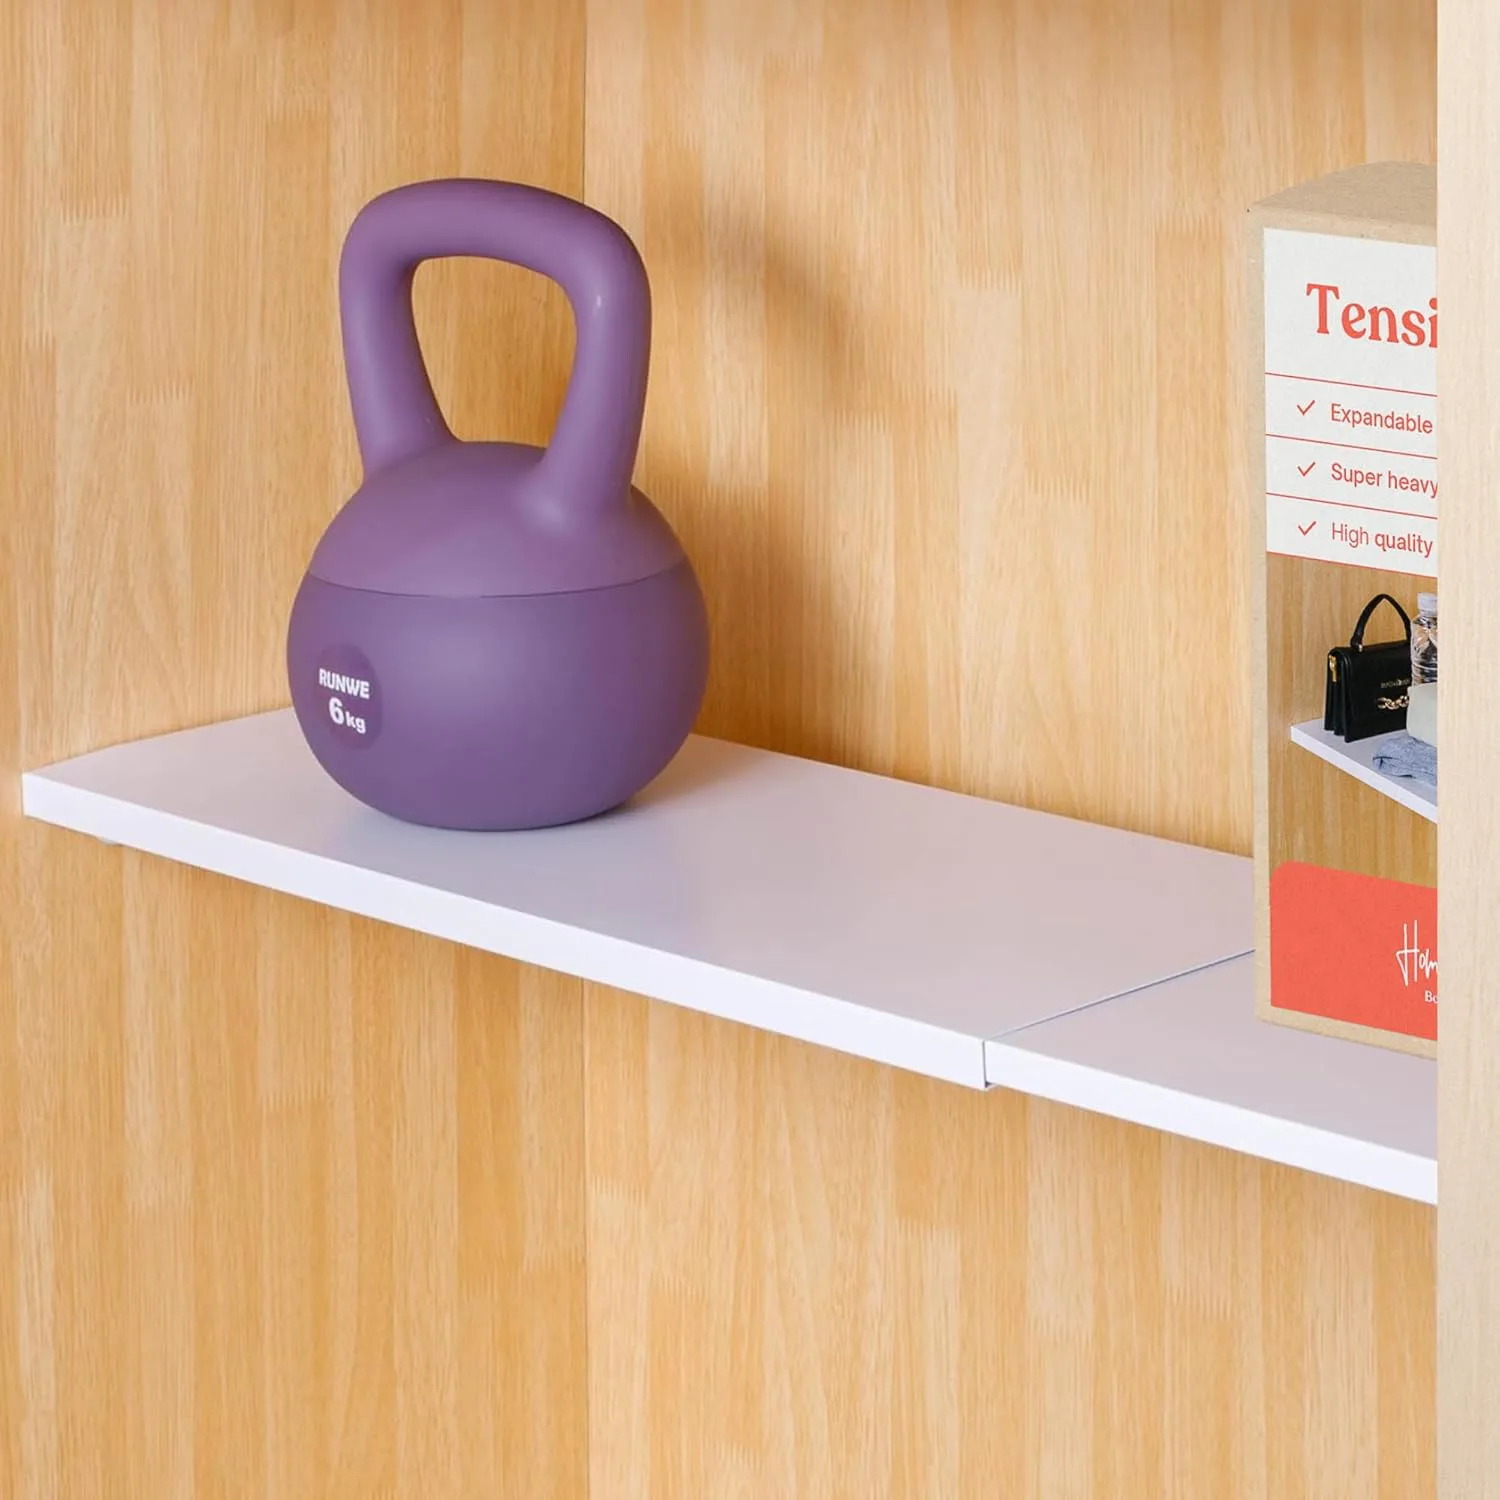
The No-Cutting Shortcut
If sourcing and cutting a board sounds like more project than you signed up for, a pre-built rod-plus-tray unit skips that step. The trade-off is a lower ceiling. Ready-made tension shelves usually top out around 18 pounds, which is right for a lightweight zone of folded tees or a small basket, and wrong for canned goods. I used to steer everyone toward the DIY two-rod-and-board version to save money. After enough “the board slipped and everything slid off” stories in closet threads, I started recommending the pre-built unit for anyone who isn’t confident leveling two separate rods themselves.
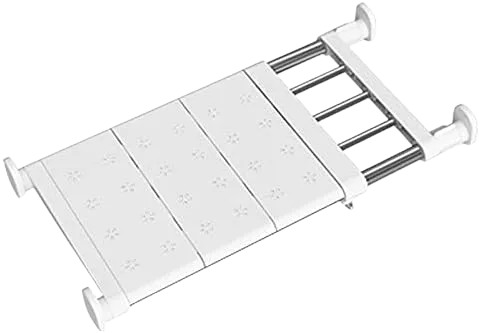
When the wall itself can’t grip a rod at all, that’s your signal to stop fighting it. A freestanding unit is the better move for a corner that refuses to hold tension.
Kitchen, Pantry, and Under-Sink Tension Rod Ideas
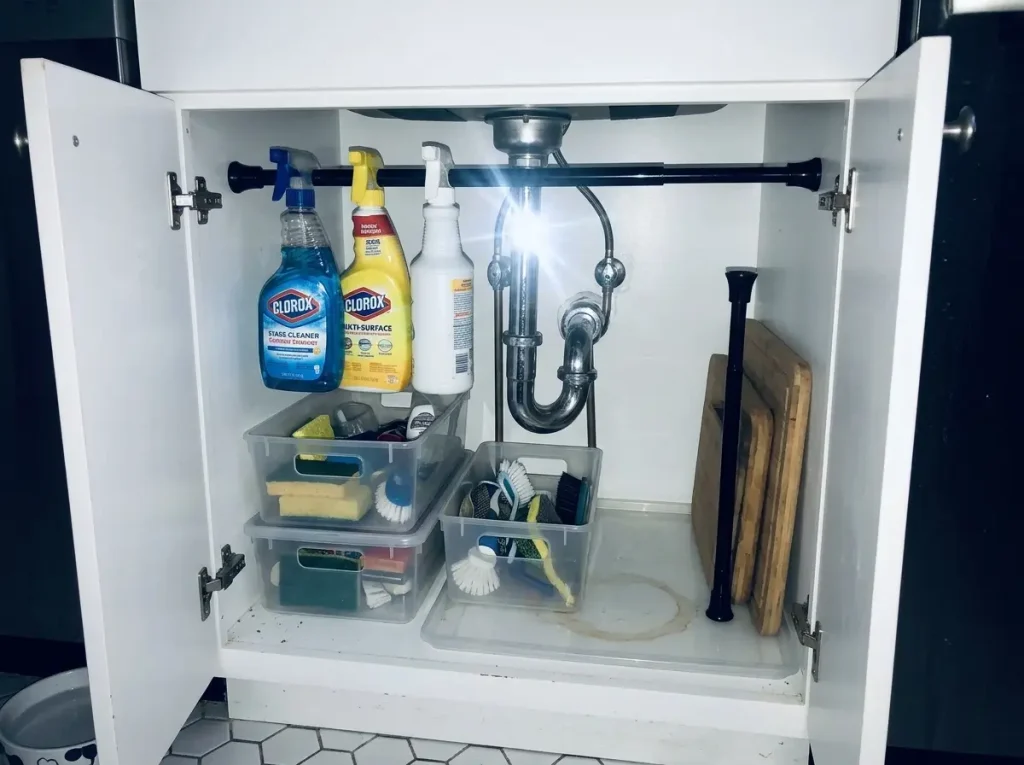
These are the near-zero-weight uses where even a cheap spring rod is genuinely the right tool. The failures only start when someone loads the same dollar-store rod like it’s a shelf.
Idea 4: Vertical Dividers for Boards and Lids
Stand a rod, or a pair of them, vertically inside a cabinet to slot cutting boards, sheet pans, and pot lids upright instead of stacking them into a tower that collapses when you pull one out. This is the pot-lid fix that clears your counter in five minutes. A small Small Tension Rod 2-Pack (available on Amazon) is the right scale here, sized for drawer and cabinet compartments rather than a full opening. It’s a low-weight job, so the inexpensive spring rods do it perfectly.
Idea 5: The Under-Sink Spray-Bottle Rod
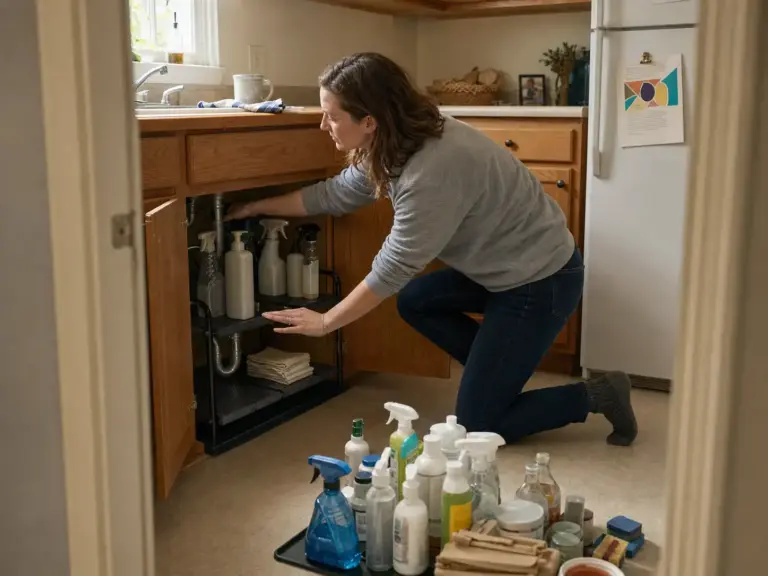
Run a rod across the width of the under-sink cabinet and hang your spray bottles from it by the trigger. That single move lifts every bottle off the floor of the cabinet and frees the space below for bins. The catch: the inside of an under-sink cabinet is usually slick laminate, which is exactly the surface a rubber cap struggles to grip. If it won’t bite, don’t crank it harder. See the fixes in the last section. It pairs naturally with zoning the under-sink cabinet around the P-trap.
Idea 6: Fill the Under-Shelf Gap
The dead gap between a shelf and whatever sits above it is prime unused space. A rod set into that gap holds lightweight items off the shelf surface, roughly doubling what the shelf can carry. It’s small, it’s reversible, and it’s the kind of thing you don’t notice until you’ve done it once.
Heavy Loads and Wet Rooms — Ideas That Need the Right Material
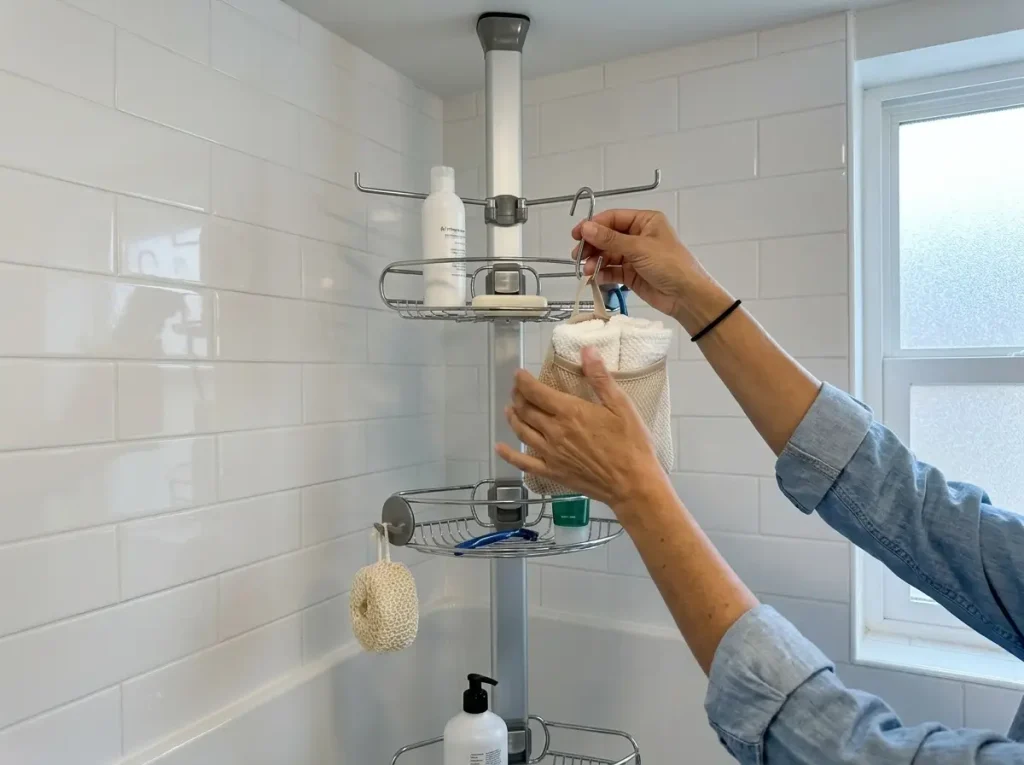
This is where the wrong rod ends up on the floor at 2 a.m. Cookware and canned goods need steel, and a tile shower needs a purpose-built pole, because rubber caps and glossy tile do not get along.
Idea 7: Steel for Heavy Loads
When the plan is stacked bins, cookware, or a shelf of canned goods, you’ve left aluminum territory. A stainless heavy-duty rod, or a two-rod platform built from a pair of them, carries the genuinely heavy end of the range. The BAOYOUNI Tension Closet Shelf Heavy Duty Organizer Rack (on Amazon) is the stainless-tier contrast to the everyday aluminum pick, sized for a wide closet or pantry span. It costs more, and for a coat rod or a light shelf it’s overkill. For real weight, it’s the only category that holds.
If you can drill, stop here and mount a real shelf. A stud-mounted bracket beats any tension rod for heavy weight, full stop. Tension shelving is the answer when holes aren’t allowed, not when they’re simply inconvenient.
Idea 8: A Pole Built for the Shower
The shower is the one wet-area use where a generic closet rod will let you down. Glossy tile and fiberglass are too slick for rubber end caps, so a horizontal rod slowly walks its way down the wall. A floor-to-ceiling tension pole made for the job, like the simplehuman 9′ Tension Pole Shower Caddy (on Amazon), braces against the ceiling instead of pinching between two slick walls. That vertical bracing is why it holds where a horizontal rod slides.
Idea 9: S-Hooks and Totes on Tile
If a purpose-built pole isn’t in the budget, the renter workaround is simpler than it sounds. Hang closed containers from S-hooks on one sturdy rod instead of stacking loose items directly on a slick surface. A sturdy stainless rod, a handful of S-hooks, and a couple of small totes does most of a purpose-built caddy’s job for a fraction of the cost. And because the weight hangs in closed totes rather than balancing on top, a wobble doesn’t dump shampoo across the tub. For readers weighing tension against something more permanent, it’s worth seeing how a stud-mounted shelf compares for real weight.
Why Tension Rod Shelves Slip — and the No-Drill Fixes
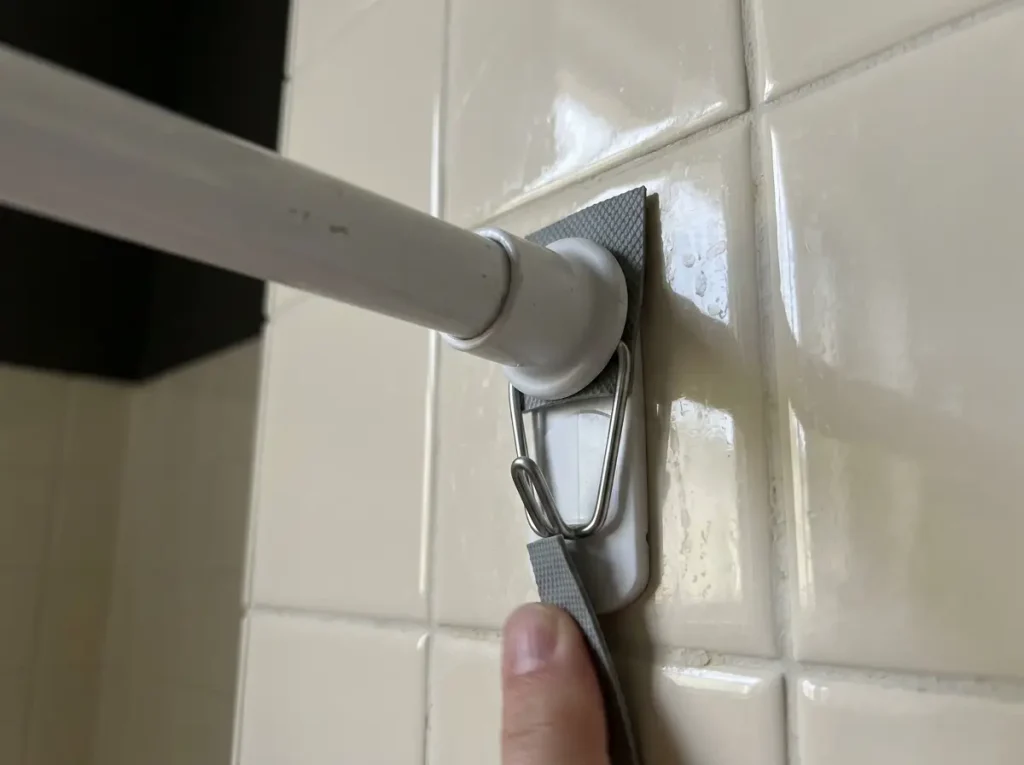
It’s rarely a dramatic collapse. It’s the slow creep over weeks: door slams, the laundry machine two feet away, temperature swings, until one morning the rod is an inch lower and the shelf is on the floor. This is the part every listicle skips, and it’s the whole reason your shelves don’t last.
Read the Surface First
Painted drywall and wood casing grip a rubber cap well. Tile, fiberglass, vinyl, and glossy laminate resist it even at full tension. The rod that held perfectly in your last apartment can fail in the new one for no reason other than the paint finish, because older rentals often have textured or high-gloss paint that grips worse than smooth drywall. When people blame the rod, the surface is usually the real culprit. Diagnose the wall before you assume the hardware failed.
The Three No-Drill Grip Fixes
I used to think a slipping rod just needed more force. It doesn’t. On a slick wall, more torque buys you days, not months, and friction at the contact point is the actual fix. You have three reversible options, none of which touch the wall. First, wrap a strip of rubber shelf liner around the contact point for extra friction. Second, lightly sand the rubber end cap so it bites instead of sliding. Third, seat an adhesive no-drill retainer or hook just under the cap so it catches what the rod’s grip alone can’t hold.
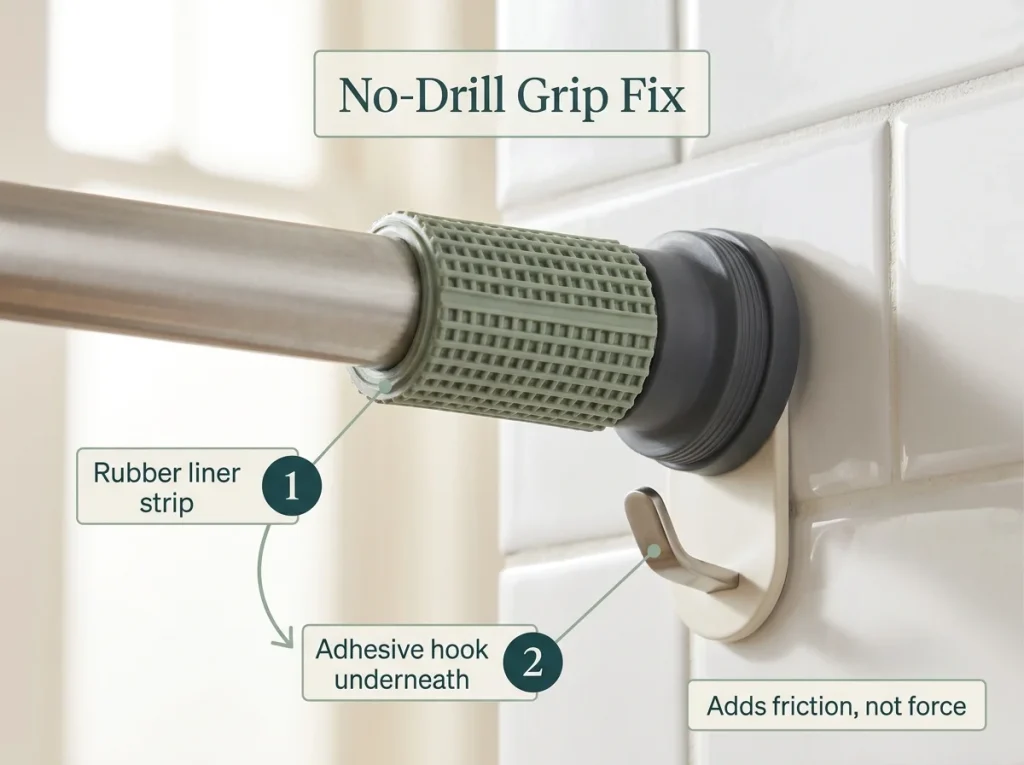
On truly slick walls, an adhesive hook rated for the load is the backstop that saves the whole setup. A multi-pack of Command Large Wire Hooks (on Amazon) seated under the rod carries the weight the cap can’t hold on tile or laminate, and peels off clean at move-out. These are the same no-drill grip fixes that protect a rental deposit elsewhere in the home.
The Three-Month Creep
Here’s the failure mode nobody names. Vibration and thermal cycling loosen spring tension gradually over weeks, so a rod set perfectly on day one can be visibly lower by day ninety. It doesn’t announce itself. It just gives, slowly, until it doesn’t. The fix is a calendar reminder, not a product: push up on each rod every few months and re-seat any that give at all.
Set the rod slightly tighter than feels necessary on install day, especially on textured paint. It will loosen a little over the first two weeks as the tension settles, and starting tight buys you months before the first re-check instead of days.
The One Thing That Decides Whether Any of This Holds
The idea is never the problem. The rod is. Every failure in this article traces back to the same root: a rod whose material, extension, or surface grip didn’t match what you asked of it.
Three things carry the whole system. Match the tier to the load before anything else, spring for light, aluminum for medium, stainless for heavy. Extend to 80 to 90 percent of the range and read the surface, because a slick wall needs a friction fix, not more force. And treat the three-month re-check as part of the system, not an afterthought, because tension creeps loose whether you’re watching or not.
At the three-month mark, push up on each rod. If it gives at all, back off the load or add a friction fix before it slides on its own. Then pick the one spot that annoys you most, the under-sink chaos or the shoe pile, set up a single rod there, and prove it holds before you buy a second.
Frequently Asked Questions
01How much weight can a tension rod hold?
It depends entirely on the material: a spring rod holds roughly 10 to 15 lbs, standard aluminum around 20, heavy-duty aluminum about 30, and stainless steel 50 or more. Capacity also drops as you near the rod’s maximum extension, so the same rod holds less stretched to its limit.
02How do you make a shelf out of tension rods?
Run two parallel rods about 12 inches apart with the lower one at least 16 inches off the floor, then lay a board or wire rack across them. For stacked bins both rods must be the heavy-duty tier. A pre-built rod-plus-tray unit skips the cutting but tops out around 18 lbs.
03Do tension rods damage walls?
No, and that’s the point. They hold by pressure between two surfaces, so there are no holes and they remove cleanly, which makes them a renter favorite. The only caution is glossy paint a rubber cap can scuff, easily avoided with a liner strip at the contact point.
04Why does my tension rod keep falling down?
Usually the surface, not the weight. Tile, fiberglass, vinyl, and glossy laminate are too slick for rubber caps, and rods near full extension lose holding force. Add friction at the contact point with a rubber liner strip, a lightly sanded cap, or an adhesive no-drill retainer before assuming the rod is faulty.
05What size tension rod do I need for a closet or cabinet?
Measure the opening and pick a rod whose range lets you sit near the middle, not at its maximum. For diameter, thin rods around three-quarters of an inch are the low-weight spring class, and thicker rods near an inch and a quarter are the heavy-duty end, a useful signal when no weight rating is listed.
Disclaimer: ClutterlessNest is a participant in the Amazon Services LLC Associates Program. As an Amazon Associate we earn from qualifying purchases. This article may contain affiliate links — if you buy through them, we may earn a small commission at no extra cost to you. We only recommend products we have tested or genuinely believe in.