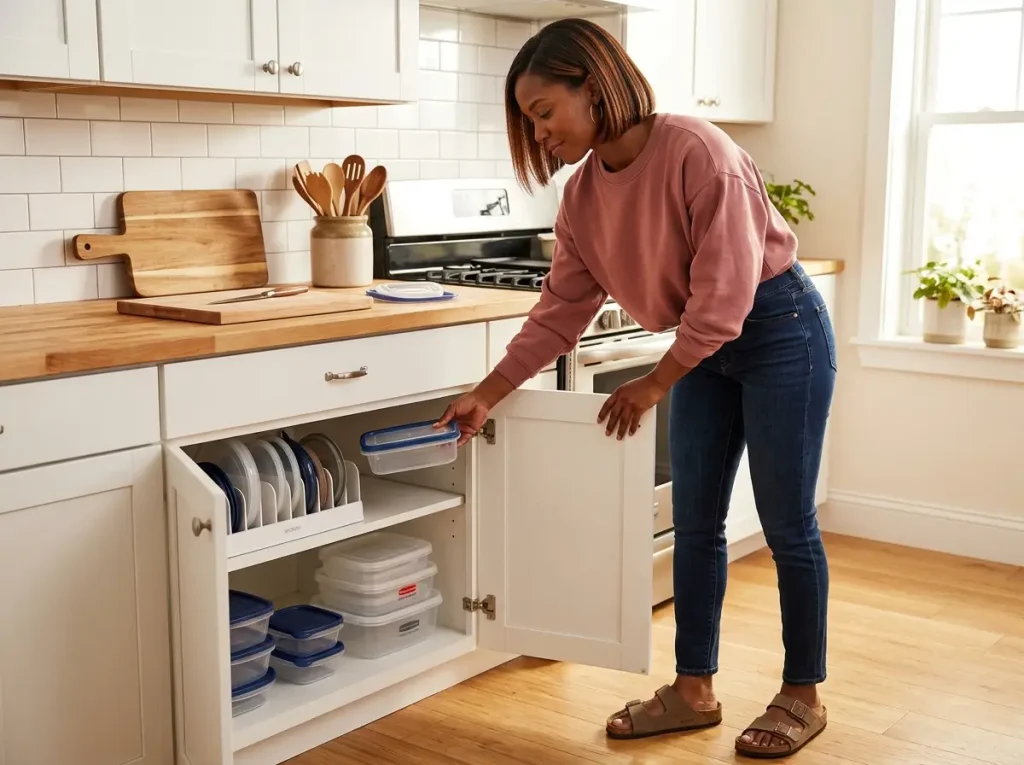
You open the cabinet for one container and three lids fall out. The round one rolls behind the mixing bowls. The square one you grab doesn’t seal on anything you own. This happens because your food container cabinet has three separate problems working against you at the same time — and sorting the lids once a month won’t fix any of them.
After organizing container cabinets in dozens of real kitchens (including my own, twice, because the first system didn’t hold), here’s what actually works past the first week: why the chaos keeps returning, the audit that cuts your collection down, the storage location decision that makes or breaks everything, three lid systems ranked by reliability, and the stacking rules that hold.
Quick Answer: Here’s how to organize food containers so the system actually lasts:
- Audit every container using the 10-second lid test — no match in 10 seconds means it goes
- Cut your collection to 8–12 matched containers you use weekly
- Choose the right cabinet — lower cabinets with a pull-out shelf beat upper cabinets for containers
- Store lids vertically in a dedicated organizer next to the containers, never stacked flat
- Nest containers by shape and brand, largest on bottom, four containers max per stack
- Keep lids and containers in the same cabinet section — proximity is the maintenance fix
Why Your Food Container Cabinet Is Always a Mess
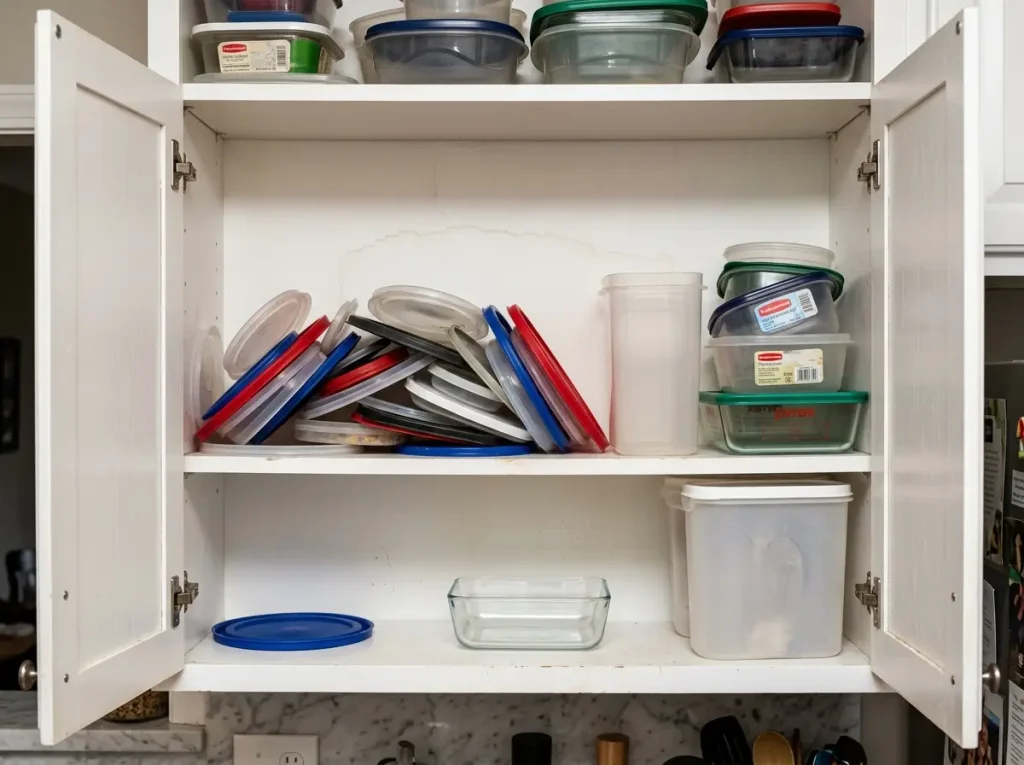
Most organization advice treats the food container problem like a clutter problem. Just sort them. Get some bins. Label things. None of that addresses why the cabinet reverts to chaos within a week. The real issue is three specific mechanisms working at the same time: lid geometry that makes stacking physically impossible, a cabinet depth that’s wrong for containers, and a dishwasher cycle that undoes the system nightly. Each one needs its own fix — and until you address all three, no amount of reorganizing will stick.
The Lid Geometry Problem (Why Even Sorted Lids Fall Over)
You’ve tried sorting lids by size. Everyone has. It looks great for about two days. Here’s why it collapses: round lids from different brands have slightly different diameters — a 3.5-inch lid from one manufacturer won’t sit flat on a 3.6-inch lid from another. The underside curvature profiles don’t match either. One brand curves gently; another has a sharper dome. Stack them together and the top lid overhangs, wobbles, and leans.
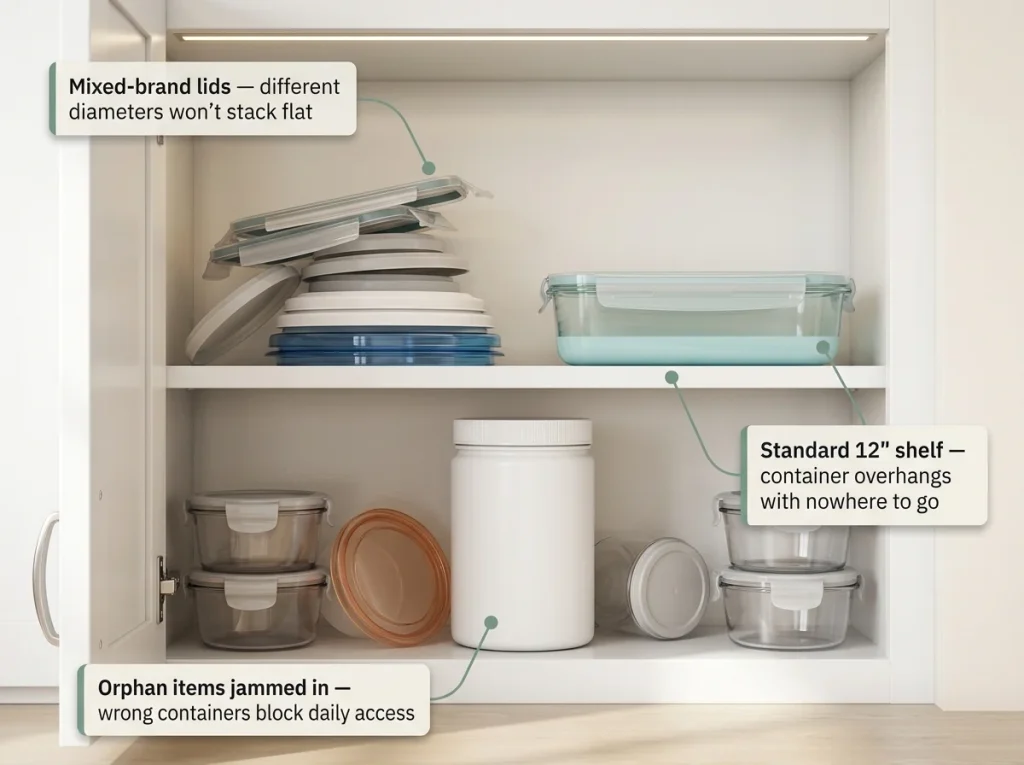
Tab positions make it worse. Some lids have tabs that point straight up; others angle outward. A stack of six mixed-brand round lids creates a lean you can predict: pull one lid from the middle and the rest slide. You’ll know this failure mode the first time you reach for a lid at 7 AM before coffee and start a tupperware avalanche that wakes up the whole apartment. The fix isn’t a better sort. The fix is vertical storage — lids standing on their edges like files in a filing cabinet, where pulling one out doesn’t touch any of the others.
The Cabinet That’s Working Against You
Standard upper kitchen cabinets are 12 inches deep. That depth is designed for plates, glasses, and mugs — items that are roughly 10 to 12 inches in diameter and sit flat. A rectangular food container that’s 7.9 inches on the long side fills most of that 12-inch depth. You can’t store two containers front-to-back. You can’t fit a lid organizer behind the containers. You can’t angle anything without it hanging past the shelf edge.
This is why containers end up jutting out of the cabinet: the shelf is too shallow for how people actually store food containers. Most people default to upper cabinets because that’s where kitchen things go — but lower cabinets are 24 inches deep, which gives you twice the storage depth and room for a pull-out shelf that makes everything accessible from the front.
The Dishwasher Shuffle (the Real Maintenance Problem)
Here’s the mechanism nobody talks about. Your container system doesn’t fail because you organized it wrong. It fails because someone unloads the dishwasher and puts containers away in whatever gap is open instead of matching each container with its lid and returning both to the correct spot. In any household with more than one person, this happens every single cycle.
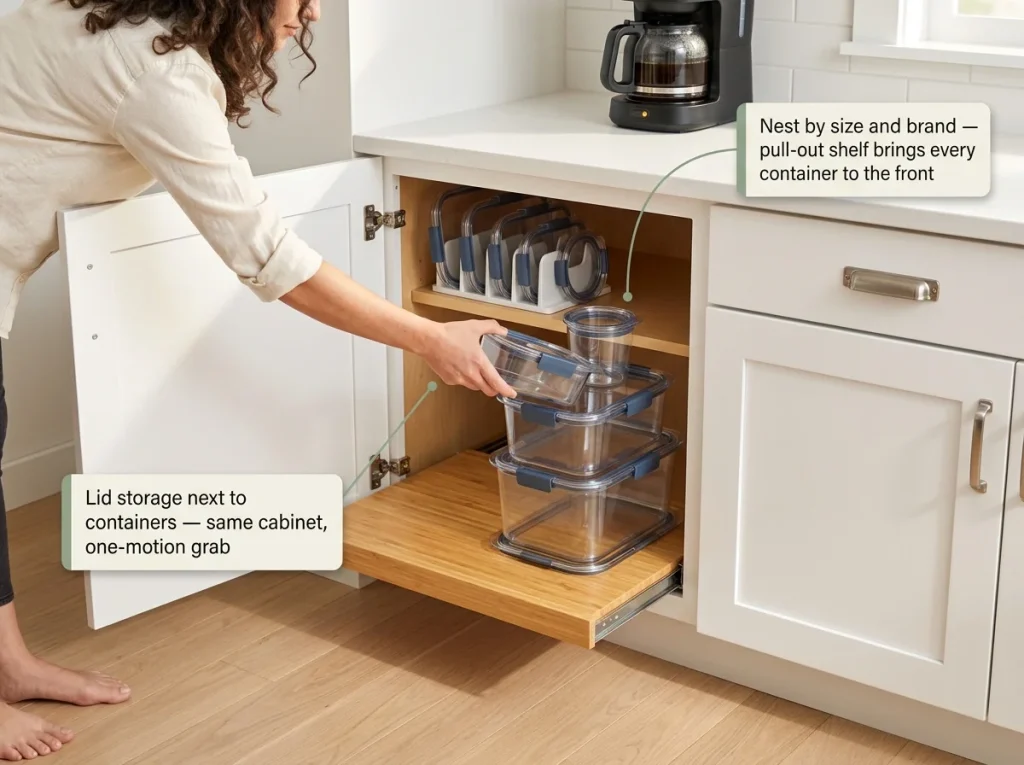
The system that requires perfect behavior every time will fail within a week. The system designed for imperfect behavior will hold for months. That means one rule above everything: lid storage and container storage must live in the same cabinet section — not lids in a drawer and containers on a shelf, not lids on the door and containers inside. One location, one motion. If someone can grab a container and its lid in the same reach, the system survives the dishwasher shuffle. If they can’t, it won’t.
Pro tip: The person who organized the container cabinet is rarely the person who breaks it. Design the system for the household member who puts things away the fastest, not the most carefully.
Start With the Audit (What Goes and What Stays)
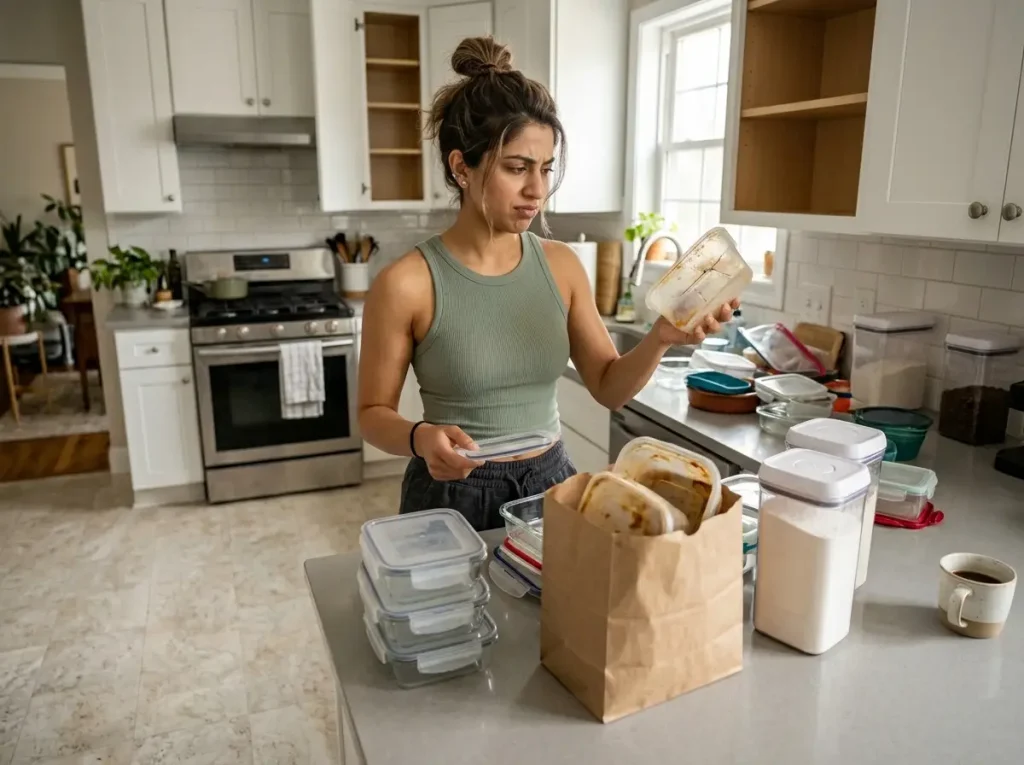
Before you buy any organizer, you need to know how many containers you’re actually working with. Pull everything out — every container, every lid, every mystery lid that doesn’t seem to belong to anything. Put it all on the counter. This is the part that looks worse before it gets better, and that’s the point.
The 10-Second Lid Test
Pick up any container from the pile. Find its matching lid. If you can’t locate the lid that actually seals on that container within 10 seconds, that container is not earning its cabinet space. Not “this lid kinda fits” — the lid that clicks, snaps, or seals properly. Orphan lids that fit close enough but don’t create a real seal will fail in the lunch bag or leak in the fridge. Test the seal, not just the fit.
Run this test on every container in the pile. You’ll probably lose a third of them. That’s normal — and that’s exactly how many containers were taking up space without doing any real work.
Container Categories: Keep, Purge, Relocate
Sort every item into three groups. Keep: the container has a matching lid, you’ve used it in the past six months, it seals properly, and it’s not cracked or warped. Purge: cracked, warped, deeply stained in a way that won’t wash clean, permanently smelly (that leftover curry container that will never smell like plastic again), or any lid without a matching container. Relocate: those large 24-cup airtight containers meant for dry goods that somehow ended up in the leftover cabinet — they belong in the pantry, not competing for daily-use space.
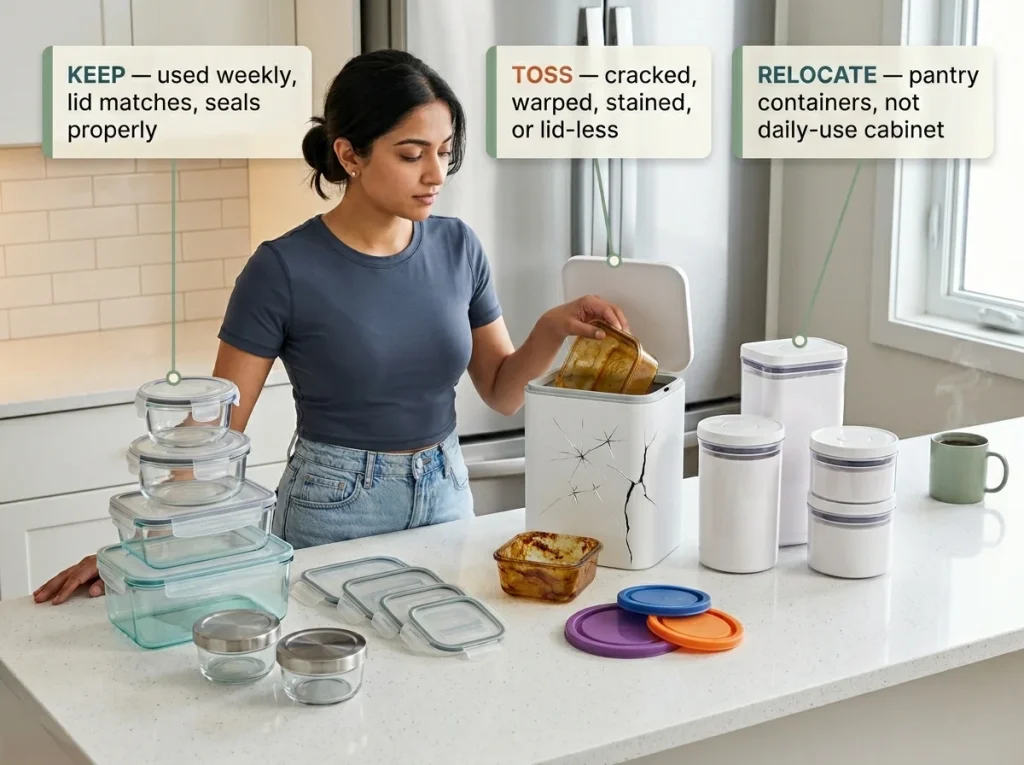
The relocate step is the one most people skip. A single large pantry container sitting in your leftover cabinet takes up the space of three meal-prep containers. Moving those to the pantry is the easiest space gain you’ll get all day.
How Many Do You Actually Need
Think about one week of leftovers. How many containers do you realistically fill and empty? For most households, the answer is 8 to 12 — roughly 3 to 4 small (1 to 2 cup), 3 to 4 medium (3 to 4 cup), and 2 to 3 large (6 to 8 cup). That’s it. Everything beyond that number is creating the problem: extra containers fill the cabinet, push organized containers to the back, add to the lid count, and guarantee that you can never find what you need when you need it.
With the right number of containers, the rest of your kitchen cabinet organization system will actually hold.
Pro tip: Count how many containers come out of the dishwasher in a typical week. That’s your real number. Everything above that count is cabinet space you’re wasting.
Choosing Your Storage Location (This Matters More Than the Organizer)
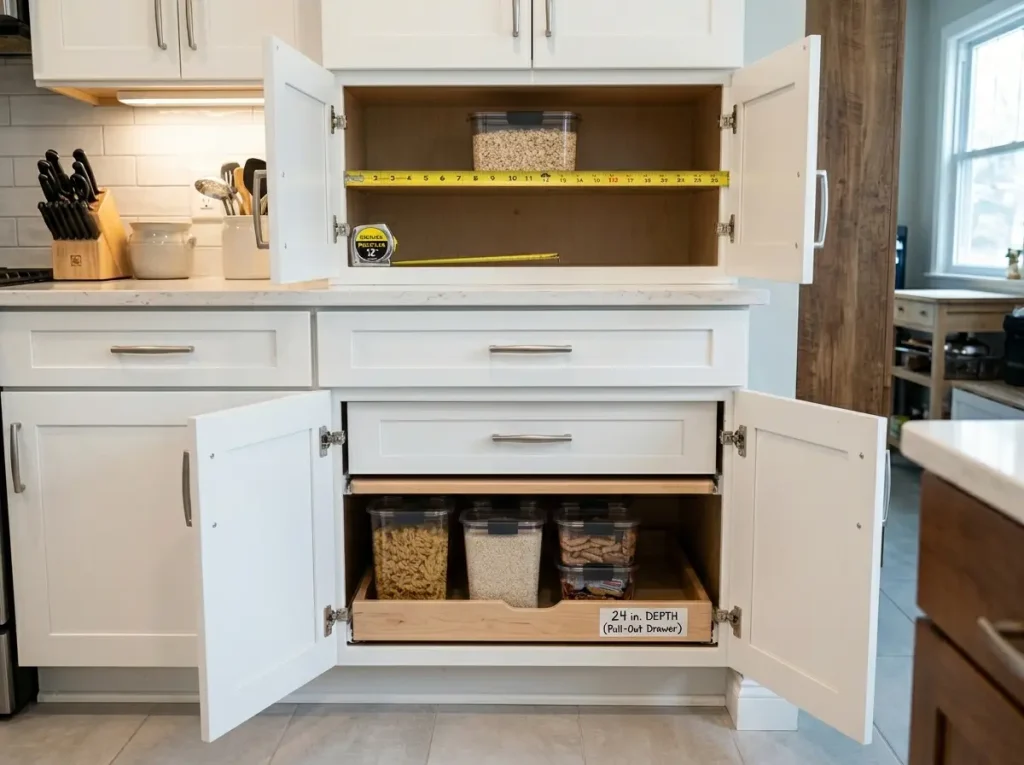
Most articles skip straight to product recommendations. But if your containers are in the wrong cabinet, no lid organizer will save the system. Where you store them shapes every other decision.
Upper Cabinet vs. Lower Cabinet for Food Containers
Upper cabinets give you 12 inches of depth. That’s enough for a vertical lid organizer and a single layer of containers side by side. You can reach everything without bending, but you’re limited to one container deep — and round lids stacked flat in an upper cabinet will roll and fall because the shelf isn’t deep enough to contain the pile once it starts shifting.
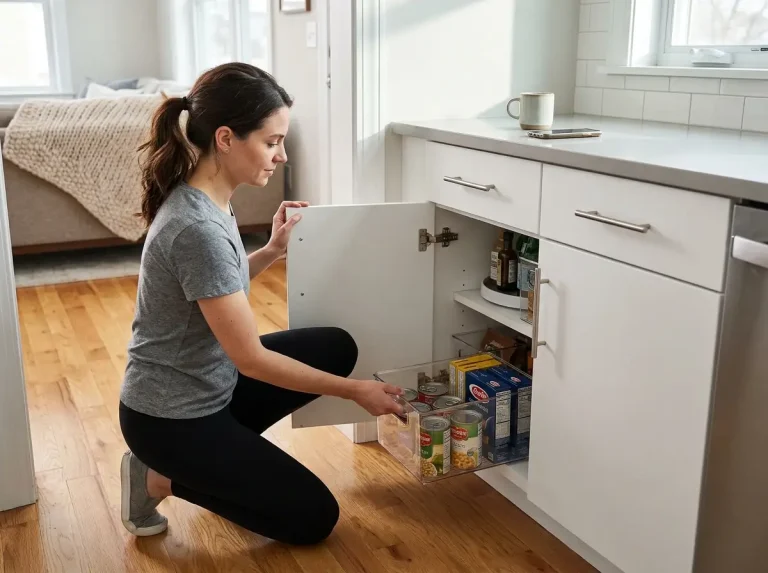
Lower cabinets give you 24 inches of depth. Twice the space means containers can sit in rows or on a pull-out shelf that brings everything to the front. Larger containers fit without hanging over the shelf edge. The trade-off is bending to reach them, but a pull-out shelf eliminates most of that friction.
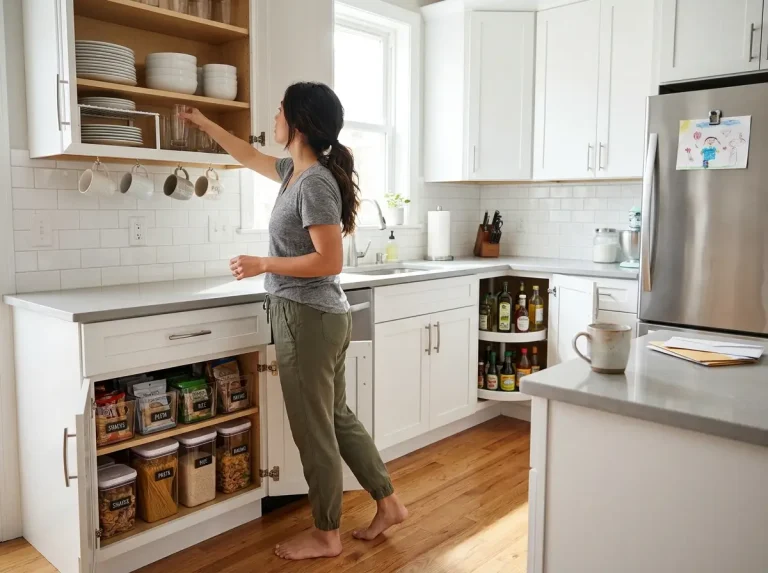
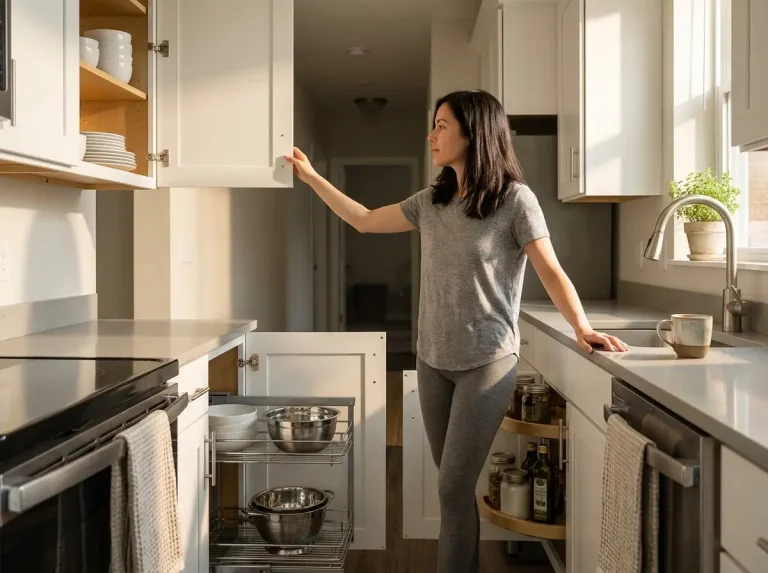
The split that works best in most kitchens: lids in the upper cabinet (a vertical lid organizer fits the 12-inch depth perfectly), containers in the lower cabinet directly below or beside it (pull-out shelf for access). Both stored in the same zone, ideally within arm’s reach of where you unload the dishwasher — NAPO-certified professional organizers recommend storing items near where you use them, and proximity to the dishwasher is the version of that rule that matters most for container cabinets.
The 12-Inch Problem (and What It Means for Your Containers)
Here’s a number that changes how you think about your container cabinet: 12 inches. That’s the standard depth of an upper kitchen cabinet, and it’s the reason half the organizers you buy don’t actually fit the shelf they’re supposed to sit on.
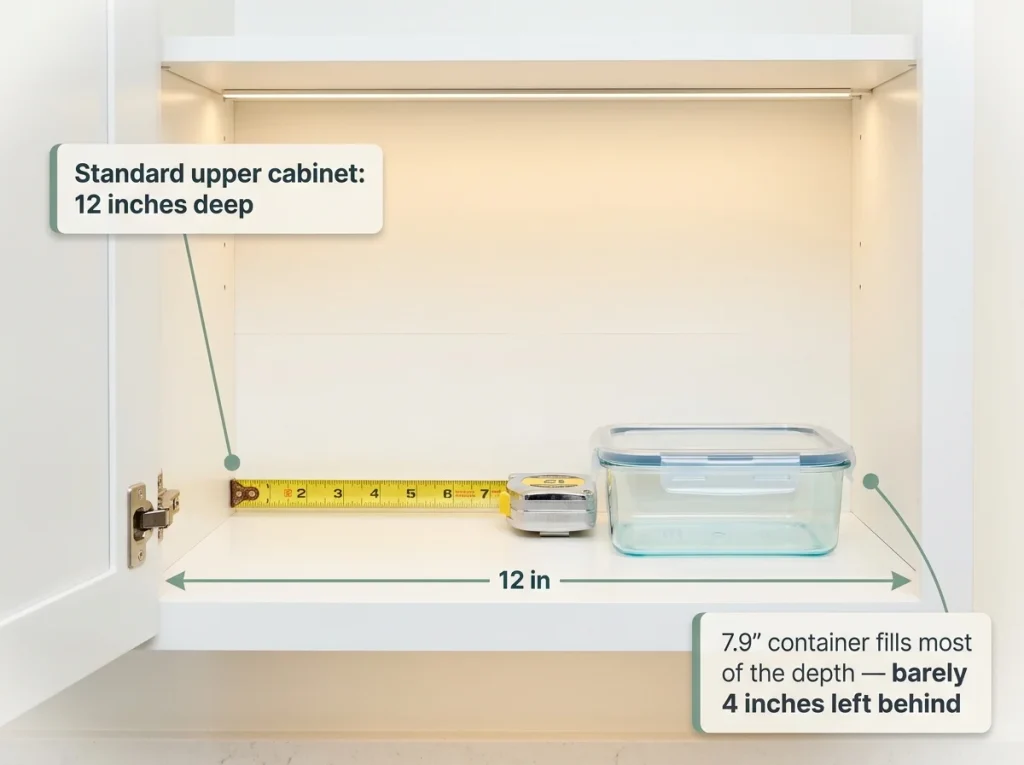
A Rubbermaid Brilliance 3.2-cup container measures 7.9 inches on the long side. Place it in a 12-inch upper cabinet and you have about 4 inches behind it — not enough for a second container in that gap. Many organizers marketed for cabinets are 14 to 16 inches deep. They’ll hang over the shelf edge in a standard upper cabinet, and that’s a purchase mistake people make over and over. Measure your shelf before buying anything: 10 to 11 inches deep is the safe maximum for standard uppers.
If your containers keep sitting at angles or jutting past the shelf edge, the cabinet is too shallow for what you’re asking it to hold. That’s when moving containers to a deep kitchen cabinet with a pull-out shelf makes everything work.
Making a Lower Cabinet Work with a Pull-Out Shelf
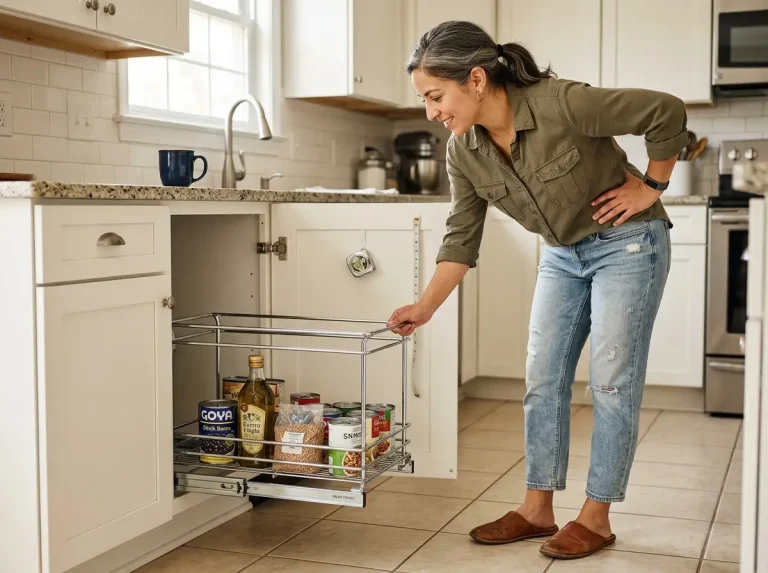
A lower cabinet’s 24-inch depth is only an advantage if you can actually reach the back. Without a pull-out mechanism, containers stored 18 inches deep get forgotten — a container can sit undiscovered in the back of a lower cabinet for six months, growing something you’d rather not identify. That’s the deep-cabinet burial problem, and a pull-out shelf is the single most practical fix.
The SpaceAid No-Drill Pull-Out Cabinet Shelf fits lower cabinets 17 to 24 inches deep and installs without screwing into the cabinet — adhesive or tension mount, depending on the model. Pull the shelf forward, grab what you need, push it back. No reaching, no shuffling, no containers vanishing into the dark. If you’re renting, this is the fix that doesn’t touch your deposit. The limitation: adhesive mounts work best on smooth, clean cabinet surfaces — textured or painted interiors may need the tension-mount version.
If no lower cabinet is available, use the upper cabinet for the lid organizer only and stack containers single-layer in whatever shelf space you have. If you want to compare options, the full guide to pull-out cabinet organizers covers screw-mount vs. adhesive, single-tier vs. two-tier, and how to measure your cabinet before ordering.
The Lid System: Three Options That Actually Work
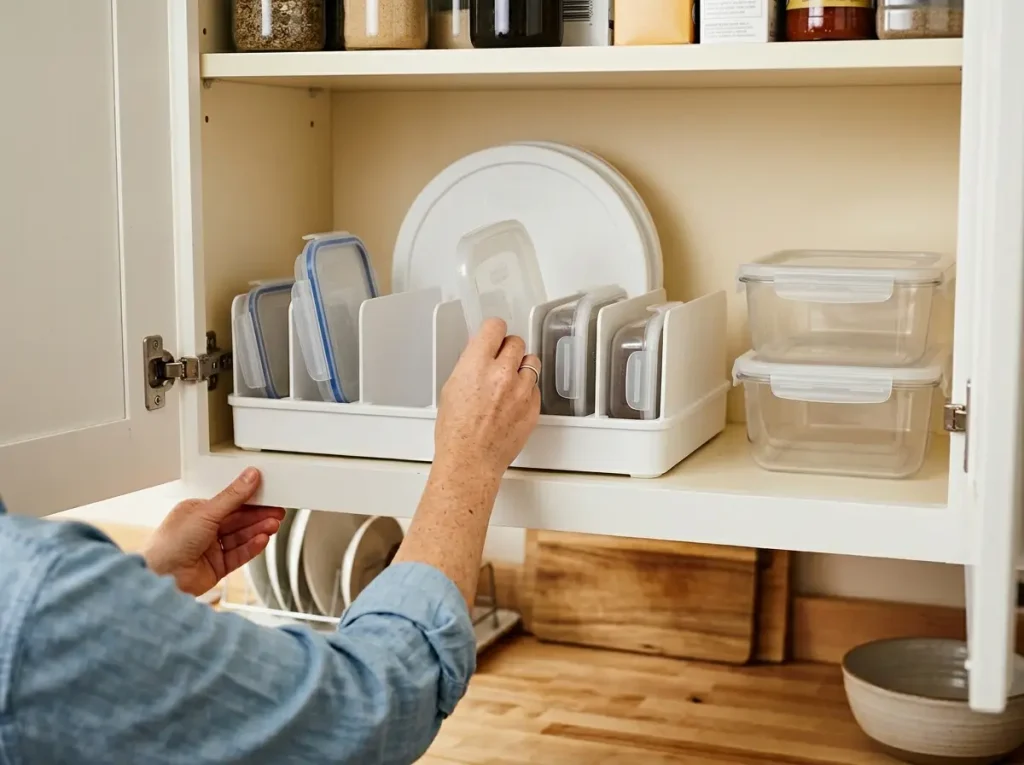
Lid chaos is the specific failure that makes people abandon container organization entirely. Everything else can work — the containers can be nested, the cabinet can be right — and the whole system still falls apart because the lids are a mess. Unlike generic cabinet organizers designed for kitchen use, lid-specific organizers account for the circular and irregular shapes involved. Here are three approaches, ranked from most reliable to most budget-friendly.
Option 1 — Vertical Lid Storage (The Most Reliable Fix)
Vertical storage eliminates the stacking problem entirely. Lids stand on their edges, separated by dividers — you pull one out without disturbing the others. No stacking, no toppling, no chain reaction when you grab a lid from the bottom. It’s the filing cabinet principle applied to your kitchen, and it works because it removes the physics that cause the problem in the first place.
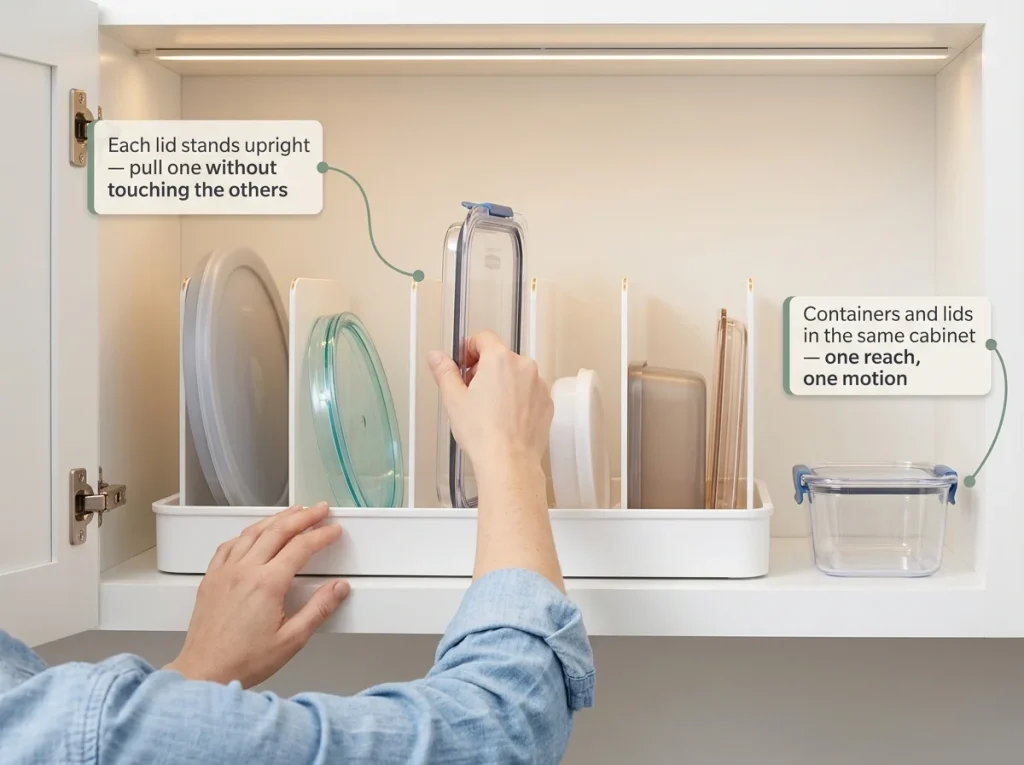
The YouCopia StoraLid Food Container Lid Organizer is built for exactly this: five adjustable dividers and a center channel that stops round lids from rolling. At 10.5 inches deep and 13.4 inches wide, it fits a standard 12-inch upper cabinet shelf with 1.5 inches to spare. The adjustable dividers handle round, square, and rectangular lids of any size — move them as your collection changes. One thing to measure first: at 13.4 inches wide, it takes up a full standard cabinet width, so check your shelf before ordering.
For smaller collections or a tighter budget, the mDesign 3-Compartment Lid Holder takes up less space at roughly 11 by 7.75 inches and works for collections under 12 lids. The three fixed sections are simpler — nothing to adjust or reconfigure — but they won’t accommodate oversized lids or collections that keep growing. If you have fewer than a dozen lids, this does the job without the premium.
The placement rule that matters most: the lid organizer goes next to the container stacks. Same shelf, same cabinet, same reach. Not in a separate drawer. Not on the opposite side of the kitchen. Right next to them.
Option 2 — Lids On (When It Actually Makes Sense)
Keeping lids snapped onto containers eliminates one decision: you never search for a lid because it’s already attached. For small collections of six to eight containers, this works. The trade-off is that containers with lids on can’t nest inside each other, so they take up significantly more cabinet space. A stack of four nested containers without lids stands about 5 inches tall. Those same four containers with lids on reach 10 to 12 inches — you just lost half your shelf height.
This method works for containers stored in a pantry, a deep drawer, or a cabinet with plenty of room. It breaks down when space is tight, when you have more than eight containers, or when multiple people access the cabinet on different schedules. If using lids-on, stand the containers upright on their short side rather than stacking them flat — they’re more stable and easier to grab individually.
Option 3 — The Tension Rod Method (Free, Two Minutes, Good Enough)
A tension rod stretched across the inside of your cabinet, parallel to the front edge, creates a ledge that lids can lean against. Prop lids upright against the rod, sorted by size — large on the left, small on the right, or however your brain organizes things. It’s not as precise as a dedicated organizer, but it keeps lids vertical instead of stacked, and that alone prevents the toppling problem.
This works in any cabinet width from 12 to 24 inches, takes two minutes to set up, needs no tools, and costs almost nothing at any hardware store or dollar store. If you already have a spare tension rod from somewhere in the apartment, it’s free. For renters, this is the zero-risk starting point — and for a full set of renter-friendly kitchen cabinet solutions that don’t require any wall modifications, the renter guide covers the whole system.
The limitation: a tension rod doesn’t separate lids into individual compartments, so they can slide sideways into each other. Best for small collections and as a temporary setup while you decide whether a dedicated organizer is worth the shelf space.
Pro tip: If the tension rod keeps sliding down, wrap two small rubber bands around each end before extending it into the cabinet. The rubber grips the interior wall and holds the rod in place indefinitely.
Container Stacking, Nesting, and When to Upgrade
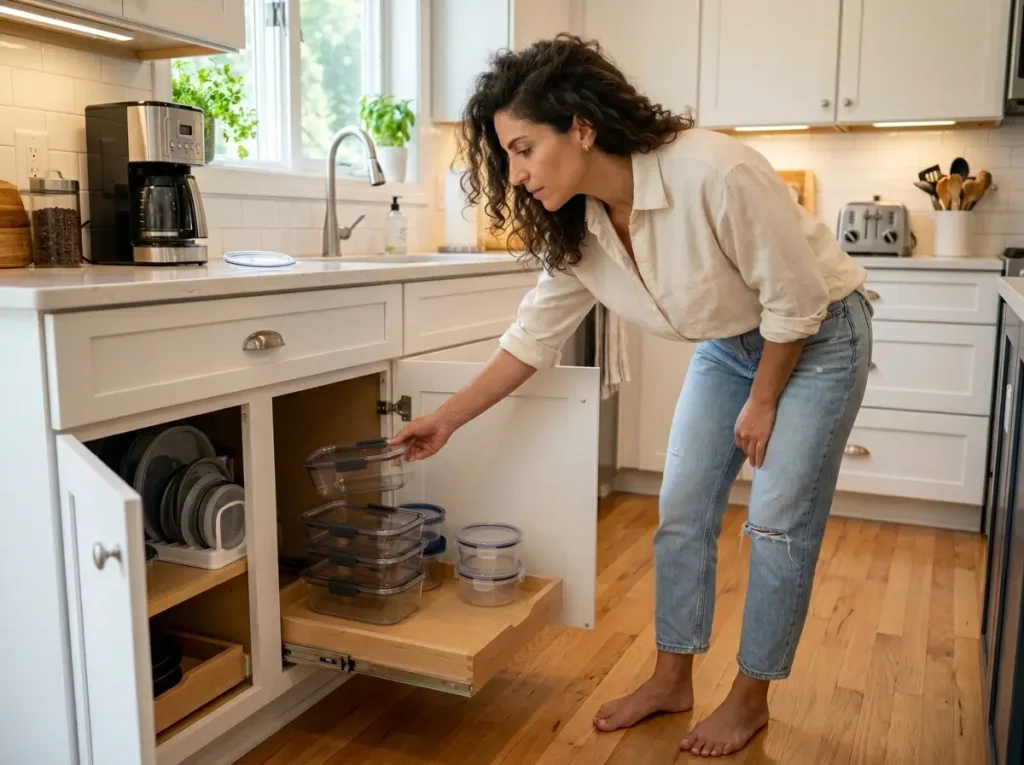
The lid system is the hard part. Container stacking is straightforward once you have the right quantity from the audit and the right location from the storage decision — but there’s a wrong way to nest that creates instability, and there’s one container attribute that changes the lid math entirely.
How to Nest Containers Without the Tower Falling
Nest by shape first: round containers inside round, rectangular inside rectangular. Never mix shapes in the same stack — a round container inside a rectangular one creates an air gap that makes the stack lean. Nest by brand second: same-brand containers are designed to fit inside each other with matching interior dimensions. Different brands almost never nest cleanly, even when the outside measurements look similar.
Stack largest on the bottom, smallest on top, always. Maximum four to five containers per stack — taller than that and the stack becomes unstable enough that someone pulling a container from the middle will bring the whole thing down. You’ll learn this limit the first time you try to grab the third container from a stack of seven and end up catching falling plastic with both hands while a lid rolls off the counter.
Why Uniform Containers Change Everything
Here’s the math that matters: if three containers of the same size share one lid design, you need two lids for three containers instead of three lids for three containers. That’s a real reduction in the lid count filling your cabinet. Same-brand containers nest perfectly because the manufacturer engineered the nesting dimensions — they’re designed to stack without the wobble that mixed-brand containers create.
A cabinet full of one brand looks organized by default. Same color, same shape, same height — even without a lid organizer, the visual order does half the work. This doesn’t mean buying an entire new set today. It means: stop adding new brands. When a container cracks or stains beyond saving, replace it with the brand you’re standardizing on. Over six months, the collection converges naturally without a single big purchase. For more on what to look for in food storage containers, including seal types and which sets actually stack cleanly, the pantry containers guide covers the full decision.
The Container Set Worth Buying (and What to Look for Before You Buy)
If you’re ready to standardize, look for four things: one lid that fits multiple containers in the same size range (reduces lid count), BPA-free Tritan material (resists staining from tomato sauce and curry where standard polypropylene gives up), rectangular shape (uses shelf space with zero gaps between containers), and dishwasher/microwave/freezer safe (so every piece goes through the same cleanup cycle).
The Rubbermaid Brilliance 10-Piece Set checks all four: five containers, five lids, and the lid compatibility across same-size containers means fewer lids in active rotation than you’d expect from a 10-piece set. The 3.2-cup rectangular containers measure 7.9 by 5.4 by 2.5 inches — they fit in a standard 12-inch upper cabinet with space behind them. Clear Tritan doesn’t yellow or hold odors the way standard plastic does after a few rounds of leftover chili. The limitation: it’s a 10-piece starter set, not a full kitchen replacement, and the larger 4.7-cup containers take up more shelf depth than the 3.2-cup size.
The budget-honest answer: you don’t have to replace everything at once. Start with the size you use most — usually medium, 3 to 4 cup — and buy one matching set of that size. Replace others as they crack, stain, or lose their seals. The goal is convergence over time, not a single expensive swap.
Conclusion
Three things hold this system together:
- The lid problem is a geometry problem — vertical lid storage solves it permanently, regardless of what containers you own
- Location matters more than the organizer — the right cabinet for your space (usually lower with a pull-out shelf) is the foundation that makes every other decision easier
- The dishwasher shuffle is the real maintenance threat — keep lid storage and container storage in the same section so putting things away is one motion, not two separate decisions
Three-Month Check: In three months, check whether the lid organizer is still sorting lids consistently or whether orphan lids have started accumulating again. If they have, someone is putting lids away in the wrong section after the dishwasher — reposition the organizer closer to the container stack.
Start with the audit. Pull everything out of that cabinet, run the 10-second lid test on every container, and get the count down to what you actually use in a week. Everything else follows from that.
Q1 Should you store Tupperware with lids on or off?
For small collections of six to eight containers, lids-on works fine — it simplifies the matching step. For larger collections, store lids separately in a vertical organizer so containers can nest inside each other. Nesting is what keeps the cabinet organized as the collection grows past eight containers.
Q2 What is the best way to organize food storage containers?
The most reliable system uses vertical lid storage in one section and nested containers sorted by shape and brand in the adjacent section. Keep both in the same cabinet zone. Proximity between lid storage and container storage is the maintenance key that prevents the system from reverting after a week.
Q3 How do you organize Tupperware in a small cabinet?
Use the upper section for a vertical lid organizer only — lids standing upright take less space than lids stacked flat. Use the lower section or an adjacent lower cabinet for nested containers. A no-drill pull-out shelf in a lower cabinet adds depth access without permanent modifications.
Q4 How many food storage containers do I actually need?
Eight to twelve matched containers covers most households — roughly 3 to 4 small, 3 to 4 medium, and 2 to 3 large. More containers means more lids, and excess lid count creates the disorganization the containers were supposed to prevent.
Q5 How do I stop my food container cabinet from getting messy again?
Design the system for whoever unloads the dishwasher fastest, not most carefully. The lid organizer and containers must share the same cabinet section — one reach, one put-away motion. That single design choice is the most effective maintenance fix because the system requiring two separate sorting decisions every cycle will not last.
Disclaimer: ClutterlessNest is a participant in the Amazon Services LLC Associates Program. As an Amazon Associate we earn from qualifying purchases. This article may contain affiliate links — if you buy through them, we may earn a small commission at no extra cost to you. We only recommend products we have tested or genuinely believe in.