You moved into the apartment, opened every cabinet, and realized they were designed for someone who owns four plates and never cooks. One fixed shelf per cabinet, 15 inches of dead air above your mugs, and lower cabinets so deep that canned goods disappear into the back like they’re entering witness protection. The kitchen cabinet organization system that works for homeowners — built-in pull-outs, custom shelf inserts, screwed-in racks — isn’t available to you. What follows is the renter-specific version: every solution here is no-drill, deposit-safe, and lifts out in under 30 seconds when you move.
Quick Answer: Here’s how to organize rental kitchen cabinets without drilling:
- Measure cabinet depth before buying any organizer (12″ upper, 24″ lower)
- Add expandable shelf risers in upper cabinets for a second tier
- Hook under-shelf baskets below existing shelves for bonus storage
- Use a friction-fit pull-out shelf in deep lower cabinets
- Hang over-the-door organizers with foam-padded hooks on cabinet doors
- Fit an expandable two-tier shelf around pipes under the sink
Why Rental Kitchen Cabinets Are Hard to Keep Organized
Every guide online jumps straight to product recommendations without explaining why your kitchen stays messy no matter what you buy. It’s not a discipline problem. It’s a design problem — landlord-installed cabinets are built to meet minimum building code, not to help someone who actually uses a kitchen.
The Single-Shelf Problem Nobody Mentions
Open your upper cabinets right now. Most rental kitchens have one fixed shelf in a 30-inch-tall cabinet, positioned roughly at the midpoint. That gives you about 14 to 15 inches of vertical space above a row of mugs that stands 4 inches tall. You’re wasting 10 to 11 inches of perfectly usable height — not because you haven’t tried to organize, but because there’s physically nowhere to put a second layer of items without another shelf.
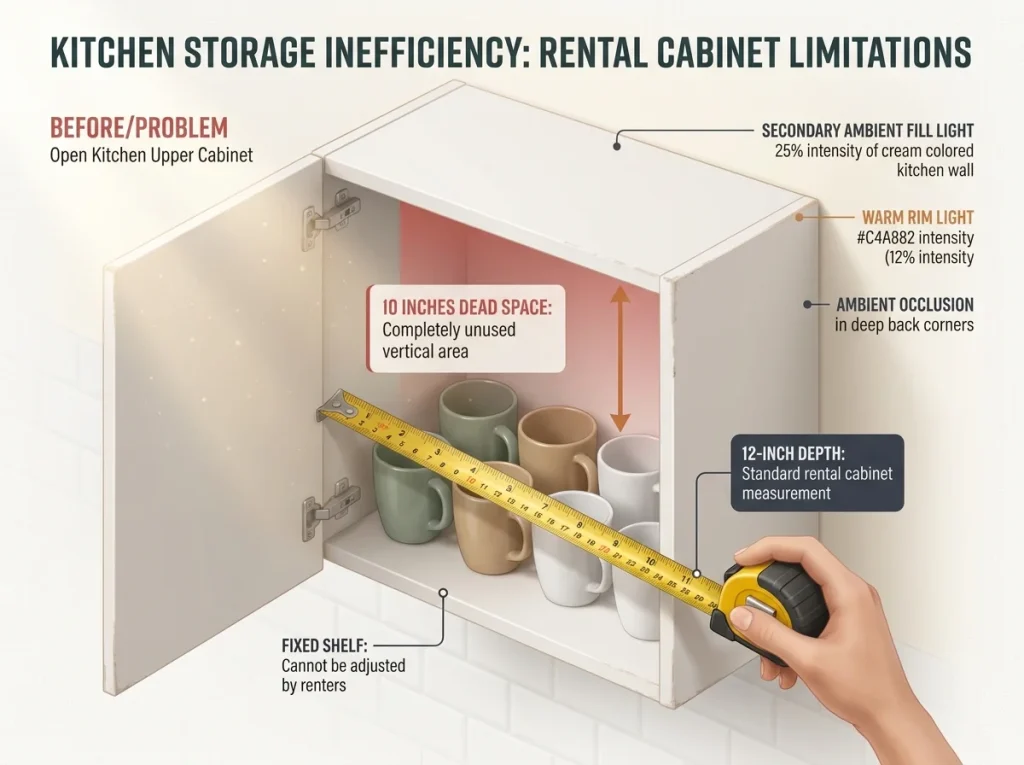
The math matters here. Standard rental upper cabinets are 12 inches deep. The usable shelf is typically 10 to 11 inches (the frame eats an inch). Any organizer deeper than 10 inches will stick out past the door frame and prevent the door from closing flush. This is the number one reason renters return cabinet organizers — they measured wrong, or they didn’t measure at all.
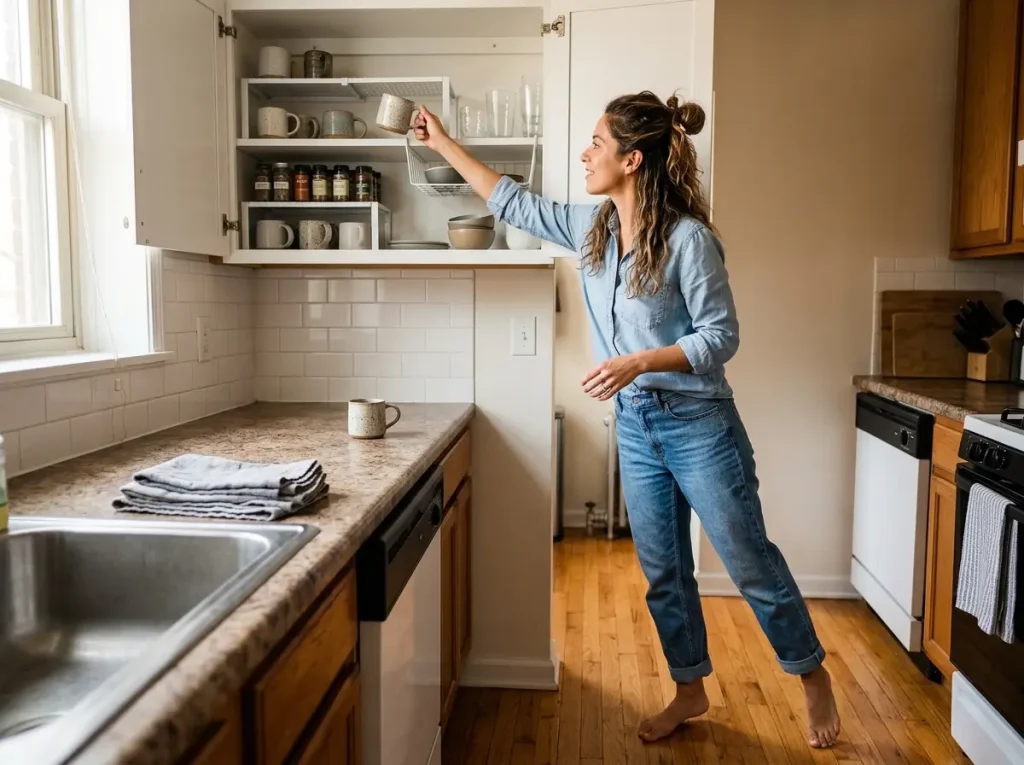
A shelf riser splits that 14-inch dead gap into two 6 to 7 inch tiers that both hold items. Two usable levels where you had one, with zero modification to the cabinet itself. That’s the fix for the single-shelf problem — not better discipline, not fewer things, just physics applied correctly.
The 24-Inch Problem in Lower Cabinets
Your lower cabinets are 24 inches deep. Your comfortable reach from a standing position is about 12 inches. That means the entire back half of every base cabinet is storage you can’t access without crouching and blindly reaching. Items slide to the back. You forget what’s there. You buy duplicates. The dead space in lower cabinets isn’t about organization — it’s about physics.
You’ll know this problem is real the first time you find three half-empty bottles of soy sauce lined up behind a pot you forgot you owned. Everyone discovers this exactly the same way — a year into the lease, during a deep clean they didn’t plan. The back half of a 24-inch cabinet is where things go to be forgotten.
What You Can’t Change — and What You Can
Here’s the constraint set for renters: no new shelves, no drilling, no permanent adhesive on visible surfaces, and everything must come out cleanly on move-out day. That eliminates about 60% of the organizational products you’ll see recommended online. What’s left is a specific subset — friction-fit, gravity-held, hook-based, and expandable solutions that don’t touch the cabinet structure permanently.
The rest of this guide covers only that subset. Every product and method below passes the renter test: can you remove it in 30 seconds with no tools and leave zero evidence it was ever there? If yes, it’s here. If not, it’s not.
Upper Cabinet Organization for Renters
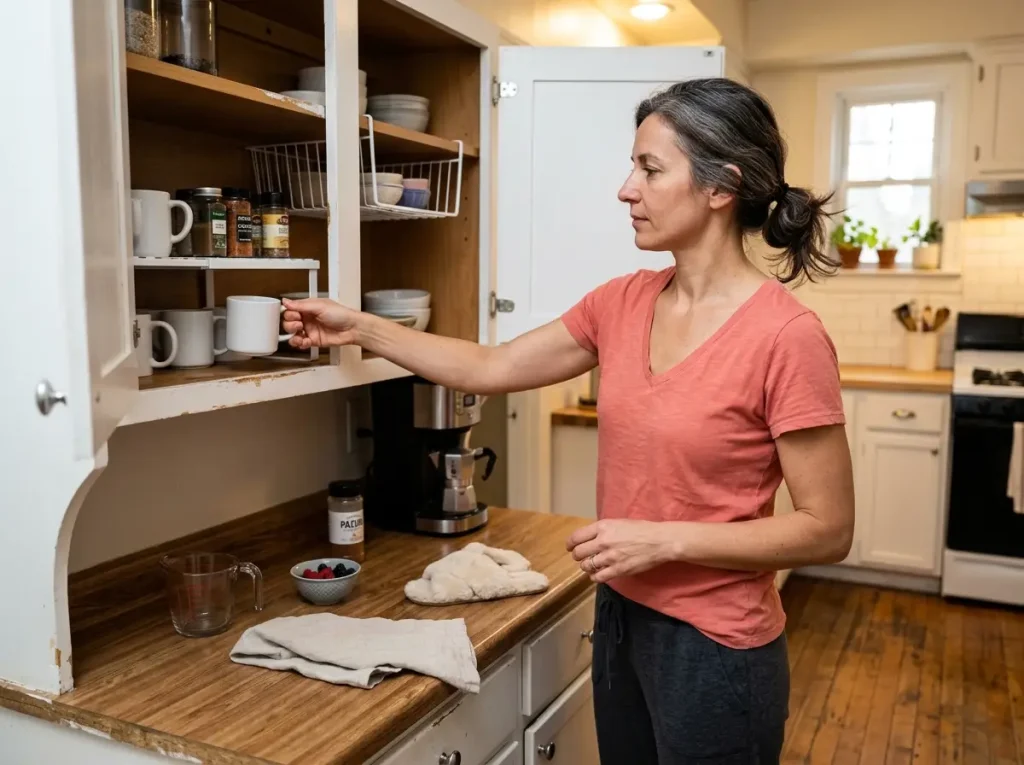
Upper cabinets are where renters waste the most money on organizers that don’t fit. The problem isn’t the product — it’s that nobody measured the shelf depth first. A shelf riser that sticks out past the door frame is just an obstacle you paid for.
Measure Before You Buy (The Number That Changes Everything)
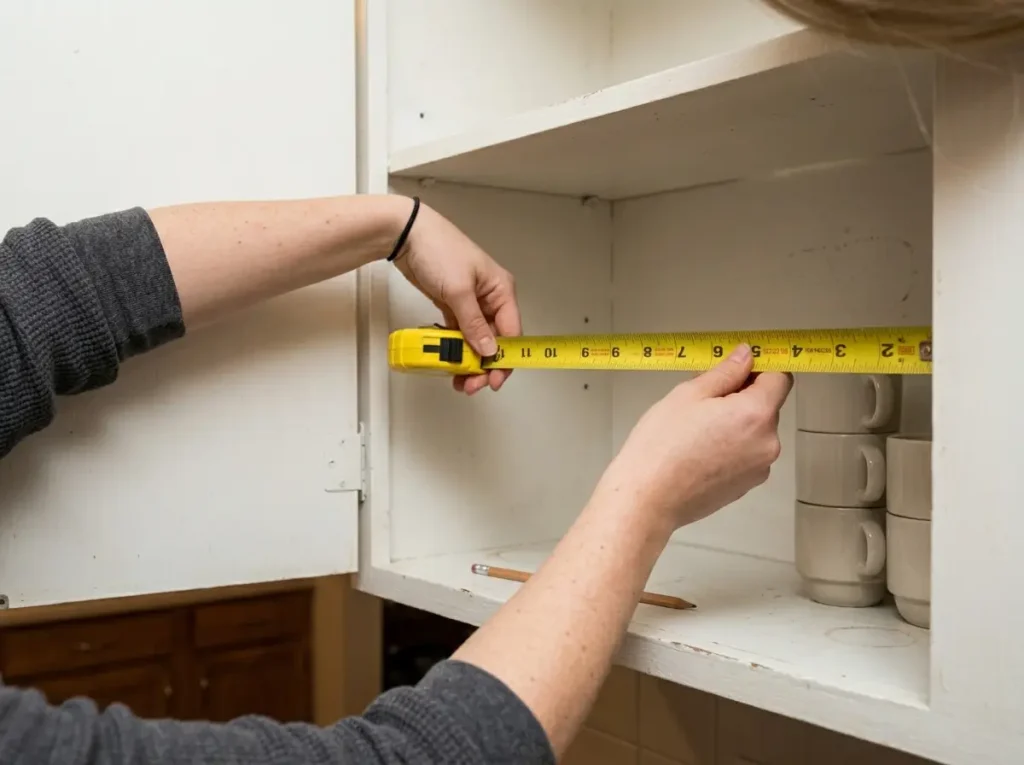
Grab a tape measure. Open your upper cabinet and measure from the back wall to the front edge of the shelf — not the cabinet depth, the actual shelf depth. In most rental kitchens, this number falls between 10 and 11 inches. Write it down. Now measure the width between the side walls. That’s your second number. Any organizer you buy needs to be at least one inch shorter than your shelf depth (so it doesn’t block the door) and either match your width exactly or be adjustable.
This is the step that eliminates returned products and wasted afternoons. Skip it and you end up with a shelf riser that blocks the door from closing — which you’ll discover by hearing the cabinet door bounce back open at 6 AM when you’re half awake. If you want cabinet organizers that match each cabinet type, those measurements are your starting point for everything.
Pro tip: Measure your cabinet shelf depth with the door fully closed — a tape measure from the front edge to the back wall tells you the exact maximum depth for any organizer. If it reads 11 inches, buy organizers 10 inches or less.
Shelf Risers and the Second Level You’re Leaving Empty
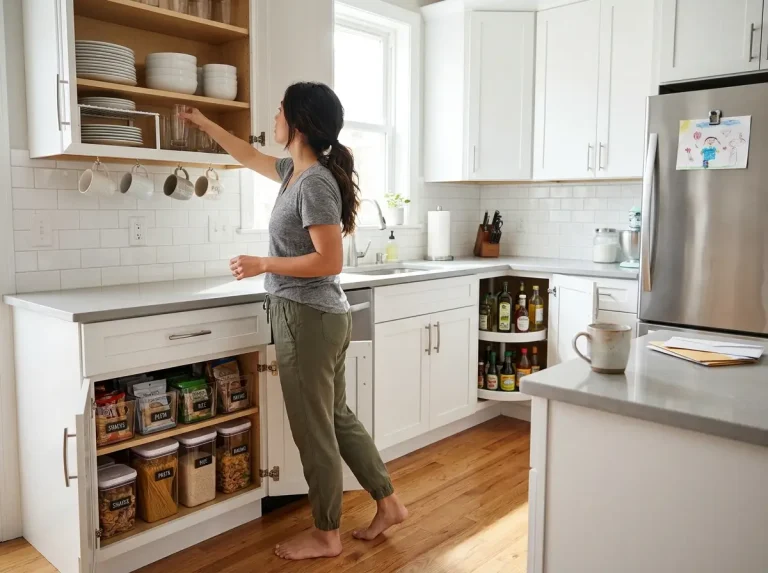
Once you know your shelf depth, a riser turns one shelf into two. You place shorter items on the lower level — mugs, small cups, jars you reach for daily — and taller or less-used items on the platform above. The key is frequency: daily items at the lower level where you can grab them without looking, weekly items on top where they’re visible but not in the way.
The SimpleHouseware Expandable Shelf Rack stretches from 15 to 25 inches wide, which covers nearly every rental cabinet width without guessing. It sits on the existing shelf with no installation — set it down and load it. The 4 to 6 inch height creates a second tier that fits standard mugs and short jars without blocking the shelf above.
One limitation: if your cabinet width is under 15 inches, this one won’t collapse small enough. A fixed-width wire shelf riser from a dollar store works fine for narrow cabinets — just measure first.
Under-Shelf Baskets and What They Can Hold
The space between the bottom of a shelf and the tops of items stored below it is dead vertical space in most kitchens. An under-shelf basket hooks onto the shelf edge and hangs below, creating a shallow storage zone for lightweight items: mugs, small bowls, lids, or loose packets.
The Under-Shelf Wire Basket slides onto any shelf that’s 0.75 inches thick or thinner — which covers most rental cabinet shelves. At 16 by 10 by 4.5 inches, it holds mugs or small cups below the shelf while leaving the main shelf surface entirely free.
One limitation: these baskets hold roughly 8 to 10 pounds before the hooks start to bow. You’ll hear a slight creak from the wire when you’ve overloaded it — that’s the warning sign. Ceramic mixing bowls and full jars of sauce are too heavy. Keep it lightweight and this lasts for years without bending.
Lower Cabinet Organization for Renters
As professional kitchen organizers emphasize, the zone-first approach matters most in lower cabinets where depth kills accessibility. Your base cabinets have 24 inches of depth but your arms have about 12 inches of comfortable reach. The entire back half of every lower cabinet is a storage graveyard unless you bring the contents forward.
The Pull-Out Solution (and Why Most Renters Skip It)
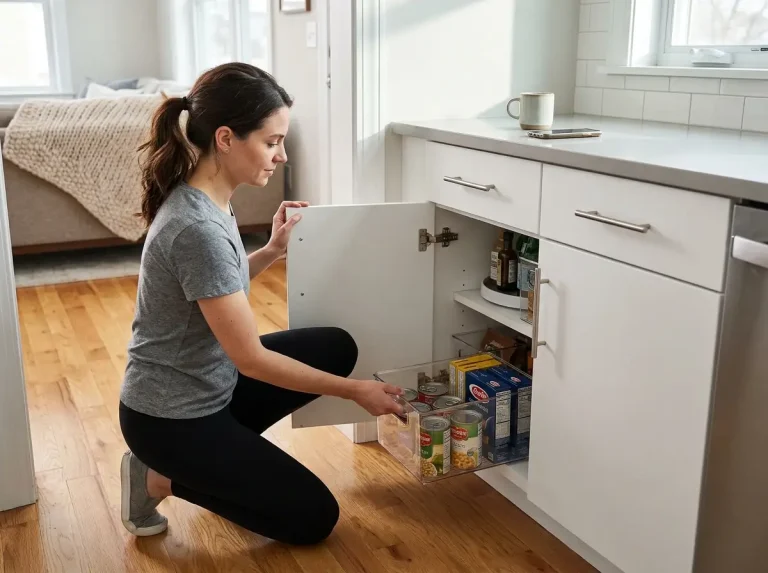
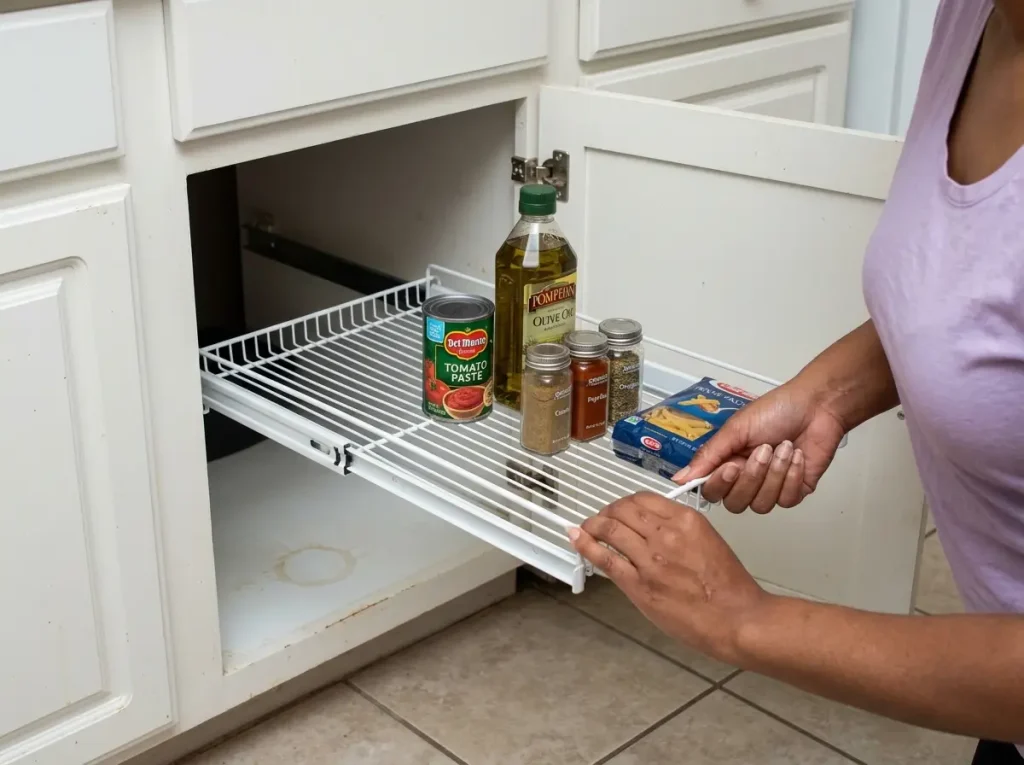
Most renters assume pull-out shelves require installation — screws into the cabinet frame, hardware that voids the deposit. That used to be true. It isn’t anymore. Friction-fit pull-outs exist specifically for rental kitchens, and they solve the 24-inch depth problem completely by sliding the full cabinet contents toward you like a drawer.
The SpaceAid No-Drill Pull-Out Cabinet Shelf fits cabinets 17 to 24 inches deep and expands from 14 to 21 inches wide. It uses the cabinet frame itself as the anchor point — friction against the side walls holds it in position. Pull the full depth of your cabinet to the front, grab what you need, slide it back. No tools, no adhesive, no damage.
When you move, it lifts straight out. If your cabinets are shallower than 17 inches, the adhesive version works for lighter loads — but the adhesive type can’t handle the same weight and may leave residue if the cabinet interior is painted rather than laminated.
For a deeper look at why standard advice fails in 24-inch cabinets specifically, the deep cabinet dead-space fix covers the full approach with additional methods.
Turntables — When They Work and When They Don’t
A turntable sounds smart until you use one in the wrong cabinet. In a narrow straight lower cabinet, a 12-inch turntable leaves dead corners that nothing fits into. The spin doesn’t add accessibility — it just rearranges what you can’t reach into a circle of what you can’t reach. But in a wide base cabinet or a corner cabinet where items cluster together — oils, vinegars, sauces, spice bottles — a turntable turns a pile into an organized ring you can spin through in seconds.
The Copco Non-Skid Turntable 12-inch has a non-slip rubber base that holds position without adhesive and a raised lip around the edge. That lip is the detail that separates functional turntables from the cheap flat ones. You’ll understand why it matters the first time you open a cabinet door quickly and watch a jar spin to the edge — on a flat turntable, that jar hits the floor. On one with a raised lip, it stays put. If your cabinets are narrower, a 9-inch version fits tighter spaces without wasting corner area.
Pro tip: Place your turntable toward the back of a wide lower cabinet — it brings back-row items forward with a spin instead of forcing you to reach past the front row every time.
The Vertical Tension Rod Trick
Cutting boards, baking sheets, pot lids, muffin tins — anything flat and awkward gets stacked in most kitchens. And stacked flat items create the avalanche: you need the one on the bottom, you pull, everything crashes forward. A vertical tension rod fixed between the cabinet floor and the shelf above turns that stack into a filing system. Items stand upright, separated by the rod, and you grab any one without disturbing the rest.
A tension rod from any dollar store fits cabinets 11 to 18 inches wide. Place it vertically near the cabinet center to create two upright slots, or use two rods to create three. This costs almost nothing, installs in five seconds with no tools, and solves a problem that drives people to buy specialty pan racks at ten times the cost. Sometimes the cheapest fix is the one that actually works best.
Cabinet Door Organization for Renters
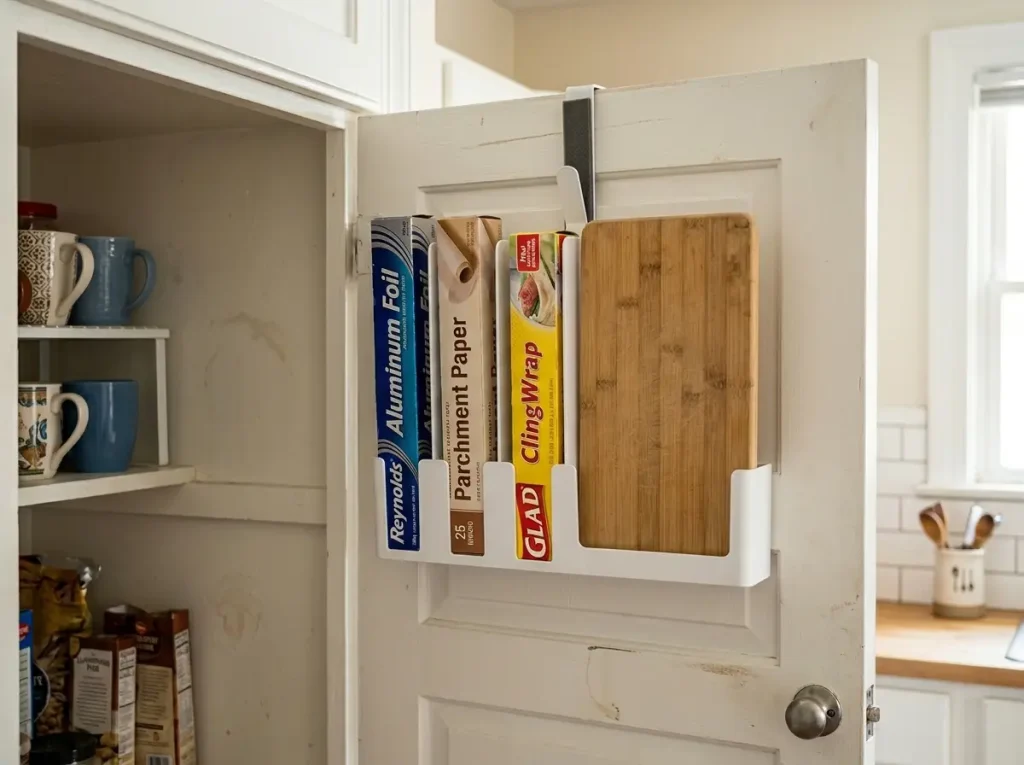
The inside of every cabinet door is 12 to 36 inches of usable surface that holds nothing in most rental kitchens. Over-the-door organizers fix this — but only if you choose one that won’t scratch the door frame or rattle every time you open and close the cabinet. That rattle is the reason most renters take door organizers down within a month.
What Actually Fits on a Cabinet Door
Before you buy anything for a cabinet door, measure the clearance between the door’s inner surface and the nearest shelf edge when the door is closed. Most standard cabinets leave 1.5 to 3 inches of gap. Any organizer deeper than your clearance will hit the shelf when the door swings shut — either jamming the door or pushing shelf items backward every time you close it.
The SimpleHouseware Wall/Door Mount Kitchen Wrap Organizer extends about 2.5 inches from the door surface — it fits most standard cabinet door clearances without interference. It hooks over the door edge with no screws or adhesive and holds aluminum foil, plastic wrap, parchment paper, and a cutting board in separate slots. Lifts off in two seconds for move-out.
One limitation: it needs a door edge at least half an inch thick for the hooks to grip securely. Thin laminate cabinet doors without a solid edge won’t hold it well. For more door-mount organizers worth using, the companion guide covers options for every door type.
Protecting the Door Frame at Move-Out
Here’s the renter detail nobody tells you: bare metal hooks on an over-the-door organizer will scratch the cabinet door frame within weeks. Every open and close creates micro-abrasion at the hook contact point. Over six months, those scratches become visible lines. Over a year, they look like damage a landlord can point at.
The fix costs pennies: foam weatherstrip tape on every metal hook edge that contacts the door frame. Cut a small strip, wrap it around the contact point, press firmly. The foam absorbs the friction, prevents scratching, and eliminates the rattle that makes these organizers annoying in quiet kitchens. Your deposit stays safe and your mornings stay quiet. Cabinet door interiors are rarely inspected as closely as walls at move-out — but visible scratches on the frame edge are exactly the kind of thing a thorough landlord notices.
Pro tip: Apply foam weatherstrip tape on both sides of over-the-door hooks — the side facing the door frame AND the side facing the cabinet interior. Both contact points move against surfaces every time the door opens.
What to Keep Off the Doors
Not everything belongs on a cabinet door. Heavy items — full oil bottles, cast iron lids, bags of flour — exceed the weight capacity of most over-the-door hooks within weeks. The hooks slowly bend outward, the organizer tilts forward, and one morning it falls off while you’re pouring coffee. Keep the total loaded weight under 10 pounds.
Good candidates for door storage: foil rolls, wrap boxes, spice packets, cutting boards, oven mitts — all light enough to stay put indefinitely. If something is too heavy for the door, the better solution is usually moving it to the front of the nearest shelf where you can reach it without any organizer at all. Sometimes organizing means putting things in the right spot, not buying another product.
Under-Sink Cabinet Organization for Renters
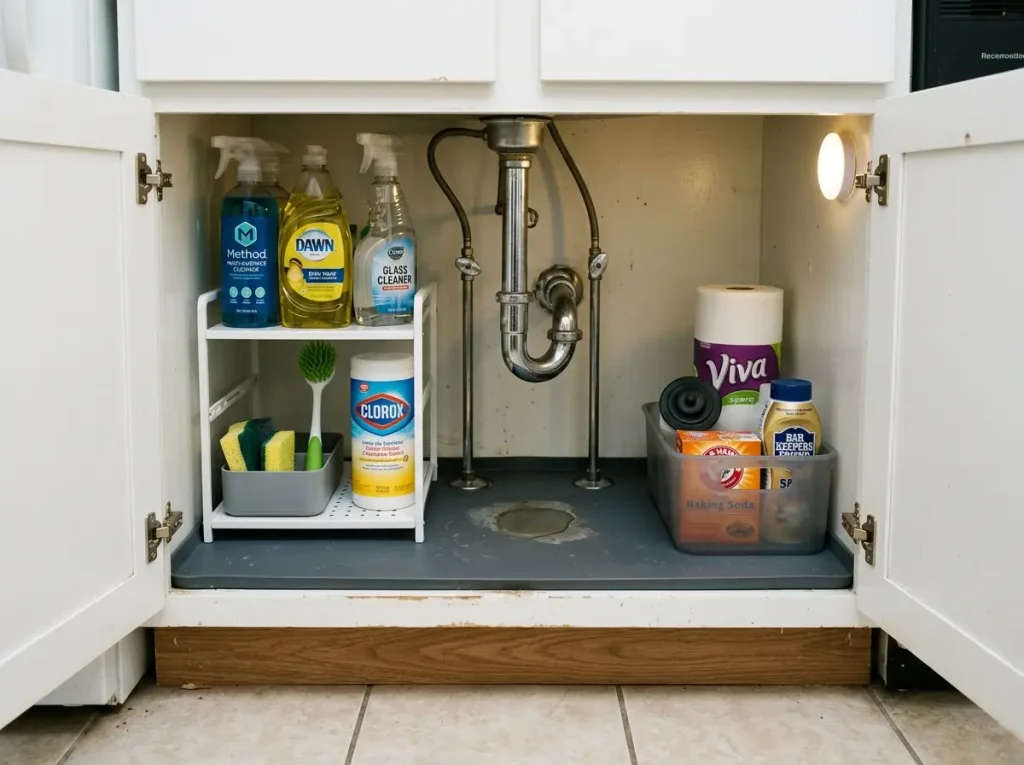
The space under your kitchen sink is probably the least organized cabinet in your apartment. Not because it’s hard to fix — because the pipe takes up the middle, nothing stacks properly around it, and most people give up after shoving two cleaning bottles in there. If you want the full under-sink organization system, that guide goes deep. Here’s the renter-specific version.
Mapping Your Pipe Situation
Before buying anything, open the cabinet and look at what you’re working with. Most rental kitchen sinks have a P-trap pipe centered under the basin with supply lines running up each side to shutoff valves. The usable storage zones are on either side of this pipe assembly. Measure the width of each zone — most standard under-sink cabinets give you two sections of 8 to 12 inches each, depending on your cabinet width and pipe positioning.
The height matters too. Measure from the cabinet floor to the underside of the sink basin — most rental under-sink cabinets give you 14 to 18 inches of vertical clearance. That number determines whether a two-tier shelf fits (needs at least 14 inches) or whether you’re limited to single-level bins on the floor.
The Two-Tier Fix
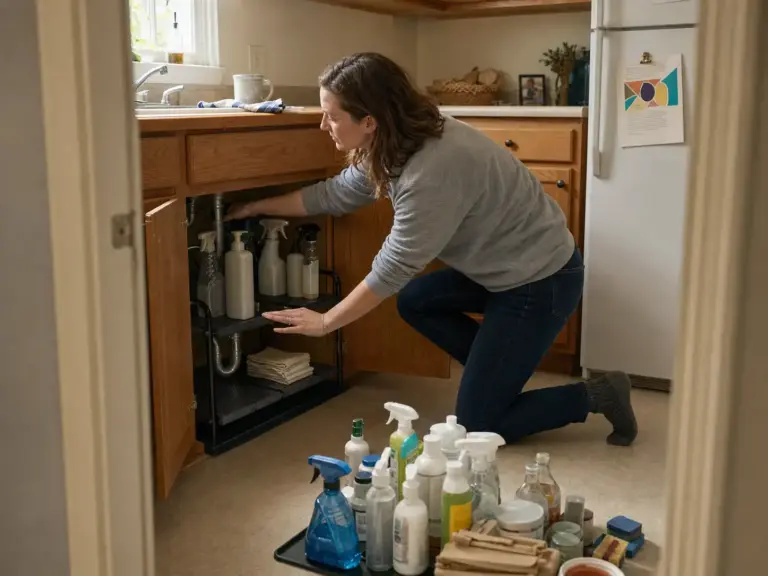
Once you know your side-zone widths and height clearance, an expandable two-tier shelf slots in on one or both sides of the pipe. Two levels of storage where you previously had one cluttered cabinet floor with bottles tipped over and sponges lost behind the P-trap.
The SimpleHouseware Under Sink 2-Tier Expandable Shelf Organizer adjusts from 14.4 to 23.2 inches wide, which means it expands around most pipe configurations rather than fighting them. Top tier holds upright spray bottles — daily cleaning products you reach for often. Lower tier holds sponge trays, scrub brushes, and small bins for backstock.
Lifts straight out on move-out day with zero damage. One limitation: if your under-sink vertical clearance is under 14 inches, a single-tier version or flat bins arranged on each side of the pipe work as alternatives.
The Drip Mat Rule
Here’s the detail that protects your deposit from something you won’t notice until it’s too late: supply line fittings in older rental buildings drip. Not a flood — a slow, occasional drip that leaves a water stain ring on the cabinet floor over months. By the time you notice the discoloration, the stain is set into the cabinet material and you’re explaining it at move-out.
A silicone drip mat with raised edges on the cabinet floor catches those drips before they become a deposit issue. It also contains cleaning product spills — a tipped bottle of surface cleaner on a Saturday morning doesn’t soak into the cabinet floor when there’s a mat with a one-inch lip catching it. This isn’t an organization product. It’s deposit insurance. Put one down before you organize anything else under the sink.
Making Your Renter Cabinet System Last
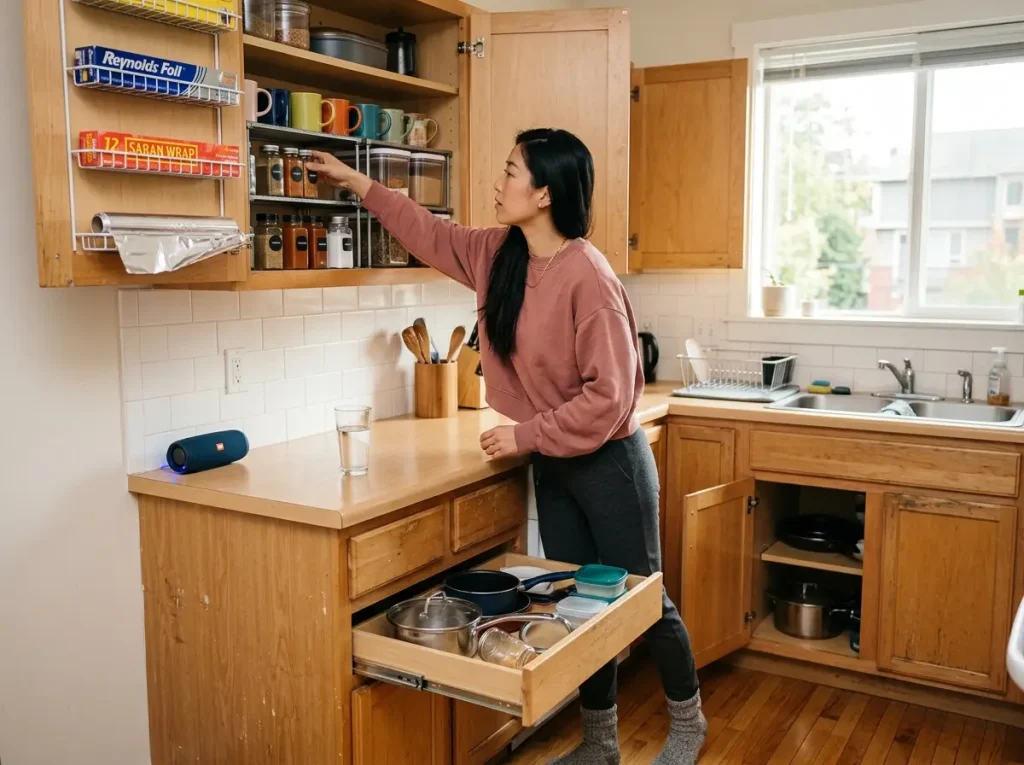
You can spend a weekend organizing every cabinet in your kitchen, take a photo, feel satisfied — and watch the whole thing collapse by month two. Not because the products failed. Because the system assumed everyone in the household would maintain it perfectly. They won’t. You on a rushed Tuesday morning won’t either.
Designing for the Lowest-Effort User
If you live alone, you’re designing for your worst self — the Tuesday morning version running late who drops things wherever there’s space. If you share the kitchen with a roommate, you’re designing for the person who puts things back “roughly.” Either way, the system needs to tolerate imprecision.
Wide zones beat narrow ones. “Mugs go in this cabinet” works. “Tall mugs on the left side of the riser, short mugs on the right” breaks the first time someone is tired. Build zones that are obvious without labels — wide enough that being slightly off doesn’t collapse the whole system. Your roommate won’t follow a precision layout. Design knowing this, not hoping they’ll change. Three obvious zones beat six specific ones every time.
The 10-Minute Monthly Reset
Every system drifts. Items migrate to wrong zones. The turntable gets loaded unevenly on one side. Something ends up behind the pull-out shelf instead of on it. This is normal — not failure, just entropy. The fix isn’t reorganizing from scratch every few months. It’s a 10-minute reset once a month.
Open every cabinet door. Pull anything that drifted back to its zone. Check that pull-outs slide smoothly and aren’t jammed by something that rolled underneath. Confirm the turntable isn’t overloaded on one side. Close the doors. Done. Ten minutes when done monthly. An entire frustrating afternoon when you let it slide for six months and the whole system has silently reverted to chaos. The difference between a system that lasts and one that collapses is this monthly check-in.
Your Move-Out Prep Checklist
Photograph your cabinet interiors the day you move in. Timestamp those photos — they’re your proof of pre-existing condition if anything gets questioned at move-out. This takes two minutes and saves arguments later.
When you’re ready to leave: confirm no adhesive product left residue (peel slowly — if paint comes with it, use a hair dryer to warm the adhesive first). Check all over-the-door organizers for scratches on the door frame. Verify every shelf riser, pull-out, and basket lifts out cleanly with no marks underneath.
Pack your entire cabinet organization system into two bags — it goes with you to the next apartment. You spent months learning what works for your cooking style and habits. That’s a whole-apartment organization system building itself, piece by piece. The same portable-kit thinking applies to your no-drill closet system and every other space you organize as a renter.
Conclusion
Three things to take away: measure before you buy anything (cabinet depth, shelf width, door clearance — these three numbers prevent most returns), use only friction-fit and hook-based products that pass the 30-second removal test, and design zones wide enough that imperfect daily use doesn’t break the system.
Three-Month Check: Open every cabinet three months after setup. If anything has permanently migrated out of its zone, that zone is too narrow or too specific — widen it and simplify the rules.
Start with the one cabinet that frustrates you most. Get it right. Live with it for a week. Then do the next one.
Q1 How do you organize kitchen cabinets without drilling?
Use shelf risers, over-the-door organizers, under-shelf baskets, and friction-fit pull-out shelves — all set in place with no installation. None leave residue or damage cabinet surfaces. Measure your cabinet depth (typically 12 inches upper, 24 inches lower) before buying any organizer to avoid returns.
Q2 What are the best no-drill organizers for rental kitchen cabinets?
For upper cabinets: expandable shelf risers and under-shelf wire baskets. For lower cabinets: a friction-fit pull-out shelf for deep base cabinets and a non-skid turntable for corners. For doors: over-the-door organizers with foam-padded hooks to prevent frame scratching.
Q3 How do you maximize kitchen cabinet space in a small apartment?
Start with shelf risers in upper cabinets to create a second level, then address lower cabinet dead space with a pull-out shelf or turntable. Cabinet door backs are the most underused surface in any rental kitchen — an over-the-door organizer adds storage without taking shelf space.
Q4 Are Command strips safe to use inside kitchen cabinets?
Command strips on cabinet interiors hold lightweight items under 5 pounds. Use painter’s tape as a buffer layer under the adhesive on painted or melamine surfaces — the tape peels cleanly without pulling paint at move-out. Never exceed the weight limit printed on the packaging.
Q5 How do you organize under the sink in a rental?
Measure the clearance on each side of the P-trap pipe first. An adjustable two-tier expandable shelf fits around most standard pipes and doubles under-sink storage without drilling. Add a silicone drip mat on the cabinet floor to catch slow drips from supply line connections — deposit protection most renters skip.
Disclaimer: ClutterlessNest is a participant in the Amazon Services LLC Associates Program. As an Amazon Associate we earn from qualifying purchases. This article may contain affiliate links — if you buy through them, we may earn a small commission at no extra cost to you. We only recommend products we have tested or genuinely believe in.