You own 300 square feet and every surface is doing double duty. The closet holds clothes, cleaning supplies, and the vacuum. The bedroom is also the office. The kitchen counter is the dining table, the prep station, and the mail pile. You’ve tried organizing before — bought bins, watched videos, spent a Saturday afternoon rearranging — and it looked great for about ten days. Then it reverted.
That reversion isn’t a discipline problem. It’s a systems problem — something even NAPO (the National Association of Productivity & Organizing Professionals) emphasizes when training organizers to build systems that survive daily life. The organization advice most people follow was designed for houses with dedicated rooms and walk-in closets, not for a one-bedroom where every square inch has to justify itself. These ten ideas are built for apartments — small ones, rented ones, shared ones — and they’re designed to still be working three months from now when normal life has had its way with them.
Quick Answer: The best small apartment organization ideas work with your space constraints, not against them.
- Edit your belongings before buying any organizer
- Organize by function zones, not by room labels
- Use vertical space above cabinets and doors (measure first)
- Maximize your closet with a double rod and velvet hangers
- Store seasonal items under the bed in low-profile containers
- Turn the back of every door into accessible pocket storage
- Build a 15-minute monthly reset to prevent reversion
Start Here — Not With Bins
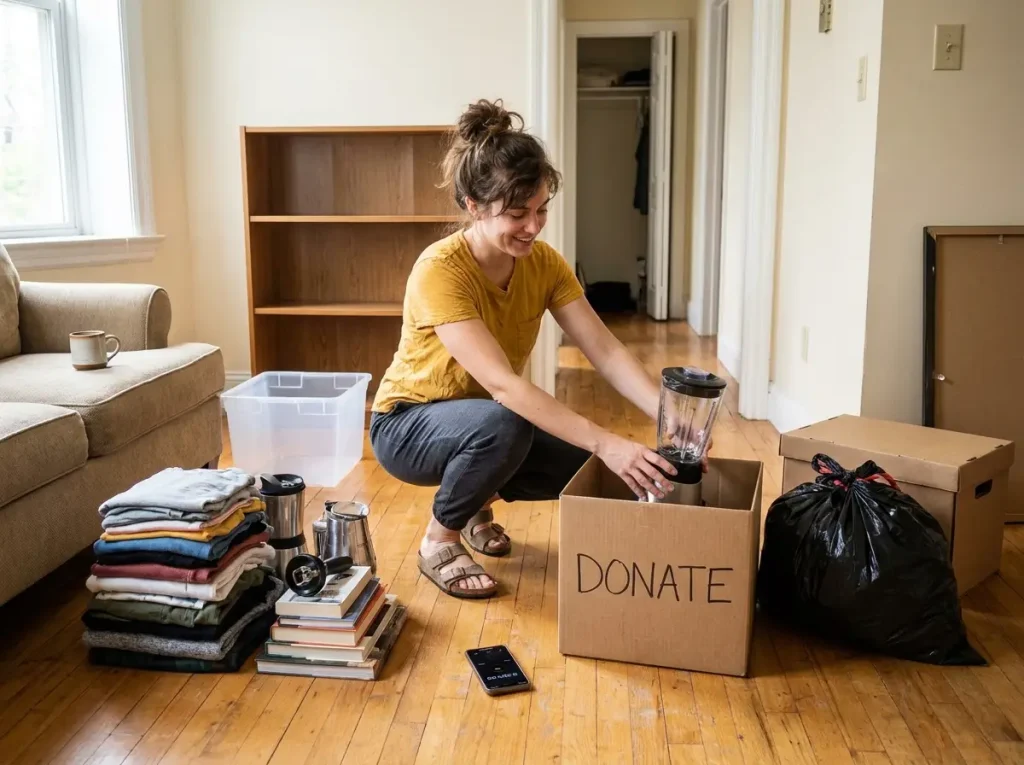
The first mistake in any small apartment organization project is starting at the store. You walk into Target, buy a set of matching bins, come home, and try to fit your existing stuff into them. The bins don’t fit the shelves. The stuff doesn’t fit the bins. Three weeks later the bins are stacked in a corner holding nothing, and you’ve lost the receipt.
The fix starts with subtraction, not addition. Before you buy a single organizer, you need to reduce what you own to what actually fits your space. This isn’t about minimalism or getting rid of things you love — it’s about being honest that a 500-square-foot apartment cannot hold the same volume of belongings as a three-bedroom house.
The One-Room Sweep That Changes Everything
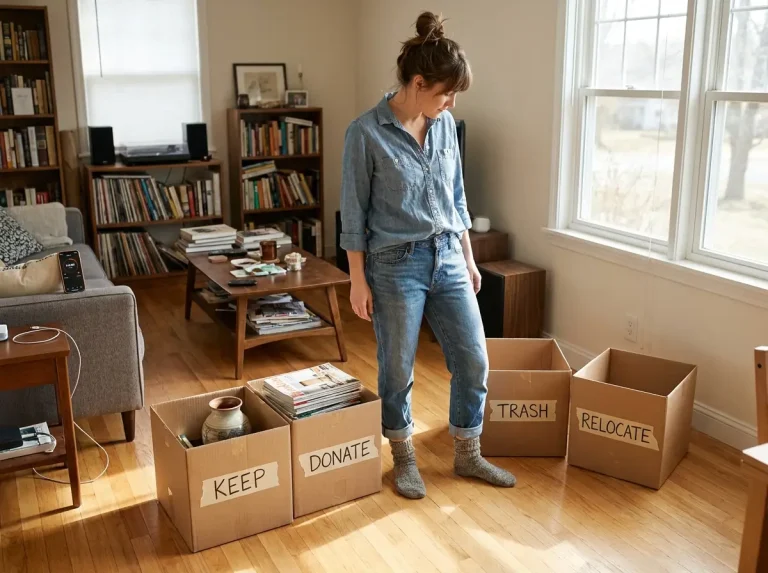
Pick one room. Set a timer for 30 minutes. Pull everything out of one area — one closet, one set of kitchen cabinets, one bathroom vanity. Sort into three piles: keep here, relocate, and remove. “Keep here” means it belongs in this spot and you use it at least once a month. “Relocate” means it’s useful but stored in the wrong place. “Remove” means donate, trash, or give to someone who’ll actually use it.
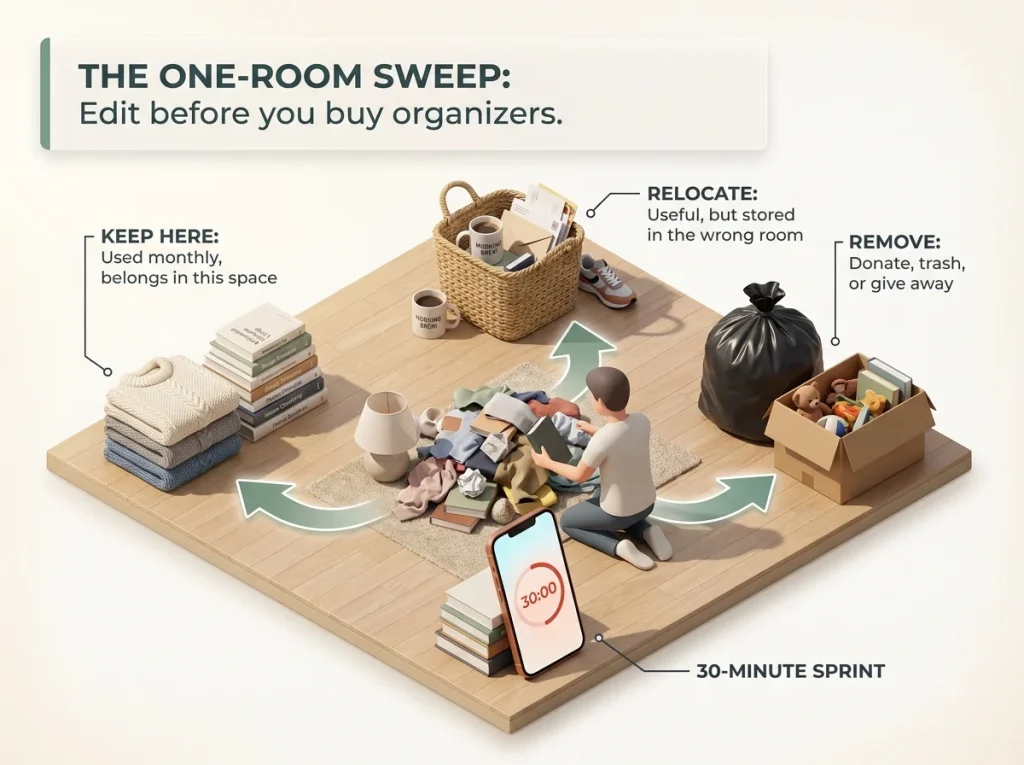
The 30-minute cap matters. Decluttering when you’re overwhelmed causes decision fatigue after about 45 minutes — a pattern well-documented in behavioral research — and that’s when you start keeping everything “just in case.” Short sessions, repeated over a few days, produce better results than a marathon weekend purge that leaves you too tired to finish.
Pro tip: If you haven’t used something in the last 90 days and it’s not seasonal, it’s a candidate for removal. In a small apartment, storage space is too expensive to waste on “maybe someday” items.
Why Buying Organizers First Always Fails
Organizers are containers. Containers have dimensions. Your shelves, drawers, and closets have dimensions. If you buy first and measure never, you end up with bins that stick out past the shelf edge, drawer dividers that leave gaps, and stackable containers that are too tall for the cabinet they’re supposed to fit inside.
The sequence that works: edit your belongings first, measure the empty spaces second, buy organizers third. Every recommendation below follows that order. The room-by-room decluttering method works well here if you want a structured sequence — start with the bathroom (smallest, fewest emotional attachments) and work toward the bedroom closet last.
Map Your Apartment by Function, Not by Room
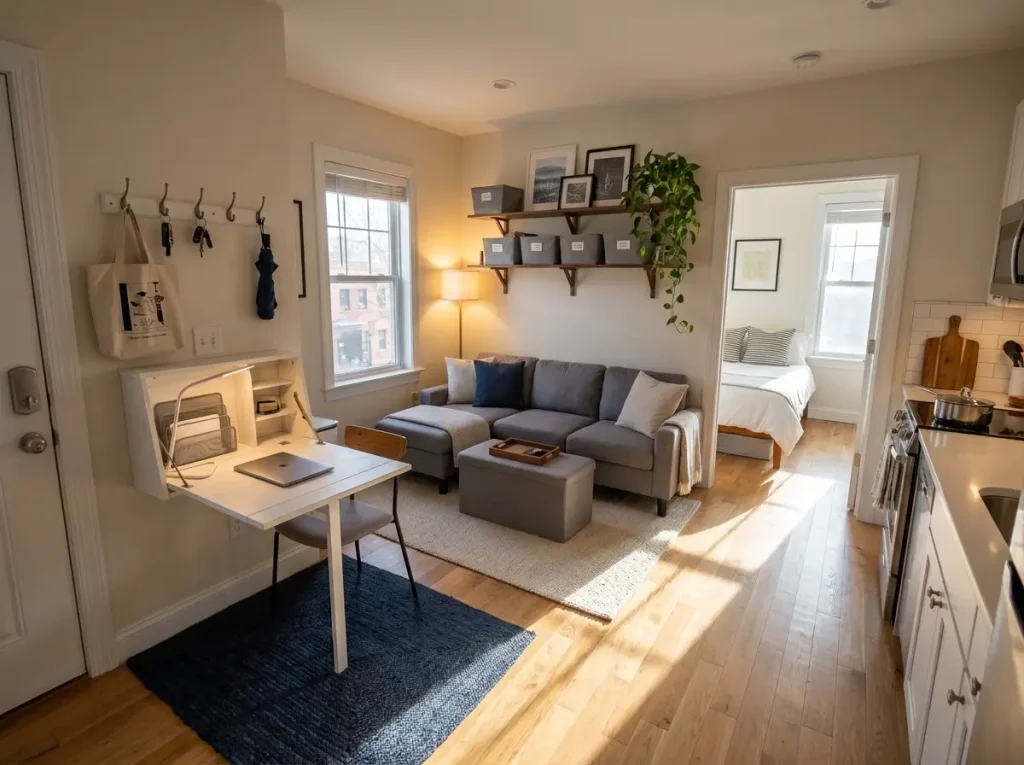
In a house, rooms have single purposes. The bedroom is for sleeping, the office is for working, the kitchen is for cooking. In a small apartment, every room does at least two jobs. Your bedroom is also your office. Your living room is also your dining room. Your kitchen counter is your prep surface, your mail station, and your coffee bar.
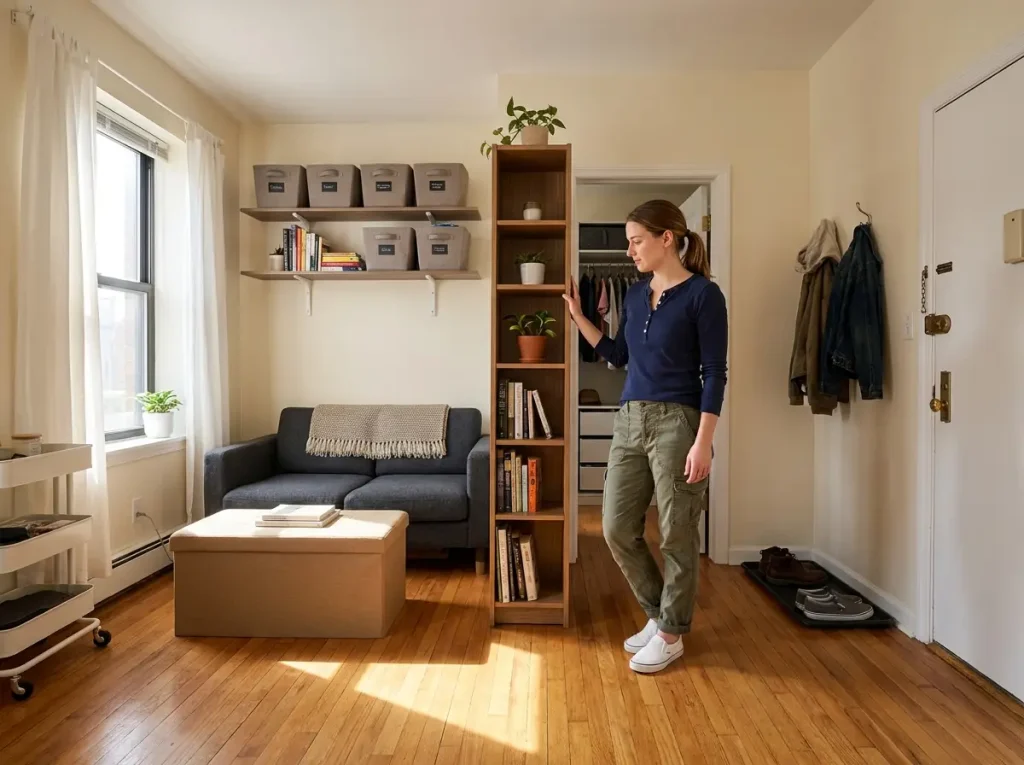
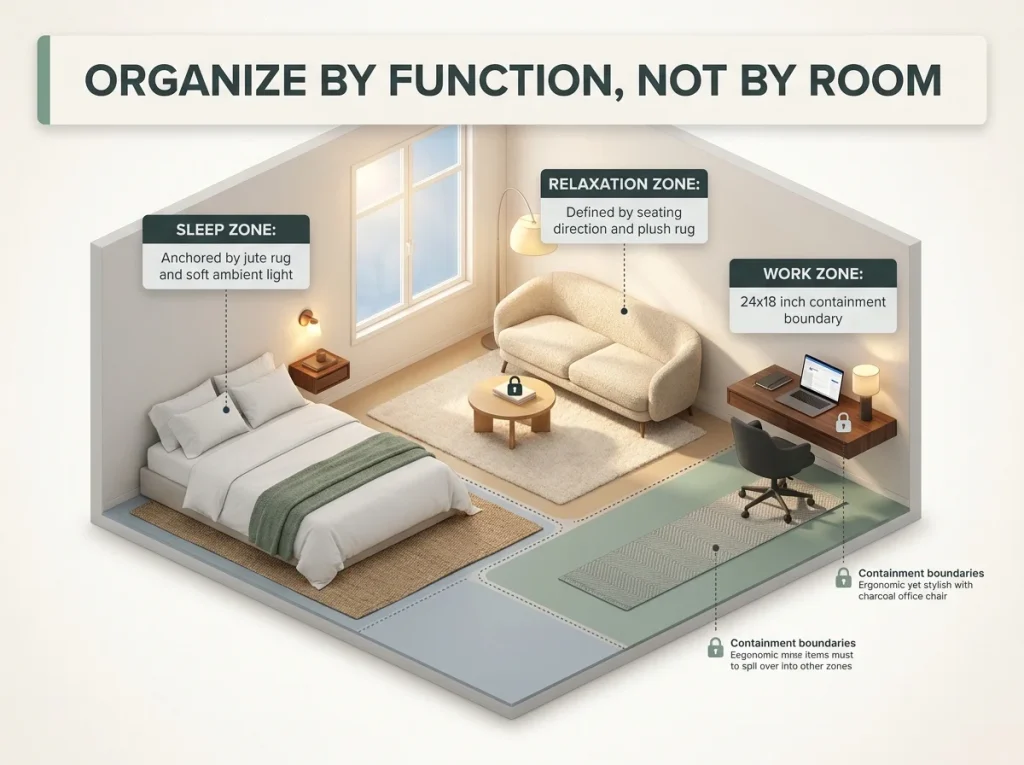
When you organize by room label, you fight this reality. When you organize by function, you work with it. The idea is to map every activity you do in your apartment and give each one a defined zone — even if three zones share the same room.
The Zone Method for Multi-Use Rooms
Walk through a normal day in your apartment. Where do you work? Where do you eat? Where do you get ready in the morning? Where do you relax at night? Each of those activities is a zone. Now look at where you currently do them — odds are some zones overlap badly, which is why things pile up.
A work zone needs a surface, a power outlet, and a place for supplies. A relaxation zone needs seating, lighting, and a spot for whatever you do to unwind. A getting-ready zone needs a mirror, your daily products, and a flat surface. Define these zones physically — even a small rug or a different light source creates a visual boundary that your brain recognizes as “this area is for this.”
One Rule That Stops Surface Clutter
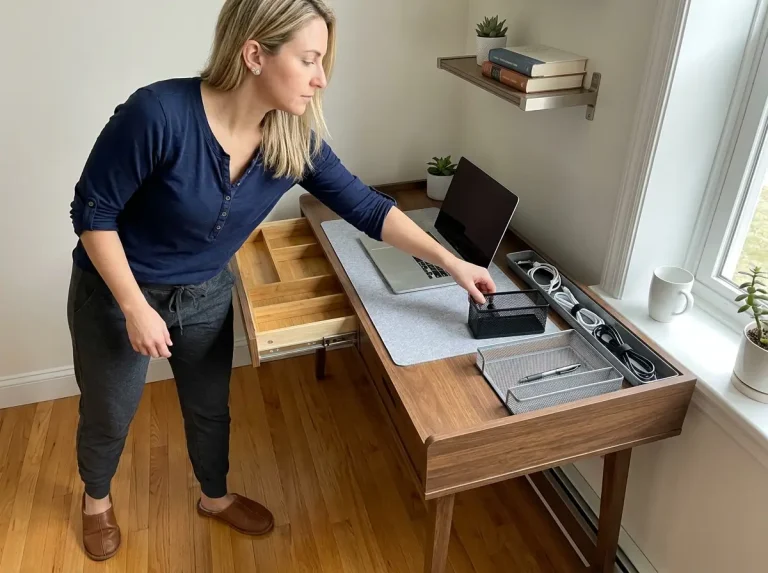
Each zone gets a containment boundary. This is the physical edge of what that zone is allowed to hold. Your work zone might be a 24-by-18-inch desk area — nothing work-related lives outside that rectangle. Your coffee station might be a 12-inch section of counter — the coffee maker, the mug, the sugar, and nothing else.
When something doesn’t fit inside its zone boundary, that’s a signal you have too much for that function, not that you need a bigger zone. In a small apartment, zones don’t expand — they edit. The desk organization system follows this exact principle with an 18-inch primary zone rule that keeps work surfaces functional.
Go Vertical — The Specific Numbers Matter
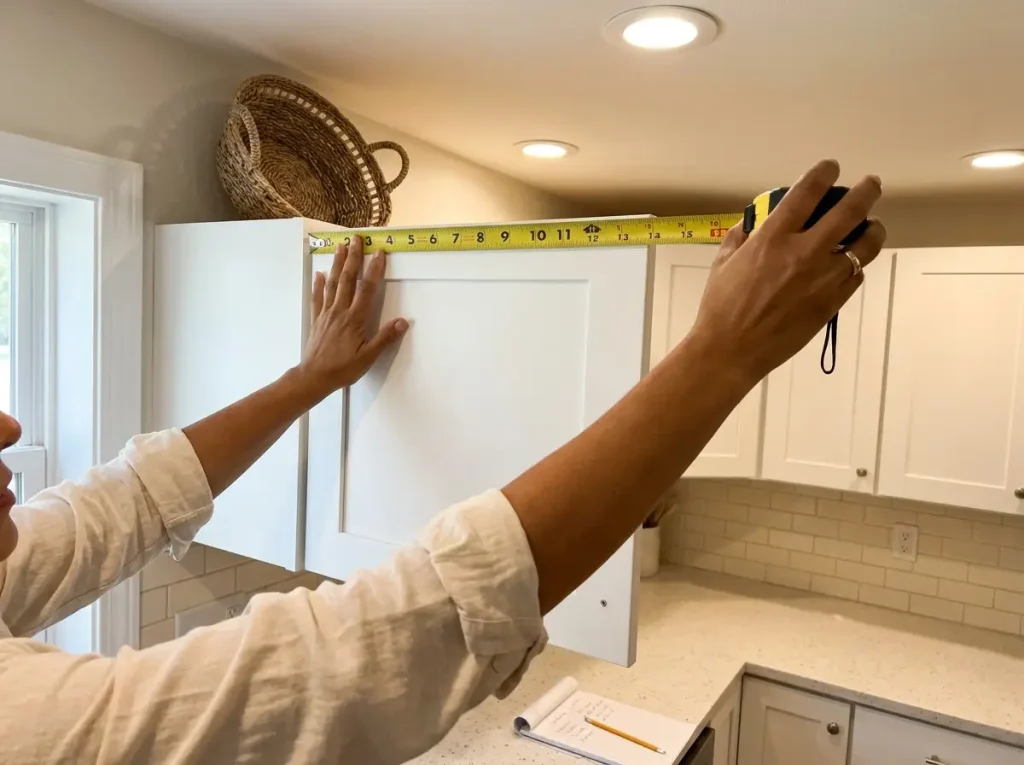
Most apartment organization advice says “use vertical space.” That’s true but useless without numbers. Vertical space means the gap between the top of your kitchen cabinets and the ceiling, the wall above your toilet, the inside of your closet doors, and every wall that has nothing on it below six feet.
Here’s where the numbers matter: measure the gap. A typical apartment kitchen has 13 to 16 inches of dead space above the upper cabinets. That’s enough for a row of baskets holding items you use once a month — platters, vases, seasonal dishes. But if your gap is under 10 inches, standard baskets won’t fit, and you need flat bins or decorative trays instead.
Measure Before You Mount Anything
Three measurements unlock most of your vertical potential. First, the gap above kitchen cabinets to the ceiling. Second, the wall space above your toilet — typically 24 to 30 inches of usable height between the tank top and any existing shelving or ceiling obstruction. Third, the empty wall space in your bedroom between the top of the headboard (or where the headboard would be) and the ceiling.
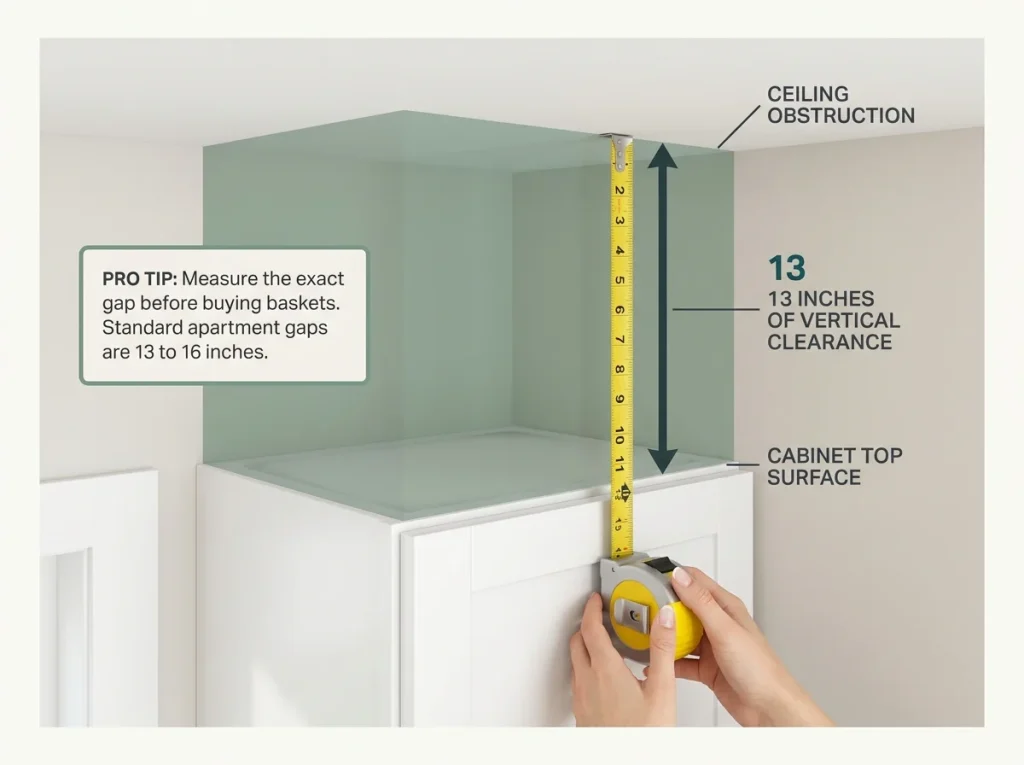
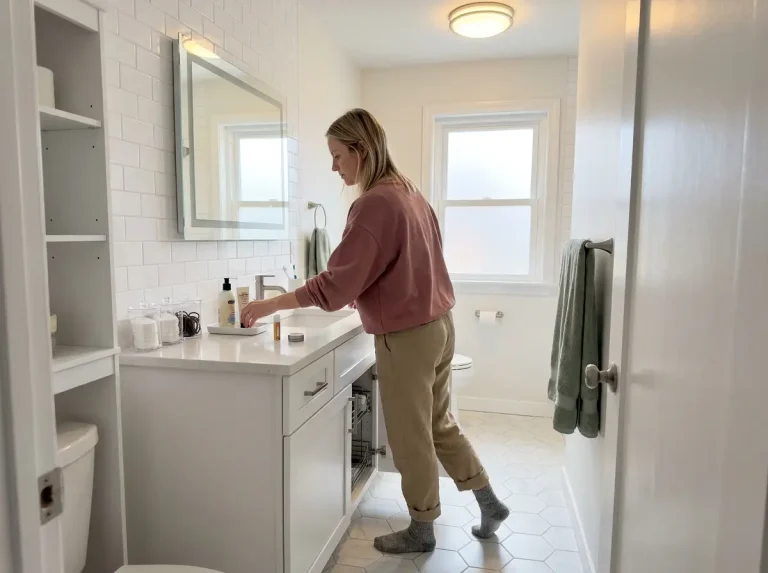
Each of these measurements tells you what you can add. Over-toilet shelving is one of the most underused spots in apartments — a freestanding shelf unit adds three tiers of storage without drilling. The small bathroom storage guide covers the exact measurement framework for all seven bathroom storage zones.
Pro tip: Write your measurements down and keep them in your phone notes. You’ll reference them every time you shop for organizers, and “I think it’s about 14 inches” leads to returns.
Walls You Can Use Without Drilling
Renters often skip vertical storage because they assume it requires holes. It doesn’t. Command strips rated for the right weight hold floating shelves, hooks, and small caddies on painted drywall. Tension rods fit inside window frames, between cabinet walls, or inside closets to add hanging rails. Over-door hooks require zero hardware.
The constraint isn’t the wall — it’s the weight. Command strips have specific weight ratings (usually 3 to 16 pounds per strip set depending on the size). Check the rating, weigh what you’re hanging, and leave a margin. The no-drill closet organization guide covers the full weight rating system for every type of renter-friendly mounting.
Your Closet Is Doing Three Jobs — Let It
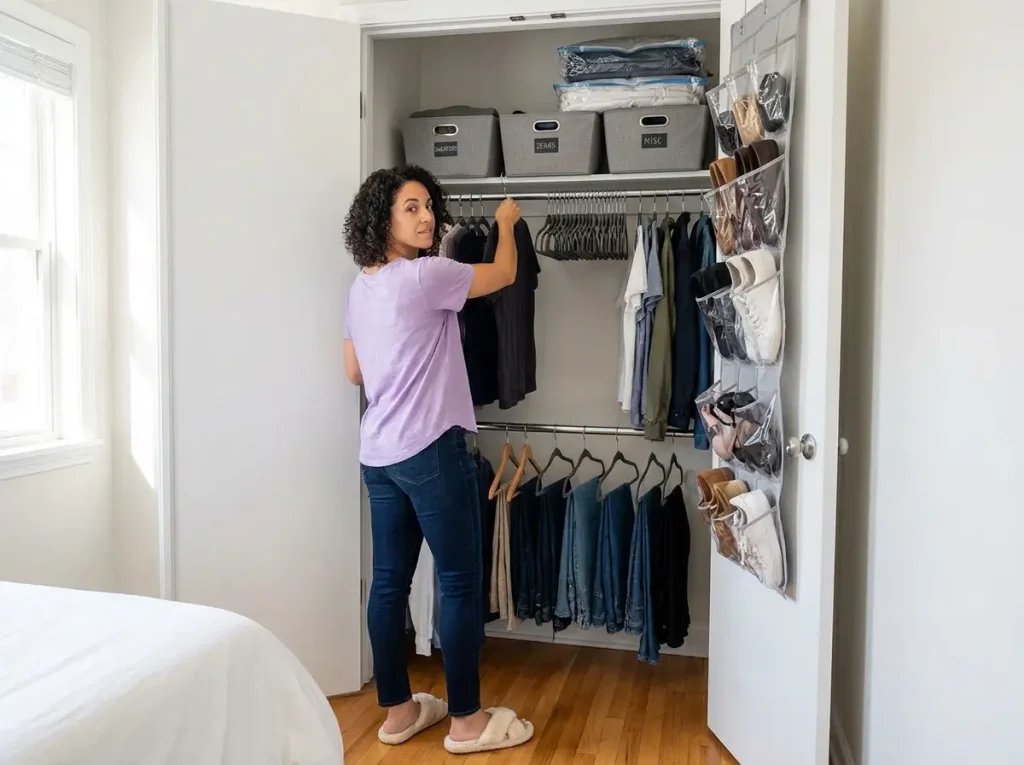
The standard apartment closet is 36 inches wide, 24 inches deep, has one rod and one shelf. It was designed in the 1960s for a person who owned half the wardrobe you do. You’re asking it to hold your clothes, your shoes, your accessories, your extra bedding, and whatever else doesn’t fit anywhere. No wonder it’s a mess.
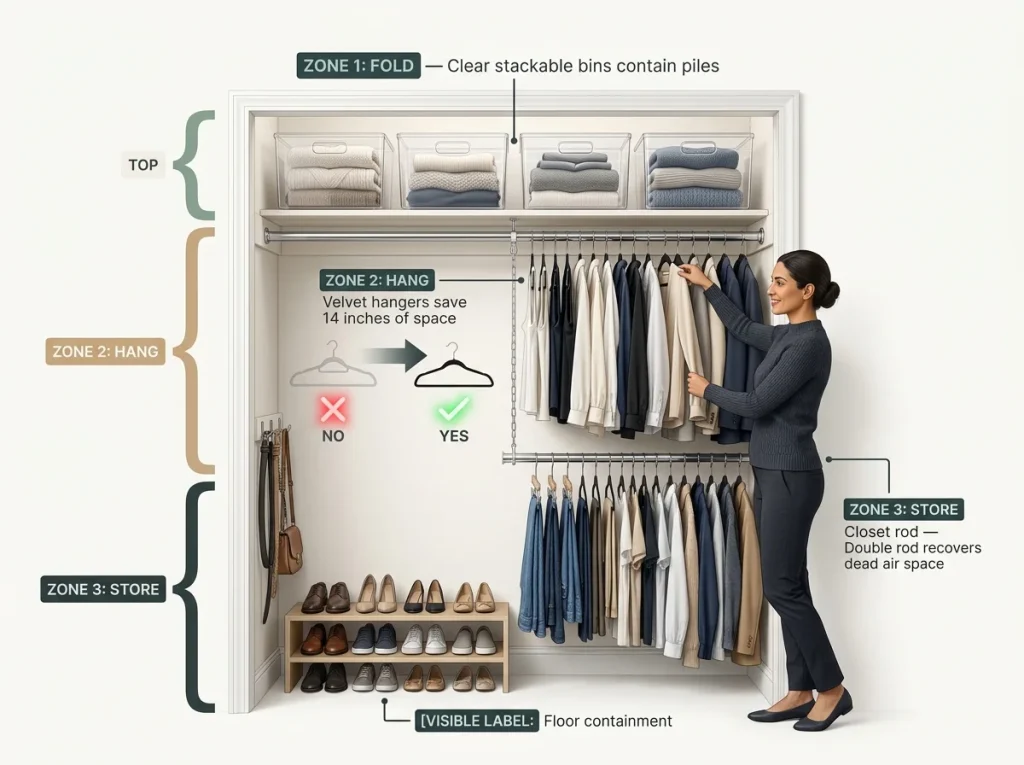
The fix isn’t buying a closet system — it’s dividing the closet into three zones: hang, fold, and store. The rod handles hanging. The shelf and added bins handle folding. The door and floor handle storage. Once each zone has a job, the closet stops being a catch-all and starts being a system.
The Velvet Hanger Switch (And Why It Matters)
Standard plastic hangers are 0.6 inches thick. Velvet hangers are 0.2 inches. On a 36-inch closet rod, switching 50 hangers from plastic to velvet reclaims roughly 12 to 14 inches of rod space. That’s enough room for 15 to 20 more garments on the same rod — or, better, enough breathing room that you can actually see and reach what you have.
The Zober Premium Velvet Hangers 50-Pack are 17.5 inches wide and the non-slip coating holds slippery fabrics — silk, rayon, athletic wear — without the shoulder bumps that wire hangers leave. Amazon Basics makes a similar velvet hanger that works fine for cotton and heavier fabrics, but the Zober coating grips better on the slick stuff.
Double Your Hanging Space Without Drilling
Below your hanging clothes, there’s usually 24 to 30 inches of dead air between the hem of your shortest garments and the closet floor. A closet rod doubler adds a second rod below the first, turning that dead space into a second tier for shorter items — folded jeans on clip hangers, skirts, or blouses.
The STORAGE MANIAC Adjustable Closet Double Rod 2-Pack hangs from your existing rod, holds up to 110 pounds, and adjusts to fit different closet widths. No drilling, no screws — it hooks over the top rod and hangs straight down. The stability is better than most competitors at this weight rating, which matters if you’re loading it with denim and heavier garments. The closet organization guide covers the full math on how much vertical space a double rod recovers based on your closet dimensions.
Shelf Bins That Prevent the Pile Avalanche
The single shelf above the closet rod is where folded items go to become a leaning tower. You stack sweaters, they slide. You stack jeans, they topple when you pull one from the middle. The shelf isn’t the problem — the lack of containment is.
Clear stackable bins turn a single shelf into defined compartments. The mDesign Stackable Plastic Storage Bins 4-Pack fit standard closet shelf depths and the transparent sides mean you can see what’s inside without pulling bins down. Dollar Tree bins work for lightweight items like scarves and accessories, but for heavier folded clothing that gets moved frequently, the thicker plastic in the mDesign set holds its shape better over time. Label the front of each bin — “workout,” “jeans,” “sweaters” — and the guessing game stops.
Under the Bed Is a Room You’re Not Using
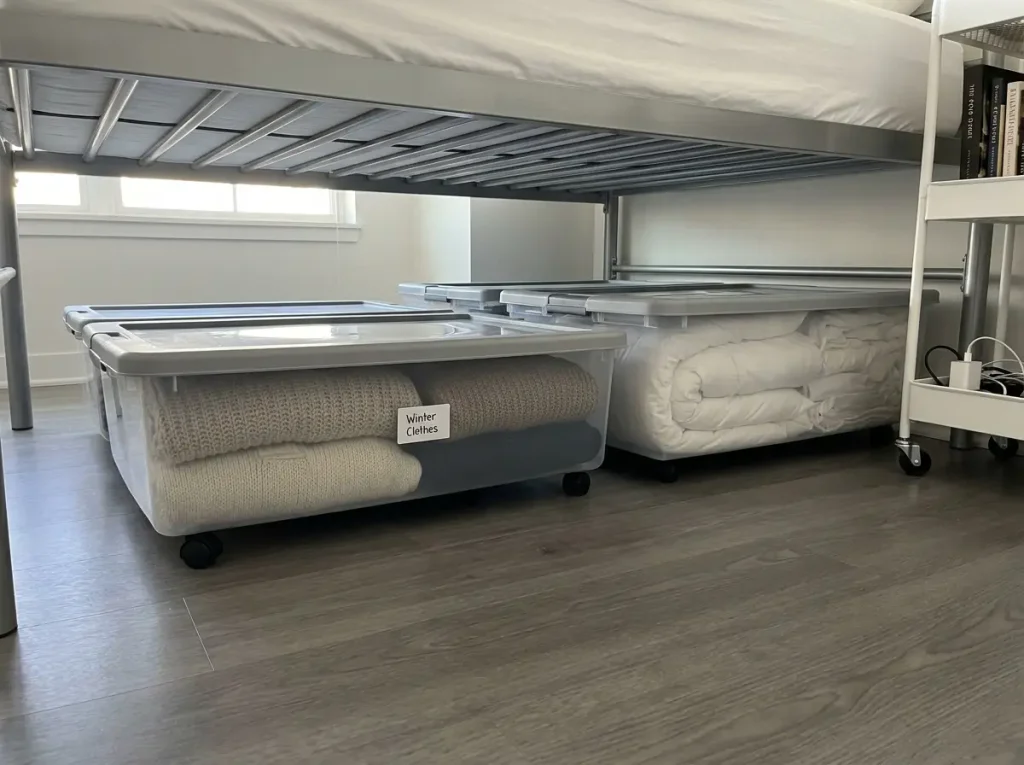
Look under your bed right now. If you have a standard metal frame, you have 7 to 9 inches of clearance between the floor and the frame. If you have a platform bed, you likely have 4 to 7 inches. Either way, that’s a rectangle of floor space the size of your mattress that’s either empty or full of dust and lost socks.
This is real storage — enough for an entire season of clothing, extra bedding, or shoes you wear four months a year. The key is matching the container height to your clearance. Most people buy containers that are too tall, then shove them in at an angle, and wonder why they can’t get them back out.
Matching Containers to Your Clearance
Measure the clearance from the floor to the lowest point of your bed frame. Subtract one inch for retrieval margin — you need space to slide containers in and out without scraping. A 7-inch clearance means containers no taller than 6 inches. A 9-inch clearance gives you room for standard-height bins.
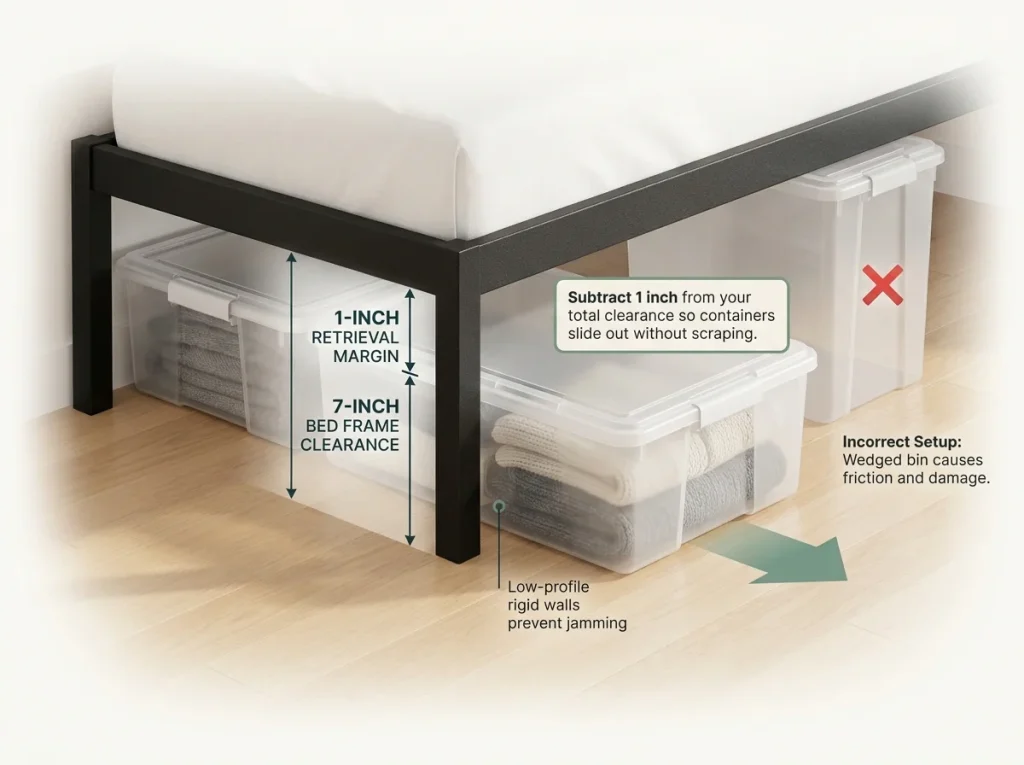
The storageLAB Under Bed Storage Container is 33 by 17 inches and just 4.5 inches tall — it fits under platform beds with 5-inch clearance and under metal frames with room to spare. The handles on the short sides make pulling it out straightforward. For seasonal items you access quarterly, these are hard to beat. If you have taller clearance and want more capacity, rigid-walled containers work, but for low-clearance beds the flat profile is what matters. The under-bed storage seed guide covers every clearance height with matched container types.
The Gaps You’re Ignoring
Under the bed isn’t the only dead space in your apartment. The gap between your fridge and the counter — usually 7 to 10 inches. The gap between the washing machine and the wall. The gap between the nightstand and the bed frame. Every one of these is a storage slot if you have the right container.
The Slim 3-Tier Rolling Storage Cart fits gaps as narrow as 7.5 inches and adds three usable shelves to a space that was holding nothing. Kitchen gap? Use it for spices, oils, and wrap. Bathroom gap beside the toilet? Cleaning supplies and extra toilet paper. Bedroom gap? Charging station, water bottle, books. It rolls out for access and rolls back to disappear. The SPACEKEEPER 4-tier version is only 4.9 inches wide if your gaps are tighter — common beside fridges and toilets in older apartments.
Pro tip: Before buying any gap organizer, slide a tape measure into the gap at both the top and bottom. Walls aren’t always parallel, and a cart that fits at the top may jam halfway down if the gap narrows by even half an inch.
Every Door Is a Drawer You’re Not Using
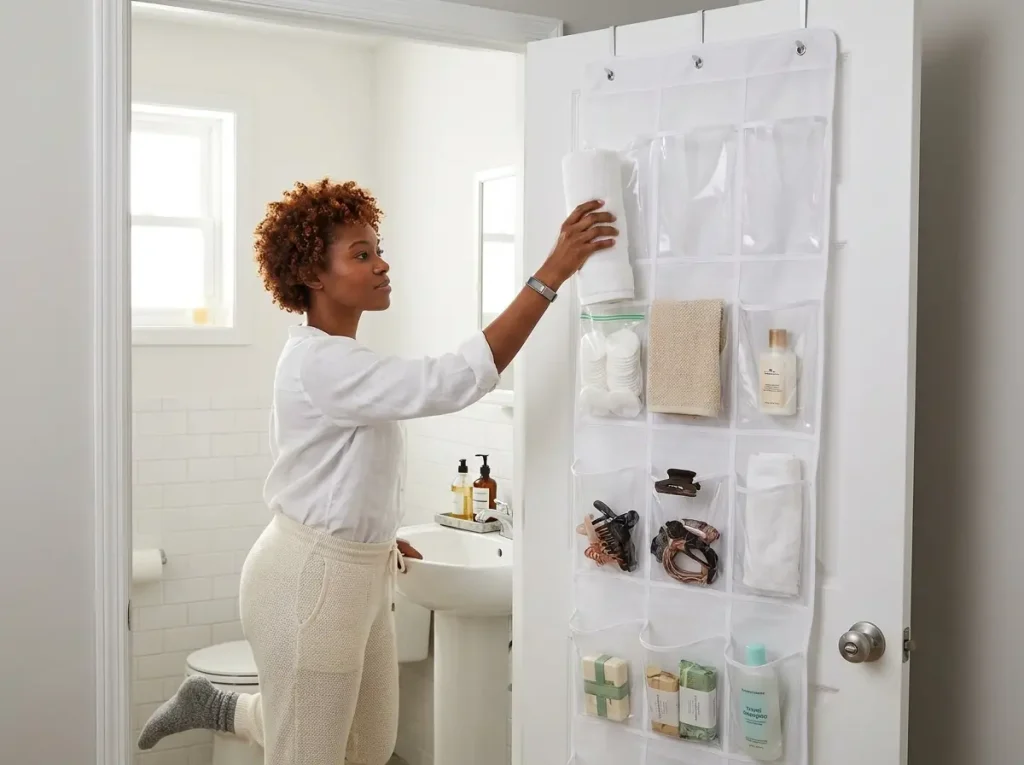
Count the doors in your apartment. Front door, bedroom door, bathroom door, closet doors. The back of every one of those doors is a flat surface that can hold 24 or more items — and right now, it’s holding nothing.
Over-the-door organizers are the most space-efficient storage in any apartment because they use zero floor space, zero wall space, and zero closet rod space. They use the one surface nobody thinks about. And they come off in seconds when you move.
The 24-Pocket System
The classic over-the-door shoe organizer isn’t just for shoes. A 24-pocket organizer on the back of a bathroom door holds cotton rounds, lotions, washcloths, hair accessories, cleaning supplies, and spare toiletries — all visible, all accessible, all off the counter and out of the cabinet.
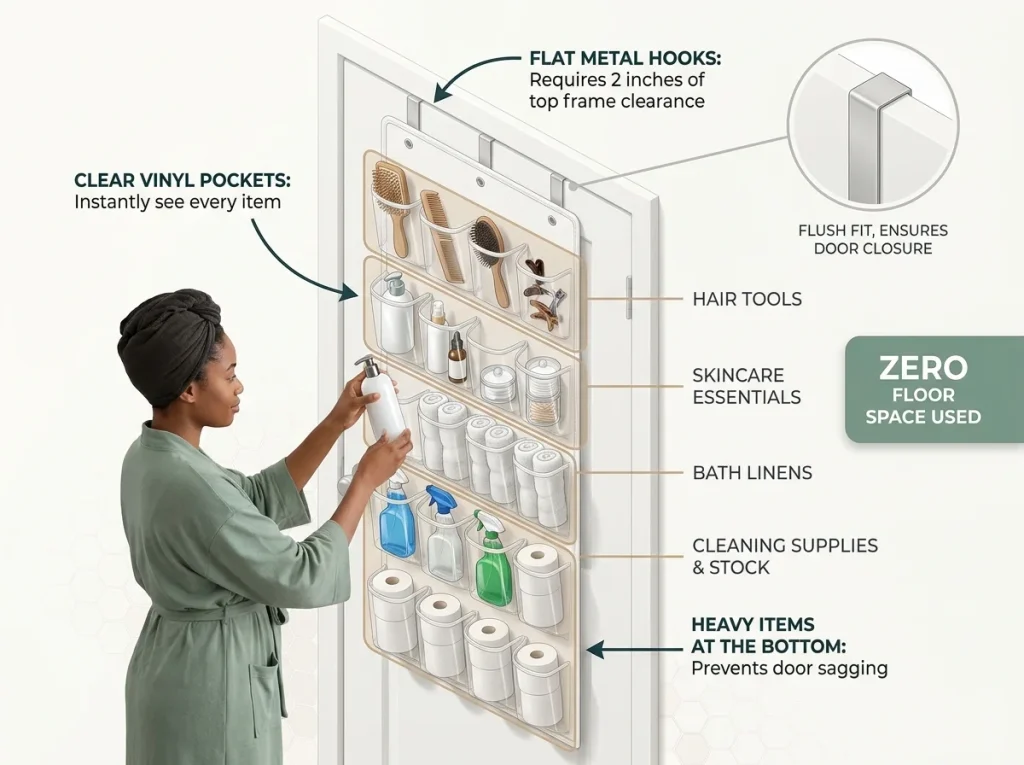
The SimpleHouseware Over-the-Door Shoe Organizer with 24 Pockets hooks over any standard door without hardware. The pockets are slightly wider than most competitors, which matters if you’re storing items like spray bottles upright — narrow pockets tip them over. On a closet door, use it for accessories, belts, scarves, and small items that would otherwise disappear in a drawer. On the bedroom door, use it for daily essentials — wallet, keys, chargers, headphones. The pantry door organizer guide covers the weight and clearance math for kitchen doors specifically.
Door Clearance: The Thing Nobody Checks
Before you hang anything over a door, check two things. First, the gap between the top of the door and the frame — most over-door hooks need at least 2 inches. Second, whether the door still closes fully with the organizer hanging. If the bottom of the organizer hits the door frame or the hinge side when the door swings, you’ll stop closing the door, and an organizer on a door that stays open is an organizer you stop using.
Hollow-core doors — the standard in most apartments — handle light organizers fine but struggle with heavy loads. If you’re hanging something that’ll hold more than 10 pounds total, feel the door by knocking. A hollow thunk means hollow core. Spread the weight across the organizer rather than loading the bottom pockets heavily, and you’ll avoid the slow sag that pulls the hooks out after a few months.
The System That Lasts Three Months
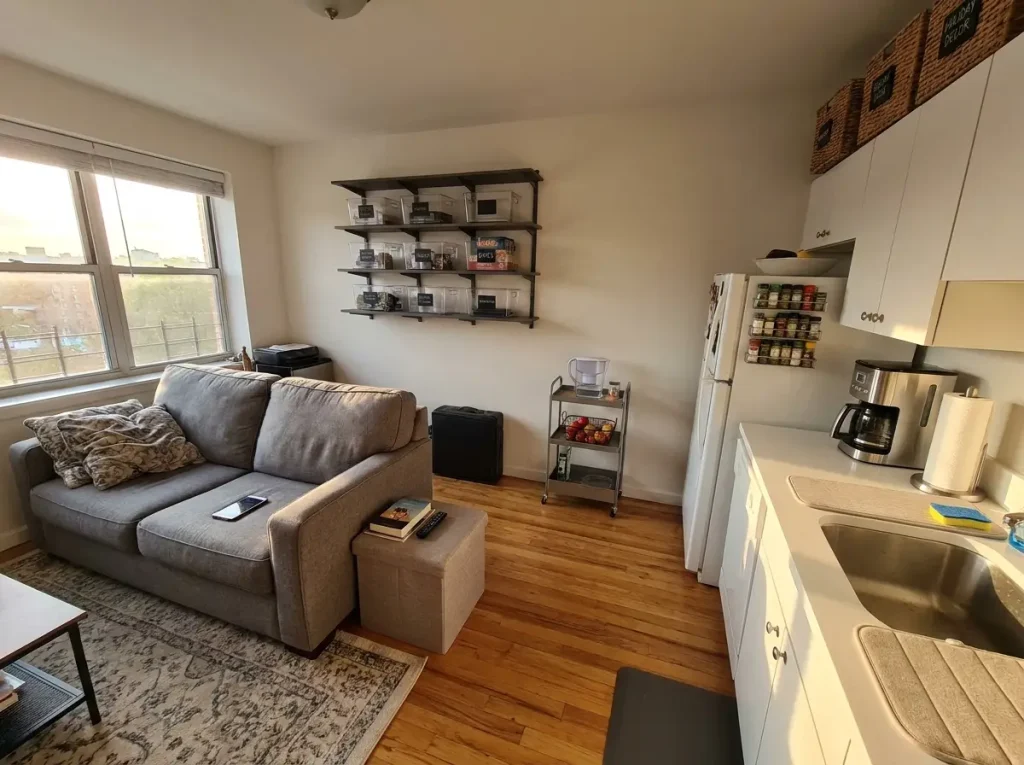
Every organization system above will look great the day you finish it. The question is whether it still works in three months, after real life — laundry piling up, groceries shoved wherever they fit, the morning rush when everything lands on the nearest surface — has tested it.
Systems fail for one reason: they lack a reset mechanism. A reset is a short, scheduled routine that puts everything back in its place before the drift becomes a collapse. Without one, even the best-organized apartment reverts to chaos in 60 to 90 days.
The 15-Minute Monthly Reset
Set a calendar reminder for the first Saturday of every month. That’s reset day. Walk through your apartment with a laundry basket and collect everything that’s migrated from its zone. The coffee mug on the nightstand goes back to the kitchen. The mail on the counter goes into the paper zone or the recycling. The shoes by the couch go back to the door organizer.
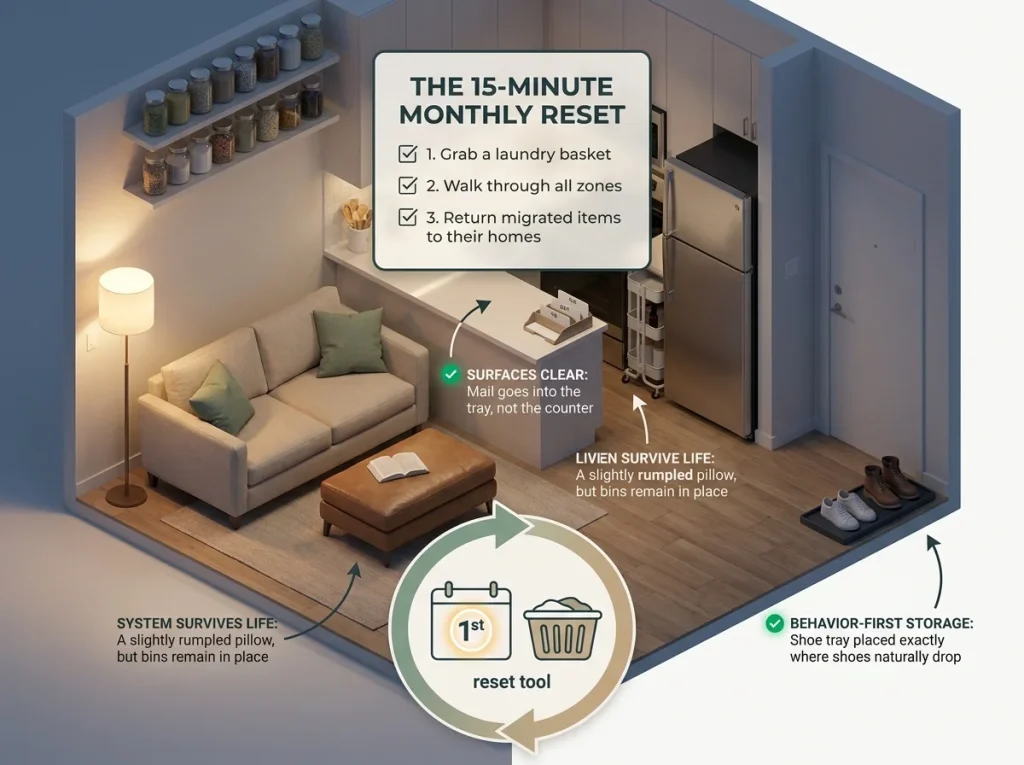
This takes 15 minutes. Not an hour, not an afternoon — 15 minutes of walking each item back to where it belongs. The reason it’s monthly instead of weekly is that weekly resets feel like chores and get skipped. Monthly resets feel like maintenance and actually happen. The small apartment organization guide builds this weekly 10-minute reset into the full apartment system, but for most people, a monthly check catches drift before it becomes a full-day reorganization project.
The Two Signs Your System Needs Adjusting
If your monthly reset takes more than 20 minutes, one of your zones isn’t working. Something about the location, the container, or the rule is fighting how you actually live. That’s not a discipline failure — it’s a design failure. Move the zone, change the container, or simplify the rule.
If the same category of item keeps ending up in the wrong place — shoes by the door instead of in the closet, mail on the kitchen counter instead of in the paper tray — that’s your apartment telling you the “wrong” place is actually the right one. Build the system around the behavior you already have. Put a small shoe tray by the door. Put the paper tray on the kitchen counter. How to organize a small apartment that stays neat covers this behavior-first approach in detail.
Start With the Space That Annoys You Most
You don’t need to organize your entire apartment in a weekend. You need to fix the one space that frustrates you every day — the closet you fight with every morning, the kitchen counter that’s never clear, the bathroom cabinet where everything falls out when you open it.
Pick that space. Edit what’s in it. Measure it. Add the right organizer. Set a monthly reset. That’s it. One space, done properly, with a system that accounts for how you actually live in it. Then do the next one when you’re ready.
The apartment doesn’t need to look like a magazine. It needs to work — on a Tuesday morning when you’re running late, on a Sunday night when you’re too tired to clean, and three months from now when the initial motivation has worn off. That’s what lasting organization looks like.
Q1 How do I organize a small apartment with no storage?
Use vertical space, door backs, under-bed clearance, and furniture gaps — every apartment has hidden storage in these four areas. Measure each space first, then match organizers to the actual dimensions rather than guessing.
Q2 What should I organize first in a small apartment?
Start by decluttering one area completely before adding any organizers. The bathroom is the best starting room because it’s small, the decisions are easy, and you can finish in under an hour.
Q3 How do I keep a small apartment organized long-term?
Set a 15-minute monthly reset where you walk through each zone and return displaced items. If the same items keep migrating, move the storage to where the items naturally land instead of fighting the pattern.
Q4 What are the best renter-friendly organizers for apartments?
Velvet hangers, over-the-door pocket organizers, under-bed containers, slim rolling carts, and Command strip shelves all work without drilling or permanent modification. Every product in this guide is fully removable.
Q5 How do I organize a small apartment on a budget?
Edit your belongings first — that costs nothing and creates the most space. Then prioritize the highest-ROI purchases: velvet hangers for the closet, one under-bed container for seasonal items, and one over-door organizer for the bathroom. Three purchases cover the biggest storage gaps in most apartments.
Disclaimer: ClutterlessNest is a participant in the Amazon Services LLC Associates Program. As an Amazon Associate we earn from qualifying purchases. This article may contain affiliate links — if you buy through them, we may earn a small commission at no extra cost to you. We only recommend products we have tested or genuinely believe in.