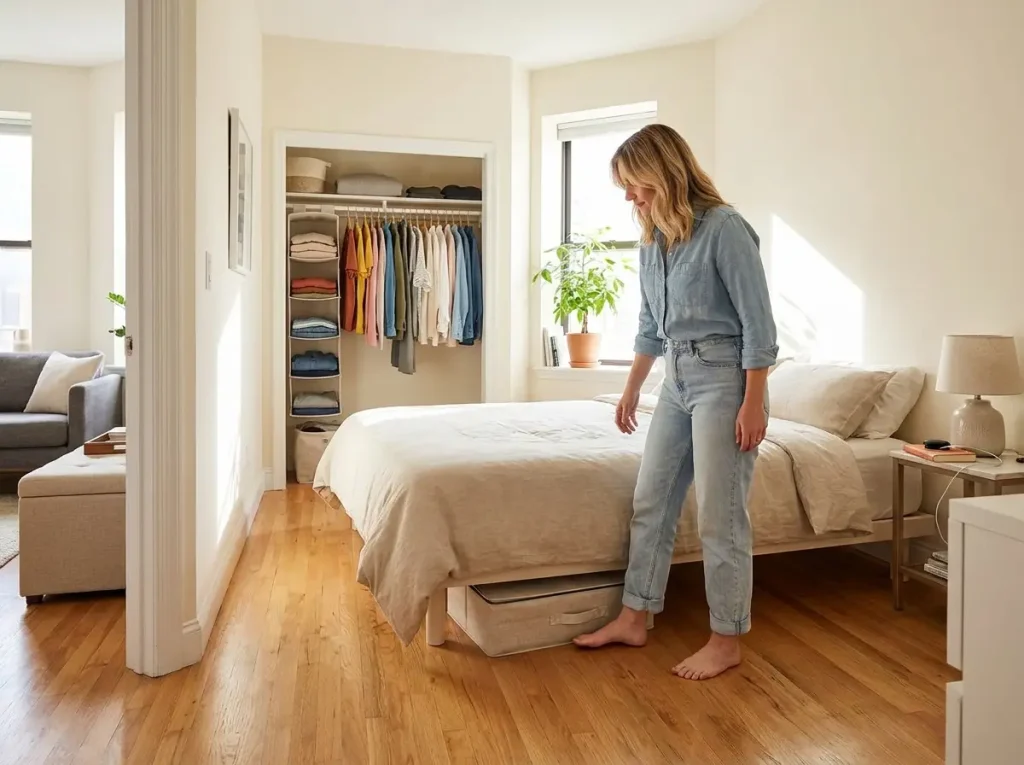
You moved into a one bedroom apartment thinking you had plenty of space — then six months happened and now the closet is stuffed, the bedroom chair is a laundry staging area, and the kitchen cabinets are a guessing game. I’ve organized enough one bedrooms to know the pattern: people buy bins before they edit their stuff, skip half the rooms, and never build in maintenance. This guide covers every room in a one bedroom apartment with systems that hold up past the first weekend, starting with the mistake that sinks most projects before they begin. For the full small apartment organization framework, start there — this article goes deeper into the specific problems a one bedroom layout creates.
Quick Answer: The best one bedroom apartment organization tips focus on systems, not products:
- Declutter by category before buying a single organizer
- Treat the bedroom as a clutter-free zone with a door boundary
- Double your closet capacity with velvet hangers and a second rod
- Choose multi-functional furniture that stores and serves
- Use vertical walls and over-door space in every room
- Run a 10-minute weekly reset to stop the slow slide back to chaos
Declutter Before You Buy a Single Organizer
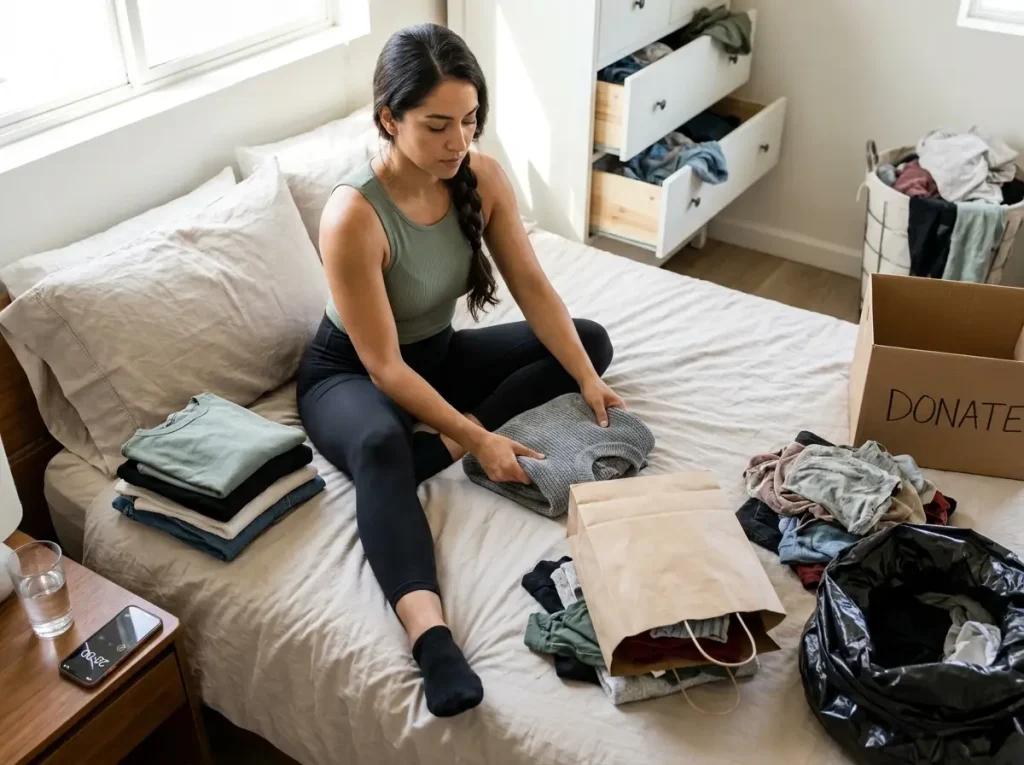
Every failed organization project I’ve seen starts the same way: someone buys a set of matching bins, fills them with the same stuff they already had, and calls it organized. Three weeks later the bins are overflowing and the “system” is just a more expensive version of the same mess. The problem was never storage. The problem was volume.
A one bedroom apartment gives you roughly 600 to 800 square feet of living space, and maybe 30 to 40 square feet of dedicated closet. That math only works if you own what fits — not what you’ve accumulated since college.
Why Buying Bins First Always Backfires
Buying storage products before decluttering is like buying a bigger suitcase instead of packing lighter. You end up organizing things you should have removed.
I watched a friend spend an entire Saturday reorganizing her bedroom closet with new bins and shelf dividers. It looked perfect. By week two, the bins were stuffed with clothes she hadn’t worn in a year, and she couldn’t find anything faster than before.
The bins weren’t the problem. The 40 items she never wore were the problem. Decluttering has to come first because it changes the math.
If you remove 30% of what you own, your existing closet suddenly has room. Your kitchen cabinets suddenly make sense. The bedroom floor stays clear because there’s less stuff competing for space.
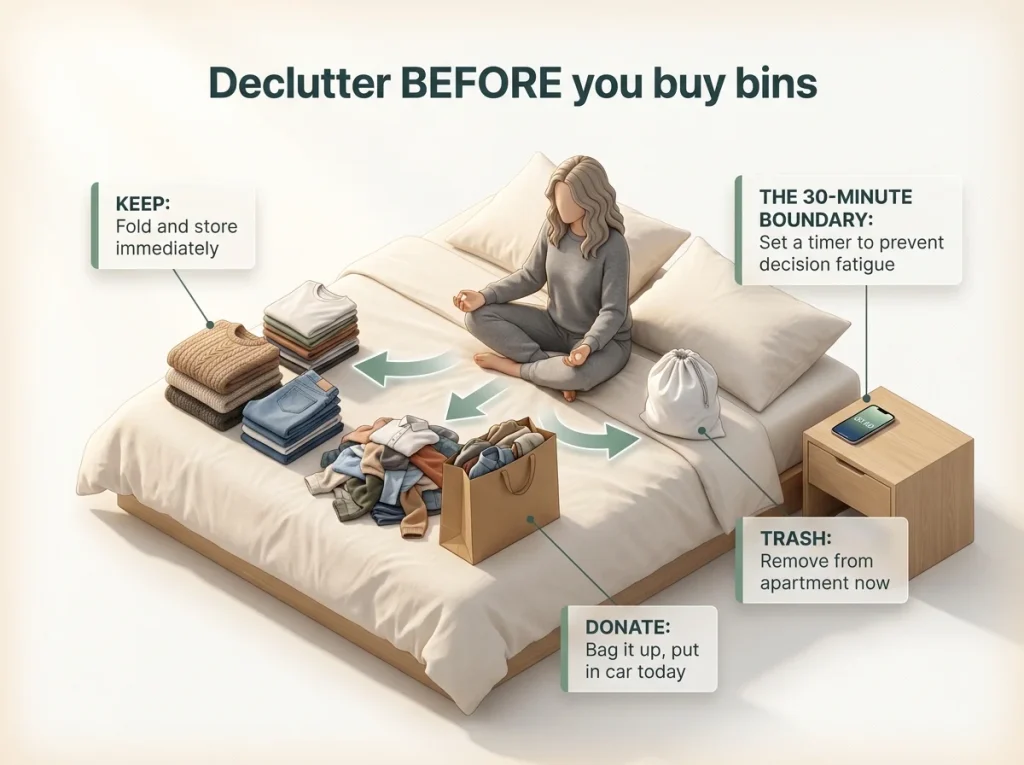
Pro tip: Set a timer for 30 minutes and do one category at a time — all your shirts, then all your shoes, then all your kitchen gadgets. Timed sessions prevent the decision fatigue that turns decluttering into an all-day spiral.
The One-Category Method for Renters Who Are Pressed for Time
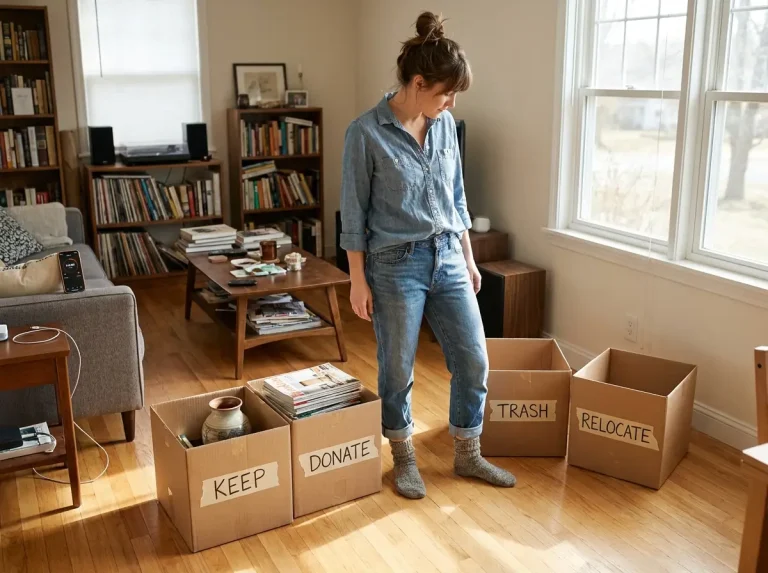
You don’t need a full weekend. The one-category method works in 20-minute sessions: pick one category (t-shirts, mugs, cleaning supplies), pull every item in that category from every room, and sort into keep, donate, and trash.
One category per session. Three sessions per week. Within two weeks, you’ve edited every major category in a one bedroom apartment without ever feeling overwhelmed.
The key is pulling items from every room — not just the room where most of them live. When you see all 14 mugs on the counter at the same time, letting go of six becomes obvious. When they’re scattered across three cabinets, each one feels necessary.
If you’ve never done a full edit before, the room-by-room decluttering guide breaks the process into a sequence that prevents you from creating bigger messes in the middle.
Use the Bedroom Door as Your Clutter Firewall
Here’s what nobody tells you about a one bedroom layout: the bedroom is always the first room to get messy, and it drags the rest of the apartment down with it. In a studio, you see everything from everywhere — visual clutter is impossible to ignore. In a one bedroom apartment, the bedroom has a door.
That door lets you hide the mess. And hiding the mess is how the pile on the chair becomes a pile on the floor becomes a room you avoid organizing because it feels like too much.
The fix is treating that door as a firewall. Nothing goes into the bedroom that doesn’t have a home in the bedroom. If it doesn’t belong in there, it doesn’t cross the threshold.
Why the 1BR Bedroom Always Gets Messier First
The bedroom collects clutter from the rest of the apartment because people use it as a staging area. Laundry that hasn’t been folded. Shopping bags that haven’t been emptied. The jacket that should be on a hook by the front door. In a studio, those things are in your face. In a one bedroom, they pile up behind a closed door where you don’t see them until the room feels suffocating.
One detail that surprises most people: the bedroom in a one bedroom is usually the smallest room in the apartment. Builders allocate more square footage to the living area because that’s what sells the floor plan. Your bedroom might be 10 by 11 feet — and 40% of that is bed. Every square inch of remaining space matters.
The Under-Bed Zone
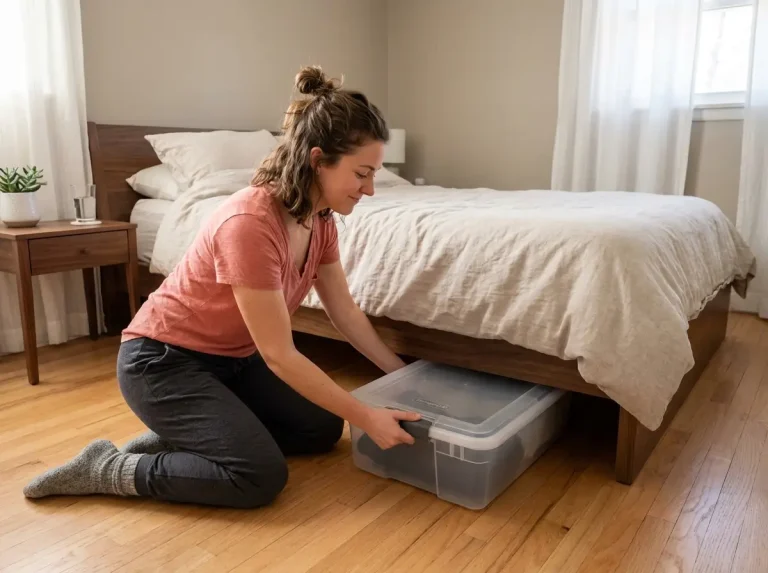
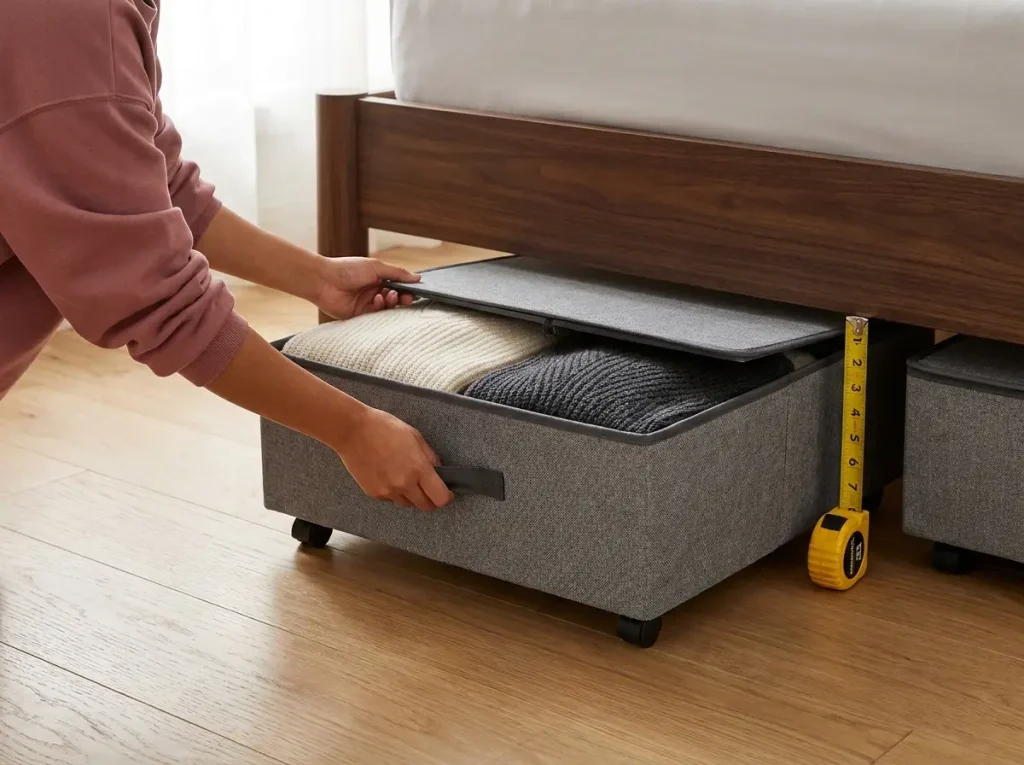
The space under your bed is the largest unused storage area in most bedrooms, and most people either ignore it or throw things under there loose. Both approaches waste it.
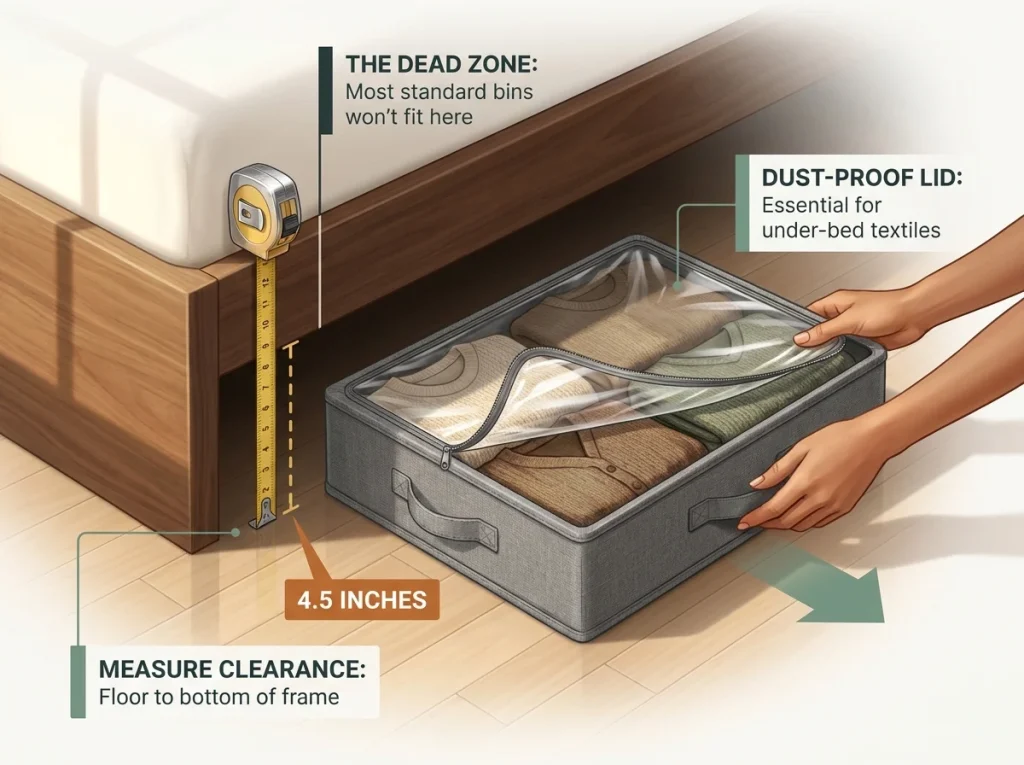
First, measure the clearance between your floor and the bottom of the bed frame. If you have a platform bed sitting close to the ground, you might only have 4 to 5 inches. The storageLAB Under Bed Storage Container fits in as little as 4.5 inches of clearance and comes with a lid that keeps dust out of seasonal clothing and extra linens. Most under-bed bins won’t fit that gap — they’re designed for taller bed frames and will just sit there on the floor next to the bed, taking up space instead of using it.
If your bed sits too low for even the flattest container, the EclatBain Bed Risers add 3 to 8 inches of adjustable height without modifying the frame — a renter-safe fix that creates an entire storage zone where there was none. Just check that the riser weight rating matches your mattress plus frame weight before you buy.
For more approaches to this space, the under-bed storage guide for small bedrooms covers every bed type from platforms to metal frames.
The Nightstand and the Doom Chair
Every bedroom has a flat surface that attracts clutter — the nightstand, the dresser top, or the chair that was supposed to be for reading but became a permanent clothes rack. The fix is the same for all of them: limit what’s allowed there and enforce it.
Your nightstand should hold a lamp, your phone charger, and one personal item. That’s it. No stack of books. No pile of receipts. No three half-empty water glasses. If the surface can hold more than what belongs there, it will fill up within a week.
The doom chair is harder. You know the chair — the one where “I’ll put this away later” clothes live permanently. The real solution isn’t willpower.
It’s removing the chair and putting a hook on the back of the bedroom door for the clothes-you-wore-once-but-will-wear-again category. No chair means no pile. One hook means one item at a time.
Pro tip: If you can’t remove the doom chair, put a small basket on the seat. When the basket is full, everything in it gets put away or goes in the hamper. The physical boundary forces the decision that willpower doesn’t.
Your Apartment Closet Has More Space Than You Think
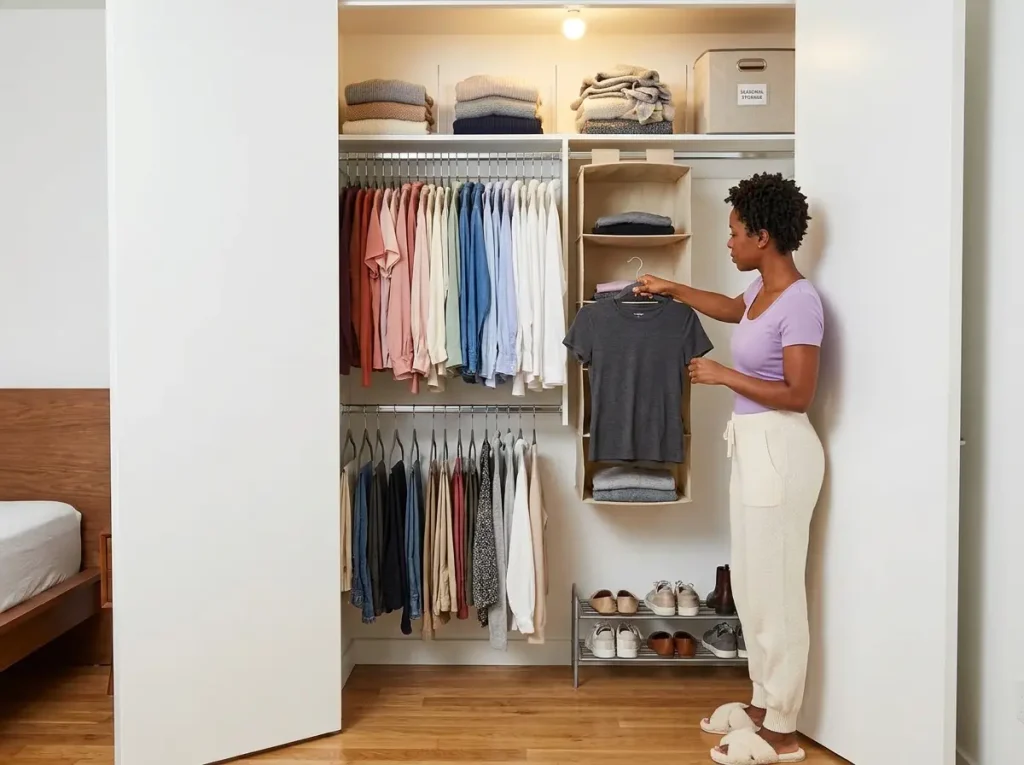
The standard rental closet — one rod, one shelf, a depth that barely fits a hanger — wastes roughly half its usable volume. You’re hanging everything at one height, ignoring the space below the shortest garment, and stacking things on the single shelf until the pile topples. Sound familiar?
The fix doesn’t require a custom closet system or a drill. Three changes recover most of that wasted space.
The Rental-Special Closet
If your closet is about 60 inches wide, 24 inches deep, and has a single rod at about 66 inches high with one shelf above it, you have what I call the rental special. It was built to check a box on the floor plan, not to actually store a full wardrobe. But the bones are fine — the volume is there, it’s just not being used.
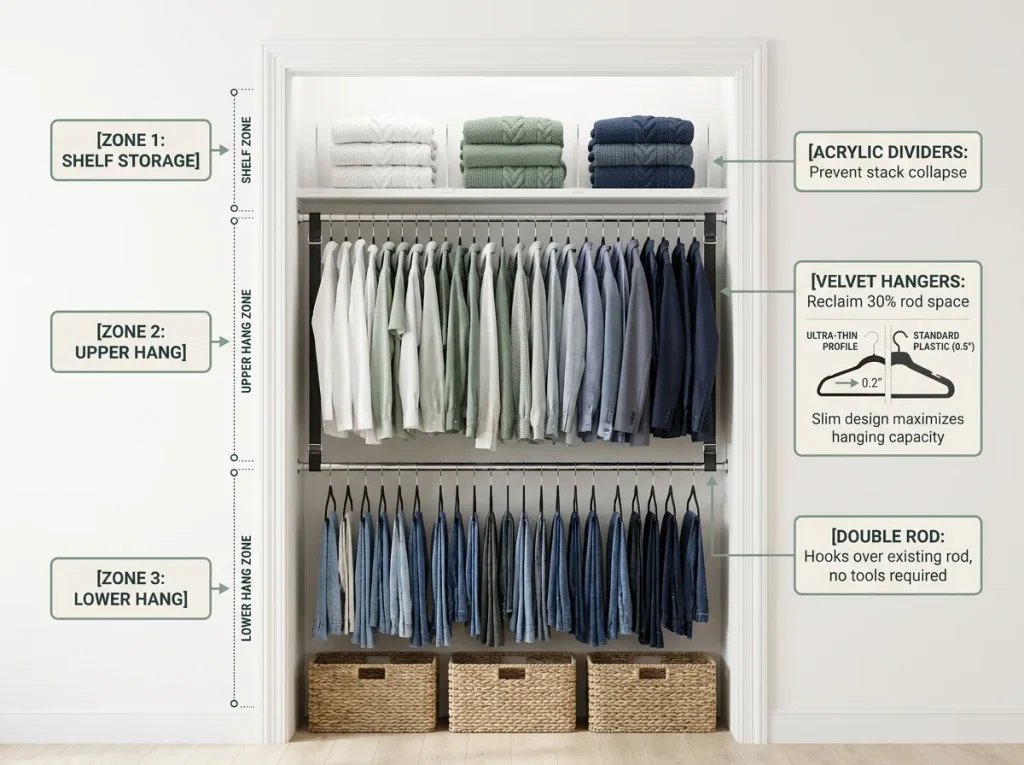
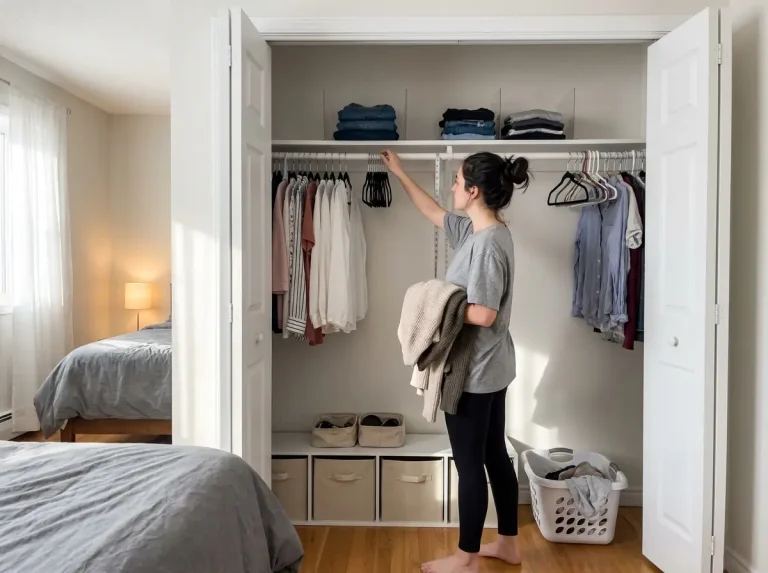
The three zones you need to create: upper hang (blouses, shirts, jackets on the existing rod), lower hang (pants, skirts, shorter items on a second rod), and shelf storage (folded items with dividers to keep stacks from collapsing into each other). You can add all three zones without touching a single wall.
The Velvet Hanger Switch
This is the single highest-return move in any apartment closet. Standard plastic hangers are about 0.75 inches thick. The Zober Premium Velvet Hangers are 0.2 inches thick — less than a third of the width.
On a 50-hanger closet, that switch reclaims over 14 inches of rod space. That’s enough room for 20 to 25 more garments on the same rod without changing anything else.
The velvet grip also stops clothes from sliding off, which means you can actually push hangers closer together without everything ending up on the closet floor. If budget is tight, the Amazon Basics velvet hangers are slightly thicker at 0.25 inches but still a big improvement over plastic.
The Double Rod and the Dead Floor Zone
Below your hanging shirts, there’s usually 30 to 36 inches of dead air between the bottom of your shortest garment and the closet floor. That’s enough for an entire second hanging zone.
The STORAGE MANIAC Adjustable Closet Double Rod hooks over the existing rod and creates a lower bar for pants, skirts, and folded-over jeans. It holds 110 pounds — enough for a full load. No tools, no holes, and it comes off cleanly when you move out.
On the shelf above the rod, folded stacks of sweaters and jeans tend to lean into each other until the whole row topples. The HBlife Acrylic Shelf Dividers clip onto shelves up to one inch thick and keep three or four stacks independent. The cost is minimal and they prevent the weekly frustration of refolding everything after one sweater falls.
For the full breakdown of renter closet strategies, including tension shelves and fabric hanging organizers, see the guides on how to organize a reach-in closet and no-drill closet organization for renters.
Pro tip: Organize your closet by garment type first (all shirts together, all pants together), then by color within each type. You’ll get dressed faster because your brain processes categories before it processes individual items. Skip organizing by occasion or season — those categories break down within a month.
Living Room: Make Every Piece Work Twice
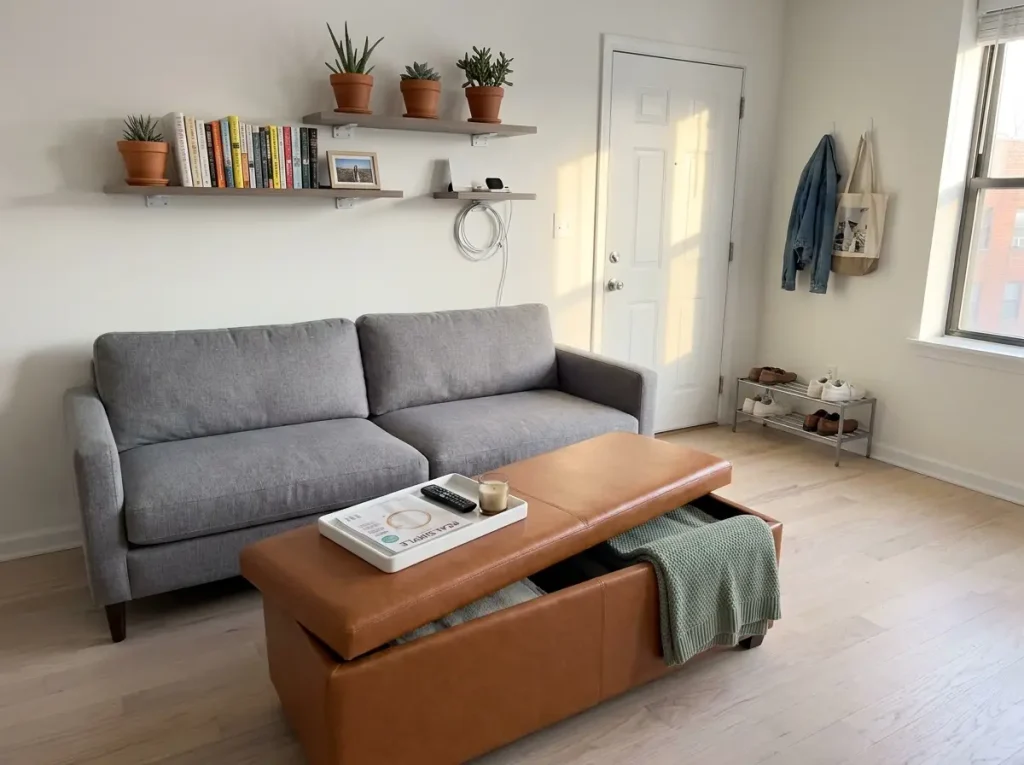
In a one bedroom apartment, the living room is also your office, your guest room, your dining room, and your storage unit. You can’t afford furniture that only does one thing. Every piece needs to pull double duty — or it’s taking up space that could serve you better.
Multi-Functional Furniture First
The coffee table is the biggest opportunity in most living rooms. A standard coffee table takes up 4 to 6 square feet of floor space and gives you nothing but a flat surface. Replace it with a storage ottoman and you get seating, a table surface, and an enclosed storage compartment in the same footprint.
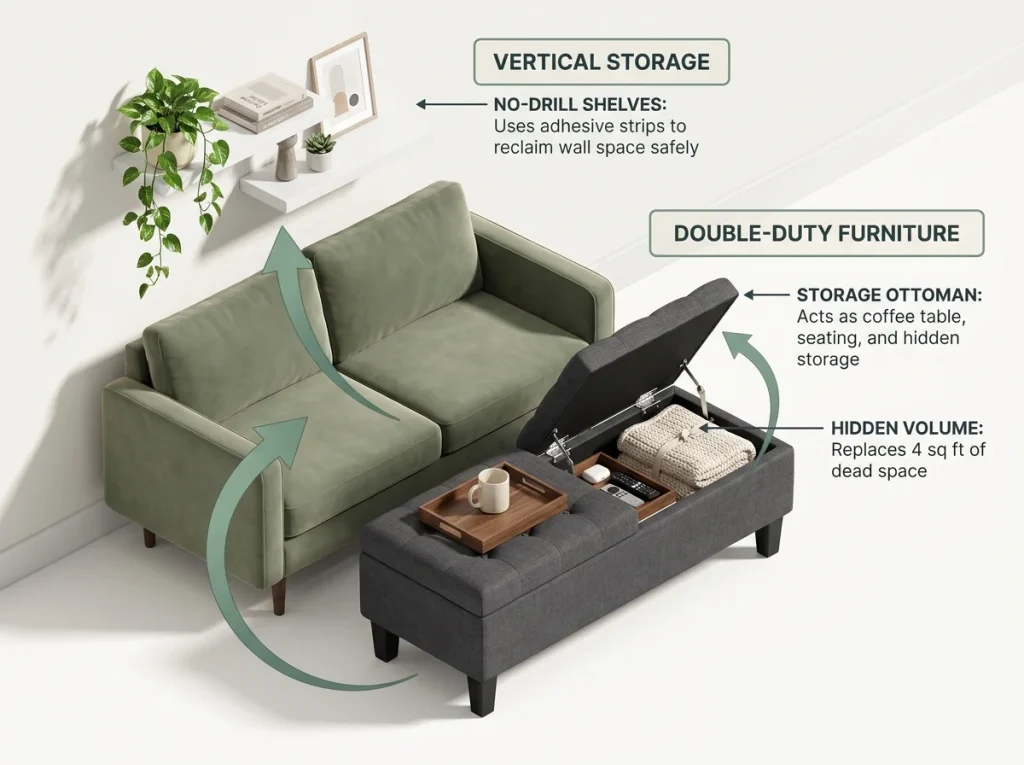
The SONGMICS Storage Ottoman Bench at 43 by 15 inches seats two people and fits blankets, remotes, cables, and extras inside. A tray on top turns the lid into a stable surface for drinks and books. It’s freestanding, so nothing to install — and it moves with you. If you’re looking for something smaller or cheaper, any storage bench works as long as the interior dimensions fit what you plan to keep inside.
Vertical Walls: The Storage You’re Not Using
Floor space is the bottleneck in a small apartment. Wall space is almost always underused. The area above your sofa, above the desk, above the entryway console — that’s all usable storage that doesn’t shrink your room.
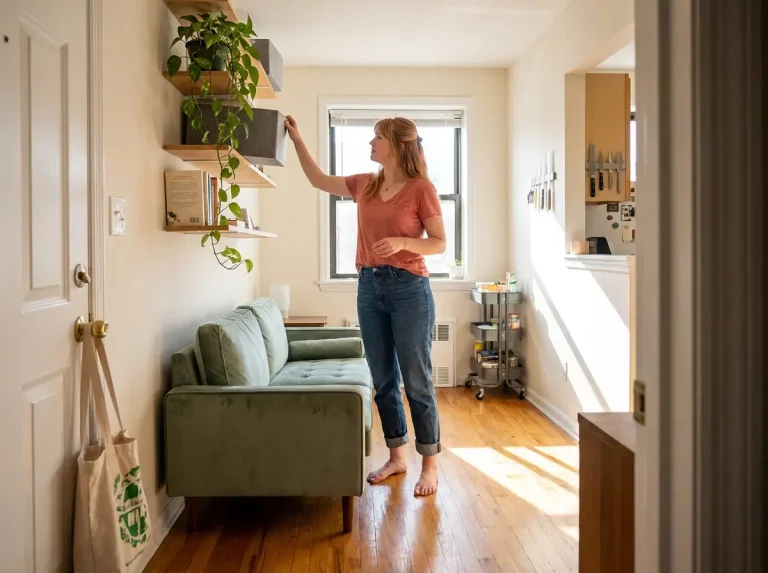
The Floating Wall Shelf No-Drill 16.5″ (2-Pack) mounts with adhesive strips and holds books, plants, and small decor without putting a single hole in the wall. Install two at different heights above the sofa and you’ve added shelf space that was invisible before. When you move out, the adhesive strips peel off clean. If you want wider shelves or something available for same-day pickup, Command Floating Shelves are narrower but sold at most stores.
The general rule: anything that can go on a wall should go on a wall. Headphones, bags, jackets, keys — a two-dollar adhesive hook takes it off the counter or the floor and puts it where gravity works in your favor.
The Entryway Problem
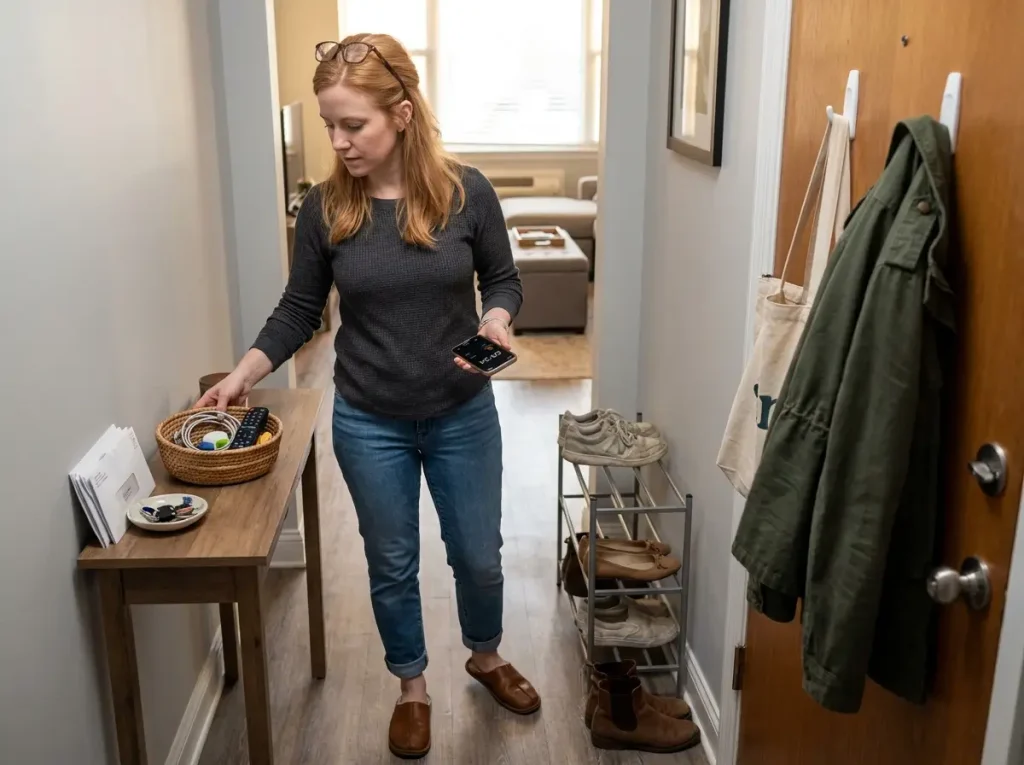
One bedroom apartments rarely have a real entryway. You walk in and you’re in the living room. That means shoes, keys, bags, and jackets have no landing zone — so they end up on the floor, on the couch, or on the kitchen counter.
The fix doesn’t need a dedicated piece of furniture. A narrow shoe rack against the wall near the door, two adhesive hooks on the back of the door for a jacket and a bag, and a small tray or basket on the nearest flat surface for keys and mail. That’s your entryway. The total footprint is about 12 inches of wall space and one tray.
The National Association of Productivity and Organizing Professionals recommends designating drop zones near entry points as the first step in small space organization — and in my experience, this single change prevents more daily clutter than any closet system.
Kitchen and Bathroom: The Easiest Wins in the Apartment
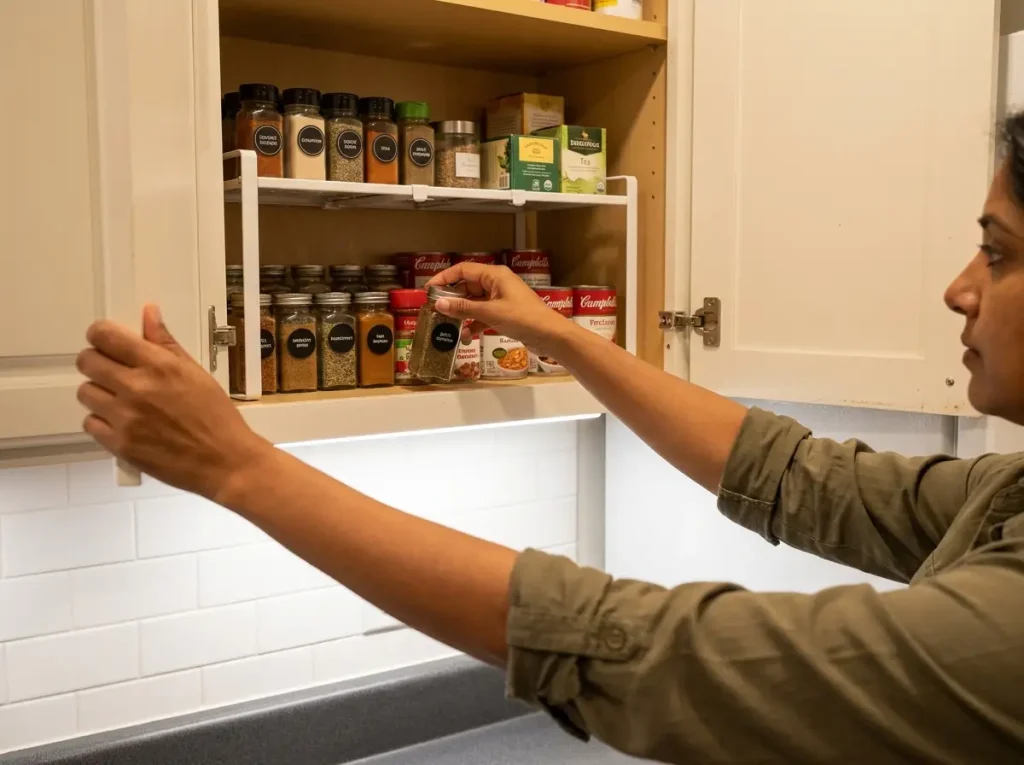
These two rooms respond the fastest to organization because the problems are specific and the fixes are immediate. You’re not rethinking your lifestyle — you’re just making the cabinet you already have work better.
The 12-Inch Cabinet Problem
Standard apartment upper kitchen cabinets are 12 inches deep. Your mugs, spice jars, and canned goods are maybe 3 to 4 inches deep. That means you’re only using the front third of every shelf and the back two-thirds becomes a dead zone where things go to be forgotten.
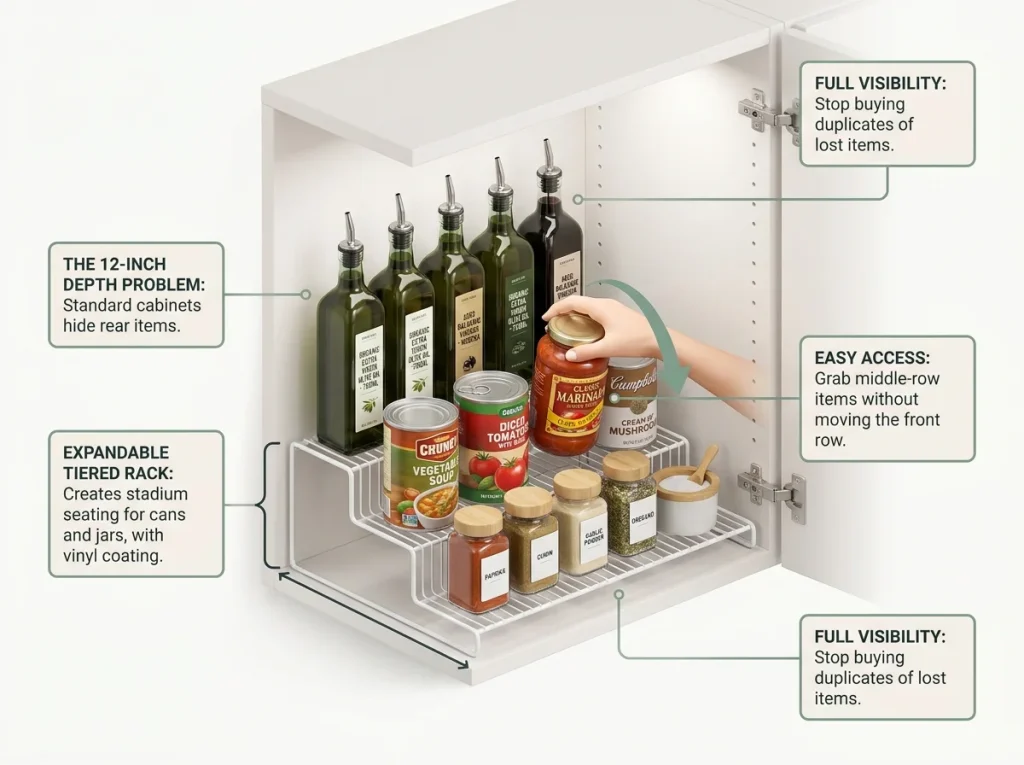
The SimpleHouseware Expandable Shelf Rack creates two visible tiers inside that 12-inch depth, so everything sits in a row you can see and reach. No more moving six cans to find the one behind them. It’s freestanding, adjustable width, and fits standard upper cabinets without any mounting.
If you want to test the concept before buying anything, pull everything out of one cabinet, group by size, and put the tallest items on one side and shortest on the other. Even this basic sort will show you how much dead space was hidden in there.
For apartment kitchens with no dedicated pantry, the apartment pantry guide covers how to create pantry zones using cabinet interiors, slim carts, and closet conversions.
Bathroom Walls and the Over-Door Fix
The bathroom in a one bedroom apartment usually has one vanity, one medicine cabinet, and almost zero counter space. The under-sink area is a mess because the pipe steals usable depth, and everything slides around every time you open the door.
Two moves fix most bathroom storage problems. First, use the wall space above the toilet. A no-drill adhesive shelf or an over-toilet shelving unit adds two to three tiers of storage in a space that’s doing nothing right now. Second, the back of the bathroom door can hold a narrow pocket organizer for hair tools, cleaning bottles, or rolled towels.
Pro tip: In the bathroom, moisture is your enemy. Skip fabric organizers under the sink — they absorb humidity and get musty within a few months. Use plastic or metal bins with drainage holes instead. Trust me, you’ll smell the difference by month two.
For a full breakdown of renter-safe bathroom solutions, including the under-sink pipe workaround, see the small bathroom storage ideas guide.
The Reset That Makes It Last
This is the section that separates systems that work from systems that look good for a week. Every person I’ve helped organize a one bedroom apartment has the same question at the end: “How do I keep it this way?” The answer is brutally simple and almost nobody does it.
Why One-Time Organizing Always Fails
Organization is not an event. It’s maintenance. The one bedroom apartment you just organized is going to drift back toward disorder because that’s what happens when humans live in spaces.
You bring in mail. You leave a jacket on the couch. You cook dinner and don’t put the spice jar back exactly where it was. Each of those tiny lapses is invisible on its own. After two weeks of them, the apartment feels chaotic again and you think the system failed.
The system didn’t fail. You just didn’t maintain it. And that’s not a character flaw — it’s a design problem. The solution is building maintenance into the system itself.
The 10-Minute Weekly Reset
Pick one day. Set a timer for 10 minutes. Walk through the apartment and put every object that has migrated from its home back where it belongs. That’s it.
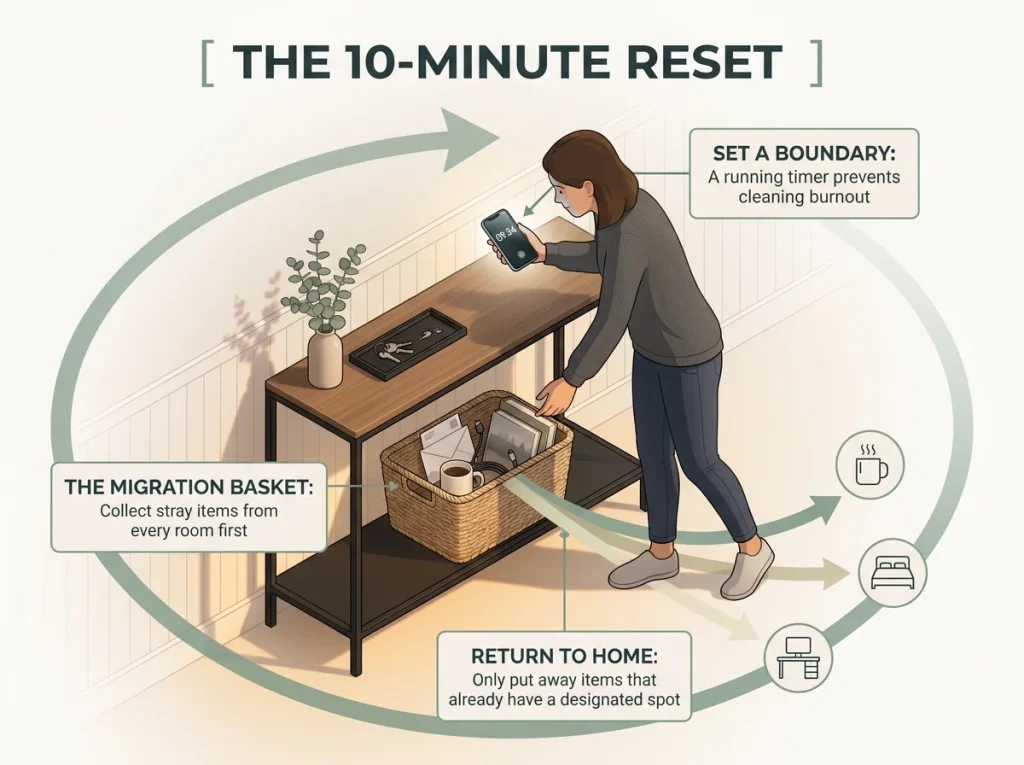
The timer matters because it creates a boundary. Without it, the reset becomes “I should clean the whole apartment,” which becomes “I’ll do it later,” which becomes never. Ten minutes is not enough to deep-clean anything. It is enough to move the 15 to 20 items that have wandered during the week back to where they belong.
Start in the entryway and work clockwise through each room. Put shoes on the rack. Hang the jacket. Return the mug to the kitchen.
Put the charger back on the nightstand. Fold the blanket into the ottoman. By the time the timer goes off, the apartment looks organized again — because the underlying system was already in place.
After three weeks of doing this, the reset takes less than 10 minutes because fewer things have wandered. The system trains you to put things back during the week, and the weekly reset catches whatever slipped through.
Three key takeaways: Edit what you own before you buy a single organizer. Treat the bedroom door as a tool — nothing crosses the threshold without a home inside the room. Run a 10-minute weekly reset on the same day, every week.
Three-month check: Revisit your under-bed containers, closet rod arrangement, and kitchen cabinets after three months of real use. If something isn’t working — a bin that’s always full, a shelf that you never touch, a zone that collects the wrong items — adjust the system to match how you actually live, not how you planned to live.
Start with the closet. It’s one door, a contained space, and you’ll see results in 30 minutes. Get it right. Then do the kitchen. Then the bedroom. One room at a time, one system at a time, until the whole apartment works.
Q1 How do I organize a one bedroom apartment with no closet space?
Use a freestanding garment rack with a shelf base as your primary hanging zone, then add vertical storage with adhesive wall shelves and over-door organizers. Under-bed containers handle seasonal overflow. Measure your available wall space before buying anything — dimensions determine what fits, not marketing photos.
Q2 What is the best way to maximize storage in a small apartment?
Measure every unused gap — under the bed, above the toilet, inside cabinet doors, behind room doors — and fill each with a size-matched organizer. Vertical space is almost always underused. A small apartment gains the most storage from walls, door backs, and the airspace below hanging clothes.
Q3 How often should I reorganize my apartment?
A 10-minute weekly reset keeps things in place. Do a full review of your systems every three months — if a zone consistently collects the wrong items or a bin stays permanently full, the system needs adjusting. Reorganize rooms only when your lifestyle changes, not as a recurring project.
Q4 Can I organize an apartment without drilling holes?
Yes. Adhesive hooks, adhesive floating shelves, over-door racks, tension rods, and freestanding furniture handle every major storage need without touching the walls. Check weight ratings and surface compatibility before mounting adhesive products — textured or painted surfaces sometimes need a different adhesive strip.
Q5 What should I organize first in a one bedroom apartment?
Start with the bedroom closet. It’s a contained space with a clear boundary, results are visible within one session, and the skills transfer to every other storage area in the apartment. After the closet, move to kitchen cabinets, then bathroom, then living room surfaces.
Disclaimer: ClutterlessNest is a participant in the Amazon Services LLC Associates Program. As an Amazon Associate we earn from qualifying purchases. This article may contain affiliate links — if you buy through them, we may earn a small commission at no extra cost to you. We only recommend products we have tested or genuinely believe in.