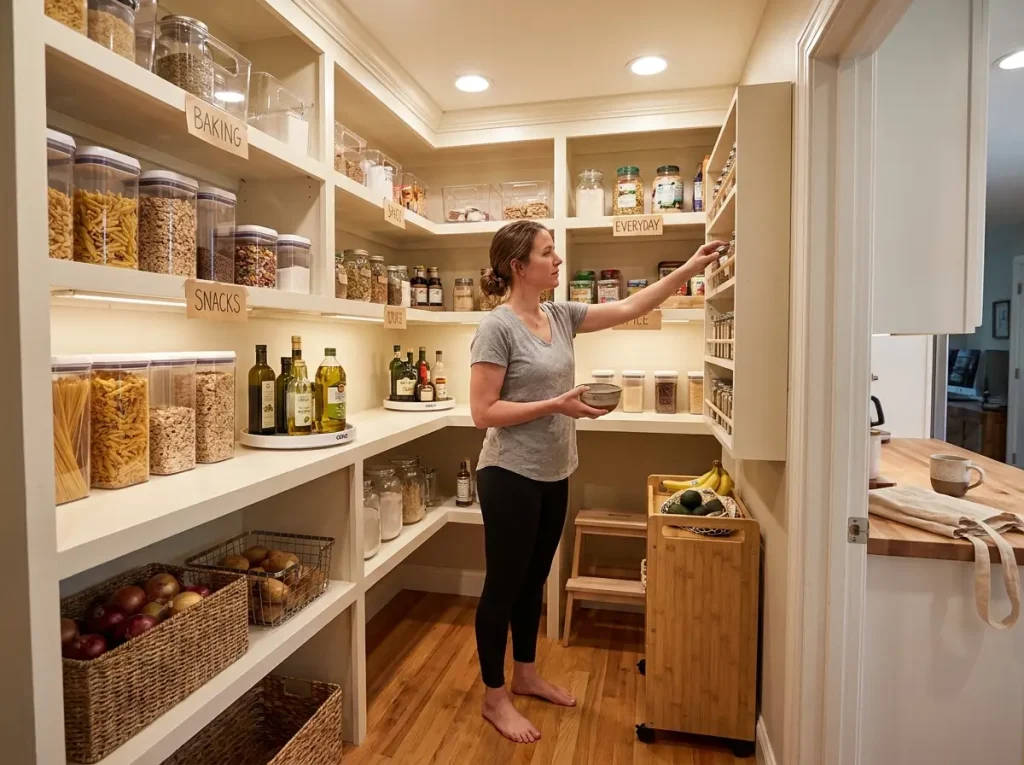
You have more pantry space than most people dream about, and somehow it’s harder to keep organized than the two-shelf closet pantry you upgraded from. That’s not a character flaw — it’s a design problem. Walk-in pantries fail differently than reach-in pantries, and generic “add bins and labels” advice ignores the specific layout, depth, and floor space issues that make your walk-in fall apart after two months. This guide breaks down walk-in pantry organization by layout shape, zone placement, shelf depth, lighting, and the monthly reset that keeps the whole system running past the “after photo” stage.
Quick Answer: Walk-in pantry organization starts with your pantry shape — U-shape, L-shape, or galley — because each layout dictates where shelves go, how wide your aisle needs to be, and where your zones make sense. Measure your shelf depth, assign zones by cooking frequency, and schedule a monthly 30-minute reset to prevent backslide.
Why a Walk-In Pantry Fails Differently Than a Reach-In
The overbuying trap
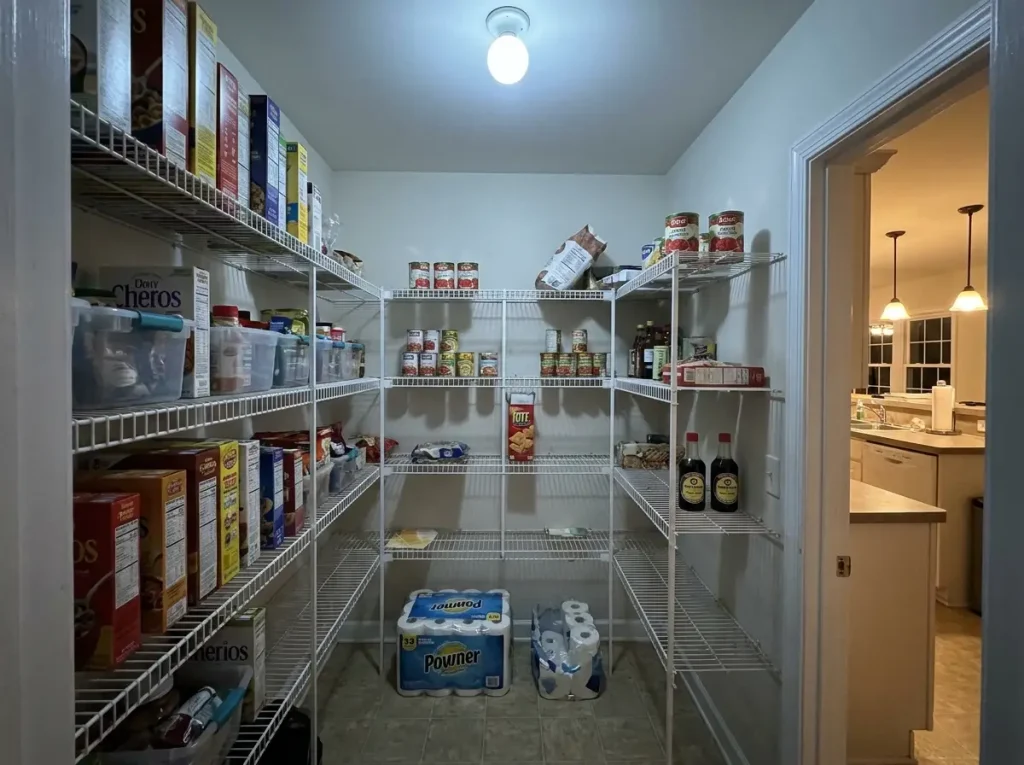
Reach-in pantries fail because you run out of space. Walk-in pantries fail because you have too much of it. The extra room tempts you into stocking more than you’ll use in a month, and before you know it, you’ve got three bottles of soy sauce because the first one got shoved behind a cereal box. Organizers call this the Costco trap — you buy bulk because you can fit it, then lose track of what you already have.
The overbuying cycle feeds itself. More stock means more items pushed to the back of deep shelves, which means more forgotten inventory, which means more duplicate purchases. A small or reach-in pantry forces you to rotate because everything is visible. A walk-in doesn’t — and that’s the core problem.
Zone creep and the back-shelf graveyard
Zone creep is what happens when items slowly migrate out of their assigned areas. The baking supplies creep toward the snacks. The canned goods end up on three different shelves. Within two months, your zones are suggestions, not systems. In a reach-in, zone creep is limited by space. In a walk-in, items have room to wander.
The back-shelf graveyard is worse. Those last six inches on every deep shelf become a collection of cans and jars nobody touches until a yearly cleanout reveals things that expired months ago. If you’ve ever pulled a can from the back row and found dust on the lid, you know exactly what this looks like.
Why your reach-in habits don’t transfer
A reach-in pantry needs a weekly five-minute check because everything is within arm’s reach. A walk-in needs a different cadence — a monthly back-shelf sweep — because the hidden inventory accumulates slower but deeper. Walk-ins also have floor space, door-back real estate, and lighting needs that reach-in pantries don’t. Treating a walk-in like a big reach-in is why most systems fail within the first quarter.
Pro tip: If you’re switching from a reach-in to a walk-in, resist the urge to fill every shelf immediately. Live with the space for two weeks before buying organizers — you’ll learn where you naturally reach first.
Match Your Layout to Your Pantry Shape
U-shape layout (three-wall storage)
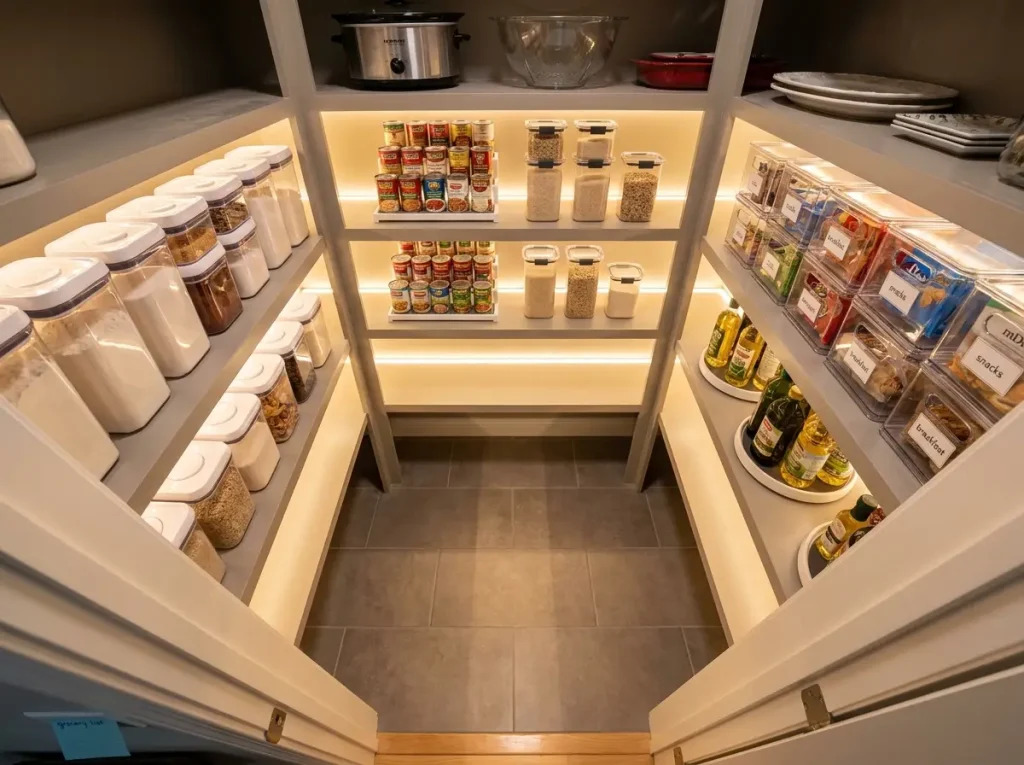
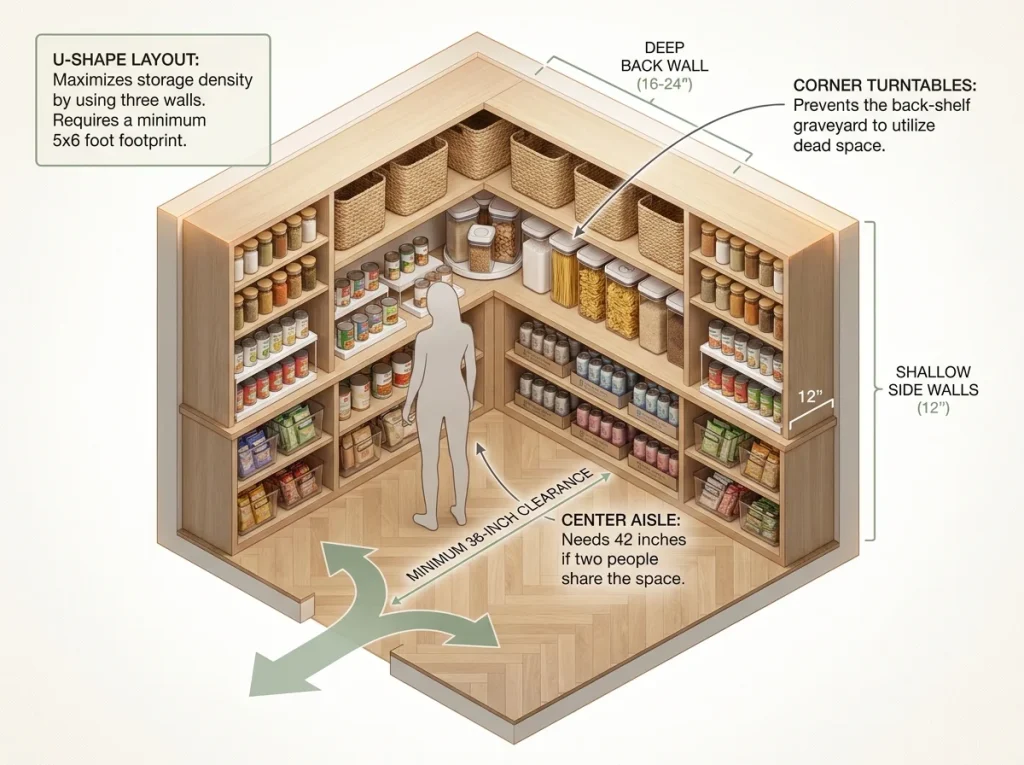
A U-shape walk-in pantry uses three walls for shelving and leaves the fourth open for the door. This is the highest-density layout, surrounding you with storage on all sides. It needs a minimum footprint of about 5 feet wide by 6 feet deep, with at least 36 inches of clearance in the center aisle — 42 inches if two people need to pass each other or if accessibility matters.
The U-shape works best for dedicated pantry rooms because every wall earns its keep. The tradeoff is that you need to plan shelf depth carefully — if all three walls have 16-inch-deep shelves and your aisle is only 36 inches, the room feels tight. Keep standard walk-in pantry dimensions in mind when deciding shelf depth per wall.
L-shape layout (two-wall storage)
An L-shape uses two adjacent walls and leaves two sides open — the entry wall and one side wall. This works well in square walk-ins around 5 by 5 feet. You get less total shelf space than a U-shape, but you gain an open wall that’s perfect for a rolling cart, a small countertop for meal prep staging, or a step stool that stays within arm’s reach instead of buried in the garage.
The L-shape is the most forgiving layout for smaller walk-ins because it doesn’t force you into a narrow corridor. If your walk-in is closer to a converted closet than a dedicated room, start here.
Galley layout (parallel walls)
A galley walk-in puts shelving on two parallel walls with a walkway down the middle. It’s the natural choice for long, narrow spaces — think 4 feet wide by 8 feet deep, common in converted hallways or additions. The advantage is visual scanning: you can see both sides at a glance without turning around.
The galley layout needs a minimum 36-inch aisle between the two shelf walls. If your space is under 4 feet wide, a single-wall setup is more practical than forcing galley shelving into a corridor where you can’t open a bin without bumping the opposite shelf.
Zone Placement That Works With Your Shape
Eye-level and prime real estate
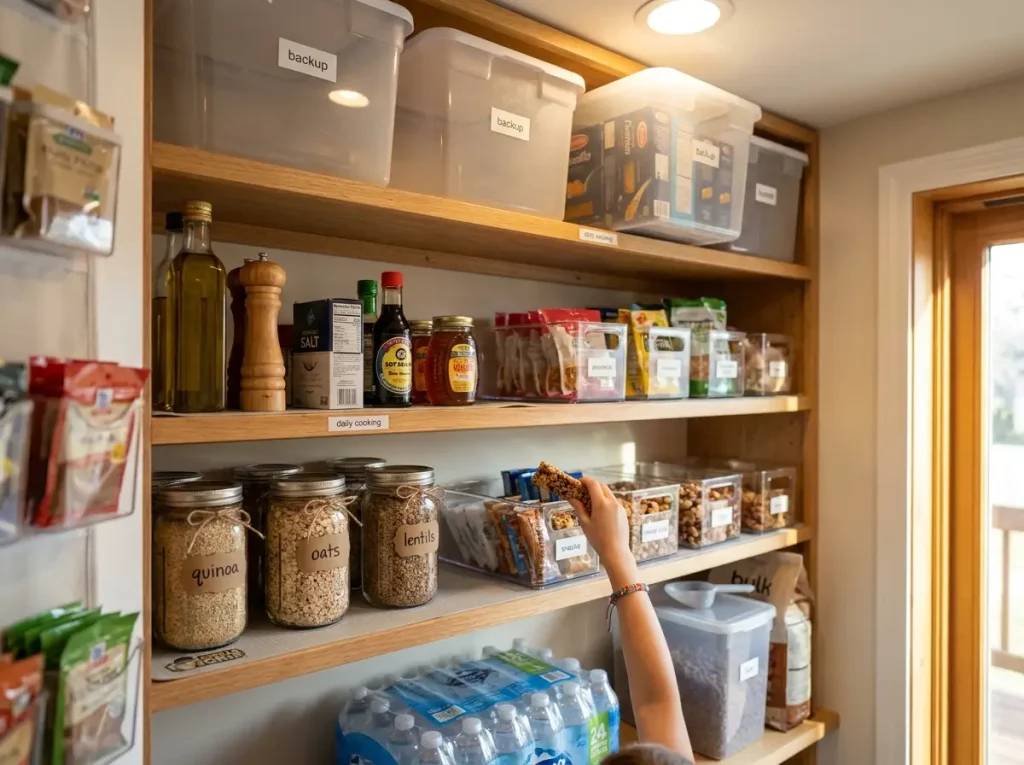
The shelves between 48 and 60 inches from the floor are your prime real estate — the things you reach for every day go here. Cooking oils, daily spices, the snacks your kids grab after school, the rice and pasta you use three times a week. These items belong at eye level regardless of your layout shape.
Everything else arranges around this core. Baking supplies that you use once a week go one shelf above or below. Canned goods and dry staples go mid-level. Backup stock and bulk items go highest or lowest — anywhere you need a reach or a bend to access, because you’re only going there once a week or less.
Bottom shelves and floor space
This is where walk-ins separate from reach-ins. You have actual floor area to work with. Heavy items — bottled water, bulk paper goods, pet food — go on the lowest shelves or directly on the floor in bins. A rolling cart for produce like potatoes, onions, and sweet potatoes keeps them off shelves where they need airflow, and you can roll the whole cart out to the kitchen counter during meal prep.
Keep onions and potatoes on the cart but separated by at least one tier — stored together, they release gases that accelerate each other’s spoiling. One organizer learned this the hard way after a bag of potatoes went soft in a week because they sat next to a mesh bag of onions in the same bin.
Pro tip: Keep a compact step stool inside the walk-in, not in the garage. If reaching the top shelf requires a trip to another room, those shelves stop getting used within a month.
Door-back storage
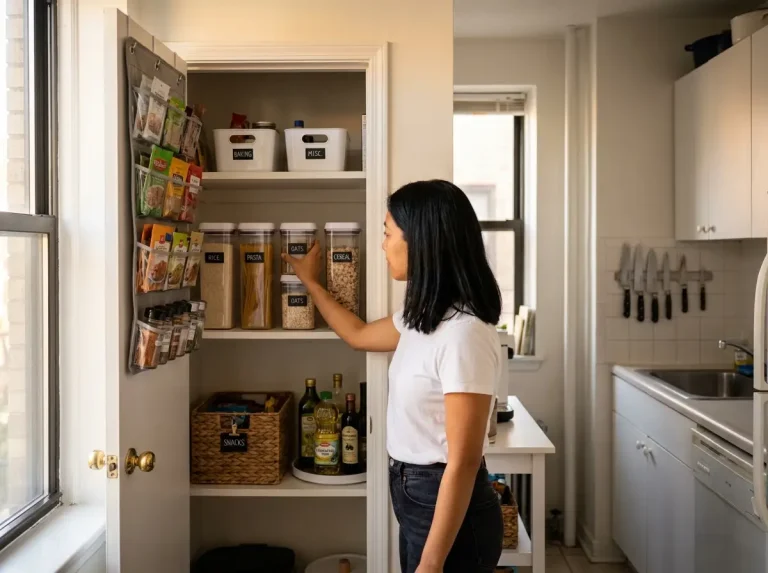
Walk-in pantry doors are wider than reach-in doors, which means more vertical real estate on the back side. The SimpleHouseware Over-The-Door Organizer ($15) fits standard doors up to 1.75 inches thick and holds up to 15 pounds per tier — enough for spice packets, seasoning mixes, snack bars, and small condiments. If you’re renting and can’t drill, a shoe organizer repurposed for the door back does 80% of the same job for about $1.25 at the dollar store.
The key is weight distribution. Put heavier items on the lower tiers so the organizer doesn’t swing when you open the door. Lightweight packets and snack bars go up top. This sounds obvious until your door organizer crashes at 2 AM because you loaded the top with glass spice bottles.
Link up to the full pantry zone system for the complete zone breakdown across all pantry types.
Shelf Depth and Visibility Fixes
Turntables and shelf risers
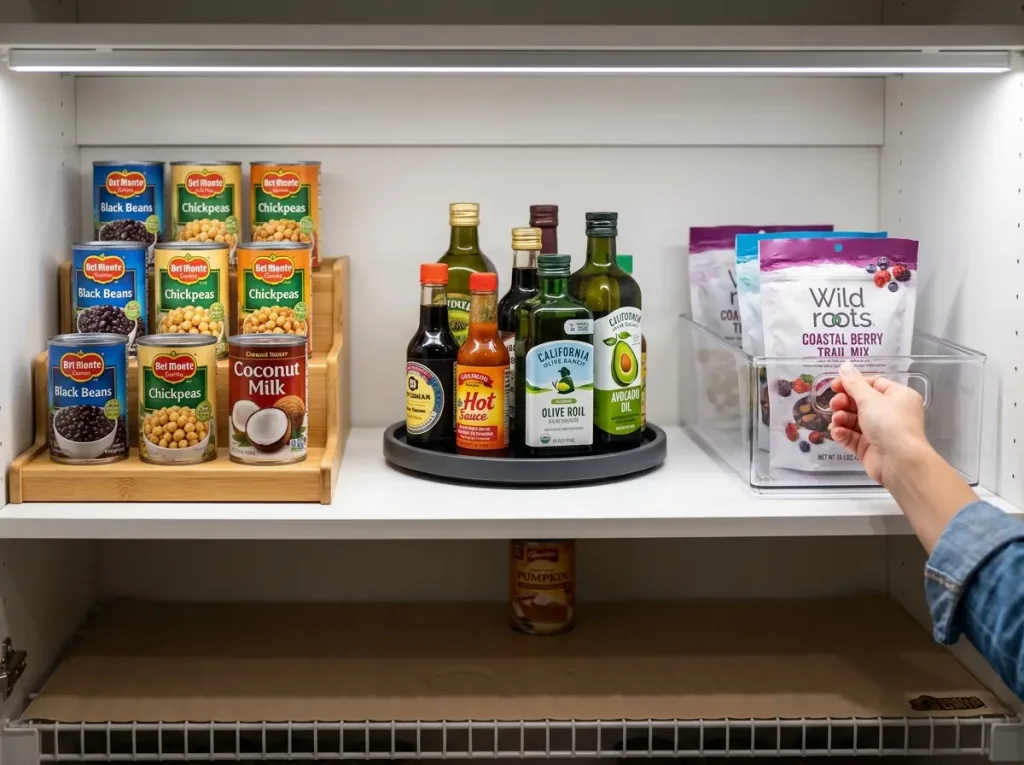
Walk-in pantry shelves are often 16 to 24 inches deep — and anything past the first six inches becomes invisible during a quick grab. Two tools fix this. A turntable lets you spin to access back-row items without moving the front row. The Copco Non-Skid Turntable 12-inch ($12) is worth the money specifically because of the non-skid base — cheaper turntables spin right off wire shelves, which is exactly the kind of problem that only shows up after a bottle of olive oil slides off and shatters on the floor.
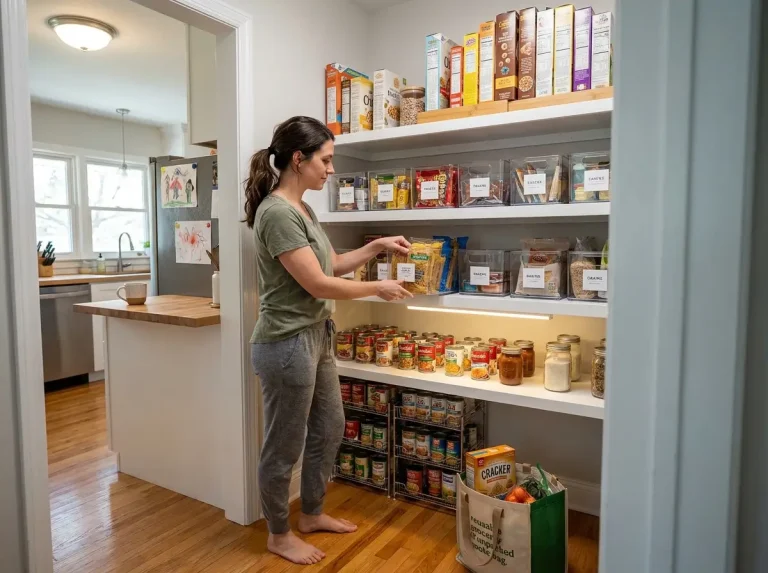
Shelf risers create stadium-seating for cans and jars — the back row sits higher than the front, so every label is visible without moving anything. This matters most on the canned goods shelf, where identical-looking cans get lost behind each other. Your sibling article on deep shelf organization strategies covers advanced deep-shelf techniques if your shelves are 20 inches or deeper.
Clear bins and pull-forward systems
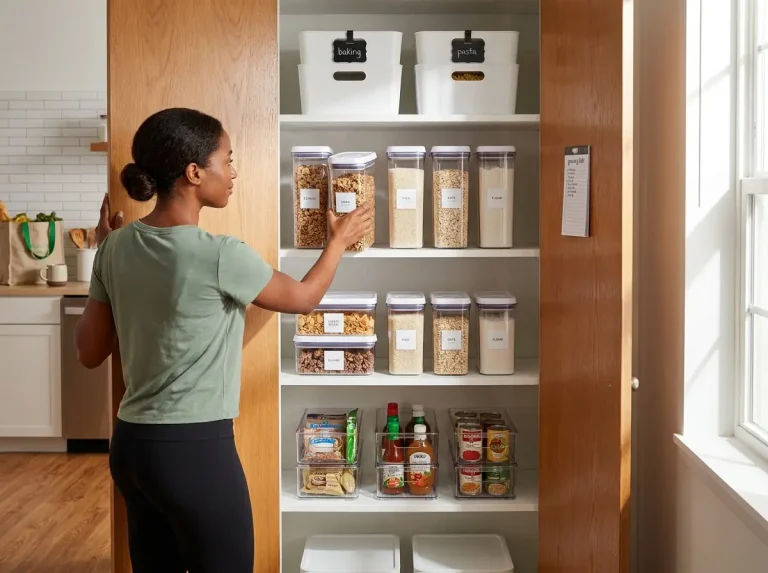
Clear mDesign Stackable Plastic Storage Bins ($17 for a 4-pack, 10×6×5 inches each) solve the pull-forward problem — instead of reaching behind the front row, you lift the whole bin out, grab what you need, and slide it back. Stackable bins also reclaim vertical dead space between shelf levels. The budget alternative is Dollar Tree bins at about $1.25 each — they don’t stack, but they pull forward just as well.
Before buying any bins, measure your shelf depth and the space between shelf levels. A bin that’s too tall for the gap between shelves forces you to remove it every single time, and you’ll stop doing that within a week.
Wire shelf fixes (liner + label strategy)
Wire shelving is standard in most walk-in pantries, especially in rentals. The problem: small items tilt between the wires, cans leave rust rings, and everything slides around. The Gorilla Grip Shelf Liner ($7 per roll, cut to fit) fixes all three issues. One organizer skipped the liner and had chipped paint and scratched shelves within a week — it’s the cheapest product in this list and probably the one with the highest return.
Label your shelf edges, not just your bins. A simple strip of masking tape with a marker works fine. The label tells everyone in the household — not just you — where things go back. Systems break down fastest when one person set them up and nobody else knows the rules.
Lighting and Floor Space — Walk-In Advantages You’re Wasting
Under-shelf LED lighting (installation + specs)
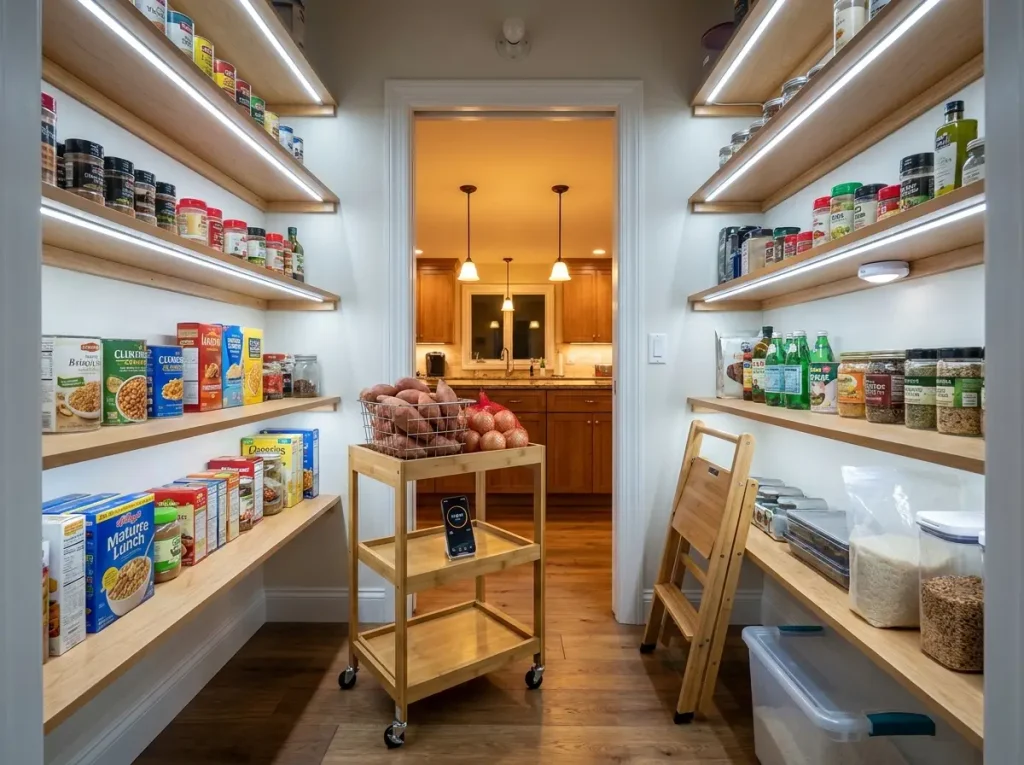
Most walk-in pantries have one overhead bulb and no window. That single light source casts shadows under every shelf lip, making the lower shelves dim enough that you can’t read labels without pulling items out. A motion sensor LED strip kit ($20 for a 6-strip set) mounts under each shelf with adhesive backing, plugs into any outlet, and turns on automatically when you walk in. Look for 5000K daylight color temperature — anything warmer than 4000K makes labels harder to read in a windowless space.
The free alternative works for galley layouts near a bright kitchen: leave the pantry door open and rely on the kitchen light. For U-shape and deeper walk-ins, the overhead spill doesn’t reach the back wall, and LED strips are the practical fix.
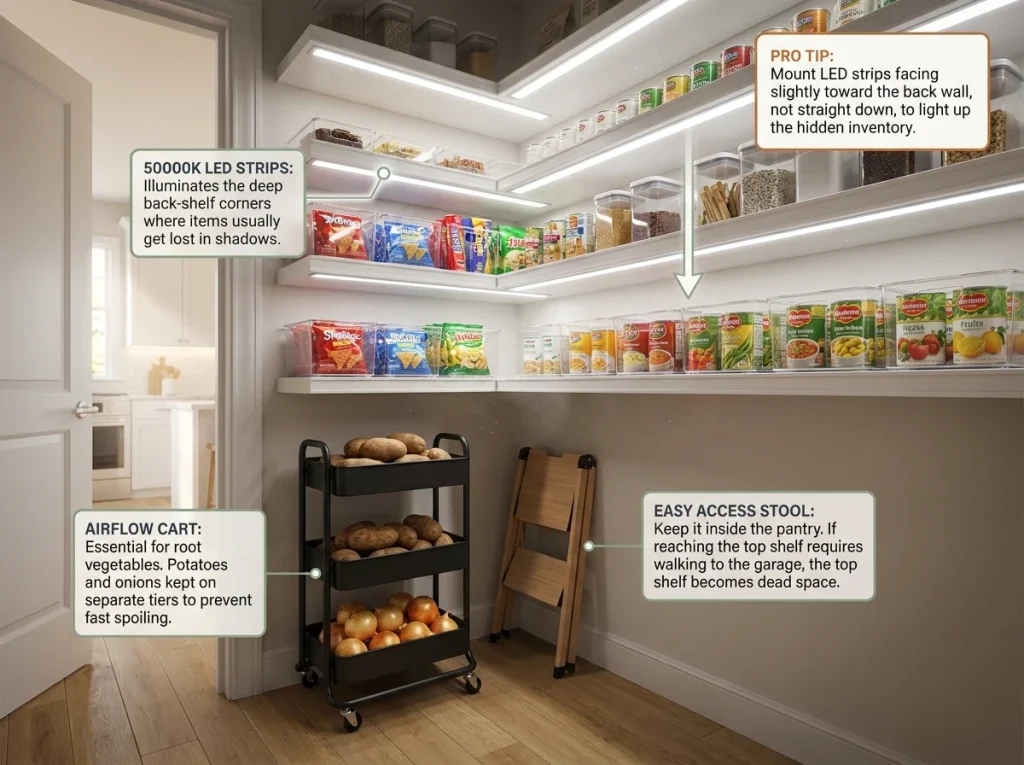
Pro tip: Mount the strips facing the back wall, not straight down. This lights up the deepest part of each shelf — where items hide — instead of spotlighting the front row you can already see.
Floor space strategy (cart, stool, bulk bins)
The floor of your walk-in is usable space that most people leave empty. A three-tier rolling cart handles root vegetables (potatoes, onions, garlic — each on a separate tier for airflow), doubles as a meal prep shuttle you can roll to the kitchen counter, and fits in the gap between shelf walls in a galley layout. Tuck a folding step stool in the corner beside it — the top shelf only gets used if access is effortless.
Floor-level bins work for heavy bulk items: a 25-pound bag of rice, cases of sparkling water, a bag of dog food with a scoop. These are too heavy for standard wire shelves anyway, and putting them on the floor prevents shelf sag over time.
The Monthly Walk-In Reset
The back-shelf sweep
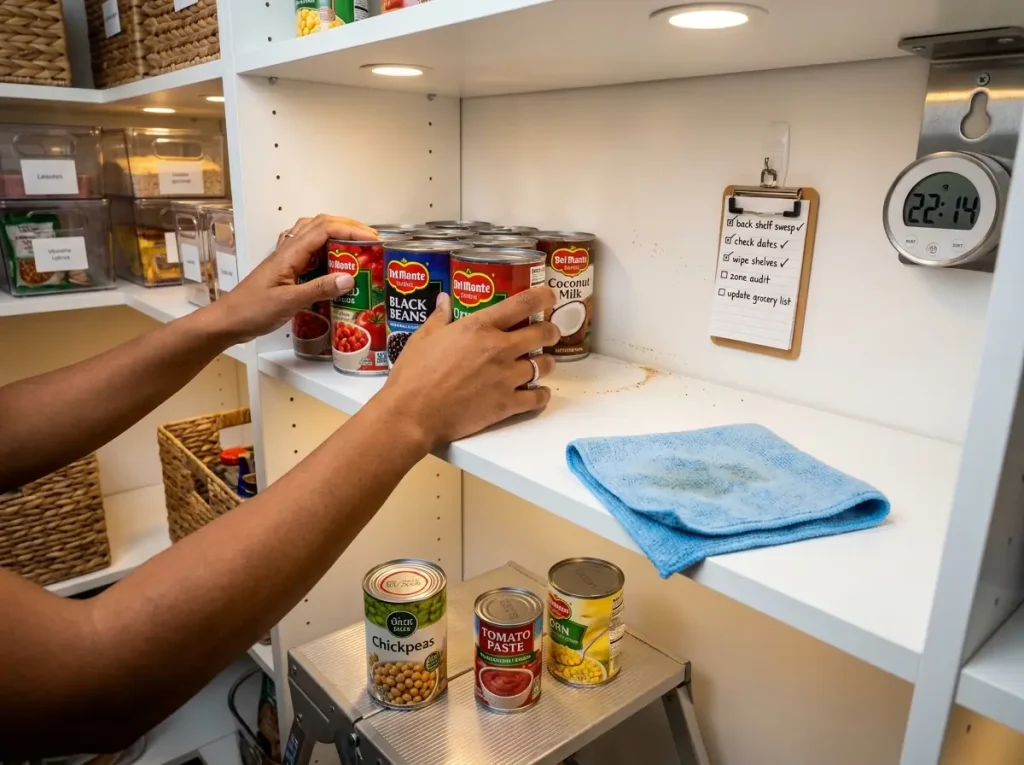
Set a recurring reminder — first Saturday of the month, 30 minutes. Pull everything from the back six inches of each shelf forward. Check expiration dates. Wipe the shelf surface (you’ll find crumbs and dust every time). Restock using FIFO — new items go behind existing ones so the older stock gets used first. This single habit prevents the back-shelf graveyard from forming.
Zone audit and restock
After the shelf sweep, do a quick zone check. Has anything migrated? Snack bars that ended up on the baking shelf. A can of coconut milk that somehow moved from canned goods to the breakfast zone. Put everything back where it belongs. Zone creep is gradual — you won’t notice it day to day, but a monthly audit catches it before the whole system drifts.
Inventory check before shopping
Walk through the pantry with your phone and take a quick inventory photo of each wall before your grocery run. This takes two minutes and prevents the Costco trap — you can see at a glance that you already have four cans of black beans before buying four more. Some people keep a running grocery list clipped to the inside of the pantry door, which works even better if everyone in the household adds to it.
Check the budget-friendly pantry organization guide for reset supplies that cost under $15 total.
Conclusion
Three things matter for walk-in pantry organization that actually lasts. First, your pantry shape — U, L, or galley — determines your shelf layout, so measure before buying a single bin. Second, walk-ins fail from excess, not shortage. Zones, labels, and the anti-overbuying mindset prevent the Costco trap and zone creep that unravel most systems within two months. Third, a 30-minute monthly reset is the difference between a system that works for a week and one that works for a year.
Three-Month Check: After 90 days, reassess your zone assignments. Your cooking habits shift with seasons, new recipes, and changing schedules — if your baking zone is prime real estate but you haven’t baked since February, swap it with something you reach for daily.
Pick one wall. Measure your shelf depth. Set up your first zone. Once that wall works for a full month, move to the next.
Q1 How do you organize a walk-in pantry?
Start by identifying your layout shape — U-shape, L-shape, or galley — then assign zones based on how often you use each category. Place everyday items at eye level, bulk items on the bottom, and lightweight packets on the door back. Schedule a monthly 30-minute reset to prevent zone creep.
Q2 What is the best layout for a walk-in pantry?
A U-shape layout gives you the most storage by using three walls, but needs at least 36 inches of center aisle clearance. For smaller or square walk-ins, an L-shape uses two walls and leaves room for a rolling cart or counter on the open side.
Q3 How do I maximize space in my walk-in pantry?
Use shelf risers for can visibility, turntables on deep shelves and in corners, an over-door organizer for lightweight items, and floor-level bins for heavy bulk goods. Under-shelf LED strips reveal usable space hidden in lower-shelf shadows.
Q4 What should I put in a walk-in pantry?
Group items into five zones — everyday cooking essentials, baking, snacks, canned and dry goods, and bulk backstock. Keep non-food items like paper towels on the lowest shelves. Separate onions from potatoes — stored together, they spoil faster.
Q5 How often should I reorganize my walk-in pantry?
A full reorganization shouldn’t be needed if you do a 30-minute monthly reset. Pull items from the back of each shelf, check expirations, return anything that migrated out of its zone, and take a quick inventory photo before your next grocery run.
Disclaimer: ClutterlessNest is a participant in the Amazon Services LLC Associates Program. As an Amazon Associate we earn from qualifying purchases. This article may contain affiliate links — if you buy through them, we may earn a small commission at no extra cost to you. We only recommend products we have tested or genuinely believe in.