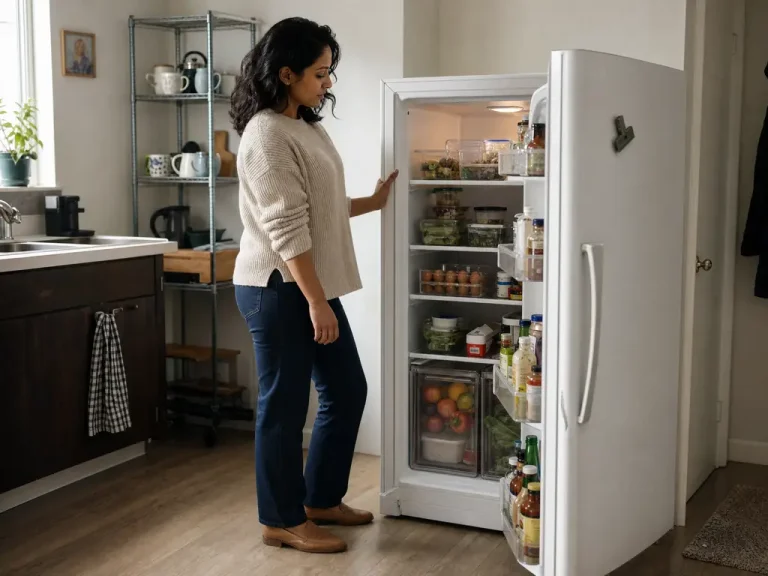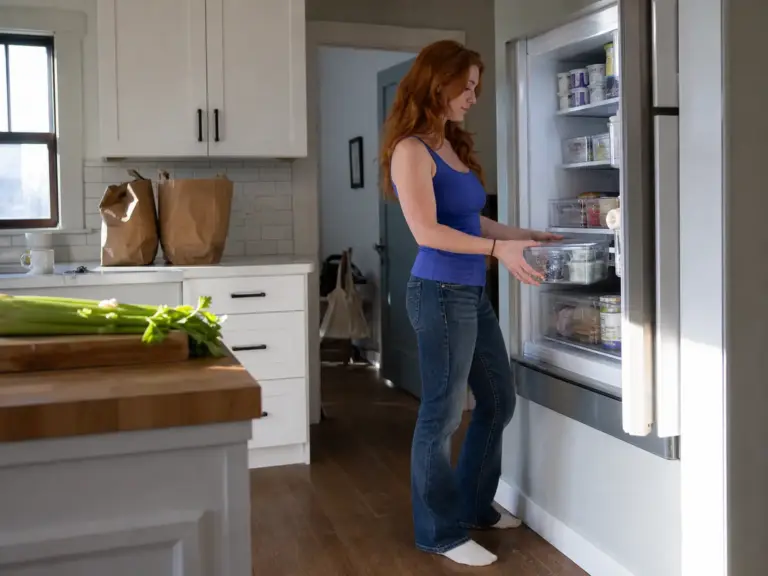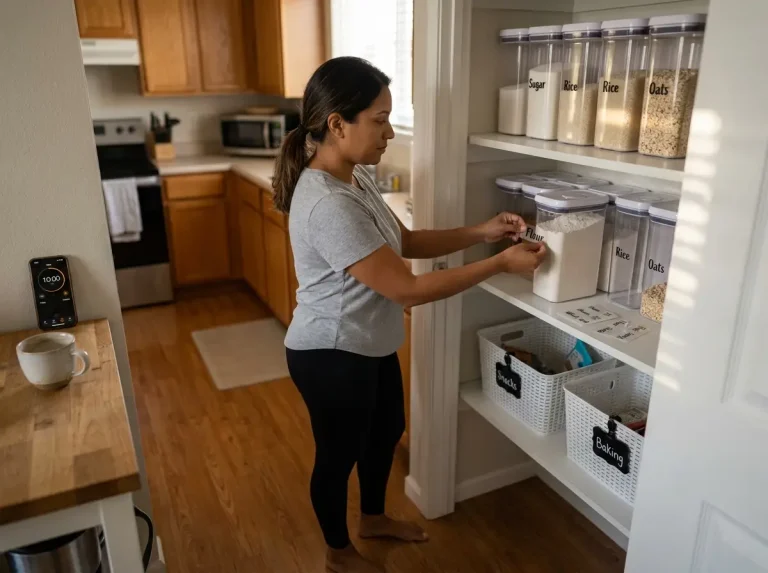
On Sunday you had eight matching containers lined up on one shelf, lids clicked shut, the whole thing looking like something worth photographing. By Wednesday night you’re standing in front of an open fridge holding two identical containers, no idea which one is older, and dinner has turned into a decision you no longer want to make. The failure isn’t willpower, and it isn’t the containers. USDA’s cold-storage window for cooked food is three to four days, which means a Sunday batch is already at its ceiling by Wednesday, and most fridges are physically set up so they can’t tell you that at a glance. Good fridge organization for meal prep solves that with structure instead of effort: the two-zone split that keeps raw ingredients away from ready meals, day-based labeling that ends the guessing, portion-and-reheat placement, and what to do the week prep day just doesn’t happen. If your fridge is small enough that shelf space is the binding constraint, start with organizing a small fridge first, then come back and layer this on top.
Quick Answer
Organize a fridge for meal prep in six steps, in this order:
- Clear one shelf and make it the prep zone
- Split that shelf into raw-staged and ready-to-eat halves
- Cool cooked food before you seal any lid
- Label every container with the day it was made
- Put single-serve at eye level, family-serve below
- Discard on day four, no negotiation
Why Your Fridge Meal Prep System Fails by Wednesday
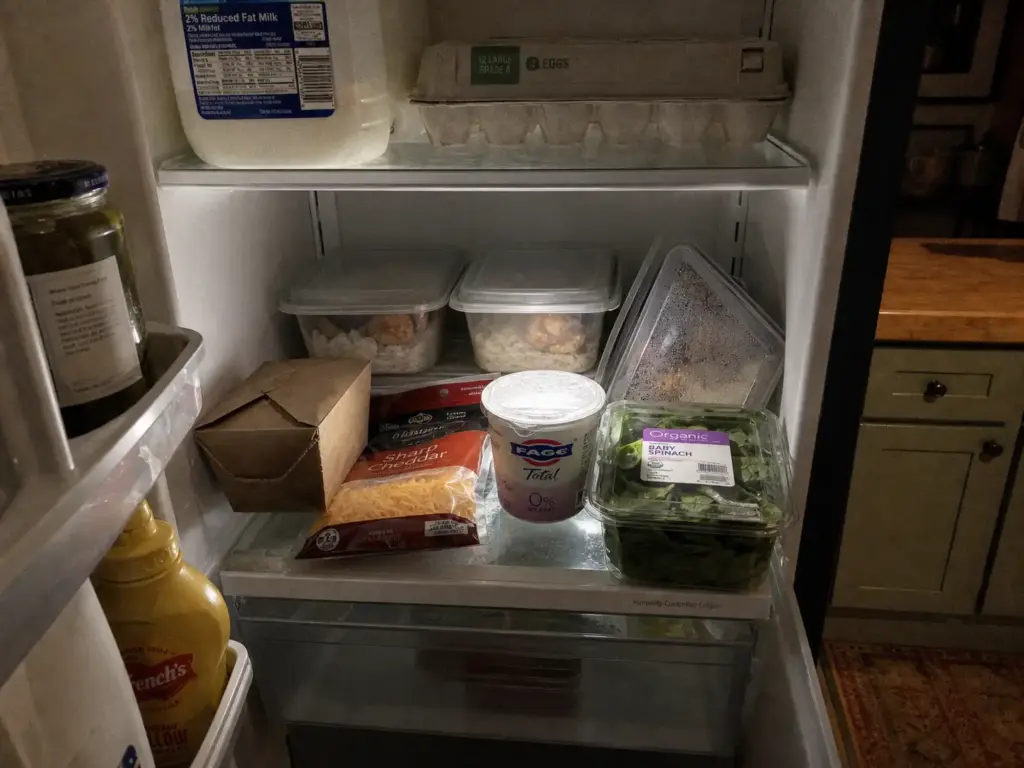
Almost everyone reads the midweek collapse as a character flaw. I just got lazy. I lost motivation. That’s not what happened. Three specific mechanical things went wrong, and none of them have anything to do with discipline, which is why trying harder next Sunday produces the same Wednesday.
Failure mode one: the batch was too big. Cooking all five weekday lunches in a single Sunday session means every one of them peaks on Monday. The texture goes first, then the flavor, and by midweek reheated rice and chicken have gone flat well before the safety window actually closes. This is the most repeated complaint in meal-prep threads, and it’s worth naming clearly: the food didn’t spoil, it just stopped being appetizing. You threw it out anyway, which means the batch size wasted the food just as effectively as spoilage would have.
Failure mode two: warm food went straight into a sealed container. Trapped steam condenses on the lid, pools, and drips back down onto whatever’s underneath. That standing moisture accelerates spoilage and turns anything with a crisp edge into something soft. Most people read the USDA’s guidance on getting food refrigerated within two hours as an instruction to seal and chill immediately, but it’s a cooling window, not a sealing one. You have those two hours to get the food out of the 40 to 140°F range, and using twenty minutes of them to let steam escape is well inside the rule. Anyone who has opened a container to find the lid fogged and the broccoli limp has met this one.
Failure mode three: there was no boundary. The meal-prep shelf has no rule about what’s allowed on it. Tuesday’s grocery run needs somewhere to land, Monday’s takeout container needs somewhere to land, and the tidiest shelf in the fridge is the obvious candidate. Within two weeks there is no prep zone. There’s just a shelf.
That third one deserves more attention than it gets, because it’s the only failure that’s invisible while it’s happening. Batch size announces itself the moment Wednesday’s lunch tastes tired. Condensation announces itself the first time you peel back a fogged lid. Boundary erosion announces nothing at all: every individual act of putting something on the prep shelf is completely reasonable, and the shelf looks fine right up until the week you open the door and can’t find the food you cooked. There is no single moment where the system breaks, which is why nobody catches it in time to stop it.
The mechanism moves faster than people expect, too. A prep zone that’s holding a full week of food has almost no spare room by definition, so it takes very few unrelated items before the prepped containers start getting shuffled toward the back. That’s one grocery run, not several. The realistic lifespan of an unbounded prep shelf is about one shopping cycle, not the several weeks most people assume they have before things drift.
Then the three compound. Prepped containers get pushed toward the back behind newer arrivals, lose their visual identity, and become what organizing communities call the forgotten Tupperware: a container you know is yours, made recently enough that throwing it out feels wasteful, and old enough that eating it feels like a gamble. So it sits. And the longer it sits the more it functions as a wall between you and the food you actually wanted.
Every one of those three failures is structural, which is the good news. Smaller batches, a cooling step, and a physical boundary fix all three, and none of them cost anything. They also address the thing most people are actually trying to solve, which is food waste reduction: the containers that get thrown out aren’t the ones that went bad, they’re the ones nobody could date. Before you build a meal-prep workflow on top of the fridge, though, general refrigerator organization has to make sense first, and the underlying fridge layout has to work on its own terms, because a prep zone parked in the warmest corner of the unit is running on a shorter clock than you think.
The Two-Zone Split That Holds the Whole System Together
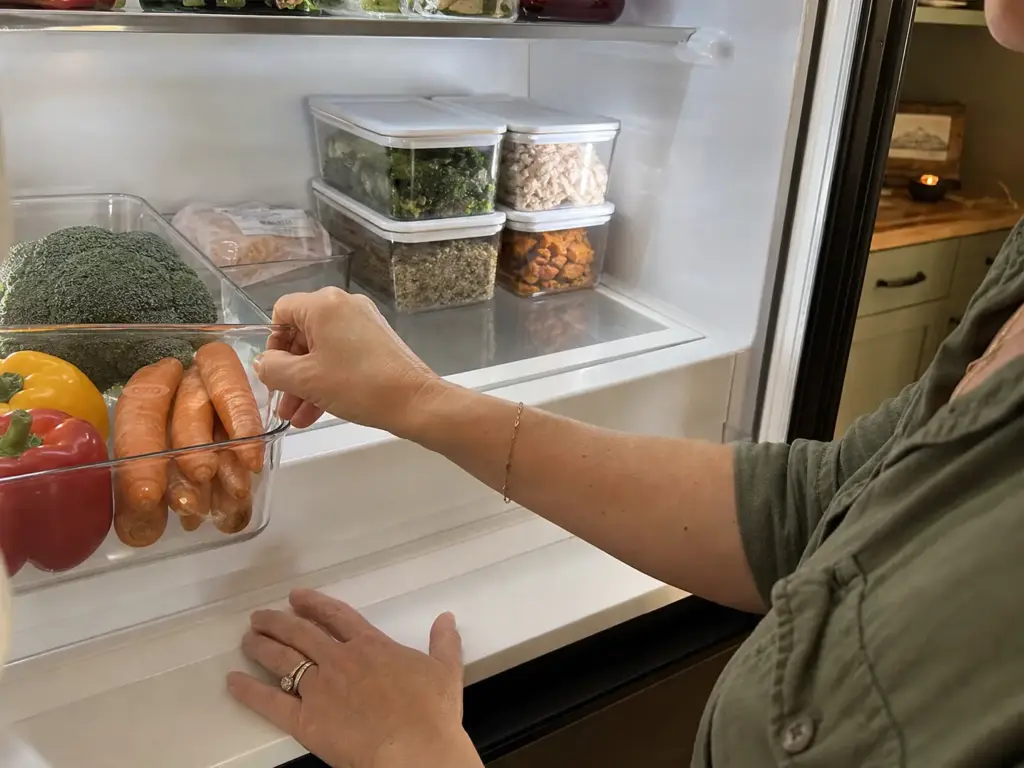
Most fridge advice treats the appliance as one filing system: dairy here, produce there, condiments in the door, done. That model works beautifully for groceries. It falls apart the moment half your fridge is food you cooked yourself, because cooked food is on a clock and a jar of mustard is not.
Why raw-staged and ready-to-eat can’t share a shelf
The traffic pattern is the entire argument. Your raw-staging zone holds the ingredients waiting for the next cook session, and it gets touched once a week. Your ready-to-eat zone holds finished meals, and it gets opened every single day, sometimes twice. Mix them and you have daily hands digging through weekly inventory, which is precisely how the back of a shelf turns into a blind spot nobody has looked at in eleven days.
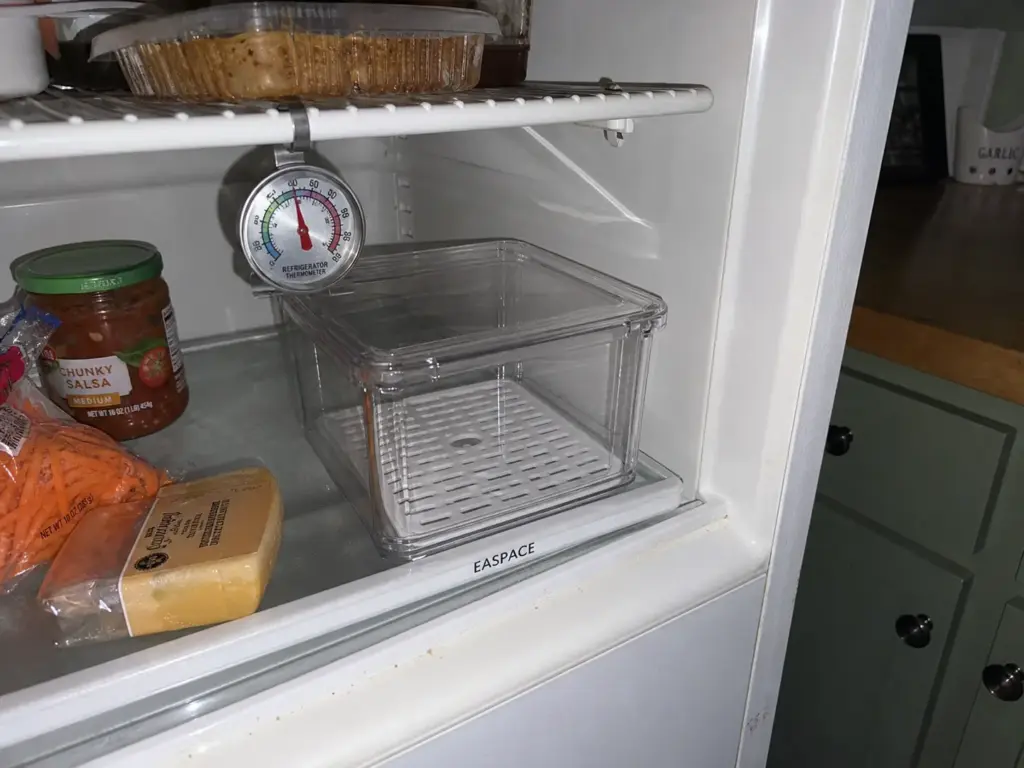
There’s a moisture argument underneath the traffic one. Raw produce and unwrapped proteins release water continuously. Sealed prepped meals release nothing. Put them on the same surface and the moisture from the raw side collects under the containers on the ready side, which is a small thing that becomes a slimy thing by Thursday. This is where bins with drainage holes earn their place: the EASPACE Clear Fridge Organizer Bins have perforated bases that let shed moisture fall through instead of holding it against the food, which is the one spec that genuinely separates a raw-staging bin from a ready-to-eat bin. The lids are the weak point, honestly. Stack more than two and the top one flexes.
Where each zone goes (and why the door doesn’t count)
Ready-to-eat prepped meals belong at eye level, on the shelf you reach for without thinking about it. In most units that’s the top shelf or the one just below it, and it’s the prime real estate: it goes to the food on the tightest clock, because a container you can see is a container you eat.
Raw staged ingredients go lower and further back. It’s colder down there, and you only need to reach them once a week, so the inconvenience costs you nothing. Raw proteins stay on the bottom shelf regardless of what your meal-prep system looks like. That rule exists so drips fall onto nothing, and it doesn’t bend for organizational elegance.
The door is the warmest real estate in the fridge, and every time you open it the contents get a blast of room-temperature air. It holds condiments. A prepped meal parked in the door is the one that turns first, and it will turn well before day four.
Pick the prep shelf by watching where the cold air actually comes from. In most top-freezer and bottom-freezer units the coldest air enters at the back of the middle shelf, which makes that spot ideal for prepped meals and a poor choice for anything you want to stay crisp.
Giving the raw zone a visible ceiling
An uncapped raw zone is what eventually becomes the produce graveyard, and the descriptions people use for it are consistently vivid: fuzzy fruit, shriveled vegetables, a cabbage that has gone soft in a way cabbage should not. It happens because buying produce for a prep session and buying produce out of general optimism feel identical at the store, and the fridge has no way to tell you which one you did.
The fix is a bin with edges instead of a shelf without them. When the bin is full, you’ve bought enough. That’s it. A physical boundary performs the arithmetic you were never realistically going to do in the produce aisle, and it does it before the food is in your cart rather than after it’s gone bad.
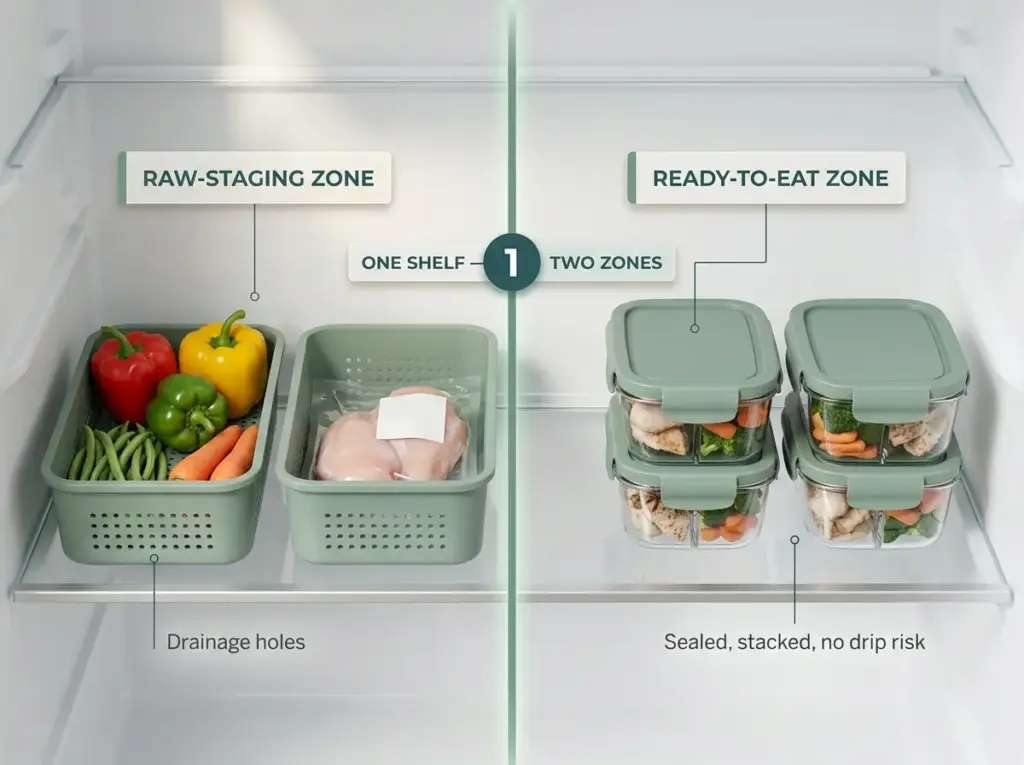
Start free. Reused clamshell containers from store-bought berries already have drainage holes and cost nothing, and a shoebox lid works as a boundary tray while you figure out whether the zone placement is right. If it holds for a month and you want something that stacks and wipes clean, a multi-bin set does the job better than a single large bin, because the raw-versus-ready line then lives in the hardware instead of in everyone’s memory.
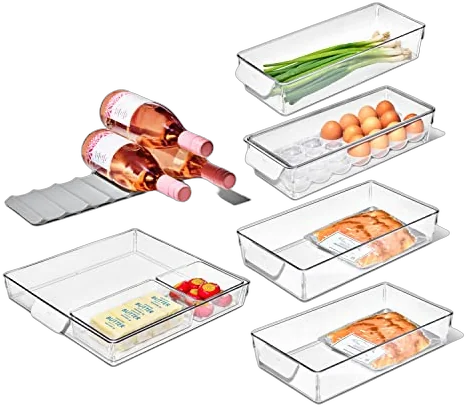
If you’d rather solve the hardware question properly before committing, which bins actually fit your shelf depth is its own question and worth answering with a tape measure in hand.
Labeling by Day, Not by Contents
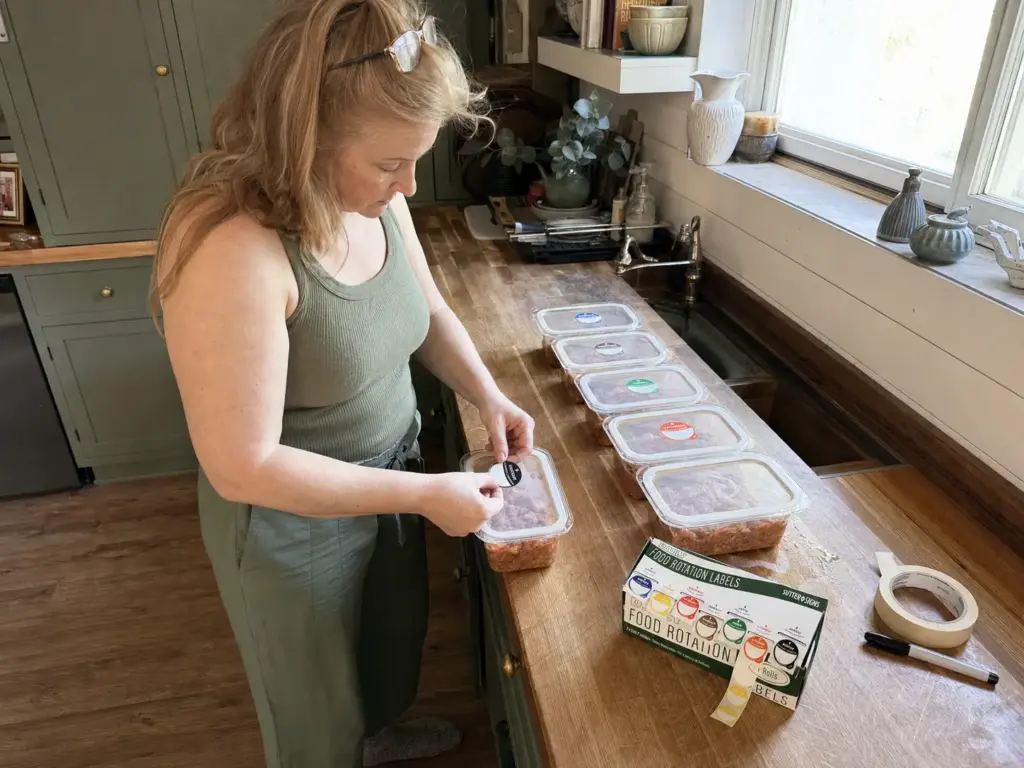
You already know what’s in the container. You cooked it. What you don’t know at 7 p.m. on Wednesday is whether that one came from Sunday’s batch or from the Tuesday top-up, and that is the only question a label needs to answer. Almost nobody’s label answers it.
The date is the only field that matters
Contents labeling solves a problem that clear containers already solved. If you can see the food, writing “chicken and rice” on the lid adds nothing. Date labeling solves the problem that actually makes you throw food out, which is uncertainty about age. Home-cooked food has no printed expiration dates to fall back on, so whatever you write on the lid is the only dating information that exists.
The window is tight enough that a single day matters. FoodSafety.gov’s cold storage chart puts the ceiling at 40°F or below and gives cooked meals and poultry three to four days, so a Sunday batch is at its limit by Wednesday or Thursday. A label with no day on it forces a guess, and a guess in front of an open fridge almost always resolves toward the trash.
One detail that trips people up: the shortest-lived ingredient sets the date, not the longest. Cooked rice holds about six days on its own and cooked pasta about five, but a chicken-and-rice bowl is bounded by the chicken’s three to four. Label the bowl, not the components. Clear containers make this easier than frosted ones, which is the practical case for a set like the Rubbermaid Brilliance 10-Piece Set: fully transparent walls and lids mean the contents identify themselves and the label is freed up to carry only the date. They’re plastic, so they’ll stain from tomato-based sauces over time no matter how carefully you wash them.
Front-to-back rotation, so the oldest thing is the easiest to grab
FIFO isn’t a warehouse concept here. It’s shelf placement. New containers go behind, older ones come forward, and the whole rule is that if you have to move something to reach the older container, the system has already failed. That’s the test. Not whether you intend to eat the older one.
The other half is the weekly reset: whatever is left when prep day arrives goes, before the new batch goes in. Not after. This is the single step that keeps the zone from quietly filling up with archaeology, and it’s the one people skip because the leftovers still look fine.
Write the day you made it, not the day it expires. Expiry math done at 9 p.m. while holding a hot pan is where most labeling systems quietly break. A made-on date needs no arithmetic and still tells you everything: if the label says Sunday and today is Thursday, you already have your answer.
What to label with (and what fails)
Masking tape and a marker is the free version and it genuinely works, with one caveat everybody discovers the hard way. Fridge condensation lifts the adhesive, so tape has to go on a dry container, not one straight out of the dishwasher or straight off a cooling rack. Apply it to a wet lid and you’ll find it curled up in the corner of the shelf a few days later, which is the same adhesive failure that peels pantry labels off in a month when the container has been anywhere near a steamy stove.
Purpose-made day-of-week dots exist because of exactly that failure. The Day of the Week “Day Dot” Labels use a residue-free adhesive rated down to well below freezing, which means they survive the moisture cycle and still peel off clean instead of leaving a gummy ring. A 7,000-count dispenser is comically more than a household will use in a year, so treat the count as a decade of supply rather than a value proposition.
Here’s a correction worth making. I used to recommend a label maker as the answer to fridge labeling, full stop. After enough threads describing peeled-off printed labels floating around the bottom of the crisper, I split the job in two. A label maker like the Brother P-Touch PTD220 belongs on the permanent layer: bin fronts, shelf edges, the things that define the zones and never change. It’s the wrong tool for individual containers you’ll relabel every Sunday, where you want something disposable and fast.
Portion Size Decides Which Shelf a Container Lives On
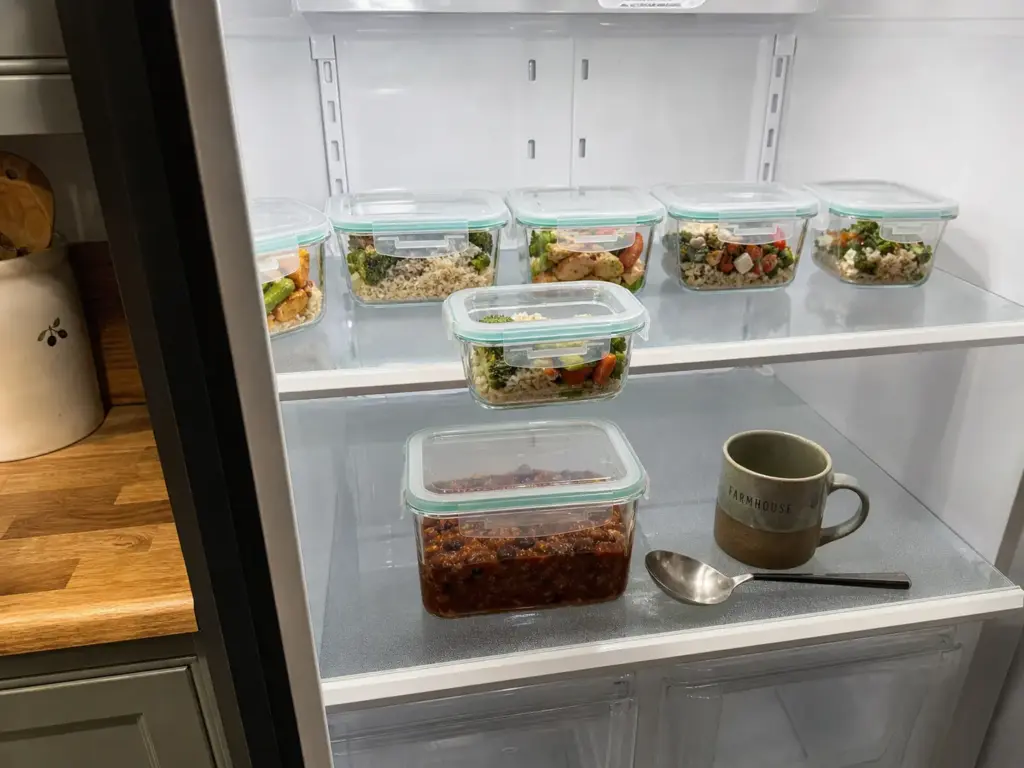
Container advice online stops at “get clear stackable ones.” Nobody mentions that a stack of single-serve lunches and a family-sized batch of chili have completely different jobs, get grabbed by different people at different times of day, and shouldn’t live in the same place.
Single-serve at eye level, family-serve below
Single-serve grab-and-go containers get taken by one person, usually on the way out the door, usually in a hurry. That means eye level, front row, and stacked no more than two deep. Anything deeper than two and the bottom one becomes invisible.
Family-serve batches behave differently. They get carried to the counter and served from, they’re heavy, and they only move at mealtimes. A lower dedicated shelf suits them better, because lifting a full 35-ounce container down from above shoulder height is how lids come off mid-air.
The mistake this arrangement prevents is specific: five single-serve lunches buried under one family-sized container. Grabbing lunch then means unstacking the entire shelf at 7 a.m., which is roughly the moment anyone decides meal prep isn’t worth it.
Matching sizes are the wrong goal, matching footprints are the right one
A one-size container set doesn’t match how people actually eat. A single-serve lunch and a family side dish need genuinely different volumes, and buying twelve identical mid-size containers means every meal gets stored in something either half-empty or overfull.
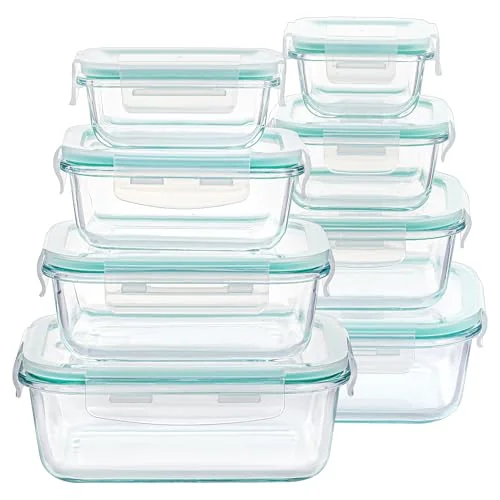
What should match is the base footprint. Same footprint, different heights, is the combination that lets a shelf stack cleanly instead of becoming a pile. Community threads have a name for the alternative, which is meal-prep Tetris: the nightly ritual of removing three containers to extract one, then rebuilding the stack in a slightly worse configuration than before. Graduated sizes on a shared base put an end to that.
The conventional wisdom says buy the airtight set and stop thinking about it. In practice, how well a lid actually seals varies more than the marketing suggests, and a lid that seals well but takes two hands to close will lose to a slightly leakier one that closes with a thumb. Whatever mismatched containers you already own will demonstrate the eye-level and lower-shelf split before you spend anything. The placement rule is free. The matched set is an upgrade to it, not a prerequisite.
Portioning at prep time, not at eating time
Portioning into individual containers on prep day is what makes a grab-and-go zone work at all. A big communal batch means somebody stands in front of the open fridge with a spoon, deciding what counts as a serving and how much to leave for everyone else. That deliberation is the exact moment the system stops being convenient, and convenience was the whole point.
The honest trade-off is dishes. Individual portions cost you more containers and more washing, and pretending otherwise is how people quit in week three. A workable middle: prep half the week in single-serve for the mornings that are genuinely rushed, and leave the rest as family-serve. You get most of the benefit without doubling the load on the dish rack.
Sort the Grab-and-Go Zone by How It Gets Reheated
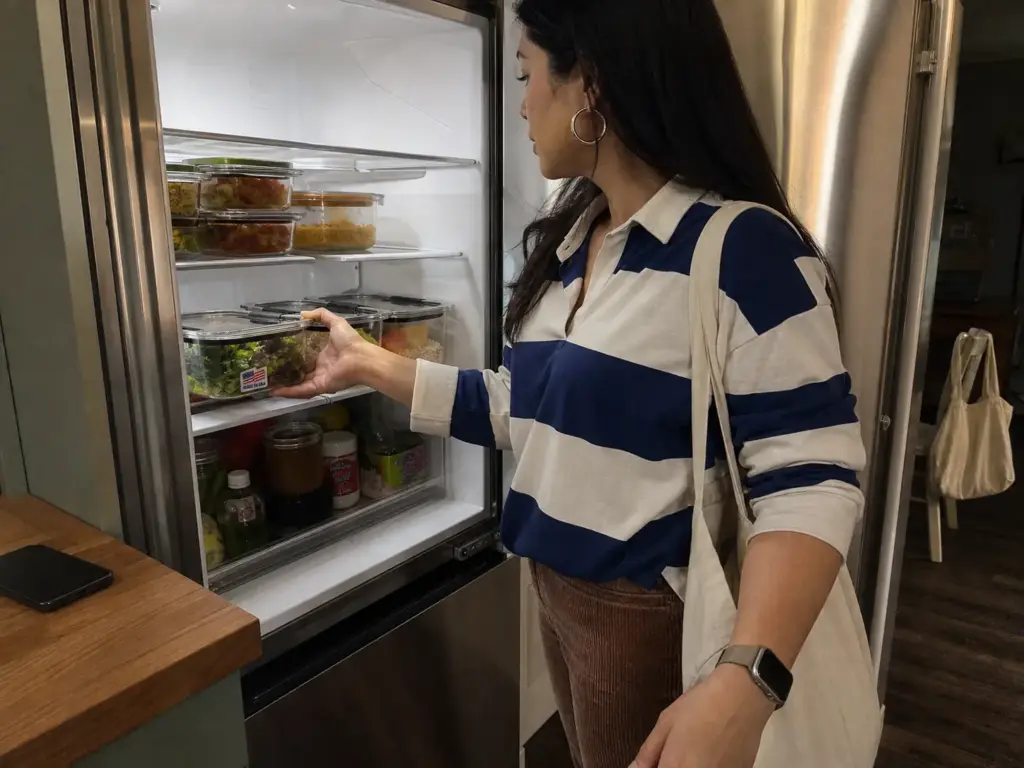
At 7:40 in the morning nobody is reading labels. You want to open the door, take the thing, and leave. Which means the zone has to be sorted by what you’re about to do with the food, not only by the day it was made.
Two sub-groups: eat cold, needs heat
Salads, overnight oats, cut fruit, grain bowls eaten at room temperature: these leave the fridge and go directly into a bag. Group them together at the front of the zone on weekday mornings, because they’re the ones that need zero decisions. Their holding times are shorter than most people assume, and the FDA’s refrigerator and freezer storage chart is the reference worth checking for the specific components you’re prepping, since cut fruit and cooked seafood behave nothing like cooked grains.
Anything that needs the microwave is a different action with a different time cost attached. Keeping the two groups mixed means every morning starts with a sorting task you already did on Sunday, which is a small tax paid five times a week for no reason.
The container material changes the workflow
Glass goes fridge to microwave to table with no transfer step, which is genuinely fewer dishes. The snap-on plastic lid comes off first though. Manufacturers say so explicitly, and it’s the instruction people skip once and then remember permanently after finding a warped lid that no longer seals.
Plastic is lighter, cheaper, and travels better in a bag, and if the meal is being eaten at a desk that matters more than material purity does. A dropped glass container in an office kitchen is a genuinely bad afternoon.
The practical split: glass for the meals reheated at home, plastic for the ones leaving the house. Sorting the zone along that line means the choice has already been made before you’re standing there in a coat deciding.
The lid problem nobody mentions
Lids are where this system actually breaks. A tidy stack of nested containers with the lids living in a separate drawer turns grab-and-go into a two-location task, and two locations at 7:40 a.m. is one too many.
So: lids on, containers stacked, even though nesting them lidless saves real shelf space. Space isn’t the constraint being solved in the prep zone. Friction is. Nest the empties in the cabinet all you like, but the loaded containers on the prep shelf wear their lids.
Turn one container in each stack 90 degrees to mark where the cold-eaten group ends and the reheat group begins. It reads instantly with the door open and it costs nothing, which makes it the rare zoning cue that survives in a shared fridge where nobody else read the plan.
One more sorting decision belongs on Sunday rather than Thursday: anything you won’t eat inside that window belongs in the freezer, not the back of the fridge. Days four and five of a five-day prep are freezer days, and deciding that while you’re portioning costs nothing.
What Happens the Week You Skip Prep Day
Every meal-prep system online assumes prep day happens. Some weeks it doesn’t. A kid gets sick, work runs long, Sunday evaporates. The difference between a system that lasts a year and one that lasts a month is entirely about what the fridge looks like on the weeks it goes wrong, and almost nobody writes about that part.
The zone survives an empty week if the boundary does
An empty prep zone is completely fine. It looks like failure and it isn’t. A prep zone full of unrelated leftovers is how the zone actually dies, because once the boundary is breached it does not come back on its own. Nobody ever wakes up and decides to evict the takeout containers from the meal-prep shelf.
So the rule that holds is narrow and slightly uncomfortable: the zone stays empty, or it holds prepped food. Nothing else goes there, including during the weeks there’s no prepped food to put in it. Yes, that means leaving visible empty shelf space while a bag of groceries sits on the counter. That’s the cost, and it’s cheaper than rebuilding the system in September.
In a shared household, a boundary nobody can see is a boundary nobody respects, which is the whole roommate problem in one sentence. A labeled bin front does more work here than any conversation will. “Prep zone” printed on the front of a bin is a visible, non-nagging claim on that space, and it survives the fact that your roommate was never going to read your organizational reasoning. It also gives you something to point at that isn’t a person.
Twice-weekly beats one big Sunday
The most repeated real fix for the midweek quality cliff isn’t a product at all. It’s a schedule change: two smaller prep sessions instead of one large one, say Sunday and Wednesday. Thursday’s lunch is then one day old instead of four, which is the entire difference between food you look forward to and food you’re negotiating with.
It also fails more gracefully, which matters more than it sounds. Miss one of two smaller sessions and you’ve lost half a week. Miss the one big Sunday and you’ve lost all five days, which is exactly when people order takeout four nights running and conclude that meal prep doesn’t work for them.
The second session doesn’t need to be a session. Forty minutes on a Wednesday evening, cooking one grain and one protein, refills the zone completely. Batch-cooking culture has made prep day sound like a four-hour production, and for most households that framing is the thing standing in the way.
The reset that takes four minutes
Before every prep session, in this order: everything left from the previous round comes out, the shelf gets wiped, and the new batch goes in behind nothing. Four minutes, start to finish. It’s the step that prevents slow accumulation, and it’s the first step to rebuild when the system has drifted, because you cannot rotate front-to-back onto a shelf that already has strangers on it.
One thing worth doing once, before you commit a shelf to prepped food: check the actual temperature with an appliance thermometer. The dial on the door tells you what the fridge was asked to do, not what the middle-back of shelf two is actually holding at, and those can differ by several degrees in an older unit or a very full one. If the shelf you chose is running warm, every container on it is on a shorter clock than the label suggests, and you’ll read that as a labeling failure when it’s a physics one. When the temperature reading tells you the underlying layout is fighting you, start there instead before layering a workflow on top of it.
Conclusion
Split the shelf before you buy anything. Raw ingredients staged for later on one side, ready-to-eat meals on the other, because those two categories get touched at completely different rates and mixing them is what creates the blind spot at the back.
Label the day, not the contents. Clear containers already tell you what’s inside; only the date tells you whether it’s still yours to eat, and uncertainty about age is what actually sends food to the trash.
Portion and place by how the food leaves the fridge. Single-serve at eye level, family-serve below, cold-eaten meals in front on weekday mornings, and lids on everything that’s loaded.
In three months, look at what’s sitting in the back of the prep zone. If there’s anything there you can’t date, front-to-back rotation stopped happening at some point, and the weekly reset is the step to rebuild first.
Clear one shelf this Sunday. Split it in two. Label whatever goes on it with the day you made it. That’s the whole system, and the containers can wait.
Frequently Asked Questions
01What is the 3 3 3 rule for meal prep?
It’s a planning framework that caps a session at three breakfasts, three lunches and three dinners. The specific number matters less than the cap itself: a bounded plan keeps you inside the 3 to 4 day safe window instead of cooking five days of food that peaks on Monday.
02How do you properly refrigerate meal prep?
Let cooked food cool before sealing it, then store it in airtight containers at 40°F or below, on a shelf rather than in the door. Sealing food while warm traps steam that condenses inside the container; USDA’s two-hour rule is a cooling window, not an instruction to seal immediately.
03Can meal prep last 5 days in the fridge?
Cooked meals containing meat, poultry or seafood should not: USDA’s window is 3 to 4 days for cooked meat and poultry, and 2 to 3 for cooked seafood. Individual components stretch further, but a mixed bowl is bounded by its shortest-lived ingredient. Freeze days four and five instead.
04What is the best fridge layout when you meal prep?
Give ready-to-eat prepped meals the eye-level shelf, keep raw ingredients staged for future cooking lower and further back, and leave raw proteins on the bottom shelf where it’s coldest. The door holds condiments only, since it’s the warmest part of the unit.
05How do you keep prepped meals from getting forgotten in the back of the fridge?
Rotate front to back, newest containers behind and oldest forward, and label every container with the day it was made rather than what’s in it. The containers that get thrown out are the ones that lost their date and got pushed behind a newer grocery run, which is a placement problem rather than a memory problem.
Disclaimer: ClutterlessNest is a participant in the Amazon Services LLC Associates Program. As an Amazon Associate we earn from qualifying purchases. This article may contain affiliate links — if you buy through them, we may earn a small commission at no extra cost to you. We only recommend products we have tested or genuinely believe in.