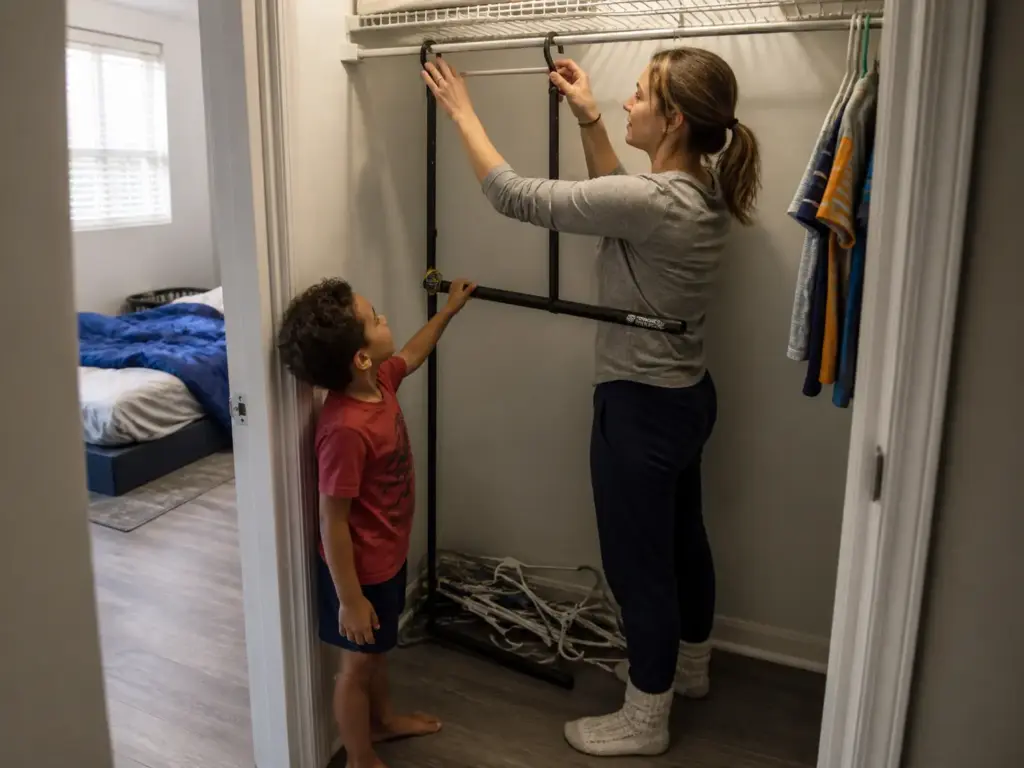
You spent a Saturday on it. You sorted the hand-me-downs, decided what to donate, bought the plastic bins, and took the photo where everything finally lines up. Three weeks later the clothes are on the floor again, or draped over the chair that has become a second closet, and you’re wondering what’s wrong with your kid.
Nothing is wrong with your kid. Most kids closet organization ideas fix the bins and never touch the rod, and the rod is the part that decides whether a six-year-old can put a shirt away without calling for help. The numbers for that rod exist, they’re age-banded, and almost nobody publishes them.
Here’s the whole approach: measure what your child can actually reach, get a rod down to that height without drilling if you rent, then build every shelf, bin, and hook around that one measurement.
Quick Answer
Organize a kid’s closet in this order, and the height comes first:
- Measure your child’s reach height with them standing flat-footed.
- Drop a rod to it: 30–36 inches for ages 3–6, 40–48 inches for ages 7–12.
- Give every category one container with exactly one rule.
- Label in pictures for pre-readers, text once they read.
- Send out-of-season and outgrown clothes to lidded bins on the top shelf.
Why Your Kid’s Closet Reverts Within a Month
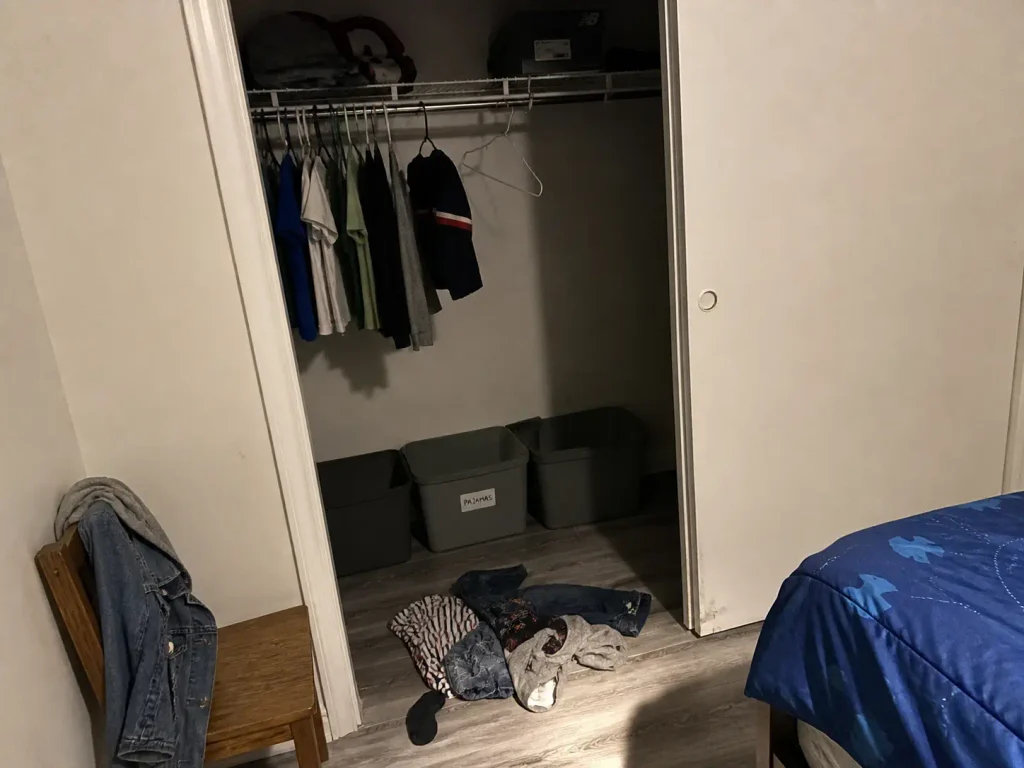
Every parent diagnoses the child first. He won’t put things away. She never hangs anything up.
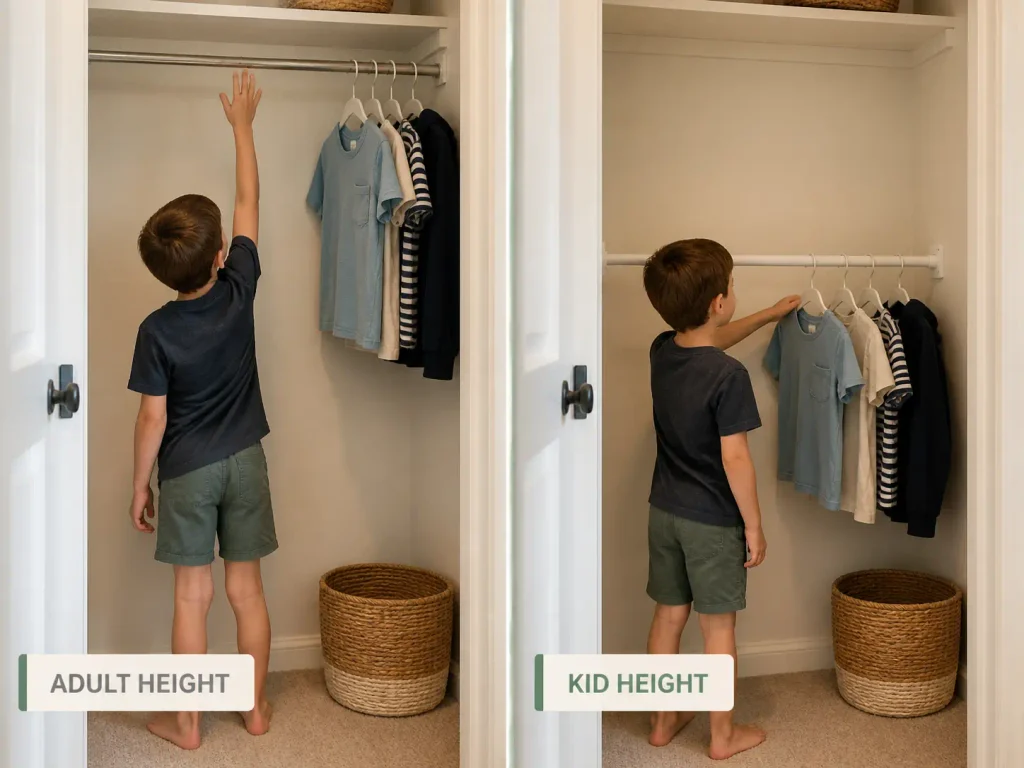
Then you look at the actual geometry of the room and the diagnosis falls apart: the closet rod is at 66 inches and the kid is 44 inches tall. The system asked a six-year-old to do something physically impossible and then treated the failure as a behavior problem.
That 66-inch number isn’t a coincidence, and it isn’t your builder being careless. It’s the adult default. A single-rod closet gets hung around 66 inches from the floor, and a double hanging rod setup lands the lower rod near 40 inches and the upper one near 80, according to the standard rod-height reference for double-hang closets.
Those heights are correct for the person paying the mortgage. Nobody lowers them when a toddler moves into the room, because the closet was finished before the kid existed. This holds whether you’re working with a reach-in closet or a walk-in closet, since both get their rods hung to the same adult spec.
So here is the failure that shows up over and over in organizing threads, and it always has the same shape. The “after” photo is real: the bins are sorted, the closet floor is clear, the hand-me-downs are gone. But the rod is exactly where it was on move-in day.
Within a few weeks the clothes migrate back to the chair, and the parent concludes that organizing kids’ closets doesn’t work. The bins were never the problem. The bins were the only part that got fixed.
The second failure is quieter and takes about a month. Somewhere in the setup, one basket gets designated as the catch-all. Miscellaneous, random, extra. It doesn’t matter what you call it, because a container without a single rule will eat the containers around it.
Your child puts something in it that doesn’t obviously belong anywhere, which is correct behavior given the label. Then the next ambiguous item goes there too, and by week four half the closet’s logic has drained into one basket.
Notice what isn’t on this list: the top shelf. That shelf sits at 80 inches or higher by design, which means it’s already parent-only territory. It doesn’t need lowering, and it doesn’t need a barrier. It needs a job, which is covered further down.
The reframe that makes all of this click: an adult closet gets set once. A kid’s closet gets reset. You are not looking for the correct height, you are looking for a height that moves, because the child it’s built for keeps growing.
Once you accept that, the whole product list changes. This closet stops being a one-off project and starts being one adjustable piece of the whole-room system this closet sits inside.
Measure Reach Height Before You Buy Anything
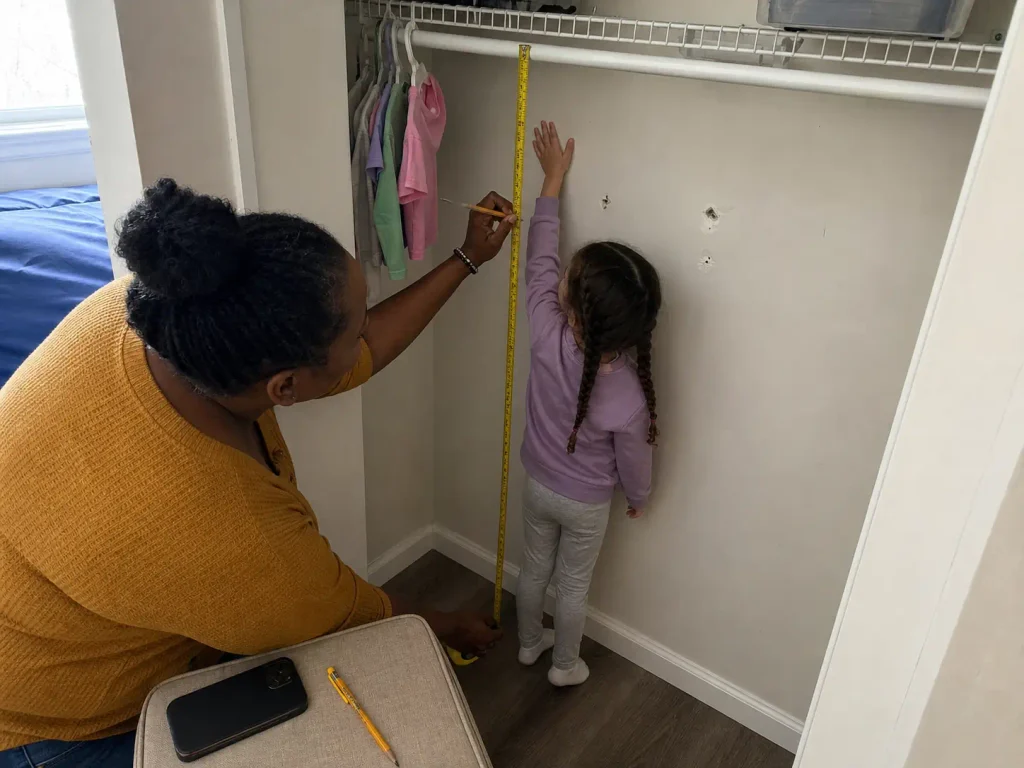
This is the five-minute step everyone skips, because it feels too obvious to be the thing that matters. It is the thing that matters. Get your child, get a tape measure, and go stand in the closet.
Have them stand flat-footed, no tiptoes, and reach up like they’re grabbing a shirt off a hanger. Mark where their fingertips land comfortably, not where their maximum stretch ends. Maximum stretch is a measurement of what they can do once, on a good day, while you’re watching.
Comfortable reach is what they’ll do at 7am on a Tuesday when they’re half-awake and holding a stuffed animal. That comfortable number is reach height, and it is the number the entire closet gets built around. Everything you decide about kid-accessible storage from here traces back to it.
Now compare it to what you’re aiming for. For ages 3 to 6, the rod belongs 30 to 36 inches from the floor. For ages 7 to 12, 40 to 48 inches. Those brackets come from two independent sources that landed in the same place: the rod-height reference above, and a NAPO-certified organizer’s rule of thumb for kids’ rod height, which puts the floor at no more than 30 inches for little kids and the ceiling at 48 inches for a preteen.
Hold that against the 66-inch adult standard for a second, because the gap is the whole article. For a four-year-old you are not nudging the rod down a few inches, you are cutting its height roughly in half.
That is why “lower the rod a bit,” which is what most kids closet organization advice says, produces a closet that still doesn’t work. A rod at 55 inches is lower. It’s also still unreachable.
When your child sits between two brackets, aim at the lower number. Pants dragging the floor is an annoyance you fix with a hem or a shorter hanger. A rod they can’t reach is a system that never starts. Low and slightly awkward beats correct and unusable, every time.
One more thing about that number before you spend anything: it governs more than the rod. The shelf your child folds onto, the bin they drop socks into, the hooks for backpacks, the dirty laundry hamper. All of it sits at or below reach height, or it doesn’t get used.
Everything above that line belongs to you. Draw the line once, on the wall, in pencil, and every later decision in this closet answers itself.
Get the Rod Down to That Height Without Drilling
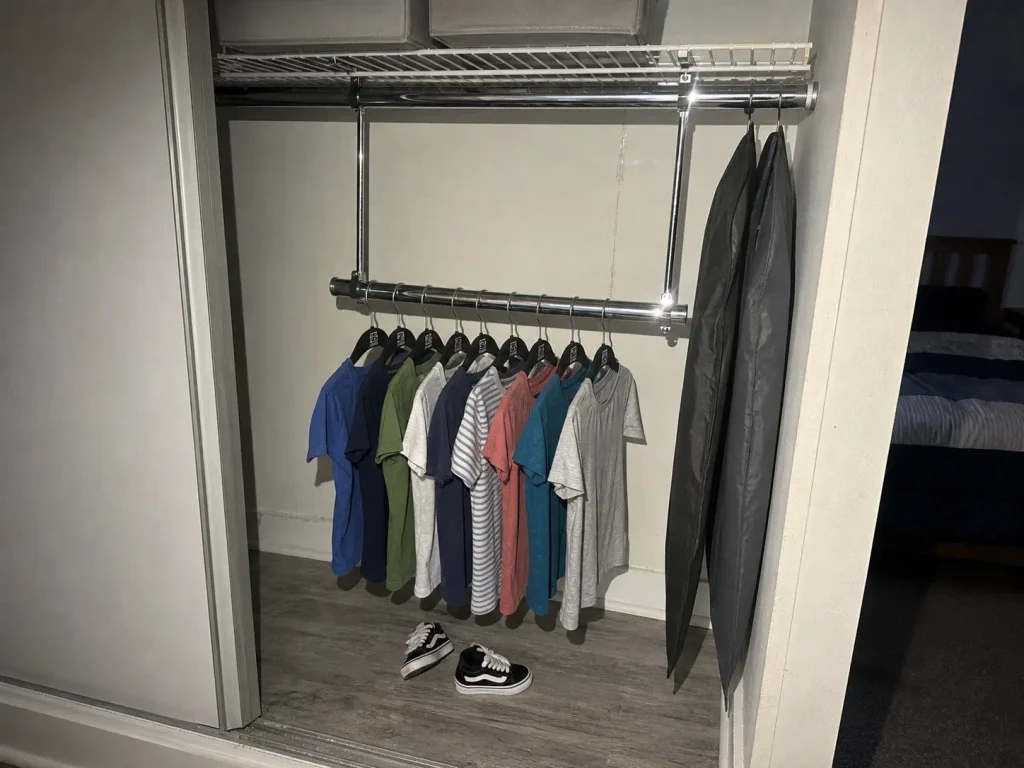
Before you buy a single thing, open the closet and look up. A surprising number of reach-in closets already ship with a second rod bracket, an adjustable track, or a shelf-and-rod unit with more than one mounting slot. If yours has any of those, the fix is free and takes ten minutes with a screwdriver. Check first.
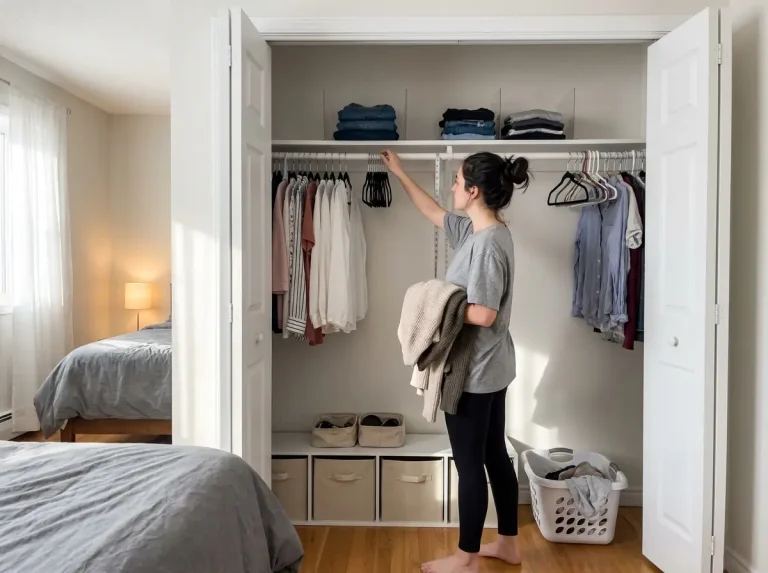
If it doesn’t, the mechanism you want is a clip-on double rod. It hangs from the rod you already have and drops a second one down to kid height. No brackets, no anchors, no wall damage, no conversation with your landlord.
The STORAGE MANIAC Adjustable Closet Double Rod is the 2-pack version of this, adjustable across roughly 21 to 37 inches in both width and drop, rated around 110 pounds per pair. A full season of kids’ clothes doesn’t get within shouting distance of that ceiling, so treat the rating as reassurance rather than a spec to shop on. The real limitation is that it hangs from the existing rod, so a closet with no upper rod at all gives it nothing to clip onto. That’s also the budget closet organizer move here, since it costs a fraction of a custom closet system and does the one job that matters.
And honestly, for a kid’s closet the no-drill version isn’t the compromise option. It’s the better one. The height you need this year is wrong next year, and a fixed bracket you’d have to unscrew and re-drill two inches lower is a height that will quietly never get adjusted.
Clip-on means the reset takes four minutes instead of an afternoon, which is the difference between a system that adapts and a system that expires. If you want the general-audience version of this thinking, the no-drill closet methods that won’t cost your deposit cover the same renter-friendly territory for adult closets.
Here’s the detail that sinks DIY versions, and almost nobody mentions it. A closet rod spanning more than about four to five feet needs a center support bracket or it sags under load. If your kid’s closet is wide and you run a lower rod across the full width, you’ll get a gentle bow in the middle within a few weeks, and then every hanger in the closet slides to the low point.
Two shorter rod segments beat one long unsupported span. A clip-on doubler sidesteps this by covering a section rather than the whole run, which is another quiet argument for it. A tension rod is the one thing not to substitute here, since it relies on friction against two side walls and a rail full of winter coats is exactly what makes it let go.
The last piece of the hanging zone is what the clothes hang on. Wire hangers you already own are free and they work, so start there and don’t let anyone tell you a kid’s closet needs a matched set. But hanger thickness matters more on a kid’s rod than an adult’s, because you’re working with a shorter usable span to begin with.
Bulky plastic hangers eat that span fast. Slim velvet ones like the Zober Premium Velvet Hangers run about 0.2 inches thick and reclaim roughly a quarter of the rod, and the flocking keeps slippery kids’ tops from sliding off onto the floor. The tradeoff: a 50-pack is far more hangers than one child’s closet needs, so plan on the extras migrating to another closet.
Build the Fold Zone So Stacks Stop Collapsing
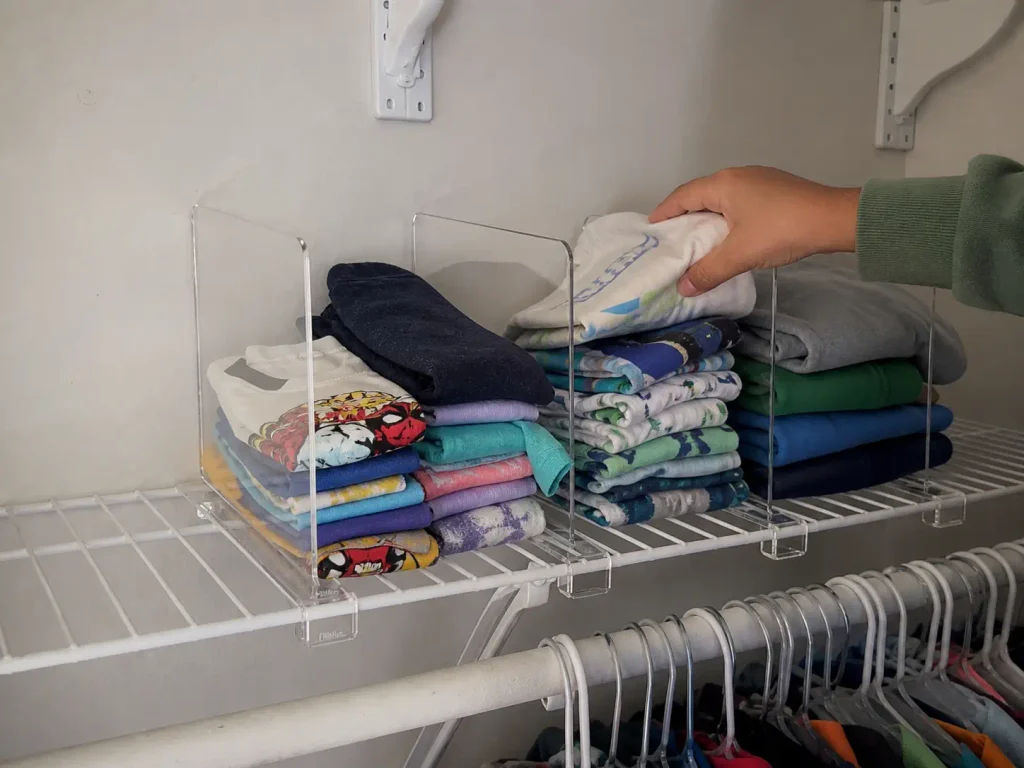
Your kid folds a shirt. It’s a nine-year-old’s fold, so it’s roughly rectangular. They set it on the stack, the stack shifts, and the whole thing leans sideways into the next stack.
Two days later there are no stacks. There’s a shelf of mixed clothing with pajamas somewhere in the middle of the T-shirts.
This is not your child undoing your work. Adult folded stacks survive because adult folds are square enough to sit flat and adults put the shirt down with two hands and some care. Kid folds are lumpy, and kids put things down with enthusiasm.
The stack has no walls, so it does what an unsupported stack of irregular objects does. It falls over, the categories merge, and once the categories merge nobody can find the soccer shorts. Deciding what gets folded vs hung in the first place is half the battle: hang anything that wrinkles or that they wear weekly, fold the rest.
The fix is a wall, not better folding. Shelf dividers slot onto the shelf and give each stack a vertical boundary, so a leaning stack leans into acrylic instead of into the pajamas. The HBlife Acrylic Shelf Dividers come in a 6-pack sized for shelves 9/16 to 1 inch thick, which covers most wire shelving and laminate shelving, and each one holds about 15 pounds of lean.
Check your shelf thickness before ordering, because a shelf outside that range means the divider won’t clamp and you’ll be looking at a freestanding fabric drawer unit instead. What matters here is that your child’s folding standard never has to improve. That’s the entire point.
One category per divided section, and no section called “other.” The moment a section has no rule, it starts eating the ones beside it. If something genuinely doesn’t fit a category, that’s a signal the category list is wrong, not a reason to open a miscellaneous bay.
Give the stacks room to breathe, too. Closet shelves usually sit 12 to 16 inches apart vertically, which is enough for a reasonable stack plus the clearance a small hand needs to lift the top item without knocking the rest sideways. Build stacks to about two-thirds of that gap.
If a stack reaches the shelf above, your child has to slide items out horizontally, and horizontal extraction is how the whole stack ends up on the floor. Shelf depth matters here as much as the gap: a deep shelf invites a second row behind the first, and the back row becomes dead space nobody remembers. The same clearance math shows up all over the reach-in closet geometry this borrows from, where narrow depth makes every inch of grab room count.
One reassurance, since a shelf full of bins looks heavier than it is. Wire closet shelving typically holds a few hundred pounds, and the part that gives out is almost never the shelf. It’s the plastic bracket clip holding it to the wall.
If a shelf in your closet has sagged or dropped, check the clips before you assume you overloaded it. Replacement clips are pocket change and the fix takes minutes.
Give the Door and the Top Shelf Their Real Jobs
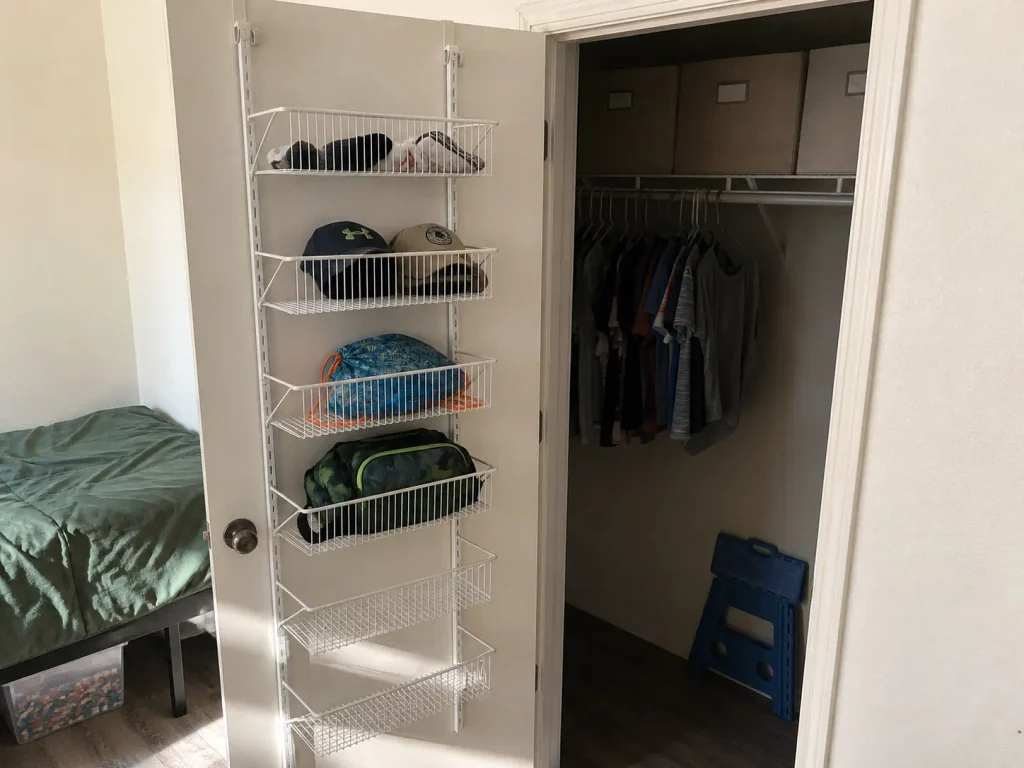
Two surfaces in every kid’s closet are doing nothing. The back of the door is a couple of square feet of vertical space that most people never look at, because nobody thinks of a door as storage. And the top shelf has quietly become an accidental junk drawer where a broken toy, a bag of outgrown shoes, and a gift bag nobody can date are cohabiting.
Both surfaces have obvious jobs. Neither one has been assigned.
The door goes to accessories. Hats, hair things, small bags, socks, a laundry catch, the stuff that has no natural home and ends up in whatever container is closest. This costs zero floor space and zero shelf space, which is why it works even in a narrow closet where nothing else fits.
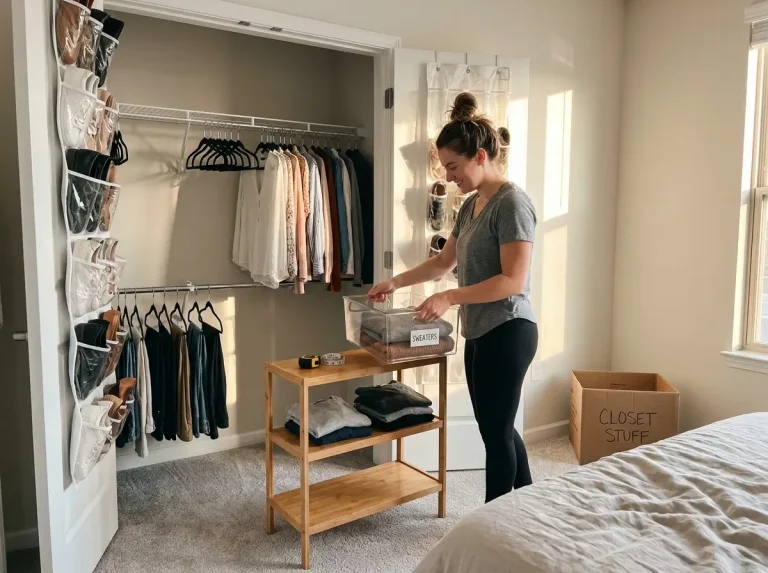
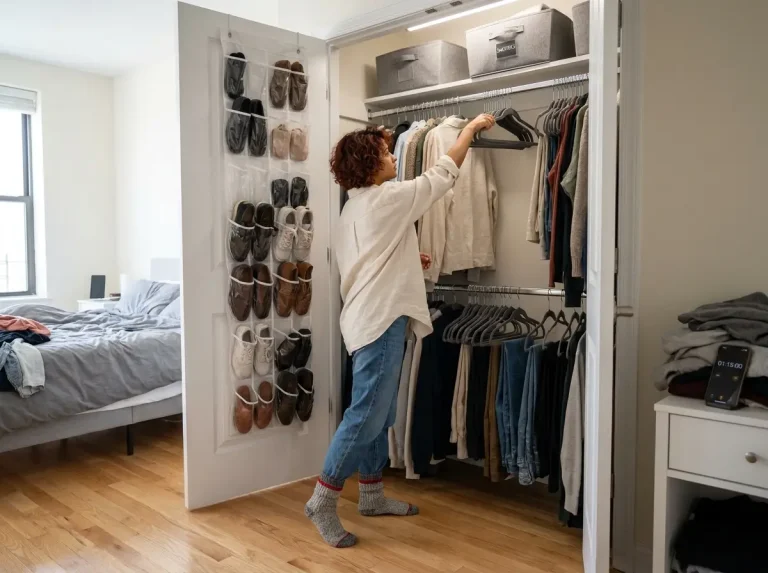
Start with what you own: a shoe storage organizer from a previous apartment, repurposed, does this job for free and its pockets are already the right size for small objects. If you’d rather have something adjustable and sturdier, the ClosetMaid Adjustable 8-Basket Over-Door/Wall Organizer runs about 77 inches tall by 18 wide and 6.6 deep, and the baskets move as your categories change. It’s also the piece with the most common ordering mistake attached to it.
Measure your door gap first. An over-the-door organizer needs roughly two inches of clearance between the door and the frame to let the door still close, and closet doors vary more than you’d expect, especially in older buildings where the frame has shifted.
Bifold doors are their own problem: they fold against themselves and usually can’t take an over-door unit at all, in which case the same organizer mounts to the wall instead, or you fall back on wall hooks at reach height. Check the swing, then order. The rest of the renter-safe kit shows up in the renter-friendly organizer set this pulls from.
Now the top shelf, at 80-plus inches. It’s out of reach by design, and that’s not a defect to work around. It’s free storage for exactly the things that should be hard to get to: out-of-season clothing and the next size up in hand-me-downs. That’s your seasonal rotation handled with no extra system.
Give it one job and nothing daily lives up there, ever. Any lidded box you already own works, as long as it’s labeled. If you want them to disappear when they’re empty, the PRANDOM Large Collapsible Storage Bins with Lids fold flat between seasons, which is the actual argument for them, since rigid bins occupy the same footprint whether they hold winter coats or air. Fabric does mean they won’t stack more than two or three high without slumping.
Labeling is what closes the loop, and it’s the cheapest part of the whole system. Picture labels for a child who doesn’t read yet, text once they do. Drawing them yourself, or printing photos of what goes in each bin, costs nothing and works exactly as well as anything you can buy.
Dollar-store fabric bins with real labels beat a matched designer set with none, every single time, which is the verdict organizing threads keep landing on. If you’re labeling enough containers that hand-drawing gets tedious, a Brother P-Touch PTD220 Label Maker prints durable laminated text that survives being grabbed by damp hands, which is more than you can say for masking tape. Reserve it for the containers whose contents are stable, though. Labeling a bin whose category changes every four months just means peeling labels off later.
Put the picture label on the front of the bin and a duplicate inside the lid. When the bin gets emptied and refilled with something else, the outside label peels off and the inside one tells you what the bin was before you renamed it. Saves the annual “what was in here” archaeology.
Last piece: the step stool. The COOSEYA 2-Step Stool for Kids has a non-slip surface and two heights, and it exists for occasional supervised trips to that top shelf, nothing more. Any sturdy stool you already own does the same job.
Here’s the rule that matters more than the product: if your child needs the stool to get their daily clothes, the rod is still wrong. Go back to section two and drop it further. A stool that becomes a daily requirement is a symptom, not a solution.
And while you’re thinking about a kid climbing on things near a closet, any freestanding wardrobe, closet tower, or drawer unit in that room needs anchoring to the wall, per the federal tip-over safety standard for clothing storage units. The anchor kit ships in the box. Use it.
Narrow Closets, Shared Closets, and the Growth-Spurt Reset
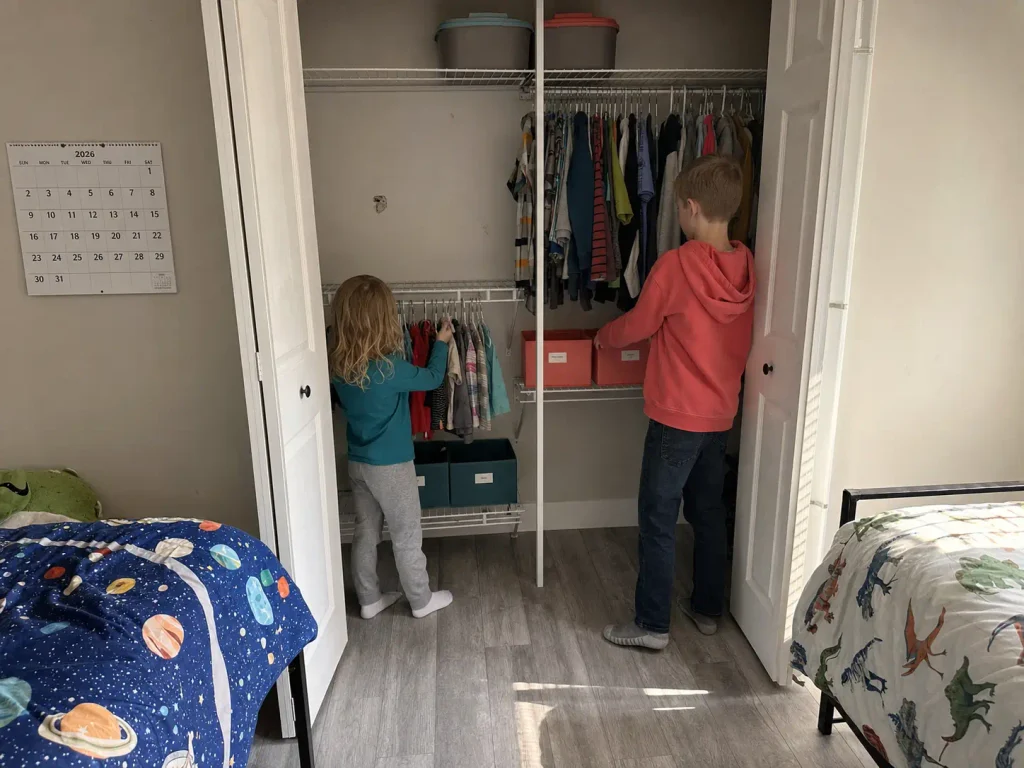
This is where the standard advice quietly stops applying. The kit at the hardware store is sized for a closet you don’t have. The closet has two children in it. And the height you spent all Saturday getting right will be wrong by next spring.
All three are solvable, and not one of them requires a bigger closet.
The Closet That’s Too Narrow for the Kit
Most closet system kits are built for 72 to 108 inch openings. A kid’s reach-in is frequently 24 to 48 inches, which puts that closet width well outside the range, and the usual conclusion is that a non-standard closet size needs a custom installer. You don’t.
The requirement isn’t width, it’s trimmable components. Kits that ship with rods designed to expand across a range, or shelving meant to be cut to length, will size down to a 24-inch narrow closet without complaint. Kits built around fixed-width panels won’t, and no amount of creativity changes that.
So the question at the store is one question: does this expand or cut, or is it a fixed size? Read that off the box before anything else. A 24-inch reach-in with a trimmed rod, one shelf, and a clip-on doubler is a complete system. It’s just a small one.
Measure the opening at three heights: floor, mid, and top. Older buildings settle, and a closet that’s 26 inches at the top is often 25 at the floor. Buy for the smallest of the three numbers, or you’ll find out about the difference with the shelf already halfway in.
The Closet Two Kids Share
Every shared-closet complaint sounds like a storage shortage and almost none of them are. Two kids, one closet, one basket of socks, and a running argument about whose shirt is whose. Adding a second basket doesn’t end it. Zone ownership does.
This is zone organization applied to a sibling closet. Each child gets a defined shelf, a defined basket, and a defined segment of rod, plus a color that’s theirs. Youngest takes the bottom, since their reach height is lower, and the oldest takes the top reachable shelf. Nothing is pooled.
That last part is what actually resolves the arguments, because when the storage is shared, neither kid is responsible for the mess in it, and both are correct about that. Give each of them a bounded clothing zone and there’s nobody left to blame for what’s in it.
I used to think shared closets were mostly a labeling problem, that clearer labels on shared bins would sort it out. The recurring pattern in shared-room threads says otherwise: labeled shared storage still produces the standoff, because the label describes the contents but never assigns the responsibility. Ownership does what labeling can’t.
The Room With No Dresser
When two kids and two beds fill the floor, a dresser isn’t happening. The closet becomes the dresser instead. Labeled bins on the shelves take over drawer duty, one bin per category, and a hanging shelf organizer down the side of the closet gives you four or five soft “drawers” using rod space instead of floor space.
It sounds like a downgrade. In practice, an open bin at reach height beats a stiff dresser drawer for a small child, because a drawer that sticks is a drawer that never gets opened, and drawer dividers only help once the drawer itself opens easily. If the room does have a dresser, under-bed storage in low rolling boxes absorbs the overflow the closet can’t. The closet-as-dresser setup has the full version of this build.
The Growth-Spurt Reset
Here’s the part nobody puts in the ideas post. Every one to two years, a growth spurt changes your child’s reach and their wardrobe proportions with it, and the closet you built stops fitting.
This is the moment parents describe most often: the system worked perfectly on install day and expired without announcing it. Nothing broke. It just stopped matching the kid.
The two signals are opposites, which is why they’re easy to miss. Clothes dragging on the floor means they grew and the rod is now too low for the new length. A child who has quietly stopped hanging things up means they grew and the rod is now too high, because the shirts got longer and the effective reach didn’t.
Neither one announces itself. You notice a chair with clothes on it and blame the eight-year-old.
Put the reset on the calendar instead. Twice a year, at the season change, take the tape measure back into the closet and re-measure reach height. If it moved, move the rod, which with a clip-on takes minutes.
This is also the only sane moment to declutter. Pull anything that no longer fits into the top-shelf bins, bring the next size down, and purge what nobody will wear again. Doing the sort twice a year against a real size change beats a random Saturday closet makeover, because you’re deciding against evidence instead of sentiment. That’s the entire maintenance loop, and it’s why the adjustable version of every component in this article beats the permanently mounted one.
When Toys Have Taken the Closet Floor
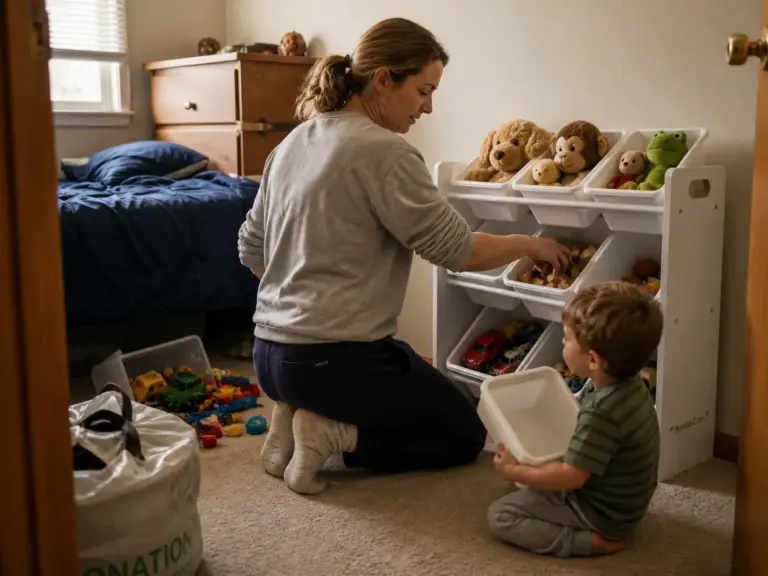
If the closet floor has been colonized by toys, that’s a containment problem with its own answer, and mostly its own article. The short version: stack labeled bins you already own along the floor, one category each, at the height a kid can drop things into without aiming. If you want a purpose-built version, a Humble Crew Kids Toy Organizer puts nine removable bins on three tiers so a child can self-sort by category at their own height, though it takes real floor width that a narrow closet may not have. Beyond closet-floor overflow, the full system lives in toy storage that holds up in a small room.
And if you’re reading all this while looking at a room where the closet is honestly the least of your problems, start upstream with the one-afternoon whole-room reset and come back to the closet after.
Conclusion
Measure reach height before you buy anything. Every other decision in this closet depends on that one number, and skipping it is why the last reorganization didn’t survive the month.
Drop the rod to the age bracket: 30 to 36 inches for ages 3 to 6, 40 to 48 for ages 7 to 12. Clip-on beats drilled, not because it’s cheaper, but because you’re going to move it again and a fix that’s four minutes of work is a fix that actually happens.
Give every container exactly one rule, and label it in your child’s language. Pictures before they read, text after. No container called “other,” on any shelf, at any height.
In three months, don’t audit the closet. Watch where the clothes land when your child undresses. If they’re on the floor or on the chair, the rod is too high again or a container lost its rule. That’s information, not a discipline problem.
Take the tape measure and your kid into the closet tonight. Have them reach up, and mark the spot on the wall in pencil. Everything else in this article follows from that one mark.
Frequently Asked Questions
01What is the best way to organize a child’s closet?
Lower the rod to your child’s reach height first: 30–36 inches from the floor for ages 3–6, 40–48 inches for ages 7–12. Then give every category one container with one rule, label in pictures or text, and reserve the top shelf for out-of-season clothes in lidded bins.
02What is the best way to organise my child’s wardrobe?
Sort by what your child reaches for daily, weekly, and seasonally, then map each tier to a height: daily clothes on the lowered rod and lowest shelf, weekly items just above, seasonal storage up top. The height mapping matters more than the sorting logic. A perfectly categorized wardrobe out of reach still ends up on the floor.
03How do you organize a 10 year old’s room?
A 10-year-old sits at the top of the 40–48 inch rod bracket and can handle text labels without picture labels. Hand over the decisions they can own, like which category goes in which basket or what color their zone is, because at that age a system they helped build is one they’ll maintain.
04How do you organize clothes for kids with ADHD?
Cut the number of steps between taking something off and putting it away. Open bins beat lidded ones, a lowered rod beats a folded stack, and one visible container per category beats a drawer where everything disappears. Avoid any container without a single clear rule.
Disclaimer: ClutterlessNest is a participant in the Amazon Services LLC Associates Program. As an Amazon Associate we earn from qualifying purchases. This article may contain affiliate links — if you buy through them, we may earn a small commission at no extra cost to you. We only recommend products we have tested or genuinely believe in.