









In this article
You bought the fridge bin set everyone recommends. It arrived, you loaded it up, you slid it onto the shelf, and the front edge hung off by two inches so the door wouldn’t shut. Or it cleared the shelf fine and then you realized you could only fill it halfway, because the shelf above it sits four inches up.
That’s the moment most people decide they’re bad at this. Search around and you’ll find the same sentiment over and over in small-kitchen threads: it’s so small and I don’t know where to start. But the problem usually isn’t you. Nearly every guide on how to organize a small fridge was written by someone standing in front of a shelf several inches deeper than yours, using containers that were sized for that shelf.
This article works from published dimension bands for mini, dorm, and compact apartment refrigerators, and from FDA temperature guidance, rather than from a generic use-clear-bins template. Here’s what’s ahead: which of the three small-fridge situations you’re actually in, what to measure before you spend a dollar, why a packed small fridge spoils food faster than a roomy one, and what to do when the honest answer is that no bin on the market fits.
Quick Answer
Organizing a small fridge is a measuring problem before it’s a container problem. Work in this order:
- Empty the whole fridge and toss anything expired.
- Measure shelf depth, usable width, and clearance between shelves.
- Match container footprint to the shelf, height to the clearance.
- Leave the back few inches of every shelf clear for airflow.
- If nothing fits, skip bins entirely and zone by rule instead.
First Figure Out Which Small Fridge You Actually Have
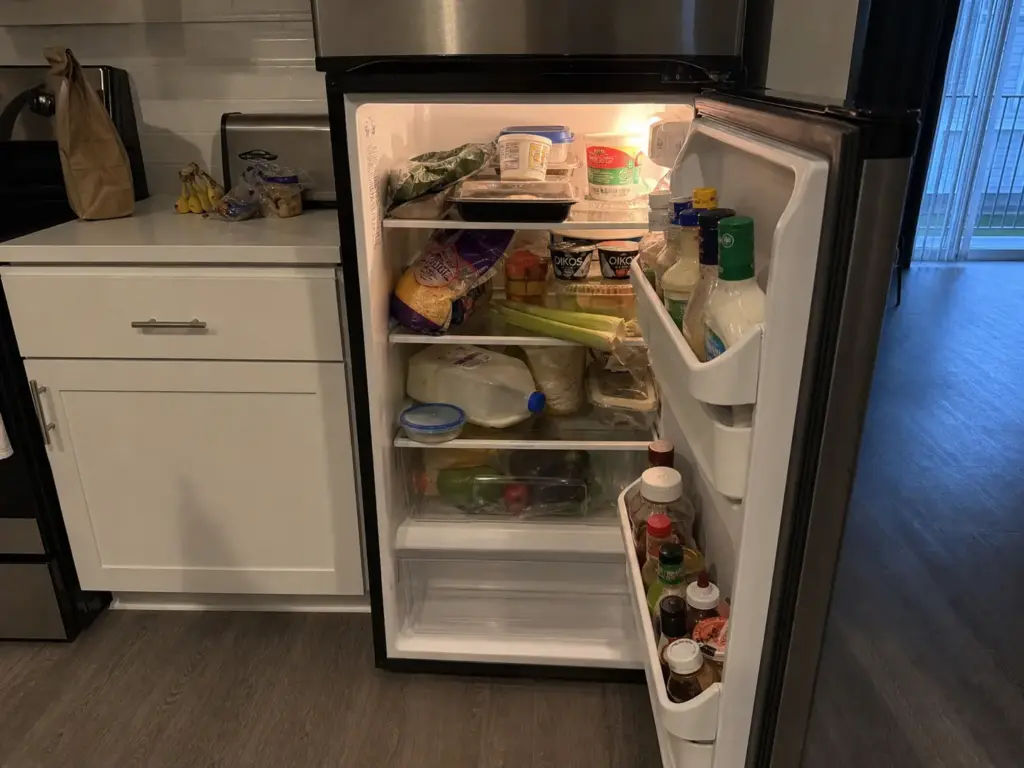
Three people type this exact search and mean three different appliances. One has a cube on the floor of a studio apartment. One has a real refrigerator that happens to be narrower than the ones in magazine photos. One has a perfectly normal fridge trying to feed four adults. Telling all three to use clear bins is a big part of why the advice keeps failing.
Before you read any further, find the cubic feet figure. It’s usually printed on a sticker inside the door frame, on the back of the unit, or in the manual you probably still have in a drawer. That number tells you which of the next three sections is actually yours.
While you’re there, do the reset that every later step assumes you’ve done: clean out the fridge completely, toss expired items, wipe the shelves, and sort by category on the counter before anything goes back. You’ll almost always consolidate duplicates at this stage, because two half-empty jars of the same thing is the most common thing a small fridge is hiding.
The Compact Apartment Fridge (Smaller, But Still a Real Fridge)
Compact apartment refrigerators generally run 18 to 24 inches wide, 30 to 66 inches tall, and 20 to 28 inches deep. The shallowest full-height apartment models start around 24 inches wide, 60 inches tall, and 26 inches deep. This is still a shelf-based refrigerator with a proper freezer and crisper drawers.
If this is you, standard organizing advice mostly translates. You need fewer containers than a full-size fridge would take, and you need to check clearance more carefully, but the basic shape of the system holds.
The True Mini or Dorm Fridge (A Cube With Shelves)
Compact mini fridges run roughly 17 to 20 inches in depth, width, and height. Dorm units land around 20 inches wide by 20 inches deep by 30 to 40 inches tall. What you have is a cube with two or three shallow shelves and a freezer compartment that’s barely worth the name.
Almost nothing written for refrigerator organization applies here without modification. Your shelf is shallower than most organizer bins are long. That’s not a failure of effort, it’s arithmetic, and the next section walks through it.
The Normal Fridge Feeding Too Many People
There’s no dimension band for this one, because it isn’t a measurement problem. Your fridge is a normal fridge. It’s just carrying four adults’ groceries, or a household that cooks every night, or a week’s meal prep for two people who both take lunch to work.
Smaller containers will not fix this. What helps is per-person or per-category zoning and portioning food down before it goes in, so the volume matches the box you’re putting it in. A shared refrigerator in a house with roommates needs the same treatment plus one addition: named shelves, agreed out loud, because a zone nobody else knows about isn’t a zone. If this is your situation, the general framework for mapping a fridge before you buy anything is a better starting point than this article, and you can come back here for the airflow section.
One thing all three share: a small fridge goes from clean to chaotic in days rather than weeks. There’s no buffer. One item shoved in the wrong spot throws the whole layout off, where a full-size fridge can absorb a fair amount of disorder before it reads as messy.
If your fridge has a removable shelf, take one out and set it on the counter before you plan anything. Two-thirds of what makes a small fridge feel impossible is that you’ve never actually seen a shelf on its own, away from the unit, where you can lay a container on it and see the overhang.
Measure These Three Things Before You Buy a Single Bin
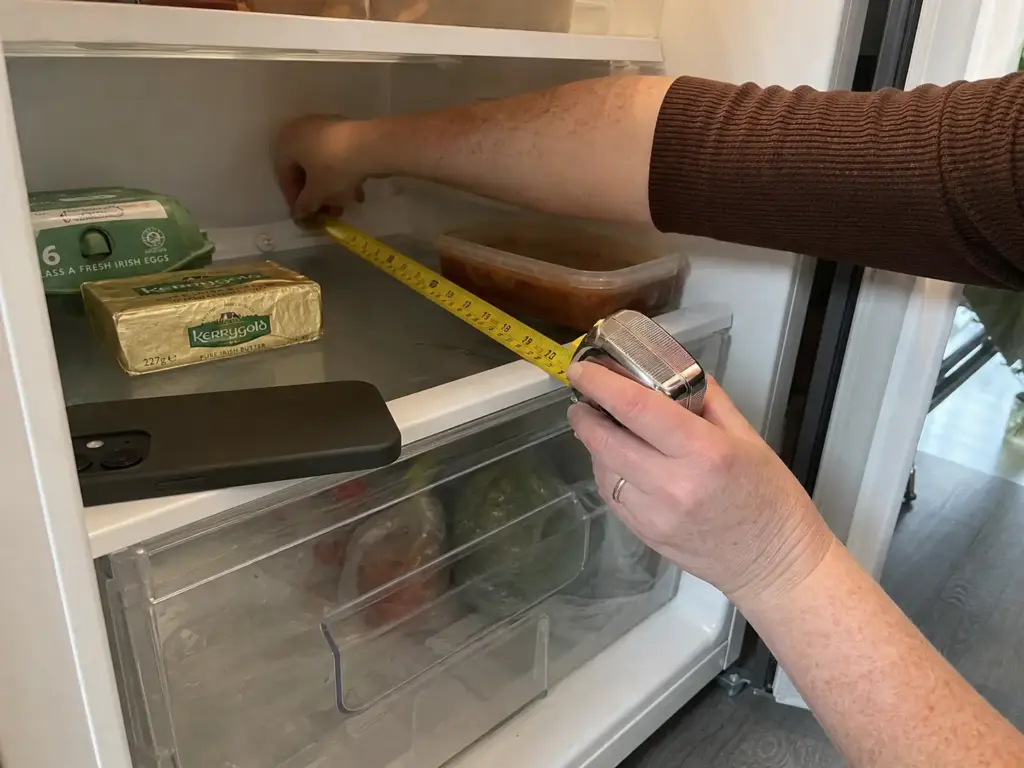
Everyone measures shelf width. Almost nobody measures the clearance between shelves, and that’s the dimension that kills most container purchases. The bin fits the footprint fine, and then you go to slide it in and it catches on the shelf above.
Three numbers. Write them on your phone. Then shop.
Shelf Depth (And Why the Listing Number Lies)
Measure from the back wall of the fridge to the front lip of the shelf. Then subtract for anything that eats into that run: the door seal that swings inward, a raised molded edge on the shelf front, a wire retainer at the back.
The interior depth listed on a spec sheet describes the cabinet, not the flat surface you can put a container on. Those are different numbers, and the gap between them is where returned purchases come from. Hold your measured depth against every product listing, not the manufacturer’s interior figure.
Clearance Height Between Shelves
Measure from the surface of the shelf to the underside of the shelf directly above it. Not to the next shelf’s surface. The underside, because that’s what your container has to pass beneath.
In compact and mini units this is frequently the binding constraint, and it’s the number product listings bury deepest. A container listed at 4 inches tall does not fit under 4 inches of clearance, because you have to tip it to get it in. This is the same arithmetic behind the same measuring logic applied to a freezer, where the stacking limits are even tighter and the published bin heights make the constraint obvious.
Usable Width Versus Spec Width
A shelf with a molded lip or a raised edge gives you less flat run than the spec sheet claims. Measure inside the lip, wall to wall, at the height where your container will actually sit.
Now for the benchmark that reframes everything. Narrow refrigerator organizer bins on the market bottom out around 12.25 inches long by 6 inches wide by 3.5 inches high, and the widest common ones run about 12.5 by 8 by 3.5. Nothing in the mainstream multi-packs goes under roughly 12 inches long.
Set that against a mini fridge whose entire interior is 17 to 20 inches deep before you subtract for shelving and the back wall. The arithmetic explains itself.
This is why bins bought for a normal fridge end up returned or sitting in a closet corner. It’s one of the most repeated stories in dorm-fridge threads, and it’s almost never a case of somebody buying carelessly. It’s a case of the listing saying fits most fridges, which is a marketing claim, not a measurement.
Why a Packed Small Fridge Spoils Food Faster
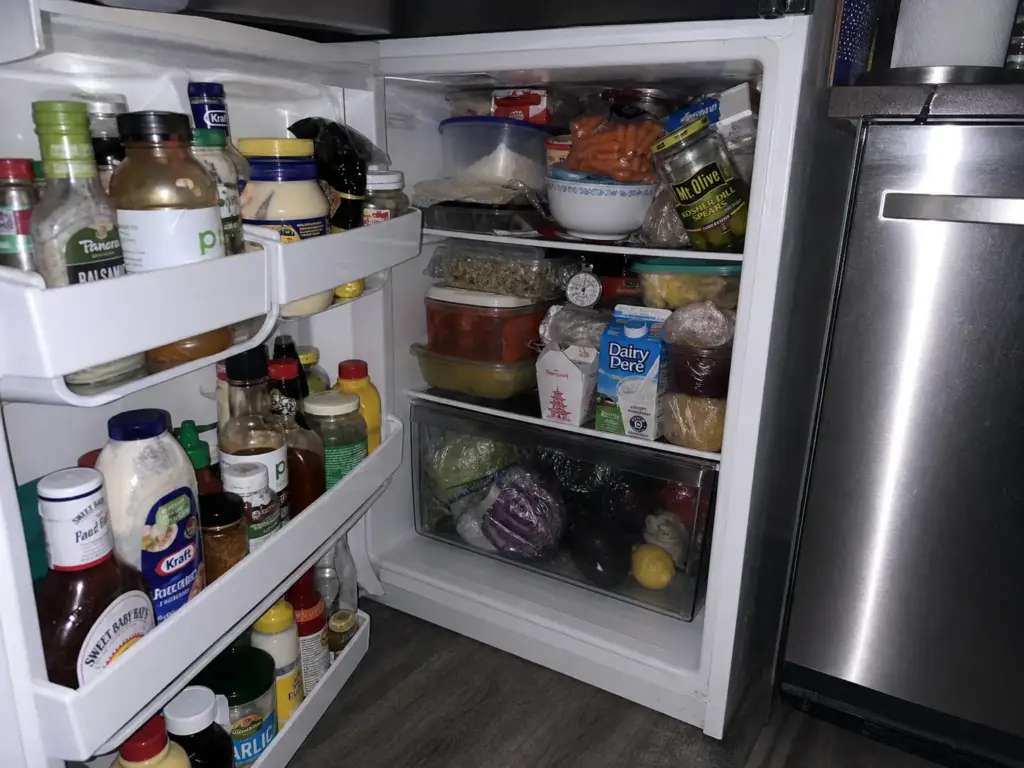
Here’s the experience nobody connects to organizing: your milk is always slightly warm, or the spinach in the back turns two days early, and you assume the fridge is just old or cheap. Sometimes it is. More often it’s packed tight enough that cold air can’t circulate, and one pocket of the interior is running warmer than whatever the door display says.
Air Has to Move, Even Inside
Refrigerators need 1 to 2 inches of clearance behind and above the unit for airflow, plus another half inch to an inch for tilt during installation. That’s the outside. The same principle governs the inside: cold air has to move around what’s in there, not just sit near it.
A full-size fridge has inches to spare when you overpack it. A small one doesn’t. When you push containers flush against the back wall of a mini fridge, you’re blocking the same clearance a bigger unit could afford to lose and still function.
Where to Put the Thermometer
Put an appliance thermometer at the back of a middle shelf. Not clipped to the door, not sitting in the front where you can read it without moving anything, because those are the two spots least likely to show you the problem.
The FDA sets the threshold at 40°F or below, and perishables held above 40°F for four hours or more should be discarded. A blocked interior pocket can cross that line while the reading you can see looks completely fine. That’s worth reading directly at the FDA’s cold facts on refrigerator thermometers, particularly the part about how much variation a single unit can hold.
If you want to go further on temperature zoning, which shelf actually runs coldest covers the door-versus-shelf differences in detail rather than repeating them here.
The Cycle That Undoes Your System
Warm pockets lead to faster spoilage. Faster spoilage leads to emergency purges, where you pull everything out on a Tuesday night and shove it back in without regard for the layout. After two or three of those, the system you set up isn’t a system anymore.
This is why small-fridge organization falls apart on a shorter timeline than full-size. It reads as a discipline problem. But it’s a packing problem.
So here’s the rule that governs every section that follows: leave the back few inches of every shelf clear. Yes, that costs you storage in a fridge that has none to spare. It costs less than throwing out groceries twice a month.
Run the thermometer test on a Sunday night, when the fridge is at its fullest after a grocery run. Testing an empty fridge on a Thursday tells you nothing about the conditions that actually spoil your food.
Bins That Actually Fit a Small Fridge

The advice to use clear bins is fine. The gap is that nobody tells you which ones survive contact with a shelf that’s four inches shallower than the reviewer’s. Footprint first, height second, appearance last.
Start With What You Already Own
Before buying anything, try grouping with containers already in your kitchen. A shoebox-sized food storage container with the lid off works as a bin. So does a shallow baking dish, a loaf pan, or a cut-down cereal box.
If your shelf is genuinely tiny, this might be the entire answer. It costs nothing, it’s reversible, and it tells you whether you actually want containment or whether you just want to be able to find the yogurt. Spend a week with the free version before you spend anything.
Two features are worth caring about when you do buy: BPA-free plastic if food touches the container directly, and bins with lids and handles only if you plan to pull the whole bin out. On a shallow shelf a handle adds length you don’t have, so in a true mini it’s usually the wrong feature.
For a Compact Apartment Fridge
If you landed in scenario A, standard bin sizing mostly still works. The adjustment is quantity: you need fewer pieces than a full-size fridge would take, and buying a large set means half of it goes in a cupboard.
The OXO Good Grips Fridge Organization Set, 8-Piece covers the different zones of a compact apartment shelf in one purchase, with a multi-size mix so you’re not forcing one footprint onto every shelf. The limitation is direct: this is a scenario-A pick, not a mini or dorm pick. On a true 17-inch-deep cube these pieces will overhang, and no amount of rearranging fixes that.
For a True Mini or Dorm Fridge
Go to the narrowest footprint the market sells and accept that even that may be tight.
The narrow bins in the Set Of 10 Refrigerator Organizer Bins – 5 Wide and 5 Narrow Stackable measure about 12.25 inches long by 6 wide by 3.5 high, which is roughly the floor of what’s commercially available, and the set includes wider 12.5-by-8 pieces that suit a compact apartment shelf if you have both situations in the house. The honest limitation: 12.25 inches of length against a 17-to-20-inch interior leaves you very little margin once you subtract the back clearance you’re supposed to keep, so measure before ordering rather than after.
On turntables: a 9-inch non-skid turntable is the ceiling for a small fridge, not the starting point. Every kitchen-cabinet guide recommends 12 to 16 inch turntables, and those will not work here. If a turntable makes sense for you, the Copco Non-Skid Turntable 9 inch (Set of 2) is sized for it, and the non-skid base matters more in a small unit where the door swing jostles everything on every open. Even 9 inches crowds a true mini shelf, so this one is worth measuring twice.
I’ll walk something back here. Earlier I said footprint first, height second. For turntables that order flips, because a turntable needs headroom for whatever sits on it, not just for itself. Measure the clearance first on that one.
Why Stacking Backfires Here
Stackable is printed on nearly every organizer bin sold, and in a small fridge it’s close to a trap. Stacking two bins eats the clearance between shelves and blocks airflow in the same move, which is the exact failure from the previous section.
One layer per shelf. Back inches clear. If you need more capacity than that allows, the answer is outside the fridge, not stacked inside it.
If it turns out you have more room than you thought, the full bin comparison for a standard-size fridge covers the wider field of options.
The No-Bin Path for Renters and Tight Budgets
Some readers here aren’t budget-limited. They just don’t want bins, and searching for how to organize a small fridge without bins is a genuine preference rather than a compromise. And if you’re in a dorm or a rental, you may not have this fridge, or this kitchen, in twelve months, which changes the math on buying a container system for it.
Zoning Without Containers
Assign each shelf one job and hold the line. One shelf for ready-to-eat food, one for raw ingredients, the door for condiments only. That’s the whole system.
The zoning that matters most is the part that’s about food safety, not tidiness. Raw meat goes on the bottom shelf, always, because it’s the coldest zone and because nothing below it can be dripped on. Proper meat storage means a tray or a shallow dish under it, which is worth the two seconds it takes.
Leftovers and anything ready-to-eat go up top where you’ll see them. Dairy and butter belong on a shelf rather than the door, even though nearly every fridge is built with a butter compartment in the warmest possible spot. If your unit has a humidity drawer, that’s where ethylene-sensitive produce goes, separated from the fruit that’s off-gassing at it.
The container was never doing the organizing. The rule was. A bin is a physical reminder of a decision you already made, and in a fridge small enough that everything is within arm’s reach, you don’t need the reminder as much as you’d think.
Then add rotation. Reserve the most visible spot, usually the front of the top shelf, as an eat first bin zone, container or no container. Anything on its way out goes there, oldest to front, newest to back, every time you unpack groceries. In a small fridge this single move replaces most of what a bin system would do, because there’s no back corner where something can quietly go bad for a month, and it’s the single biggest lever you have on food waste.
Labeling is optional here and mostly isn’t worth it. In a full-size pantry a label maker earns its keep. On three shelves you can see in one glance, a label is telling you something you already know.
The Dollar-Store Substitute
When you do want containment, dollar-store wire bins and baskets are the standard low-cost stand-in for name-brand fridge organizers. Same containment, a fraction of the cost, and no sense of loss if you leave them behind when you move out.
They’re less pretty and the wire ones don’t contain a spill. That’s the tradeoff, and for a lot of renters it’s a good one. A Dollar Tree wire basket that holds your yogurt in one place is doing the same job as a designed product at ten times the price.
Add Space Around the Fridge, Not Inside It
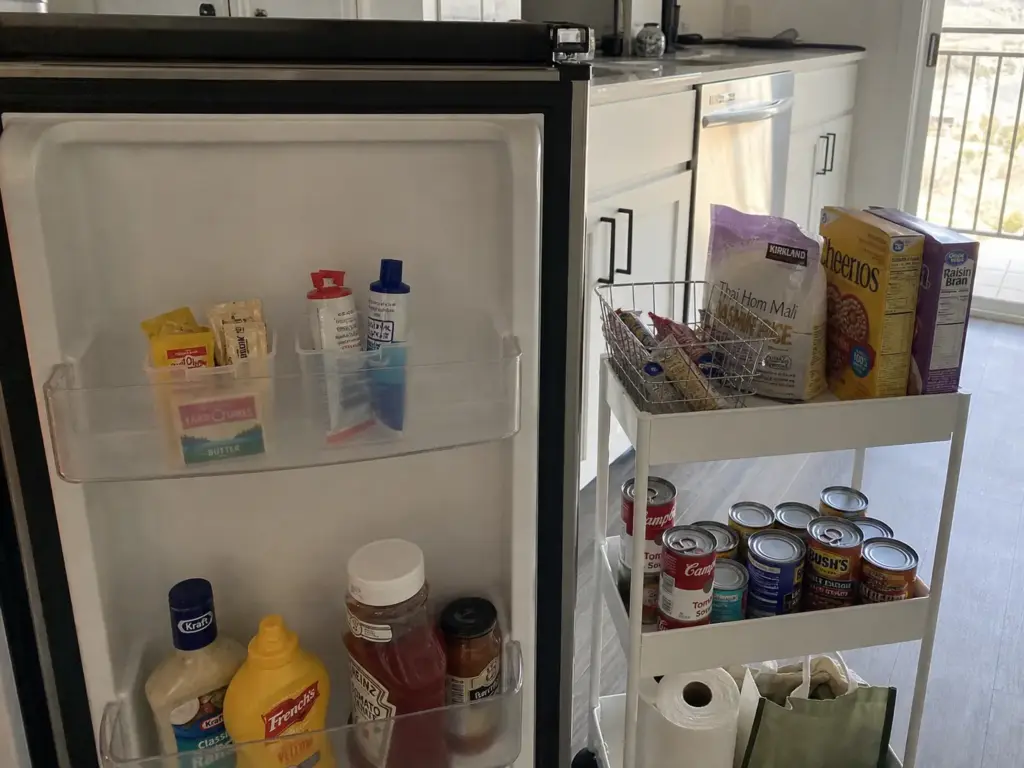
This is the move most people skip. If your mini fridge is full, the answer often isn’t a better interior layout, it’s giving the overflow somewhere else to live. Shelf-stable groceries, snacks, backup drinks, and produce that doesn’t need refrigeration are all competing for space they don’t need.
Freestanding over-fridge shelving, a mini fridge stand that lifts the unit and adds a shelf underneath, and three-tier rolling carts all solve this without touching a wall or modifying the appliance. No drilling, no adhesive, and they move with you. Dorm-fridge advice consistently favors these for exactly that reason: unlike a closet you can at least command-strip, a refrigerator can’t be modified whether you rent or own. The same logic shows up in the same vertical, no-drill thinking applied to the rest of a small apartment.
Door storage is the one place a small purchase reliably pays off, because compact door shelves are shallower than full-size door bins are built for. The 8Pcs Refrigerator Door Organizer Box set runs roughly 4.5 by 3.4 by 4 inches per box, small enough to sit on a shallow compact door rack where a full-size organizer simply overhangs. The limitation is availability: this is a small-run product and stock moves, so if the free and dollar-store options are covering you, they’re covering you.
Before you buy any container for a rental fridge, ask whether it works in a fridge you don’t own yet. Rectangular, unbranded, and modestly sized survives a move. A set custom-matched to one specific shelf configuration does not.
Keeping It From Sliding Back in Two Weeks

A small fridge doesn’t give you the grace period a big one does. There’s nowhere for a forgotten container to hide for a month. That sounds like a downside, and partly it is, but it also means a small fridge only needs a short, frequent routine instead of a big quarterly excavation.
Start with shopping frequency, which is part of the system rather than separate from it. In a fridge with no buffer, buying a full week of groceries in one trip guarantees you overpack on day one, which is the airflow problem from earlier arriving on schedule. Two smaller trips beat one big haul here, even though that’s the opposite of standard grocery advice.
This is also where meal planning stops being a productivity exercise and becomes a spatial one. Plan around what physically fits, restock the two or three things you actually ran out of, and you avoid the Sunday cram that undoes the layout.
The Weekly Ten-Minute Pass
Once a week: pull anything from the eat-first zone that’s actually gone, wipe one shelf, push the newest items to the back so older ones surface. Ten minutes, no unloading.
Then run the duplicate test. If you bought something you already had because you couldn’t see it, the layout is wrong, not your memory. In a fridge this size you should be able to spot everything within about five seconds of opening the door. If you can’t, something is stacked, or something is buried in the back inches you were supposed to leave clear.
Condiments are the slow leak. They’re the one category that quietly fills a small door and never gets audited, because each individual bottle feels like it might get used. Purge them on a set schedule, twice a year is plenty, rather than waiting until the door won’t close.
And the back inches stay clear. Every time. It’s the first rule to erode and the one whose collapse restarts the whole spoilage cycle.
Wrapping It Up
Three things to carry out of this:
Measure shelf depth, clearance height, and usable width before you buy anything. Most small-fridge bin failures are just purchases made in the wrong order.
Leave the back few inches of every shelf clear, even though it costs you space you don’t have. Blocked airflow is what turns an organized small fridge back into a chaotic one, usually within a month.
If nothing fits, nothing has to. Zoning by rule, a dollar-store basket, or a cart beside the fridge does the same job as a bin system that was never sized for your shelf in the first place.
In three months, open the door and time yourself finding the mustard. If it takes more than a few seconds, or if you’ve bought a duplicate of anything, the zones have drifted and the layout needs one pass. Not a teardown.
Grab a tape measure and get the three numbers off one shelf. Everything else follows from that.