








In this article
On Sunday your freezer looked like the after photo. By Thursday at 7pm, after a long day, the grocery bags get shoved in fast and the door barely closes on the second push. And somewhere in there you bought a fourth bag of peas, because you couldn’t see the first three. The freezer organization ideas that actually hold up are the ones built around a measurement, not a matching bin set. It’s the same measure-first approach that runs the whole refrigerator: measure before you buy anything. Every number in this article is a real inch measurement, which is more than any of the top-ranking freezer articles will give you.
Here’s why organized freezers revert, what to purge, how to zone each freezer type, the freeze-flat-and-file method, the one-shelf rental freezer, what’s worth buying, and the habit that keeps all of it alive.
Quick Answer
Six rules, in the order you should do them:
- Purge by quality, not by fear. Nothing at a steady 0°F is unsafe.
- Measure the clearance under your freezer shelf before buying a single bin.
- Freeze flat in bags, then file them upright like folders instead of stacking.
- Zone by food type and label the bin, not just the food.
- Portion cooked food into single servings so it actually gets eaten.
- Keep a running inventory on the door and mark things off as they leave.
Why Your Freezer Organization Never Lasts More Than Three Weeks
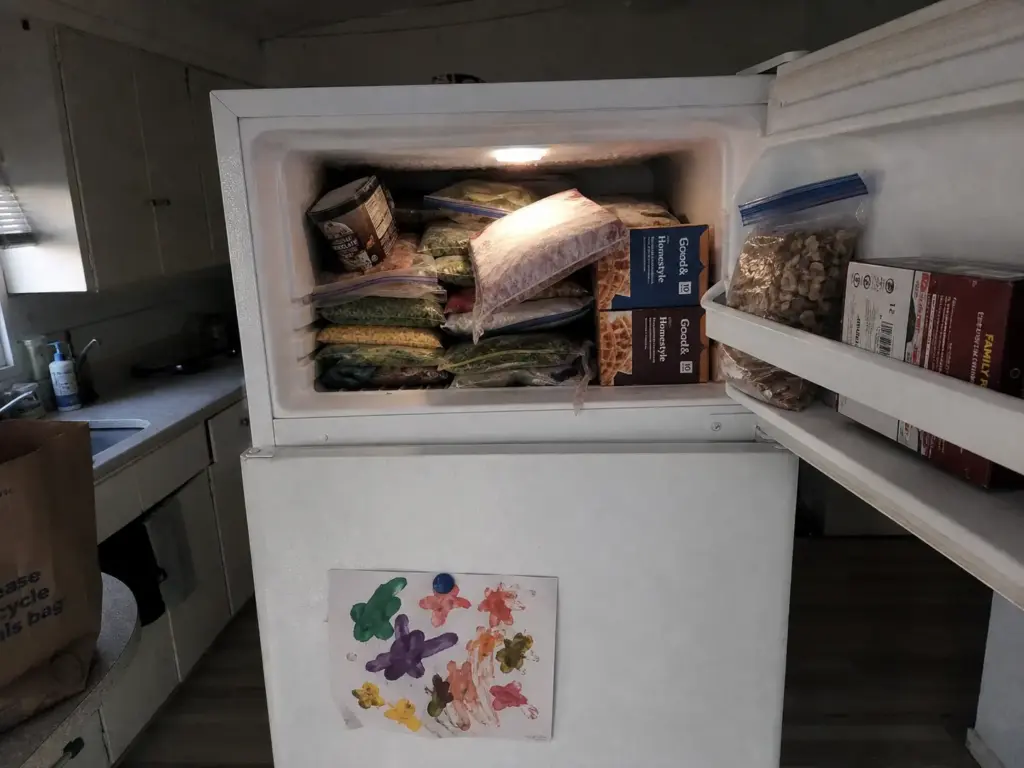
Everyone who has organized a freezer has also watched it fall apart. What nobody tells you is that it’s a geometry problem before it’s a discipline problem. You didn’t fail at organizing. You built a system that punished you every time you used it.
The Stack Is the Problem, Not the Pile
Stacking is the failure mechanism. When four bags of frozen vegetables sit in a pile, getting the one on the bottom costs you five moves: lift, set down, lift, set down, dig. Do that at 7pm with a bag of groceries still on the counter and you won’t do it. You’ll wedge the new bag into whatever gap exists and shut the door.
So the reversion isn’t a character flaw, it’s arithmetic. Every stacked item raises the price of using your system, and people stop paying. Vertical filing removes the charge entirely: bags stand on edge like folders, and pulling one out disturbs nothing. The behavior change comes downstream of the geometry, which is why the fix in a later section is physical and not motivational.
Invisible Inventory Makes You Buy It Twice
Here’s the loop that fills a freezer past the point of usefulness. You can’t see what you own, so you re-buy it. The freezer black hole now holds two of everything, which means it’s overfull, which means the pile falls out when you open the door. The bag avalanche teaches you to open the door as little as possible, which means you look even less, which means you re-buy again.
Four bags of peas and no ground beef is that loop’s receipt. Your freezer didn’t lose the beef. It hid your inventory, and hidden inventory is what your grocery list ends up guessing at. Naming the loop matters because the fix is not a bin. It’s the running list covered near the end of this article.
Before you reorganize anything, photograph the inside of your freezer with your phone and check the photo against your grocery list next time you shop. It’s a two-second version of an inventory system, and it will stop the duplicate-buying loop this week instead of next month.
The Household Member Who Never Read Your Plan
The most honest thing said about freezer systems comes from a chest-freezer thread on Bogleheads, where a long-time freezer keeper put it this way: organization is the easy part, and maintaining it is harder, especially if your better half is the “stuff it in and close the door” type. That’s the archetype your system has to survive. Not a saboteur, just someone who was never in the meeting.
Lecturing that person does nothing. Making the right spot obvious does. If the bin is labeled GROUND BEEF, the ground beef lands in it without a conversation, and if the zones only make sense to the person who built them, they will fail on the first busy weeknight.
Which reframes the whole goal. You’re not building a photogenic freezer. You’re building one that survives Thursday at 7pm, and the honest test is whether it still reads clearly three months from now with normal use, not whether it looks good the day you finish.
Purge First and Decide What’s Worth Freezer Space

The purge is the step people dread, because they think they’re deciding what’s hazardous. They aren’t. Once you know nothing in a properly cold freezer is unsafe, the pile becomes a simple question of whether it will still taste like food, and that’s a decision you can make in four seconds while standing in front of an open door.
Nothing in a 0°F Freezer Is Unsafe (So Stop Deciding That Way)
At a steady 0°F, food stays safe indefinitely. Not “safe for a while.” Indefinitely. Every storage time you have ever seen printed on a chart is a quality figure, and no competitor in this space says so plainly, which is why so many freezer purges turn into anxious guesswork over a bag of chicken thighs.
The one thing worth checking before you organize is the temperature itself, because none of this holds if your freezer is running warm. A freezer thermometer costs less than a single bin and answers the question directly. The low-tech tell: ice cream that’s scoopable straight out of the freezer means you’re above zero.
The Storage Times That Actually Matter
Six numbers replace all the judgment. Ground meat lasts 3 to 4 months at good quality, pork chops 4 to 6, beef steaks 6 to 12, whole chicken 9 to 12, vegetables 8 to 12, and cooked meals 2 to 6. That’s the whole purge rule, and the federal cold storage chart gives you the only purge rule you need — three to four months for ground meat, six to twelve for steaks if you want the full list.
Tape those numbers inside the door and the purge stops being a debate with yourself. Ground beef from last summer goes. The whole chicken from last fall is fine. You stop holding a frozen package at arm’s length trying to remember what month you bought it, because the question is now arithmetic instead of memory. Worth saying plainly: frozen food at zero doesn’t expire the way a fridge item does, so what you’re pulling isn’t unsafe food, it’s food past the point where it still tastes like what you bought.
What Freezer Burn Is Telling You
Freezer burn is those grayish-brown leathery patches, and it happens when air reaches the surface of the food and dries it out. It’s a quality problem, not a safety problem. You trim the gray part off and cook the rest.
But it’s also the only measurable proof you get that your packaging is failing rather than your bin system. A half-empty bag with a pocket of air in it will burn no matter how tidy the shelf around it looks. That distinction sets up the wrapping method two sections down, and it’s the reason a matched bin set can’t fix a freezer-burn problem.
Do the Purge in One Pass
Empty the whole thing onto a towel-covered counter in one pass rather than working shelf by shelf. Shelf-by-shelf lets you shuffle the same mystery bag from one spot to another four times without ever deciding about it. Sort into three piles: keep, cook this week, gone. Then wipe the shelves before anything goes back.
One warning about the moment you’ve got everything out: set a timer for twenty minutes and don’t start this at 9pm. The counter tower gets soft fast, and a rushed refill is how the original pile re-forms.
While things are out, strip the outer cardboard cartons off everything that has one. Waffle boxes, pizza boxes, veggie-burger boxes. The cardboard is packaging for the store shelf, not for your freezer, and pulling it reclaims real volume in a small compartment. It’s the first free win of the process and it happens before a single product enters the picture.
Zone It by Freezer Type (Top, Side, Drawer, Upright, Chest)
Most freezer advice quietly assumes you own a standing freezer with shelves. Half the people reading this have a cubby over the fridge, a narrow column beside it, or a chest freezer in the garage, and the same advice actively fails in all three. Pick your shape first, then zone.
Zone by Food Type Before You Zone by Shape
The universal logic runs on temperature and leak risk. Raw meat and fish go lowest, so nothing drips onto anything below during a defrost or a power blip. Ready-to-eat items and ice cream get eye level, because prime real estate should hold what you actually reach for. The freezer door is the warmest, most temperature-swung spot in the compartment, so it takes the things that don’t care: nuts, flour, butter, herbs, coffee.
That order holds in every freezer shape. What changes is how you build the shelves and dividers to support it, and that depends entirely on the geometry you were handed.
Top, Side, and Drawer Freezers
The over-fridge freezer gives you one full-width shelf plus the door, and it gets its own treatment further down because it’s the hardest of the five to solve.
A side-by-side freezer column is tall and narrow, roughly 26 inches deep, and the entire game there is short-depth bins that pull out like drawers. Anything that lives at the back of a 26-inch column is functionally gone. You don’t need deep bins; you need bins you can pull all the way out with one hand.
A bottom freezer drawer actually gives you two different storage jobs. The shallow upper tray is a filing drawer, so flat-frozen bags go there standing on edge. The deep main drawer takes bulk. Divide that main drawer front-to-back rather than left-to-right, because a front-to-back divider still lets you see and reach the back of each lane when you slide the drawer out. Left-to-right buries half of it.
Upright Freezers and the Bag Avalanche
On an upright freezer the problem isn’t finding things. It’s what happens when you pull a shelf out and three bags come with it. Flat trays and open racks do nothing about this, because there’s nothing at the sides to hold the load in when it starts moving.
The specification that fixes it is a side wall around 5.9 inches high. That’s tall enough that a bag of frozen chicken tips against it instead of over it during the slide-out motion. Worth knowing before you shop, because plenty of freezer baskets are essentially flat trays with a lip, and the lip is not the same thing as a wall.
Chest Freezers and the Archaeology Dig
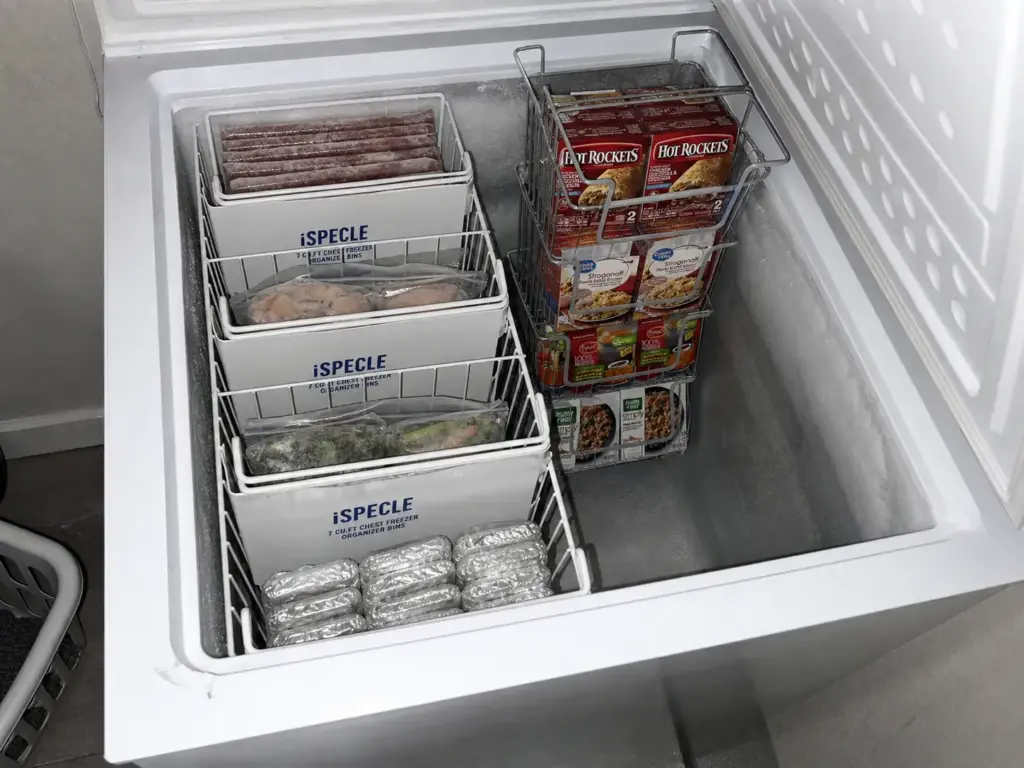
Forum posters describe finding things in a chest freezer as an archaeology dig, and the language is earned. You want the ground beef, so you unload the top layer onto the kitchen floor, then a second layer onto the counter, and now there’s a small tower of frozen bags sweating next to your dinner. That’s the chest freezer’s real cost, and it’s why lift-out handles matter more than compartments do.
Verticality is the enemy in a chest. The answer is categories you can lift out whole, and the cheapest version of that costs nothing. Old refrigerator crisper drawers and produce bins make excellent chest dividers, since they’re already food-safe and already rated for cold. If you or a neighbor has an old fridge sitting in a garage, that’s your divider set. Reusable grocery totes work as lift-out bins too, and they collapse when you don’t need them.
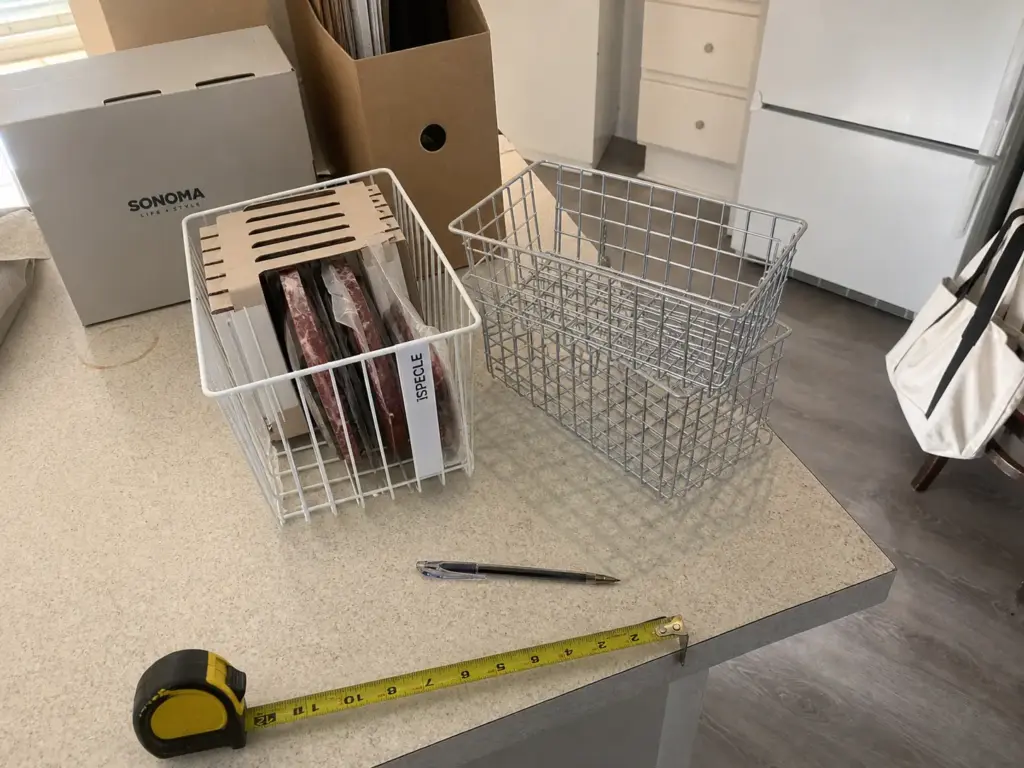
If you’d rather have handles that fold, the iSPECLE Freezer Organizer Bins 4 Pack for 7 cu ft Chest Freezer run 14.7 x 7.1 x 6.1 inches and hold 33 pounds and up without the sides bowing out, which matters more than it sounds like it should. Frozen meat is heavy, and a basket that sags in the middle stops sliding past its neighbor. That 14.7-inch length is the number to measure against, not the capacity claim on the box. For a smaller 5-cubic-foot chest, the Orgneas Stacking Freezer Organizer Bins Set of 4 are 13.4 x 6.5 x 6.7 inches with an open front, so you can read the contents without lifting the basket out at all. They’re also where the stack-height rule below comes from.
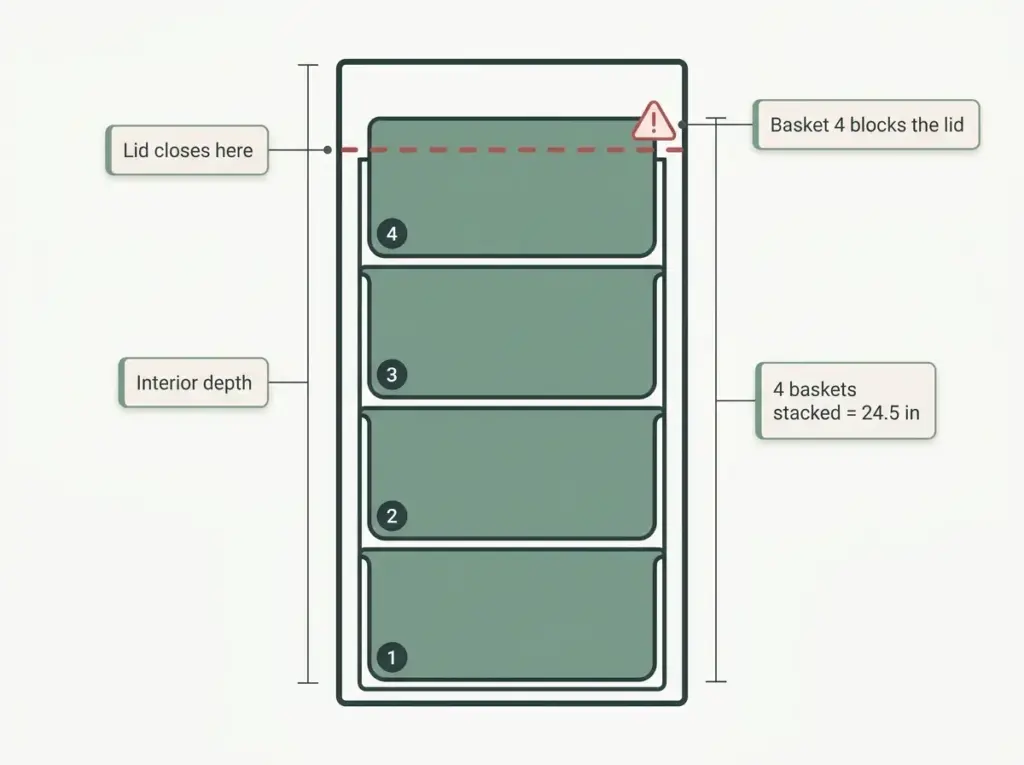
Here are the two chest-freezer numbers nobody publishes. First, a 14.7-inch basket needs 15 inches of clear run, and most 5 to 7 cubic foot chests take exactly two across, not three. Second, four small baskets stacked reach 24.5 inches of total height, so if your chest’s interior depth is under that, the lid will not close on the fourth basket. You get three. Measure interior length and interior depth, then subtract about an inch for wiggle room and frost buildup before you order anything.
In a chest freezer, put the category you reach for most in the basket nearest the hinge side, not the front. The front basket is the one that gets pulled out and set on the floor every time you dig for something else, so whatever lives there takes the most abuse and ends up back in the wrong place.
Freeze Flat, File Vertically, and Label Like You’ll Forget
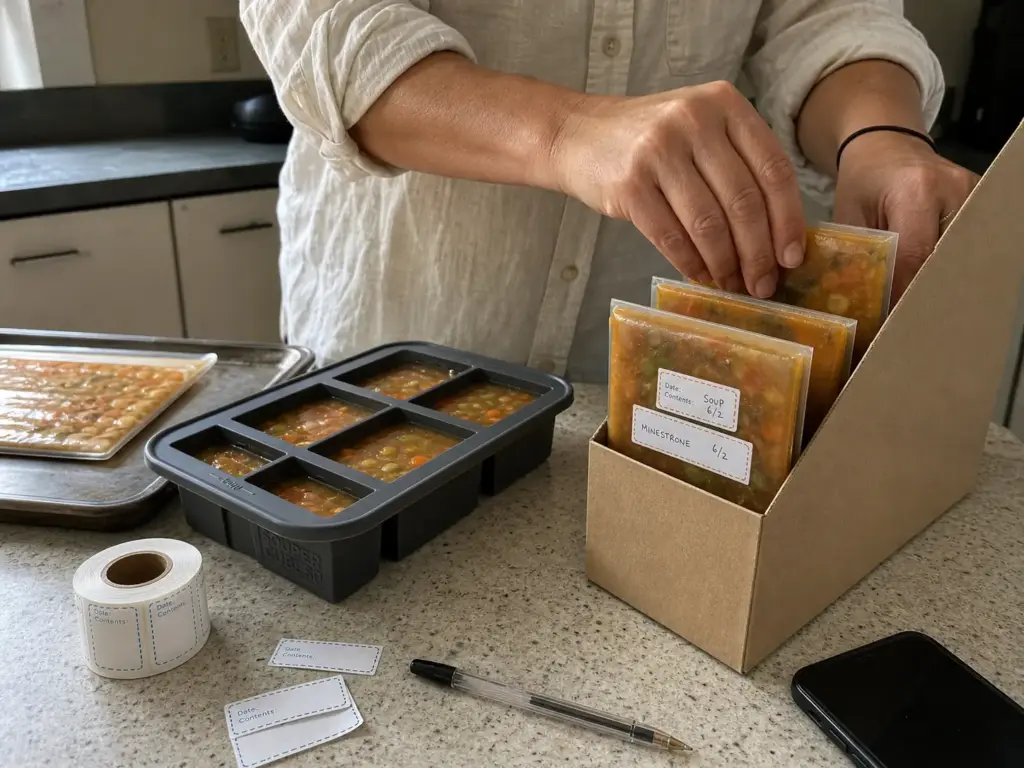
This is the part that feels fussy and turns out to be the whole thing. A stack of flat-frozen bags standing upright in a shoebox will beat a matched set of expensive bins holding lumpy frozen bricks, every time, because you can read the whole shelf without moving anything.
Freeze Flat, Then File It Like a Folder
The method has four steps and takes an extra ninety seconds per bag. Fill the freezer bag, press the air out with the flat of your hand, lay it on a sheet pan until it’s solid, then stand it up on edge. What you get is a rigid rectangle about half an inch thick, and rectangles file.
The reason this works isn’t tidiness. It’s that extraction now costs one move instead of five, which is the mechanism from the beginning of this article solved in physical form. Flat bags also thaw faster than a frozen lump, and they stack into the dead space at the top of a shelf when you run out of vertical room.
You don’t need a filing product for this. A magazine file, a file sorter, or a shoebox with one side cut down turns any shelf into a filing cabinet, and it costs nothing if you already own one. Binder clips are the other free move here: clip an open bag shut and hang it off a wire freezer shelf, which reclaims the dead air above the shelf and keeps the bag from tipping over into the ice cream.
Wrap It Twice or Trim It Later
Two layers is the actual freezer-burn defense. Plastic wrap pressed flat against the surface of the food first, then a bag or a foil overwrap on top. The point of the first layer is to leave no air touching the food, and the USDA is blunt about this: food kept at a steady 0°F stays safe indefinitely, and every storage time you’ve ever seen printed is about quality, not safety — the quality loss you’re preventing with that second layer is exactly the gray leathery patch.
I used to treat freezer burn as a container problem, and the fix I recommended was better bins. After enough threads where someone’s chicken burned inside a pristine organizer set, the honest answer is that the bin never touched the outcome. The air pocket in a half-empty bag did. Wrapping costs nothing and outperforms every organizer in this article.
This is also where airtight containers get oversold. Rigid airtight tubs are genuinely better than a loose bag for anything liquid or crumbly, but a rigid box holds a fixed volume whether or not the food fills it, so a half-full one keeps a bigger air pocket against the surface than a flat-frozen bag does. Use them for stock, berries, and leftovers you’ll eat inside a month. Wrap and flat-freeze everything you’re storing longer than that.
Portion It Before It Becomes a Brick
Freezing soup in one large container is the reason it never gets eaten. A frozen brick isn’t food, it’s a project: you have to plan around it a day ahead, thaw the whole thing, and then eat the same soup four nights running. Single portions turn that same soup into countable inventory you can grab on a Tuesday.
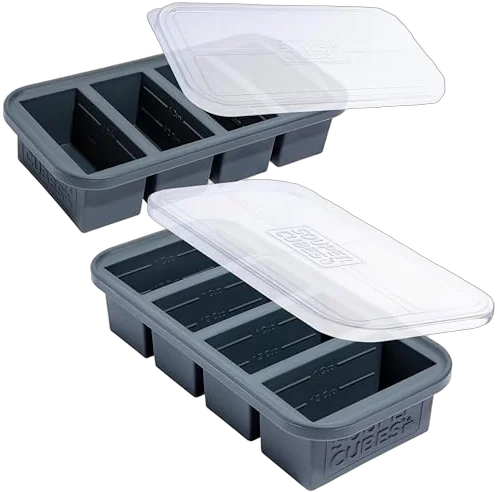
The free version works fine. Freeze in a muffin tin, pop the pucks out once they’re solid, bag them, and label the bag. You already own the tin, and a standard muffin well is roughly a half cup, which is a useful unit for stock and sauce even if it’s small for a full meal.
If you portion often enough that popping pucks out of a muffin tin gets old, a purpose-built tray is the upgrade worth making.
Label the Bin, Not Just the Bag
Label the bin and you stop managing people. The household member who never read your plan can still put the ground beef into the bin marked GROUND BEEF, and that’s the entire mechanism. Labeling only the bag means every returning item requires a decision, and decisions are what get skipped when the door is open and the kitchen is warm.
Every competitor on this topic says Sharpie and masking tape. Masking tape is exactly what fails at 0°F: the adhesive goes brittle, the edge lifts, and a week later the label is loose in the drawer while the bag underneath it has become mystery meat. It’s the same failure as labels that peel off in a month in a pantry, just accelerated by cold.
Blue painter’s tape holds up considerably better than masking tape and costs nothing if it’s already in a drawer, so start there. If you’re labeling a whole freezer’s worth of bags and bins, the Yoget Removable Freezer Labels 300 Count are 1 x 3 inches, which is big enough for contents plus a date, take an ordinary ballpoint pen, and peel off without leaving paper or glue behind. It’s the cheapest thing in this article and the highest-leverage. The one limitation: they’re paper-faced, so a wet bag straight out of a defrost cycle won’t take one until you dry the surface.
The Rental Cubby Freezer With One Shelf and a Door
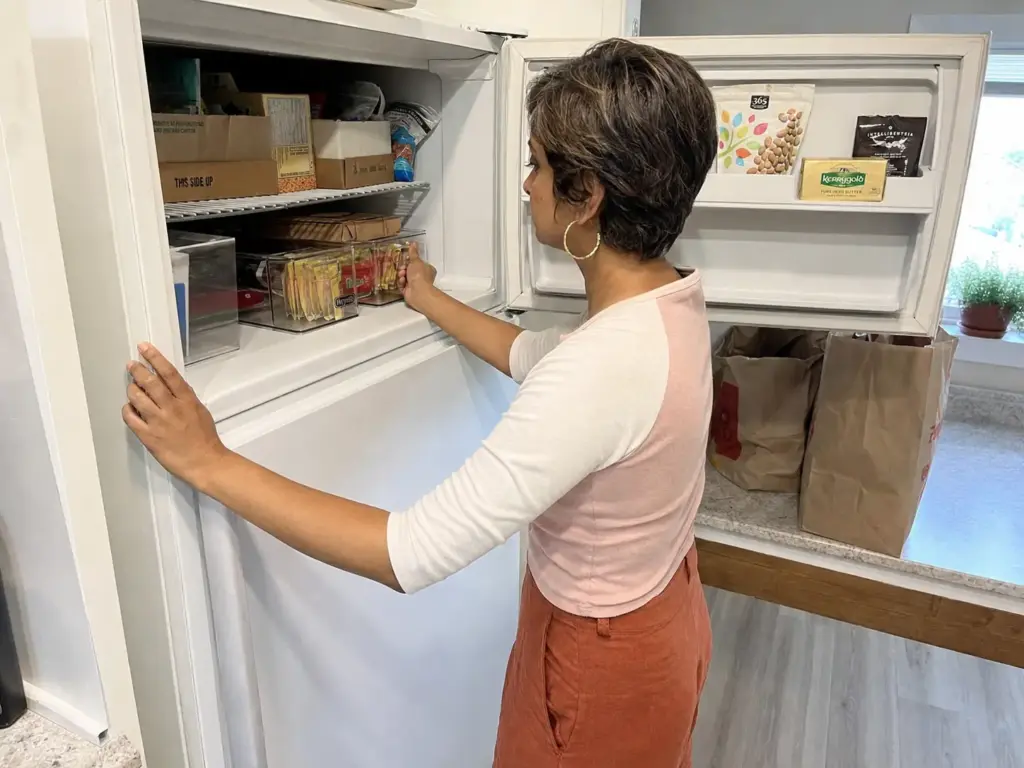
Every freezer article eventually tells you to use the drawers or zone your shelves. If you rent, you’re standing in front of one shelf and a door rack thinking which drawers. This is the freezer millions of people actually have, and it needs its own plan, not a scaled-down version of somebody else’s.
What You’re Actually Working With (One Shelf, One Door Rack)
Apartment-class refrigerators run 24 to 28 inches wide, 60 to 66 inches tall, about 26 inches deep, with 9 to 15 cubic feet total and 11 to 13 being typical. The top-freezer class overall spans 24 to 33 inches wide. A common 18 cubic foot top-freezer is 30 inches wide and ships with one full-width freezer shelf plus the door, and that’s the entire storage architecture.
Read that again, because it’s the part that makes the standard advice useless. There is no drawer to organize. There is no second tier. You have to manufacture the second tier yourself, and until you do, every bag you own is competing for the same single horizontal plane.
Height Is What Disqualifies a Bin, Not Footprint
A 24-inch-wide fridge yields roughly 21 to 22 inches of interior freezer width, which sounds like plenty of room. It isn’t the number that matters. The clearance under that single shelf is only a few inches, and that clearance is what decides which bins can exist in your freezer at all.
So a bin around 2.8 inches tall slides under the shelf and creates the tier the appliance never gave you. A 6-inch lidded bin does not clear, and no review score changes that. This is the flagship rule of the whole article: in a cubby freezer, height disqualifies a bin, not footprint. A bin can be the perfect width, the perfect depth, beautifully clear, well reviewed, and still be unusable because it’s two inches too tall.
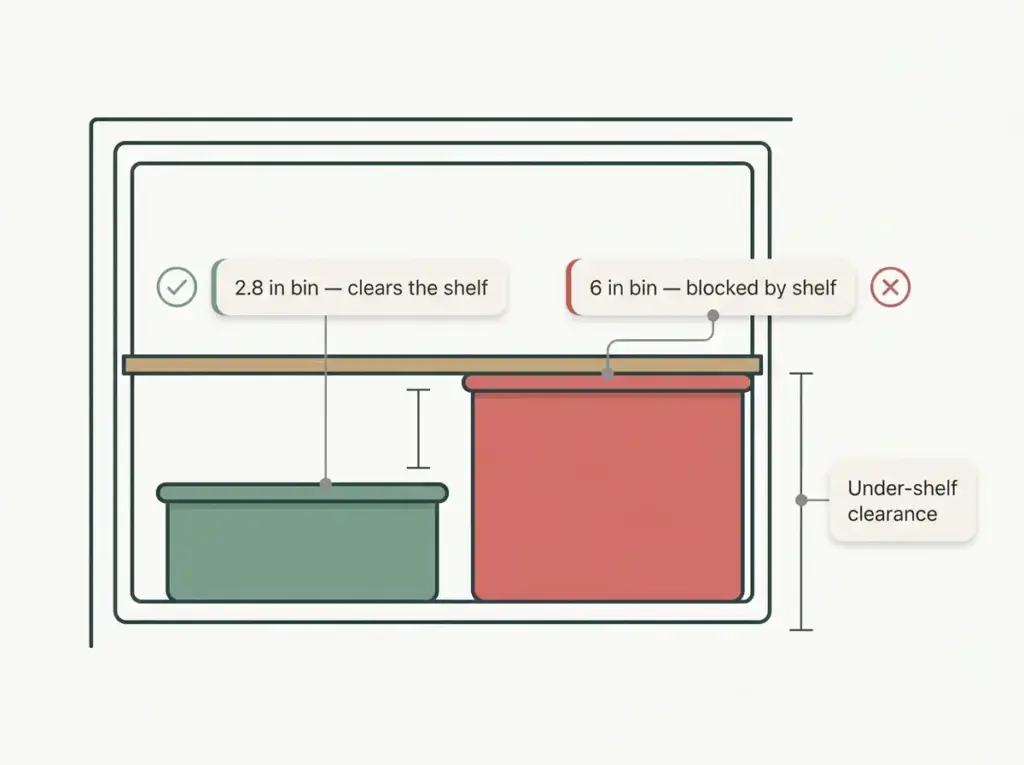
Before you buy anything for that gap, check what you already own. A shoebox with the lid off, or a stack of takeout containers, gets you a workable under-shelf tier for free, and you’ll learn in two weeks whether the tier is even in the right place. If it works and you want something you can see through, the Heyuzb Set of 8 Clear Fridge Organizer Bins measure about 10 x 5.2 x 2.8 inches, which is the bin class that fits under a rental freezer’s shelf rather than fighting it. Clear matters here more than in a big freezer, because you can read the contents without pulling anything out of a compartment that has nowhere to set things down.
Eight bins is more than the freezer needs, and the extras go to work in the fridge below. The limitation worth knowing: they’re open-topped, so anything sharp-cornered on the shelf above can still catch a bag as you slide the bin out.
A Three-Zone Plan for One Shelf
Three zones, and that’s all this freezer supports. The under-shelf tier holds flat-filed bags: vegetables, portioned meals, anything you flattened on a sheet pan. The on-shelf tier holds the boxed and awkward items with the cartons already stripped off, standing upright rather than lying in a heap. The door rack holds the cold-tolerant things, so nuts, flour, butter and coffee live there along with the inventory card.
In these small over-fridge freezers, people describe awkwardly shaped frozen meat sitting on unstable bags of vegetables, where any change risks the whole thing coming out at you. It becomes a Jenga tower you’re afraid to touch. Filing upright is what makes the tower unnecessary, because a stack you never build can’t fall. Binder clips on the wire shelf reclaim the dead air above it, which in a cubby freezer is a meaningful percentage of your total space.
Nothing Here Needs Landlord Permission
Worth saying out loud: none of this requires drilling, adhesive, or a conversation with your landlord. No command strips, no tension rods, no holes. Every other renter fix in the kitchen comes with a deposit caveat somewhere in the fine print, and this one genuinely doesn’t.
That’s also why this particular system survives a move. It’s the same small-apartment math that makes a rental pantry revert, read in the other direction: when the fix is measurement plus filing rather than hardware, you take it with you and re-measure once.
Freezer Organizers Worth Buying and What to Skip
Roundups tell you which bins to buy. Almost nobody tells you that you might not need to buy any, or that the wrong bin makes a deep freezer worse. Both are true, and the order matters: free first, cheap second, matched to your freezer last.
Start With What You Already Own
Here’s the combination that produces most of the result for nothing. Strip the outer cartons off everything that has one. Freeze flat in the bags you already buy. File those bags upright in a magazine holder or a shoebox. Binder-clip open bags to the wire shelf. Tape an index card to the door as the inventory list.
Run that for two weeks before you spend anything. If the system survives two weeks of normal grocery hauls, you now know where it strains and what shape of bin you actually need. If it doesn’t survive two weeks, a bin was never going to save it. That’s the three-month thinking applied to a purchase decision, and it’s the same logic behind the three measurements to take before you buy any fridge or freezer bin.
The honest counterweight to every roundup, including this one, comes from an experienced chest-freezer owner: bins only aren’t very efficient. Bins without a labeling and logging layer on top just give you four smaller piles instead of one big one. The bin is the container for a system, not the system.
The Cheap Tier That’s Actually Worth It
Two purchases carry most of the paid value: a roll of cold-rated removable labels, and open wire baskets. The labels do more for you than the baskets do, which tells you something about how much of this is inventory rather than storage.
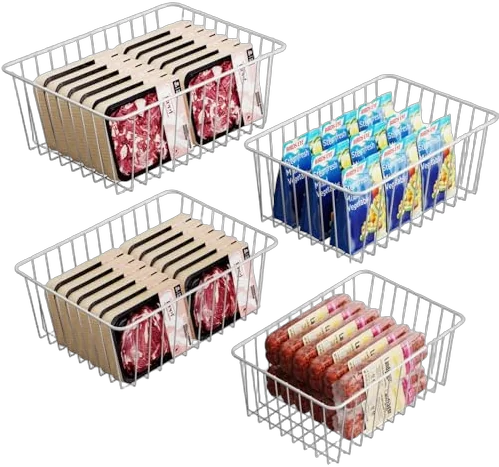
Wire matters for a physical reason. Open grid lets cold air move through the load, while a solid plastic tub in a deep freezer blocks circulation and slows the refreeze after someone stands there with the lid open deciding what’s for dinner. The LISHINE 4 Pack Deep Freezer Organizer Bins are stackable open wire, which is the cheapest route into a stacking system for a chest or upright. The trade-off is real, though: wire grid lets small items fall through gaps and it will frost over faster than smooth plastic, so bag the loose stuff first.
Take three measurements before you order any freezer bin and write them on your phone: interior width, interior depth, and the clearance under the shelf. Then subtract an inch from each for wiggle room and frost buildup. The clearance number is the one people skip, and it’s the one that causes returns.
For what it’s worth, a wire-basket set lands in genuinely budget territory next to a matched plastic system, and the gap is wide enough that it’s worth trying wire first even if you suspect you’ll end up wanting solid sides.
When It’s Worth Buying for Your Freezer Type
The reason to spend more is a specification that solves your specific failure mode. Not a matched set. Not a color. A roughly 6-inch side wall for the upright’s slide-out avalanche, fold-down handles for lifting a category out of a chest, a 2.8-inch profile for a rental cubby. Matching colors is not a specification, and a set that matches across four different freezer problems solves none of them well.
What to Skip
Four things, stated plainly. Tall lidded bins in a cubby freezer, because they won’t clear the shelf and the lid adds height you can’t spare. Solid plastic tubs in a deep freezer, because they block the airflow the load needs to recover after the door’s been open. A vacuum sealer bought before you’ve fixed your wrapping habit, since the two-layer wrap solves most of what people buy a sealer for and it costs nothing. And any organizer at all bought before measuring.
The conventional wisdom is that a matched bin set is the upgrade. In practice the upgrade is a tape measure and a label roll, and the bins are what you buy third.
The Inventory Habit That Keeps It Organized
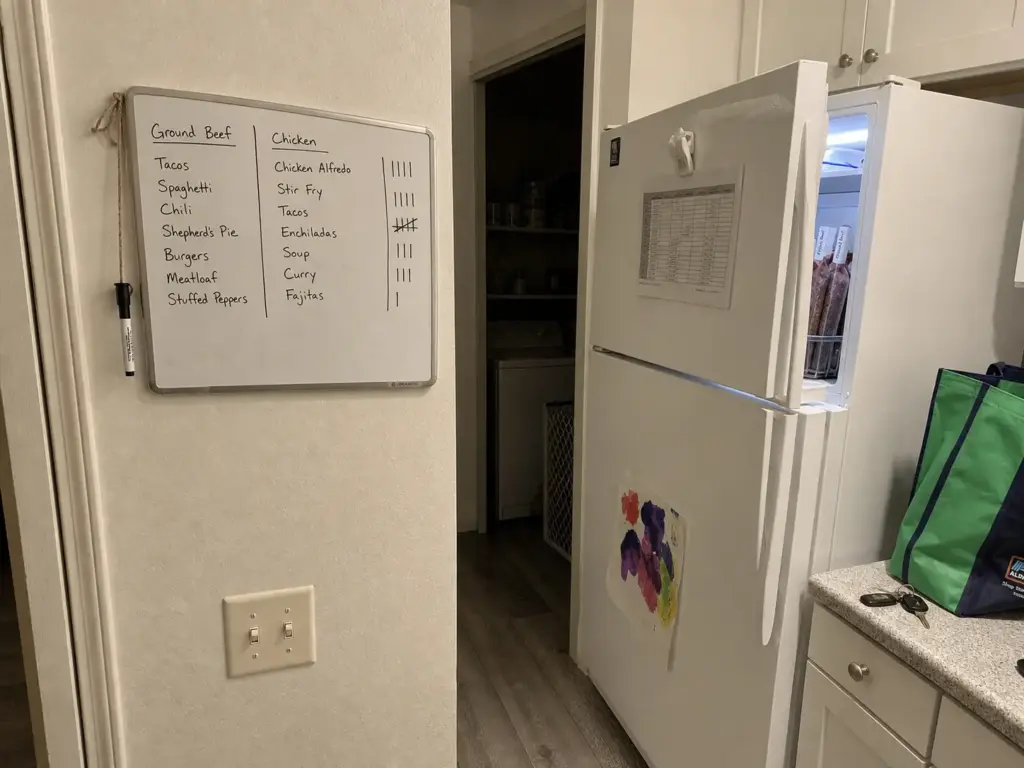
The thing that makes a freezer system survive years isn’t a layout. It’s a ledger. Long-time freezer keepers describe the same practice: nothing goes in without being dated, labeled and recorded on a small whiteboard next to the freezer, and nothing comes out without a stroke mark on that whiteboard. One in, one out, applied to food. It’s boring, it needs no app, and it’s the only version anybody reports still running years later.
That ledger is what closes the loop from the start of this article. Invisible inventory was what made you buy the fourth bag of peas, and a list on the door is the cheapest possible fix for it. If you want a printed companion for the storage times, print the FDA’s one-page refrigerator and freezer chart and tape it inside the freezer door — it turns the purge into a two-minute check.
Your Five-Minute Weekly Reset
Five minutes, right before the grocery run, and the timing is the whole trick. Read the list so you’re not shopping blind. Re-file anything that got shoved in sideways during the week. Then move whatever is closest to its quality date into a “cook this week” spot at eye level, which is the single highest-value move in the routine because it converts forgotten food into dinner.
Notice what the reset does not try to do. It doesn’t prevent the Thursday-at-7pm dump. You’re not going to out-discipline a long day with groceries in your arms. What the reset does is schedule the recovery, so the dump costs you four minutes on Saturday instead of costing you the system.
For a shared freezer, two adjustments carry most of the load. A kids’ snack bin at reachable height stops the raid that undoes the top shelf, because the raid happens when the thing they want is behind the thing you organized. And labeling the bin rather than the food means the “stuff it in and close the door” household member lands things in roughly the right place without being managed. That’s the same problem one shelf down in a shared refrigerator, and the fix rhymes: make the right spot obvious enough that following the system is easier than not.
One diagnostic for month three. If you’re still finding unlabeled bags at that point, the problem is your label layer, not your bins. Buying more bins at that stage is how people end up with an organized freezer full of mystery meat.
Conclusion
Measure the clearance under your shelf before you buy anything. In a freezer, height is what disqualifies a bin, not footprint, and that one number prevents most of the returns and all of the frustration.
Freeze flat and file upright. Stacking is what makes you stop putting things back, so removing the stack removes the reason your system falls apart in week three.
And a layout doesn’t survive on its own. A list on the door does, because the failure was never storage. It was inventory you couldn’t see.
In three months, open the freezer and look for exactly one thing: an unlabeled bag. If you find one, the label layer slipped, and that’s a five-minute fix with a pen, not a reorganization.
Start with one shelf. Empty it, file what goes back in upright, and tape an index card to the door. If that shelf is still readable in two weeks, do the next one.
Frequently Asked Questions
01What is the best way to organize my freezer?
Purge by quality, zone by food type with raw meat lowest, freeze flat and file bags upright instead of stacking them, then label the bin and keep a list on the door. The order matters more than the products do. Filing is what keeps it usable, because it lets you take one thing out without moving anything else.
02How do I organize my fridge freezer?
A fridge freezer usually gives you one shelf and a door rack, so add a low tier underneath: bins around 2.8 inches tall slide under the shelf where a 6-inch bin won’t clear. File flat-frozen bags in that tier, keep boxed items on the shelf with cartons removed, and reserve the door for cold-tolerant things like nuts and butter.
03Why put a penny in the freezer?
It’s a folk power-outage test: freeze a cup of water, set a coin on top, and if the coin sits at the bottom when you get home, the freezer thawed and refroze while you were out. Treat it as a rough signal, not proof. The reliable check is a thermometer reading 0°F.
04Where not to put a freezer?
Don’t put one anywhere the ambient temperature swings outside its rating. An uninsulated garage, unheated porch or direct sun makes a standard unit run hard in summer and stop cycling properly in winter. Leave clearance around the coils, keep it off carpet, and check whether your model is garage-rated before it lives out there.