








In this article
You spent a Saturday pulling everything out of your pantry, bought a bunch of matching bins, arranged it all by color, and took the photo. Two weeks later you couldn’t find the cumin behind three boxes of pasta that migrated from their assigned shelf. Sound familiar?
The problem wasn’t your effort — it was your budget strategy. Most pantry organization advice assumes you’ll drop $100+ on acrylic containers and a label maker. But the best pantry systems I’ve built cost a fraction of that, and the one I use right now started at $12.
This guide breaks pantry organization into three budget tiers — $0, under $15, and under $50 — so you can pick the level that fits your wallet right now and upgrade later without starting over. Every recommendation includes what it actually costs, what space it fits, and whether it’ll still be working three months from now.
Quick Answer: To organize your pantry on a budget:
- Declutter expired and unused items before buying anything
- Repurpose glass jars, shipping boxes, and containers you already own ($0)
- Add Dollar Tree bins and chalkboard labels for under $15
- Upgrade to durable stackable bins and shelf liners for under $50
- Set a weekly five-minute reset to keep the system working long-term
What to Do Before You Spend a Dollar
Pull Everything Out and Be Honest About It
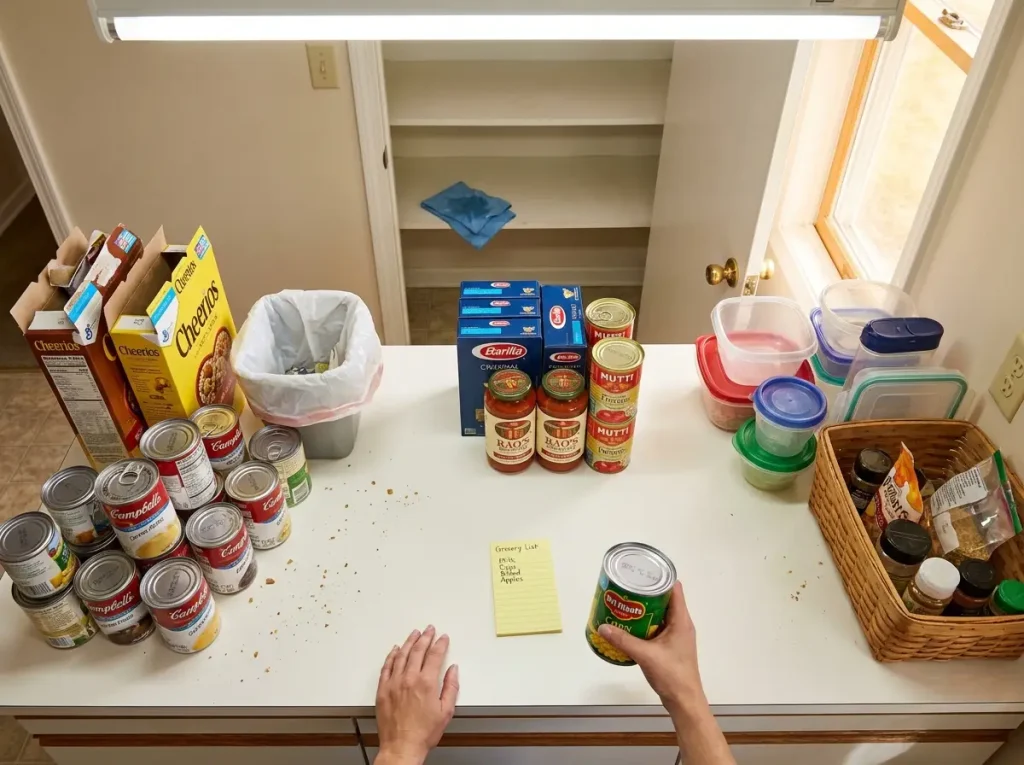
Every budget pantry project starts the same way, and it has nothing to do with buying containers. Pull every single item off your shelves. All of it.
You’re going to find expired canned goods you forgot about, three half-empty bags of the same rice, and a spice blend from 2019 that smells like dust. That’s normal.
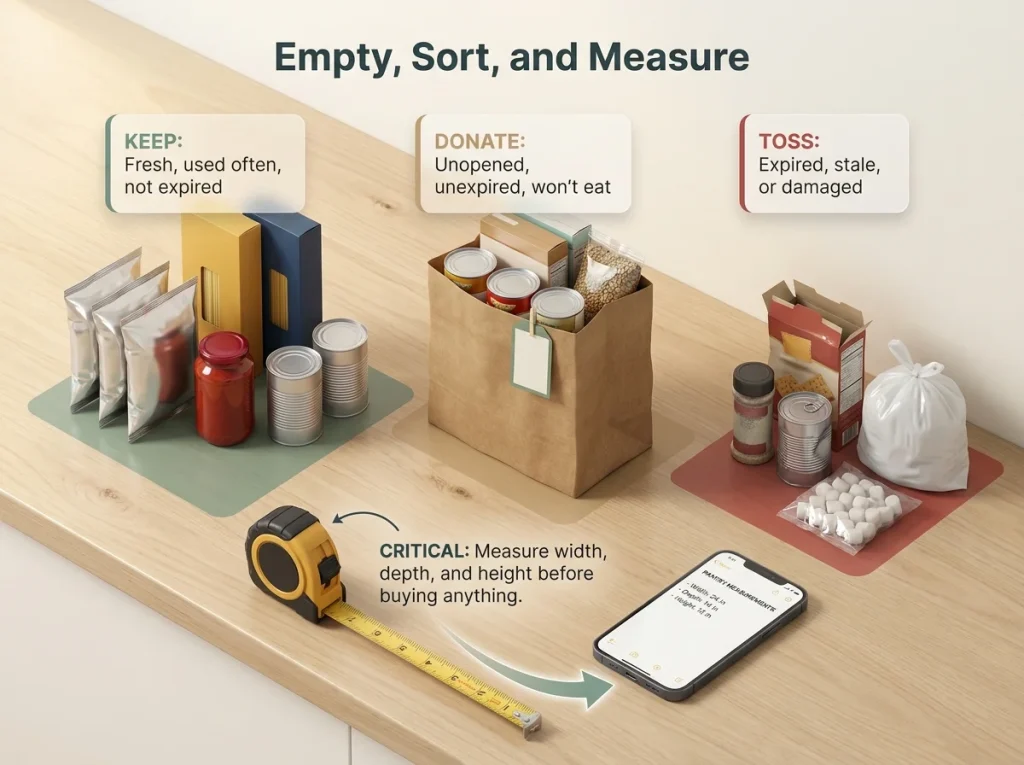
Check expiration dates on everything. Toss what’s expired, consolidate duplicates into one container, and set aside anything your family just doesn’t eat. If you’re unsure whether something is still safe, the USDA FoodKeeper app has shelf-life data for over 650 products. That jar of tahini you bought for one recipe eight months ago? Donate it or toss it. You’re not going to start making hummus regularly just because it’s in your pantry.
Pro tip: Wipe down every shelf while it’s empty. If you have wire shelving, vacuum the crumbs that fell through the gaps — this takes two minutes and makes the whole pantry feel different when you reload it.
Measure Before You Shop
This is the step everyone skips, and it’s why people end up with bins that don’t fit. Grab a tape measure and record three numbers: shelf width, shelf depth, and the height between shelves. Standard wire pantry shelves are usually 12 to 16 inches deep with 12 to 14 inches of clearance between them. Write these down on your phone before you walk into any store.
Those numbers determine everything. A bin that’s 11 inches wide fits a 12-inch shelf perfectly. A bin that’s 13 inches wide sits on the floor because it doesn’t fit anywhere. This single step prevents the most common budget-organization waste: products you bought that don’t work in your actual space.
The $0 Tier — Organize With What You Already Have
Repurpose Glass Jars You’re Already Throwing Away
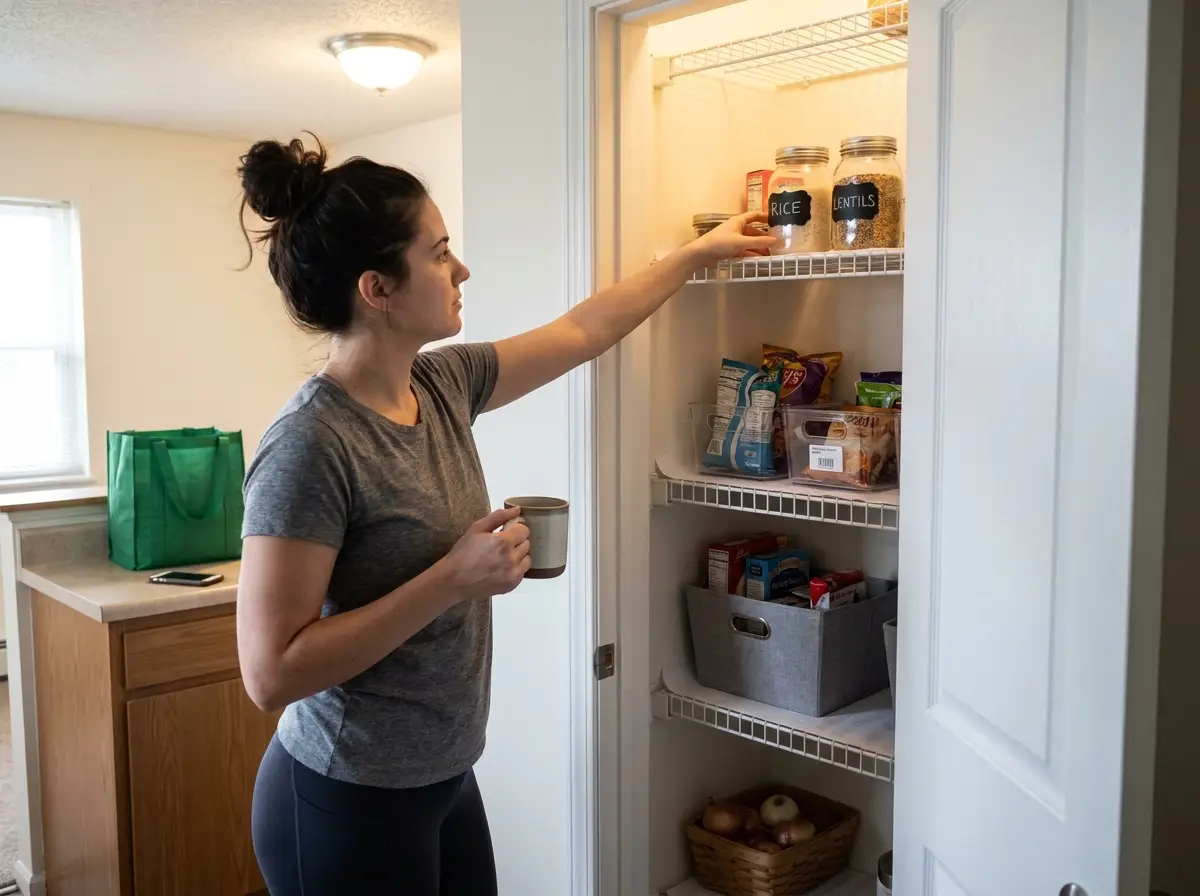
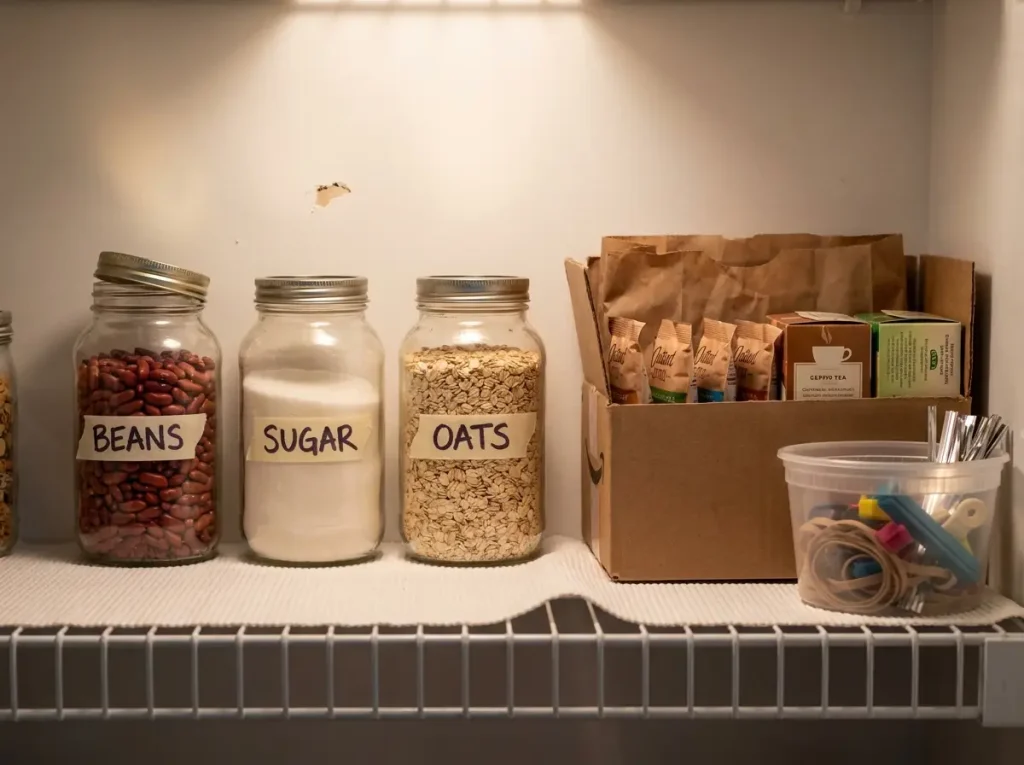
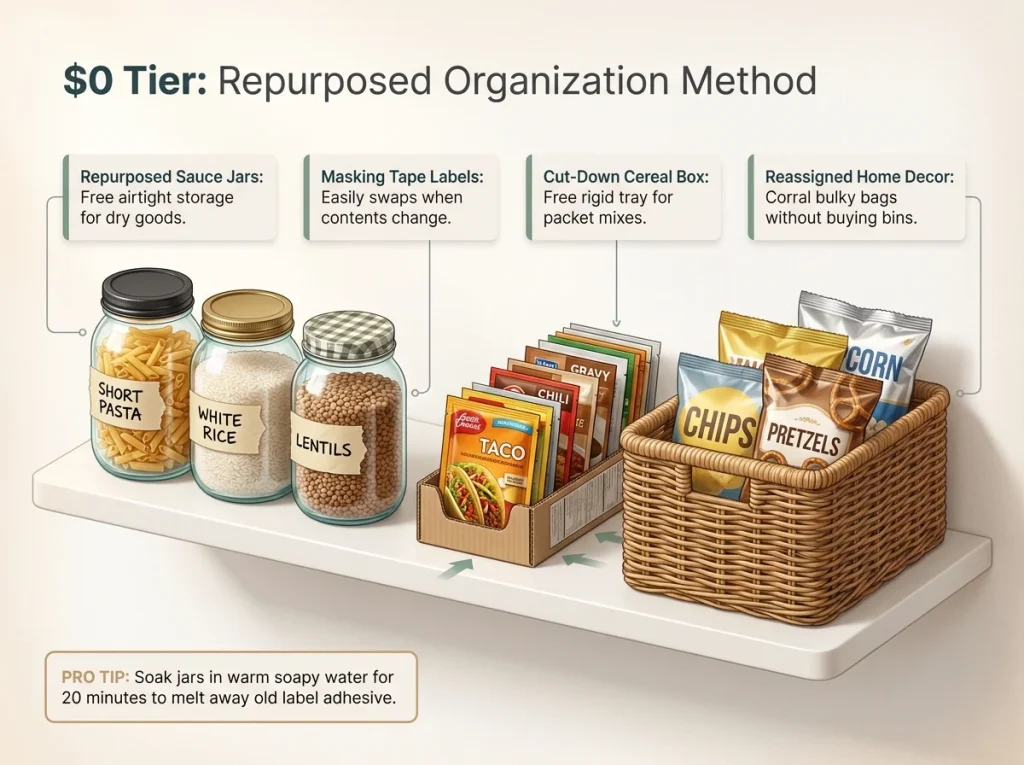
Before you spend anything, look at what’s in your recycling bin. Pasta sauce jars, pickle jars, jelly jars — these are free storage containers with lids. Wash them thoroughly, peel the labels (soak in warm soapy water for 20 minutes and the adhesive comes right off), and use them for dry goods like rice, lentils, oats, sugar, and flour.
They won’t match, and that’s fine. Your pantry isn’t a magazine shoot — it’s a tool that needs to help you find things fast. A mismatched set of clean glass jars with masking tape labels works better than an expensive matching set you can’t afford to complete.
Cardboard Boxes You Already Have
Shipping boxes, cereal boxes with the top flaps cut off, even shoe boxes — these work as category bins. Line them with a paper bag if you want them cleaner. One box for snack bars, one for tea and coffee packets, one for baking supplies. They’re free, they’re the right size for most shelves, and when they wear out in a few months, you replace them with another box you were going to recycle anyway.
Pro tip: Cut cereal boxes in half lengthwise and use the bottom half as a shallow tray for spice packets or seasoning mixes. The cardboard is rigid enough to slide in and out of a shelf without collapsing.
The Basket and Container Audit
Walk through your house and collect containers that aren’t doing important work elsewhere. That decorative basket on the shelf with nothing in it? Pantry bin. The plastic shoebox-sized container in the closet holding three random things? Pantry bin. Most homes have four to six containers sitting around that can be reassigned to pantry duty without buying anything.
This $0 tier alone gets most pantries functional. If you declutter, repurpose what you have, and group items by category, you’ve solved 70% of the problem without opening your wallet. If your pantry is the reach-in closet type with limited shelf space, the small pantry organization guide covers how to maximize every inch of a compact layout.
The Under-$15 Tier — Dollar Store and Budget Retail
What to Buy at Dollar Tree (and What to Skip)
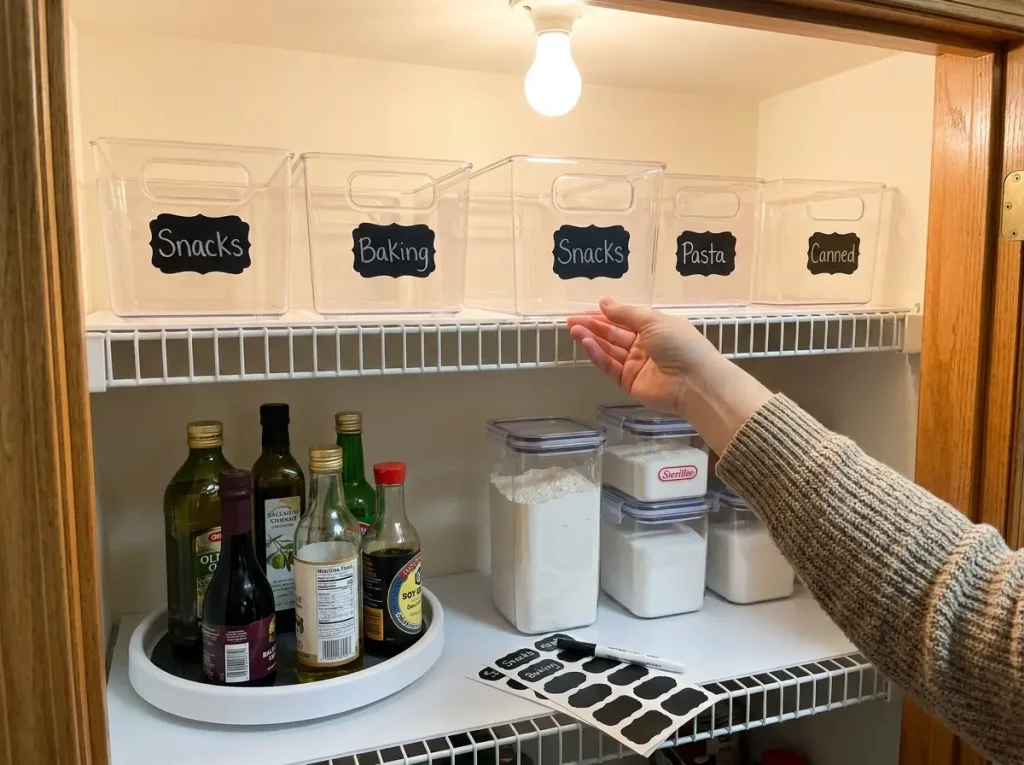
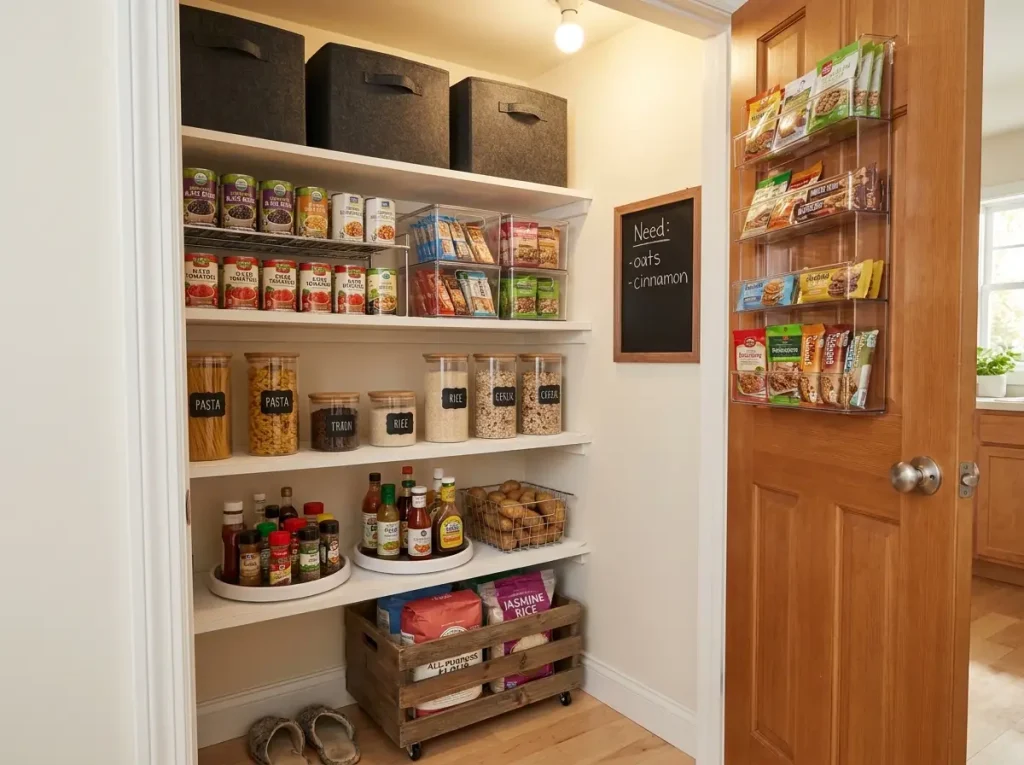
Dollar Tree is the go-to budget source for pantry organization, but not everything there is worth buying. The clear plastic storage bins (7.75 x 5.5 x 3 inches, $1.25 each) are solid for grouping lightweight items like snack bags, tea boxes, and packet mixes. Four of them cost $5 and give you a clean category system for one full shelf.
Skip the flimsy basket-style bins with woven texture — they look nice for about a month, then the plastic weave cracks at the corners. Also skip any container that doesn’t have a flat bottom, because it’ll rock on wire shelves and dump your spices.
The glass canisters with stainless steel lids ($1.25 each) are a genuine find — they hold a full box of pasta and look like containers that cost $4 to $5 at Target. Buy six to eight of these for your most-used dry goods and you’ve spent under $10 on storage that actually looks intentional.
Labels That Last on a Budget
A pack of chalkboard label stickers ($6-$8, pack of 80-120 with chalk pen) is the single best budget investment for pantry organization. Unlike printed labels, you can wipe and rewrite them when you switch what’s in a container. This matters on a budget because your containers will rotate — you’ll use a jar for rice this month and oats next month.
If even $6 feels like too much right now, masking tape and a permanent marker does the same job for $0. It looks rougher, but it works. The point is that every container gets a label, because unlabeled containers are the fastest way for a budget system to fall apart. You forget what’s in the opaque bin, you stop putting things back in the right spot, and within a month your categories are meaningless.
Pro tip: Label the shelf, not just the container. A small piece of masking tape on the shelf edge that says “baking” means even when someone grabs the wrong bin, the empty spot still tells them where it goes back.
The $12 Setup That Covers Most Pantries
Here’s what $12 actually buys you: four Dollar Tree clear bins ($5), four Dollar Tree glass canisters ($5), and a roll of masking tape you already own for labels. That’s enough to organize a standard four-shelf pantry into clear categories with visible contents. If you add chalkboard labels, you’re at $18 total, and the system looks like you spent $60.
The Under-$50 Tier — The Full Budget Makeover
When to Spend More Than Dollar Store Prices
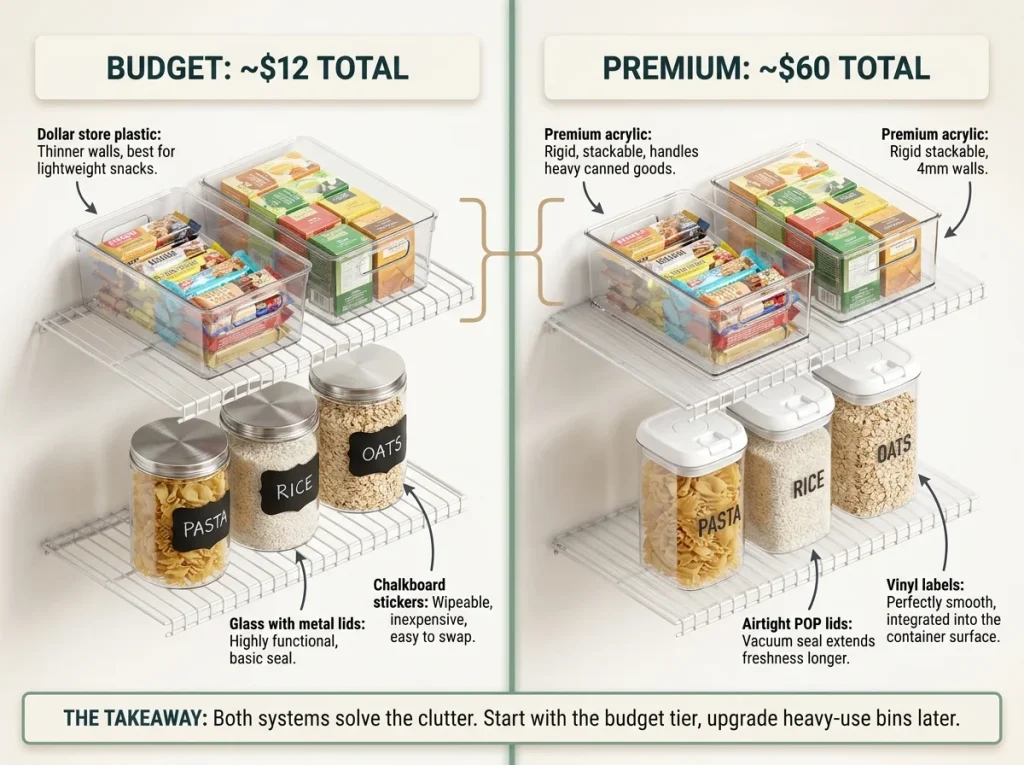
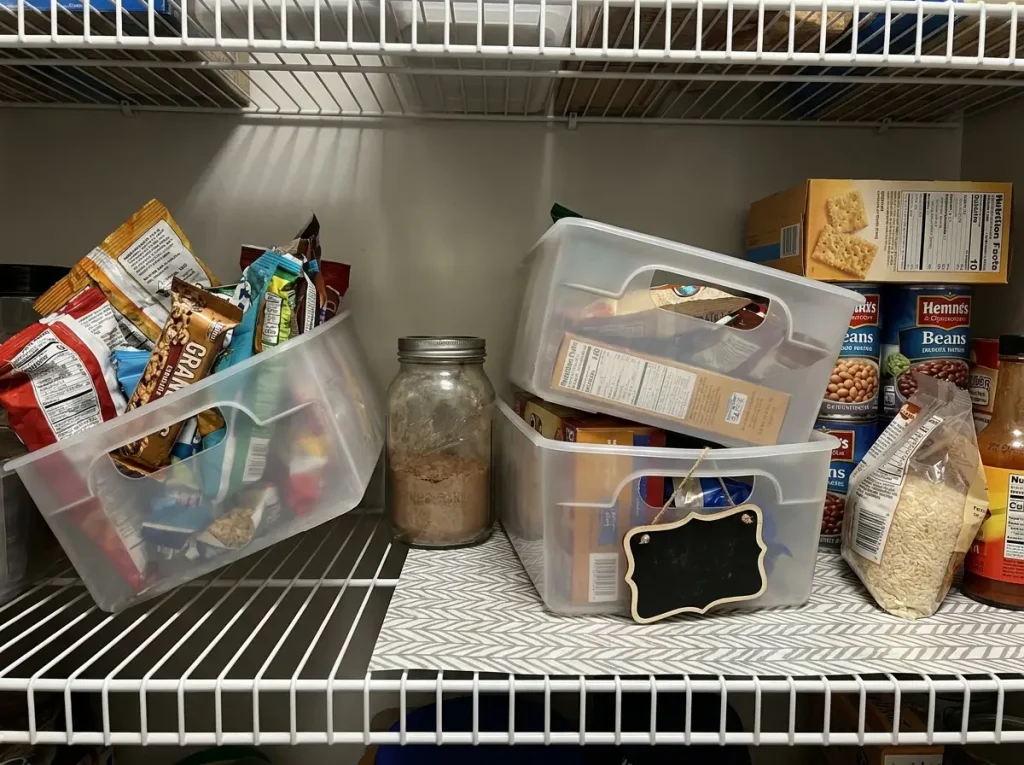
Dollar Tree bins work for lightweight items, but they have limits. Stack two of them with canned goods inside and the bottom bin warps within a month. The plastic is thin — it’s designed for a dollar, not for holding 10 pounds of canned tomatoes.
If you want bins that hold heavier items and last more than a year, the mDesign Stackable Plastic Storage Bins ($22 for a 4-pack, 10 x 6 x 5 inches) are the mid-range sweet spot. They fit standard 12 to 16-inch pantry shelves and the plastic is thick enough to stack without bowing.
You don’t need to replace every Dollar Tree bin with mDesign. Use the cheap bins for light stuff — snack bags, tea boxes, seasoning packets. Use the sturdier bins for heavy items like canned goods, jars, and bottles. Mixing price tiers is smarter than buying everything at the same level.
Shelf Liners and Turntables — The Two Upgrades Worth the Money
If you have wire shelving — and most rental pantries do — items slide, tip, and fall through the gaps. A Gorilla Grip Shelf Liner ($8-$12 per roll, 12 inches x 20 feet) solves this immediately. Cut it to fit each shelf, lay it down, and suddenly your bins sit flat and your jars stop tipping.
One roll covers five to six standard pantry shelves. It’s removable, so renters can take it with them.
For corner dead space or deep shelves where bottles get lost behind each other, a Copco Non-Skid Turntable ($8-$10, 9-inch diameter) makes everything accessible with a spin. Put oils, vinegars, and hot sauces on it. The non-skid base keeps bottles upright even on wire shelves, which is something the $3 plastic turntables from the dollar store can’t do — those slide across wire shelving the moment you spin them.
The Full Budget Breakdown
Here’s what a complete budget pantry makeover costs at each tier:
| Home Organization Budget Tiers | ||
|---|---|---|
| Tier | What You Get | Total Cost |
| $0 | Repurposed jars + boxes + containers from around the house | Free |
| Under $15 | Dollar Tree bins + glass canisters + tape labels | $10-$15 |
| Under $50 | Everything above + mDesign bins + shelf liner + turntable + chalkboard labels | $45-$50 |
Start at $0. Add the Dollar Tree layer when you can. Upgrade the heavy-use spots to mDesign when the Dollar Tree bins start to warp. This isn’t an all-or-nothing project — it’s a system you build up over time as your budget allows. For a full comparison of container types, sizes, and which ones fit specific shelf depths, see the best pantry storage containers guide.
Why Budget Pantry Systems Fall Apart (and the Fix)
The Three Reasons Your Organized Pantry Reverts
You organized it. It looked great. Three weeks later it looks like it did before. This isn’t a character flaw — it’s a systems problem, and budget setups are especially vulnerable to it.
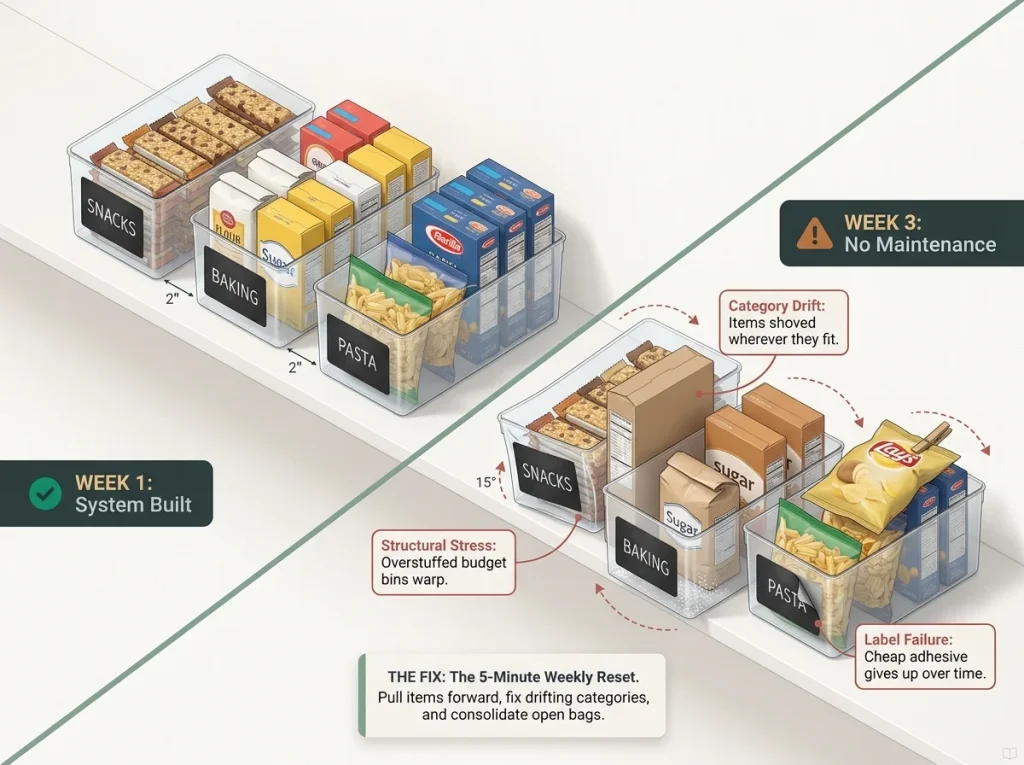
Reason 1: No labels. Without labels, “the snack bin” becomes “the bin where I put whatever fits.” Within two weeks, every category has drifted. Fix: label every single container AND the shelf spot it sits on. Double-labeling costs nothing and creates a visual system that even kids and distracted partners can follow.
Reason 2: Cheap bins that warp. Dollar store plastic bins flex under weight. Once a bin warps, it doesn’t stack right, it doesn’t slide right, and you stop using it. Fix: reserve dollar store bins for lightweight items only. Anything heavier than a box of pasta goes in a sturdier container.
Reason 3: No reset routine. Organization isn’t a one-time event — it’s a recurring ten-minute task. Without a weekly reset, items drift back to random shelves.
Fix: pick one day a week (I use Sunday evenings) and spend five to ten minutes putting everything back in its labeled spot. Check for expired items while you’re at it. This single habit is the difference between a system that lasts and a system that looks great for one Instagram photo.
The Five-Minute Weekly Reset
This is the maintenance system that makes everything above actually stick. Once a week, same day every week:
- Pull forward any items that migrated to the back of deep shelves
- Put anything that landed on the wrong shelf back in its labeled spot
- Consolidate duplicates — if you opened a second bag of rice, pour it into the jar with the first one
- Check one shelf for expiration dates (rotate which shelf each week — you’ll cover the whole pantry monthly)
- Wipe down one shelf if it needs it
Five minutes. That’s it. The system you built — whether it cost $0 or $50 — only works if you maintain it. The good news is that maintaining a labeled, zoned system takes almost no effort once the initial setup is done.
Pro tip: Do your reset right before you make your grocery list. You’ll see exactly what you’re running low on, avoid buying duplicates, and the pantry is fresh when you put new groceries away.
The full zoning system — grouping items by meal frequency instead of just by category — is covered in the pantry organization seed guide, which explains why meal-frequency zones outperform traditional category grouping.
Conclusion
Three Takeaways
A functional pantry doesn’t require matching containers or a $200 trip to The Container Store. It requires three things: decluttering before organizing, labeling everything (even with masking tape), and spending five minutes a week putting things back where they belong.
The Three-Month Check
In three months, check your Dollar Tree bins for warping — any bin holding heavy items that’s bowing needs to be replaced with something sturdier or reassigned to lighter duty. Check your labels for peeling. And check your categories: if a zone has become a catch-all for random items, it needs to be re-labeled or split into two zones.
Start Here
Pick the shelf that annoys you the most. Pull everything off it. Throw away what’s expired. Put back what remains in groups that make sense for how you cook. Label each group.
That’s your first shelf done — and it cost you nothing. Do the next shelf tomorrow.
Q1 How can I organize my pantry without spending any money?
Pull everything out, toss expired items, and group what remains by category. Use repurposed glass jars from pasta sauce or pickles for dry goods, cut-down cereal boxes as shelf trays, and masking tape for labels. Most homes have enough spare containers to organize a full pantry without buying anything.
Q2 What is the cheapest way to organize a pantry?
Dollar Tree bins at $1.25 each and glass canisters at $1.25 each are the lowest-cost purpose-made options. Four bins and four canisters cost $10 total and organize a standard four-shelf pantry into clear categories. Add masking tape labels for $0 and you have a functional system for under $12.
Q3 Are Dollar Tree pantry bins durable enough to last?
For lightweight items like snack bags, tea boxes, and seasoning packets, yes. For heavier items like canned goods or glass jars, no — the thin plastic warps under weight within one to three months. Use dollar store bins for light items and upgrade to thicker bins like mDesign ($22 for a 4-pack) for anything heavy.
Q4 How do I keep my pantry organized after the initial setup?
Set a weekly five-minute reset on the same day each week. Put items back in their labeled spots, consolidate duplicates, and check one shelf for expired items. This single habit prevents the slow drift that turns organized pantries back into chaos within a month.
Q5 What pantry organizers are worth spending money on?
Shelf liners for wire shelving ($8-$12) and a turntable for corner or deep-shelf spaces ($8-$10) deliver the most value per dollar. Both solve physical problems — items sliding and items hiding — that no amount of categorizing can fix on its own.