









In this article
You organized this dresser once already. Every drawer got emptied, everything got folded, and for about four days it looked like the photo you saved. Then one load of laundry went away in a hurry, and by Thursday the top drawer was a single unsorted layer again. That is not a discipline problem, and the fix is almost never a bigger drawer or a tighter fold. It’s two decisions nobody ever made: which drawer does which job, and where the one item that fits no category goes. This guide covers how to organize dresser drawers so the system survives past week one, drawer by drawer, including the parts most guides skip.
Quick Answer
Organize dresser drawers in five steps, in this order:
- Empty each drawer completely and sort into category piles.
- Assign every drawer one job based on how often you reach in.
- Match the fold and the divider to that drawer’s depth.
- Contain small items in compartments, not open piles.
- Leave the front empty for laundry and reset when the basket comes in.
Which Drawer Gets Which Job
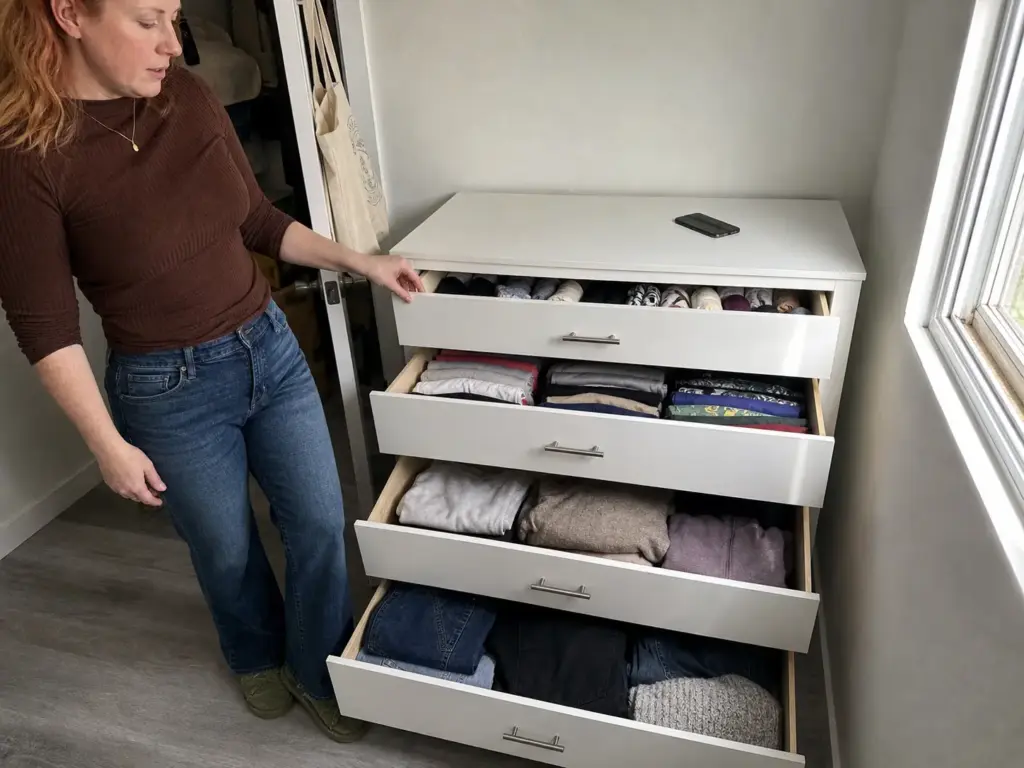
Most dressers were never loaded on purpose. Whatever came out of the dryer first went into whichever drawer happened to be open, and five years later that’s still the system. Nobody decided anything, which is exactly why nothing holds.
Deciding once fixes most of it, as long as the rule isn’t arbitrary. The pattern that holds up across real bedrooms puts small daily items in the top drawers at chest level, everyday wear like t-shirts and loungewear in the middle, and bulky or seasonal pieces like jeans and sweaters at the bottom. That isn’t tradition. It’s two physical costs stacked on top of each other: the drawer you open every single morning should be the one you don’t have to bend for, and the shallowest drawer physically can’t hold a bulky sweater well anyway.
Start by emptying the drawer, not by buying anything
Take everything out. All of it, onto the bed, sorted into piles by category rather than by owner or by color. This is where the quick purge happens too, and it needs about ten minutes of honesty: the shirt with the stretched collar, the socks with no partner, the three pairs of leggings you own because you couldn’t find the first pair. Those aren’t storage problems.
The sequence matters more than it sounds. Professional organizers recommend sorting by category before you ever touch a divider, and the reason is practical rather than philosophical. Until the piles exist, you don’t know how many compartments you need or what size they should be, and you have no read on real drawer capacity. Buying the divider set first is how people end up with eight compartments for four categories.
Bag the discards as you go rather than leaving them in a pile on the floor. Anything wearable goes straight to a donate bag and out to the car the same evening, because a donate pile that stays in the bedroom gets picked back through by Sunday and half of it returns to the drawer.
Do one drawer per session, not the whole dresser. A fully emptied four-drawer dresser at 9pm on a Tuesday becomes four piles on the bed that get shoved back in unsorted at bedtime. One drawer takes twenty minutes and actually gets finished.
The top-to-bottom assignment that actually holds
Once the piles exist, assign each drawer a single job and say it out loud. Underwear, socks and accessories take the top. Daily shirts and loungewear take the middle. Jeans, sweatshirts and anything seasonal take the bottom, where the drawer is deepest and you’ll open it least.
One drawer, one job. That rule does more work than any product in this article. A drawer serving two categories will be serving four by next month, because the boundary between two categories inside one drawer is imaginary and everyone in the house treats it that way.
What to do with the drawer that has no job yet
Nearly every dresser has one drawer nobody assigned. It’s usually the small one at the top right, or the awkward one in the middle, and right now it holds a phone charger, some receipts, a hotel sewing kit and one glove. In organizing threads people call it the miscellaneous drawer, and it’s not a storage failure. It’s a vacancy.
Assign it now, on purpose. Out-of-season overflow works. So does the shared-category drawer if two people use the dresser. What doesn’t work is leaving it undecided, because an unassigned drawer becomes the miscellaneous drawer by default, and that’s the drawer that quietly grows until it takes the one next to it.
Shallow Drawers and Deep Drawers Need Different Systems
This is the section that makes people think they’re bad at organizing. They watch a file-folding video, execute it beautifully in the deep bottom drawer, then try the same thing in the shallow top drawer and the stacks flop sideways the first time it slides. The technique didn’t fail. The drawer is the wrong height for it.
Here’s the dimensional reality nobody mentions: standard drawer height runs from 4 inches in a top drawer to 12 inches in the bottom one, and widths range from about a foot on the small drawers up to 28 or 30 inches on the wide ones. That’s a single piece of furniture with mixed depth drawers, asking for completely different containers at the top and the bottom, which is why one approach applied to a whole dresser leaves you with half of it organized.
Measure the inside, not the dresser
The trap here catches almost everyone once. A dresser listed at 20 inches deep often gives you only 14 to 17 inches of usable interior once the back panel and the drawer slide hardware are subtracted. So the bin that “should fit” arrives, sits a full inch proud of the drawer front, and the drawer won’t close.
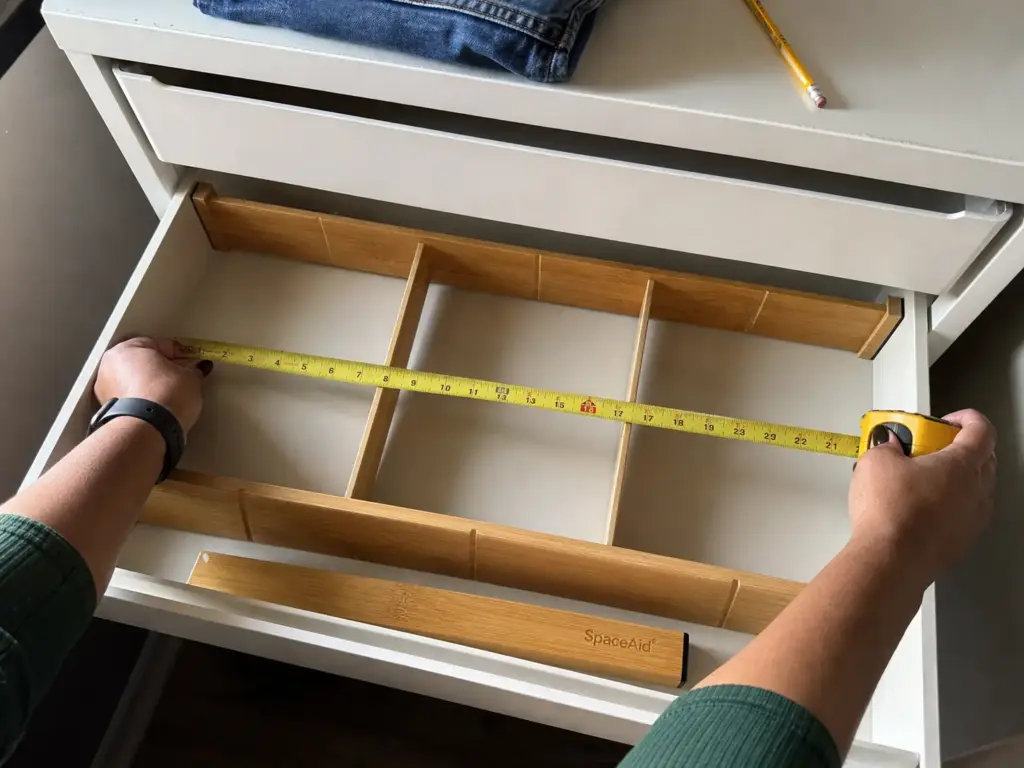
Open the drawer, put the tape measure inside it, and write down three numbers: front to back, side to side, and interior height from the drawer floor to the underside of the drawer above. Do it for the shallowest drawer and the deepest one, because those two drawer depth figures are the ones that will disagree. Write them on your phone before you shop, since every expandable drawer dividers listing states a range, and a range only helps if you know which end of it your drawer falls on.
Deep drawers: file-fold and stand things up
Deep drawers earn their space when clothes stand on edge instead of stacking flat, which is the whole stacking vs standing clothes question in one sentence. The file folding method turns the drawer into vertical storage. Every item is visible from above, so you stop excavating a stack to find the shirt at the bottom and then leaving the excavation behind. In a drawer with 8 to 12 inches of clearance there’s room for folded items to stand without tipping.
Adjustable dividers make it hold, and this is where sizing follows the drawer rather than the dresser. In a wide lower drawer, the SpaceAid Bamboo Drawer Dividers span an adjustable 17 to 22 inches, which covers the wide bottom drawers most dressers have. They’re spring-loaded against the drawer sides, so they need real drawer width to grip. In a narrow drawer they simply won’t tension.
Shallow drawers: flatter folds and low dividers
A 4-inch-deep top drawer can’t support a standing stack of anything bulky, so stop trying. One flatter layer, or roll fold clothes in rows, is the fold that survives being slid open twice a day. The conventional advice says use vertical folding everywhere. In practice, the shallow drawer is the exception, and forcing the technique there is what makes people abandon the whole system.
The divider changes with it. The Lifewit 8 Pack Drawer Dividers run 4 inches high with an 11 to 17 inch adjustable range, which is the low-profile match for a shallow top drawer where a taller panel would stand above the drawer sides and catch every time it closes. The tradeoff is real: at 4 inches they won’t corral a stack of jeans, so they belong up top and nowhere else.
That’s the whole point of buying two sizes. Buying dividers sized for “the average drawer” is the most repeated complaint in this category, because the top drawer turns out to be inches too narrow and the bottom too deep for the same set, and half the dresser stays chaotic while the other half looks great.
Spring-loaded dividers slide around every time the drawer opens hard. Two small adhesive furniture bumpers under each end stops it for pocket change, and it’s the difference between a divider that holds its line for a year and one you’re straightening every week.
Small Items Are Where Drawer Systems Break First
Big things stay folded. A t-shirt holds its shape because it’s large enough to, so the middle drawer usually survives. It’s the small stuff that migrates: socks slide under the pile, one earring ends up behind the underwear, a hair tie disappears entirely, and within a week the top drawer has become one unsorted layer again.
The distinction that matters here is between a divider and a compartment. A divider is a wall. A compartment is a box with a floor. When the item is smaller than the gap under the wall, the wall does nothing, which is why a divided sock drawer still turns into a sock heap.
Corral one category for free before you buy anything
Before buying, prototype. A shallow shoebox lid, or a gift box you were about to recycle, corrals one category for a week and tells you something a product page can’t: whether that category is big enough to deserve a purchased organizer at all. Half the time the answer is no, and you’ve saved the money.
Cut-down cereal boxes and shoe boxes sized to the drawer’s interior height are the standard DIY drawer dividers in organizing communities, and a shoebox divider works better than it sounds. Cover them with leftover wrapping paper if raw cardboard bothers you. For anyone doing renter-friendly organization on a deposit, this matters twice over: nothing here is screwed, glued or mounted to the furniture, so the whole system leaves with you. Prototype first, buy second is the sequence, and it’s the reverse of what most guides recommend.
When a compartment bin is worth it
The cardboard version stops paying off in one specific case: when the category is permanent, high-count and accessed daily. Socks and underwear qualify. You’re going to be rebuilding a cardboard sock grid every few months, and at that point even budget drawer dividers or a basic compartment bin have earned the money.
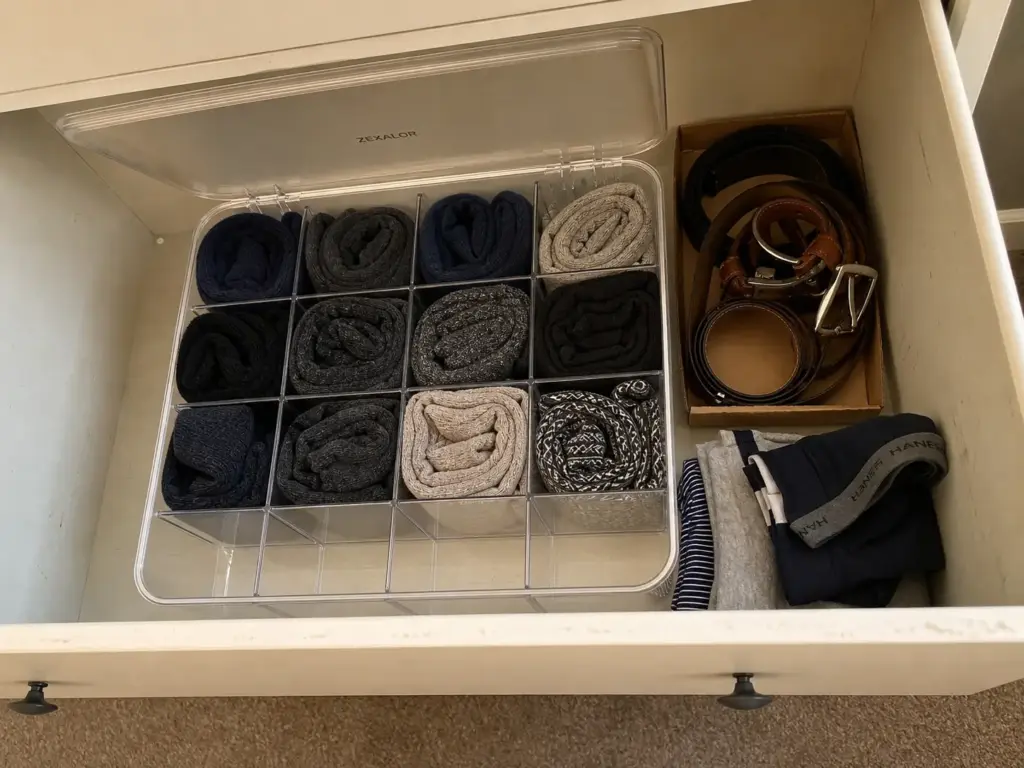
The ZEXALOR Socks Underwear Drawer Organizer is a 16-compartment divided bin with a removable lid, and the compartment count is the whole value: each pair gets a cell, so nothing slides under anything. The lid is the part to think about. Fitted on top it makes the bin stackable in a deep drawer, but in a shallow drawer it’s dead height, and a lid you have to lift twice a day is a lid that ends up leaning against the drawer wall forever. Take it off and don’t feel bad about it.
Jewelry and accessories get their own layer
Jewelry in a shared corner of the sock drawer is how chains get knotted, and untangling a necklace at 7am is its own small punishment. A cutlery tray or an egg carton works as a free jewelry tray, and for a small collection that’s genuinely the end of the problem.
For a collection that’s outgrown a tray, the Velvet Jewelry Drawer Organizer Trays work as a stacking accessory organizer, a 4-layer set with removable dividers, which matters most when drawer floor space is the constraint rather than height. Stacking upward is the only direction left in a full drawer. The caveat is the obvious one: four stacked layers means lifting three to reach the bottom, so put the pieces you wear weekly in the top layer and treat the lower ones as storage. If you want the full comparison of insert types rather than these two picks, there’s a deeper breakdown of drawer organizer inserts that fit real dressers.
Why the System Reverts and What Fixes It
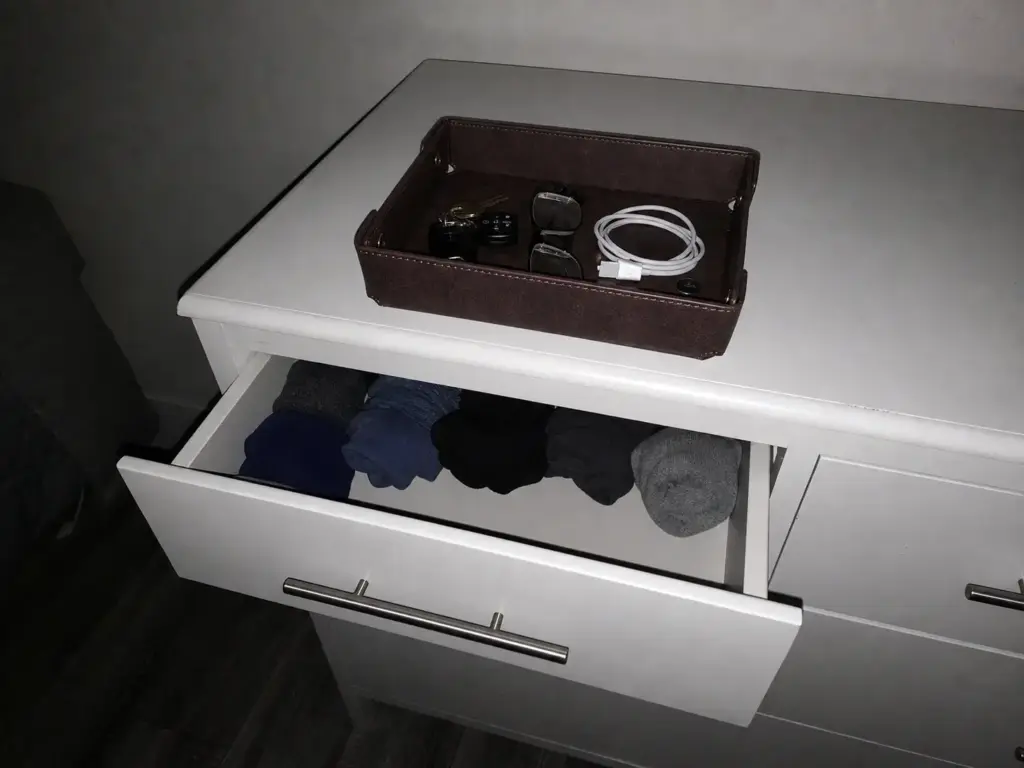
Every guide ends at the after photo. Real life starts the following Tuesday, when the laundry is warm, it’s late, and the drawer is already full. So here’s the part nobody writes: the three mechanisms that take an organized dresser apart, and what stops each one.
Leave landing room for laundry day
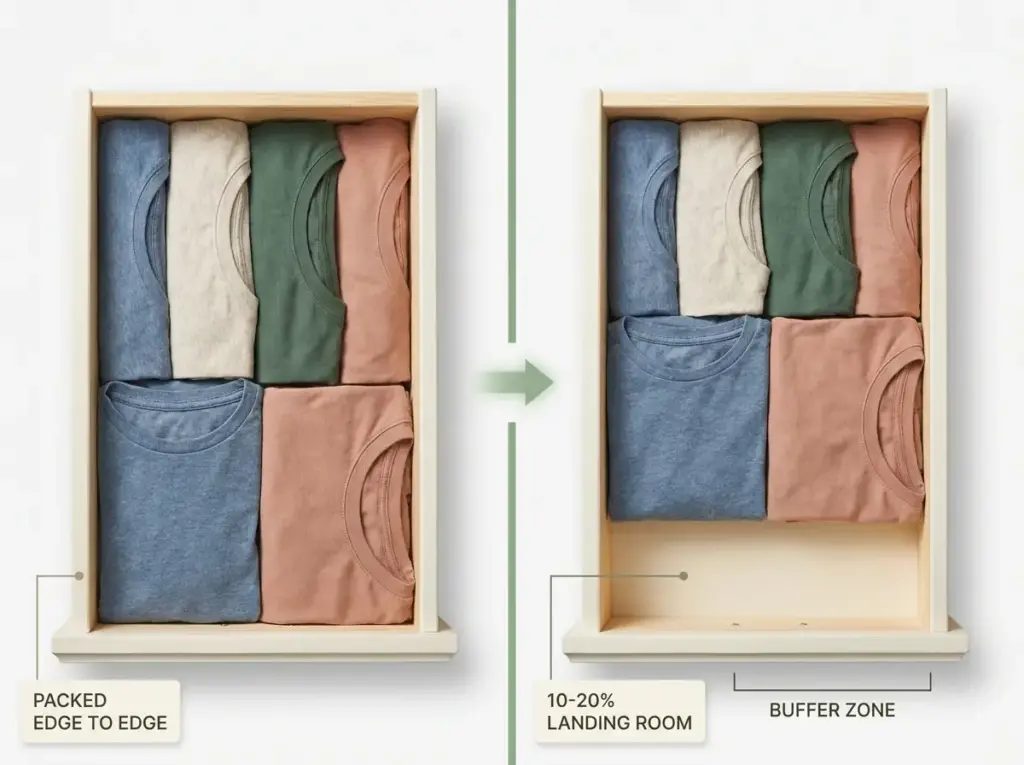
Mechanism one is the simplest and the most ignored. A drawer packed to its edges has nowhere to put clean laundry, so the clean laundry gets pressed in on top of the existing rows, which collapses the rows. Do that twice and the system is gone.
Leaving roughly 10 to 20 percent of each drawer empty is the buffer that prevents it. Not a tenth of a drawer wasted, but a tenth of a drawer doing the actual job of absorbing a laundry cycle. If the drawer is already full at the end of the reorganization, the category in it is too big for that drawer, and the answer is moving something out rather than folding tighter.
Put the gap at the front of the drawer, not the back. A gap at the back is invisible when you slide the drawer open, so the clean stack still lands on top of the folded rows out of habit. A visible empty strip behind the drawer face is a prompt: that’s where this goes.
And there’s a diagnostic hiding in that buffer. If the front gap has vanished two weeks after you set the drawer up, nothing failed at the folding level. The drawer is simply holding more clothing than it has room for, which is a decision about volume, not a technique problem, and no fold in existence fixes it.
Fold to a standard you’ll repeat when you’re tired
Mechanism two is over-engineering. NAPO’s own guidance for maintenance is blunt about it: fold to a standard you can keep up. That’s effectively an admission that most of what gets demonstrated online is built for the demo, not for week three.
I used to think the more precise fold was always the better one. After reading enough versions of the same collapse story in organizing threads, the pattern is hard to miss: the elaborate system is abandoned the first night someone puts laundry away exhausted, and once it’s broken in one drawer nobody rebuilds it. Pick the simplest fold that keeps items visible, then use it every time. A mediocre fold performed for a year beats a beautiful one performed for a week.
Give the stray item a home outside the drawer
Mechanism three is the one that actually kills systems, and it’s tiny. It’s the single item that fits no category: a charging cable, a receipt, a spare button, one glove. Every organizing guide sorts every drawer and skips this, and that’s the crack the whole thing falls through, because that item has to go somewhere and the nearest drawer is where it goes. Then the next one joins it. Within two weeks there’s a junk drawer where the accessories drawer used to be.
The instinct is to answer this with a stricter rule: everything gets a category, no exceptions. That fails for a boring reason. The stray item is stray precisely because it belongs to no category yet, so the rule has nothing to act on and the item goes in the nearest drawer anyway.
The fix is physical and it lives outside the drawers entirely, because the stray item doesn’t need a category, it needs a surface. A shallow dish you already own works from tonight. If you’d rather it look intentional on top of the dresser, the CASIRENA Faux Leather Valet Tray is a shallow catch-all sized for keys, cables and small items, and the low wall is deliberate: you can drop something in without looking. Its limitation is also its function. It fills up, and when it does that’s your signal to spend two minutes putting things where they live rather than a sign you need a bigger tray.
Shared Dressers and the Laundry-Day Reset
A system that works for one person can still fail with two, and every system fails without a trigger. This section is short on purpose, because a maintenance routine you can explain in three sentences is the only kind anyone actually does.
Split by drawer, not down the middle of one
When two people share a dresser, split by whole drawers. Never down the middle of a single drawer. An internal boundary is a mental line, and mental lines erode the first time someone is in a hurry with an armful of laundry, whereas a top-two/bottom-two or left-column/right-column split is a physical fact that survives being tired. It’s the same split-by-zone logic that works for a shared closet, just applied to a smaller container.
In a kid-and-parent overflow situation, give the shared categories the worst drawer on purpose. Seasonal items and out-of-rotation clothes belong in the hardest-to-reach drawer precisely because neither person needs daily access to it, which turns the awkward drawer from wasted space into the right space.
Then say the assignment out loud, once, to whoever else uses it. The classic argument about which drawer is the sock drawer only exists because two people each decided privately and both were sure they were right.
Make laundry day the trigger
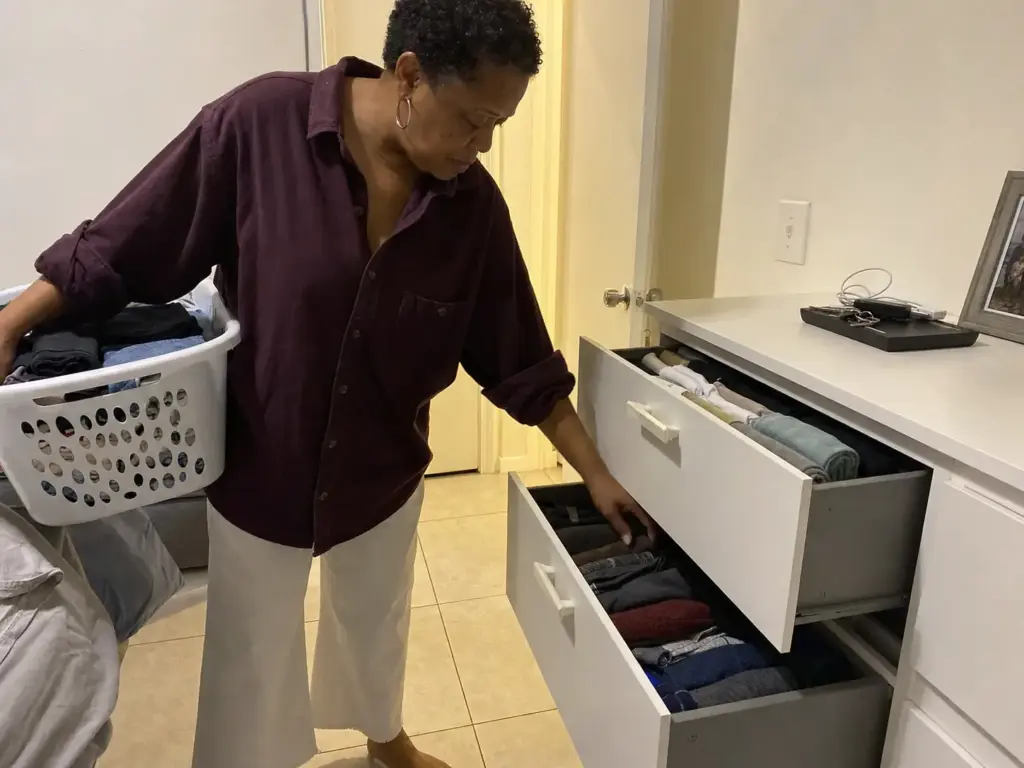
A reset needs a trigger, not a schedule. Nobody does a calendar reminder to refold a drawer. What works is attaching it to something that already happens, so the laundry day reset becomes the maintenance routine: the moment you carry the basket into the bedroom, straighten whatever got shoved in crooked, put the tray’s contents where they belong, and close the drawers. Two minutes, and it’s the only drawer organization upkeep this system asks for.
One safety note while you’re at it, because a reorganization means two or three drawers open at the same time. That’s exactly the scenario the federal stability standard that now governs every new dresser sold in the US tests for, with multiple drawers extended and simulated child weight applied. Anchor the dresser to the wall before you start pulling drawers, and not only in a kid’s room. CPSC recorded 234 tip-over fatalities from clothing storage units between 2000 and 2022, and a strap kit is a short job with a drill.
If you share the dresser, do the first reorganization together, even if one person does most of the folding. A system designed by one person and imposed on another has a shelf life of about three weeks. The person who helped decide where socks go is the person who puts socks back there.
Start With the Drawer That Annoys You Most
Three things carry this dresser organization system past week one. Every drawer gets one job, assigned by how often you reach in and how far you bend, not by whatever got folded first. Shallow and deep drawers are separate problems, so match the fold and the divider to the drawer instead of to the dresser. And the reverting happens for two reasons you can fix in an evening: no landing room for fresh laundry, and no home for the stray item.
In three months, open the drawer you use most and check whether the empty space at the front is still there. If it’s packed to the edge again, that category has outgrown its drawer, and the answer is moving something down a level rather than folding tighter.
Start with the drawer that annoys you most. Empty it, give it one job, leave room at the front. If it’s still holding after two laundry cycles, do the next one.
For the full seven-step method that this drawer-level guide sits inside, including the measure-and-zone sequence for the whole piece of furniture, see the complete guide to dresser organization.
Frequently Asked Questions
01What goes in each drawer of a dresser?
Small daily items like underwear, socks and accessories go in the top drawers, everyday wear in the middle, and bulky or seasonal items at the bottom. The logic is reach frequency plus drawer height: the drawer you open daily shouldn’t require bending, and top drawers are too shallow for bulky items anyway.
02How do you set up dresser drawers so they stay organized?
Empty each drawer completely, sort into category piles, then give each drawer a single job before placing any divider. Leave 10 to 20 percent of every drawer empty so fresh laundry has room to land, and give stray items an assigned spot outside the drawers.
03What is the KonMari method for drawer organizing?
The KonMari approach files clothes vertically so each item stands on its edge and stays visible from above, instead of stacking flat where the bottom of the pile disappears. It works best in deeper drawers with enough vertical clearance. Here’s the full KonMari method walkthrough.
04What are popular drawer organizer ideas that don’t cost anything?
Cut-down cereal boxes or shoe boxes sized to the drawer’s interior height work as free dividers, and a shoebox lid makes a solid temporary corral for one category. Prototype for a month first. If the free version holds and you use that category daily, a purchased adjustable divider has earned it.
05How do two people share one dresser without the system falling apart?
Split by whole drawers rather than down the middle of a single drawer, since an internal boundary erodes the first time someone is in a hurry. Give the shared or seasonal categories the hardest-to-reach drawer, because neither person needs daily access to it.