







In this article
You watched the video, paused it twice, and folded an entire drawer of t-shirts into neat standing rectangles. It looked exactly like the photo. Then you opened that drawer a week later and the front row had slumped sideways into itself like a row of dominoes that gave up. The KonMari folding method works, and Marie Kondo’s sequence is genuinely the best fold most people will ever learn. What nobody tells you is that your drawer’s interior height, not your technique, decides whether the fold survives past day three. This guide covers the fold itself, garment by garment, and then the four things that keep it standing.
Quick Answer
The KonMari fold turns any garment into a self-supporting rectangle in six moves:
- Smooth the garment flat, face down, and brush out the wrinkles by hand.
- Fold both sides into the center to make a long rectangle.
- Fold the rectangle in half, top to bottom.
- Fold in half again (or in thirds) until the bundle is compact.
- Stand it on the table. If it tips, fold once more.
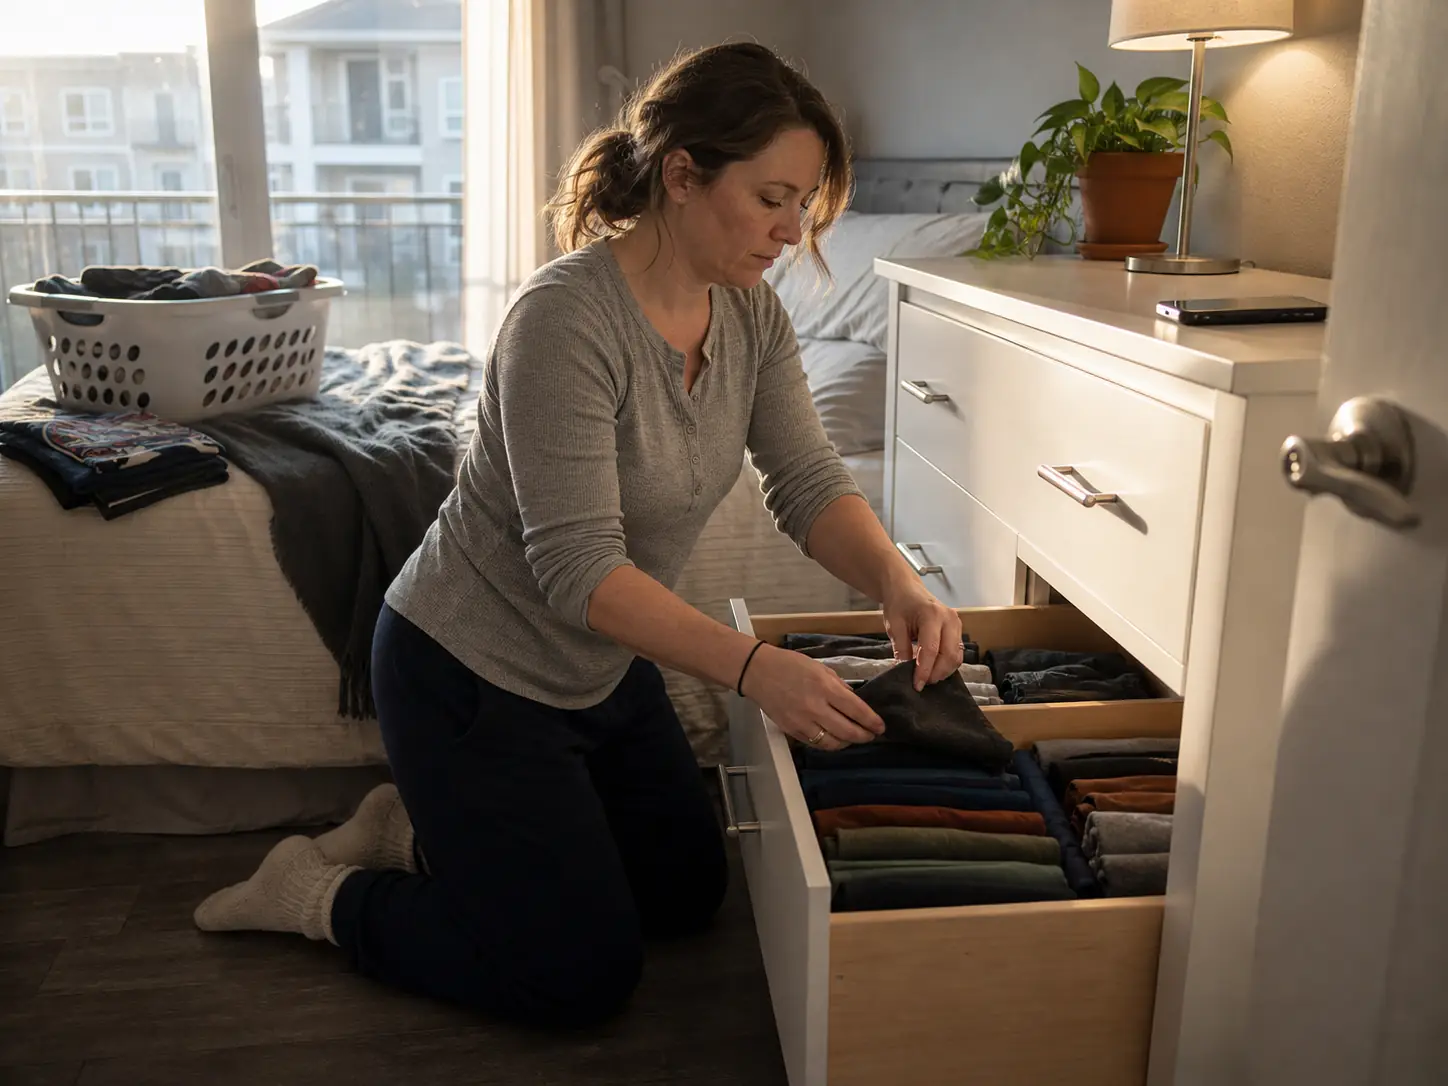
- File it into the drawer in a row, standing upright, never in a stack.
How the KonMari Fold Actually Works
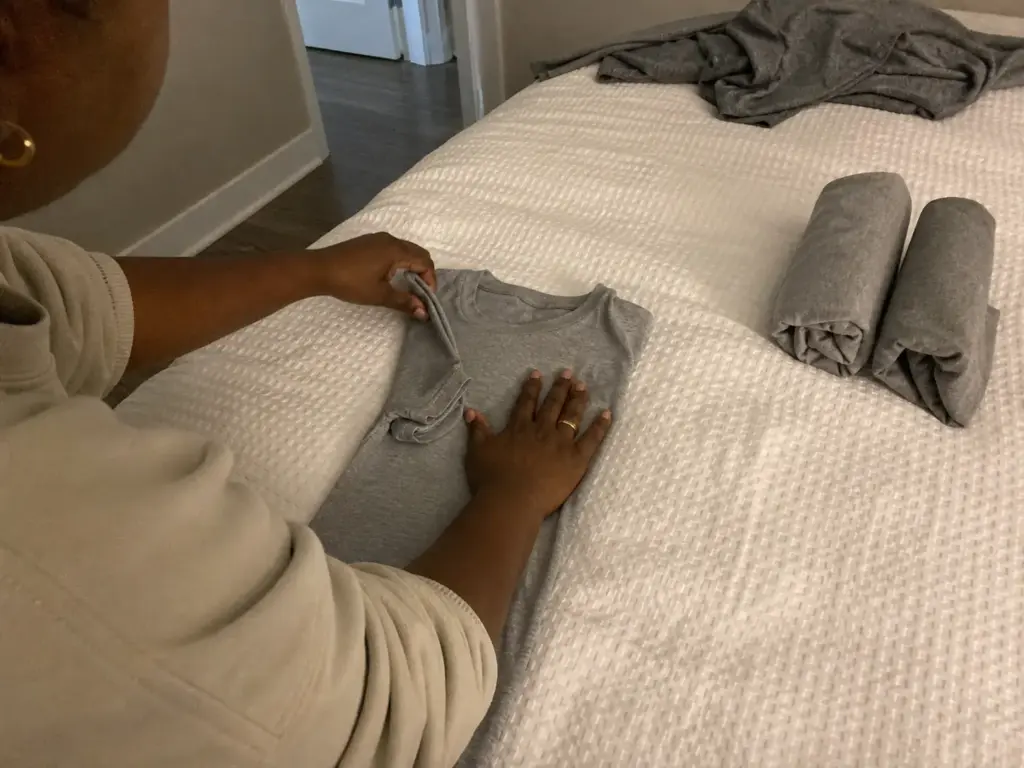
Every tutorial shows the hands moving and skips the only question you have while standing at the dresser: how do you know when you’ve folded it enough? Not “how many folds,” which changes with every garment. The answer is a physical test, and it takes two seconds.
The method itself comes out of the full KonMari method, which starts with decluttering by category before a single item gets folded. Tidying by category, not by room, is the sequence Marie Kondo built the whole system on, and decluttering before folding is not an optional warm-up. Folding a drawer you haven’t decluttered is just organizing things you were going to donate anyway. Assume you’ve done that part.
The basic sequence, step by step
Lay the garment face down and smooth it with your palm. Fold one side toward the center, tuck the sleeve back along that fold line, repeat on the other side. You now have a long rectangle roughly the width of your hand span. Fold it in half top to bottom, then in half again, and check whether it holds.
Marie Kondo frames that smoothing pass as part of the method rather than a decorative flourish, and it earns its place for a practical reason. Running a hand across the fabric is how you catch the stain on the hem, the seam coming apart, the shirt you have not worn since 2023. You’re auditing while you fold. Call it spark joy or call it a quality check on your own wardrobe; the hand does the same thing either way.
The standing test (how you know you folded enough)
Set the folded bundle on the table on its narrow edge and let go. If it stands, you’re done. If it tips over, fold it one more time and test again. That’s it.
This single test replaces every “fold in thirds” instruction you’ll read, because thirds are right for a cotton tee and wrong for almost everything else. A thin camisole may need four folds to hold itself up. A flannel shirt might need two. The garment tells you.
Run the standing test on the bed, not the floor. A mattress has just enough give that a marginally folded bundle stays up, which means anything that stands on a soft surface will definitely stand on a hard drawer bottom. Test on the surface that’s easier to fail.
Why file folding beats stacking
In a stack, the shirt you want is always the third one down, and pulling it out topples the two above it. In a filed row, you pull one item straight up and nothing else moves. That is the whole mechanical argument, and it’s why professional organizers rely on file folding to avoid the toppling-stack problem rather than treating it as a branding choice.
The wrinkle prevention benefit follows from the same physics. Nothing is pressing down through a pile, so nothing gets creased by the weight of six other garments sitting on it for a week. You still get fold lines. You just stop getting the flattened, compressed look that a bottom-of-the-stack shirt comes out with.
And the second payoff is drawer visibility: a row of standing folds shows you every item at once, the way files show you every tab. Vertical folding is really just a visibility system that happens to save space.
Fold Height Is Decided by Your Drawer, Not the Tutorial
Here is the thing that makes or breaks this entire method, and no folding guide in the search results says it out loud. The tutorial folds on a bed. On a bed, every fold stands beautifully, because nothing is closing on top of it. Your drawer has a ceiling, and that ceiling is lower than you think.
A garment folded to the standard KonMari height stands roughly 3 to 5 inches tall, and the method assumes drawers running about 4 to 8 inches deep on the inside. Do the arithmetic on the shallow end of that range and the problem shows up immediately.
Measure the drawer interior first
The number printed on the dresser box is the exterior. Interior depth runs 3 to 6 inches smaller once you account for the drawer’s own construction and the slide hardware underneath it. A dresser advertised with 8-inch drawers can easily give you 4 inches of usable interior height in the top one.
So measure the inside. Drop a ruler into the empty drawer, note the drawer interior height from the base to the top edge, and write it on a sticky note stuck to the dresser side. Same ruler check applies to measuring the drawer interior before buying dividers, and it takes about ninety seconds for a whole dresser.
Match fold height to the drawer it goes in
Once you have the interior number, the rule writes itself: fold one extra time for the shallow drawer, one fewer for the deep one. The same t-shirt gets two different fold heights depending on which drawer it lives in. Nobody says this because it sounds like it contradicts the method. It doesn’t. The standing test is still the standing test; you’re just adding a ceiling to it.
A shallow top drawer is also where divider height starts to matter. The Lifewit 8-Pack Drawer Dividers run 4 inches high and adjust from 11 to 17 inches, which is the one divider height that suits a shallow top drawer instead of fighting it. Taller dividers in a 4-inch drawer stick up past the drawer edge and catch on the frame every time you close it. The tradeoff is the short span: at 17 inches maximum they won’t cross a wide bottom drawer, so they’re a top-drawer product, not a whole-dresser solution.
What “it doesn’t close right” is actually telling you
A drawer that needs a shove to close is not a hardware problem nine times out of ten. It’s the front row of folds catching on the underside of the drawer above, getting compressed a little more each time, and eventually giving up and lying down. That’s the drawer that looked perfect on day one and toppled by week one. It was never sloppy folding.
Fold your target height a half inch under the drawer’s interior clearance, not flush to it. That half inch is what lets you slide a hand in and pull an item straight up without dragging the whole row with it. Flush-to-the-ceiling folds look tidier and are miserable to actually use.
How to Fold Every Garment in Your Dresser
Every guide teaches the t-shirt and then quietly stops. The drawer that defeats people is the one with camisoles, sports bras and dri-fit leggings in it, because that’s the stuff that slips out of a fold and refuses to hold a crease.
Shirts, short-sleeve and long-sleeve
The short-sleeve tee is the reference fold: sides to the center, sleeves tucked back along the fold line, then halved until it stands. Long sleeves change one move. Fold the sleeve back on itself along the body of the shirt rather than running it diagonally down the rectangle, because a diagonal sleeve adds thickness on one side and the finished bundle leans.
Button-downs get folded with the buttons done up (top, middle, bottom is enough) so the front doesn’t gape open mid-fold. The fold vs hang call is simpler than people make it: anything that genuinely has to stay crisp for work goes on a hanger, method or not.
Pants, jeans and shorts
Fold the pants in half at the inseam first so the legs line up, then treat the whole thing as a rectangle and halve it until it stands. If there’s a thick waistband or fly, tuck the crotch section inward before you start halving. That’s the single lump that makes jeans fold lopsided.
Thick denim gets one fold fewer than a chino. Push denim to the same fold count as a lightweight pant and you get a hard little brick that stands fine and takes up double the width.
Camisoles, tanks and slick fabrics
Narrow straps and slippery synthetics are the two things that undo a fold. Fold the straps into the body of the garment before you fold the sides in, so nothing is loose to catch and unravel the bundle when you pull a neighbor out.
Slick activewear needs a firmer hand than cotton. Dri-fit and slick synthetics behave differently in a drawer, and the honest answer is that leggings hold a fold better rolled tight than filed flat. I used to fold everything by the book, no exceptions. Enough “why won’t my leggings stay folded” threads later, I switched: roll the slick stuff, file the rest, and keep the rolls in their own compartment so the two systems don’t mix.
Socks, underwear and bras
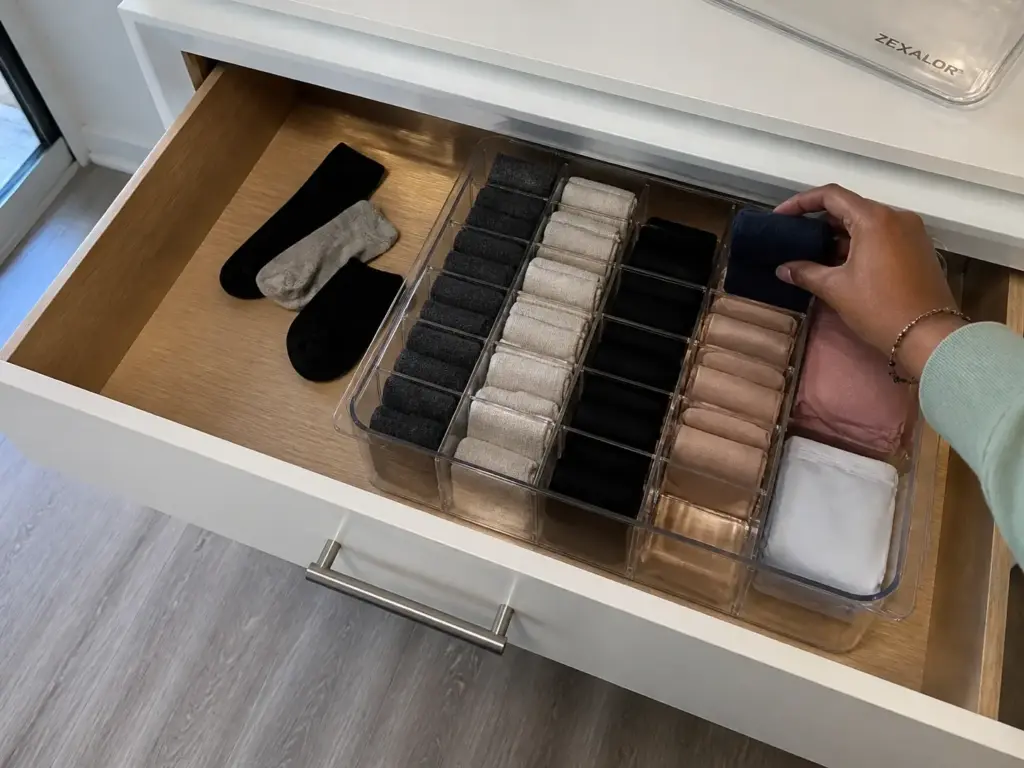
Never ball your socks. Rolling one sock inside the other stretches the cuff permanently, which is why old socks slide down. Fold the pair flat instead: lay one on the other, fold in thirds, file the little rectangle upright.
Bras keep their cup shape. Nest one cup inside the other, fold the band and straps behind, and file them standing rather than flattening them into a stack. A molded cup that gets crushed under a pile does not come back.
Small items are also the one category where a good fold isn’t enough, because a two-inch rectangle has nothing to lean against. A compartment bin solves what dividers can’t at that scale: the ZEXALOR Socks Underwear Drawer Organizer gives each pair its own 16-compartment slot so nothing migrates when the drawer slides. The limitation is that its compartments are sized for socks and briefs, so bulkier boxer briefs or padded bras will over-fill them.
Fold every item in one category to the same width, and use your widest garment in that category to set it. Uneven widths within a row are the quiet reason a drawer that stood fine on setup day collapses after a few refolds — the narrow ones tip into the gaps the wide ones leave behind.
Why Bulky Sweaters and Hoodies Refuse to Stand
You folded the hoodie exactly the same way as the t-shirt and it slumped like a beanbag. That is not a technique failure, and it is not you. The item is physically too thick to hold its own weight at that height, and Marie Kondo’s own team says as much.
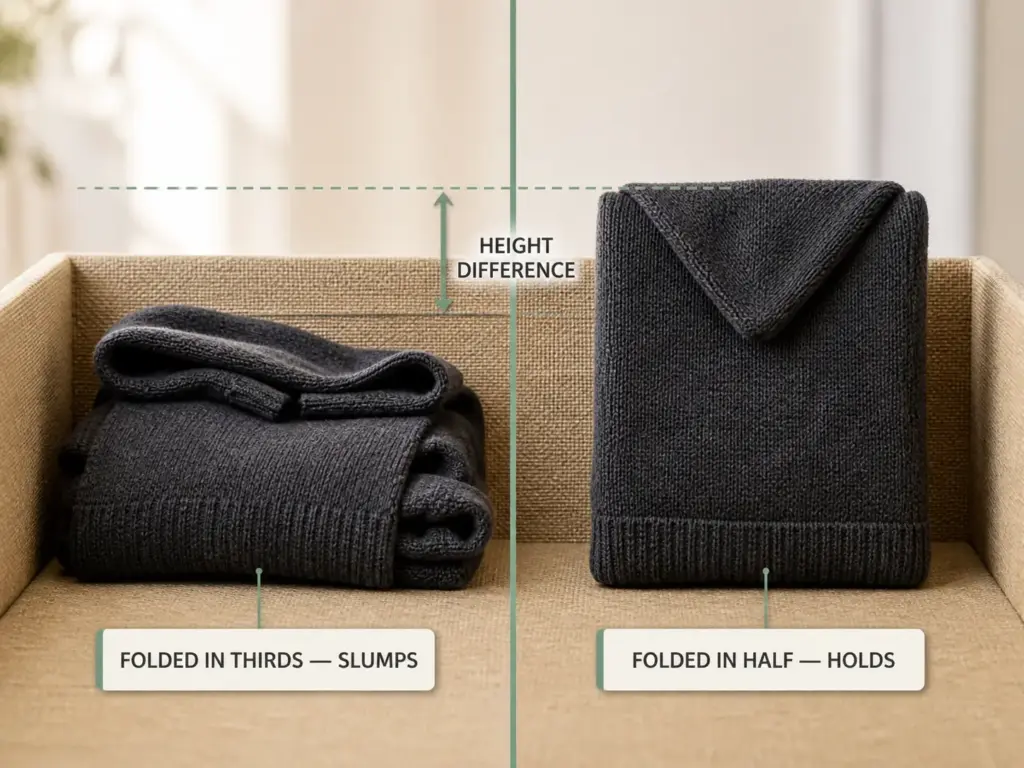
Fold in half, not thirds
Thickness doubles with every fold. A chunky knit that starts at half an inch is at two inches after two folds, and by the time it’s compact enough to be “standard height” it’s a squat wide block with a low center of gravity and no way to balance on its edge. It reaches maximum width before it reaches stable height.
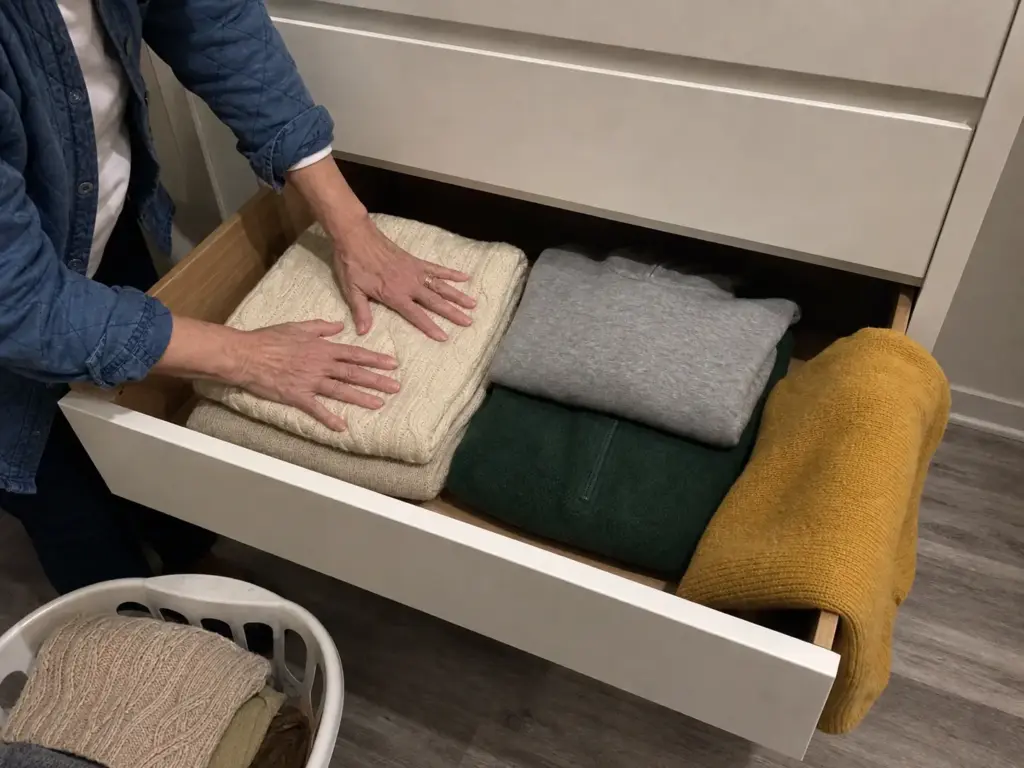
The fix is to stop folding early. Marie Kondo’s own team addresses bulky items in their folding FAQ: fold thick sweaters and fleece in half instead of thirds, and treat this as the one case where stacking beats standing. This applies to chunky sweaters, fleece, hoodies, sweatshirts, and anything with a hood or a heavy ribbed cuff.
Stack short piles instead of standing them
Bulky knits go in the deep bottom drawer, stacked two or three high, and no taller. A three-item pile stays put and you can still see what’s in it. A seven-item pile is a stack again, with all the toppling that comes with it.
Fold every knit in the pile to the same width or the stack splays outward at the corners within a week. Same width rule as the shirt rows, different reason: here it’s what gives the pile a flat, even face to hold together against. For the sweaters that don’t fit even the bottom drawer, where bulky knits should actually live is usually a shelf or a bin, not a dresser at all.
Setting Up the Drawer So the Folds Stay Standing
A perfect fold in an empty drawer falls over the first time you take something out of it. Rows need walls. Tutorials skip this because an empty demo drawer never has the problem, and neither does a drawer photographed the same afternoon it was filled.
Before any of this, each drawer needs a job. Assigning each drawer a category before anything goes back in is the prerequisite, not an optional refinement, because a drawer holding four unrelated categories will never hold four tidy rows.
Why a filed row falls over
A full row supports itself. Every bundle leans very slightly on its neighbors, and the row holds as one unit. Take one item out on a Tuesday morning and you have opened a gap: the two bundles on either side now have nothing to lean against and they fold into the space. By Thursday the whole row has migrated sideways.
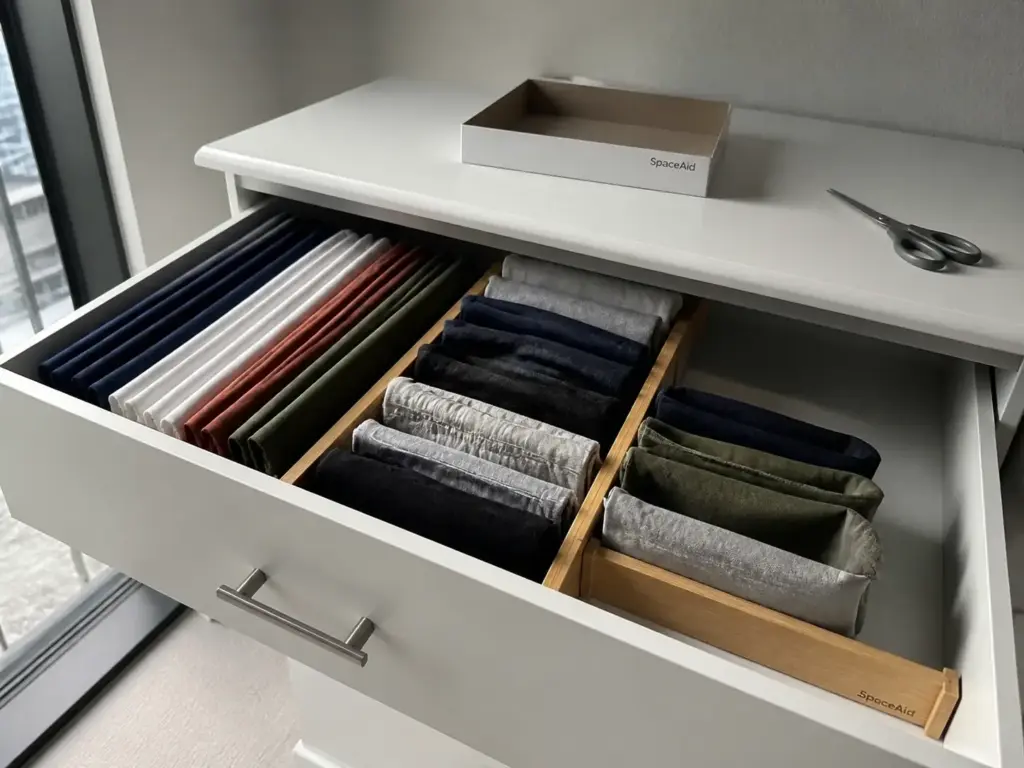
Dividers exist to break the drawer into lanes narrow enough that a row can only lean so far before it hits a wall. That’s the mechanical job. Neatness is a side effect.
The free version — shoeboxes cut to height
Before you buy anything, go get a shoebox. Cut the sides down to just under your drawer’s interior clearance and drop the box in. Shoebox cardboard is rigid enough to hold a row of standing folds, the footprint is close to a small drawer compartment already, and the lid gives you a second, shallower container for free.
This is the no-buy organization move budget threads reach for first, and it works well enough that plenty of people never move past it. Cut two or three, run the drawer for a month, and see whether the lanes you drew are the lanes you actually want. It’s a cheap way to prototype before you spend anything.
When it’s worth buying dividers or boxes
Buy when the cardboard starts sagging, or when you want expandable dividers that adjust to a drawer width instead of a fixed box. For a wide dresser drawer, the SpaceAid Bamboo Drawer Dividers adjust across a 17 to 22 inch span and hold with spring tension, so there’s no hardware, no drilling and nothing to patch when you move out. Renter-safe by design. They do slide when a drawer gets yanked open hard, so add a couple of adhesive bumpers under the ends if your dresser gets rough treatment.
For the small-item categories, a fabric box beats a divider, because underwear and bras need containment on all four sides rather than a lane. The DIOMMELL 6 Pack Foldable Cloth Storage Box measures 11 by 5.5 by 4.7 inches, which clears a standard 6-inch drawer interior and sits low enough in an 8-inch one to leave room to grab. It’s the budget-friendly stand-in for the IKEA SKUBB boxes that get named in every KonMari post without anyone offering an alternative. Soft sides are the tradeoff: they collapse inward when the box is half empty, so keep the boxes reasonably full.
Every fix in this section is a drop-in item, which is what makes this renter-friendly organization rather than a project. Nothing screws into anything, nothing leaves a mark, and it all comes out with the dresser on moving day.
Keeping the System Alive Past Week One
The system doesn’t fail on day one. It fails the first Sunday somebody else does the laundry, or the first night you’re tired and shove a shirt in flat across the top of the row. Both are survivable if you plan for them instead of pretending they won’t happen.
Batch-fold by category on laundry day
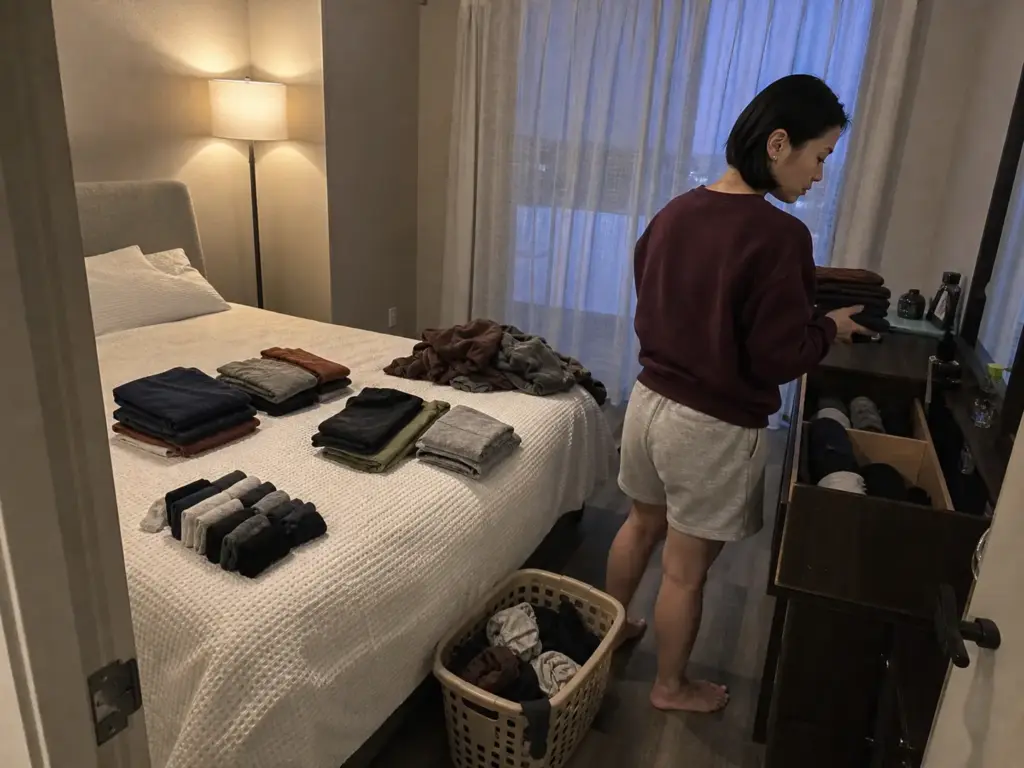
The instinct is to pull one shirt from the basket, fold it, walk it to the drawer, repeat. That’s forty trips and it’s why folding feels endless. Sort the whole basket into category piles on the bed first, fold all the shirts, then all the pants, then the small stuff, then carry each finished category to its drawer in one trip.
This is one professional organizer’s category-by-category batching method, and it matters more than it sounds like it should. Your hands get faster within a category because they’re repeating the same fold, and consistent width happens automatically when twelve shirts get folded back to back instead of scattered across a week.
The other half of this is timing: the fold happens at the folding stage, once. But if you file laundry in unfolded and promise to fix the drawer later, you have just created an organizing project. There is no later. That’s the whole laundry day reset — it isn’t a separate chore, it’s the same chore done in the right order.
When you share the dresser
A shared dresser is where this system meets its real test. A partner or roommate who doesn’t fold this way will flatten your row, and no amount of explaining the method changes that. Marie Kondo’s own public stance is worth borrowing here: fold your own things and let go of controlling theirs. So split the drawer, not the household. Your lane, their lane, a divider in between.
Kids get a modified version. A shorter fold and a bigger compartment beats a correct fold they will never repeat. If a six-year-old can get the shirt roughly folded into a bin that’s twice as wide as it needs to be, the system survives; if it requires precision, it lasts a week.
Leave one open lane in each drawer as a landing strip. On the nights you have no intention of folding anything, the shirt goes in the landing strip instead of on top of a standing row, where it would crush the whole thing. Reset it on laundry day. A system with a designated place for laziness outlasts one that assumes you never get tired.
What overflow is actually telling you
When a row won’t close without pressing it down, the drawer is not asking you to fold tighter. It’s telling you there is more clothing in there than the drawer holds. Folding smaller buys you maybe a week, and then you’re back with tighter folds that topple faster because they’re taller than the clearance.
Overflow is a decluttering signal, which loops back to where the method started. Pull the category out, keep what you actually wear, and refold. That’s the whole cycle, and it plugs into the wider dresser system this fold plugs into rather than standing alone as a one-time project.
Wrapping Up
Measure the drawer interior before you fold anything. Fold height is set by the drawer, not by the tutorial, and that single number is the difference between a drawer that holds and one that slumps by Friday.
Bulky knits fold in half and stack in short piles. Everything else folds until it stands the table test, then gets filed in a row, standing upright, front to back.
Rows need walls. A cut-down shoebox works. So does a divider. An empty drawer with no compartments does not, no matter how well you fold.
In three months, open the drawer you set up first. If one category has crept wider than its lane, or a row won’t close without pressure, that’s the overflow signal, and it’s a decluttering job rather than a folding one.
Start with one drawer. The shallow one, the one that annoys you most. Get the fold height right in there, and every other drawer in the dresser is the same fold with one more or one fewer crease.
Frequently Asked Questions
01What are the 5 steps of the KonMari Method?
The KonMari Method works through five categories in a fixed order: clothes, books, papers, komono (miscellaneous), and sentimental items, keeping only what sparks joy in each. Folding belongs to step one. You declutter the clothing category first, then fold and file whatever stays.
02What is the Marie Kondo rule?
The core rule is to keep only what sparks joy and to tidy by category rather than by room. For folding specifically, the working rule is that every item should stand upright on its own, so you can see the entire drawer at a glance without lifting anything.
03Does Marie Kondo folding prevent wrinkles?
It reduces them, for mechanical reasons rather than magical ones: in a standing row, nothing is pressing down through a stack of garments. Items still crease along the fold lines, so anything that has to stay crisp is better hung than folded.
04Is the KonMari Method effective for dresser drawers?
It is, with one condition: the fold has to be shorter than the drawer interior clearance. In a shallow top drawer the standard fold height is too tall and the front row crushes when the drawer closes, which is the most common reason people say the method did not work for them.
05How do you fold clothes vertically to save space?
Fold the garment’s sides into the center to make a long rectangle, then fold it in half repeatedly until the bundle stands up unsupported on a flat surface. File the bundles in rows front to back rather than stacking them, so you can pull one item without disturbing the rest.