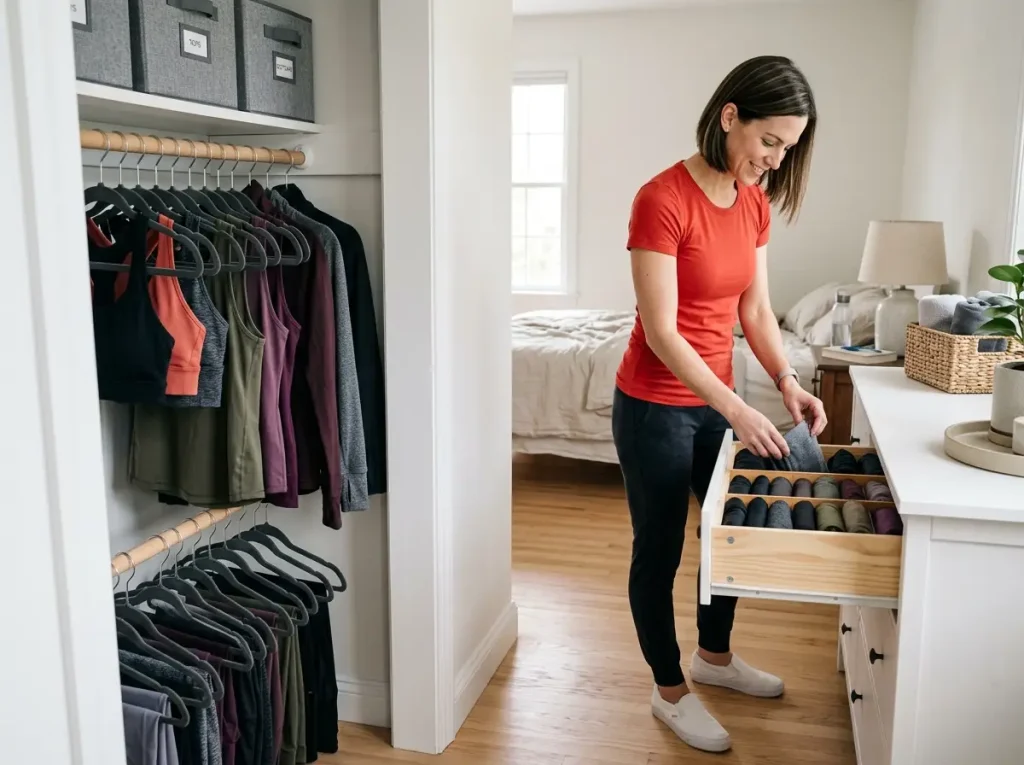
You swear you washed everything. The drawer still smells faintly like a gym bag by Wednesday, and the matching set you actually wanted is at the bottom under three single socks. Organizing workout clothes feels like it should be simple, but activewear breaks the usual fold-and-color-code advice, because the real problem isn’t tidiness — it’s moisture, smell, and slippery fabric that won’t stay where you put it. The fix is a system that keeps clean gear grab-ready, gives sweaty kit a place to dry before the hamper, and survives a 6am reach in the dark, whatever your space gives you.
Quick Answer
To organize workout clothes so they stay fresh and easy to grab, work in this order:
- Declutter the worn-out, stretched, and never-worn pieces first.
- Sort by type, then split sweaty bottoms from non-sweaty.
- Pick a method for your space: drawer, hang, or shelf.
- File-fold slick fabrics and use dividers so they stand up.
- Build a free dry zone (a hook or shower rod) for sweaty kit.
- Contain small items in pockets or bins, then re-declutter every few months.
Why Your Workout Clothes Smell (Even After Washing)
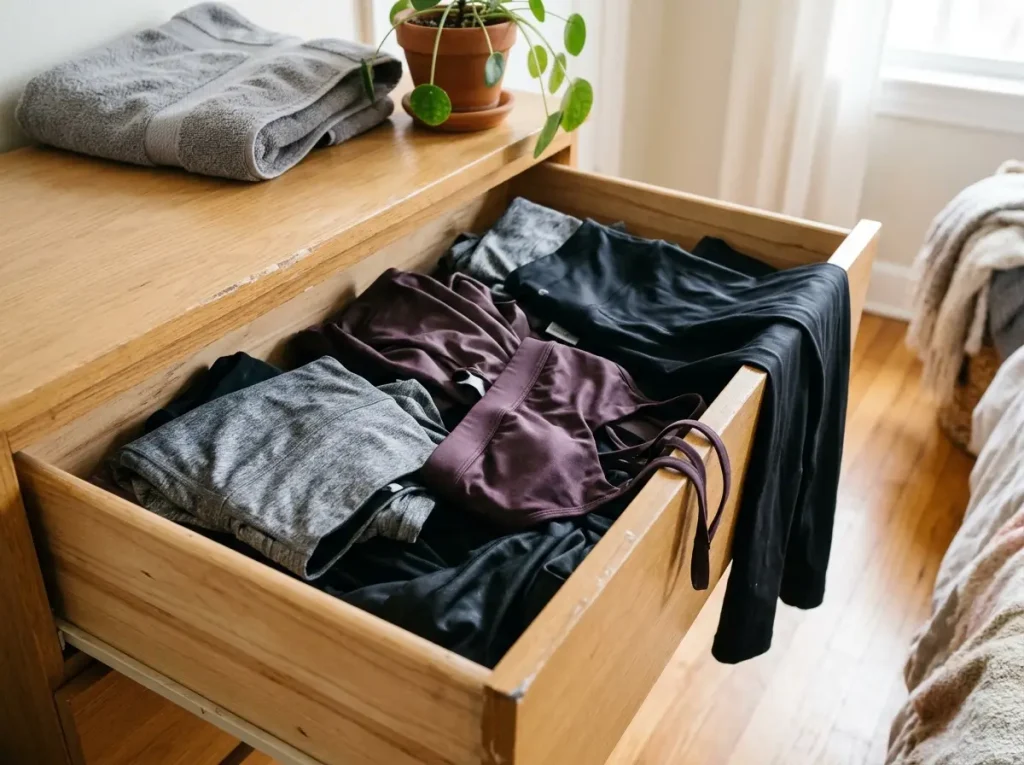
Here’s the part no folding guide tells you: the smell usually isn’t a laundry failure. It’s the fabric. Before you reorganize a single drawer, it helps to understand why workout clothes behave so differently from a stack of cotton tees, because that’s the reason your neat system keeps going sideways.
The fabric is the problem, not your laundry
Most activewear, the athletic wear built for sweat, is polyester, nylon, and spandex, and those synthetic fibers hold onto odor in a way cotton never does. The bacteria that cause the smell settle into the fiber itself, which is why gym clothes can come out of the wash and still carry “the funk” the second it warms up again. Fabric suppliers are blunt about it: synthetic fibers trap odor-causing bacteria in a way cotton doesn’t, which is exactly why activewear needs its own handling instead of getting tossed in with everything else.
Humidity is the silent killer of stretch
The second hidden problem is moisture. Any leftover dampness, even gear that feels dry to the touch, keeps a little humidity in the drawer, and that humidity grows mildew and ages the elastic faster. This is the trap behind sealing activewear in airtight bins or vacuum storage bags to “save space.”
You’re not protecting it. You’re locking moisture in with it.
Store only fully dry activewear, and store it in breathable bins, never sealed plastic. If a piece feels even slightly cool to the touch, it’s still holding moisture. Give it another hour on a rack before it goes away.
Why your neat folds collapse by Wednesday
Then there’s the slip. Smooth nylon and spandex won’t hold a crease the way cotton does, so a tidy file-folded row slowly slides into a leaning pile, and the leggings on the end unravel themselves. It’s the same physics that makes any slick stack slide: items with nothing to brace against keep finding their way back to a heap.
Knowing that changes the whole approach. You’re not organizing clothes, you’re managing moisture, odor, and slip.
Start by Purging the Activewear You Never Wear
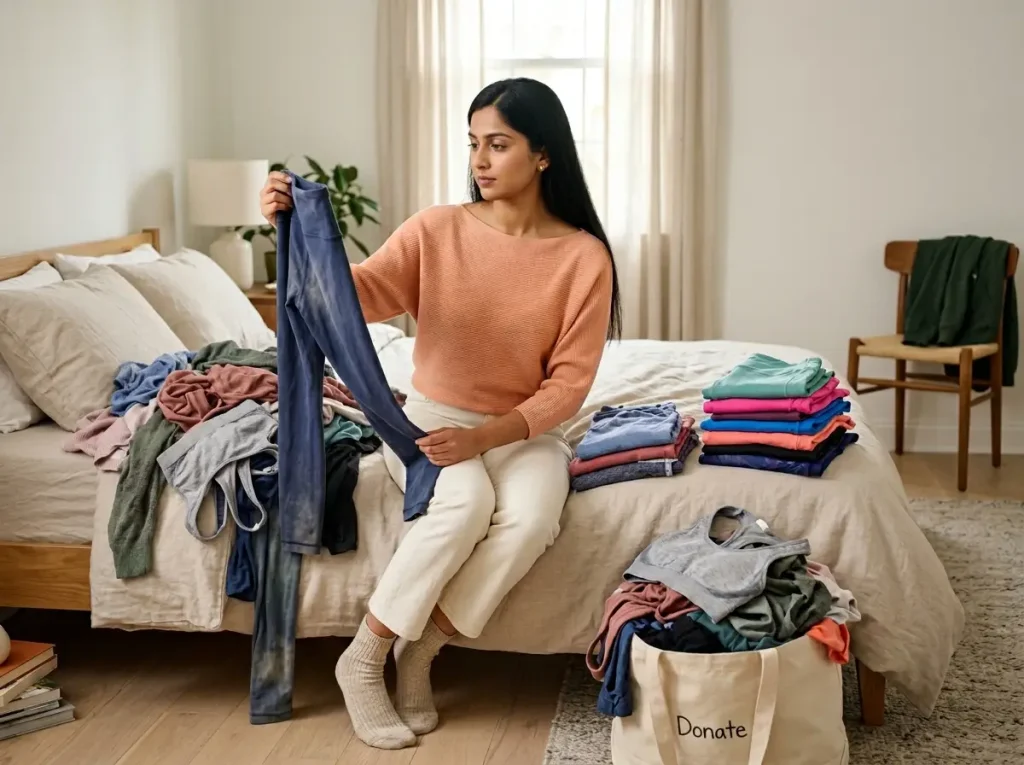
You can’t build a system around a drawer that’s 40% dead leggings. The purge isn’t the fun part, but it’s the step that makes everything after it fit the space you actually have, which is the same purge-first logic behind organizing any kind of clothing.
The keep pile vs the “it’s basically pajamas now” pile
Pull anything pilled, see-through, permanently stretched, or that holds a smell no matter how you wash it. Those are the pieces quietly eating your drawer space. A useful trick is to sort into two piles, keep and toss — well, three piles, because a middle “demote to loungewear” pile is what gets you to actually let go of the threadbare leggings instead of hoarding them “for painting.”
The sports-bra graveyard at the bottom of the drawer
Almost everyone has one. The bottom of the bra drawer turns into a graveyard of crushed, flattened bras you forgot you owned, because they got crammed in and lost their shape, and you only ever wear the same two off the top. Those are exactly the pieces to be honest about. If it’s stretched out or you haven’t reached for it in months, it goes.
One in, one out from here on
Once you’ve got it down to gear you actually wear, set a quiet rule: a new piece in means an old piece out. It’s the only thing that keeps the drawer from refilling itself by spring. And the still-good pieces you’re cutting don’t have to be trashed. Donate or resell them so the purge feels less wasteful.
Sort by Sweat Level, Not Just by Type
Most guides stop at “sort by type.” It’s a fine start, but it skips the move that’s specific to activewear: separating the gear that comes off soaked from the gear that doesn’t. That one split is what makes a clean zone and a dry zone possible later.
Tops, bottoms, bras, socks, then split sweaty from not
Do a first pass into the obvious groups: tops and tank tops, bottoms, sports bras, socks. Then run a second pass on the bottoms and split your sweaty bottoms (leggings, yoga pants, running shorts) from the non-sweaty ones (joggers, casual sets you barely break a sweat in). It sounds fussy until you realize it’s the thing that stops a damp legging from getting filed next to a clean, dry one.
One type per bin (or the basket becomes a black hole)
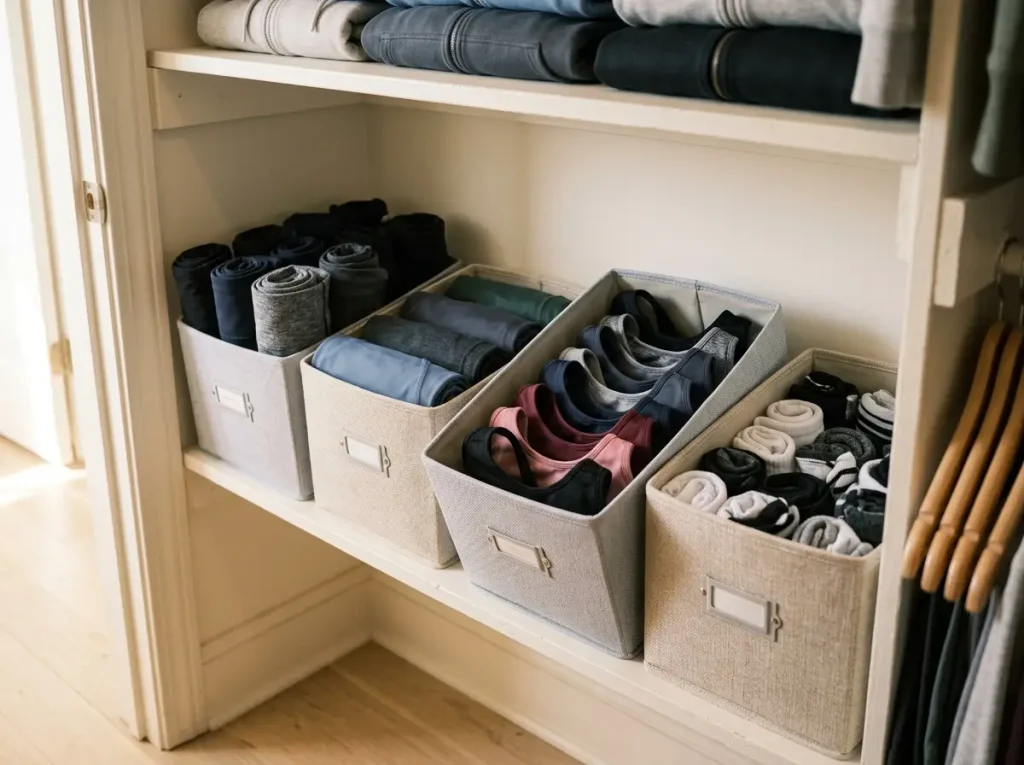
The single rule that saves this whole step is one category per bin. The “everything basket,” one container for all your activewear, turns into a black hole within weeks. You grab off the top and never dig to the bottom, so half your gear may as well not exist. Give each type its own home and the system holds.
Breathable bins beat sealed plastic
For bulky leggings and long-sleeves, breathable fabric bins are the right call, because they let any residual moisture escape instead of trapping it against the spandex. Clear plastic totes get recommended in every activewear thread, and they work, right up until you seal slightly-damp gear inside and it starts to age the elastic. Sealing activewear in airtight plastic backfires for exactly that reason, which is the same breathable-bin rule that keeps stored sweaters from going musty.
A set of labeled, collapsible bins like the Fabric Storage Bins with Labels keeps one type per bin and stays breathable, though if you already own baskets or shoeboxes, those do the job for free. Start there before you buy anything.
Fold Slick Leggings and Bras So They Stay Standing
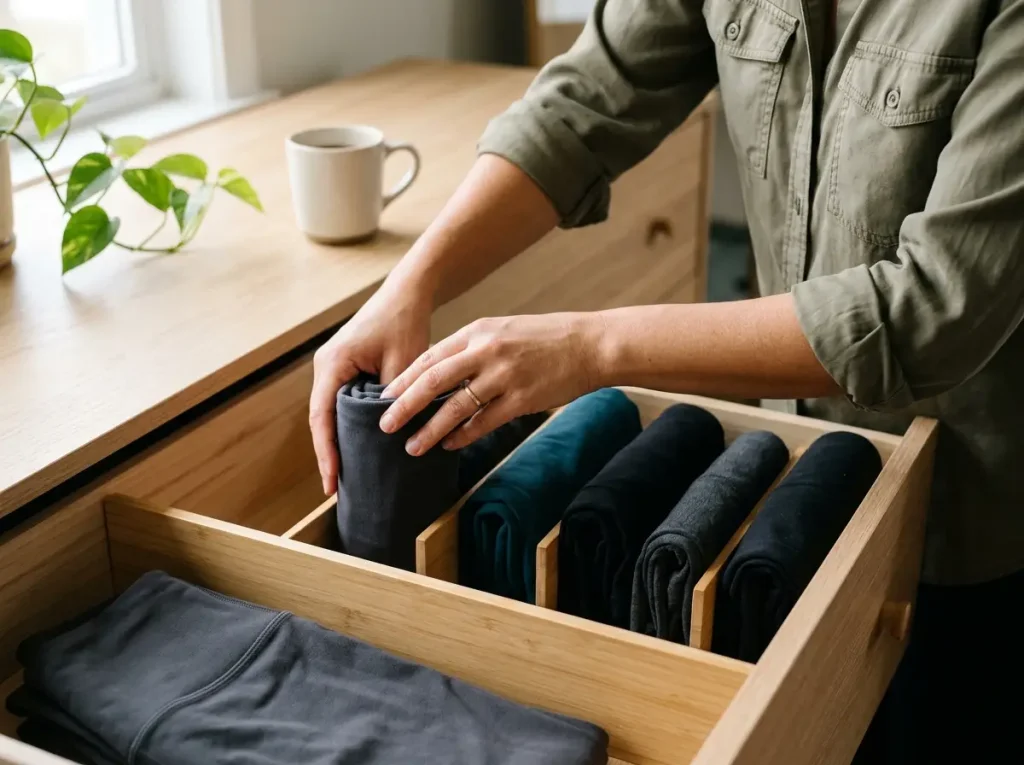
Here’s where the fabric fights back. The standard advice is to file-fold activewear with the KonMari method, the vertical folding Marie Kondo made famous for cotton tees, and in practice the slick stuff won’t hold that crease, so the row you folded Sunday is a pile by Wednesday. The fix isn’t folding “better.” It’s folding for slippery fabric and bracing it so physics can’t undo your work.
The fold-then-thirds package that stands on its own
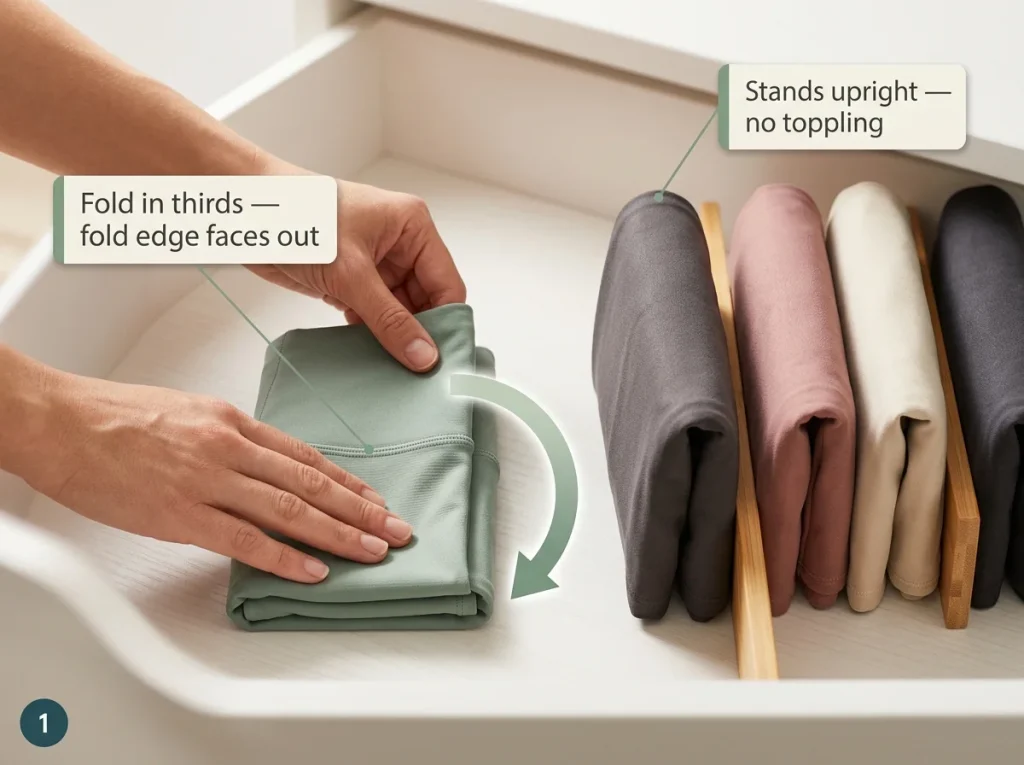
For leggings, fold in half lengthwise, then in thirds. Done right, the package stands upright on its own, so pulling one out doesn’t topple the row beside it. Keep these folded rows in shallow drawers if you can. Deep drawers bury the back row, and a buried row defeats the entire at-a-glance point of folding this way.
Tri-fold sports bras so the cups keep their shape
Sports bras want to be folded, not stacked flat. Fold each one in half, then tri-fold it into a little package and stand them side by side, so the cups keep their form and you can see every bra at once instead of excavating the bottom of the pile. It takes ten extra seconds and it’s the reason you stop wearing the same two on rotation.
When to roll instead of fold (and dividers as walls)
Some fabrics are just too slippery to hold any fold. When that happens, roll them instead, and either way, give the standing packages walls so they can’t slump sideways. Drawer dividers are what make file-folding actually work for activewear. A set of bamboo ones like these adjustable Bamboo Drawer Dividers expand to fit standard drawer depths and act as the braces that keep your rows vertical.
That said, IKEA SKUBB or even Dollar Tree dividers do about 80% of the same job (the wall does the work, not the bamboo), so don’t overspend here. The point is the wall, not the wood.
Build a Dry Zone for Sweaty Kit Before It Hits the Hamper
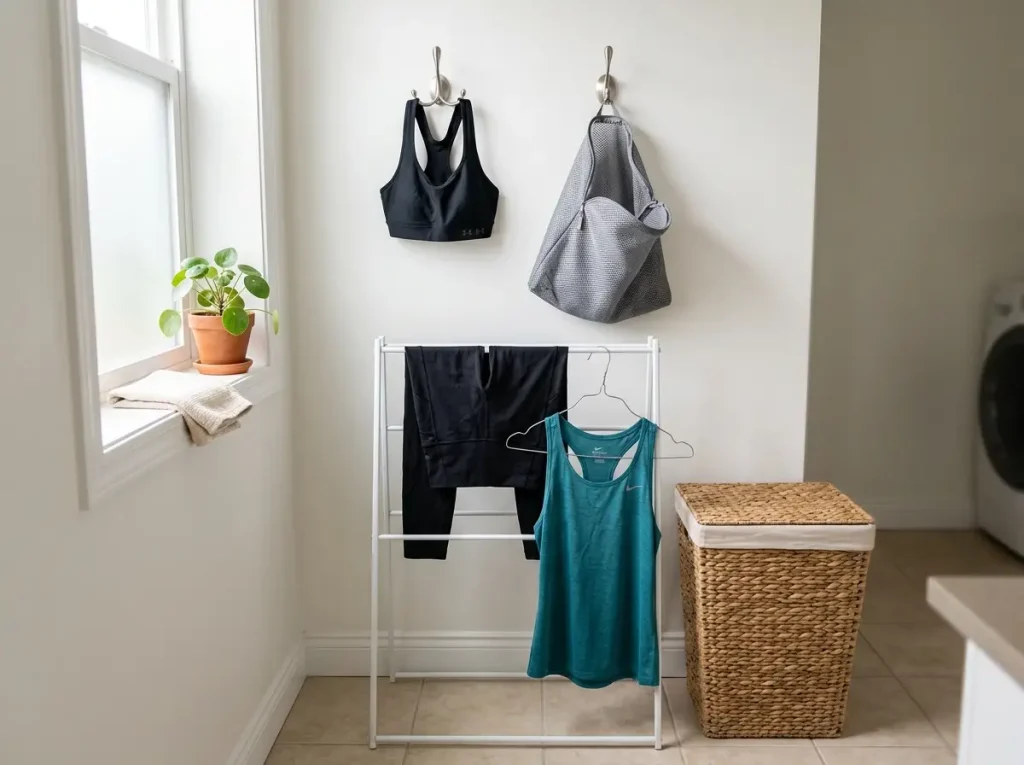
This is the section nobody else writes, and it’s the one that fixes the smell at the source. Almost no organizing guide builds a place for damp, post-workout gear to go. So the soaked sports bra gets balled into a closed hamper, where it goes musty, or shoved back into the clean drawer, which is worse. Your system needs a third zone, a dirty, airing zone, and the best version of it costs nothing.
The free version first: a hook or shower rod
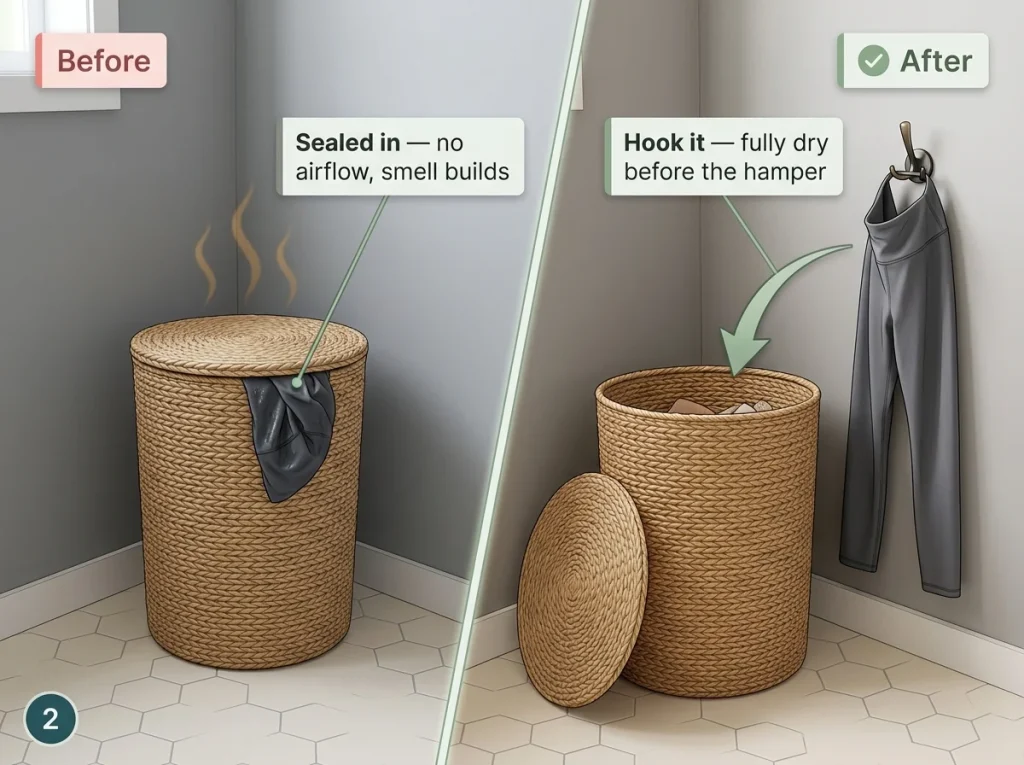
Before you buy a thing, put a single hook on the wall or use the shower rod. Hang the damp bra or leggings there until they’re fully dry, and only then do they go to the hamper or the wash.
The conventional move is to reach for some product first, but the wet-kit problem is almost never solved by buying anything. It’s solved by giving sweat somewhere to evaporate. Activewear care guides land in the same place: letting gear dry out before it hits the hamper is the step that stops the musty smell.
A mesh bag that doubles as the dirty-zone carrier
If you want to make that zone tidier, a breathable mesh laundry bag is the one purchase that earns its place. Damp kit airs on or in it, then the whole bag goes straight into the machine, which also protects bras and leggings from snags. A set like the BAGAIL Mesh Laundry Wash Bags comes in a few sizes, so the small one holds bras and the large one swallows a full session’s worth of clothes.
It complements the free hook, it doesn’t replace it. My rule: the free fix comes before the purchase, every time.
Never seal damp gear in plastic or a closed hamper
The cardinal sin is sealing anything damp. A closed hamper, a zipped bag, a lidded bin: all of them trap the moisture and turn one “I’ll wash it later” legging into a drawer that smells off for a week. Air-drying does double duty here, since airflow and a little sunlight help cut down the odor-causing bacteria, while machine drying bakes the smell in and shortens the life of the elastic.
Think in three zones from now on: a clean grab-and-go zone, this dirty airing zone, and an off-season zone (a high shelf or under-bed storage) for seasonal rotation of gear you’re not using right now. That last split is the same daily-versus-off-season logic that keeps bulky coats in check.
Storage only works if the clothes go in clean. Wash activewear inside-out in cold water and skip the fabric softener. Softener clogs the wicking pores and traps odor, so softened gear re-smells in the drawer no matter how neatly you folded it.
No Dresser? Hang and Shelve Your Workout Clothes Instead
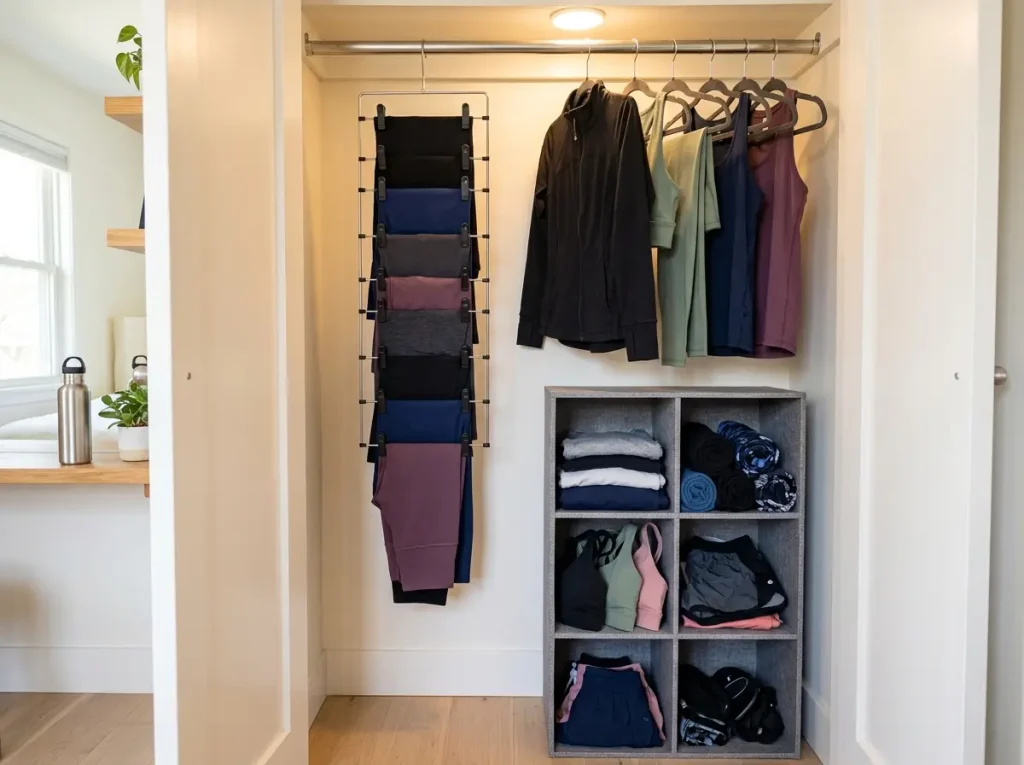
Most guides open with “go to your dresser drawer.” Great, if you have one. Plenty of renters work in a small space with a closet rod, a strip of floor, and not much else, so this section is for building the same system with no drawers and, just as important, no drilling.
Hang it: leggings on a multi-clip hanger, sets on slim hangers
If there’s no drawer depth, hang your leggings vertically. A multi-clip legging hanger holds around ten leggings per bar in the footprint of a single hanger, so a two-pack gets roughly twenty pairs off the floor and onto one rod spot. The Volnamal Multi-Clip Legging Hanger does exactly this with no tools, though a tension rod and a few S-hooks are the free workaround if you’d rather not buy one.
For matching sets, hoodies, and training jackets, slim nonslip hangers stop the slippery stuff from sliding to the floor and reclaim real rod space. A pack like the Zober Premium Velvet Hangers is the cheap, high-leverage upgrade here, though any slim nonslip hanger frees up the same rod room, so the brand barely matters.
Shelve it: a freestanding cube system
No drawer at all? A freestanding cube organizer rebuilds the dresser function without touching a wall. One cube per category, each acting as an open drawer you can see straight into.
The AWTATOS Stackable Cube Organizer is self-standing, so it doesn’t need anchors or brackets, and an IKEA KALLAX-style unit does the same thing if you find one secondhand. Put your most-used categories at chest height and save the bend-down cubes for off-season gear.
Measure your rod clearance and drawer depth before buying any hanger or cube unit. Rental closets often run shallower than standard, and a unit that juts past the door frame means the door won’t shut. That mismatch is the top reason this kind of organizer gets returned.
No-drill rules for renters
The whole renter system runs on one rule: nothing that needs anchors, brackets, or holes. Over-the-rod, over-the-door, tension, and freestanding only. That keeps your deposit intact and lets you take the entire setup with you when you move. There’s a deeper playbook of no-drill mounts that won’t cost you your deposit if you want to push the idea further into the rest of the closet.
Corral the Small Stuff: Sports Bras, Socks, and Headbands
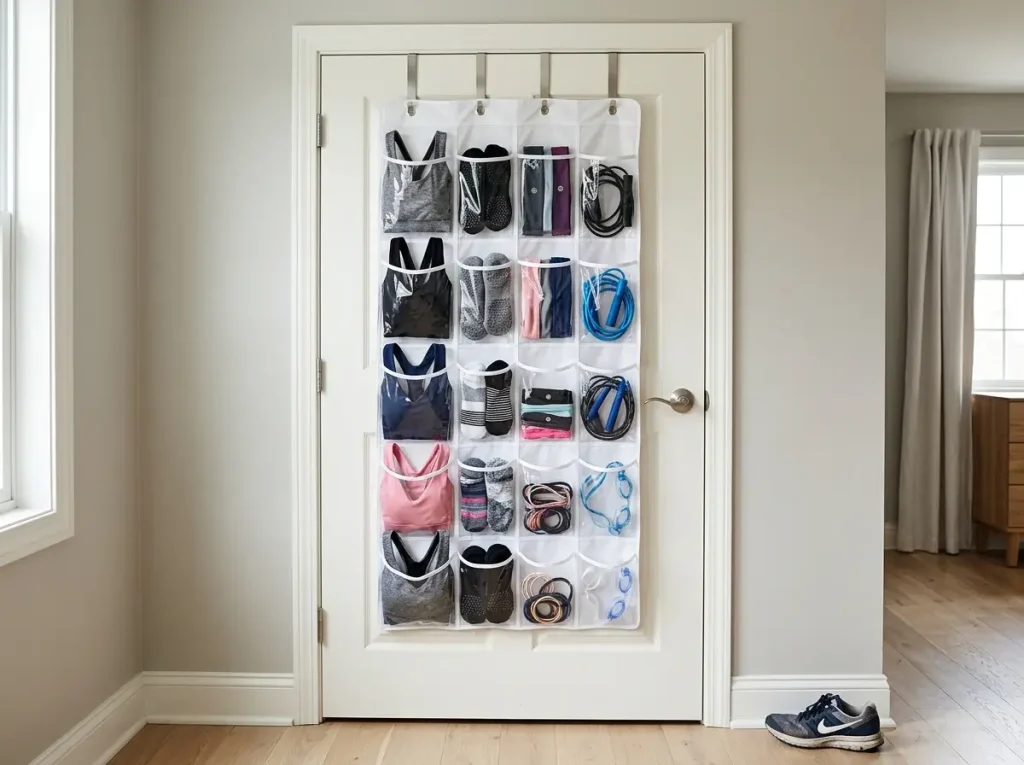
The big items are easy. It’s the small stuff that defeats people: grip socks, headbands, and sports bras that sink to the back of any drawer until you buy duplicates because you can’t find them. Vertical space turns that chaos into a one-glance grid.
Why small items vanish in a drawer
Small items disappear because they have no fixed home and nothing holds their shape, so they migrate to the bottom and you only ever see the top layer. The answer isn’t a bigger drawer. It’s getting them off the horizontal pile and onto a vertical surface where each one is visible.
Over-the-door pockets: a small-item drawer with no drilling
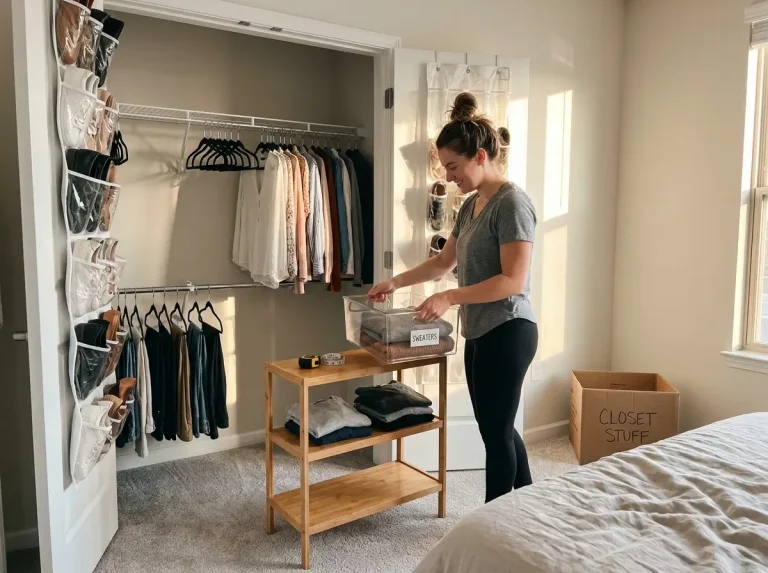
An over-the-door organizer with clear pockets adds a whole drawer’s worth of small-item storage with zero drilling, and because the pockets are clear, everything is grab-and-go visible. The SimpleHouseware Over-the-Door Organizer gives you a couple dozen pockets on the back of a door you’re already not using, though if you’ve got an old over-the-door shoe organizer in a closet somewhere, repurpose that first. One caveat worth knowing: these hang best over solid doors, and a heavy load on a flimsy hollow door will sag, so don’t overstuff the bottom rows.
A pocket (or bin) per category
The rule from the sorting step applies here too: one category per pocket. Bras in one column, grip socks in another, headbands and hair ties in a third. And store the sports bras shaped, not crushed, tri-folded standing or laid flat in their own pocket, so they keep the form you just protected two sections ago. If a door isn’t an option, the same one-category rule works on a single shelf lined with small labeled bins.
Build a Grab-and-Go System That Survives Mornings
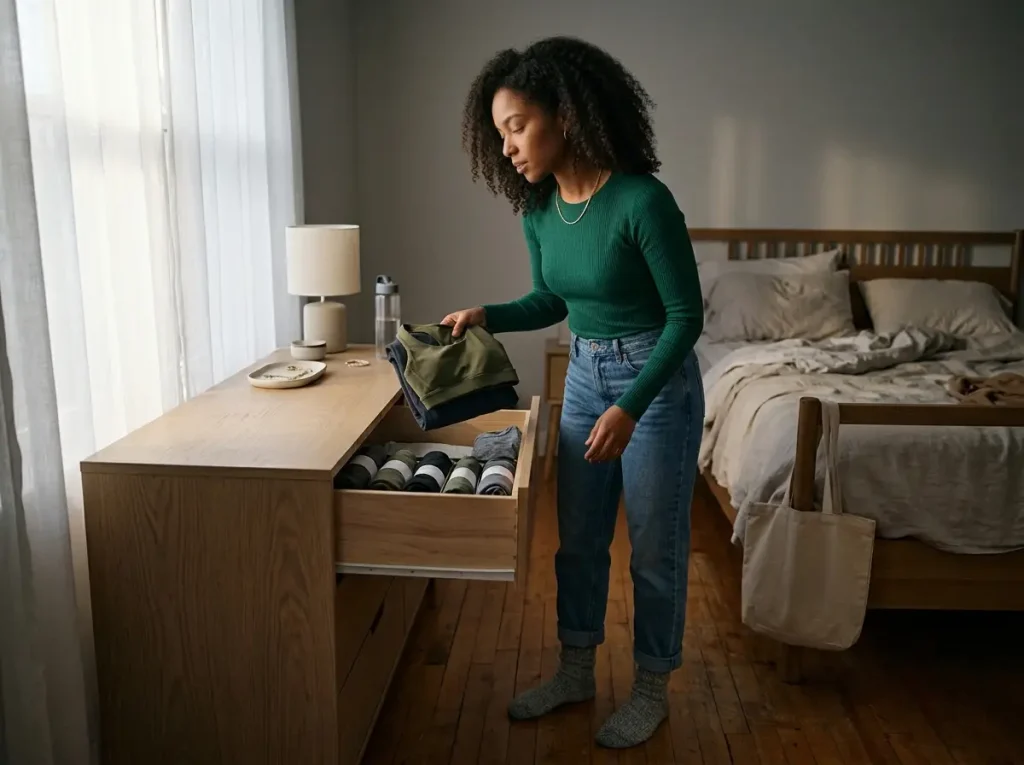
The real test of any activewear system isn’t how the drawer looks today. It’s whether, at 6am in the dark, you can grab a full set in one move and get out the door. Fewer barriers between you and dressed means more workouts you actually do, so build the system around that moment.
Bundle full outfits so you grab one set in the dark
Instead of storing tops with tops and bottoms with bottoms, bundle full outfits: a top, a bottom, and a bra grouped as one set. Then a half-asleep reach pulls a complete outfit, not three separate digs across three drawers. It’s a small change that quietly removes the most common excuse, which is the dark, fumbling hunt for a matching set that ends in skipping the workout.
Keep workout wear off the casual shelf
Keep your activewear physically separate from your casual clothes. When the two get mixed, every morning starts with digging past jeans and tees to find leggings, and that friction is exactly what wears the habit down. A dedicated drawer, cube, or rod section draws a hard line, so the workout gear is always where you left it.
Keep the most-worn sets front and center (and the 3-month reset)
Put the sets you reach for most at the front and top, and if it helps you move faster, group them by activity, or color code them (color coding sounds fussy until it saves you ten seconds every single morning) so the right set is the easiest one to grab. Then put a reminder on your calendar for a few months out. In three months, re-open every bin and pocket: anything you haven’t touched since you set it up gets demoted or donated, and the dry zone gets a quick wipe-down. That bit of maintenance is what keeps the system from drifting back into a pile, the same way a closet system that still works three months later earns its keep.
The Bottom Line on Organizing Workout Clothes
Workout clothes are a moisture-and-fabric problem before they’re a folding problem. Give sweaty kit a free dry zone before the hamper and half the smell disappears on its own. Fold the slick stuff to stand and brace it with dividers, or hang and shelve it if you have no dresser, and the system bends to fit whatever space you’ve got. Then bundle your outfits up front so the whole thing survives a 6am reach in the dark.
Start with one drawer or one rod. Build the dry zone first, since it’s free, and get that one habit working before you organize anything else. Then expand.
Frequently Asked Questions
01Where should you keep sweaty workout clothes before washing?
Hang them to air-dry on a wall hook, shower rod, or drying rack first, never balled damp into a closed hamper or back in the drawer. Once they’re fully dry, they go to the wash. This single habit prevents most of the musty smell.
02Should you hang or fold workout leggings?
Either works if you do it right. Fold them in half lengthwise then in thirds so the package stands up, or hang them on a multi-clip legging hanger if you have no drawer depth. Avoid loose stacking, since slick fabric slides into a pile.
03How do you organize workout clothes without a dresser?
Use vertical and freestanding storage: a multi-clip hanger for leggings, an over-the-door organizer for small items, and a freestanding cube unit or labeled breathable bins on a shelf. All of it is no-drill and renter-safe.
04Why do my workout clothes still smell after washing?
Synthetic fibers trap odor-causing bacteria inside the fiber, so they hold smell more than cotton. Wash inside-out in cold water, skip fabric softener, air-dry, and store only fully dry gear in breathable, not airtight, bins.
05How do you keep sports bras from getting crushed in a drawer?
Don’t stack them flat. Tri-fold each bra into a package and store them standing side by side, or give them their own column in an over-the-door pocket organizer so the cups keep their shape.
Disclaimer: ClutterlessNest is a participant in the Amazon Services LLC Associates Program. As an Amazon Associate we earn from qualifying purchases. This article may contain affiliate links — if you buy through them, we may earn a small commission at no extra cost to you. We only recommend products we have tested or genuinely believe in.