





In this article
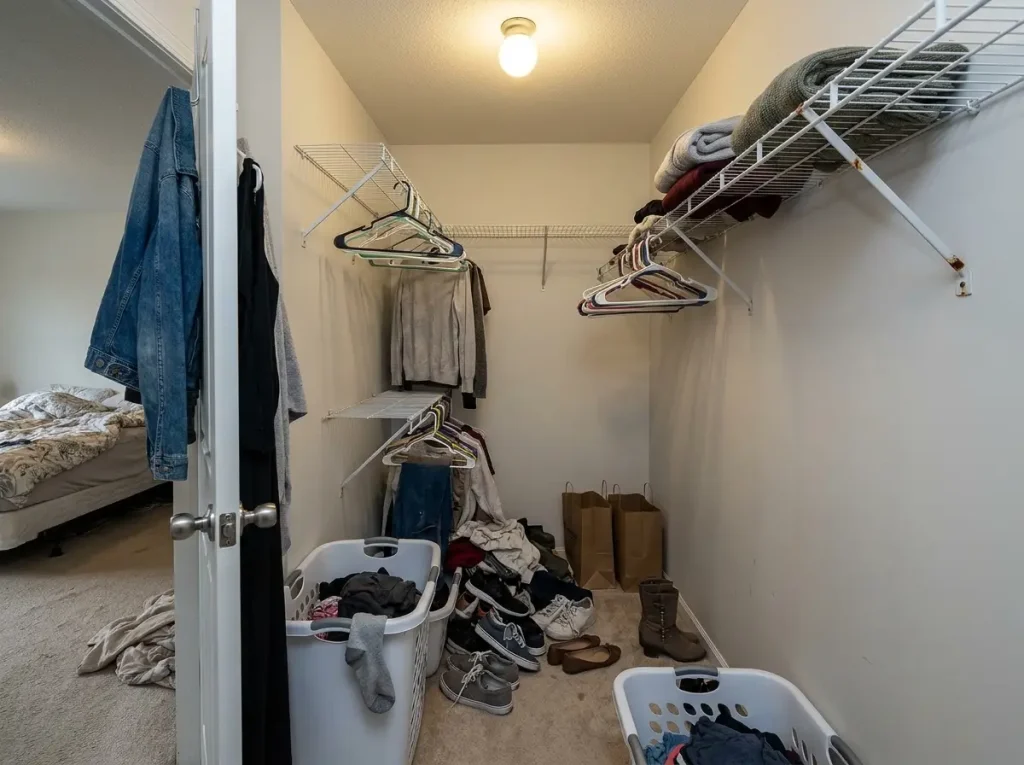
You have more closet space than some people have in their entire bedroom. And somehow, you still can’t find your jeans at 6 AM. The floor pile grows. The corners fill up with things you’ll “deal with later.” That walk-in closet was supposed to be the solution — instead, it became the room where good intentions go to sit in a heap.
The problem isn’t that you’re disorganized. The problem is that walk-in closets need a completely different approach than reach-in closets, and most advice treats them the same. A walk-in has floor space, corners, multiple walls, and usually higher ceilings — all of which become chaos magnets without a zone-based system that matches how you actually get dressed every morning.
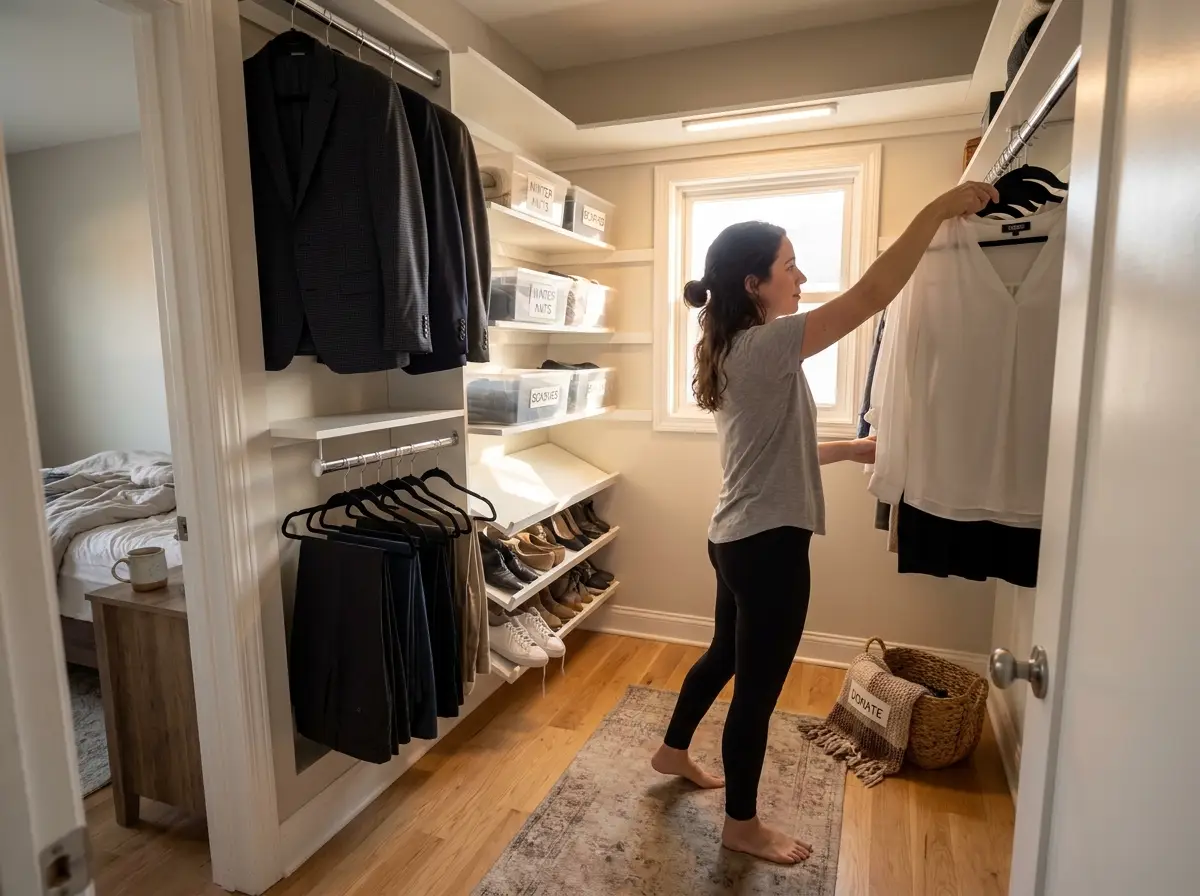
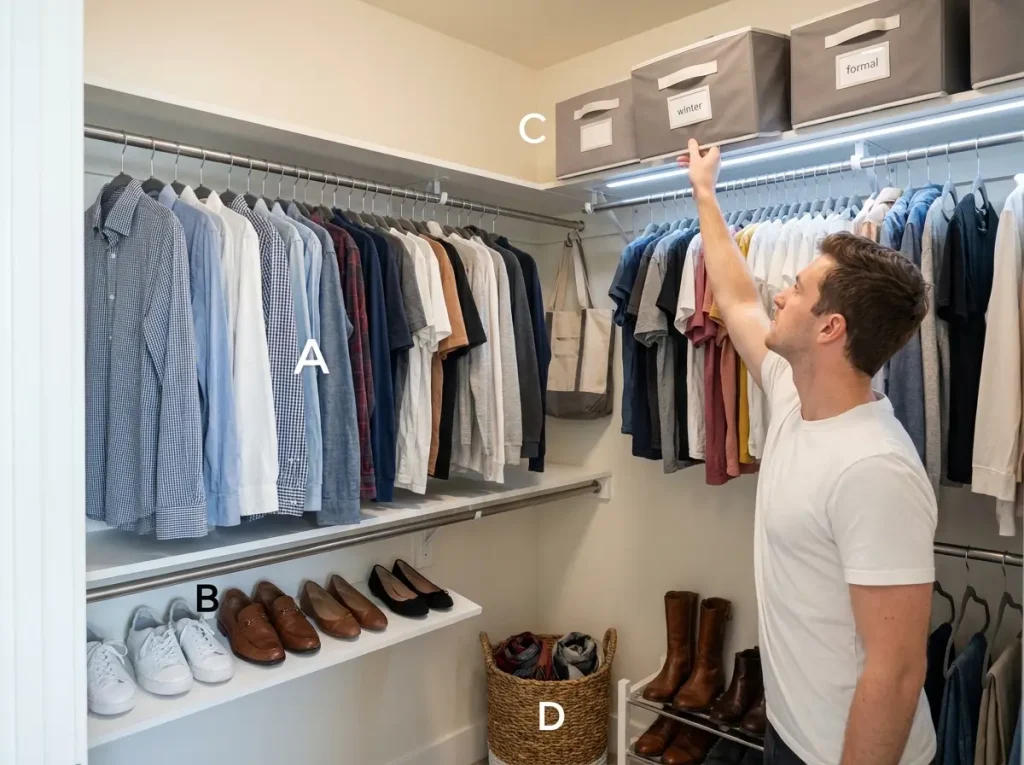
Quick Answer: The best way to organize a walk-in closet is by dividing it into functional zones.
- Zone A (eye level): daily wear you reach for every morning
- Zone B (below waist, above head): shoes, bags, and folded items
- Zone C (top shelves): seasonal and archive storage
- Zone D (floor): purpose-built shoe racks and baskets only
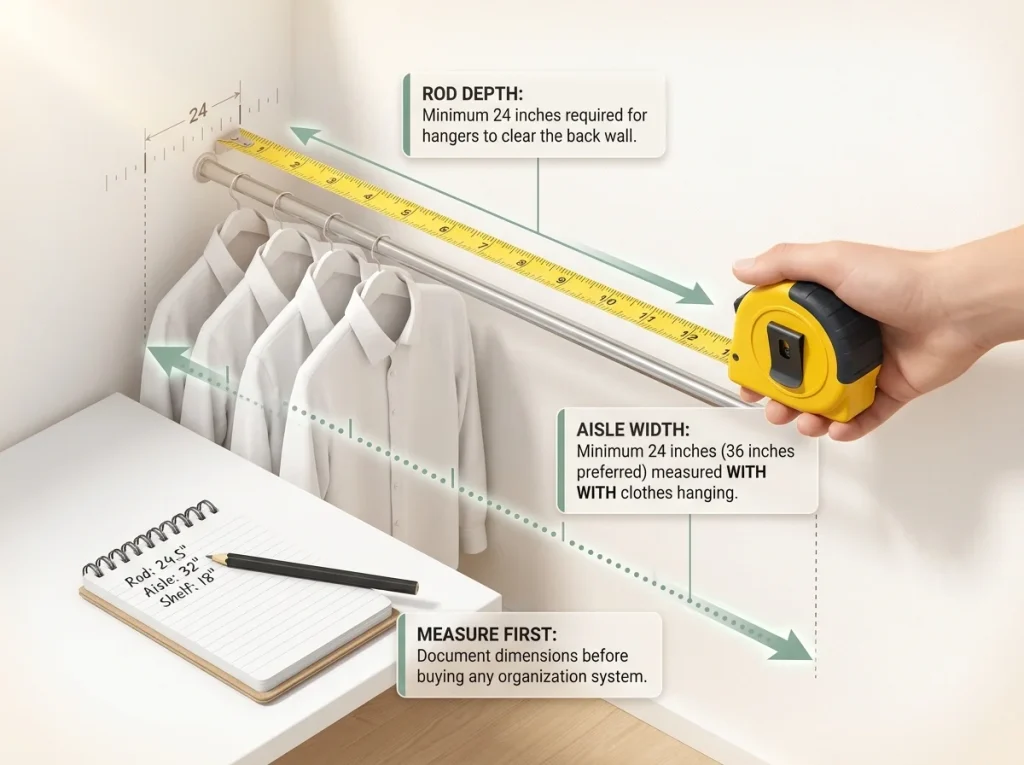
- Measure your closet dimensions before buying any organizers
- Solve the corners first — they waste up to 15% of your storage
Why Walk-In Closets Get Messy Faster Than Reach-Ins
The Space Paradox
A reach-in closet forces decisions. There’s one rod, one shelf, and about four square feet of floor. You run out of room fast, so you either edit your wardrobe or accept a permanent avalanche every time you open the door. A walk-in gives you options — and options without a system create chaos.
Walk-ins have floor space that becomes a dumping ground. They have corners where things disappear. They have multiple walls that feel like they should hold more, but without a plan, each wall becomes its own small disaster. The extra space doesn’t solve the problem. It spreads it out.
Why the “After Photo” Lies
Most walk-in closet advice shows you the finished product — matching bins, color-coded hangers, shoes lined up like soldiers. What nobody shows is what it looks like six weeks later when you’re rushing to work and the system you built for Instagram doesn’t match how you actually live.
The closets that stay organized beyond the first month share one trait: they were designed around daily habits, not around how the closet looks in a photo. Your walk-in needs to work at 6 AM on a Tuesday when you’re running late and haven’t had coffee. If the system only works when you have time to be careful, it won’t last.
The Builder-Grade Trap
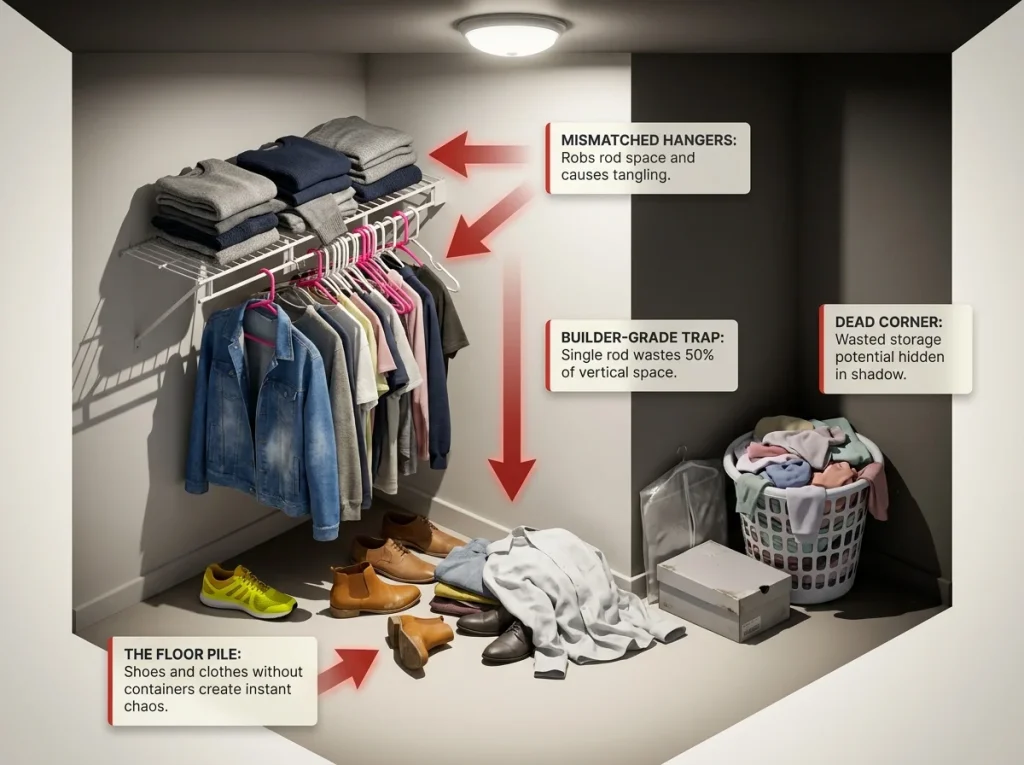
Non-adjustable shelving is the single biggest regret in walk-in closets. Standard builder-grade wire systems come with one rod and one shelf, positioned at heights that don’t match what most people actually hang. Your wardrobe changes — seasonally, after a move, after life events. Fixed shelving can’t adapt, and within a year or two, you’re working around the system instead of with it.
Pro tip: Leave 10-15% of your closet space unoccupied. A packed closet reverts to mess within weeks because there’s no breathing room to put things back properly.
Measure Your Walk-In Before You Organize Anything
The Four Measurements That Drive Every Decision
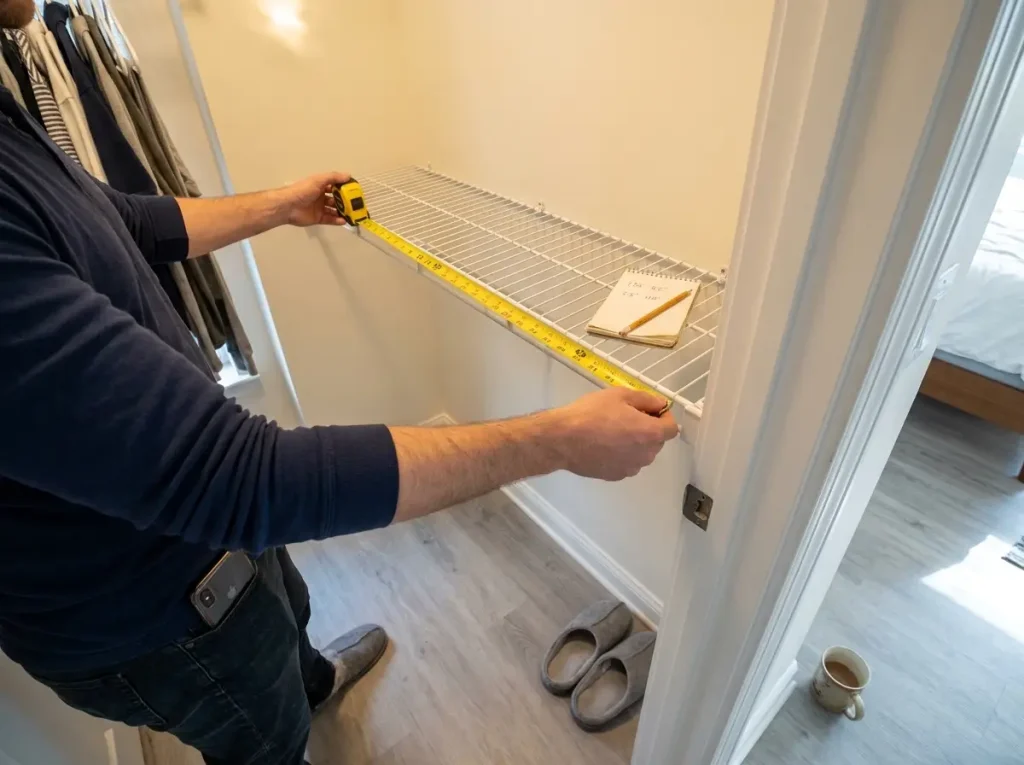
Before you buy a single bin, take four measurements. These numbers determine what fits, what doesn’t, and whether that island you’re dreaming about will actually work.
Rod depth from wall: Standard is 24 inches. Your hangers need this space to hang without touching the back wall. If your walk-in has less than 24 inches on any wall, you’ll need slimmer hangers or a wall-mounted system that compensates.
Walking aisle width: Minimum 24 inches. Preferred: 36 inches. If your aisle is under 24 inches after hanging clothes on both sides, you’ll bump into garments every time you reach across. Measure aisle width WITH clothes hanging — not just wall to wall.
Shelf depth: Shoe shelves need 12-15 inches for standard shoes and 18 inches for boots. This is shallower than your clothing rod depth, so shoe shelves on the same wall as hanging clothes need to be configured differently.
Ceiling height: Most walk-ins have standard 8-foot ceilings. A single rod at 66 inches wastes two feet of vertical space above and everything below. That’s roughly half your wall doing nothing.
What Your Walk-In Layout Type Means for Storage
Your layout determines your zone options. A single-sided walk-in (4×5 ft) only has storage on one wall — it’s basically a deep reach-in. A double-sided layout (6 ft wide) gives you two walls but a narrow aisle. An L-shaped closet creates one corner junction. A U-shaped layout (minimum 7×10 ft for two people) uses three walls and creates two corners — the most storage potential but also the most dead space if you don’t solve those corners.
Pro tip: Before buying anything, draw your closet shape on paper. Mark where the door opens, which walls have rods, and where the corners are. This five-minute sketch will save you from buying organizers that don’t fit.
When an Island Makes Sense (and When It Doesn’t)
An island needs 36 inches of clearance on all sides. Do the math: that means your closet needs to be at least 8 feet wide (36″ aisle + 24″ island + 36″ aisle) and ideally 10 feet long. If your walk-in is under 7×10 feet, an island is an obstacle, not a feature. A freestanding dresser pushed against the back wall gives you the same drawer storage without eating the walking space. According to NKBA walk-in closet planning standards, clearance around fixed furniture is one of the most commonly violated measurements in residential closet design.
The Zone System for Walk-In Closets
Zone A: Your Daily Wear Wall
Zone A is the real estate between your eye level and your waist — roughly 40 to 70 inches from the floor. This is where 70% of your daily wardrobe lives: jeans, shirts you actually wear, work clothes, and the jacket you grab on the way out.
Everything in Zone A should be on matching slim hangers. Not for aesthetics — for function. Switching from plastic hangers to slim velvet hangers reclaims roughly 15 inches of rod space per 50 hangers. The Zober Premium Velvet Hangers (17.5″W) are thinner than standard plastic at 0.2 inches thick, and the non-slip surface means shirts don’t end up on the floor. The trade-off: they’re slightly harder to slide along the rod, so space your garments with a finger-width gap.
Zone A gets the best-lit wall. If your closet light is a single overhead fixture, Zone A goes on the wall directly under it. You need to see your daily options without pulling things out to check the color.
Zone B: Below and Above Your Sightline
Zone B covers everything below waist height and above head height. Shoes go below. Bags, folded knitwear, and less-used items go above. This zone stores about 30% of your closet contents — things you need regularly but not every single morning.
The key for Zone B shelving: match shelf depth to what you’re storing. Shoe shelves at 14 inches deep work for flats and sneakers. Boot shelves need 18 inches. If you put shoes on deep 24-inch shelves, the back half becomes invisible and you’ll forget what’s there.
Pro tip: Hanger math for reclaiming rod space gets detailed — if your closet feels packed, that article covers the specific rod-space calculation.
Zone C and D: Archive and Floor Storage
Zone C is the top shelf — the highest point in your closet. Luggage, formal wear in garment bags, seasonal items you touch twice a year. Use labeled bins here so you’re not climbing a step stool to check what’s inside. Pull each bin forward slightly so the label faces out.
Zone D is the floor — and this is where walk-ins differ from reach-ins. A reach-in floor is basically dead space behind the door. A walk-in floor is usable real estate. Low shoe racks, baskets for workout gear, a small freestanding hamper — all of these work on the floor IF you follow one rule: nothing touches the floor without a container. No loose shoes. No piles. If it’s on the floor, it’s in something.
Solving the Corner Problem
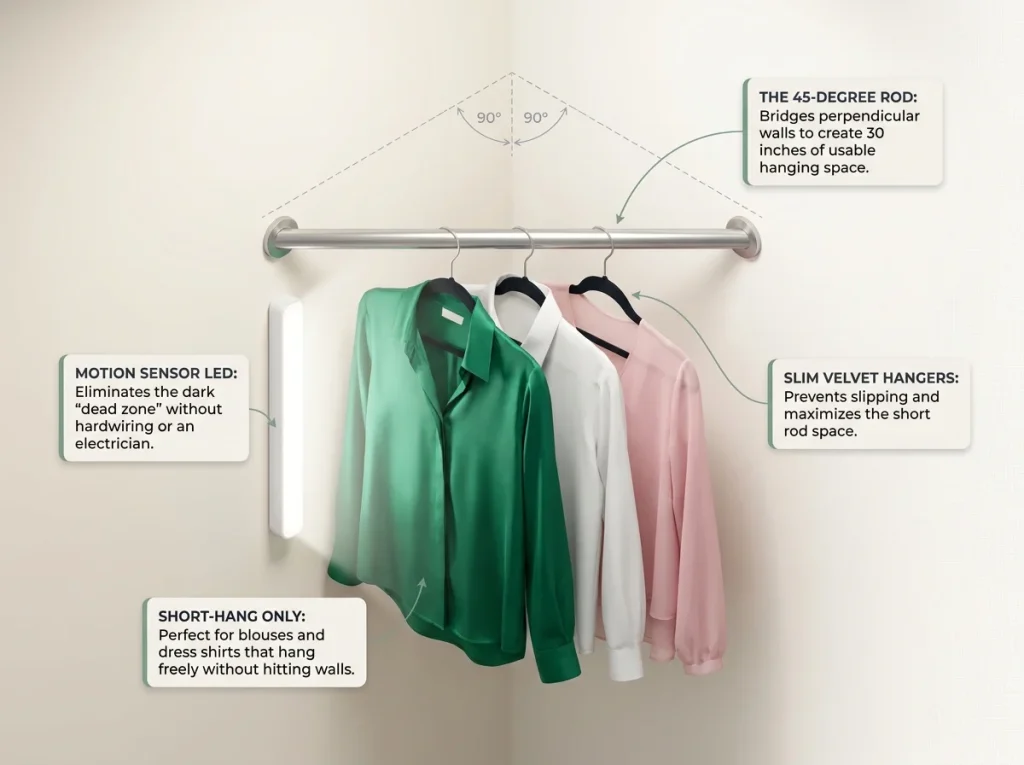
The 45-Degree Rod Trick
Those dead corners where two walls meet in an L-shaped or U-shaped walk-in? They represent up to 15% of your total storage potential. Most people shove a laundry basket in there and call it done. Here’s a better approach.
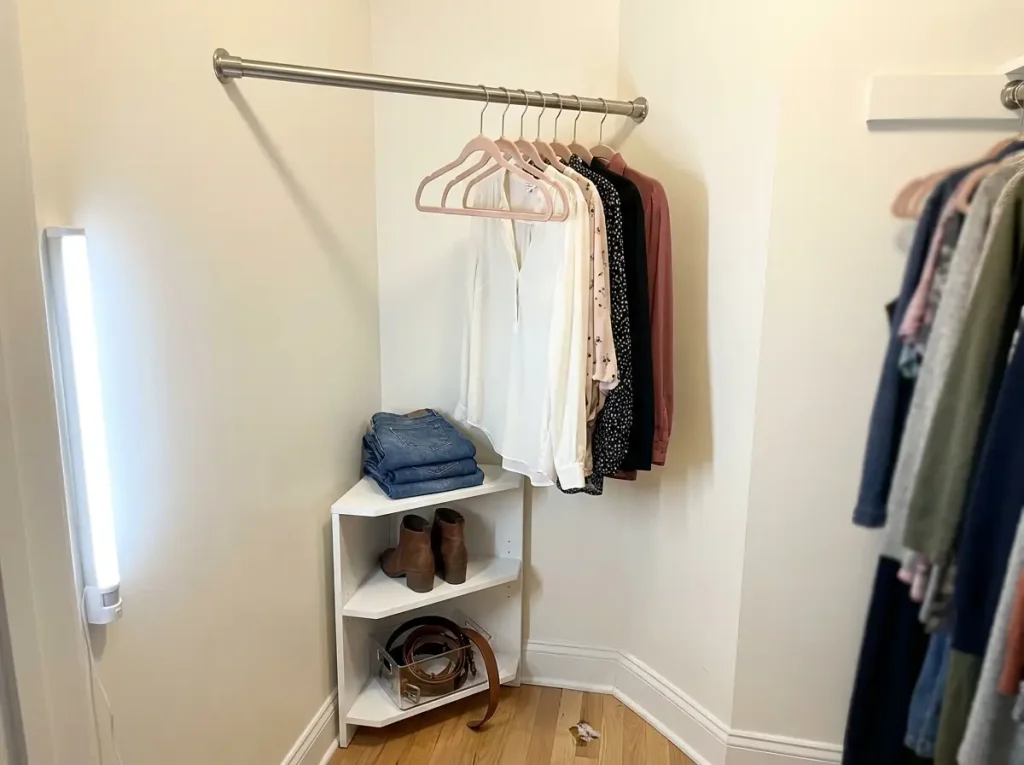
Mount a rod diagonally across the corner at 45 degrees. This creates a short hanging section — roughly 30 inches of rod — that bridges the two perpendicular walls. It’s perfect for blouses, dress shirts, or folded pants on hangers. The garments hang freely without touching either wall, and you’ve just turned dead space into functional hanging storage.
Corner Shelving and Rotating Options
If hanging doesn’t make sense for your corner (maybe it’s too narrow or you need shelf storage), a vertical corner shelf unit works. You shorten the rod lengths on each adjacent wall by a few inches and gain stacked shelving in the junction. Folded jeans, bags, or clear bins with accessories all work here.
For deeper corners in larger walk-ins, rotating pull-out shelves operate on the same principle as a kitchen lazy susan. You spin the shelf to access items that would otherwise sit in the unreachable back of the corner. These require more budget and installation work, but in a U-shaped closet with two corner junctions, they can unlock significant storage.
Lighting the Dead Zones
Corners stay unused partly because they’re dark. You can’t see what’s there, so you forget it exists. A Rechargeable LED Motion Sensor Light Bar mounted vertically on one wall of the corner solves this. It activates when you reach into the corner and charges via USB — no wiring, no electrician, renter-friendly with adhesive mounting. One light bar in each corner junction changes how you use the space.
Pro tip: Test your corner visibility right now. Walk to the darkest corner of your closet and try to identify every item there without pulling things forward. If you can’t, lighting is your first fix — before any organizer.
Double-Hang and Vertical Space in Walk-Ins
Setting Up a Double-Hang Section
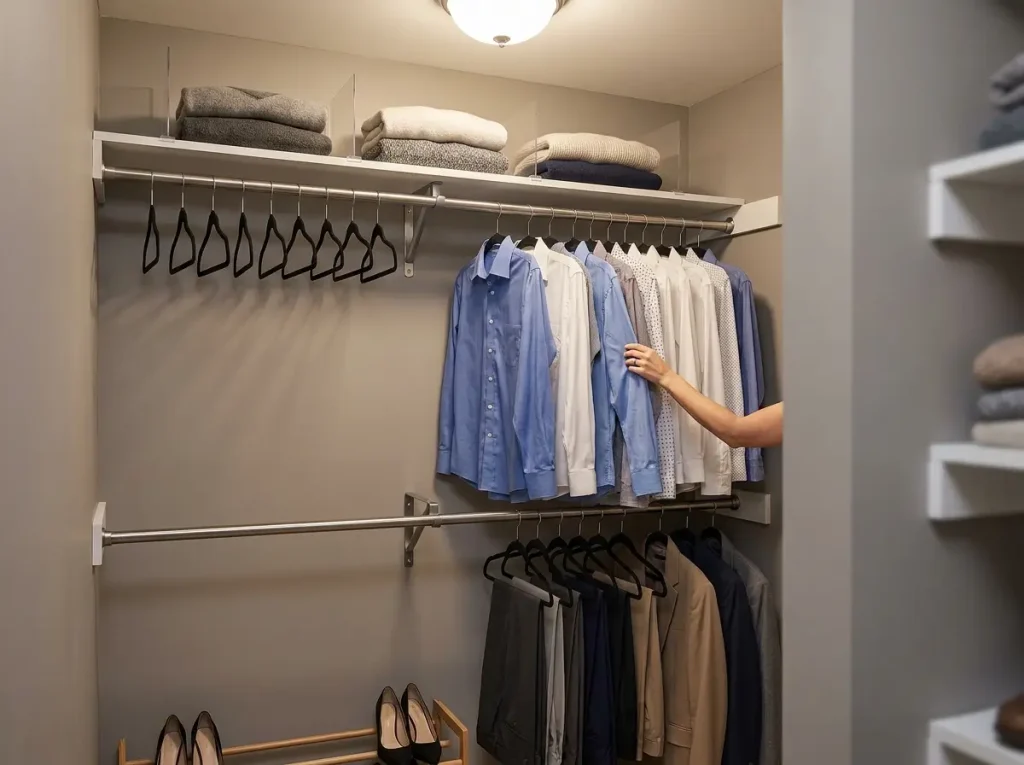
Walk-in closets typically have 8-foot ceilings with a single rod at about 66 inches. That leaves two feet of vertical space above and roughly 40 inches below — wasted. A double-hang setup puts an upper rod at 80-82 inches and a lower rod at 40-42 inches, giving you two full tiers of hanging space on the same wall section.
The STORAGE MANIAC Adjustable Double Rod (110 lb capacity) hooks directly onto your existing rod — no drilling, no wall damage. It’s adjustable, so you can dial in the lower rod height based on your garment lengths. The 110-lb rating handles a full section of shirts and pants without sagging. One caveat: it adds about 2 inches of forward depth, so if your aisle is already tight, account for that.
What Hangs Where: Long vs. Short Garments
Not everything can be double-hung. Keep one section of your walk-in as full-length hanging for dresses, coats, jumpsuits, and long skirts. Everything else — shirts, blazers, folded pants, short skirts — can go on the double-hang section.
A good ratio for most wardrobes: one-third full-length, two-thirds double-hang. If you’re unsure, count your long garments. Most people have fewer than they think. The rest of your rod should be working double duty.
Adding Shelves Above the Rod Line
The space above your upper rod (82 inches to ceiling) fits one more shelf. Use it for bins, folded items, or off-season storage. The HBlife Acrylic Shelf Dividers (15 lb per divider) clip onto the shelf edge and keep stacked sweaters from toppling into each other. They’re transparent, so they don’t block your view of what’s on the shelf.
For renter-friendly closet solutions that don’t require drilling, a freestanding double-rod garment rack placed inside the walk-in gives you the same vertical advantage. It moves with you when your lease is up, and most models support enough weight for a full wardrobe section.
Shoes, Bags, and Accessories Without the Pile
Shoe Storage by Type and Size
The floor pile starts with one pair of shoes kicked off after work. Within a week, it’s an obstacle course. Shoe storage in a walk-in needs to match the actual dimensions of what you own — not a one-size solution.
Standard shoes and sneakers fit on 14-inch deep shelves. Boots need 18 inches. Heels can sit on narrower shelves or angled racks. If you’re using deep 24-inch shelves for shoes, you’re wasting the back 10 inches. Either use the back half for something else (a second row of flats, or small bins for shoe care supplies), or switch to purpose-built shoe shelving at the right depth.
Door and Wall Space for Bags and Accessories
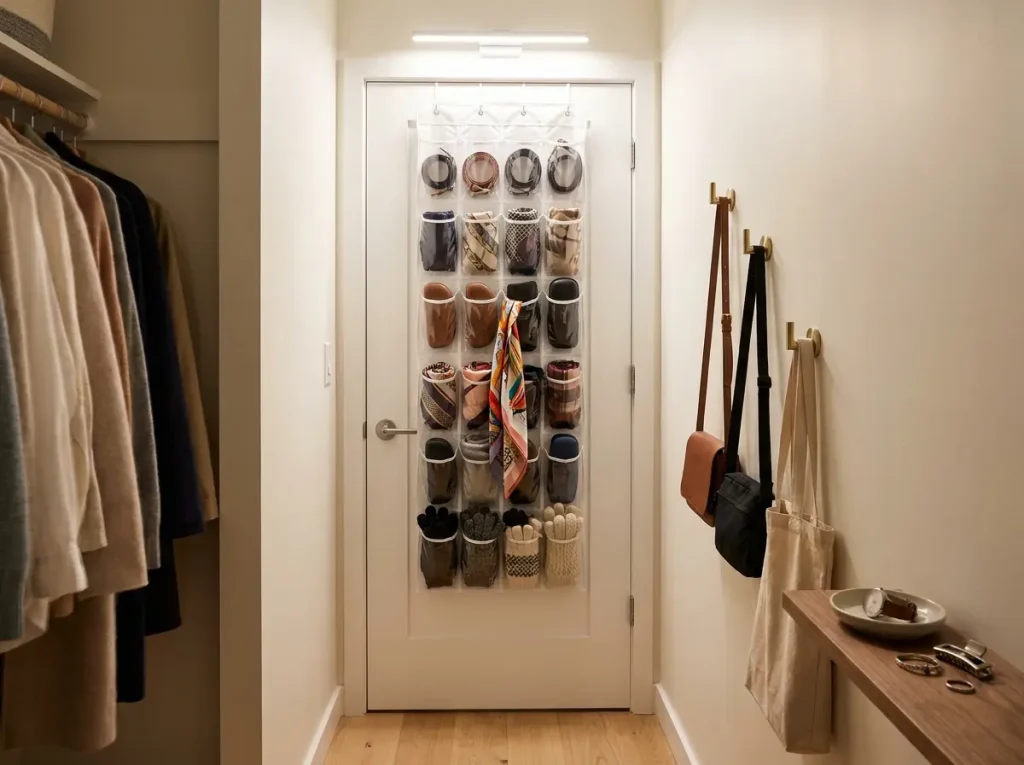
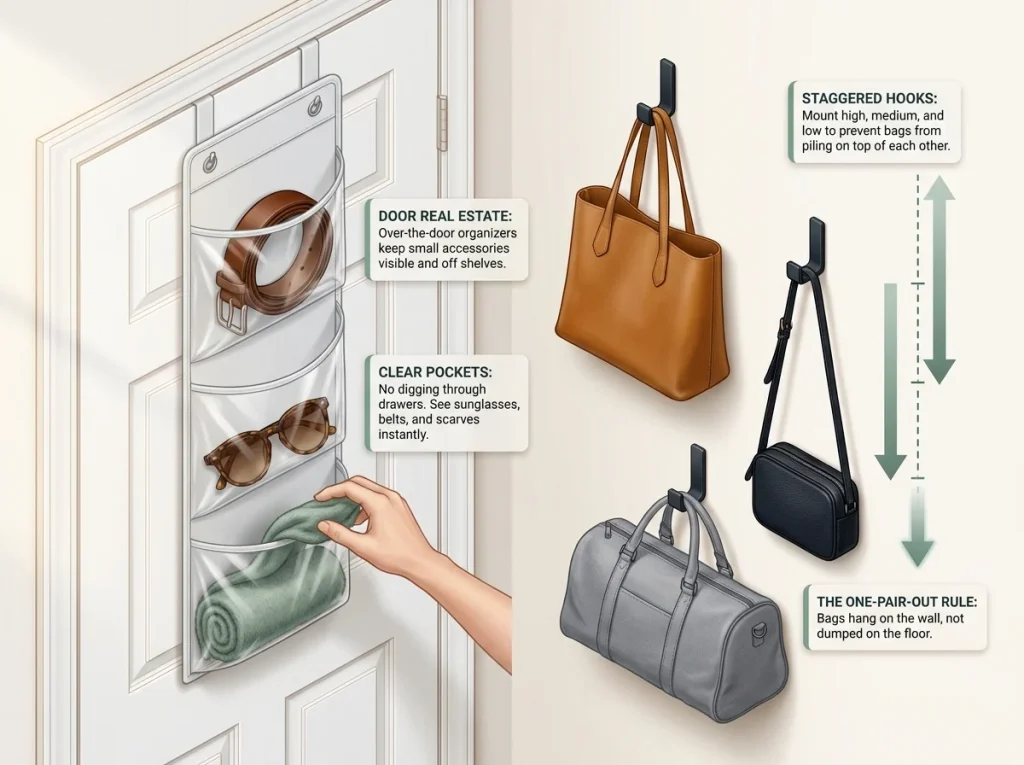
Your closet door’s interior face is prime storage real estate. The SimpleHouseware Over-the-Door Shoe Organizer (24 Pockets) works for far more than shoes — clear pockets hold rolled belts, scarves, sunglasses, and winter accessories where you can see every item at a glance. The 24-pocket layout means no digging through drawers. Check your door type first, though: hollow-core doors need hook-style hangers rated for lighter loads. Solid-core doors handle heavier options.
Wall hooks at staggered heights hold bags without piling them. Three hooks — high, medium, low — keep different bag sizes from tangling. If you mount hooks on the wall next to the door, you grab your bag on the way out without crossing the closet.
The One-Pair-Out Floor Rule
One rule keeps the floor from reverting: nothing on the floor without a container. No loose shoes. No bags propped against the wall. If it’s on the floor, it’s in a rack, a basket, or a bin. This one constraint stops the pile before it starts.
For upper shelves where seasonal bags and accessories live between uses, the Fabric Storage Bins with Labels (Set of 6, Collapsible) keep items contained and labeled. They collapse flat when not in use — helpful if your seasonal needs change year to year. The labels are the real value here: you won’t climb a step stool to check “which bin has the winter scarves” if the answer is written on the front.
Closet organizer systems with built-in shoe storage cover the full system approach if you’re ready for a complete overhaul.
The Monthly Reset That Keeps It All Working
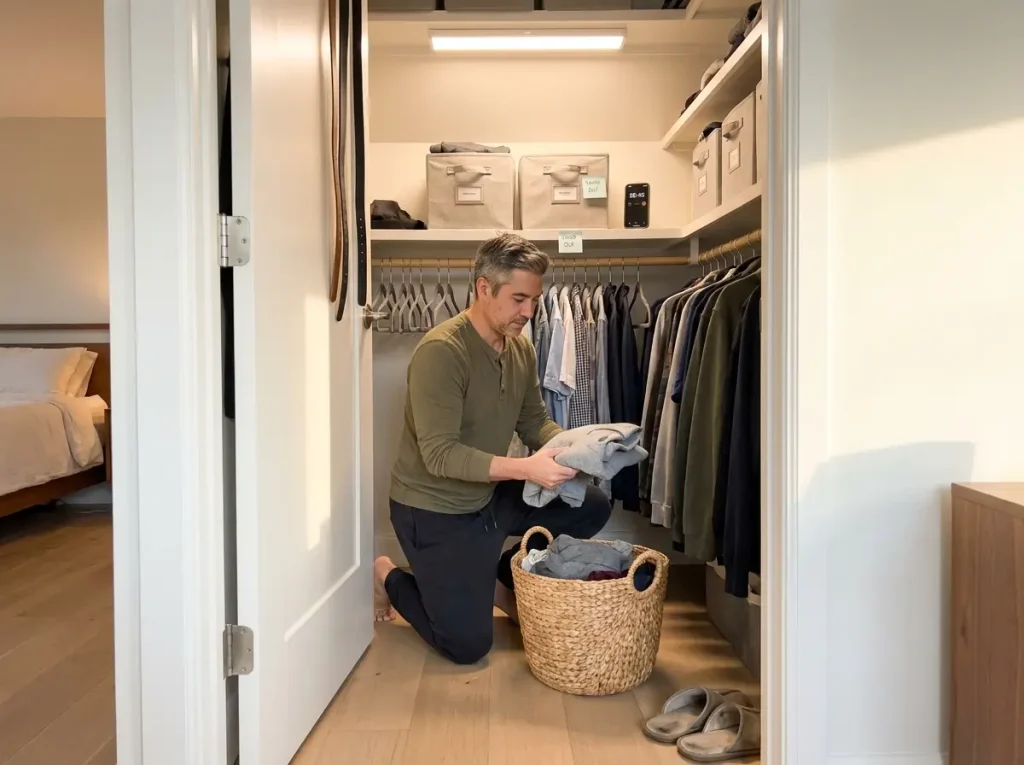
The 10-Minute Monthly Reset
Every organized closet on the internet shows the “after” moment. Nobody shows month two, when the laundry piles up, the seasonal transition hits, and the new purchases don’t have a home yet. A zone-based system only works if you maintain it — and the maintenance is simpler than you think.
Set a recurring 10-minute timer once a month. Walk through each zone:
- Zone A: Straighten hangers, close the gaps where you’ve been shoving clothes in. If any garment migrated to the wrong section, move it back.
- Zone B: Check the floor for creep. Any shoes or bags that landed outside their designated spot go back in.
- Zone C: Pull bins forward, scan labels, verify nothing needs to rotate down to Zone A for the coming season.
- Zone D (floor): If anything is on the floor without a container, deal with it now.
That’s it. Ten minutes, once a month. The closet stays functional because you’re catching drift before it becomes an overhaul.
Seasonal Rotation Without the Weekend Project
Full seasonal closet swaps feel like a chore because people save them up. A better approach: rotate one category per week during transition season. Week one, move the heavy coats from Zone A to Zone C in vacuum bags. Week two, swap the boots and sandals. Week three, rotate the knitwear. By the end of the month, your closet reflects the season — and you never spent more than 15 minutes at a time.
Pro tip: Keep your off-season garment bags and vacuum bags IN the closet, in Zone C. If they’re in the attic or the garage, you’ll keep postponing the rotation because you don’t feel like going to get them.
The Backward Hanger Method
Turn all your hangers backward at the start of each season — hooks facing outward instead of inward. As you wear something, flip the hanger back to normal. At the end of the season, anything still backward is a candidate for donation. You wore it zero times in an entire season. The data is clear.
Keep a woven basket or fabric bin inside your closet as a permanent donation box. When the backward hanger reveals something you don’t need, drop it in the basket. When the basket fills up, take it out. Ongoing editing beats the annual closet purge every time — less exhausting, less emotional, more honest.
The closets that stay organized long-term all share this: the owner treats maintenance as a small, regular habit, not a big weekend event.
Conclusion
Three things determine whether your walk-in closet stays organized or reverts within a month.
First, measure before you buy anything. Your layout type — single-sided, L-shaped, U-shaped — determines which solutions fit and which become expensive mistakes. Second, organize by zones (daily wear at eye level, secondary below and above, archive on top, floor storage in containers only) so every item has a home that matches how often you use it. Third, the 10-minute monthly reset is what separates a system that lasts from a weekend project that doesn’t.
Three-Month Check: At the three-month mark, check whether your double-rod heights still match your current wardrobe and whether any zone has drifted back to “dumping ground” status. Adjust shelf heights and rod positions if your seasonal rotation changed what hangs where.
Pick one wall. Measure it. Set up Zone A with what you already own — slim hangers, spaced properly, daily wear only. That’s your starting point. Everything else builds from there.
Q1 How do I organize a walk-in closet on a budget?
Start with what you already have — repurpose bins and baskets from other rooms, switch to slim velvet hangers for instant rod space, and use shelf risers from the kitchen. Add a donation basket in the closet for ongoing decluttering. Most walk-in improvements cost very little if you focus on the one zone that frustrates you most first.
Q2 How do I organize a shared walk-in closet for two people?
Divide the closet by person, not by category. Each person gets their own wall or section with their own Zone A for daily wear. Shared items like extra bedding or seasonal coats go in Zone C at the top. The key is that each person’s morning routine stays in their own territory so nobody is reaching past the other person’s clothes.
Q3 What is the best layout for a walk-in closet?
It depends on your room’s shape. U-shaped layouts (minimum 7×10 ft) use three walls and offer the most storage. L-shaped layouts work in smaller spaces but create one dead corner to solve. Single-sided walk-ins (4×5 ft) function like deep reach-in closets and should focus on one strong wall of vertical storage.
Q4 How do I use the corners in a walk-in closet?
Mount a 45-degree angled rod across the corner for short-hang items like blouses and dress shirts. Add corner shelving for folded items, or use rotating pull-out units in deeper corners. A motion-sensor LED light bar in each corner solves the visibility problem that turns corners into forgotten zones. Budget option: push a freestanding shelf unit into the corner — zero installation, zero wall damage.
Q5 How often should I reorganize my walk-in closet?
A full reorganization shouldn’t be necessary if you do a 10-minute monthly reset — straighten zones, enforce the floor rule, and remove items from the donation basket. Do a seasonal rotation twice a year, spreading it over a few weeks instead of one marathon session. The backward hanger method tracks what you actually wear so you can edit without guessing.