









In this article
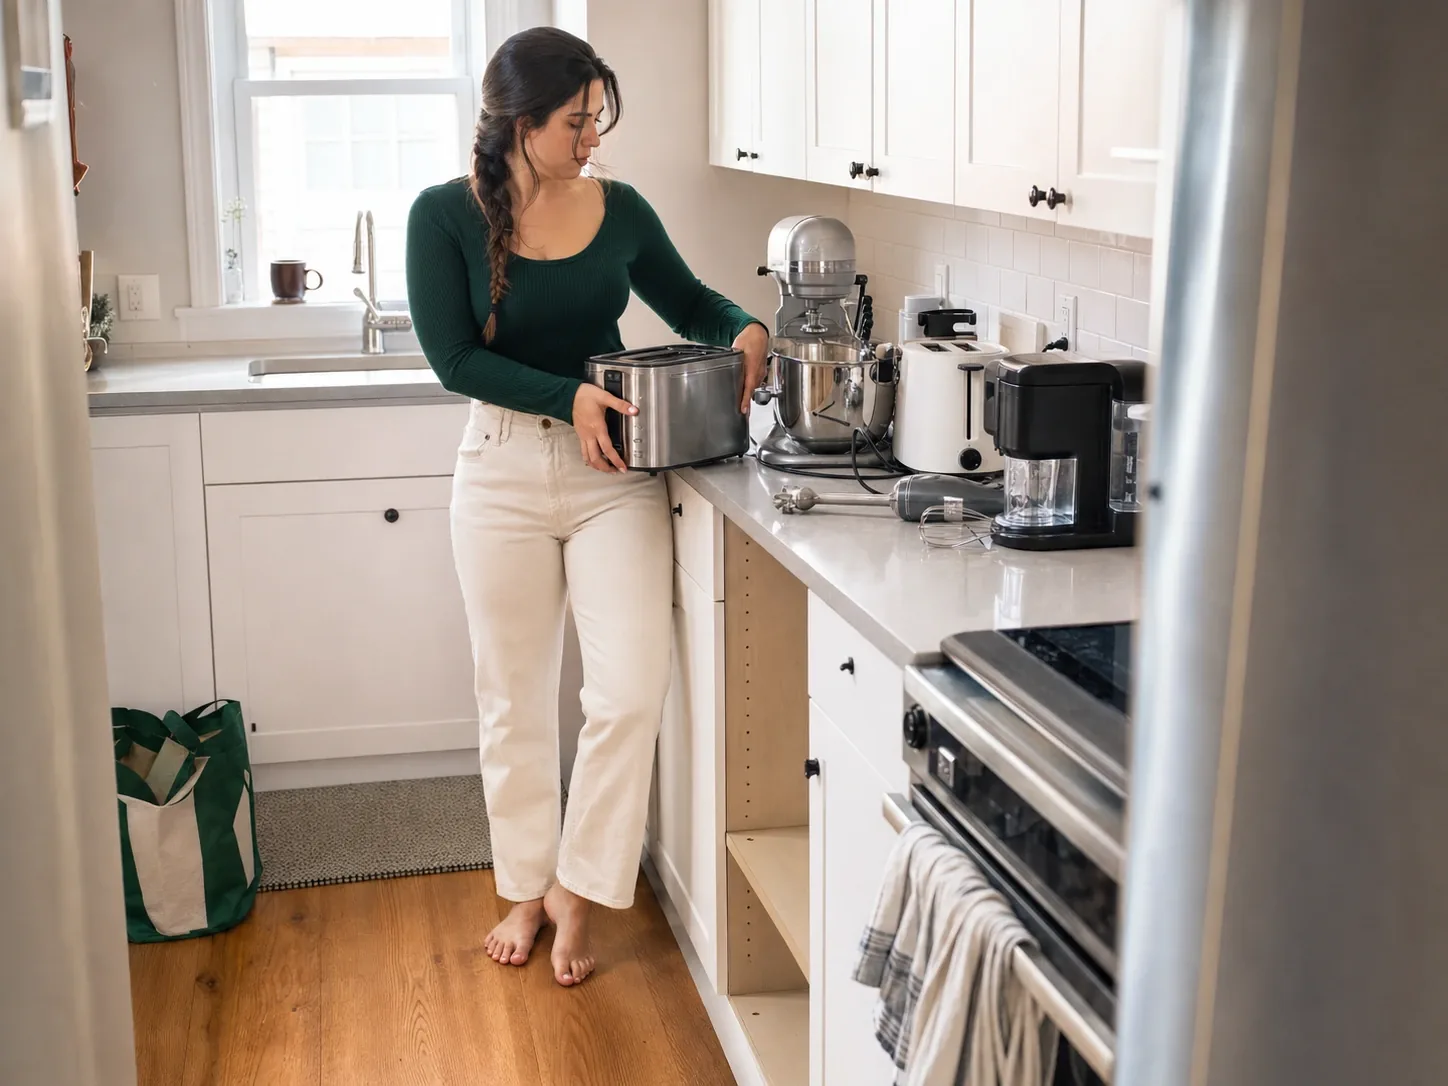
You finally put the appliance away. The toaster goes in a cabinet, the counter looks clear, and for about a week it stays that way. Then the toaster is back out, the coffee maker never left, and the stand mixer is wedged in a spot you have to kneel to reach. That is not a discipline problem. It is almost always a fit problem: the spot you picked could not really hold the appliance, or getting it out was a two-hand, bend-and-reach production nobody repeats before their first cup of coffee. The fix for appliance storage in a small kitchen is boring and it works. Sort each appliance by how much it weighs and how often you use it, then match it to a spot that can actually hold it, and confirm that before you commit.
Quick Answer
Store small appliances by sorting them first, then matching each one to the right spot:
- Sort every appliance by weight and how often you use it.
- Keep daily, light appliances nearest to reach.
- Put heavy ones in a base cabinet or on an appliance lift, never up high.
- Send occasional, small ones to a deep drawer or rolling cart.
- Move rarely-used appliances to the pantry or a closet.
- Confirm the spot’s real weight capacity before you commit.
Sort Your Appliances by Weight and How Often You Use Them
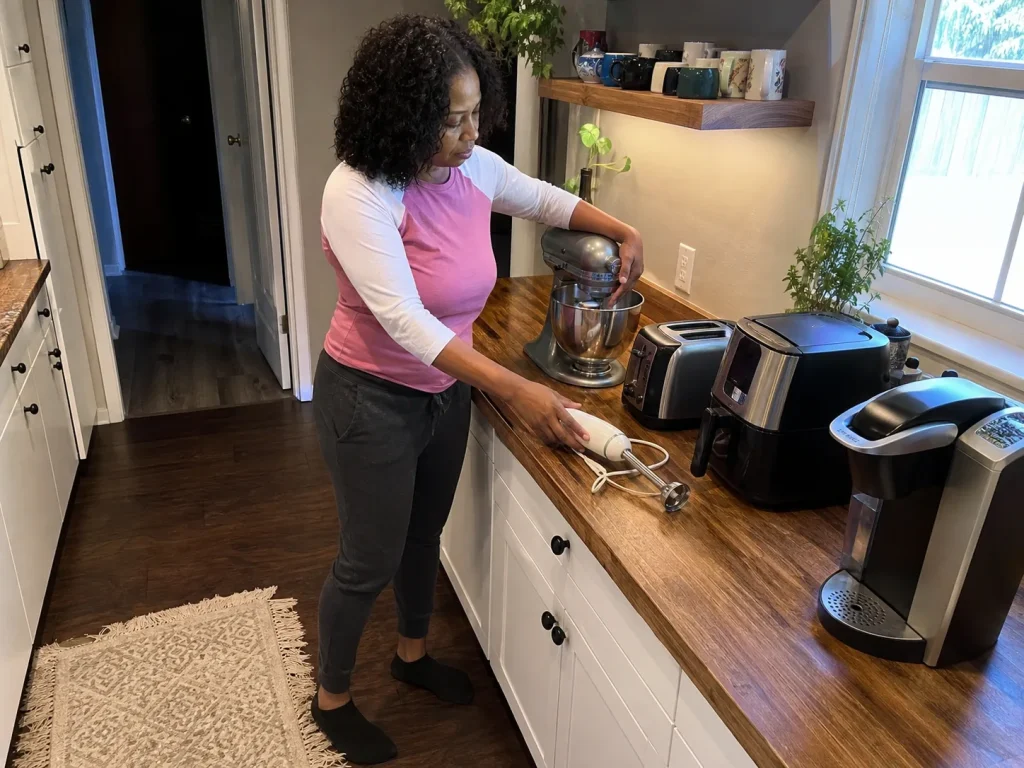
Most people skip straight to “where do I put the air fryer?” The people whose kitchens still make sense three months later do one dull step first. They sort. And the sort runs on two things at once, not one: how often you reach for the appliance, and how much it weighs. Skip either axis and you end up putting a 30-pound mixer somewhere it does not belong.
This step assumes you have already thinned out what’s actually earning counter space. If the fondue set you used once in 2022 is still in the running, sort that out first. What is left is the working set of appliances that genuinely need a home.
Weight decides what the spot has to hold
Weight is the axis everyone eyeballs and gets wrong. A full-size stand mixer runs about 20 to 30 pounds, and the 7 and 8-quart models push closer to 40. An air fryer is lighter than people assume: roughly 7 to 10 pounds for a small one, and 15 to 20 for a large 5 to 7-quart model. So the biggest air fryer in the store weighs about half of what a heavy stand mixer does. One of those can live on a wall-rated shelf. The other absolutely cannot, and putting it there is how a shelf ends up on the floor.
Write your appliances into three rough weight tiers: featherweight (immersion blender, hand mixer, single-serve coffee maker), medium (blender, food processor, standard toaster, air fryer), and heavy (stand mixer, a large multi-cooker like an Instant Pot, microwave). The tier decides which storage zones are even candidates before you think about anything else.
Frequency decides how easy retrieval has to be
The second axis is frequency of use: how often the appliance earns its keep. Daily appliances have to stay at or very near reach, because if pulling one out is any real effort, it migrates back to the counter within days. That is the single most repeated failure in kitchen-organizing threads: the coffee maker gets “properly” stored in a cabinet, then reappears on the counter by Wednesday, because the hiding spot was never the obstacle. Retrieval friction and a missing nearby outlet were.
Weekly appliances can move one step away, into a drawer, a cart, or a low cabinet. Rarely-used ones, the few-times-a-year appliances, earn a spot outside the kitchen entirely. Once you have each appliance tagged with a weight tier and a frequency, the rest of this guide is just matching. There is one more measure to take, though, before anything goes anywhere.
Measure the appliance’s footprint against the spot before you commit, not after. A blender fits a standard drawer interior of roughly 18 to 21 inches, but most stand mixer bases need the full 24-inch depth of a base cabinet to sit flat. A tape measure saves you the return trip.
Turn a Base Cabinet Into an Appliance Garage
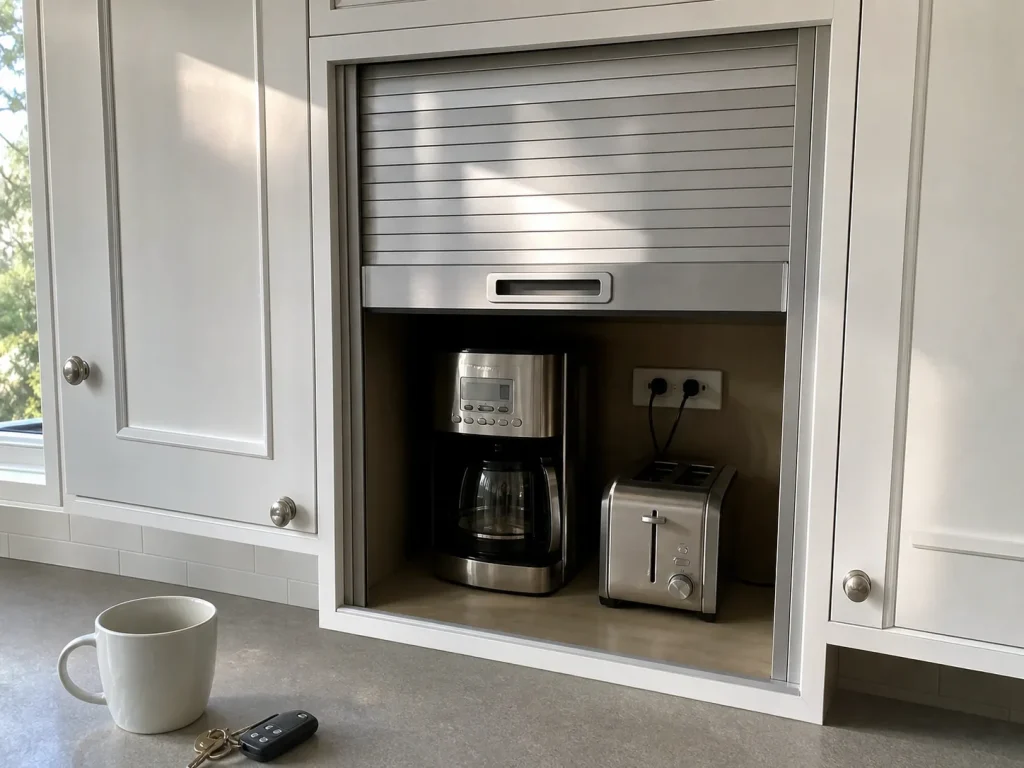
An appliance garage, sometimes called an appliance hutch, sounds like something you pay a cabinetmaker to build. Most of the time it is just a cabinet you already own, dedicated to one or two daily-but-bulky appliances so they live off the counter but stay easy to grab. Before you buy anything, the free version wins: pick an empty base cabinet, confirm it clears the appliance’s height and depth, add a non-slip liner, and you have a garage. Kits are only worth it once a specific cabinet has proven it needs one.
Make it usable, not just hidden
A garage only works if the appliance is genuinely easy to use from it. That means an outlet within cord reach, so you are not dragging a coffee maker across the counter every morning, and enough clearance to pull the appliance forward in one motion. Cord management matters here: leave the appliance plugged into an in-cabinet outlet if you have one, or coil the cord loosely so retrieval is not a detangling job. Get this wrong and you are back to the migrate-to-the-counter loop from the last section.
The door is where most garages fail
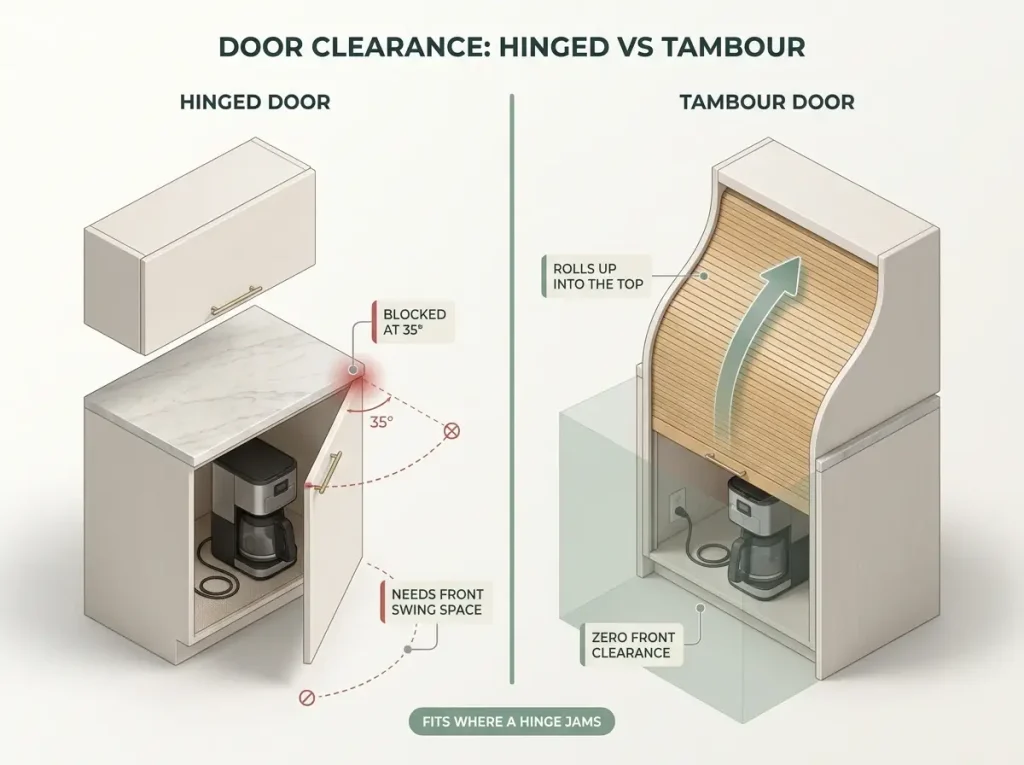
Here is the mechanical failure nobody mentions. A hinged appliance-garage door needs swing clearance out front, and in a tight kitchen it often does not have it. A low upper cabinet or an adjacent wall stops the door halfway, and now you are fighting it every time. The real fix is a tambour door, the roll-up kind that slides up instead of swinging out, so it needs zero front clearance. A kit like the Usknxiu Sliding Tambour Door Cabinet Kit retrofits a counter-height cabinet section into a proper garage that opens in a space where a hinged door would jam. It is an owner-level project, not a renter one, so if you rent, dedicate a cabinet you already have and skip the kit. If you are reworking the dead space deep base cabinets waste while you are in there, do both at once.
Fix the Corner Cabinet Dead Zone
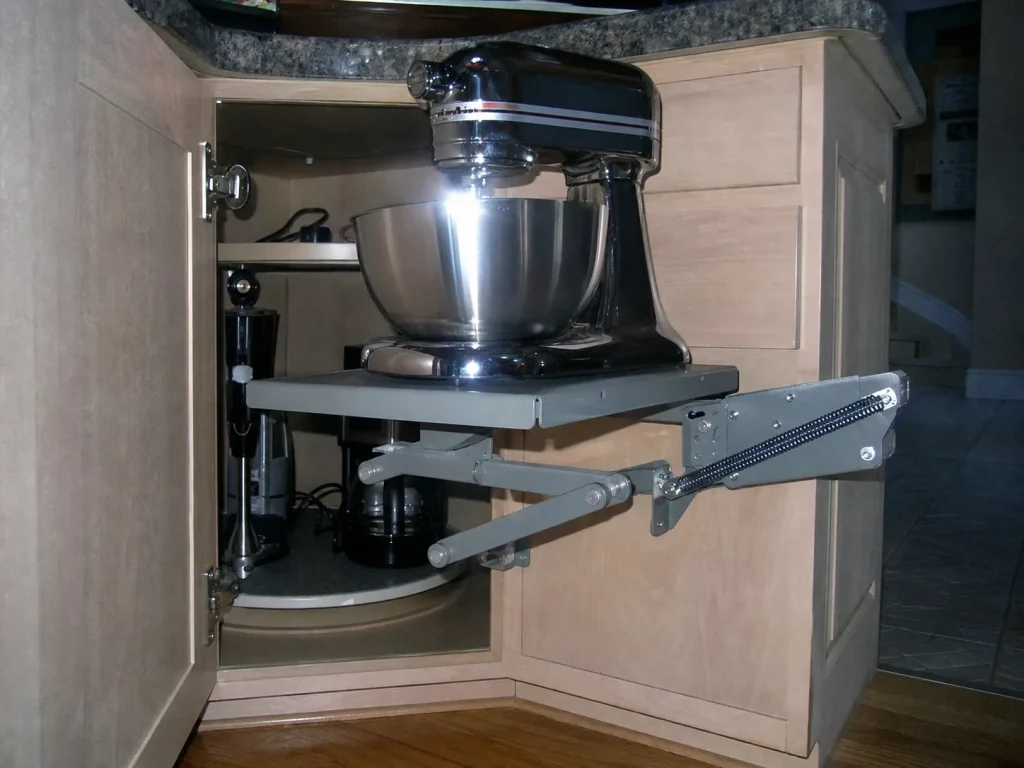
Corner cabinets are where appliances go to disappear. Tasting Table calls them “the kitchen’s Bermuda Triangle,” and anyone who has crawled halfway into one chasing a slow cooker knows exactly why. The conventional wisdom is that a corner base cabinet is wasted space. In practice, a turntable for the light stuff and a lift for the heavy stuff turns it into some of the best appliance storage you have. The move that unlocks it, again, is sorting by weight.
Light appliances get a turntable
For the featherweight tier, the problem is reach, not load. The back of a corner cabinet is unreachable, so anything stored there gets used once and abandoned, and you lose the whole cubic footage. A simple turntable, the classic lazy susan, fixes it: spin the back to the front, no tools, fully renter-safe. The Copco Non-Skid Turntable 12-inch is the standard fit for most corner cabinets and its raised lip keeps an immersion blender or a single-serve maker from sliding off when you spin it. If your cabinet opening is tighter, the 9-inch version does the same job in less space.
Heavy appliances get a lift, never a high shelf
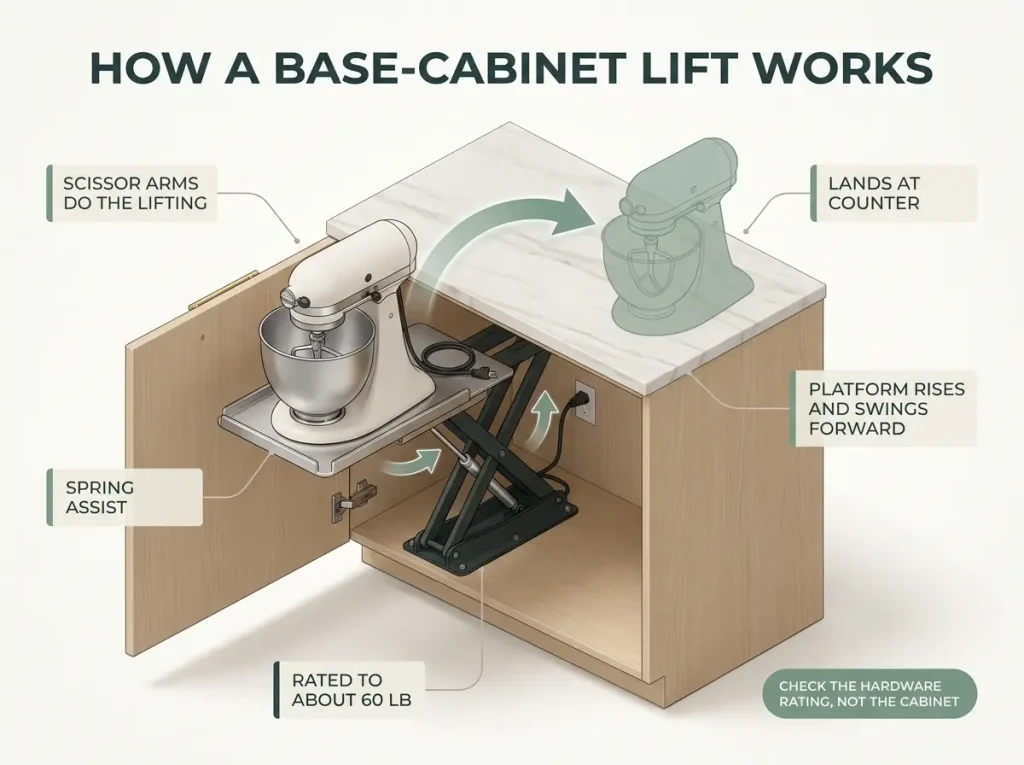
The heavy tier is a different problem, and this is where people get hurt. Do not put a 30 to 40-pound stand mixer on a high or hard-to-reach shelf. A base-cabinet appliance lift solves it: the mixer sits inside the cabinet, and a spring mechanism raises it up and out to counter height when you need it. The Rev-A-Shelf Heavy-Duty Stand Mixer Lift is rated to about 60 pounds, roughly double the heaviest stand mixer, which is exactly the margin you want on something that heavy moving over your countertop. The low-tech alternative is a stable low base-cabinet shelf with no mechanism at all, which costs nothing but makes you lift the mixer yourself. Either way, confirm the rated weight of the mechanism and the cabinet before you load it. The lift hardware, not the cabinet box, is what bears the load, so “looks sturdy” is not the check. For everything else a dead corner cabinet can hold, the same weight-first logic applies.
Reallocate a Deep Drawer for Smaller Appliances
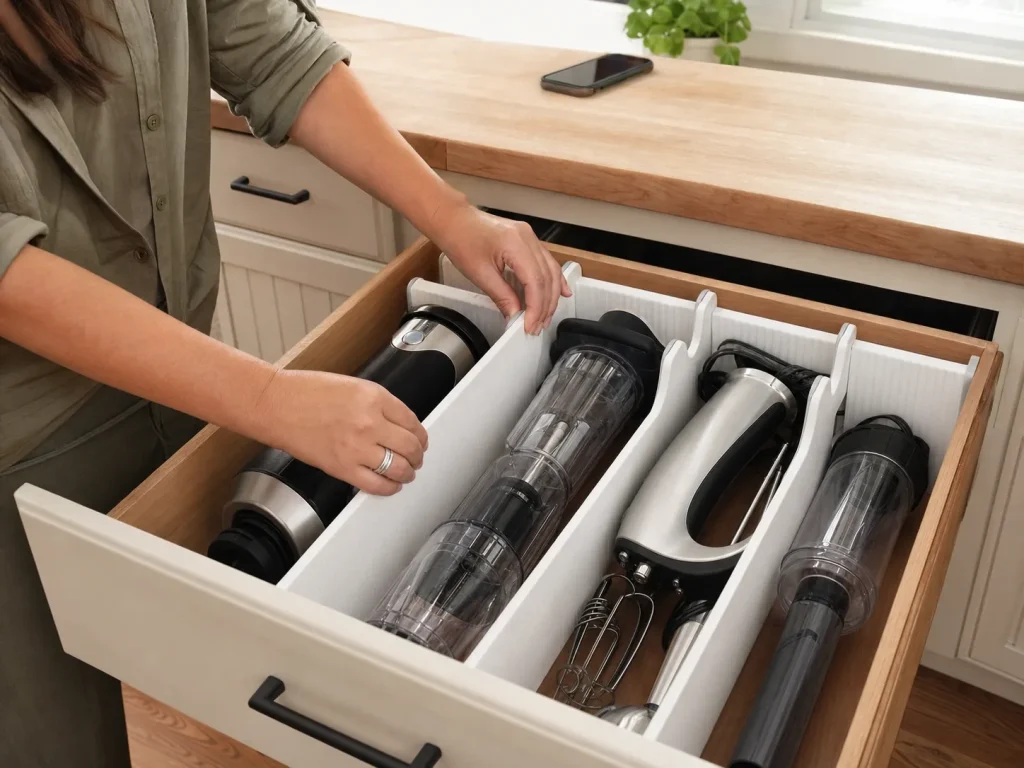
A deep pot drawer is prime appliance real estate that most people never think to repurpose. It is flat, it sits at an easy height, and it pulls all the way out to you, so there is no crawling into a dark box. For medium appliances, that come-to-you access is the whole point: retrieval friction, the thing that sends appliances back to the counter, drops to almost nothing.
What belongs in a drawer, and what does not
The drawer is right for the medium tier that clears a standard 18 to 21-inch drawer interior: blenders, food processors, hand mixers, waffle makers. A deep drawer gets recommended for everything heavy, and it works, right up until the appliance is a stand mixer. Here is the failure competitors skip entirely. A heavy load stresses the drawer slides, the runners the drawer glides on, not just the wooden box. A drawer that “should” hold a mixer can sag or start sticking after a few months because the slide hardware was never rated for that weight. The box looks fine while the mechanism quietly gives out. Keep the mixer in a base cabinet with a lift, and reserve the drawer for the medium stuff.
Keep them from sliding around
Loose appliances roll and collide every time the drawer opens and closes, and within a week you are back to a jumble. Adjustable dividers hold each unit in its own lane. The RAPTUROUS Adjustable Deep Drawer Divider expands to fit the drawer width and keeps a blender and a food processor from knocking into each other, and it drops right in with no modification, so renters are fine. If you do not have a spare deep drawer, a pull-out shelf gets you the same come-to-you access inside a base cabinet instead.
Store drawer appliances on their most stable side, not always upright. A food processor lives happily on its base, but a hand mixer nests flatter lying down with its beaters stored beside it. Lower and flatter means the drawer closes without a fight.
Use a Rolling Cart for What Has No Cabinet Home
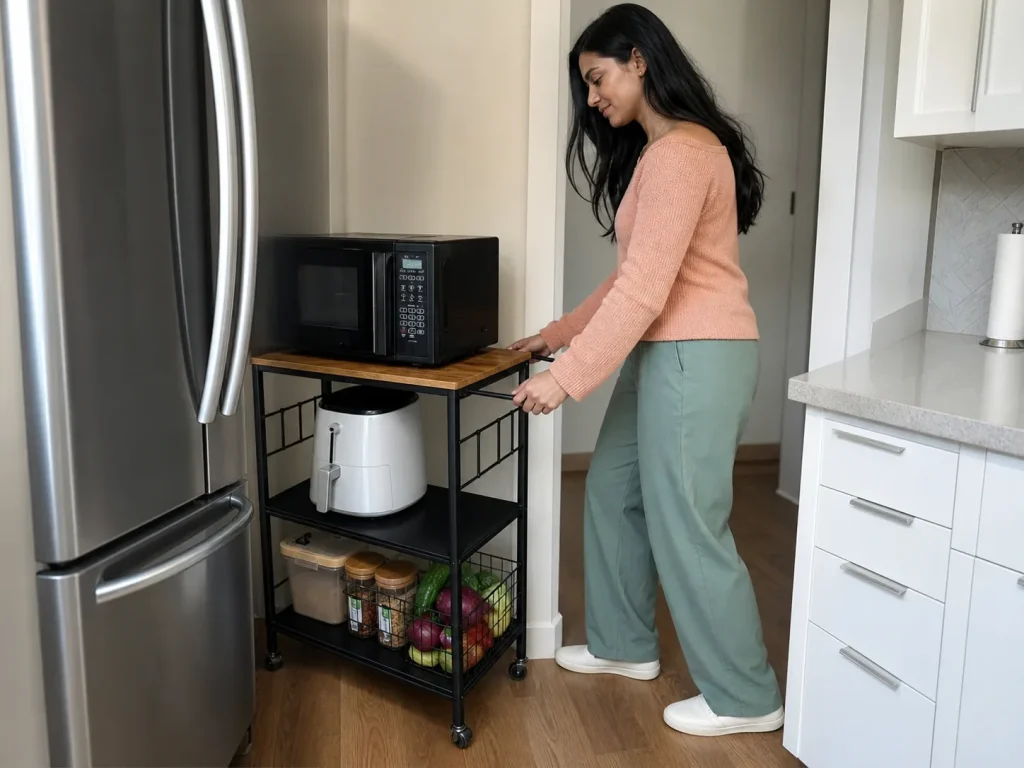
Sometimes the honest answer is that your kitchen is out of built-in storage, and forcing an appliance into a spot it does not fit is how systems fail. That is when a rolling cart earns its place. Nothing attaches to a wall or a cabinet, so it sidesteps the whole modification question, which is why it is often the best answer for a kitchen with almost no built-in storage at all.
Match the cart to the gap and the weight
Cart width is the decision most people get wrong. A wide cart with a solid top holds a microwave, an air fryer, or a stand mixer near the counter, and it becomes a small prep surface on top. The 3-Tier Rolling Kitchen Microwave Cart has a wide solid top and lockable wheels, so it stays put once you place it and does not flex under a heavier daily appliance. Lock the casters after you roll it into position, or a heavy microwave will walk it across the floor over time.
When the only open space is the narrow gap beside the fridge or a cabinet, a wide cart will not fit, and this is where the slim option wins. The Slim 3-Tier Rolling Storage Cart is about 7 inches wide and slides into that dead gap, rolling out when you need what is on it. It is renter-friendly and needs no drilling. For what it is worth, a basic, budget-friendly wire or plastic cart fills the “no cabinet home” gap perfectly well. You do not need a butcher-block island to solve this, and the cart you already have in a closet might do the job today.
Go Vertical, but Only for Lightweight Appliances
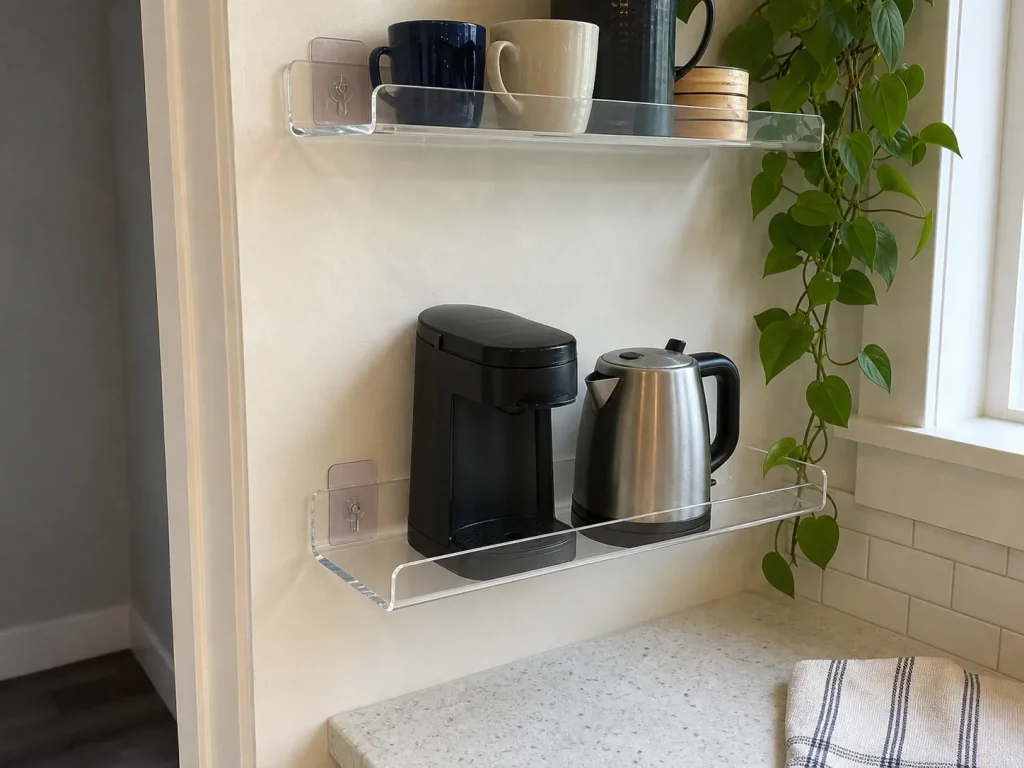
Vertical storage looks like free space, and for a single-serve coffee maker or a stick blender, it is. But this is exactly where people get hurt, so it comes with the one caveat that matters most in this whole guide. I used to point people straight to a wall shelf for anything they wanted off the counter. After enough came-down-in-a-week stories in organizing threads, I switched to sending only genuinely light appliances up high. The reason is a gap between two numbers that look like the same promise but are not.
The rating on the box is not the rating on your wall
A wall-mounted shelf’s printed weight rating assumes it is screwed into a wall stud. Mount that same floating shelf with adhesive strips or hollow-wall anchors, which is the renter-safe route, and it holds a fraction of that number. This is not a guess. Consumer Reports’ anchor testing found a drywall-plus-plastic-anchor kit failed at about 58 pounds, while the identical kit driven into a stud held 329 pounds. That is the same hardware behaving completely differently depending on what is behind the wall, and it lines up with CPSC’s anti-tip anchoring guidance on why the anchor, not the printed rating, decides what actually holds.
So when you read “holds 20 pounds” on an adhesive shelf, mentally de-rate it hard: think “one light appliance and nothing else,” not the box number. The 2-Pack No-Drill Acrylic Wall Shelves are the renter answer here precisely because the no-drill mount is the point: use them for an immersion blender or a small kettle, and keep the microwave and the mixer far away from any wall. If you own the place and can hit a stud, you get the real rating, and shelves that actually hold the weight they claim become a legitimate option for slightly heavier items. If you cannot hit a stud and the appliance is anything but featherweight, do not force the wall. Send it to the cart or the drawer instead.
Move Rarely-Used Appliances to the Pantry, and Reset Every Few Months
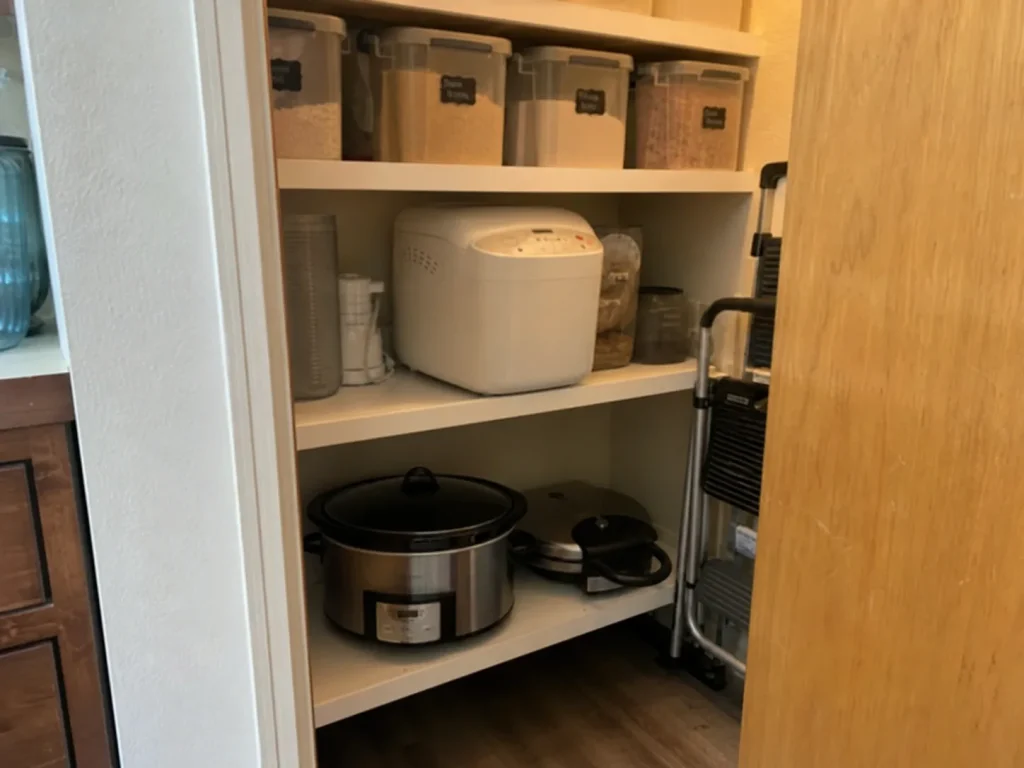
The waffle maker you use on holidays does not deserve prime kitchen storage. Pantry storage, or a closet shelf, is where the few-times-a-year appliances belong, which frees your best kitchen zones for the daily and weekly ones. Keep the box or bag if it protects the appliance, label the shelf edge rather than the appliance itself, and put the heaviest ones on a low shelf so lifting them down is never an overhead reach. If the pantry receiving all this is its own kind of mess, set up a pantry that can actually absorb the overflow first.
The reset is the part every guide skips
Every article about appliance storage frames it as a one-time setup. Real kitchens do not work that way. The three-month reset is simple: every few months, pull anything that has crept back onto the counter and re-sort it by the rule from the start of this guide. If an appliance is on the counter, it is either daily, which is fine, or it failed its spot, which means you fix the spot rather than just hiding the thing again. An appliance that keeps coming back out is not a discipline failure. It is a signal that its assigned home has too much retrieval friction or no outlet within reach, and the reset is where you catch that and correct it.
In a shared kitchen where more than one person cooks, run the reset together. A system breaks fastest when only one person designed it and everyone else quietly works around it. The three-month check is also when you re-agree, out loud, what actually earns counter space.
Bringing It All Together
Three things carry this whole system. Sort by weight and frequency before you pick a spot, because those two facts decide which zones are even possible. Match heavy appliances to a base cabinet or a rated lift and light ones to a wall or drawer, and never the reverse. And confirm the spot’s real capacity, both the mechanism and the mount, instead of trusting that it looks sturdy.
In three months, notice which appliance keeps returning to the counter. That is the one whose spot has too much friction or no nearby outlet, so fix the spot rather than re-hiding the appliance. Start with the single appliance that annoys you most on the counter right now. Give it a home that actually fits. Then move to the next one.
Frequently Asked Questions
01How do you store appliances in a small kitchen with no cabinet space?
Use a rolling cart or wall space instead of a cabinet. A slim cart fills the gap beside the fridge, and a no-drill adhesive shelf holds genuinely light appliances. Match the cart’s width to your gap and keep only lightweight items on any adhesive-mounted shelf.
02Where should I keep my stand mixer if I don’t have counter space?
In a base cabinet on an appliance lift, not on a high shelf or in a drawer. A stand mixer runs 20 to 40 pounds, which stresses drawer slides and is a real hazard overhead. A base-cabinet lift rated around 60 pounds raises it to counter height safely.
03What should I do with appliances I rarely use?
Move them out of the kitchen to a pantry or closet shelf, heaviest items down low. Occasional appliances like a waffle maker or holiday roaster don’t earn prime kitchen storage, so free those zones for daily and weekly appliances instead.
04Why do my appliances keep ending up back on the counter?
Almost always retrieval friction or no nearby outlet. If getting an appliance out is a two-hand, bend-and-reach job, or you have to re-plug it every time, it migrates back. Fix the spot with easier access or a closer outlet rather than re-hiding the appliance.
05Is it safe to put a heavy appliance in a drawer?
Medium appliances yes, a stand mixer no. The weak point is the drawer slides, not the box, so heavy loads make the runners sag or stick over months. Keep the mixer in a base cabinet and reserve drawers for blenders, food processors, and hand mixers.