









In this article
You spent a Saturday on it. Everything came out, everything got wiped, everything went back in matching bins, and for about eleven days it looked like the photo you saved. Then one tired Tuesday the yogurt went on the wrong shelf, and by the following weekend it was a fridge again. Learning how to organize a refrigerator in a way that survives past week four has less to do with bins than with temperature, measurements, and how much the system asks of you on a bad day. Everything below is built on FDA and USDA food-safety guidance and on actual interior dimensions, which is also the whole case for mapping your fridge before you buy a single bin.
Quick Answer
Organize by temperature first, containers second. Six steps, in this order:
- Empty the fridge completely and wipe every shelf.
- Put a thermometer mid-shelf and reach 40°F or below.
- Assign zones: dairy up top, raw meat bottom, produce crispers, condiments door.
- Measure shelf depth, width and vertical clearance before buying a bin.
- Contain only what rolls, leaks or hides. Leave the rest loose.
- Run a five-minute sweep once a week, before grocery day.
How Cold Actually Moves Through Your Refrigerator
Most people load a fridge like a bookshelf: by category, by what looks tidy, by what fits in the gap. A refrigerator behaves more like a house with a cold basement and a warm attic. Once you see it that way, half the rules stop feeling arbitrary.
The gradient: why the back runs colder than the front
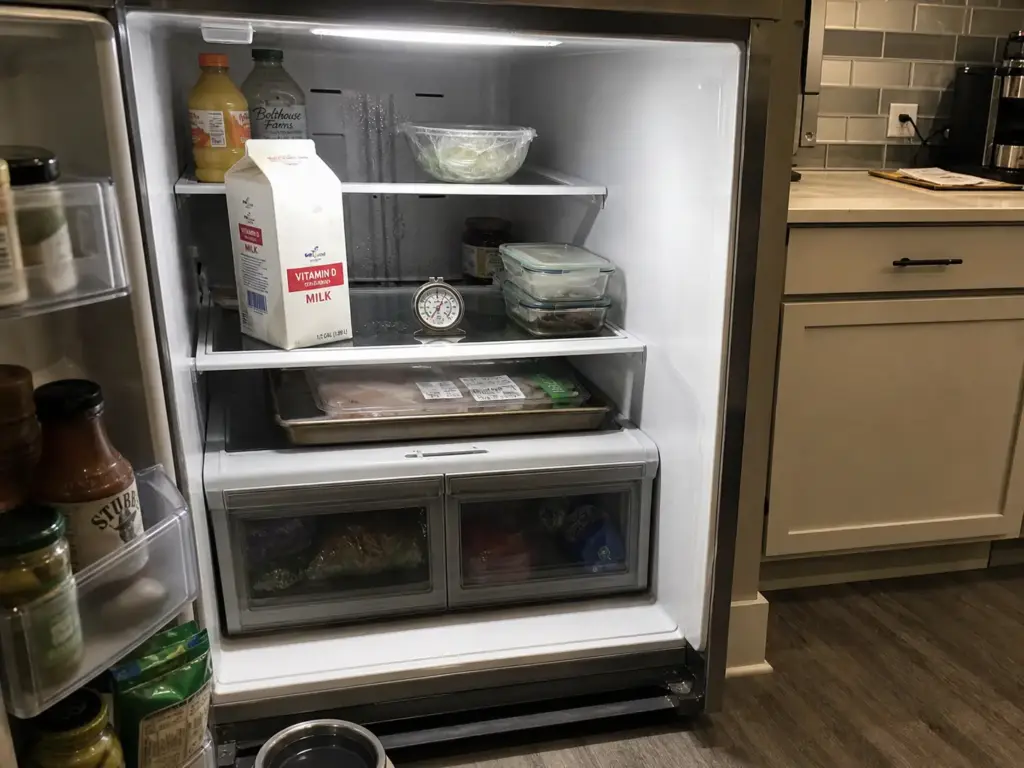
Your fridge is not one temperature. Cold air sinks and pools at the bottom, the rear wall sits closest to the cooling element and runs coldest, and the top front is the warmest interior spot in the whole cabinet. The target for the whole cabinet is 40°F or below, and 0°F in the freezer. The FDA’s own guidance is blunt about it: 40°F or below, measured with a thermometer, not with your hand.
Communities have a name for the coldest, least visible part of that gradient: the black hole, the back six inches where things go to be bought a second time.
Where to put the thermometer (and where not to)
Center of a middle shelf, sitting in open air. Not clipped to the door, which reads a temperature nothing else in the fridge experiences, and not shoved against the back wall, which reads colder than the rest of the food. Leave it there overnight before you trust the number.
What two degrees actually buys you
This sounds like pedantry until you look at the shelf-life data. Milk held at 2°C shows meaningfully less bacterial growth after four days than the same milk at 4°C. Two degrees is the difference between Thursday and Sunday, and that gap is the entire argument for thinking in zones instead of in categories.
Why the Door Is the Warmest Shelf in the Fridge
Manufacturers mold an egg tray and a gallon-sized dairy bin into the warmest part of the appliance, and then everybody blames the milk for turning early. This is the section where most readers mutter “oh.”
What the door temperature actually measures
Test-kitchen measurements across six refrigerator doors averaged around 45°F while the shelves inside the same units held 35–40°F. Every time the door swings open, that pocket flushes with room air and has to recover. Nothing else in the fridge takes that hit.
Eggs, milk and the two things everyone gets wrong
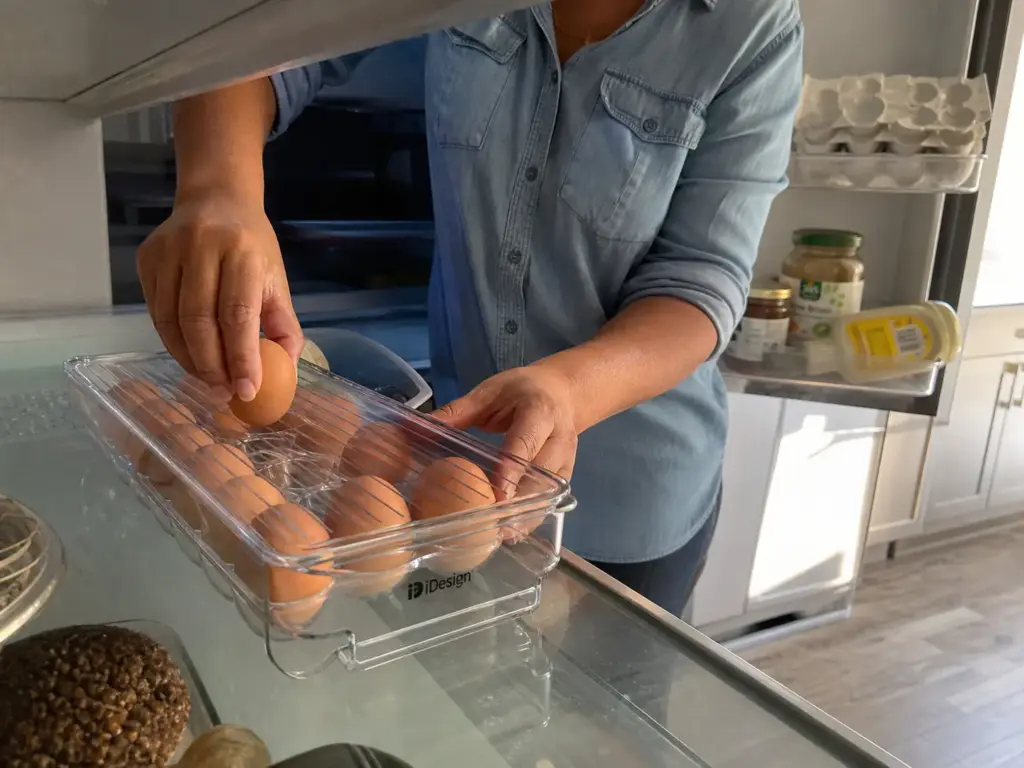
Eggs on the door ride a temperature swing all day, condensation forms on the shell, and an eggshell is porous enough for that to matter. Milk has the shortest useful life of anything most households buy weekly, and the door is the worst place in the appliance for it. Both move inside, ideally to a middle or lower shelf toward the back.
The carton your eggs came in already solves this. It stacks, it protects, and it prints the date right on the lid. Only look at a dedicated holder if the carton keeps getting crushed or you buy eggs by the flat. If that’s you, the iDesign Clear Plastic Egg Holder holds 21 eggs in a covered, clear, stackable format that fits a standard interior shelf, which is what makes moving eggs off the door feel survivable instead of annoying. It does take up more footprint than a carton, so measure before you commit.
What the door is genuinely good at
Condiments, jarred sauces, pickles, hot sauce, beer. Anything high-acid, high-salt or high-sugar tolerates a temperature swing without complaint. The door is not a bad shelf. It is a specialized one that got labeled wrong at the factory.
Before you rearrange anything, leave a cheap appliance thermometer on the middle shelf overnight and check it in the morning. If the number reads above 40°F, no layout you build will fix what’s actually wrong, and you’ve just saved yourself an afternoon of organizing a warm box.
What Goes on Each Shelf, Top to Bottom
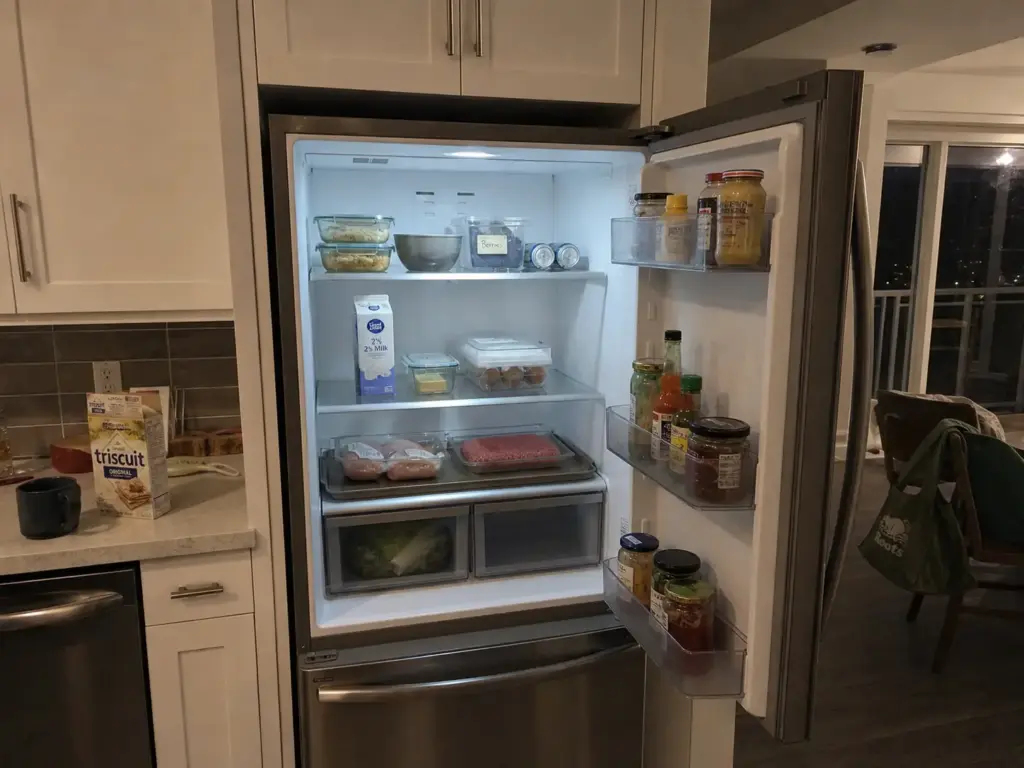
This is the part people want printed and taped inside the door: the actual fridge layout, shelf by shelf. Here it is as a top-to-bottom walk, because that’s how a person unloads groceries.
Top shelf — ready-to-eat and the “eat me first” bin
The top shelf is the warmest interior zone, but it’s also the most temperature-stable, which makes it right for anything that needs no further cooking: leftovers, drinks, yogurt, cooked food. Give one container up here a single job. Label it eat me first, and put anything within a few days of turning into it. That one move is community-invented rather than brand-invented, and it does more work than any other single change on this list.
Middle shelf — dairy after it comes off the door
Milk, cheese, eggs once they’ve moved inside. Toward the back if you have the depth, since the rear runs colder and dairy rewards every degree it can get.
Bottom shelf — raw meat and the leak rule
Raw meat, poultry and seafood live on the lowest shelf, in a leak-proof container or on a rimmed baking tray. USDA food safety basics put raw meat on the lowest shelf for one unglamorous reason: gravity. Cross-contamination has to fall somewhere, and nothing drips onto lettuce if there’s nothing below it. If your model has a deli drawer or a dedicated meat drawer, that counts as your lowest shelf. It also happens to be the coldest zone, so the safety rule and the quality rule point the same direction.
The Crisper Drawers and the Humidity Slider Nobody Explains
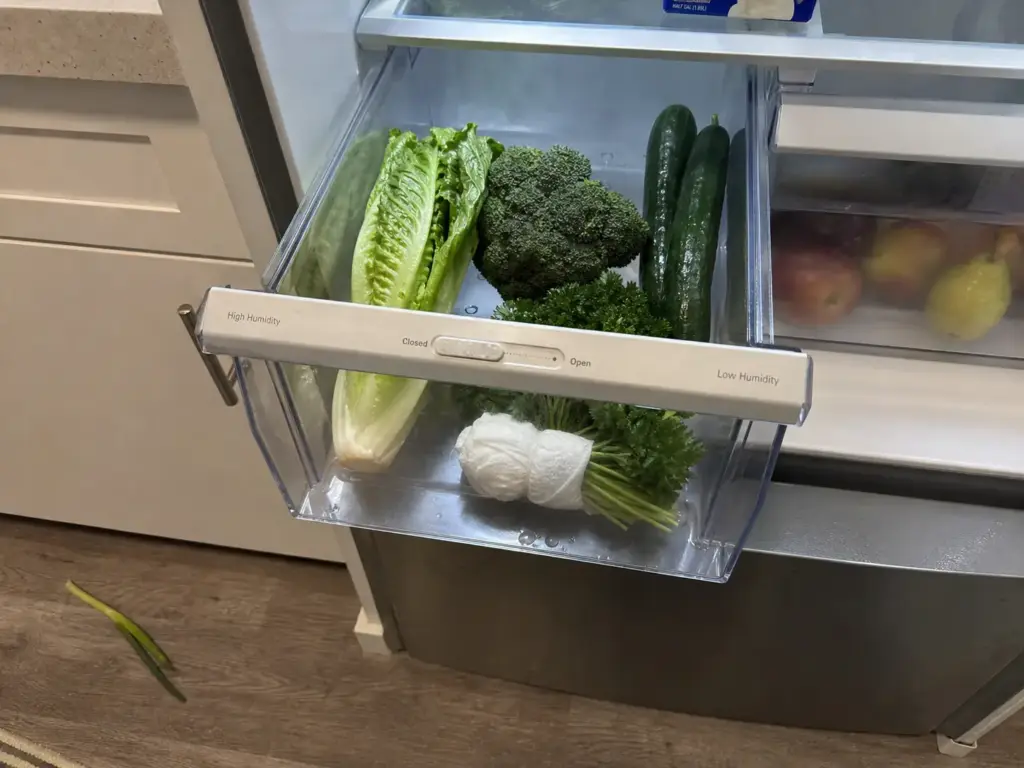
Everybody has slid that little tab back and forth without knowing which end is which. Here is the part nobody tells you about a humidity-controlled drawer: it is not a dial that adds moisture. It is a vent that decides whether moisture can leave.
High or low: what the slider physically does
High humidity means the vent is closed, so moisture stays trapped in the drawer. Low humidity means the vent is open, so moisture and ethylene gas escape. That is the whole mechanism. Iowa State Extension explains what that humidity slider is actually doing: it’s a vent, not a dial.
Wilt versus rot, the rule that sticks
Wilt equals closed, rot equals open. Produce that goes limp wants high humidity: leafy greens, lettuce, broccoli, cucumbers, fresh herbs, asparagus. Produce that goes slimy or brown wants low humidity, because those are the ethylene producers: apples, pears, melons, avocados. Vent that gas out or it ripens everything sharing the drawer. That is the real argument for fruit and vegetable separation, by the way. Ethylene-sensitive greens and gas-producing fruit want opposite vent settings, so they want opposite drawers.
The produce that should never go in the fridge at all
Tomatoes turn mealy. Bananas turn black. Potatoes, sweet potatoes, onions and dry garlic all do better in a dark cabinet with air movement. A surprising share of the “my produce gives out in three days” complaints are about food that never belonged in there.
Empty It, Wipe It, Line It: The Reset That Comes First
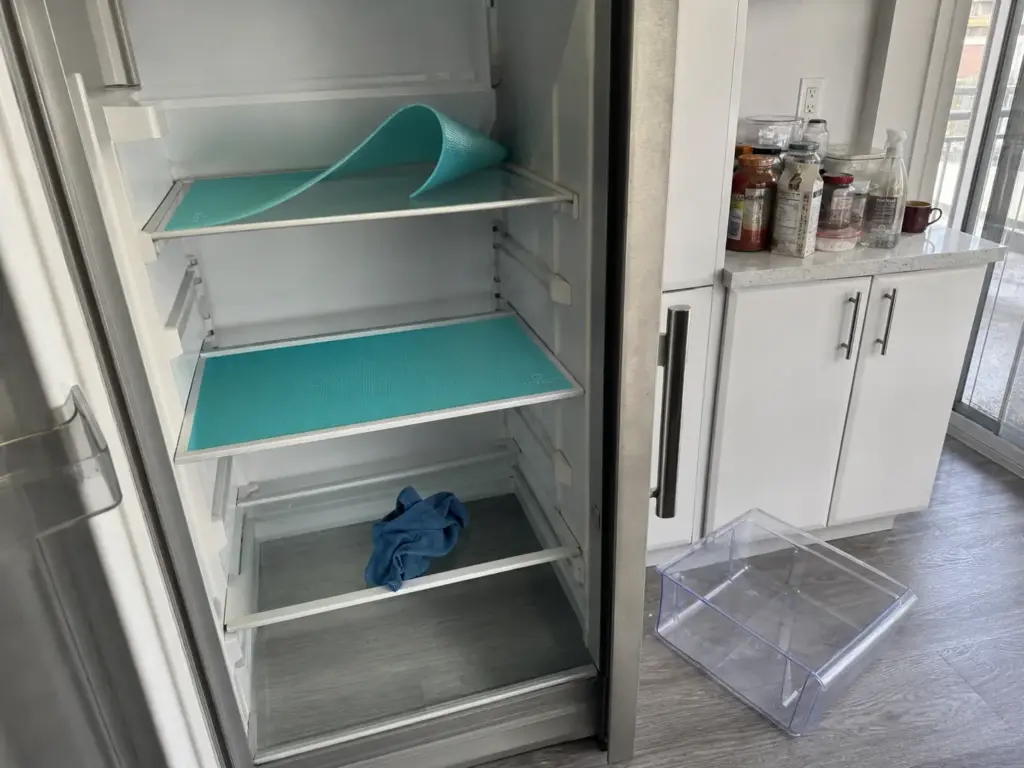
Fridge cleaning is the step everybody wants to skip, because nobody wants to hear “take everything out.” Everybody who skips it ends up organizing around a jar of something from two apartments ago.
The full empty-out (and the three-signal toss rule)
Everything onto the counter first, sorting second. You cannot judge what you own while it’s still wedged in the door. Then toss on three signals: the food is expired, it’s opened and forgotten, or you have three of them. Duplicates are the useful tell, because they mean the current layout is hiding food well enough that you bought it twice.
Wiping without wrecking the gaskets
Warm soapy water, then dry the shelves fully before anything goes back. Skip harsh cleaners and bleach on the rubber gaskets around the door. They dry out, crack, and then the seal that keeps the cold in stops sealing. A damp cloth and patience is the entire method.
Why liners go in before anything else
Shelf liners and drawer liners get dismissed as decorative, and honestly, for a long time I’d have agreed. Then you watch one jar of marinara go over on a bare glass shelf and drip into the track, and the two-hour scrub makes the case better than I can. Parchment paper or a cheap silicone baking mat you already own does the job perfectly. Cut it, drop it in, swap it when it gets grim.
If you’d rather not re-cut parchment every month, the AKINLY 9 Pack Refrigerator Mats come pre-cut at 17.7 × 11.6 in, which drops onto a standard shelf without trimming, and they’re washable and non-adhesive, so nothing leaves residue on an appliance you may not own. On narrow or half-width shelves you’ll still be cutting them down, so parchment stays the better call for odd-shaped models.
Measure Your Shelves Before You Buy a Single Bin
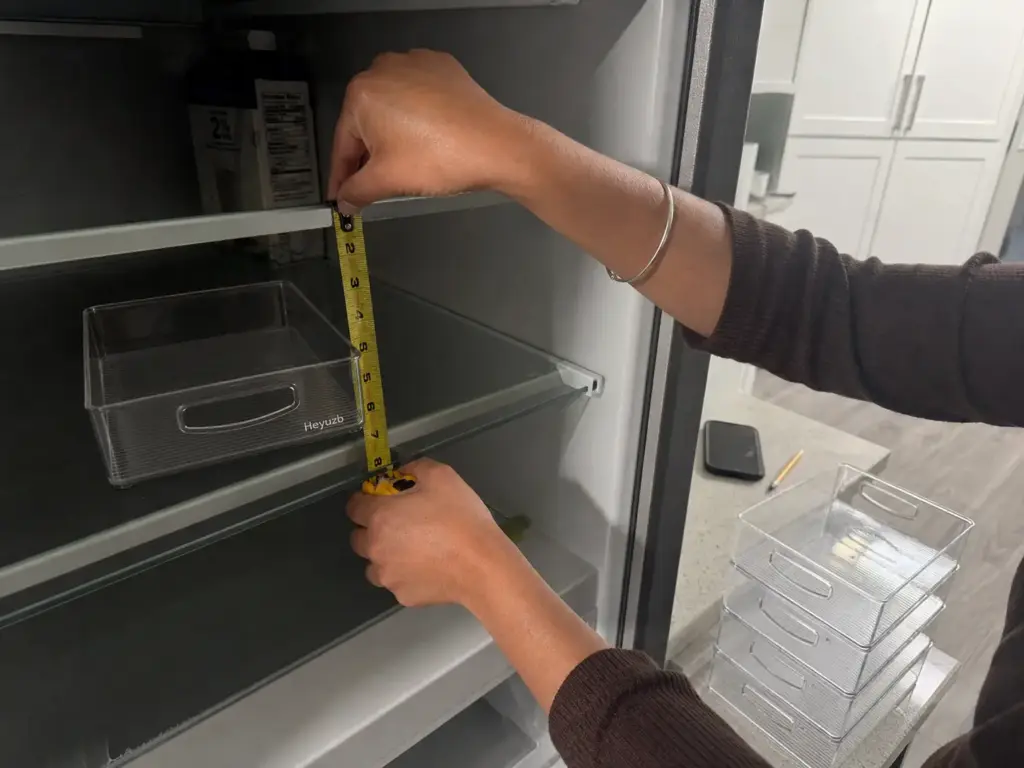
The most expensive mistake in refrigerator organization is buying an eight-piece bin set for a shelf that fits four of them. Two minutes with a tape measure prevents the return trip, and not one of the guides ranking for this topic hands you a shelf dimension to measure against.
The three measurements, in order
Standard-depth refrigerators run roughly 30–36 in deep overall, and counter-depth models run 24–30 in. Those numbers are close to useless on their own, because the usable shelf is much smaller. Once you subtract the frame, the door swing and the rear airflow gap, a typical shelf gives you somewhere around 16 × 17 in of genuinely clear space. And that is before you account for the cabinet you actually own: a French door refrigerator hands you wide, shallow shelves, while a side-by-side refrigerator hands you narrow ones, and a bin set that fits one will not fit the other.
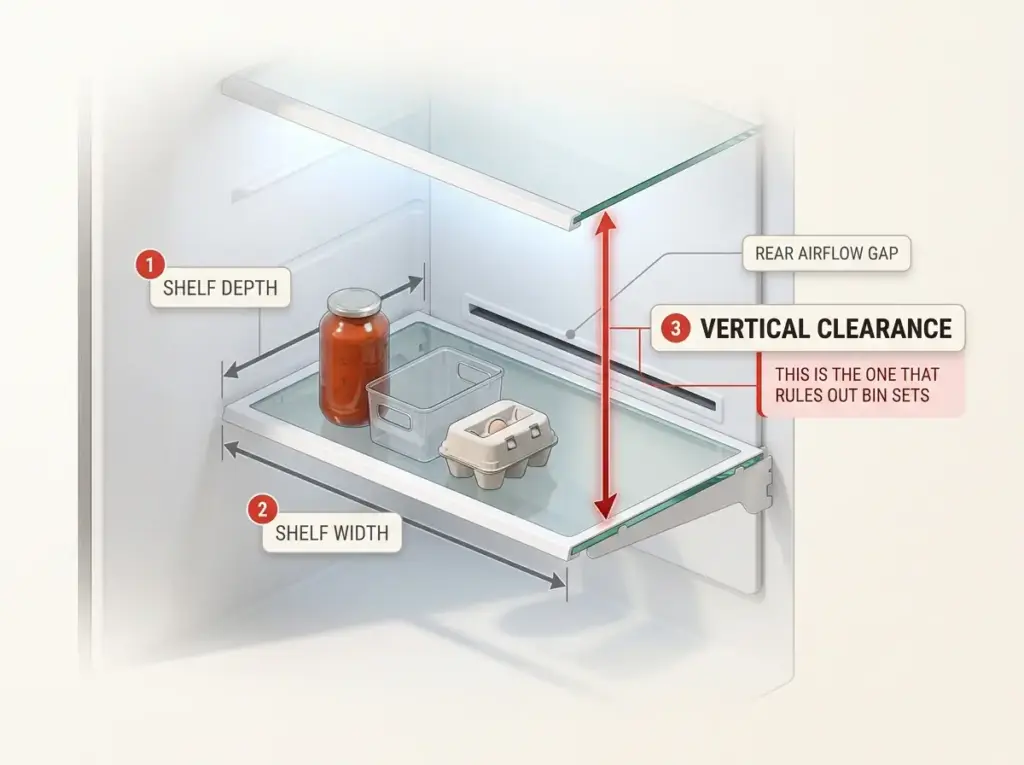
Measure in this order: shelf depth, then shelf width, then vertical clearance to the shelf above. Write all three on your phone before you shop. Every bin listing publishes exterior dimensions, and you are comparing those against your three numbers, not against how good the photo looks.
Why vertical clearance is the one that ruins bin sets
Depth and width are the two people remember. Clearance, which spec sheets call shelf spacing, is the one that quietly voids the purchase. A stackable bin set can fit the footprint exactly and still not clear the shelf above it, at which point you own eight bins and a shelf you can only use half of. If you have adjustable shelves, this is the measurement worth taking twice, because moving one shelf up an inch sometimes rescues the whole plan.
The airflow gap you have to leave alone
Leave the back of the shelf clear. A bin shoved flat against the rear wall blocks the cold air path, which frosts the vent and warms everything downstream of it. An inch or two of breathing room is not wasted space, it’s the space that makes the rest of the fridge work. That is exactly the measure-first case we make for the whole fridge, applied to one shelf at a time.
Save your three measurements in your phone’s notes app under the word “fridge,” not in a photo of a tape measure. Photos get buried in the camera roll by the time you’re standing in the store aisle, and searchable text takes four seconds to find.
Bins, Containers and a Lazy Susan That Actually Fit
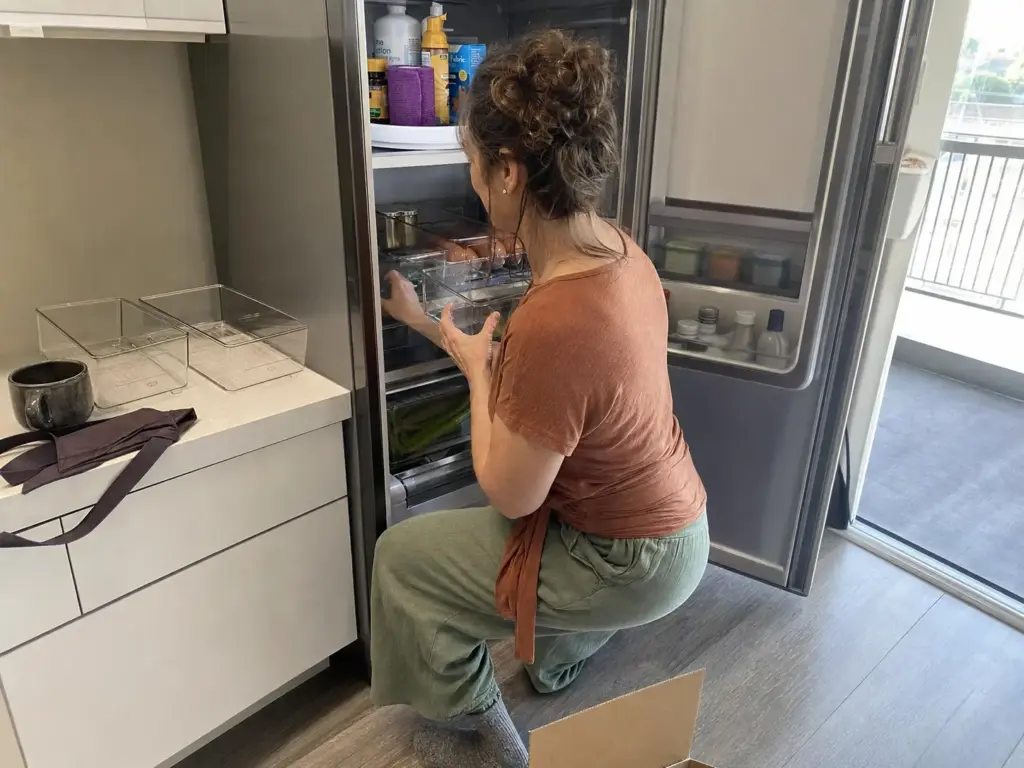
Containers are not the system. They’re the enforcement mechanism for a system you already decided on. Which means the question is never “which bins,” it’s “what actually needs containing.”
The containment test — rolls, leaks, or hides
Run every item past three questions. Does it roll (yogurt cups, cans, jars on their side)? Does it leak (raw meat, marinades, thawing anything)? Does it vanish into the back (cheese sticks, small packets, single-serve everything)? If the answer is no three times, that item does not need a bin. Wide-mouth jars, takeout containers and shoeboxes you already own handle most of what’s left, and a dinner plate or a cake stand spins well enough to be a turntable for free.
Clear over pretty, handles over lids
Clear storage bins beat opaque ones every single time. You will not remember what’s inside a white bin, and a refrigerator is the one storage space where forgetting comes with a deadline. The same logic is why glass containers beat their opaque plastic cousins for leftovers, even though they weigh more. Handles matter more than looks, because the behavior you want is pulling a bin forward like a drawer to reach the black hole at the back.
For a while I recommended buying a full eight-piece set as the starting point. Enough people described three bins that never came out of the box that I stopped. Buy four, live with them, add later. The OXO Good Grips Fridge Organization Set is the sturdier pick, with a non-slip base and mixed sizes that suit a shelf you’ve already measured. It’s also the pricier one, and an eight-piece anything deserves your three numbers first. At the cheaper end, the Heyuzb Set of 8 Clear Fridge Organizer Bins gives you clear, stackable and handled, which is the pull-forward behavior that matters most. The plastic is thinner, so keep the heavy jars out of them. That thinness is worth taking seriously in general: the cheapest dollar-store bins crack under cold plus weight, because cold plastic is brittle plastic. If leftovers are what’s overflowing, the fix is usually upstream in the leftovers containers that wreck the cabinet on their way back out.
Where a turntable earns its space
Condiments hide behind each other. A turntable solves it, but only at the right size. The 16 in turntable half the internet already owns for a pantry will not fit a fridge shelf. The Copco Non-Skid Turntable 9 inch (Set of 2) fits a roughly 16 in shelf with room left to spin, and the non-skid surface keeps jars from sliding when you open the door hard. Nine inches is small for tall bottles, so keep it to jars and short sauces. It’s the same size-first rule that decides which turntable belongs in a pantry, applied to a much shallower shelf.
How to Organize a Refrigerator Without Buying Anything
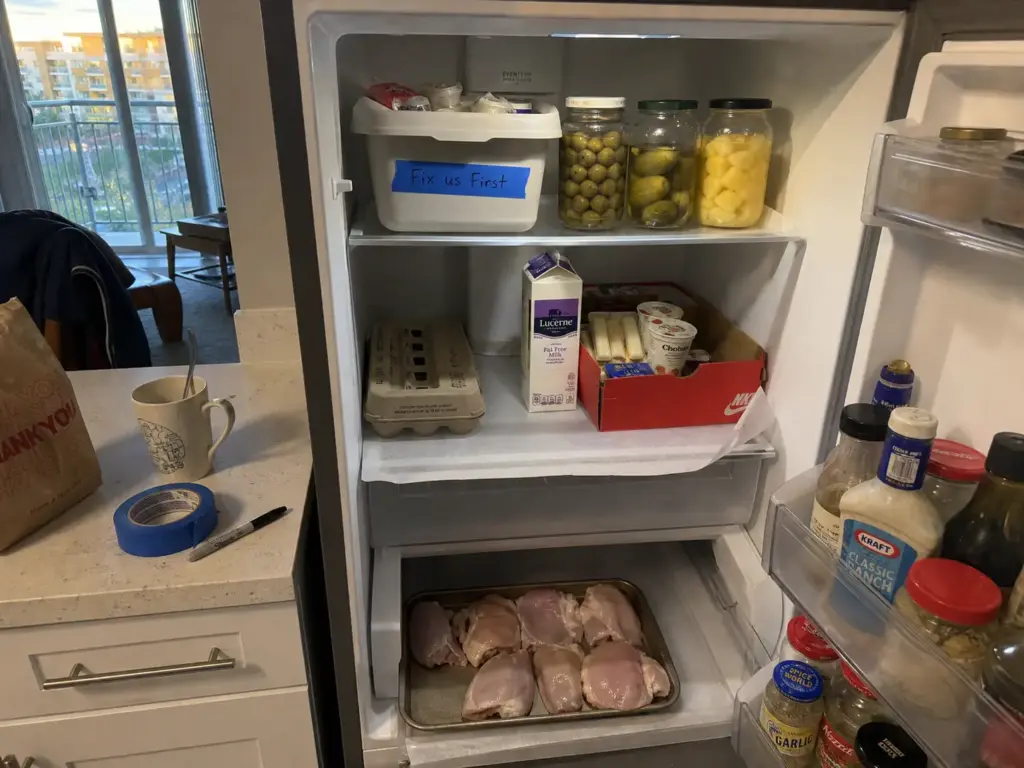
Most of what makes a refrigerator work is where things go, and where things go costs nothing. Most of the guides ranking for this topic are published by an appliance brand or a storage brand, which is a decent explanation for why none of them lead with this.
The five free moves that do most of the work
In order of payoff: draw your temperature zones and assign food to them, move the eggs and milk off the door, put raw meat on the bottom shelf in something leak-proof, dedicate one container as the “eat me first” bin, and stop refrigerating the produce that shouldn’t be in there. That’s the entire core of the system. Nothing on that list has a price attached, and if you did only those five things you would capture most of the result the bin photos are selling.
Containment you already own
Wide-mouth jars hold small packets upright. Takeout containers stack better than most bins because they were designed to. A shoebox is a bin with a shorter lifespan. A rimmed baking sheet is a pull-out tray for raw meat that also catches leaks. The egg carton is already a covered egg holder. For dated labels, painter’s tape and a marker peel clean, survive condensation better than most sticker adhesive, and let you rewrite the date every week. Parchment paper cut to the shelf is your liner.
What to buy only after two weeks of friction
Do the free version, live with it for two full weeks, and pay attention to where you actually get annoyed. Then buy for those specific points and nothing else. The friction you predicted usually isn’t the friction you get. This is the same $0-first tiering we ran on a pantry, and it holds up better in a fridge, where the constraints are tighter and the mistakes are colder.
Renters, Roommates and Shared Refrigerators

A shared fridge is not an organizing problem. It’s a negotiation problem with a cold box attached. The systems that survive are the ones that ask the least of the other person.
Label zones, not items
The standard advice is to label by contents, and for a fridge you control alone, fine. For a shared one it fails immediately. “Sam’s shelf” is a rule a person can follow at 11pm with their hands full and their coat still on. “Dairy, second shelf, front left” is a rule nobody follows twice. Zone labels also survive the fact that what’s in the fridge changes weekly while whose it is does not. It’s the same territory problem solved in a closet two people share, and the same answer works: divide the space, not the contents.
Painter’s tape and a Sharpie do this for free, peel clean, and let you rewrite as the arrangement changes. If you want something that looks less like a moving box, Chalkboard Vinyl Labels come 192 to a pack with removable adhesive, which suits contents that rotate weekly and a lease that ends. Stick them on the bin, never on the fridge wall. They need a chalk marker to be legible, so budget for one.
Nothing permanent on an appliance you don’t own
Renter-friendly is a marketing word with one real test: does it leave a mark? No permanent adhesive, no drilled hooks, no adhesive shelf liner, nothing a landlord will find at inspection. Removable labels belong on containers. Non-adhesive liners sit loose on the shelf. Every addition should be something you could pull out in five minutes.
The move-out test
Before you add anything to a shared or rented fridge, ask whether it comes out in one trip with nothing left behind. Give the shared items an explicit home too, condiments and milk especially, so “whose is this” stops being a weekly conversation. The most-upvoted roommate thread on shared-fridge labeling ends with the poster giving up and moving their groceries to a mini fridge in their bedroom. The labels weren’t the problem. A label is information, not a lock, and the system was asking for compliance nobody had actually agreed to.
Why Fridge Organization Falls Apart After a Month
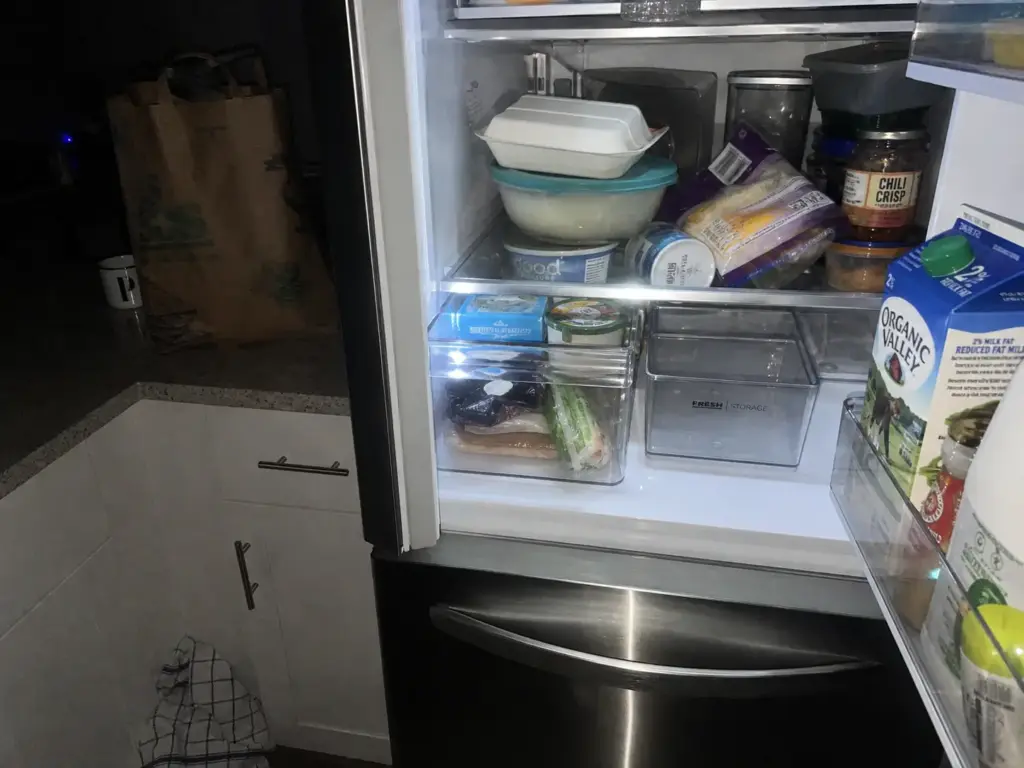
Systems don’t collapse dramatically. They collapse on one tired Tuesday when the yogurt goes on the wrong shelf because the right shelf is behind a bin, and nothing bad happens, so it happens again on Thursday.
When the system is built for a photo
A fridge designed to photograph well, everything decanted, everything matched, everything uniform, adds a step between the grocery bag and the shelf. Decanting is a chore you signed up for permanently in exchange for a look that lasts as long as your patience. The phrase people use for it is the fridge as art installation. One writer’s clear-bin, magazine-shoot version “didn’t even last a month,” by that writer’s own admission, because eating the food mattered more than looking at it. It’s the same collapse any organizing system runs into when it gets designed for how it looks empty.
The first few days decide everything
The window right after a reset is when the layout either becomes automatic or doesn’t. If putting something away takes longer than shoving it in, shoving wins, and it keeps winning. This is why the free version is worth doing first: it’s fast to put things away when there’s no decanting step and no wrong bin.
Too many bins is its own failure
Over-containment is the quiet one. When every item has a correct bin, putting something in the wrong place feels like failing at your own system, and people respond to that by not playing. Contain what rolls, leaks or hides. Leave everything else loose and let the fridge be a little imperfect on purpose.
The stakes aren’t only aesthetic. Household food waste is mostly food nobody could see, and the EPA put a number on the food your household throws away, landing around $3,000 a year for a family of four. A fridge you can see into is the cheapest intervention available for that.
The Weekly Sweep and the Three-Month Reset
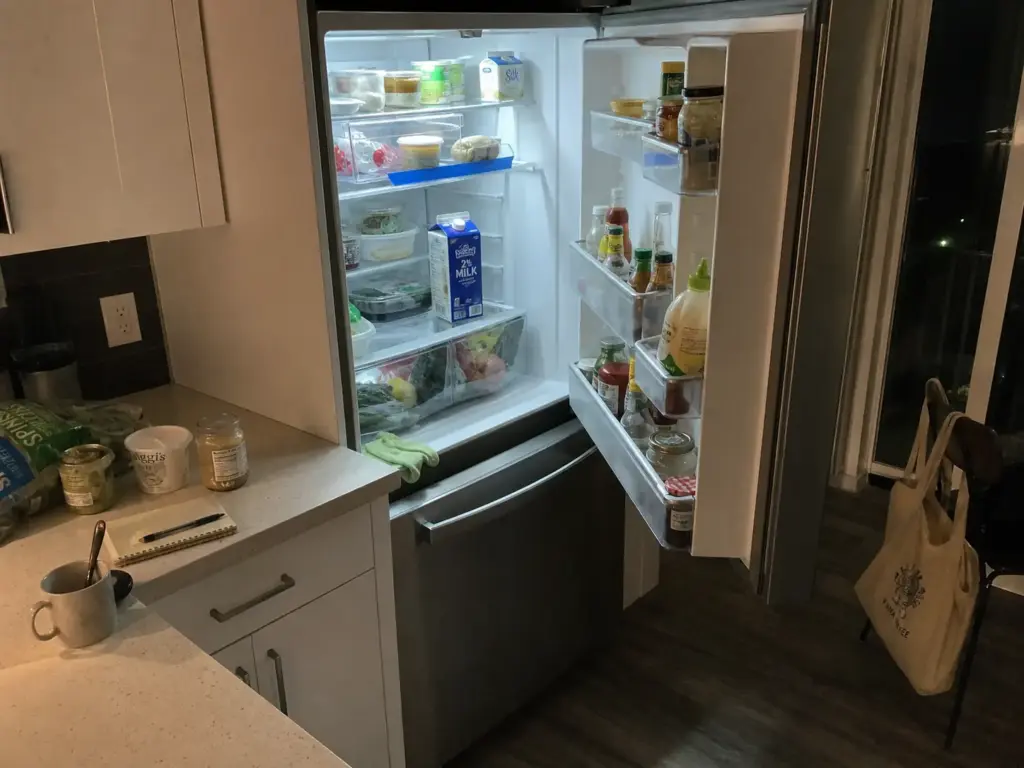
A five-minute weekly reset the night before grocery day, and one real overhaul a quarter. That’s the entire maintenance load, and it’s less time than you spend re-buying parsley you already have. Almost every fridge system that dies had no maintenance step at all, which meant the only available response to drift was another whole Saturday.
The five-minute weekly sweep
Pull anything questionable. Move whatever is close to turning into the “eat me first” bin. Wipe one spill. Make the empty space you’re about to fill. Doing this before you shop is the whole trick, because you build the list against what’s actually in there rather than against what you assume. Rotate while you’re in there, the same way a pantry wants rotating: oldest forward, newest behind, every single time. And the five minutes is the cheapest part of the whole system, because the alternative is buying parsley you already own and throwing out the first bunch a week later.
The quarterly reset and the ten-second test
Once a quarter, give it an hour. Full empty-out, wash the liners, re-check the thermometer, and re-cut the zones if your life changed since the last one. New roommate, new diet, new schedule: any of those means the zones you drew three months ago were drawn for somebody slightly different. A quarter is also about how long a shelf liner lasts before it stops looking like a liner and starts looking like the reason you need one.
Leave the freezer out of that hour. Freezer organization runs on different failure modes, freezer burn and forgotten dates rather than wilt and rot, so it wants its own session rather than the tail end of a tired one.
The three-month test that tells you whether the system is real: open the door and try to name what’s for dinner in ten seconds. If you can’t, the layout is hiding food rather than storing it. Everyone has one mystery container in there. One is a fridge. A shelf of them means the black hole never actually closed, and the fix is almost always fewer bins rather than better ones.
Attach the weekly sweep to something you already do rather than to a day of the week. “The night before I shop” survives a schedule change; “every Sunday” quietly stops happening the first weekend you’re away.
Putting It All Together
Three things carry most of the weight here. Put a thermometer on the middle shelf and get the fridge to 40°F before you organize anything, because zones only mean something if the appliance is genuinely cold. Measure depth, width and vertical clearance before you buy a single bin, and remember that the third number is the one that ruins bin sets. Contain what rolls, leaks or hides, and leave the rest loose, because over-containment is the most common quiet cause of collapse.
In three months, open the door and try to name dinner in ten seconds. If you can’t, something is hiding in the back six inches. Pull the bins forward and re-cut the zones.
Start with the door. Move the eggs and the milk inside, give the top shelf an “eat me first” container, and live with just that for a week. If it holds, keep going.
Frequently Asked Questions
01What is the most efficient way to organize a refrigerator?
Assign zones by temperature before you buy anything: ready-to-eat food and leftovers on the top shelf, dairy in the middle, raw meat on the bottom, produce split between the two crispers, condiments in the door. That single reordering does more than any bin set, because it works with the way cold distributes instead of against it.
02What should go on each shelf in the fridge?
Top shelf: leftovers, drinks and anything ready to eat. Middle shelf: dairy and eggs. Bottom shelf: raw meat, poultry and seafood in a leak-proof container, because it’s the coldest spot and anything that drips has nothing below it to reach. Crispers get produce sorted by humidity, and the door gets condiments only.
03What are some common mistakes to avoid when organizing a fridge?
The three costliest are keeping milk and eggs in the door, which averages around 45°F in test-kitchen measurements, buying bins before measuring the shelf, and containing everything instead of only what rolls, leaks or hides. The fourth is pushing bins flat against the back wall, which blocks the airflow the fridge depends on.
04How do you keep a shared fridge organized when your roommates don’t follow the system?
Label zones, not items. “Top shelf, Sam” is a rule someone can follow with their hands full at 11pm, and “dairy, second shelf, front left” isn’t. Give shared items an explicit home so nobody has to ask whose it is, and keep every label on the bin rather than the appliance.
05How often should you clean out your refrigerator?
A five-minute sweep once a week, the night before you grocery shop, plus one full empty-and-wash every three months. Doing the weekly pass before shopping is the part that saves money, because you buy against what’s actually in there instead of re-buying the parsley you already have.