










In this article
You cleared the dresser top on Sunday. It looked good enough to photograph, and maybe you did. By Wednesday there’s a receipt, a charger cable, and a hair tie sitting in the tray you bought for jewelry. Nothing about that is a discipline problem, and the same failure arc shows up in every dresser-top thread online with the same timing. The real reason is that a single dresser gives you roughly a 36-inch by 18-inch working footprint, and almost nobody counts what they’re putting on it. The dresser top organization ideas below start with the sort that comes before any container, then the space budget that tells you how many containers you actually have room for, four containment methods, the renter-safe vertical move, and the split that keeps a shared dresser from turning into a border dispute.
Quick Answer
Five moves keep a dresser top clear past the first week:
- Sort the surface into four piles before buying anything: belongs here, belongs in a drawer, belongs in another room, gone
- Cap yourself at three or four grouped containers on a standard single dresser
- Group by category (jewelry, everyday carry, decorative) instead of one big catch-all
- Keep containers shallow and set back about two inches from the front edge
- Go vertical above the dresser with no-drill shelving if the surface still can’t hold what you need
Why Your Dresser Top Gets Cluttered Again by Week Two
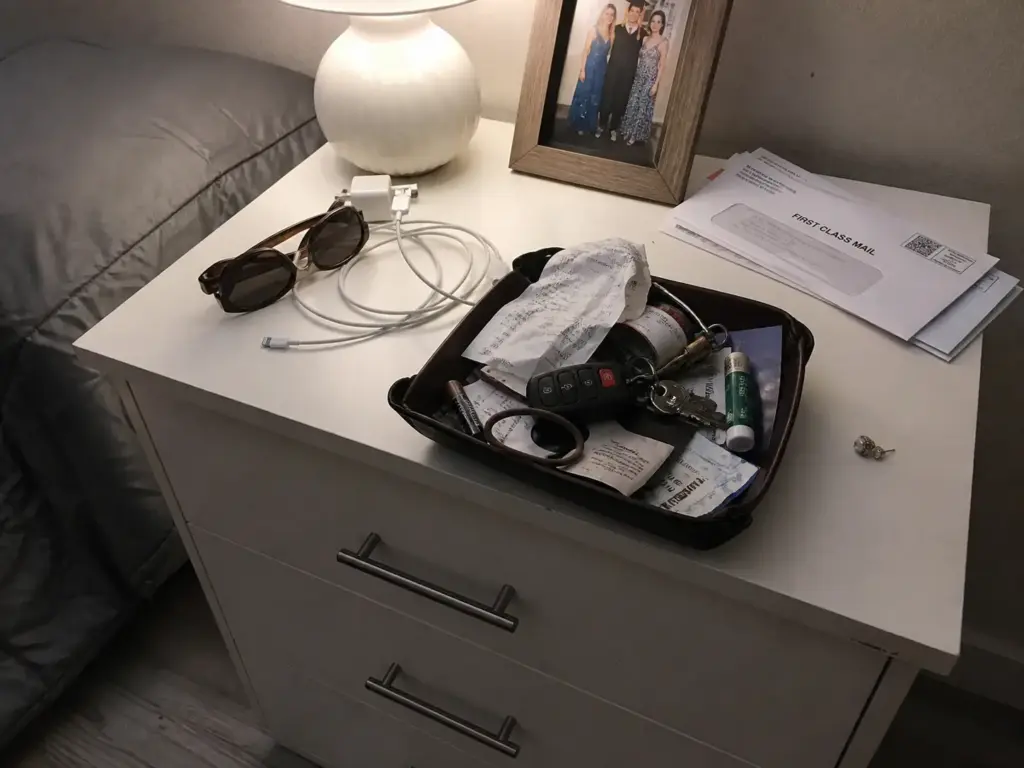
Everyone has done the Sunday reset. Nobody talks about what happens on Wednesday, when you walk into the bedroom holding your keys, a receipt from lunch, and a charger cable, and exactly one of those three things has an assigned home. So all three go down together. That’s the whole story, and it takes about four days.
Your dresser top is the bedroom’s landing pad, and it’s the one surface people declutter over and over without ever fixing. It’s the first flat surface between the door and the bed, which makes it functionally identical to the console table by your front door, except nobody ever designs it that way. An entryway gets a key hook and a mail tray because we all accept that stuff arrives there. The dresser top gets a nice tray and a candle, and then we act surprised when it starts absorbing pocket contents. If the surface keeps reverting no matter what you put on it, the wider system is worth a look too, and the dresser organization steps that hold past week one cover what happens inside the drawers underneath.
Here’s the mechanism, and it’s more specific than “you got lazy.” The moment one item on that surface lacks an assigned category, the system stops being a system. A coin goes in the tray. A ring goes in the same tray. Then a receipt, because there’s room.
Now you own a junk drawer, except it’s at eye level and you look at it every morning while you’re getting dressed. The container didn’t fail. The category rule failed, and the container was just where it happened.
The timing is what makes this worth naming. Week one is the photograph, and everything in the tray belongs there. Week two is the first unclassifiable object, and it almost always arrives in your hand rather than on purpose: a receipt you’ll “deal with later,” a charger for a device that lives in another room, one earring whose partner is missing.
None of those has a category. All of them are too small to walk somewhere else at eleven at night. So they land, and the tray’s rule quietly becomes “small things go here.”
Week three is when the rule gets tested by something with mass. A folded shirt. A book. A stack of mail. By then the surface has already conceded the principle, so there’s no reason to say no.
This is why the collapse feels sudden and isn’t. The decision that broke the system happened two weeks before the surface looked bad, and it was a decision about one receipt.
The practical consequence is that a dresser top can’t be fixed by cleaning it. Clearing the surface resets the symptom and leaves the mechanism untouched, which is why the same people reorganize the same dresser three or four times a year and assume the problem is them. It isn’t. An uncategorized object will find any surface without a rule, every time, and it will find it within about four days.
The tell isn’t the pile. It’s the first morning you drop your keys on the bare wood next to the tray instead of in it, because the tray is full of things that aren’t keys. That’s the week the system actually died. The surface won’t look bad for another two weeks, which is why almost nobody catches it in time.
This is why the single catch-all tray is both the most common dresser-top setup and the most reliable failure. Apartment Therapy has been making this point for years and the rest of the organizing world has echoed it: a generic container invites generic use. You bought one tray to hold “the small stuff,” and “the small stuff” is not a category. It’s a shrug.
And the surface is a physical problem on top of a behavioral one. The working footprint is finite, most people load past it long before they notice, and no amount of category discipline saves a surface that’s simply out of room. That’s the next section, and it’s the number nobody else will give you.
Measure Your Dresser Top Before You Buy a Single Container
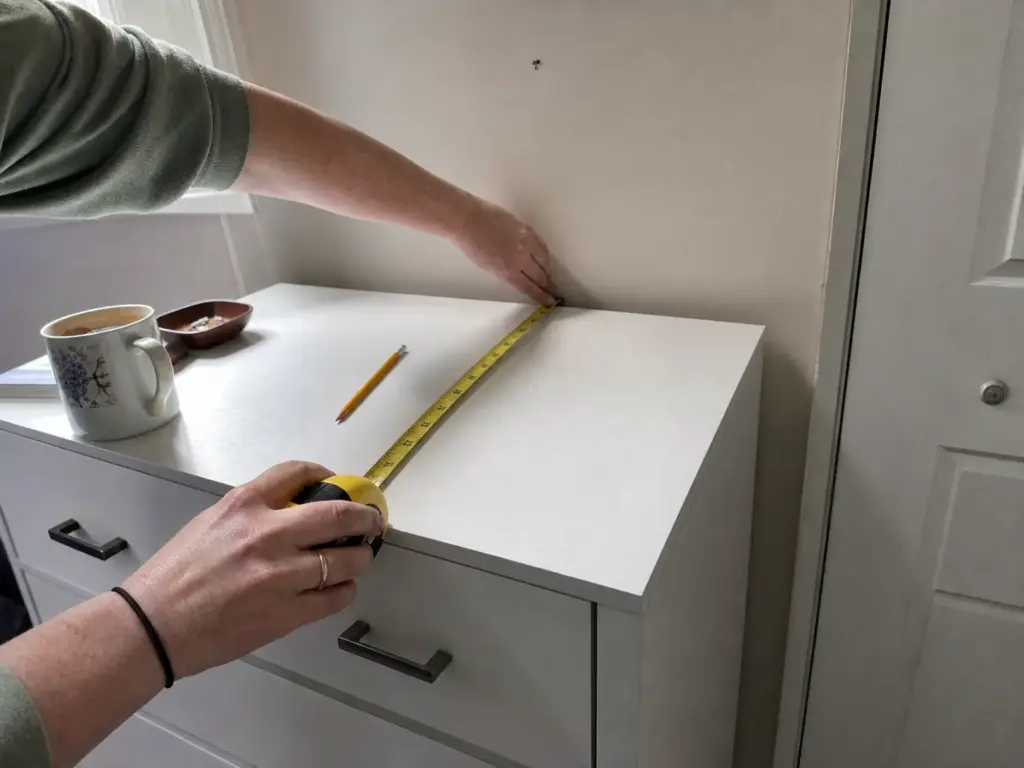
Every dresser-top article shows you a styled surface: a tray, a lamp, a jewelry stand, a small plant, a stack of books, and a candle. Six objects, beautifully spaced. What none of them mention is that the dresser surface in the photo is a 60-inch double dresser and yours is a 36-inch single. The reason your version read as cluttered isn’t your taste. It’s arithmetic.
Standard single dressers run about 36 inches wide. Doubles run to about 60. Depth is 16 to 20 inches, averaging just under 19 on a double.
So a standard single gives you roughly 650 square inches of working dresser top, and that number has to absorb every tray, box, turntable, lamp, and photo frame you’re considering at once. It sounds like a lot. It isn’t, once you subtract the parts you can’t actually use.
Which brings us to the space budget, and this is the figure no competitor states: three to four grouped containers is the practical ceiling on a standard single dresser. One shallow tray, one small box, and one turntable or one vertical item. That’s it. Past four, one container’s footprint starts crowding the next one’s, the gaps between them shrink below a couple of inches, and your eye stops reading “three organized zones” and starts reading “a pile in nicer packaging.” The containers can be beautiful. The math doesn’t care.
Two more rules that come straight out of the depth number. Leave about a two-inch buffer at the front lip, because anything deeper than roughly 16 inches overhangs the front edge of a standard-depth dresser and gets knocked off eventually, usually by a shirtsleeve, usually in the dark. And height matters as much as footprint: a tall jewelry tower parked behind a lamp means you can’t see or reach either one. Shallow in front, tall at the back, and nothing that sits over the drawer pulls.
Run the math on real objects and the ceiling stops feeling arbitrary. A valet tray takes 10 to 12 inches of width. A 9-inch turntable takes nine more. An acrylic jewelry box with a drawer stack runs about 8.5 inches at the base.
Line those three up on a 36-inch single and you’ve spent roughly 30 inches before you’ve added a lamp, a photo frame, or the two inches of breathing room each container needs so they don’t read as one continuous mass. There’s your fourth slot, and there isn’t a fifth.
The depth number bites harder than the width number, and almost nobody checks it. A single dresser gives you 16 to 20 inches front to back, and the front two are spoken for by the buffer. An 8.5-by-5.5-inch jewelry box eats about a third of what’s left. That’s why two medium containers side by side work fine on paper and feel crowded in the room: you were measuring the width and the depth was the constraint the whole time.
A double dresser doesn’t scale the way people assume, either. Sixty inches of width sounds like double the room, but the depth stays roughly the same at just under 19 inches, so what you actually gained is lateral space, not surface volume. Five or six containers on a double is still too many. The realistic ceiling there is closer to five, and only if one of them is a lamp.
Measure the dresser, measure the container you’re eyeing, then subtract the two-inch buffer before you decide. The purchase people regret isn’t the wrong style. It’s the right container in the wrong footprint, which then lives on the surface as a daily reminder that they didn’t measure.
One safety note while you’re thinking about weight on top. Any clothing storage unit sold since September 2023 ships with an anchor kit under the CPSC’s mandatory anchoring standard for dressers and clothing storage units, rated to hold at least 50 pounds of force. A loaded dresser top is exactly why that kit matters: weight up high adds leverage to a tip-over, and it matters most in a room a small child can walk into. If the kit is still in the box in the closet, that’s tonight’s ten-minute job.
Sort the Surface Into Four Piles First

The reason people skip the sort is that it takes twenty minutes and feels like it accomplishes nothing. You end up with the same objects, just in temporary piles on the bed instead of permanent piles on the dresser. But every container you buy before sorting is a container bought for the wrong volume of stuff, and that’s the purchase that ends up in a closet.
Belongs here, belongs in a drawer, belongs in another room, gone
Four piles, not three. I spent a long time recommending the standard three, because keep-donate-trash is what every decluttering guide teaches and it’s clean to remember.
It works fine for a closet purge and falls apart on a dresser top, for one reason: almost nothing on a dresser top is trash and almost nothing is donatable. It’s your own stuff, it’s all still useful, and it simply lives in the wrong room. Most sorting bins advice has no pile for that. The pile that gets skipped is “belongs in another room,” and it’s almost always the biggest one: mail, a water glass, somebody’s phone charger, three things that belong to your kid. Those items never had a dresser-top problem. They had a “put it down while my hands were full” problem, which is exactly how a surface turns into a clutter magnet: it collects things that already have a permanent home somewhere else in the house.
The rule for the “belongs here” pile has two conditions, and both have to be true. You touch it daily or near-daily, AND it has no better home. Jewelry you wear every day belongs here. Jewelry you wear twice a year belongs in a drawer. That second condition is the one that does the work, because plenty of things you touch daily have a perfectly good home eight feet away.
What actually earns a spot on the dresser top
The honest list is shorter than you want it to be. Everyday carry (keys, wallet, watch, the earrings that go in every morning), a lamp if the room needs one, and one or two things that exist purely because you like looking at them. That’s the whole list.
Everything else is drawer-bound or room-bound. This is the step where the surface gets its ceiling back, and it’s also the step where you find out whether the problem was ever really the dresser top. Usually it wasn’t.
Where the drawer-bound pile goes
Here’s the part where the sort either works or collapses: the surface only stays clear if the drawers can actually absorb what comes off it. If your drawers are already full, you haven’t solved anything. You’ve just moved the pile down eight inches and given yourself a new problem with a lid on it.
So before you finish, give the drawer-bound pile an actual home inside the dresser, with a real assigned spot per item type rather than a general “socks go somewhere in here” arrangement. If there’s genuinely no room, the fix is folding that frees up the drawer space to absorb it, because vertical filing recovers more capacity in a standard drawer than any organizer you can buy for the surface.
Before you buy a single thing, corral the survivors in a bowl or a small tray you already own and run it for a week. If that bowl stays functional for seven days, you now know exactly what size to buy. If it fills with strays by Thursday, your sort was too generous and you go again. Free, and it’s the step every organizing thread recommends before anyone mentions a product.
Group by Category Instead of One Big Catch-All
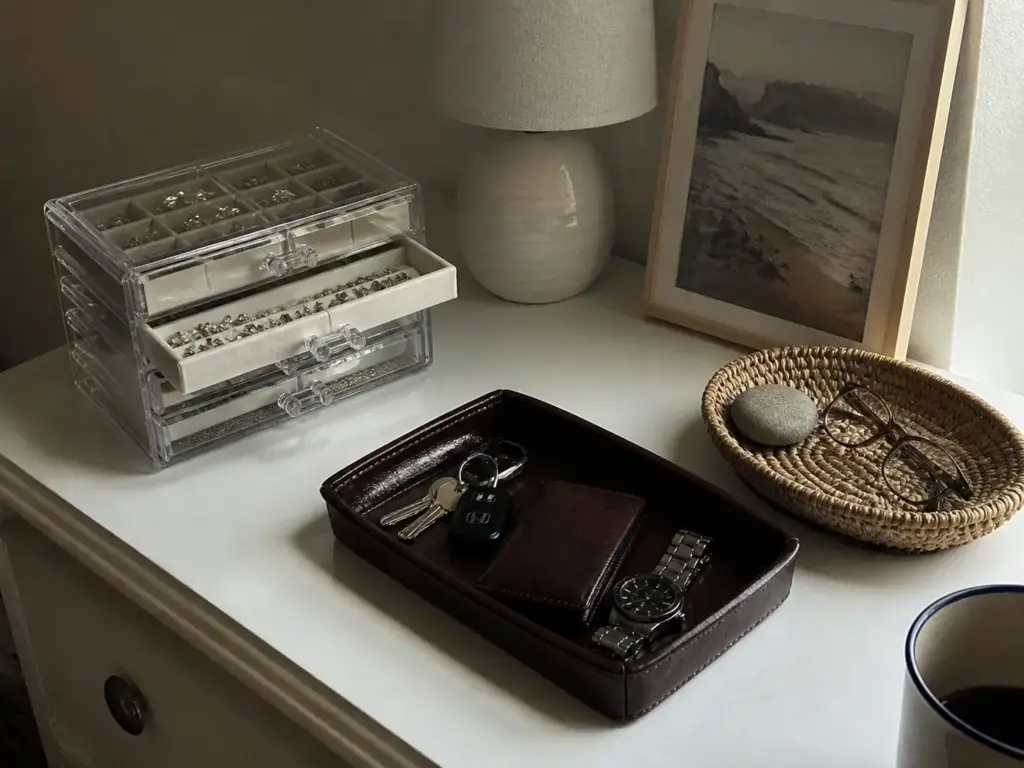
The single tray feels like the elegant answer. One container, clean surface, done. It’s also the exact shape of a junk drawer, and it fails for exactly the reason a junk drawer fails: “everything” isn’t a category, so nothing has a rule, so the newest object always becomes the seed of the next pile.
The three catch-alls: jewelry, everyday carry, decorative
Three shallow containers, each with a category and a rule. The rule is the part that makes it work, and it’s brutally simple: if an item doesn’t fit one of the three categories, it doesn’t live on the dresser. Not “for now.” At all. This is the framing Apartment Therapy popularized as the three catch-alls, and it’s the version that survives contact with a real Wednesday.
I’d add one thing the original framing leaves out. Write the rule down for the first two weeks if you have to, physically, on a sticky note inside a drawer. Not forever. Just long enough that you stop having to decide, because the decision is what you’re actually eliminating.
Start with the everyday-carry tray
If you only set up one container, make it this one. Everyday carry is the highest-traffic category on any dresser top and the one that determines whether the whole system holds: keys, wallet, watch, whatever’s in your pocket when the day ends. Get this tray right and the other two categories mostly take care of themselves, because the daily flow stops washing over them.
Shallow beats deep, every time, on a surface you look down at. A deep tray hides its own bottom layer, and the moment you can’t audit the contents at a glance, it starts accumulating. You can’t notice what you can’t see. Start with a bowl you already own, run the week test from the last section, and only then buy for the volume you actually observed.

The jewelry problem needs its own container
Jewelry is the category that most reliably migrates into the wrong tray, and it’s the one with the most to lose. Rings and stud earrings are small enough to vanish under a single receipt, and a stud that rolls off a dresser in a carpeted bedroom is gone in a way that a set of keys never is.
You have two paths. Compartments in a shallow jewelry tray is the simpler one: smaller footprint, everything visible, nothing stacked. A stacked-drawer box is the capacity option, and it costs you real estate, because a typical acrylic drawer stack runs around 8.5 by 5.5 inches at the base and roughly 6 inches tall, which is close to a third of a single dresser’s depth once you add the front buffer. Decide which problem you have before you pick.
If you want the capacity, the Watpot Acrylic Jewelry Box 5 Drawers is a reasonable version of it at about 8.5 by 5.5 by 5.8 inches, and the clear acrylic organizer construction matters more than it sounds: a drawer stack you can’t see into is a filing cabinet, and filing cabinets are where earrings go to be forgotten. The trade-off is that it counts as a full container against your three-to-four ceiling, so plan it as one of your slots rather than an addition to them.
If sorting is what you’re after and a tower isn’t, the KALETY Mens Jewelry Box Organizer & Dresser Valet Tray does the compartment job in a single shallow footprint, which keeps the “shallow in front” rule intact. It’s the budget-friendly organizer of the two by a wide margin. It holds noticeably less than the drawer stack. That’s the deal you’re making, and for most single dressers it’s the right one.
Whichever you pick, only the daily-wear pieces earn the surface. Everything you wear a few times a year should move the occasional-wear pieces into a divided drawer, where felt-lined compartments protect them better than an open tray does anyway.
The decorative category needs a rule too, and it’s the one people forget to write: one or two objects, chosen on purpose. Without a number attached, “decorative” quietly becomes the category that absorbs anything you can’t classify, which puts you right back where you started with a prettier justification.
Make the Surface Work Harder With Rotation and Vertical Space
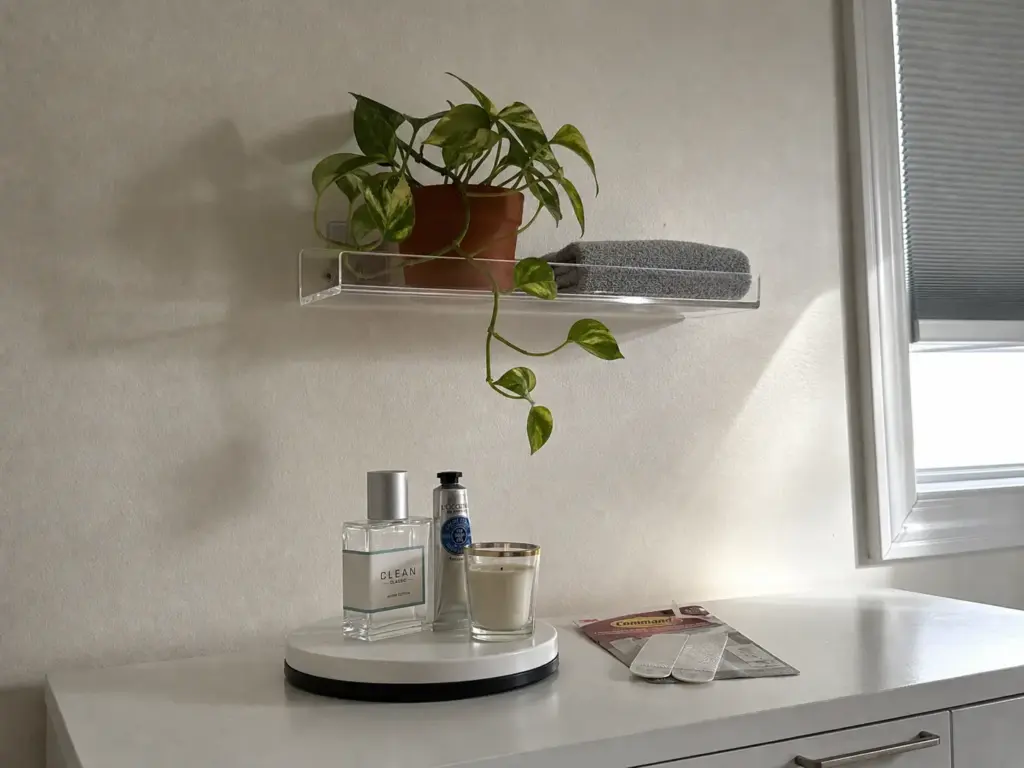
At some point the honest answer isn’t a better tray. It’s that the surface is out of room, and no arrangement of three containers is going to change the square inches available. You have two ways out of that, and neither one requires a conversation with your landlord.
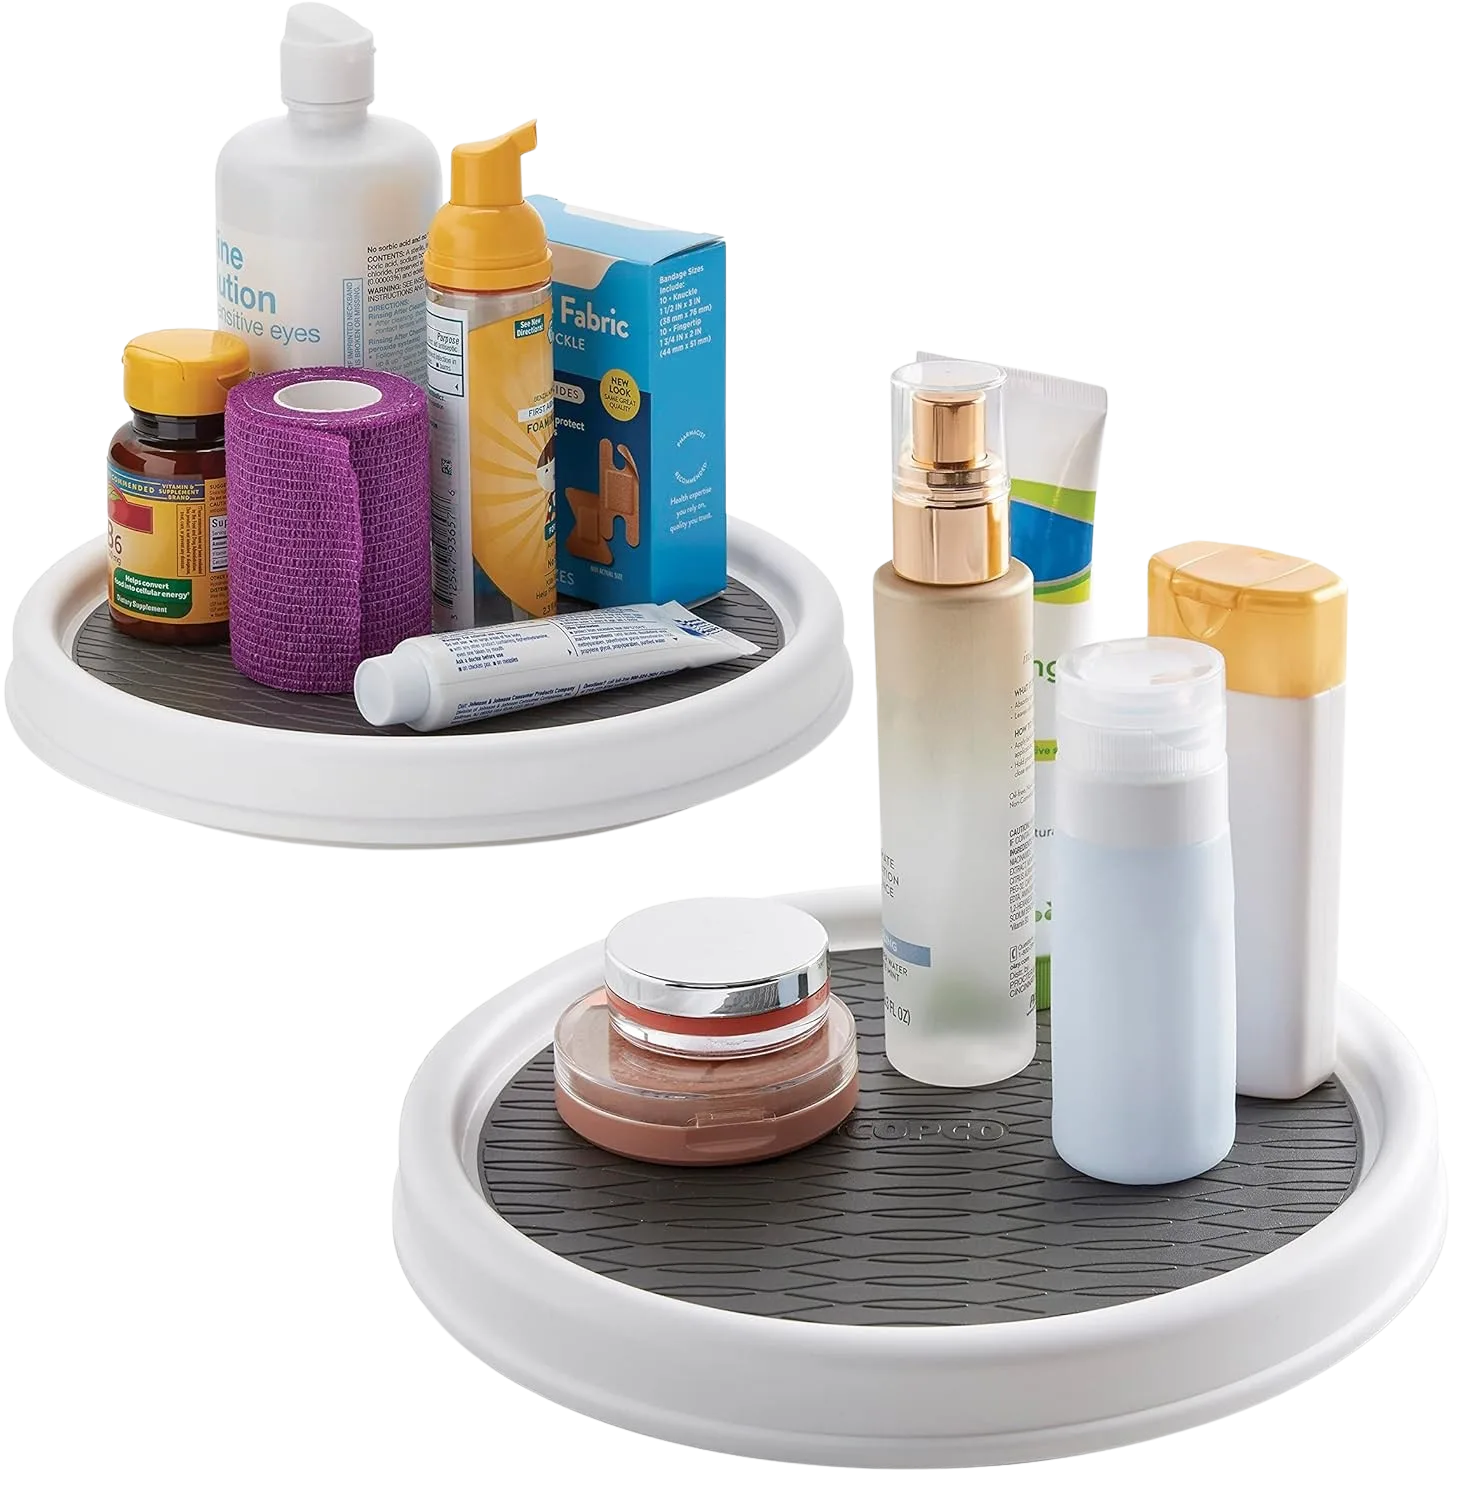
A small turntable buys you reach, not space
Let’s clear up a misconception first, because it drives a lot of wrong purchases. A turntable does not add surface area. It takes the same footprint it always had and makes the back half of it reachable, which is a genuinely useful thing on a deep dresser where the stuff at the back becomes invisible. But if you’re short on room, a lazy susan solves the wrong problem.
Size is where this goes sideways. A 9-inch turntable leaves four to six inches of clear surface around it on a standard 18-inch-deep single dresser, which is workable. The 12- to 16-inch turntables that people love in pantries will crowd a dresser top completely, and you’ll spend the next month sliding your tray sideways to make room for something that spins. I used to point people toward the bigger sizes on the logic that more capacity is better. Skincare and cologne bottles turn out to be the exact use case where a small rotating organizer wins, because those bottles are tall and narrow and you only need to spin them into view.
Going vertical above the dresser without drilling
The wall above a dresser is the most underused space in most bedrooms. It’s also the space renters get told to leave alone, which is why every “go vertical” suggestion you’ll find on this topic quietly assumes you own the place and own a drill. You don’t need either one, but you do need to respect the constraints, and they’re specific enough to be worth stating plainly.
Command Large Strips hold up to 16 pounds per pair when they’re installed correctly. Installed correctly means 30 seconds of firm pressure on the strip and a full hour of cure time before you put anything on the shelf. They bond reliably to smooth painted drywall, laminate, glass, and tile, and that list is exhaustive. Those are the Command Strip weight ratings for no-drill shelving that the whole approach rests on, and the numbers assume a smooth surface, not a hopeful one.
Textured walls are the known failure point, and this is where no-drill projects go wrong most often. If your bedroom wall has orange-peel or knockdown texture, the adhesive is only contacting the high points of the texture, which is a fraction of the surface area the rating assumes. Test one strip with something light and expendable before you mount a shelf directly over a dresser full of things you’d rather not have a shelf land on.
Budget the load honestly too. Décor, a folded stack, a small plant, a few paperbacks. Not a stack of hardcovers, not a lamp, not the thing you’re tempted to put up there because it “isn’t that heavy.” Weight is the one variable you control completely.
The hour of cure time is the step everyone skips, and it’s the step that decides the outcome. You press the strips, hang the shelf, load it the same evening, and it holds beautifully for two days. Adhesive failures above a dresser almost never happen at mounting. They happen on day three, which is exactly long enough for you to have stopped thinking about it.
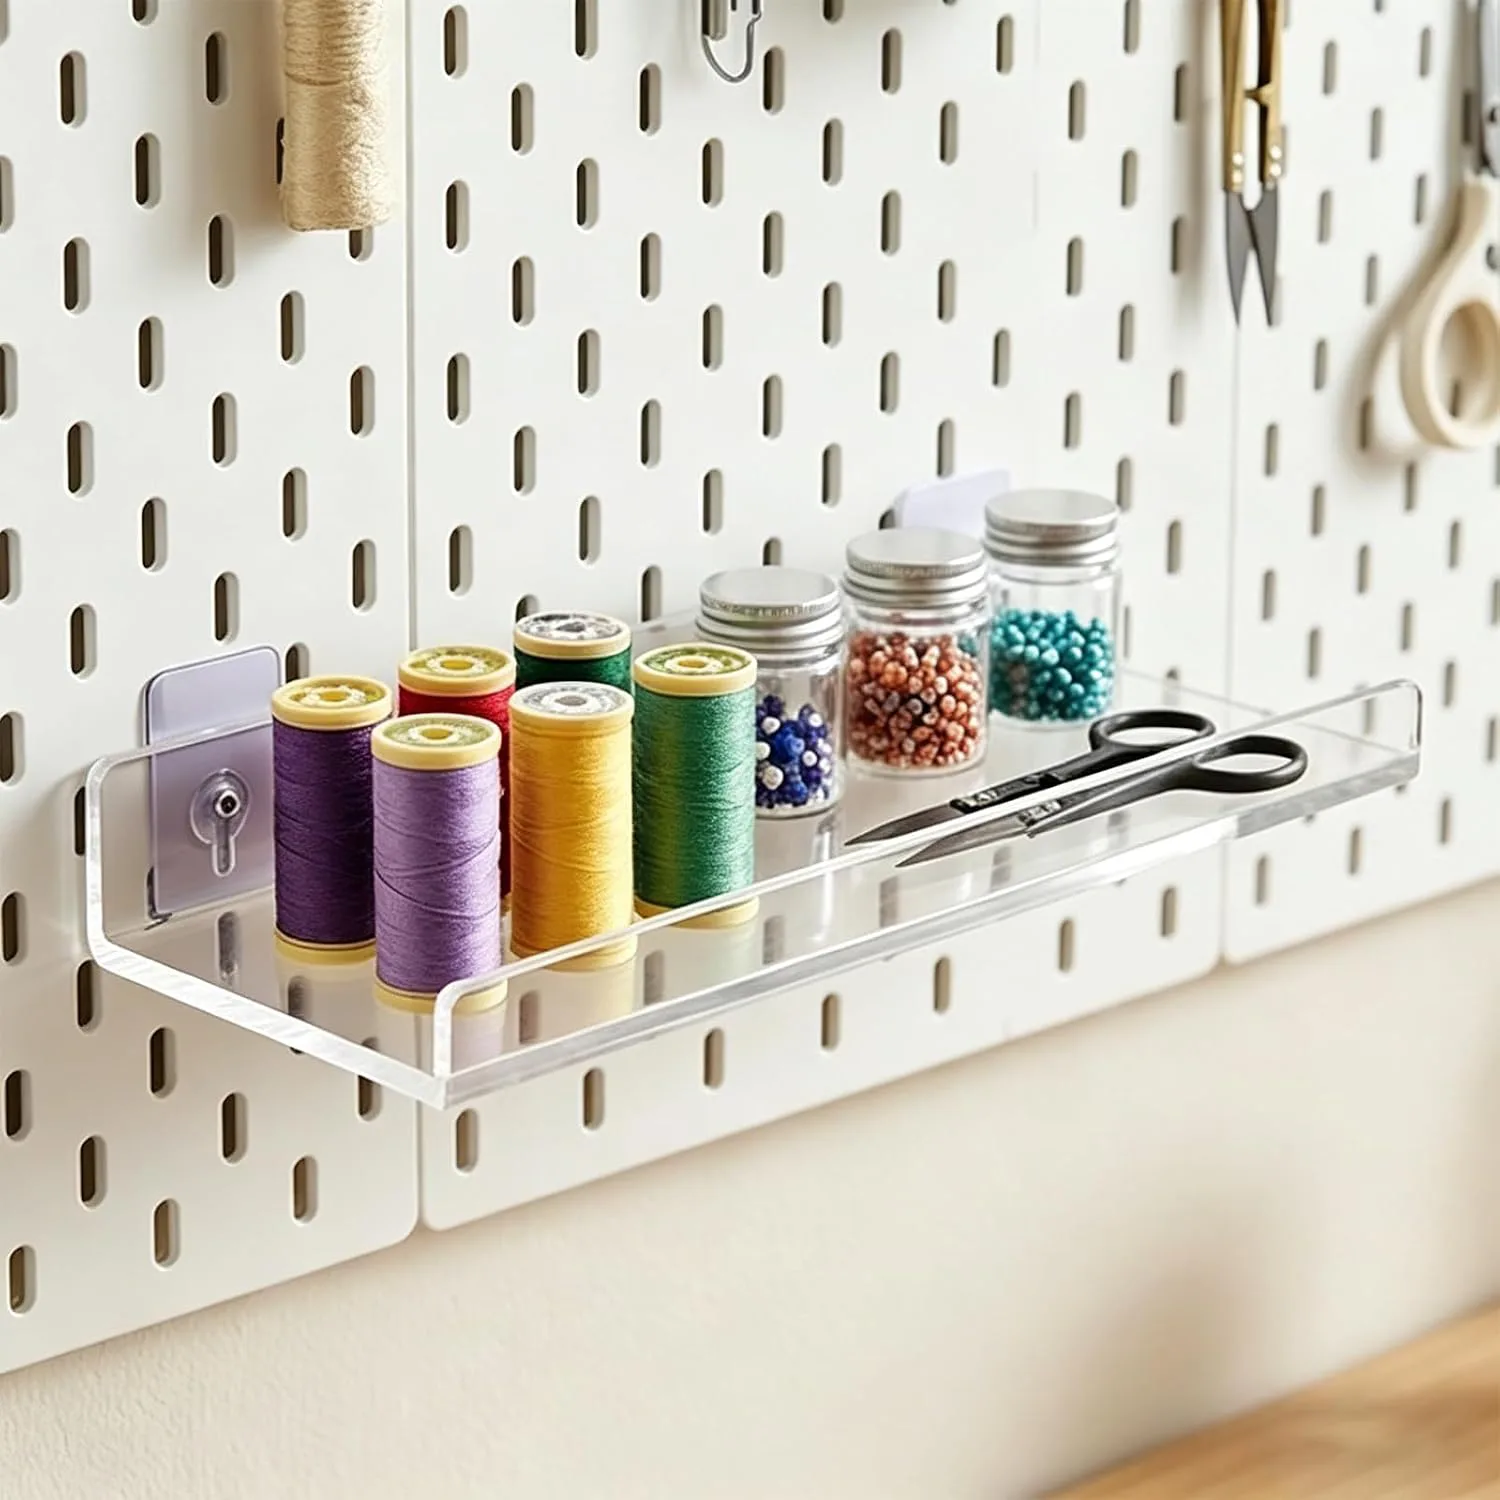
One note on the mounting hardware, because renter threads keep making a distinction that generic advice flattens: use actual Command-brand strips, not generic double-sided mounting tape. The removal mechanism is the entire point, and the generic stuff either fails early or takes the paint with it when it comes off. If your dresser sits near an attached bathroom or you run a humidifier in the bedroom, the Command Bath Large Water-Resistant Adhesive Strips are the variant rated for that moisture exposure, and 16 pairs is enough for a shelf plus whatever else you decide to hang. If your bedroom is nowhere near humidity, standard Command Large Strips are cheaper and do the identical job. No reason to pay for water resistance you don’t need.
While you’re mounting things, the same logic scales. The same no-drill approach applied across the rest of the bedroom covers the closet side, where the weight ratings matter even more because hanging clothes are heavier than they feel. And if you’re working with a small footprint overall, more ways to use the wall space you’re allowed to use goes further into above dresser storage and the rest of the vertical real estate most apartments waste entirely.
Splitting a Shared Dresser Top Without a Turf War
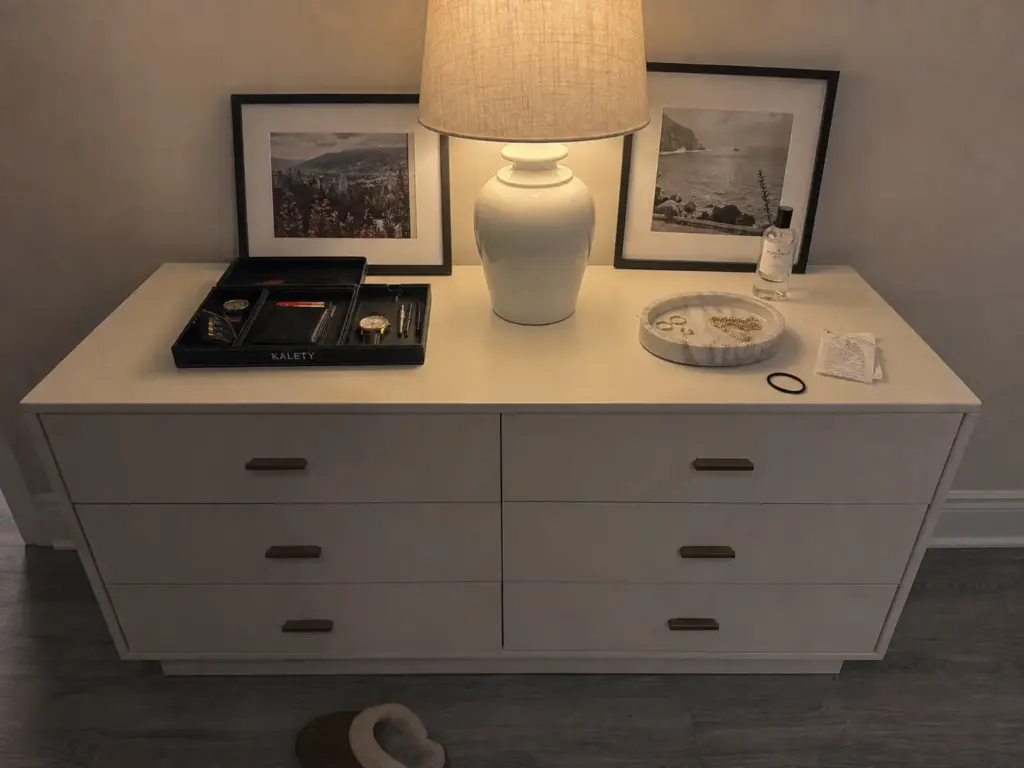
Two people, one surface, and one of you cares about this considerably more than the other. Every dresser-top article on the internet writes for a single user with a single set of standards. Most dresser tops in real bedrooms serve two people, and the shared-surface version is a different problem with a different solution.
The fix is physical division, not a shared system. One tray per person, each side running its own rules. Shared containers fail for a reason that’s more structural than personal: two people rarely have the same definition of what belongs in a container, so every shared tray becomes a negotiation nobody actually holds. Your partner isn’t sabotaging the system. They’re using a category rule they never agreed to, because it was never theirs.
Physical division also quietly solves the enforcement problem, which is the part that damages more relationships than the clutter ever did. Nobody has to police anybody. Your side, your standards. If their half looks like a receipt museum, that’s genuinely not your project, and the two of you have just eliminated the recurring argument that starts with “can you please just.”
The space budget from earlier applies per person, not per dresser, and this is the arithmetic most couples miss. A 60-inch double dresser splits into two roughly 30-inch zones, which means two containers each, not four apiece. The dresser got bigger. Your individual allowance didn’t get bigger with it. If both of you want a valet tray plus a jewelry container, you’re already at your limit, and that’s fine as long as you knew it going in.
For the two-tray split, something like the KALETY valet tray works well precisely because its compartment layout packs sorting into one compact footprint, so two of them fit a double dresser without eating the per-person budget. Two of the same tray also makes the division read as intentional rather than accidental.
The dividing line has to be visible. A lamp, a small plant, the edge of a runner, anything with physical presence in the middle of the surface. An invisible line gets renegotiated every single week by whoever gets home first and needs somewhere to put their sunglasses down.
Shared surfaces also need shared rules one level down, because a shared dresser’s drawers break the same way its top does. If one of you files clothes vertically and the other one stacks, the drawers hit capacity twice as fast and the overflow lands right back on the surface you just divided. Agreeing on a folding system both people can actually follow matters more than either of you picking the objectively better method.
Conclusion
Three things carry most of the weight here. Sort before you shop, because the container you need depends on what survives the sort, not on what looked good in somebody’s styled photo. Cap the surface at three or four grouped containers on a single dresser, since that ceiling is arithmetic and not a matter of taste. And give every category a rule, because a tray without a rule is a junk drawer that happens to sit at eye level.
In three months, open every container on the dresser top and look at what’s inside. If any of them is holding something that doesn’t match its category, that’s the item that will restart the pile. Reassign it or get rid of it, and you’ve bought yourself another three months in about ninety seconds.
Tonight, clear the surface completely. Put back only what you physically touched today, and go to bed. What’s on the dresser in the morning is your real container count, and it’s usually smaller than the one you were shopping for.
Frequently Asked Questions
01What should you put on top of a dresser?
Only what you touch daily and has no better home: everyday carry like keys and a watch, the jewelry you actually wear, a lamp if the room needs one, and one or two things you keep because you like looking at them. Everything else belongs in a drawer or another room.
02How many organizers fit on a dresser top?
Three to four grouped containers on a standard single dresser, which runs about 36 inches wide by 16 to 20 inches deep. That usually means one shallow tray, one small box, and either a turntable or one vertical item. A 60-inch double holds more, but if two people share it, the budget is per person.
03What is the best way to organize a dresser top?
Sort the surface into four piles first, then group what stays into three categories with a rule for each: jewelry, everyday carry, and decorative. A single catch-all tray is the most common approach and the most reliable failure, because everything is not a category and the tray turns into a junk drawer within weeks.
04Can renters put shelves above a dresser without drilling?
Yes, with Command-brand adhesive strips rather than generic mounting tape. Large strips hold up to 16 pounds per pair, need 30 seconds of firm pressure and a full hour of cure time before loading, and only bond reliably to smooth painted drywall, laminate, glass or tile. Textured walls are the known failure point.
05How do you organize a dresser top two people share?
Divide the surface physically instead of building one shared system: one tray per person, each side with its own rules, and a visible dividing line like a lamp or a small plant. Shared containers fail because two people rarely agree on what belongs in them, and a visible line means nobody has to police anybody.