







In this article
You already did this once. A full Saturday, everything pulled out of the closet, a donation bin by the door, a fresh set of containers from the store. Four weeks later there are clothes on the floor again and the nightstand is holding an empty glass, two hair ties, and a charger that stopped working months ago.
The reversion isn’t a discipline problem, and organizing communities are blunt about the mechanism: bins bought before an edit relocate clutter instead of removing it, and anything without an assigned home lands on the nearest flat surface. That’s a sequence problem, and sequence is exactly what a numbered idea list can’t give you. So here is how to organize a small bedroom as an actual order of operations: five steps, each one depending on the one before it, plus the two measurements that decide whether a product fits your room at all and the single place where the no-drill rule should be broken.
Quick Answer
Organize a small bedroom in this order, because each step decides the next one:
- Declutter before you buy a single container.
- Zone the room by what you do in it, not by furniture.
- Contain each zone with something that fits the measured space.
- Place storage where the item is actually used, off the floor first.
- Maintain with one weekly reset and one quarterly edit.
Why Your Small Bedroom Reverts Within a Month
Almost everyone has done the weekend purge. Almost nobody has done it in an order that survives a Tuesday. That’s the thing most small bedroom organization advice leaves out: the collapse is predictable enough to describe before it happens, which is worth more to you right now than another list of bin recommendations.
You Bought Containers Before You Edited
The most repeated line in organizing communities is some version of this: you can’t organize clutter, and if you’re using bins and sorters to contain clutter instead of editing it first, they will blow up in your face eventually. It sounds harsh until you run the math on your own room.
A container doesn’t remove anything. It adds capacity. And capacity is the reason the room filled up in the first place, so buying six new bins for a room that’s already over its limit is a very expensive way to postpone the decision.
This is also why a room can look minimal and still feel cluttered even after you’ve cut back. The visible surfaces got clear, but the volume never actually went down, it just moved into opaque boxes where you stopped counting it. The bins gave you permission to skip the edit. Four weeks later, the overflow reappears on the floor because there was never room for it.
Every Flat Surface Becomes a Landing Strip
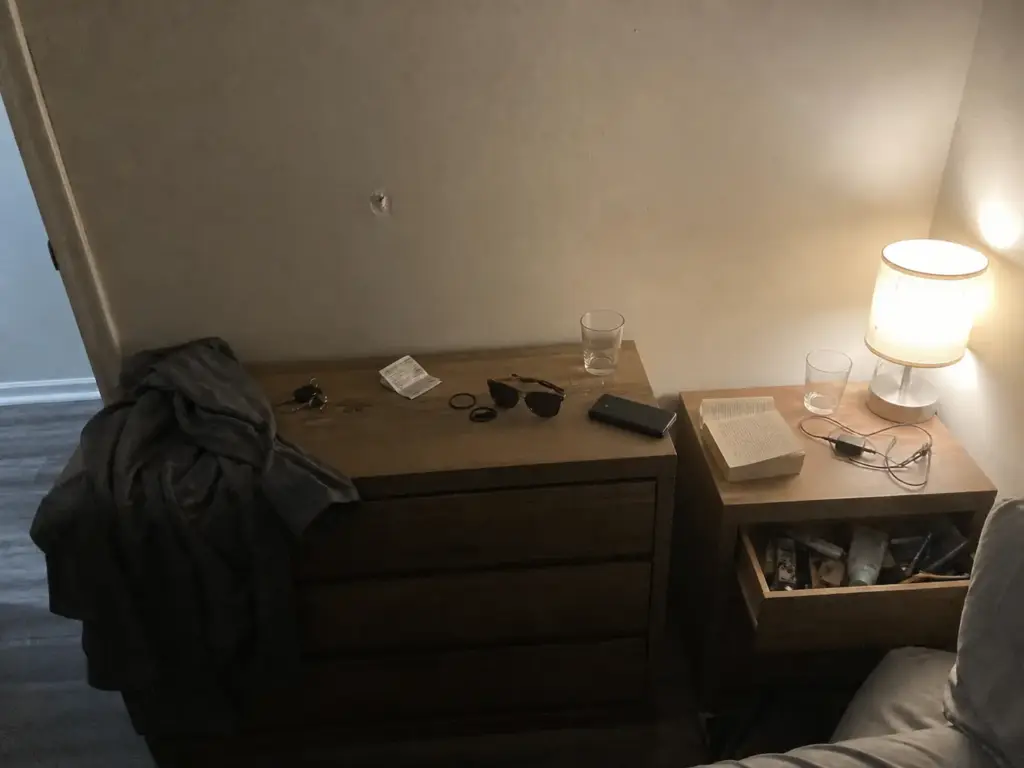
Organizers call it the landing strip: the flat surface closest to where you stand when you empty your pockets. In a bedroom that’s almost always the nightstand or the dresser top. Keys, coins, receipts, the earring you took out at 11pm, yesterday’s shirt. None of it belongs there and all of it stays there.
Nothing about this is willpower. It’s distance. The drawer is two extra seconds away, and at the end of a long day two seconds wins every time.
Here’s the number that makes it concrete: a 36-inch dresser top realistically holds three or four containers before the landing-strip effect takes back over, not six. People load a surface by the area they can see, not by the reach-and-return math that actually governs whether clutter-free surfaces hold. Put a fifth tray up there and the whole top reverts to a dumping ground within a week, tray and all.
Before you reorganize anything, stand where you actually stand when you walk in at night and put your things down. Whatever surface your hand reaches first is the surface that will defeat your system. Design that spot on purpose instead of fighting it.
The System You Built Assumes a Good Day
Under-bed bins have their own failure pattern, and it’s quieter. They get loaded once during the big push, slid into place, and never opened again. No alarm goes off.
A year later they hold things nobody in the house wants, taking up the best dead space in a room that has none to spare. That’s not storage. That’s parking.
The common thread: the system that works on the day you build it is not the same system that works on a weeknight when you’re tired, running late, and holding a laundry basket. If a step in your setup requires lifting a bin, removing a lid, and putting the lid back, it will hold for about three weeks. Design for the tired version of yourself, not the version that spent a whole Saturday enjoying this.
Step 1 — Declutter Before You Buy a Single Bin

“Declutter first” is everywhere and mostly useless, because nobody tells you how far to go or how to know when you’re finished. A small bedroom does give you something a big room doesn’t: an objective stopping point. The room itself tells you when you’re done.
Start With Clothes, Not With the Room
Work in this category order: clothes you haven’t worn in a year, then duplicates, then the nightstand contents, then under-bed archaeology, then surfaces. Clothes come first because they’re the highest-volume category in nearly every bedroom, which makes them the fastest visible win. Pull twelve things out of a closet and you can see the difference immediately. Pull twelve things out of a nightstand drawer and the room looks identical, which is how people lose momentum an hour in.
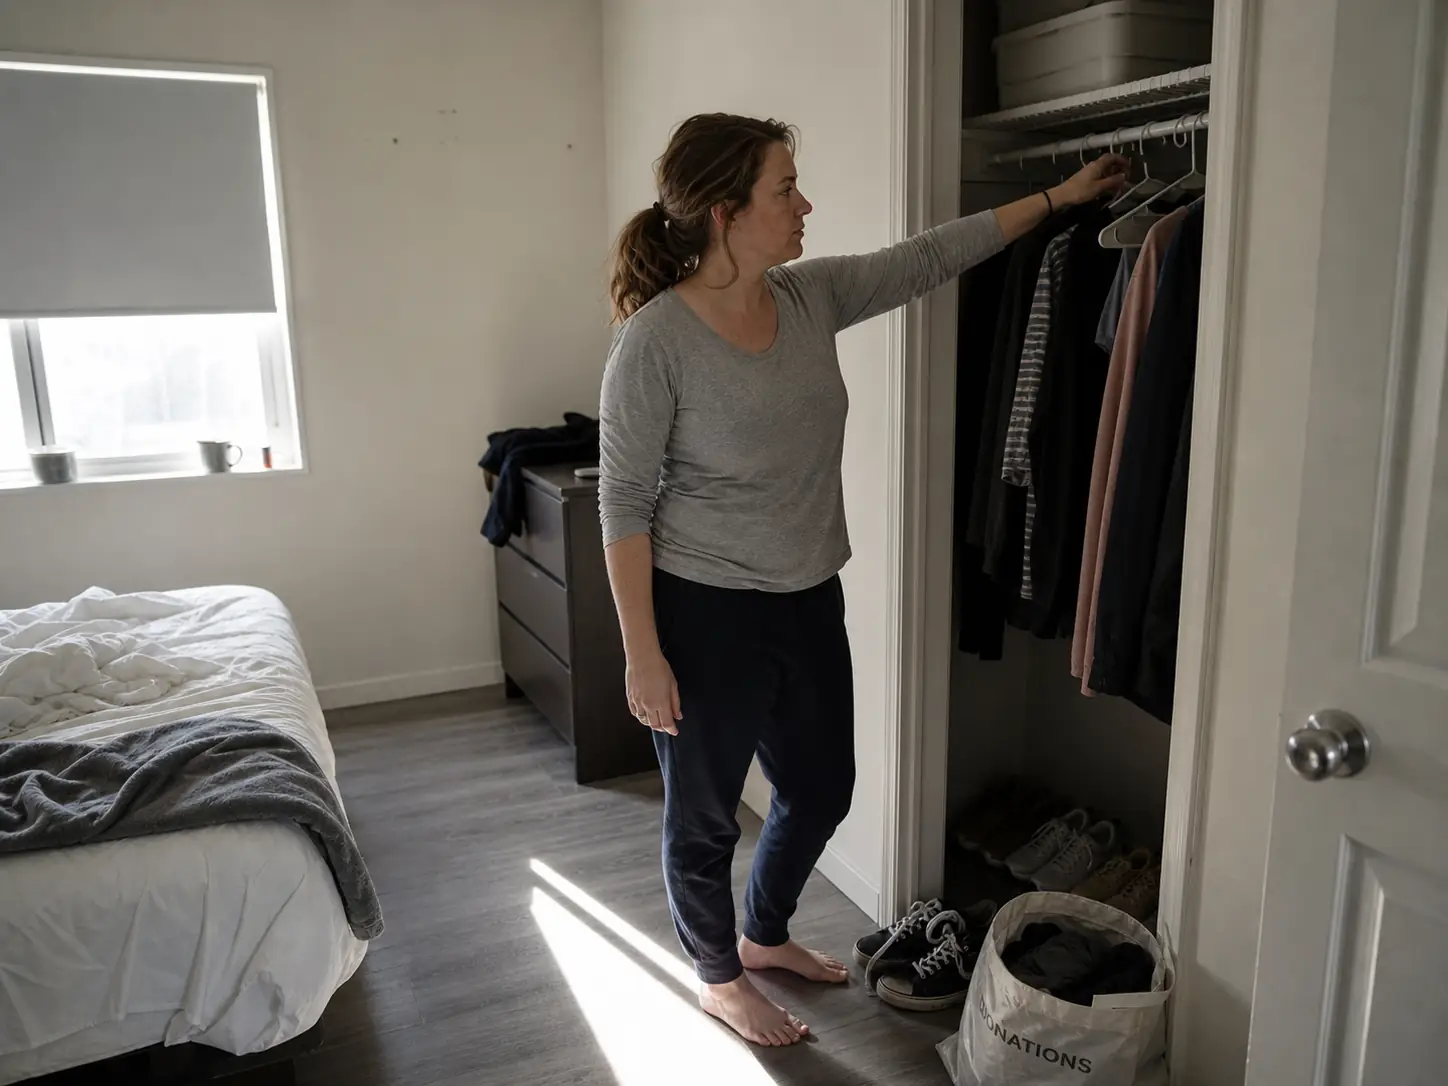
The free version of this step is a laundry basket and two trash bags. One becomes the donation bin, one leaves as trash, the basket holds anything that belongs in another room. Nothing to buy, nothing to measure, nothing to order and wait for. If you want containers for the first sorting pass, use a shoebox or an old tote you already own, which is the budget-friendly swap organizing threads suggest before anything else.
Count Rod Inches Before You Count Hangers
Here’s a decision tool that saves people from buying a closet system they don’t need. Slim velvet hangers take up about two inches of closet rod each, so roughly 60 inches of rod holds about 30 hung garments. Measure your rod, divide by two, and you have the honest capacity of your closet in garments before you hang a single thing.
That number tells you which problem you actually have. If you own 34 hanging garments and your rod holds 30, you have an edit to do and it’s small. If you own 70, no second rod, no hanger upgrade, and no organizer is going to fix it, and you’re better off going deeper on the full closet organization method than buying more hardware.
Most people are somewhere in the middle and discover that switching to slim hangers alone buys back enough rod to end the problem. It’s the cheapest fix in the room.
Know What “Done” Looks Like
You’re done when everything that stays has a plausible home. Not when the donation bag reaches a certain size, not when a specific percentage is gone, not when the room matches a photo (nobody’s room matches the photo). Plausible home means you can point at a spot and say what lives there.
In a small bedroom that threshold arrives sooner than people expect, and that’s the good news of a tight room. There aren’t that many places for things to go, so the list of unhomed items gets short fast. Whatever is left without a spot at that point is your real decision pile. Everything else was noise.
Step 2 — Zone the Room by What You Actually Do in It
Most people organize around the furniture they happen to own. The dresser gets the clothes because it’s a dresser. The nightstand gets whatever fits in a nightstand. But a small bedroom really only hosts about four activities, and each one has a natural location that often has nothing to do with where the matching furniture set ended up.
This step is about function, not placement. If you haven’t settled where the furniture goes in a small bedroom yet, do that first and get your bedroom clearance sorted, then come back here, because zoning a room you’re about to rearrange is wasted effort.
The Four Zones Every Bedroom Has
Nearly every apartment bedroom breaks into the same four zones. Sleep-adjacent covers what you genuinely need within arm’s reach at night. Dressing covers daily-wear clothes and whatever mirror you use. Long-term storage covers off-season, sentimental, and rarely-touched items. Drop-off covers keys, wallet, jewelry, and the day’s pocket contents.
Write those four down and assign every category in the room to one of them. This sounds like busywork. It’s the step that makes Step 4 decidable, because once an item has a zone, its location stops being a matter of taste and becomes a matter of arithmetic.
Give the Best Reach to the Daily Stuff
The one rule that decides most placement questions: zone by frequency, not by category. Daily items get the shortest reach, quarterly items get the worst real estate in the room. That means the sweater you wear twice a week does not go in the bottom drawer just because it’s a sweater and the sweaters live together.
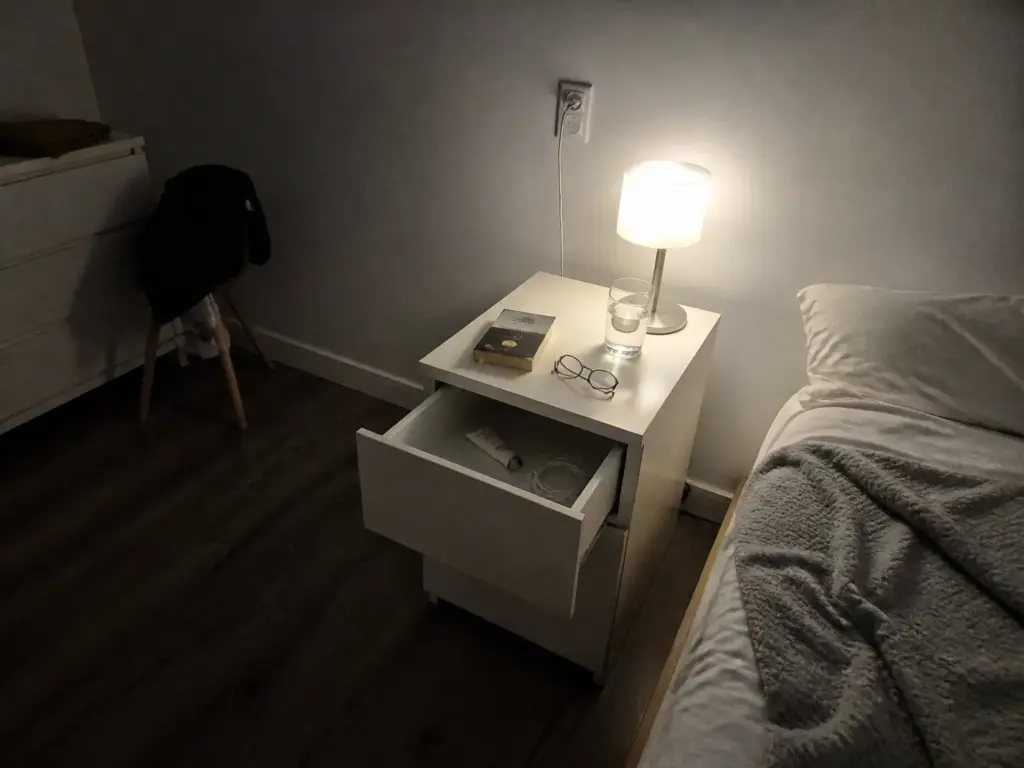
The nightstand is where this rule pays off fastest, and it’s also where it gets ignored most. Professional organizers at NAPO recommend limiting the nightstand to what you’d want within arm’s reach at night, which in practice is a very short list: a lamp, a book, water, maybe a charger. Open your nightstand drawer right now and count how many things in there pass that test. Almost everything else is in that drawer because the drawer was close, not because the item needed to be there.
Zone boundaries only hold if a second person can guess them without being told. If your partner or roommate can’t tell where a thing goes by looking at the room, it isn’t a zone yet, it’s a preference you’re keeping in your head. Test it by asking them to put three random items away.
Build a Drop-Off Zone or Your Dresser Becomes One
The drop-off zone is the one people skip, and it’s the direct cause of the landing strip described earlier. Pocket contents have to go somewhere. If you never assign them a home, the nearest surface becomes their home by default, and it will be the surface you least want covered.
I used to treat this as a last-step detail, something to sort out once the drawers and the closet were handled. Reading enough bedroom-declutter threads changed my mind: the drop-off spot is the first zone to define, because it’s the only one that competes with your system in real time, every single night. Pick the spot deliberately, get it within one step of where you actually stand, and the rest of the room stops absorbing the overflow.
Step 3 — Contain Each Zone With Something That Actually Fits
This is the step where money gets wasted. People buy the container that matches the look they want, then discover it doesn’t clear the bed frame or the drawer, and either eat the return shipping or live with it sticking out. Two measurements prevent almost all of it, and both take under a minute.
Measure Under-Bed Clearance Before You Buy Anything
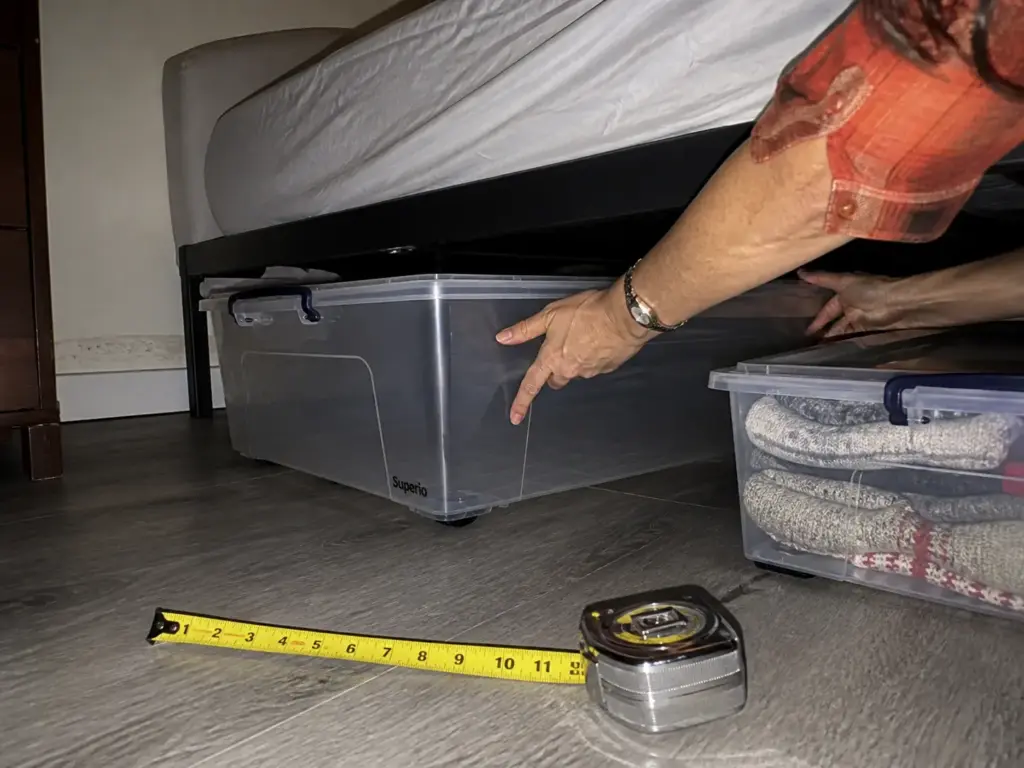
Under-bed clearance is the number that decides everything happening down there, and it varies more than people assume. Platform beds typically leave four to seven inches. Standard metal frames leave seven to thirteen. That gap is wide enough that a container designed for a metal frame will simply not slide under most platform beds, which is the single most common reason under-bed storage gets returned.
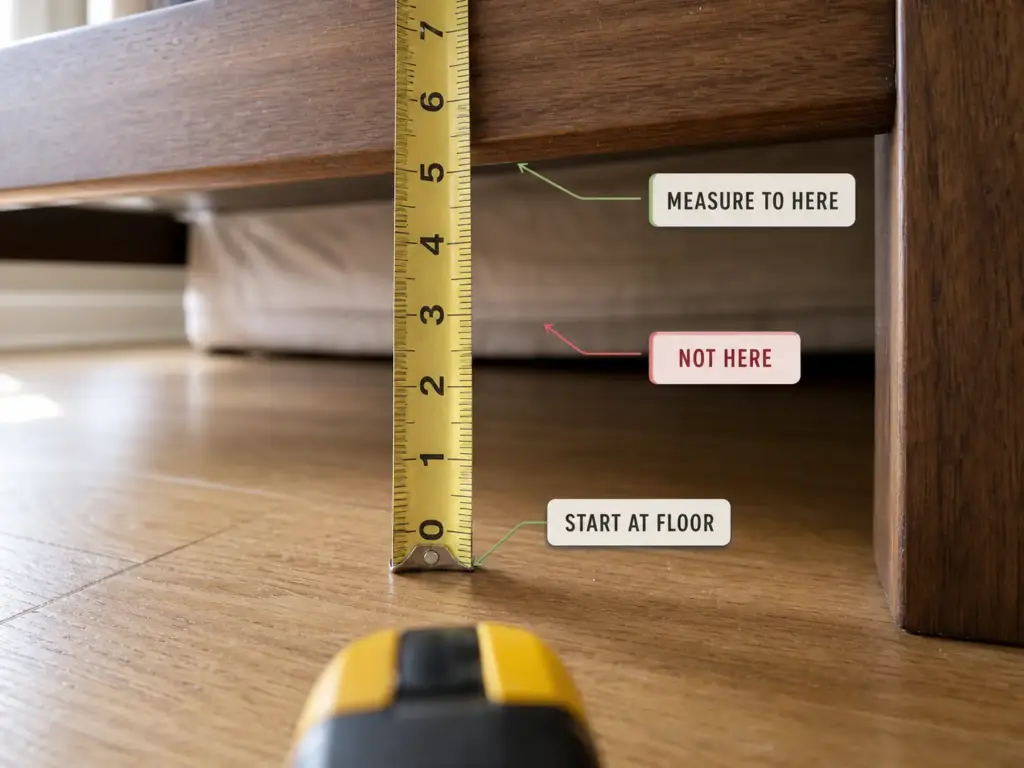
Measure it with the tape lying flat on the floor, running up to the lowest point of the frame, not to the slats and not to the mattress. Write the number down before you shop, and then subtract half an inch so the bin isn’t scraping on the way in. That half inch is the difference between a bin you use and a bin you fight.
If you already own flat bins that clear your number, use them and skip the purchase entirely. If you don’t, and your frame gives you seven inches or more, the Superio Under Bed Storage Containers with Wheels, Set of 3 run 26 by 16.5 by 6.3 inches and roll out on casters, which matters more in a small room than it sounds.
In a big bedroom you can drag a flat bin out into open floor and dig through it. In a small one there is no open floor to drag it into, so wheels turn a two-hand crawl into a one-hand pull from the side of the bed.
The limitation is the same one every wheeled bin has: the casters add height to the total, so measure against the full loaded height, not the box dimension on the listing. If your clearance is right at the line, go flat instead and pull from the short end. This is also the whole basis of the rolling versus flat under-bed containers decision, which has more nuance than one paragraph can hold.
When the Bed Is Too Low, Raise the Bed
If your clearance came in at four or five inches, the instinct is to hunt for “ultra-thin” specialty bins. Skip that search. Raising the bed is cheaper, faster, and gives you a number you choose instead of a number you accept.
The EclatBain Bed Risers, Set of 4 adjust to three, five, or eight inches, which means a platform bed with four inches of clearance can go to nine or twelve without touching the frame, the wall, or your deposit. They turn the bins you already own into bins that fit, which is the opposite of most organizing purchases, and in a rental bedroom they’re about as renter-friendly as a storage fix gets: fully removable, no hardware, nothing to patch at move-out.
Two caveats worth knowing before you order. Risers change how the bed feels to get into, and if you’re already at the higher end of a standard mattress height, adding eight inches makes it a genuine climb, so start with the shortest setting that clears your bins. And check that your frame’s legs or corner posts actually seat in the cup, because risers are sized for typical leg profiles, not for every frame design out there.
Every Drawer Section Needs a Rule
Drawers revert for a specific reason: everything goes in and nothing has a fixed spot. Dividers alone don’t solve that. Dividers plus a rule per section solve it. Batteries here, chargers here, jewelry here.
And if you create a “miscellaneous” section, that section eats the entire drawer within a week. It always wins. There is no version of this where the miscellaneous section stays small.
Test the rules for a month with shoeboxes or small boxes you already have. They’re ugly and they slide around, but they tell you whether the categories you picked are ones you’ll actually follow, which is the only thing worth knowing before spending money.
If the sections survive that month, the Bamboo Drawer Dividers Organizers, 4-Pack hold the boundaries properly at 2.6 inches high and adjustable from roughly 17 to 22 inches, which covers most standard dresser and nightstand drawers. Two honest limitations. First, spring-loaded dividers grip the drawer sides, so they need reasonably rigid drawer walls to stay put, and thin veneer drawers can flex enough to let them creep. Second, at 2.6 inches tall they’re built for flat-folded clothes and small items, not for tall bottles or stacked hardware. If your drawers are deeper than that or you want the full comparison, we cover dividers that actually fit standard dresser drawers separately.
Step 4 — Place Storage Where the Item Gets Used
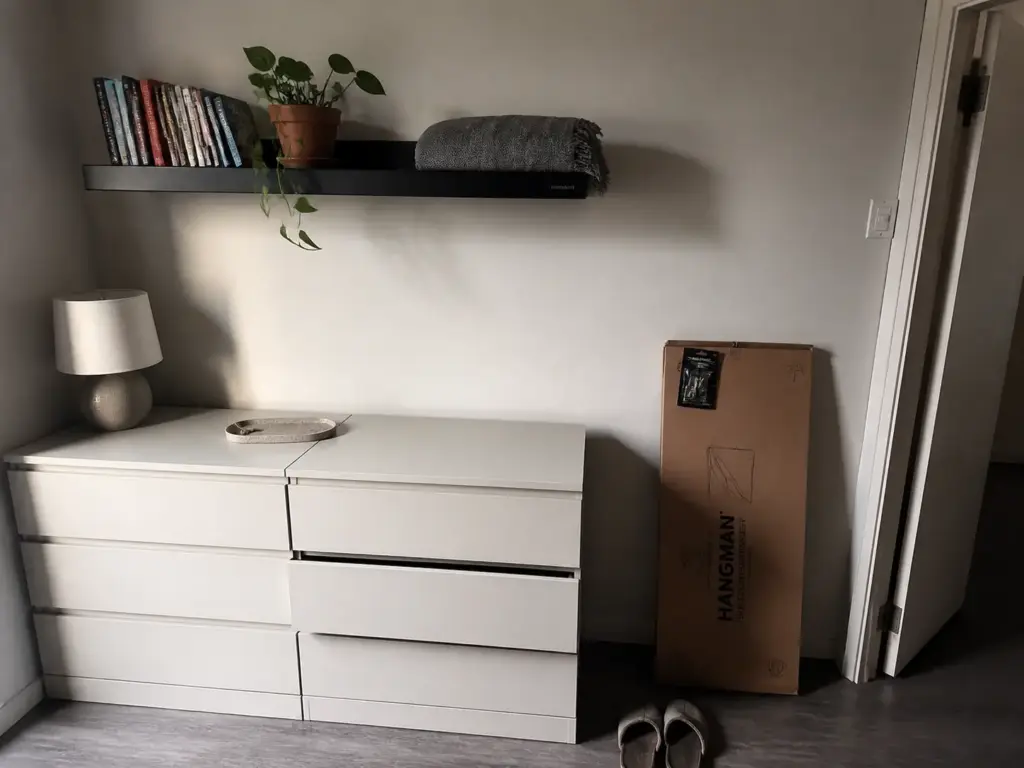
In a small bedroom, floor is the resource. Not wall, not shelf. Floor.
Every square foot a storage piece stands on is floor the room can’t spare, and visible floor is what makes a small room usable, not just what makes it photograph bigger. Which means the fix is going up and going dual-purpose, and both are renter-doable.
Go Up Before You Go Wider
Look at your bedroom wall above the furniture line. In almost every room, everything from roughly four feet up is completely empty. That’s storage capacity nobody is using, in the one dimension a small room has plenty of.
The budget version is a picture ledge on mounting tape, plus a couple of adhesive wall hooks for bags and robes. Command strips handle light items and cost very little, and that’s a real option worth trying first if what you’re storing is books and small boxes.
When you’re ready to splurge on something that holds actual weight without stud-hunting, the Hangman No-Stud Floating Shelves, 36″ mount without drilling into framing and put a full three feet of shelf above the dresser line, which is the wall-mounted shelving answer to a floor-standing bookshelf.
The caveat that matters: no-stud systems still have a weight rating, and drywall condition changes what any mounting method holds in practice. Plaster walls, textured walls, and older drywall all behave differently, so check how much weight each mounting method actually holds before you load a shelf with anything heavy and walk away from it.
Mount vertical storage at the height you can reach without a chair. A shelf you need to fetch a stool for becomes long-term storage within a month, whatever you intended to keep on it. If it’s above your reach, only off-season items go up there.
Make the Closet Shelf Work at Its Real Depth
Closet shelves run about 11 to 15 inches deep, with 12 to 14 inches of vertical space standard above the hanging rod, and the rod itself sitting roughly 12 inches out from the back wall. Those three numbers explain why building out deeper shelving over a rod backfires: anything deeper than about 15 inches puts items past your reach, so the back of the shelf becomes another forgotten zone, exactly like the under-bed bins.
Work with that depth instead of fighting it. Bins sized to the shelf depth, one row deep, labeled on the front edge. And over-the-rod hanging organizers do more for a small closet than build-out shelving, because they use the vertical gap between garments without adding depth.
That’s also the renter answer, since none of it needs anchors. If you’re renting and want the whole approach, we have no-drill closet setups that won’t cost your deposit covered end to end.
One Piece, Two Jobs, at the Foot of the Bed
Any storage piece that stands on the floor in a small bedroom should be doing two jobs. Multi-functional furniture is the whole category, and seating plus storage at the foot of the bed is its classic version. If you already own a trunk or a blanket chest, that’s your piece. Put it there and stop reading this subsection.
If you don’t, the SONGMICS Storage Ottoman Bench runs 43.3 inches long and 15.7 deep, which gives you a place to sit while you put shoes on plus concealed storage for blankets and off-season items in a single footprint. Measure the clear space at the foot of your bed before you order, though, and be strict about it: you need the bench length plus room to walk past. If your clear run is under about 36 inches, skip the piece entirely rather than squeezing it in. A bench you have to sidestep every morning costs you more than the storage gains you.
Step 5 — Maintain It With One Weekly Reset
The “after” photo is where most organizing content stops. It’s also the exact point where your last attempt started coming apart. A maintenance routine doesn’t have to be long. It has to be short enough to actually happen on a weeknight, which is a much harder design constraint than it sounds.
The Weekly Reset, Start to Finish
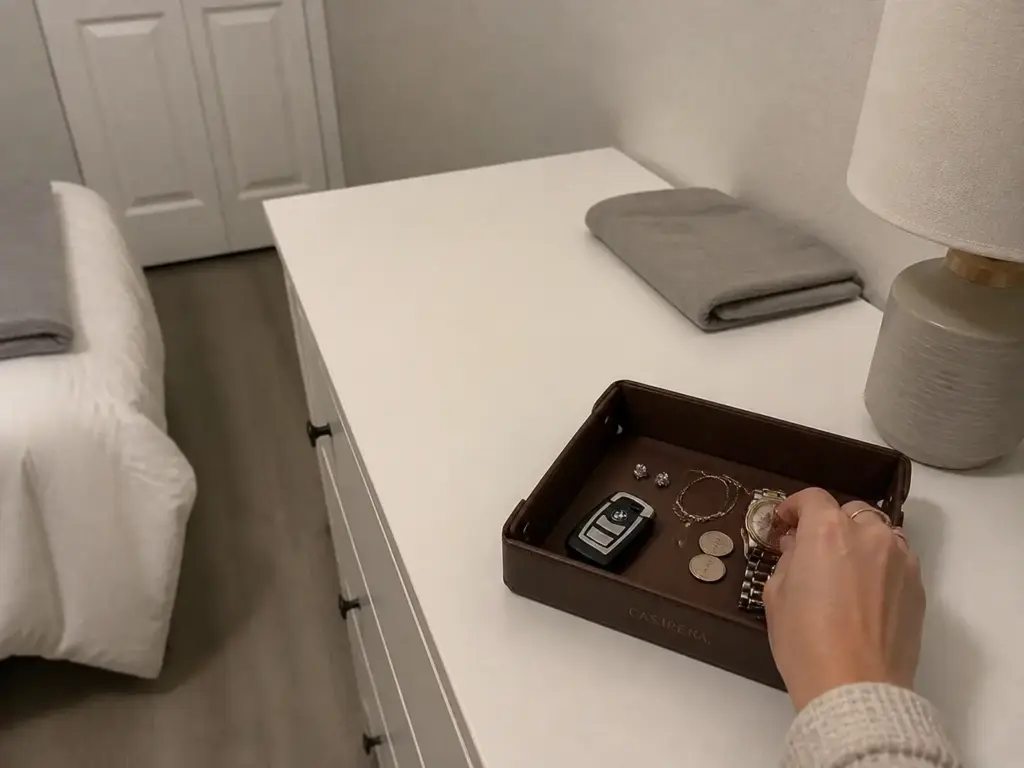
The whole reset is three moves. Surfaces go back to their assigned zones. The floor gets cleared. The drop-off tray gets emptied into wherever those items actually live. That’s it.
Give it about the length of one podcast episode and do it on the same day each week so it stops being a decision. Here’s the diagnostic hidden in that timing: if the reset consistently runs longer than one episode, the problem isn’t your discipline, it’s that the room is still holding more than it can hold. Something needs to come out of the room, not into a new bin. A reset that keeps growing is the room telling you Step 1 wasn’t finished.
The Quarterly Edit for Everything You Can’t See
Four times a year, open everything you can’t see into. Every under-bed container, the top closet shelf, the back of the bottom drawer. Set a calendar reminder, because “someday” is precisely the schedule that turned those bins into parking spots the first time.
The rule for the quarterly pass is simple and slightly uncomfortable: if you haven’t touched an item since the day you put it in there, it isn’t being stored, it’s being avoided. Off-season clothes are the legitimate exception, and they earn their space as long as they actually rotate back in. That rotation is the whole point of keeping off-season clothes stored where they won’t be forgotten instead of just out of sight. Everything else in those bins is a decision you deferred, and a quarterly reset matters far more to whether this room holds than which bin you bought.
The Drop-Off Tray Does More Than It Should
Of all five steps, this is the smallest intervention with the largest effect. Give keys, jewelry, coins, and pocket contents one legitimate home and the landing strip stops forming, because the items that seed it now have somewhere to go that’s as close as the surface was.
A shallow bowl or any tray already in the house does this job perfectly. Use that first, for at least a few weeks, and confirm you actually use it before spending anything.
If nothing you own has the right footprint, the CASIRENA Faux Leather Valet Tray Organizer is sized for a dresser or nightstand top and has raised sides, which is the detail that matters more than the material: a flat tray lets coins and earrings migrate off the edge, and then you’re back to a landing strip with a decorative rectangle in the middle of it. One tray, one spot, emptied weekly. If your dresser top is the surface fighting you hardest, we go deep on the dresser top specifically in its own guide.
The One Place the No-Drill Rule Should Not Apply
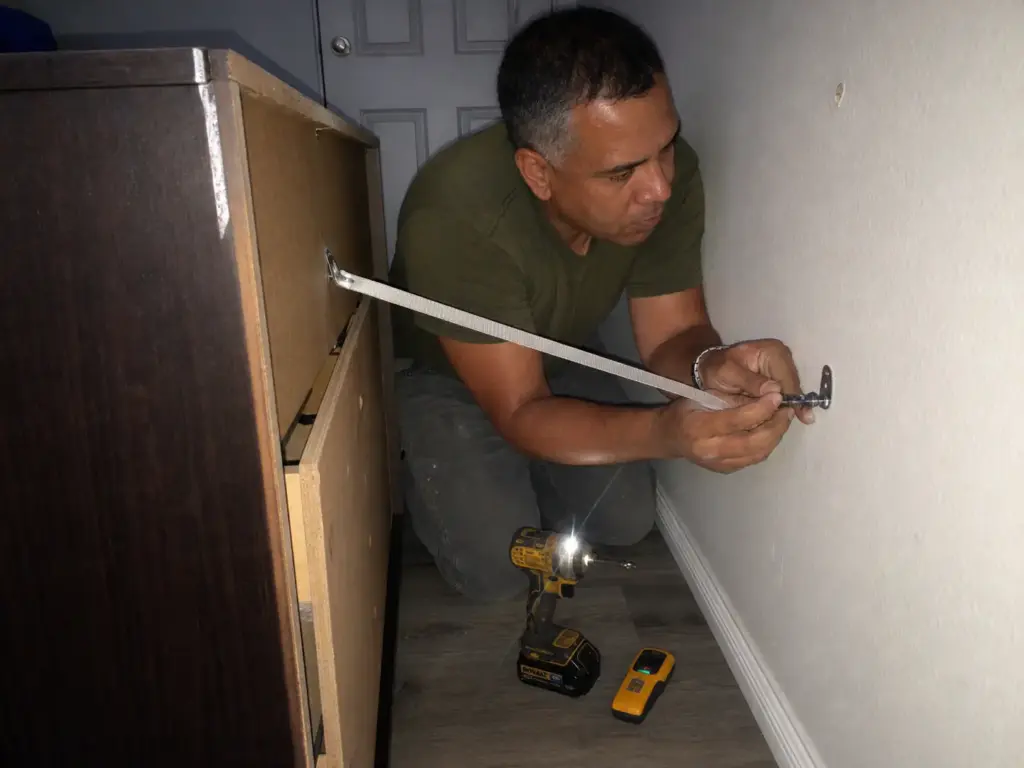
Every other fix in this article avoids the wall. This one shouldn’t. It’s the one place where “I’m renting” is not a good enough reason, and it takes about twenty minutes.
Anchor the Dresser Even in a Rental
The CPSC’s furniture tip-over safety standard, known as the STURDY rule, took effect in 2023 and requires manufacturers to build tip-resistant clothing storage units. Read that sentence carefully, because the gap in it is the point: it applies to new manufacturing. It does nothing for the dresser already standing in your room. A hand-me-down piece, a move-in leftover, or anything you bought before 2023 is not covered by it, and in a small bedroom the dresser is often the tallest freestanding thing in the space with the least floor around it.
The scale is why this belongs in a how-to instead of a safety article nobody clicks. The CPSC recorded an estimated annual average of about 5,300 furniture tip-over injuries treated in US emergency rooms across 2006 through 2021, with clothing storage units the leading cause. That is common, not theoretical.
The threshold is easy to apply: any dresser taller than roughly 30 inches or heavier than about 30 pounds gets an anchor strap. And the method matters as much as the decision. Consumer Reports’ testing of furniture anchor kits found adhesive-only devices are not equivalent to a strap screwed into a wall stud, which is the method that actually holds under load.
Yes, that means two small screw holes in a rental wall. A patched screw hole is a five-minute repair with a dab of spackle at move-out, and it is a trade every landlord dispute in the world would side with you on.
Everything else in this system stays no-drill and moves out with you: the risers, the over-the-door organizers, the tension rods, the no-stud shelving. One exception, twenty minutes, one small hardware purchase. If the dresser is the piece giving you the most trouble in the room, the rest of the dresser method picks up where this leaves off.
Conclusion
Three things carry this whole system. Edit before you buy, because every container purchased ahead of the purge adds capacity to a room whose actual problem is capacity. Zone by frequency, then place by reach, so daily items get the shortest distance and quarterly items get the worst spot in the room. And measure under-bed clearance and closet shelf depth before anything goes in a cart, because those two numbers decide which half of the storage market fits your room at all.
Then run the three-month test on it. In three months, open every under-bed container and the bottom of the closet. If something in there hasn’t been touched since the day you loaded it, it isn’t stored, it’s parked, and it should leave the room.
Start with the nightstand drawer tonight. It takes fifteen minutes, it’s the drawer that reverts fastest, and it tells you immediately whether the zoning rule you picked is one you’ll actually follow. Then work outward.
Frequently Asked Questions
01How do you start organizing a small, cluttered room?
Start by removing things, not by rearranging them, and pull the clothes you haven’t worn in a year before you touch a single bin. In a small room the edit creates the space every later step depends on, and it costs nothing. Once what remains can plausibly fit, zoning and containing become quick decisions instead of guesses.
02How do I organize a small bedroom with no storage?
Use the two spaces a room with no closet still has: under the bed and the wall above the furniture line. Bed risers open up under-bed clearance without modifying the frame, and no-stud shelf systems put storage on empty wall space without drilling into framing. Between the two, most small bedrooms hold more unused capacity than people expect.
03What is the best way to lay out a small bedroom?
Layout is a separate decision from organization and it comes first, because bed placement and walking clearance determine what storage can physically exist in the room. Our small bedroom layout guide covers the clearance numbers and the placement mistakes that eat floor space. Once the furniture is settled, the five steps here handle everything inside it.
04How often should I reset a small bedroom to keep it organized?
Once a week for surfaces and floor, once a quarter for anything you can’t see. The weekly reset takes about the length of one podcast episode and puts everything back in its assigned zone. The quarterly pass is what keeps under-bed bins from turning into permanent storage for things nobody wants.
05How do I organize a small bedroom on a budget?
Do the entire edit first with a laundry basket and two trash bags, then use containers you already own, a shoebox as a drawer divider and a bowl as a drop-off tray, for a full month. Anything that survives that month is worth replacing with a real version, and most of what you were about to buy turns out to be unnecessary.