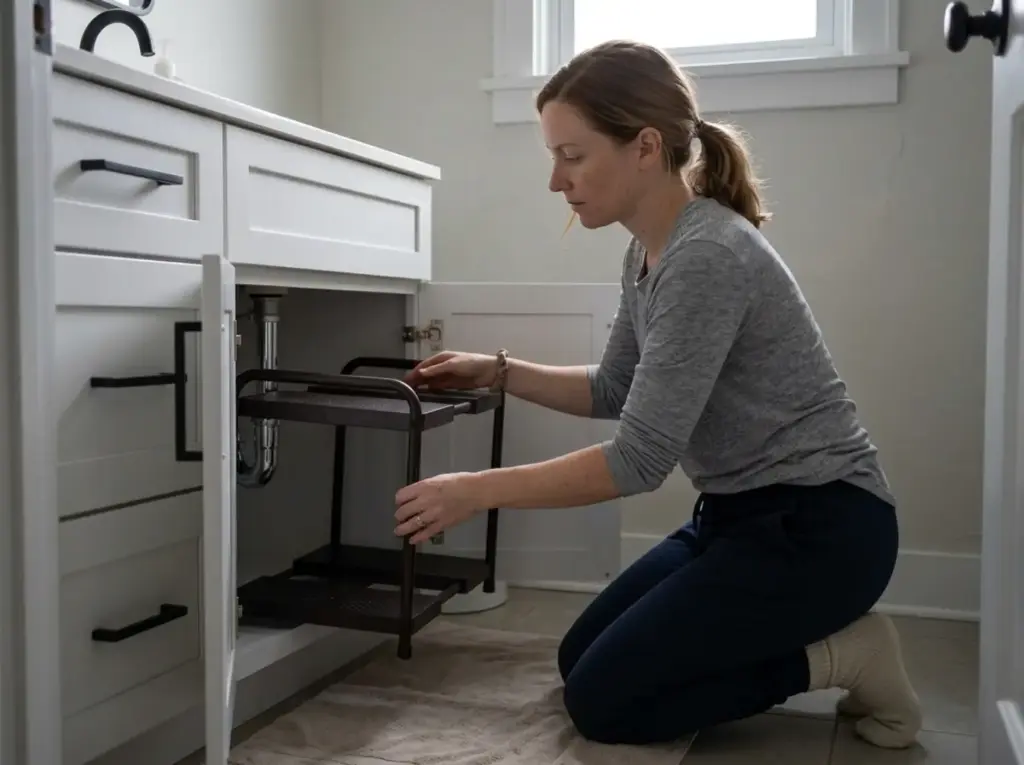
You open the cabinet door, something tips over, and there you are again on the bathroom floor moving the same three bottles you moved last month. The most common comment under under-sink organizing posts isn’t “this looks great.” It’s some version of “but will it actually fit MY cabinet?” That question is the whole problem, and almost nobody answers it.
If you want to know how to organize under bathroom sink space that stays organized, the sequence matters more than the products: empty first, sort second, measure third, buy last. Most posts on this topic run that order backwards and open with the shopping. Here are the five steps in the order you actually do them, ending with the part nobody writes about, which is why the whole thing survives past week three.
Quick Answer
Organize under a bathroom sink in five steps, in this order:
- Empty the cabinet completely and wipe the floor.
- Sort into three piles: keep here, belongs elsewhere, toss.
- Decide which category wins the cabinet before anything goes back.
- Measure opening width, usable depth, and clear height beside the pipe.
- Load it back in reach order and label the zones.
Empty the Cabinet Completely Before You Buy Anything
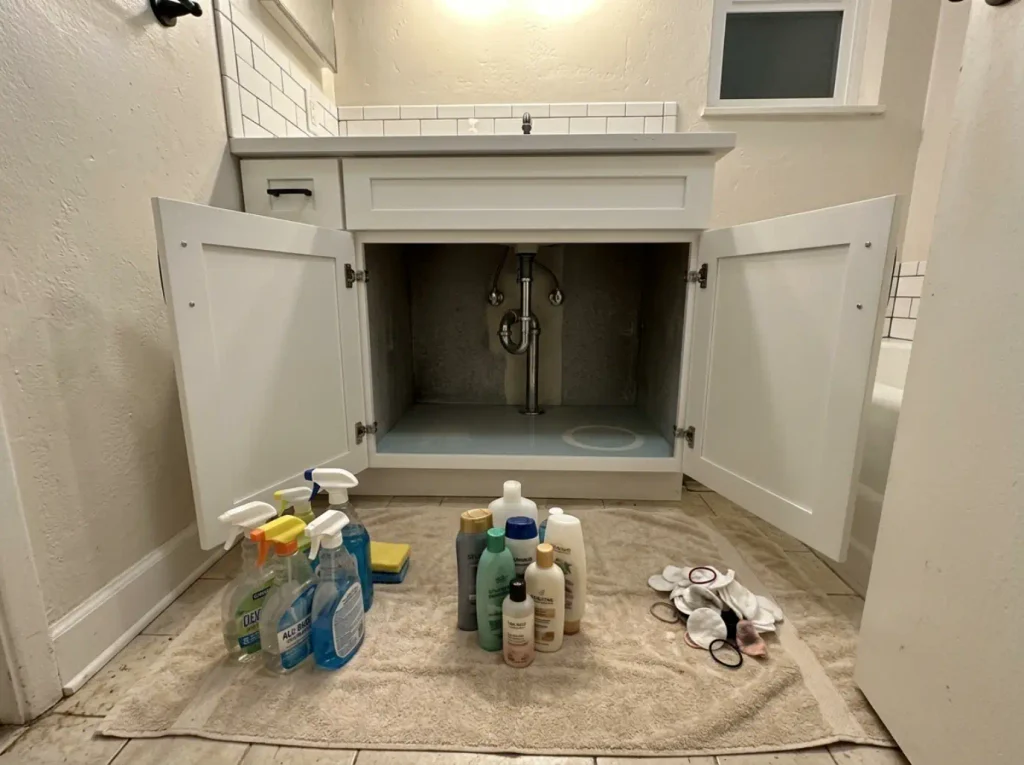
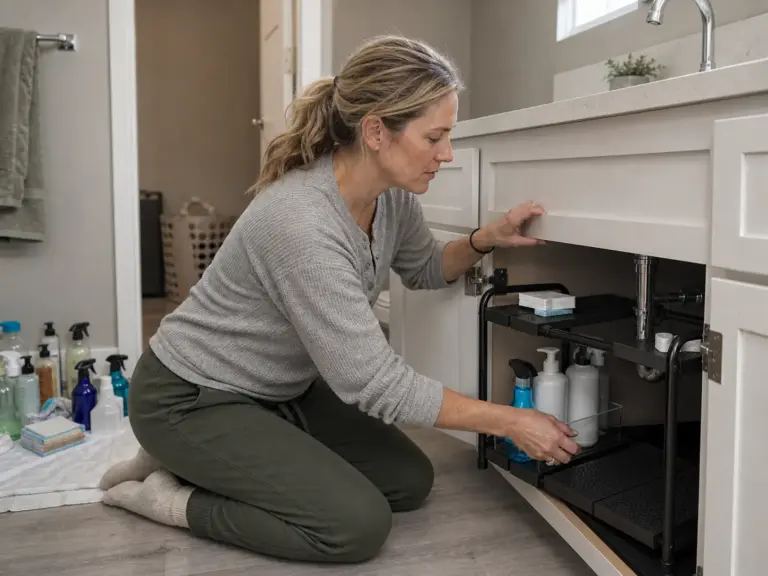
Nobody wants this step. It makes the bathroom worse before it gets better, and for twenty minutes your floor looks like a drugstore shelf collapsed onto a towel. Do it anyway. You can’t measure a cabinet whose floor you can’t see, and you can’t know which containers you need until you know what’s staying.
The half-empty bottles are the tell: nobody finishes an under-sink reset without finding three of the same thing.
Everything comes out. Not most of it, not “the stuff in front,” all of it, onto a towel spread on the bathroom floor. The towel keeps bobby pins and sample packets from rolling under the vanity toe kick.
This is also why professional organizers agree the first step is decluttering before you buy a single bin rather than a stylistic preference. Buy first and you build a system around things you were about to throw out.
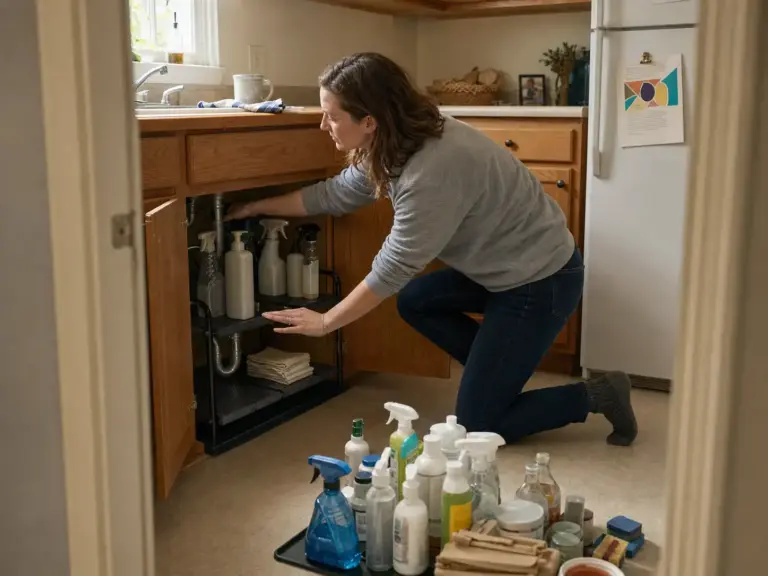
Sort into three piles as you go: keep here, belongs somewhere else, toss. The middle pile is the one people skip, and it’s almost always the biggest. Backstock shampoo that belongs in a linen closet. Travel sizes that belong in a suitcase.
The first-aid kit everyone stores under the bathroom sink and then can’t find in an emergency because it’s behind the toilet bowl cleaner. Sorting takes fifteen minutes and typically empties a third of the cabinet before you’ve bought anything.
Now wipe the cabinet floor and look at it while it’s bare. This is the only moment you’ll ever see the base clearly, and a slow leak leaves a stain you can only spot when nothing sits on top of it. A dark ring, a soft spot, a chalky white bloom around the supply lines: any of those is a plumbing problem, not an organizing problem, and putting bins over it hides the evidence for another year.
Lay a trimmable drip mat on the bare cabinet floor before a single bin goes back in. Under-sink plumbing weeps eventually, and a cut-to-fit mat is the cheapest insurance you can buy against an unsealed particleboard base. Trim it with scissors around the pipe, not around the bins, so it stays useful when you rearrange later.
If you want the full measuring walkthrough for your specific vanity, including how to work around the supply lines, the full under-sink walkthrough, including how to measure around your plumbing covers it one level up. This article gives you the reference numbers you need in Step 4, but the deep dive on pipe clearance in a bathroom vanity cabinet lives there.
Decide Whether Toiletries or Cleaning Supplies Win the Cabinet
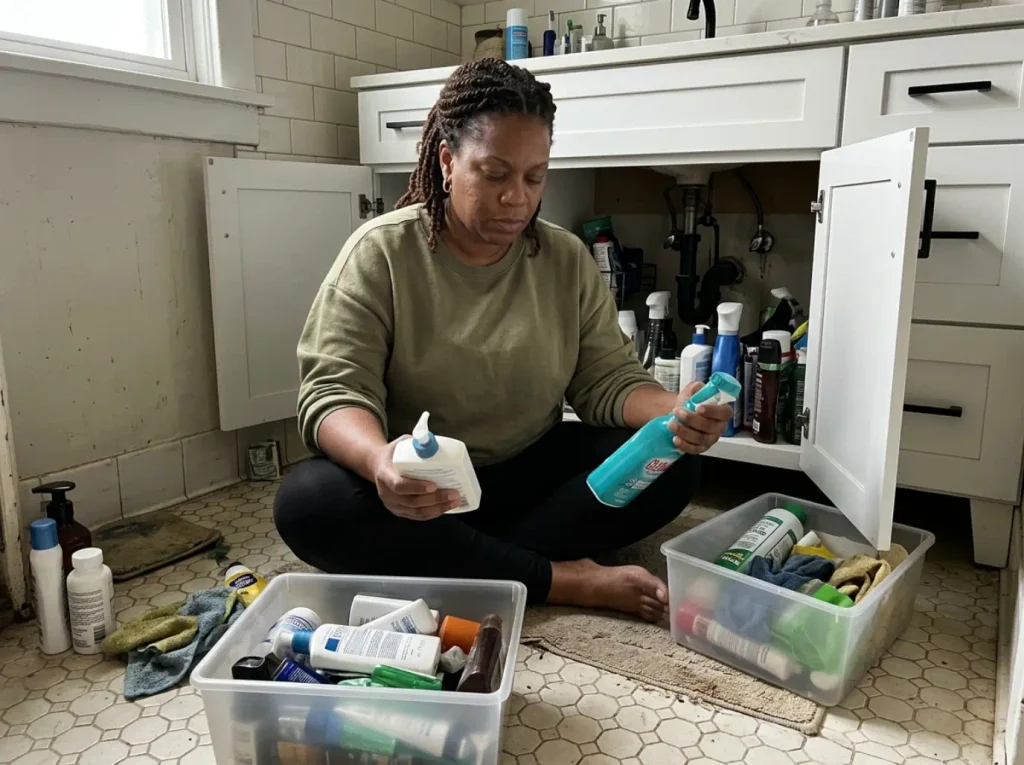
This is the decision nobody names out loud, and it’s the reason so many under-sink cabinets fail. One narrow cabinet cannot be the cleaning caddy and the toiletry backstock and the hair-tool drop zone at the same time. Something has to lose. If you don’t decide which, the cabinet decides for you, and the way a cabinet decides is by turning back into a pile.
Count the categories honestly. Bathroom cleaning supplies. Toiletries backstock. Daily-use items you reach for at the sink.
Hair tools, bulky and full of cords.
And in plenty of homes, makeup.
That’s five categories fighting over a footprint usually 24 to 36 inches wide, minus a drain pipe standing in the middle of it. The math doesn’t work, and pretending it does is how you end up with a catch-all bin.
The deciding question isn’t what fits.
It’s what you reach for in this room. Anything you use elsewhere in the house is a relocate, no matter how logical it feels to keep it here.
Toilet bowl cleaner, yes. The all-purpose spray you actually use in the kitchen, no. Sunscreen you grab on the way out the front door, no.
Whatever survives gets its own bin or its own tier. Not a shared one. Categories that share a container merge inside a month, and that isn’t a discipline problem, it’s a container problem.
The pattern shows up in every under-sink thread: cleaning supplies and toiletries collapse into one mixed bin, and three weeks later nobody can find the spare toothpaste because it’s behind the bathroom cleaner. When each category has a physical edge, putting something back takes no thought. When they don’t, every put-back is a judgment call, and judgment calls are what people skip in a hurry.
Two-person bathrooms change the math again. Each person needs their own zone, or the system depends on both of them agreeing where things go, and that agreement does not hold. Split the width and give each person a bin.
The small stuff that survives this cut, hair ties, clippers, sample packets, needs subdivision rather than its own zone: compartment bins or a cheap drawer organizer dropped inside a larger bin keeps them from becoming the loose layer at the bottom that every category eventually sinks into.
If a category can’t get at least a full bin of its own, it doesn’t belong under this sink. That is the cleanest test there is. A category squeezed into “half of the left bin, next to the other thing” is already scheduled to merge.
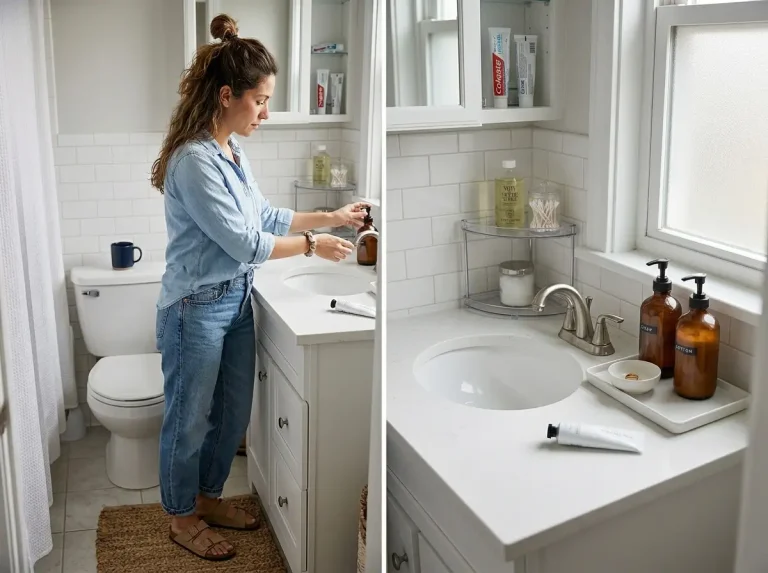
The daily-use items that lose this fight are usually the ones you touch every single morning, and cramming them into a cabinet you have to crouch for is a losing trade anyway. The daily-use items that lose this fight usually belong on the counter, decanted into something that looks deliberate rather than left as a row of drugstore bottles.
Match the Container to the Pile, Not to the Cabinet
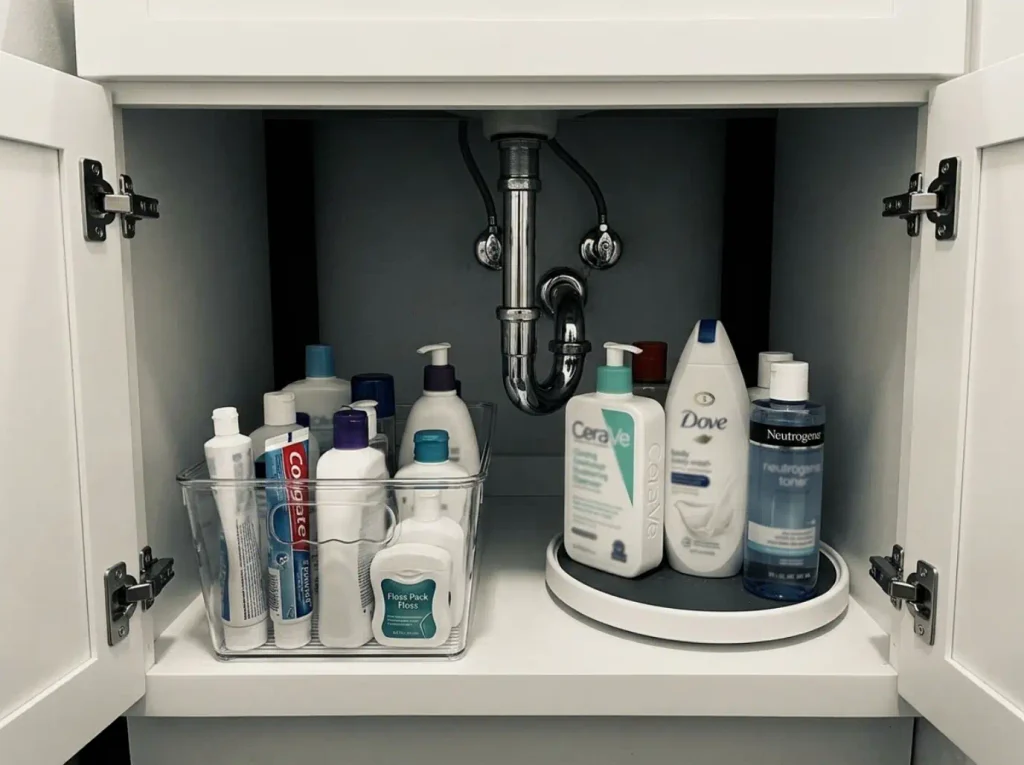
Most people pick containers by what looks right in the cabinet. That’s backwards, and it’s the specific reason the “after” photo dies. The right question is how often you touch the thing. Something you grab every morning at 7am and something you restock twice a year need physically different containers, and putting them in the same bin guarantees you’ll dig past the second to reach the first, every day, until you stop bothering to put anything back.
The rule is simple: daily-reach items need an open top, and backstock needs something that pulls forward. Access frequency picks the container. Aesthetics don’t get a vote until after that. If you’ve already sorted a kitchen cabinet, the same daily-reach and backstock split that works under a kitchen sink transfers directly, pipe and all.
None of this requires a purchase on day one, though. Shoeboxes and cereal boxes cut down to height test whether your zones are even right, and budget-organizing threads keep landing on the same conclusion: a full under-sink refresh built from a handful of dollar-store bins and one raised shelf does the same work as a boutique kit. Run cardboard for a week. If a zone is wrong, you’ll know by Thursday, and you’ll have found out for free.
Open Bins for What You Reach for Daily
Clear bins are doing real work here, not decoration. When you can read the contents through the wall of the bin, you don’t open anything and you don’t lift anything out to check. Retrieval is a two-second grab with one hand while the other holds a toothbrush. The open top is the other half of it, because anything with a lid adds a step, and steps are where systems quietly die.
Once the cardboard test says the zone is right, the Vtopmart 6 Pack Clear Stackable Bins with Lids run roughly 11 by 8 by 6 inches, which stacks two-high in most standard vanities without touching the underside of the basin. In a daily-reach zone, leave the lids in the box. Use one only on the bottom bin of a stack, where it becomes the shelf for the bin above.
A Pull-Out Drawer for the Backstock at the Back
A standard vanity runs 20 to 23 inches deep, most landing near 21. Reach in from the front and your arm comfortably clears maybe 13 or 14 inches before your shoulder hits the frame. That means the back eight inches is a blind spot, and things stored there aren’t stored, they’re archived. This is where spare bottles go to be forgotten and re-bought.
The fix is anything that brings the back of the cabinet to you instead of sending you in after it. The Simple Houseware 2 Tier Pull-Out Sliding Drawer Under Sink Storage rides on a track so the tier comes fully forward, turning those dead eight inches into real storage without kneeling and groping around a drain pipe. The caveat is real: a sliding unit needs a clear run, and on many single-sink vanities the P-trap sits dead center and blocks the track. Measure the floor on each side of your pipe before ordering, because a drawer that can’t extend is a bin with extra steps.
Add-on shelf tiers are frequently rated far lower than people assume, with many individual wire or mesh tiers holding somewhere around 6 to 11 pounds. Heavy backstock and full jugs belong on the cabinet floor, where the load goes straight into the cabinet base. The tiers are for light, bulky things.
A Turntable for Bottles That Disappear
Bottles and jars are their own problem. They’re round, so they don’t line up. They’re tall, so they hide each other.
And they migrate: every time you reach past one it drifts further back, until it hits the blind zone and you buy a replacement for something you already own. That’s how a household ends up with three bottles of the same face wash.
The OXO Good Grips Lazy Susan Turntable 16-Inch has a non-skid surface, so bottles don’t slide off when you spin it, and one rotation brings the back row to the front.
I used to recommend a turntable as the default first purchase here. After enough jammed-turntable stories in under-sink threads, I stopped: on a single-sink vanity the drain pipe usually sits right where the circle wants to be, and a 16-inch disc catches the pipe every half turn. Check for a clear circle of floor on one side of your plumbing first. If you don’t have one, a 9-inch turntable or a flat non-skid tray you pull forward by hand gets most of the benefit.
Fit It Around the Pipe Without Guessing
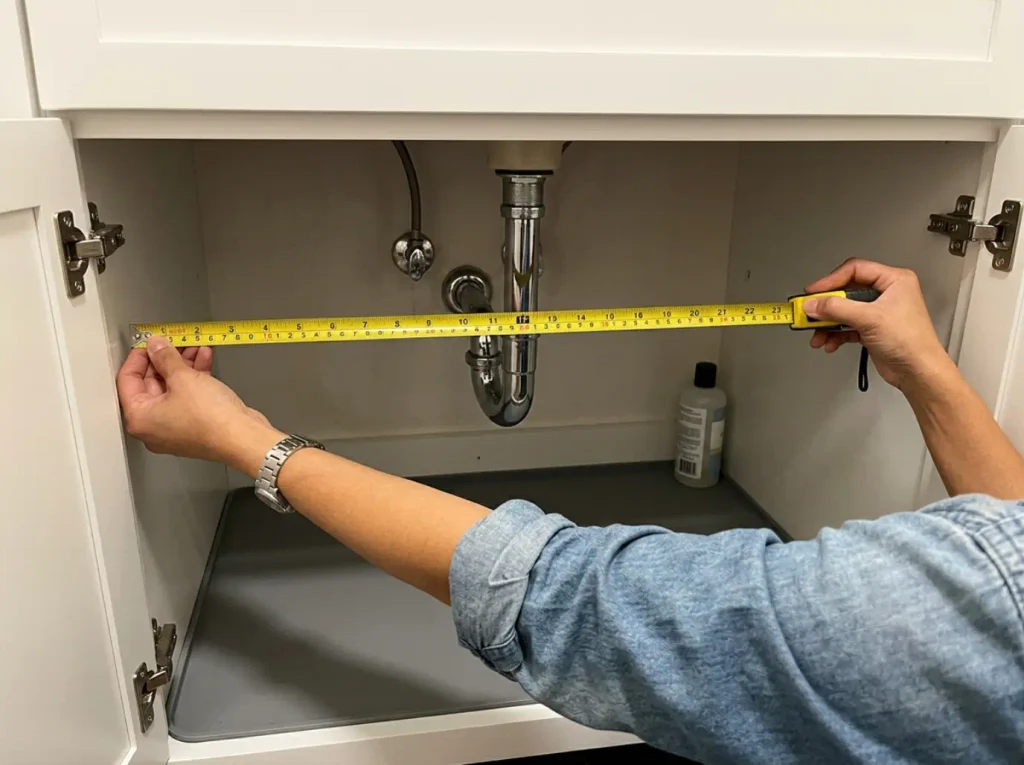
The P-trap is why under-sink organizing is its own topic instead of a paragraph inside a bathroom storage article. Every cabinet has one, it’s almost never where you’d want it, and it’s the most common reason an organizer arrives, doesn’t fit, and goes back in the box. This is also where the search results go quiet. On one of the top-ranking posts for this exact topic, a reader with a 22-inch cabinet asked the author directly for dimensions and got back “measure and pick what fits,” which is not an answer, it’s a shrug.
The Three Measurements That Decide Everything
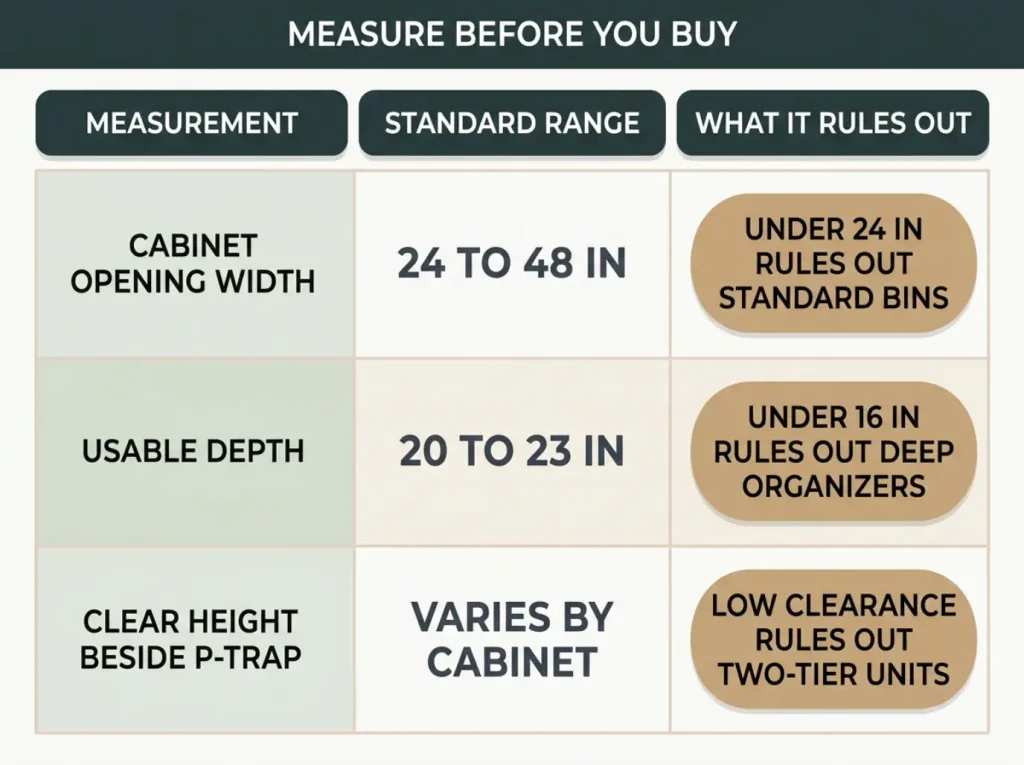
Here are the reference numbers nobody else hands you. Standard bathroom vanities come in 24, 30, 36, and 48-inch widths, with cabinet depth running 20 to 23 inches and most landing near 21. Counter overhang adds roughly an inch and a half on top, which is why measuring the counter instead of the opening is such an easy way to buy something an inch too big. Shallow vanities of 16 to 18 inches are common in older and smaller bathrooms, and if that’s yours, anything marketed for a “deep cabinet” will stick out past the door frame and stop it closing.
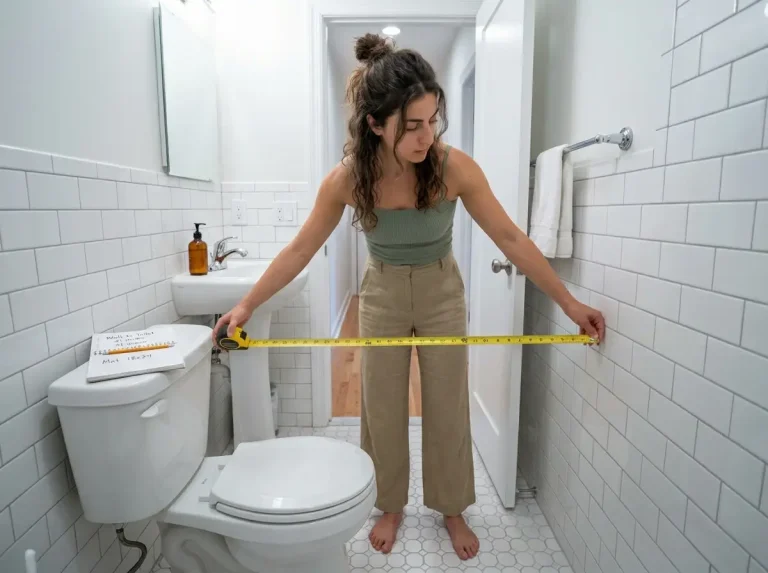
Three measurements, in this order. The cabinet width at the opening, measured between the inside faces of the frame, not the counter above it. The usable depth, from the inside of the door to the back wall. And the clear height under the P-trap on each side of the pipe, which decides whether a two-tier unit fits or whether you’re stuck with a single layer.
Write them on your phone. Everything you buy has to respect all three, and the one people forget is always the third.
Why Expandable Beats Fixed-Width Under a Sink
Expandable-width organizers exist because of this exact problem. Instead of demanding a fixed footprint and hoping your pipe cooperates, they adjust to whatever gap the plumbing leaves. That makes them the safer first purchase: the failure mode of a fixed-size set is a return label, and the failure mode of an adjustable one is that you slide it another two inches.
The SimpleHouseware Under Sink 2-Tier Expandable Shelf Organizer adjusts across a range of cabinet openings and adds a second tier of vertical space beside the pipe, usually the most wasted air in the cabinet. It rests on the floor with zero installation, so it works in a rental and moves with you. The limitation: the shelf surface is a wire grid, so small or narrow items tip over on it. Put those in a bin and put the bin on the shelf.
The conventional advice is to buy a matched set of uniform containers so everything coordinates. In practice, a mixed setup that respects your three measurements beats a matched set that half-fits, every time. Get the fit right first. Matching is a problem you can solve later, or never.
Using the Cabinet Door Without Drilling
None of this needs a drill, which matters when the cabinet isn’t yours. The inside of the cabinet door is the most wasted surface in the room, and it’s the natural home for flat things: a small caddy for sponges, a hook for a hairdryer cord, a shallow basket for cleaning cloths. Nothing heavy, nothing that swings into the shelving when the door shuts. Test the swing before you commit, because a door-mounted basket that collides with your top tier is an irritation you’ll notice daily.
For a rental, Command Bath Large Water-Resistant Adhesive Strips are the version to reach for over standard indoor strips. A bathroom cabinet cycles through humidity every time somebody showers, and standard adhesive gives up under that in a way the water-resistant version doesn’t. Clean the door with rubbing alcohol first (not a household spray, which leaves a film that defeats the adhesive) and give it an hour before hanging anything. Skipping that hour is why strips fail.
The rest of the no-drill approach for a rental bathroom covers the walls, the back of the door, and the over-toilet space with the same deposit-safe logic.
Put It Back So It Survives Past Week Three
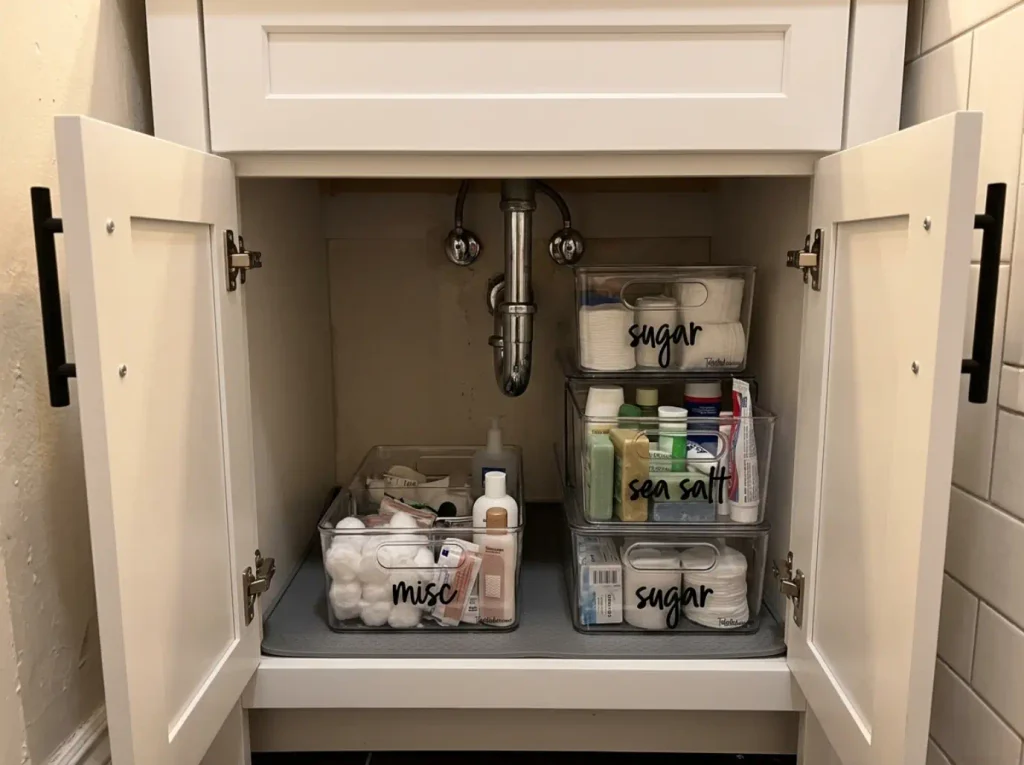
The after photo is not the finish line. Every under-sink cabinet you’ve seen photographed looked like that once, including the ones that are a pile again today. What separates the two isn’t discipline. It’s whether the system survives contact with somebody who wasn’t there when you built it.
In a shared bathroom, if your partner or roommate has to guess where something goes, they’ll guess wrong, and the cabinet unwinds one wrong guess at a time. That’s the same reason small bathroom storage keeps reverting, and it has nothing to do with buying better bins.
Load It Back in Reach Order
Put things back by how often you reach for them, not by category tidiness. The daily-reach zone goes at the front, in the arc your hand sweeps when the door opens. Backstock goes behind it. Heavy items (jugs, spare bottles, anything full of liquid) go on the cabinet floor rather than a shelf tier, both because of the weight ratings and because a heavy thing on a high tier is the thing that lands on your hand.
One detail people miss: if your cabinet has two doors, one side is closer to where you stand at the sink. That side gets the daily zone. It sounds like it doesn’t matter. Then you spend two weeks reaching across the pipe every morning and it stops sounding like a detail.
Label It for the Person Who Did Not Build It
Label the zones, not just the bins. A labeling system here isn’t decoration, it’s an instruction sheet for everybody else in the household. Nothing under a sink stays sorted when only one person follows the system, and that’s a maintenance problem, not a container problem.
A label converts “where does this go?” from a decision into a lookup, and people will do a lookup when they won’t make a decision.
Painter’s tape and a permanent marker label a cabinet perfectly well and cost nothing. Start there, especially while the zones are still settling, because you’ll relabel twice in the first month and you want that to be free.
The only argument for a real label set is that it survives humidity and looks like it was meant to be there. The Talented Kitchen 157-Piece Pantry Label Set is black print on clear vinyl, which is the part that matters in a bathroom: paper labels curl and lift within a few months of shower steam, vinyl doesn’t. The pieces are pre-printed pantry terms, so expect to use the blanks for anything bathroom-specific.
The reset is smaller than people fear. Every few weeks, open the cabinet, put back whatever migrated out of its zone, and throw out whatever is empty. Two minutes. That’s the entire maintenance routine, and it’s the difference between a system and a photograph.
While you’re in there, treat the shelf liner as a consumable rather than a fixture: it absorbs residue from damp sponges, cleaning supplies, and makeup, and it gets swapped every few months. Cutting a fresh one takes five minutes and resets the cabinet to looking new.
Conclusion
The sequence is the system. Empty, sort, decide, measure, then buy. Shopping first is what breaks this job, and it’s what almost every article on the topic quietly encourages you to do.
Access frequency picks the container, not the cabinet and not the color. Daily-reach gets an open top you can grab from in two seconds. Backstock gets something that pulls forward, because the back eight inches of a 21-inch vanity is a blind spot no amount of good intentions fixes.
Measure three things before you spend anything: the opening width, the usable depth, and the clear height beside the pipe. Those three numbers are the difference between an organizer that fits and a return label.
In three months, open the cabinet and look at what has drifted out of its zone. Whatever moved is telling you that zone is in the wrong place, not that you need another bin.
Empty it this weekend. That’s the whole first step, and it’s the one that decides whether the rest of it works.
Frequently Asked Questions
01What should be stored under a bathroom sink?
Store the cleaning supplies you use in that room, your toiletry backstock, and the daily-use items you reach for at the sink. Anything you use elsewhere in the house belongs elsewhere, and that single filter empties most cabinets by a third. Keep heat-sensitive items and anything you would not want near a pipe that may weep somewhere else.
02What are some common mistakes to avoid when organizing under a sink?
The two big ones are buying containers before emptying the cabinet, and choosing those containers by size instead of by how often you use what goes inside. The first builds a system around things you were about to throw out. The second buries your daily items behind backstock you touch twice a year.
03Are under-sink organizers worth it?
The adjustable ones are worth it, because they solve the problem the cabinet actually has, which is a drain pipe sitting where you want your shelf. Fixed-size sets are the ones that end up going back. Test your zones for a week with boxes you already own before buying anything at all.
04How do I organize under a bathroom sink with a pedestal sink or no cabinet?
You cannot, because there is no cabinet to organize. The storage has to move to the walls, the back of the door, or an over-toilet unit instead. A skirted pedestal plus a low basket recovers some of the floor space, but it stays open storage. Here is the system for a bathroom with no cabinets at all.
Disclaimer: ClutterlessNest is a participant in the Amazon Services LLC Associates Program. As an Amazon Associate we earn from qualifying purchases. This article may contain affiliate links — if you buy through them, we may earn a small commission at no extra cost to you. We only recommend products we have tested or genuinely believe in.