There’s a door in your hallway you close before anyone comes over. Behind it: a washer, a dryer, a jug of detergent balanced on top of a laundry basket, and a broom wedged in sideways. Organizing communities have a name for this kind of space, the closet of shame, and the reason yours resists every tip you’ve read is simple.
Almost all of that advice was written for a laundry room. A room has floor space and walls you can walk up to. You have roughly five inches on either side of your machines and a door that has to close. So here’s how to organize a laundry closet the way a closet actually works: measure four numbers, claim the side gap, go up, fold the bulky stuff flat, contain the sorting, and then keep the whole thing from going musty.
Quick Answer
Organize a laundry closet in this order, and measure before you buy a single thing:
- Empty it and measure both side gaps, rear clearance, dryer-top height and depth to the closed door.
- Claim the side gap with magnetic organizers on the machines’ own metal casing.
- Go vertical above the machines with expandable tension shelving, not fixed brackets.
- Mount the drying rack and ironing board so they fold flush and clear the door swing.
- Give dirty laundry one slim lidded hamper instead of the dryer top.
- Leave the washer door ajar between loads so the closet can dry out.
Measure Your Laundry Closet Before You Buy Anything
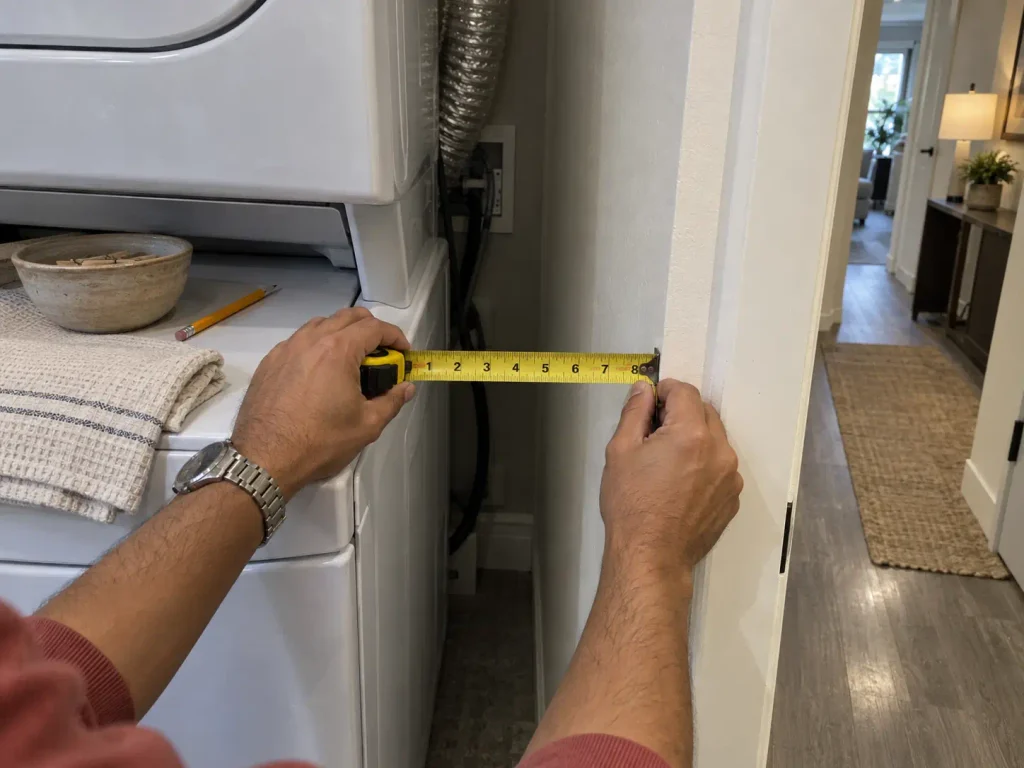
Most people start this project in a shopping cart. The closet punishes that harder than any other space in the house, because there is no slack in it. A bin that’s one inch too deep doesn’t “mostly fit.”
It stops the bi-fold door from closing, and now the closet is worse than it was when it was just messy. A tape measure is the cheapest organizer you will ever use, and it’s the only one that never needs returning.
Four numbers decide what can physically exist in this space. Both side gaps, measured separately, because they’re almost never equal: the machines were shoved in by an installer with a dolly, not centered by a designer.
Rear clearance, from the back wall to the back of the washer, where the hoses live. Dryer-top to lowest fixed shelf, which tells you whether anything can sit up there at all. And the one nobody takes: depth from the back wall to the closed door. That last number is where organizing plans die.
According to Precision Appliance Leasing’s standard appliance-installation clearance guidance, “Common practice and many manufacturer guidelines suggest anywhere from about 1/2 inch to 1 inch (roughly 13-25 mm) of clearance on each side for a freestanding washer or dryer to accommodate vibration and minor thermal expansion.” The same guidance puts three to six inches behind a washer for hoses and drain, and roughly twelve inches between the top of a dryer and fixed shelving above it. Read those as install minimums for the machine, not as a storage budget for you. They’re the floor, not the ceiling, which is exactly why your own numbers matter more than anyone’s chart.
Measure depth with the door shut, not open. Bi-fold panels fold back into the opening and the track hardware sits proud of the frame, so a closed door can eat two or three inches that are completely invisible while you’re standing there with the closet open. Close it, then measure from the back wall to the inside face of the panel.
For a real-world reference point rather than a manufacturer’s minimum: the r/OrganizationPorn tiny-closet thread describes roughly five inches of clearance at the closet doorway, with a few additional inches once you’re inside on either side of the machines. That is the closet this article is written for. Compare it to the top-ranking photos for this search, all of them wide, bright, four-foot-deep laundry rooms with cabinetry, and you can see why none of that advice survives contact with your hallway.
One more split, and it changes every answer that follows. A stacked washer dryer and a side-by-side washer dryer are two different closets, and laundry closet organization branches here.
Side-by-side gives you one usable side gap and a long flat top surface that becomes your folding station whether you plan it or not, and it’s the only configuration where a countertop over the washer and dryer is worth considering. Stacked gives you two narrow side gaps, zero top surface within reach, and forces every bit of storage onto the walls or the machine sides.
Decide which one you have before you read another tip, including the ones below. In an apartment laundry closet the stacked configuration is the default, which is why so much generic utility closet advice lands wrong. If you measure and discover you’re actually working with a shallow room rather than a true closet, the wider playbook for small laundry room storage applies to you instead of this one.
Claim the Dead Side Gap With Magnets, Not Screws
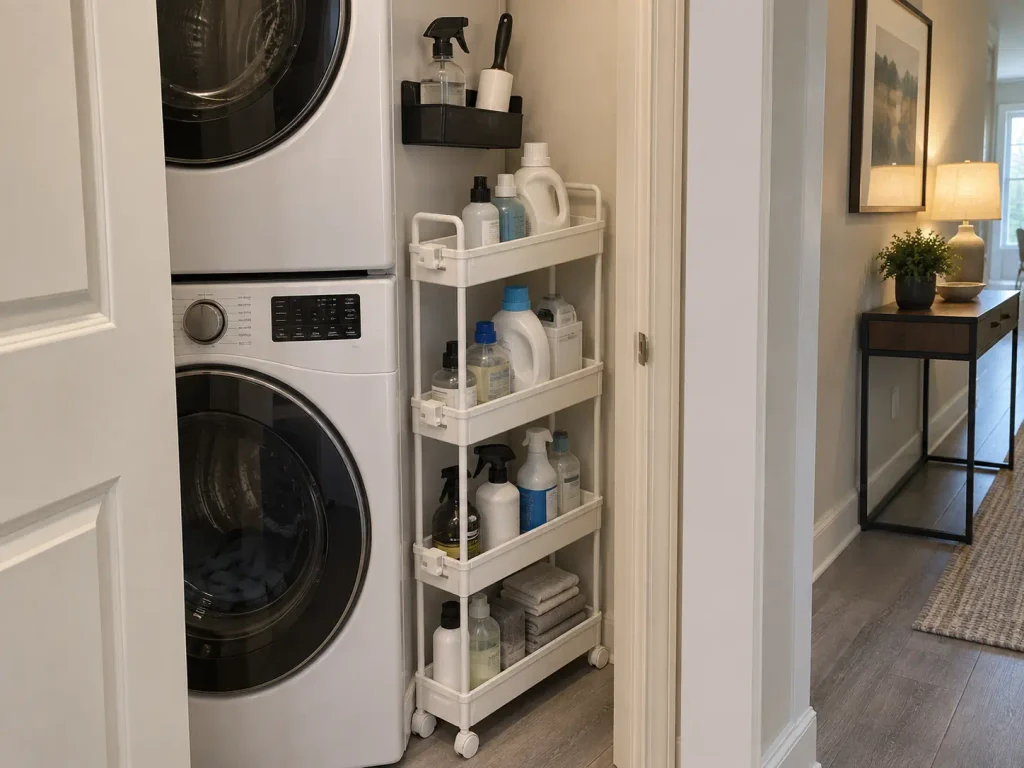
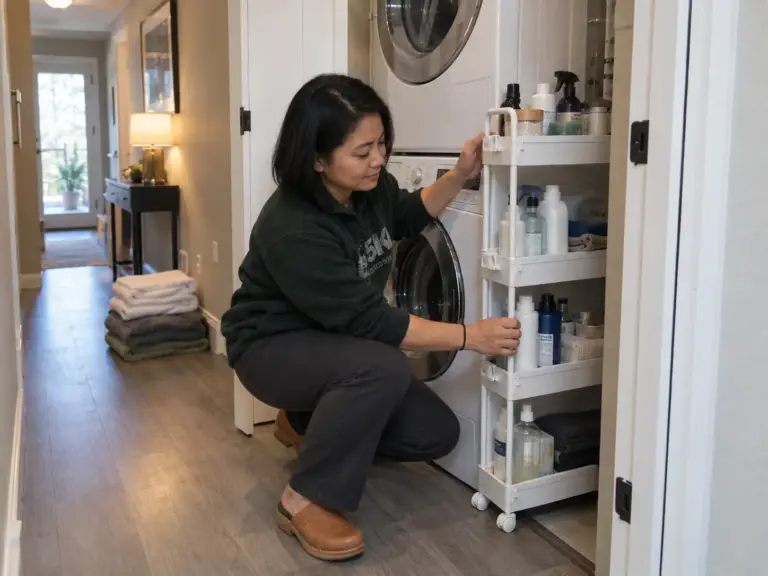
That strip beside the machines is the most contested square footage in the closet, and in most homes it stores exactly one thing: a bottle of fabric softener that fell down there sometime last year and has been out of reach ever since. It’s dead space for a reason. At roughly five inches of side clearance, everything marketed as a “narrow space organizer” is still too deep, and anything that sits on the floor there ends up behind the machine, which functionally means it no longer exists.
Here’s the surface nobody uses. Your washer and dryer casings are flat painted steel. They are a mounting surface you already own, in the exact place you need one, and the overwhelming majority of laundry closet advice walks right past them to talk about wall anchors.
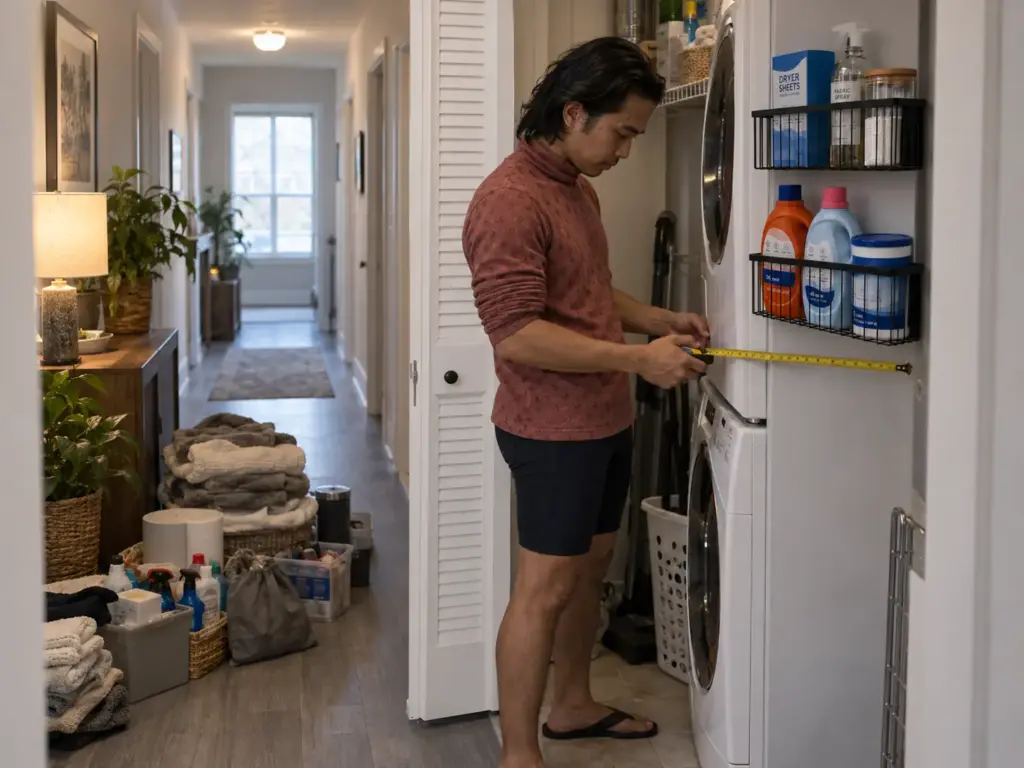
Magnetic organizers grip that casing directly. No wall damage, no adhesive residue, no landlord conversation, and the whole system comes off in thirty seconds when you move.
The load numbers are worth knowing because they settle the argument. Magnetic organizer shelves built for machine side panels commonly carry roughly thirteen to eighteen pounds per basket. Consumer magnetic hooks on thick metal are routinely marketed at fifty to a hundred pounds. Adhesive strips, by Command’s own published weight-limit guide, top out between five and seven and a half pounds on that same smooth surface.
So the rule writes itself: adhesive is for the lint roller and the spray bottle. Magnetic bins are for the detergent, and that single swap is what turns no-drill storage from a compromise into the better option.
I used to default to command hooks and adhesive strips for every renter-friendly storage question in this niche, honestly, because they’re the first thing anyone thinks of. Then you look at a gallon jug of detergent, which runs close to nine pounds full, and the math stops being a preference. If you want the full drill-versus-no-drill breakdown for the rest of the space, we’ve got laundry storage sorted by whether you can drill.
Budget organization before the splurge alternative, always. Organizing threads keep pointing at Harbor Freight magnetic shelves as the cheap stand-in here, mounted the same way to the machine’s side panel. If those hold what you need, you’re finished with this section and you can skip the rest of this paragraph.
If you want baskets sized for detergent rather than for a screwdriver, the AMZFAWO 2-Pack Magnetic Laundry Organizer Shelf uses a full-back magnetic panel instead of four corner magnets, with the large basket rated around 17.6 pounds and the medium around 13.2.
The limitation is real and worth stating: it only works on machines with bare painted metal sides. If your washer is boxed in by cabinetry on both sides, or wrapped in a panel kit, there’s nothing for the magnet to grab. Check with a fridge magnet first. Takes five seconds.
Floor level is a separate problem with a separate answer. The gap beside the machines runs all the way to the floor, and that lower stretch is where the softener bottle went. Anything you put down there has to come back out, which is the part people skip.
A narrow rolling cart solves it, and the wheels are genuinely the point, not a feature. The SOLEJAZZ Slim Rolling Storage Cart is about five inches wide across four tiers, so it slides into the gap and pulls straight out when you need to reach the wall behind it, vacuum the lint drift, or check a hose. Static floor storage in a closet always gets abandoned, because the day you can’t reach behind it is the day you stop pulling it out at all.
Go Vertical Above the Machines Without Putting a Hole in the Wall
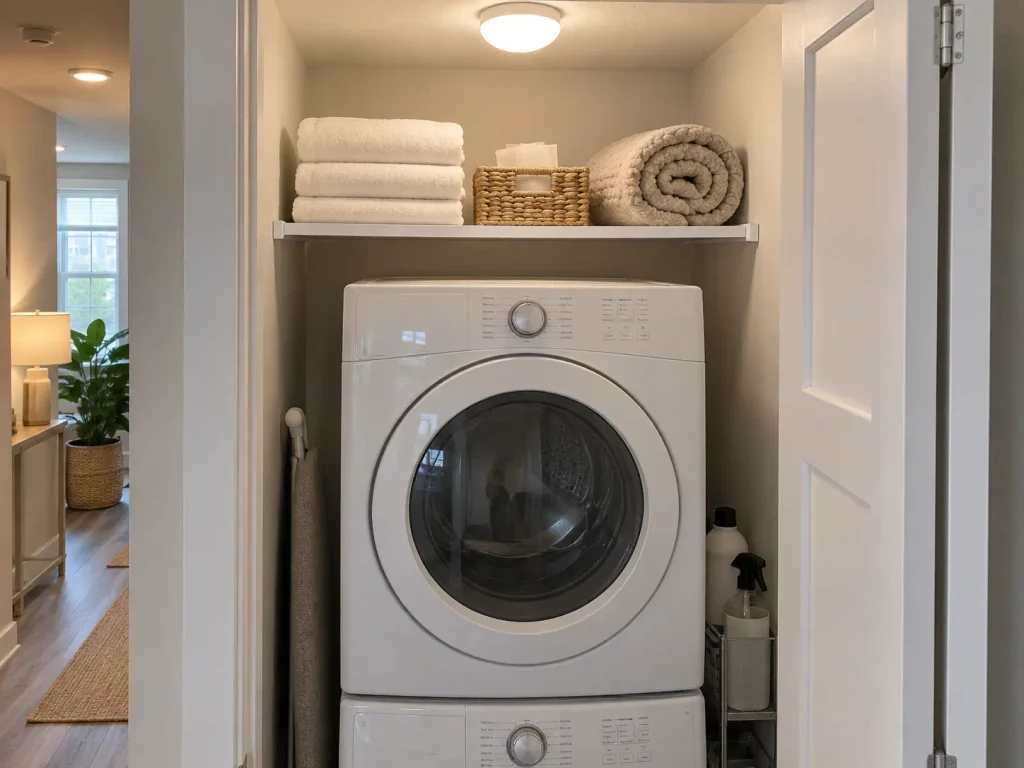
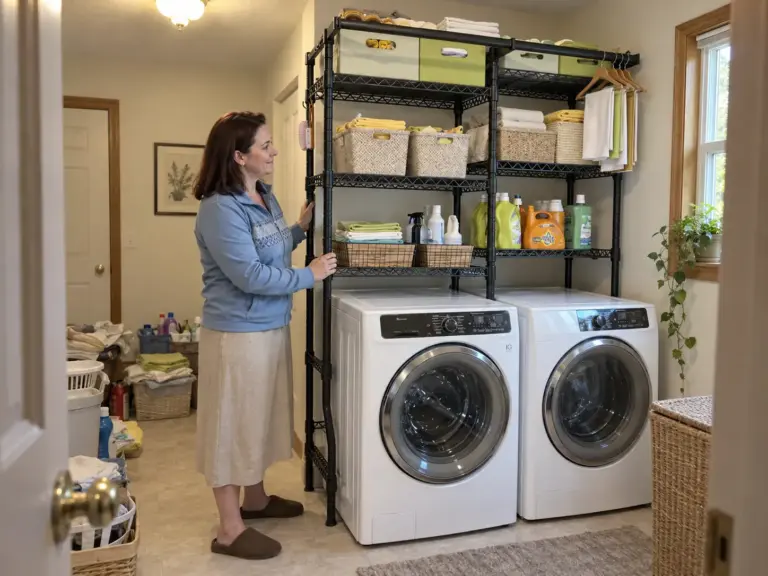
Vertical storage is the whole opportunity here: every laundry closet has two or three feet of blank wall above the machines doing absolutely nothing. In a rental that space reads as off-limits, so it stays empty for the entire lease and the detergent stays on the dryer. It isn’t off-limits. It just can’t be solved with brackets.
Conventional wall-mounted shelving is the wrong instinct here even if you own the place and own a drill. I used to think owning the place settled this question and you just bracketed a shelf in. But closets are rarely square. The width at the back wall often differs from the width at the door by a quarter inch or more, and a shelf cut to one of those measurements either wobbles on the other or sticks out far enough to foul the door.
Tension-mounted shelving sidesteps the whole problem: it expands to whatever width the closet actually is and pushes sideways against the side walls instead of hanging weight off drywall. That’s what makes it a real answer for renters rather than a downgrade.
The Home in Bold Tension Rod Shelving expands to fit and comes down at move-out with nothing left behind. Its limitation is the same as every tension system: it needs two parallel side walls within its range, so it won’t help on a closet with an open side or a half wall.
Respect the twelve-inch rule while you’re up there. Appliance guidance wants roughly a foot of clear space between the top of the dryer and the bottom of anything fixed above it, and that number isn’t about airflow alone. It’s the space you need to open a top-load lid, get at a lint screen, and pull a machine forward when something needs service. A shelf mounted four inches too low turns a ten-minute repair call into a two-person furniture-moving job, and you’ll discover that on the worst possible day.
Weight discipline decides whether the shelf is still up there in a year. Light, bulky, reached-for-weekly. Dryer sheets storage belongs up here, along with spare rags, folded linens and the backup box of stain remover.
Cleaning supply storage can share that shelf if the bottles are light. Broom and mop storage cannot: those go on a magnetic gripper on the machine’s side panel or on the back of the door, never overhead. Not the gallon jug, not the toolbox, not the iron: detergent storage belongs at machine-side level, and a magnetic lint bin belongs within arm’s reach of the dryer door, not overhead. Heavy things belong on the floor or on the machine casing where the magnets are, and every failure story about tension shelving starts with somebody putting a jug on one.
One cheap addition earns its place up there: a mini spring-tension rod run across the front of the shelf, like the KXLife Small Spring Tension Curtain Rod 2-Pack at 7.5 to 11.5 inches, which acts as a lip so nothing slides off when the closet door thumps shut. It’s the cheapest fix in this article, it only works on shelves inside that width range, and the same rods double as drawer dividers if your closet happens to have a drawer. Skip clear acrylic bins up there, by the way: they look sharp in photos and they crack when a shelf flexes.
Sort what goes overhead by how often you touch it, not by what it is. Weekly items go up top. Daily items belong at machine-side level where you can reach them one-handed while holding a basket. Anything seasonal shouldn’t be in the laundry closet at all, and if it’s up there right now it’s the reason you think you’re out of space.
Make Drying and Ironing Fold Flat Against the Wall
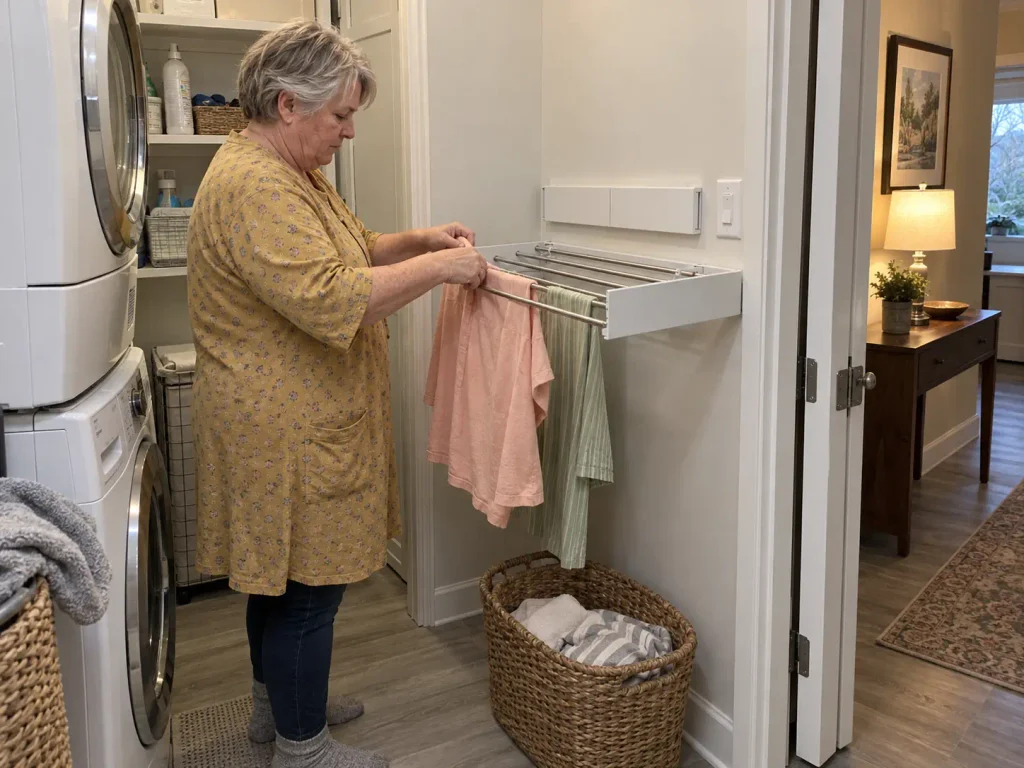
The drying rack and the ironing board are the two objects that make a laundry closet genuinely unusable, because neither one has anywhere to go. The rack ends up living permanently open in the hallway. The board leans behind the door until somebody knocks it over at an inconvenient hour. Both problems have the same answer, and it’s fold-away storage built on a hinge.
Freestanding versions fail in a closet for a specific reason worth naming. A floor-standing drying rack takes up precisely the footprint you need for standing in front of the machines, which means the only way to use the closet is to move the rack first. And it never gets folded away, because folding it means finding somewhere to put a folded rack, and there is nowhere. So it stays open forever, in the hallway, with one damp towel on it.
The fold-away math is what makes a wall-mounted version work: a rack around thirty-two inches wide when open collapses to roughly two to three inches deep against the wall. That closed depth is the only number that matters for a closet, because it’s the difference between clearing the bi-fold door and colliding with it. Check depth-when-closed on any wall-mounted unit before you check anything else. And check it against your own door, not against the product photo (which always shows the rack on a wide open wall with nothing in front of it).
The Vikaqi Wall Mounted Clothes Drying Rack is built to that shape at 32 inches open and flush when folded, which is the profile this constraint requires. The obvious caveat: it mounts to the wall, so it is the one recommendation here that a strict no-holes lease rules out.
Mount height is a door-clearance decision and nothing else. Before you mark a single hole, open and close the door slowly and watch where the panels and the hardware actually travel. Bi-fold doors swing out into the room as they fold, and the pivot hardware sweeps an arc that’s wider than the door’s closed footprint. Get this wrong and the rack and the door will meet exactly once, loudly.
Now the part the ironing board section of most articles refuses to say. A lot of closet-sized laundry setups don’t need a full board. If you iron two shirts a week, a tabletop ironing mat rolls up and lives in a drawer, costs close to nothing, and does the job on any flat surface including the dryer top.
Buy the wall-mounted board only if you genuinely iron in volume, and if you do, the Xabitat Wall Mounted Ironing Board at 36.2 by 12.2 inches uses the same fold-flush logic as the rack. Same caveat too: it’s wall-mounted, which puts it out of reach for renters who can’t drill. If holes are off the table entirely, a tension rod run between the closet’s side walls handles hang-drying, and the mat replaces the board outright.
Contain the Sorting So the Dryer Top Stays Clear
The dryer top is the most contested surface in the house. It’s the folding station. It’s the staging area for clean clothes nobody has put away since Sunday. And it’s where the dirty pile goes when the hamper is full.
It cannot be all three at once. Pick one job for it and give the other two somewhere else to live.
Understand why the pile always comes back. The dryer top is the only horizontal surface at waist height anywhere near the closet, so every load defaults there by pure physics of convenience. You can clear it on Saturday and it will be repopulated by Tuesday.
Nothing changes until dirty laundry gets a designated container that is closer to the person carrying it than the dryer top is. That’s the whole mechanism. Convenience beats intention every single week.
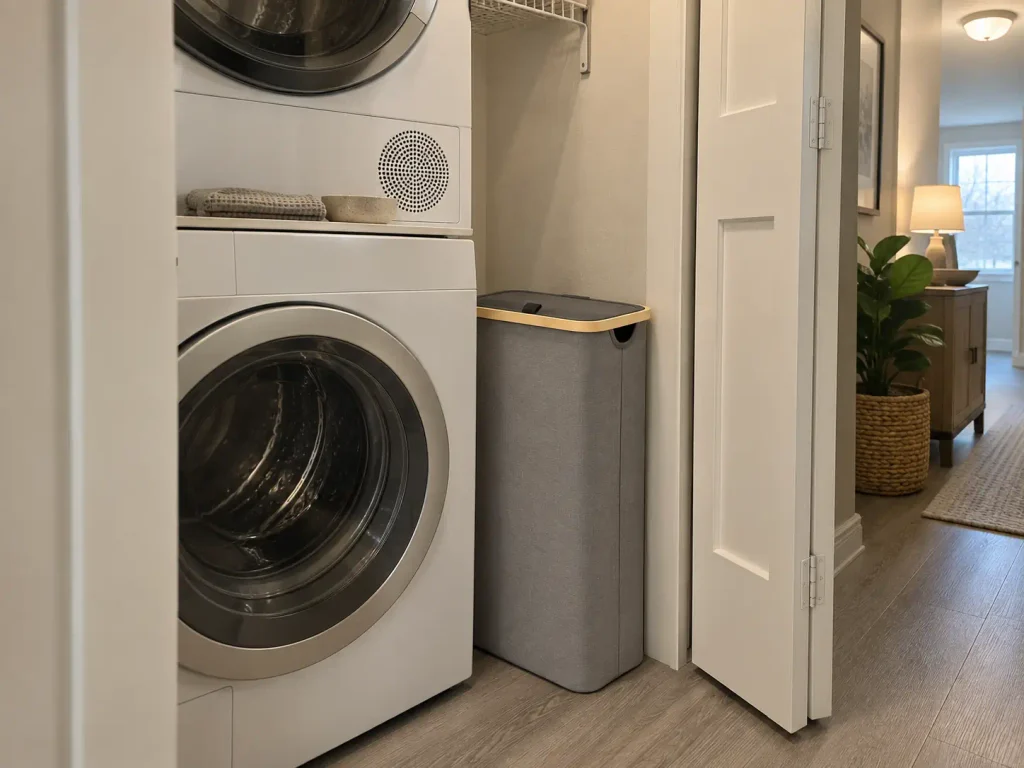
A hidden hamper, slim and lidded, beats big and open in a closet, which is the opposite of the advice that works in a bedroom.
For years the standard line was to size up, on the theory that a bigger hamper gets emptied less often. In a closet that logic inverts: a big open hamper is the thing standing between you and the machines. A hamper under nine inches deep tucks into the gap beside the machines instead of parking in the doorway. And the lid earns its keep here in a way it never does upstairs, because this door gets opened dozens of times a week, sometimes while someone else is standing in the hallway.
The micro-budget version is a mesh pop-up hamper that stores flat on the shelf and opens on laundry day, and if the closet is only a staging point rather than the permanent home for dirty clothes, that’s the right call and you can stop here. If the closet is the permanent home, the SpaceAid Slim Laundry Hamper with Lid is dimensioned at 16 by 8.75 by 28 inches, so the 8.75-inch depth is built for a closet footprint rather than a bedroom corner. At 65 liters it’s a one-household hamper, not a family-of-five hamper, which is the honest limitation.
Sort honestly while you’re at it. A two-bin sort works in a closet. A four-bin sort does not, because there’s no floor for it and you know there isn’t.
Sort by wash temperature or by person. Never both.
That is the whole of category-based zoning in a space this size, and a labeling system here means two strips of tape, not a label maker and a font decision. The moment you try to run a two-axis sorting system in five inches of clearance, the overflow goes back on the dryer top and you’re where you started.
One safety note, because the shape is the risk here rather than the contents. Anything tall and narrow standing on the closet floor, a slim rolling cart or a stacked drawer tower, is exactly the profile the federal tip-over safety standard for clothing storage units exists to address.
CPSC’s guidance is to anchor storage furniture to the wall, and a narrow unit loaded with detergent is more top-heavy than it looks once the upper tiers fill up. If it’s taller than it is wide and it holds weight, anchor it. Kids in the house or not. For more on building systems that survive this kind of daily use, we’ve covered laundry organization ideas that hold up.
Keep a Closed Closet From Turning Musty
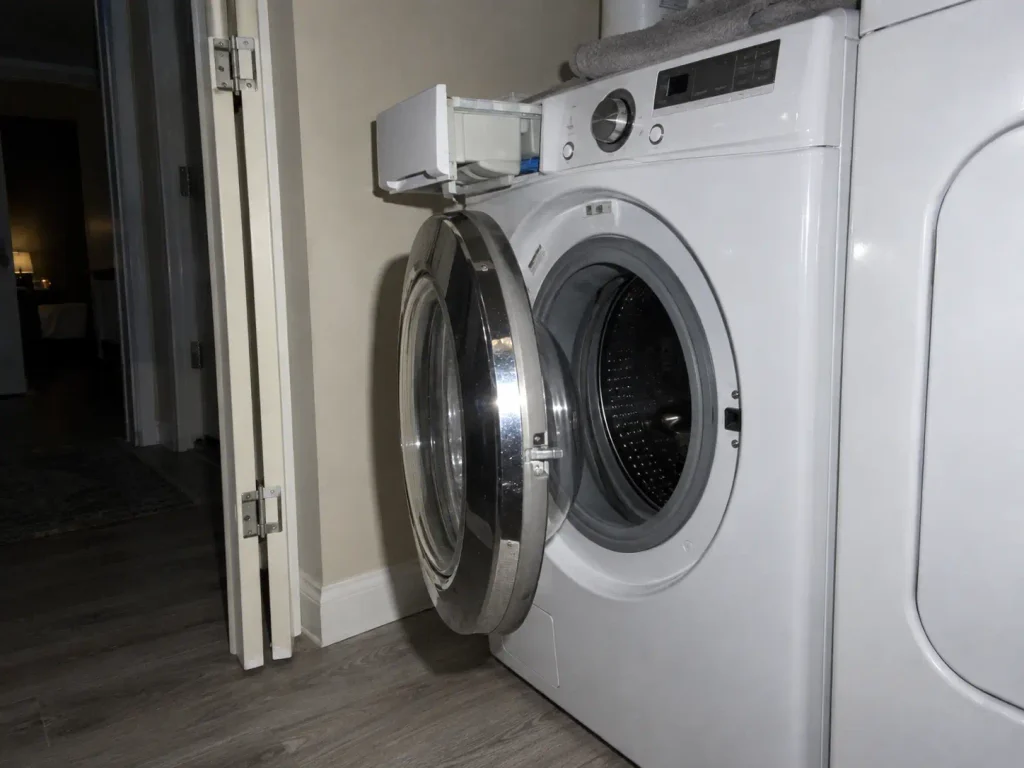
This is the failure that shows up after the photo. The closet works. It looks finished. Everything has a home and the dryer top is clear for the first time in two years.
Then one morning about ten weeks in you open the door and there’s a smell, faintly sour, coming from somewhere you can’t identify. This is the single most common complaint about enclosed laundry closets and not one competing article for this search mentions it.
The mechanism is straightforward once you say it out loud. A wash cycle leaves standing moisture in the drum, the gasket and the detergent drawer. A dry cycle pushes warm damp air into the surrounding space. Then you close a door on all of it and walk away.
Mold prevention guidance targets thirty to fifty percent relative humidity, and a sealed closet wrapped around a machine whose entire purpose is making things wet does not hold that number on its own. You didn’t build a storage system on top of a moisture problem. You built a lid on one.
The free fix comes first because it’s also the best one. Leave the washer door ajar a few inches between loads, and pull the detergent dispenser drawer out while you’re at it. That’s it. Two seconds, zero dollars, and it’s the highest-return habit in this entire article.
Front-loaders need it most because the rubber gasket holds water in its folds, but a top-loader drum benefits too.
Then give the closet a way to breathe, because ventilation is the part of this that no organizer can buy for you. Prop the door open for an hour after a load finishes, which costs nothing and handles most of it. Run the bathroom or hallway exhaust fan if one is nearby, since air moving anywhere is better than air moving nowhere.
And if you own the place, fit a louvered or vented door. Appliance installation guidance is explicit that closet installations need adequate ventilation per the manufacturer and local code, so a solid slab door on a laundry closet isn’t a decorating choice you get to make freely.
Machine vibration is the other slow failure, and it wears a disguise. Stacked machines need a rated stacking kit, a metal bracket set that ties the dryer to the washer and absorbs vibration between the two units. Not every washer and dryer pair is stack-compatible, and a stacked dryer sitting on a washer with nothing joining them will walk during a spin cycle.
Closet owners report this as “the machines shift,” which sounds like an organizing complaint and is actually a stability problem. Worth sitting with for a second: everything you stored on those machine sides, every magnetic basket and every bottle, is riding on that connection. Check for the kit before you hang anything. On a side-by-side pair that walks, anti-vibration pads under the feet are the cheap first move, and while you’re back there, a rigid dryer vent elbow in place of a crushed foil duct buys back an inch or two of rear clearance at the same time.
Put a phone light on the back corner behind the machines and the underside of your tension shelf once a month. Mildew starts in the spots with no airflow and no light, and it’s visible as faint grey speckling well before anything smells. By the time you notice it with your nose it has been growing for weeks.
Three months in, that check is the whole maintenance routine. Back corner, shelf underside. If either one is damp or speckled, your storage is fine and your ventilation isn’t, and no amount of rearranging bins will fix a humidity problem.
Conclusion
Measure four numbers before a single organizer enters the house: both side gaps separately, rear clearance, dryer-top-to-shelf height, and depth to the closed door. Spend the side gap and the machine casings before you spend the walls, since magnets hold several times what adhesive does on the same painted steel and leave nothing behind when the lease ends. And build the airflow in from day one, because a closet that can’t breathe quietly undoes all the rest of it.
In three months, open the door and check two places: the back corner behind the machines and the underside of the tension shelf. Damp or musty in either spot means the storage is working and the ventilation isn’t, and that’s a two-minute fix if you catch it early.
Start with the tape measure and that one strip of dead space beside the machines. It usually holds everything currently sitting on top of your dryer.
Frequently Asked Questions
01What should you not store in a laundry closet?
Anything moisture-sensitive and anything you need daily. Paper goods, spare linens and cardboard boxes all absorb the humidity a wash-and-dry cycle puts into a closed closet, and daily-use items stored behind a machine become items you stop using. Keep detergent, dryer sheets, stain treatment and spare rags.
02How do I organize a small laundry closet without drilling?
Work three surfaces in order: the machines’ painted-metal casing with magnetic organizers, the floor gap beside them with a slim wheeled cart, and the wall above with expandable tension shelving. All three leave with you at move-out. Adhesive strips are the weakest option, rated 5 to 7.5 pounds.
03How much space do you need around a washer and dryer?
Installation guidance commonly calls for about half an inch to an inch on each side, three to six inches behind a washer for hoses, and roughly twelve inches between the dryer top and any fixed shelf. Those are minimums for safe operation, not a storage budget, so measure your own closet.
04What are the most common laundry closet organizing mistakes?
Buying before measuring, measuring with the door open, and hanging weight on adhesive strips. The first two produce organizers that block the door; the third produces a shelf on the floor. The fourth is sealing the closet so tightly it has no airflow, and that one only shows itself around month three.
05Should I leave the washer door open between loads?
Yes, a few inches, along with the detergent dispenser drawer. It lets the drum air out instead of sitting damp behind a closed door, and it matters more in a closet than an open laundry room because that moisture has nowhere else to go. Cheapest mildew prevention there is.
Disclaimer: ClutterlessNest is a participant in the Amazon Services LLC Associates Program. As an Amazon Associate we earn from qualifying purchases. This article may contain affiliate links — if you buy through them, we may earn a small commission at no extra cost to you. We only recommend products we have tested or genuinely believe in.