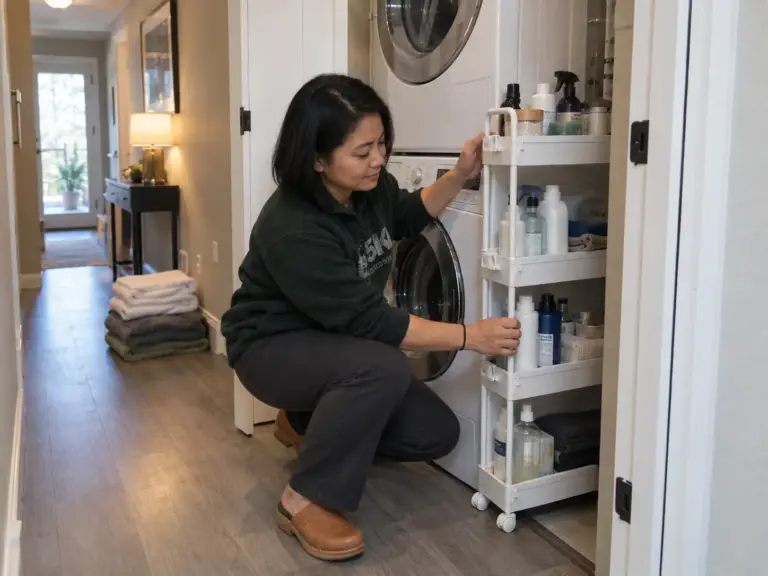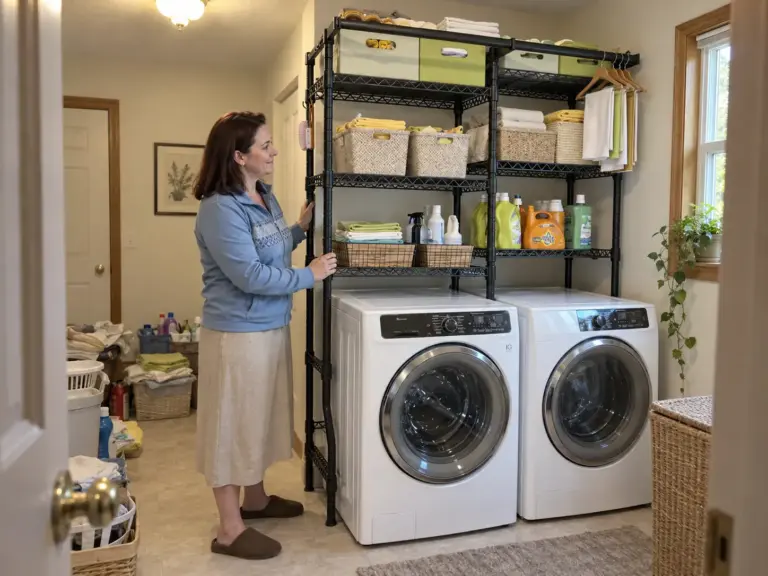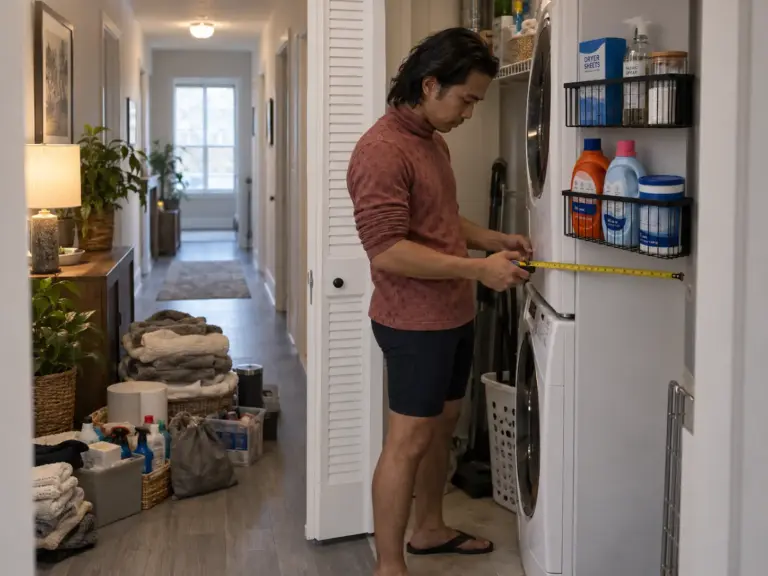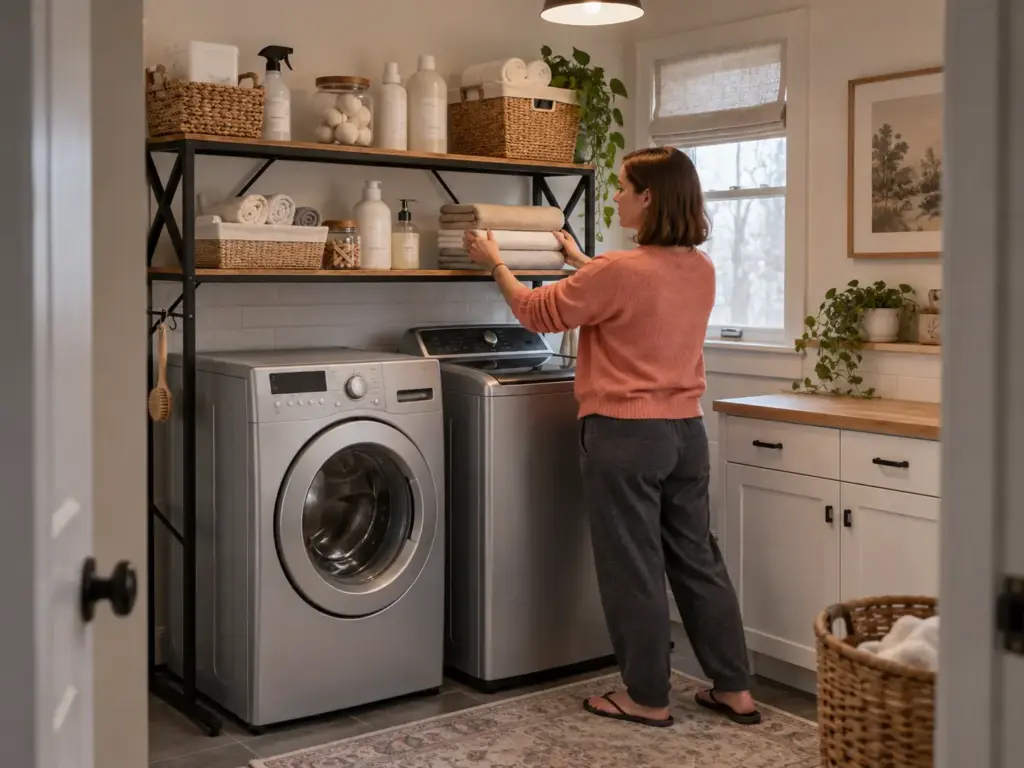
The shelf is up. The brackets are level, the detergent has a home, and the laundry closet finally looks like someone thought about it. Then you start a load, lift the washer lid, and it stops halfway with a soft plastic tap against the underside of your brand-new shelf. There is nothing to do at that point except take it back down.
The two numbers that decide whether over washer and dryer storage works are the vertical clearance your lid actually needs and where a shelf’s weight ends up once it is loaded, and almost nobody in this category prints either one. So this guide starts with the tape measure, then sorts every option by two questions: are you allowed to drill, and do your machines sit side by side or stacked?
Quick Answer
Over-appliance storage comes in five shapes, and your lid clearance plus your drilling permission decide which ones you can actually use:
- Wall-mounted floating shelf: needs anchors and a wall you can drill
- Freestanding straddle unit: stands on its own legs, no wall damage
- No-drill tension-rod shelf: lightest option, supplies only
- Built-in or hanging cabinet: hides detergent and supplies behind a door
- Countertop-style shelf spanning both machines: folding surface, side-by-side pairs only
Measure the Space Over Your Washer and Dryer First
Every article in this category tells you to leave room for the lid. None of them tell you how much. So you are standing in a laundry closet with a tape measure and no idea whether nineteen inches is fine or a mistake, and the mistake only announces itself after the brackets are in the wall. Here is the number.
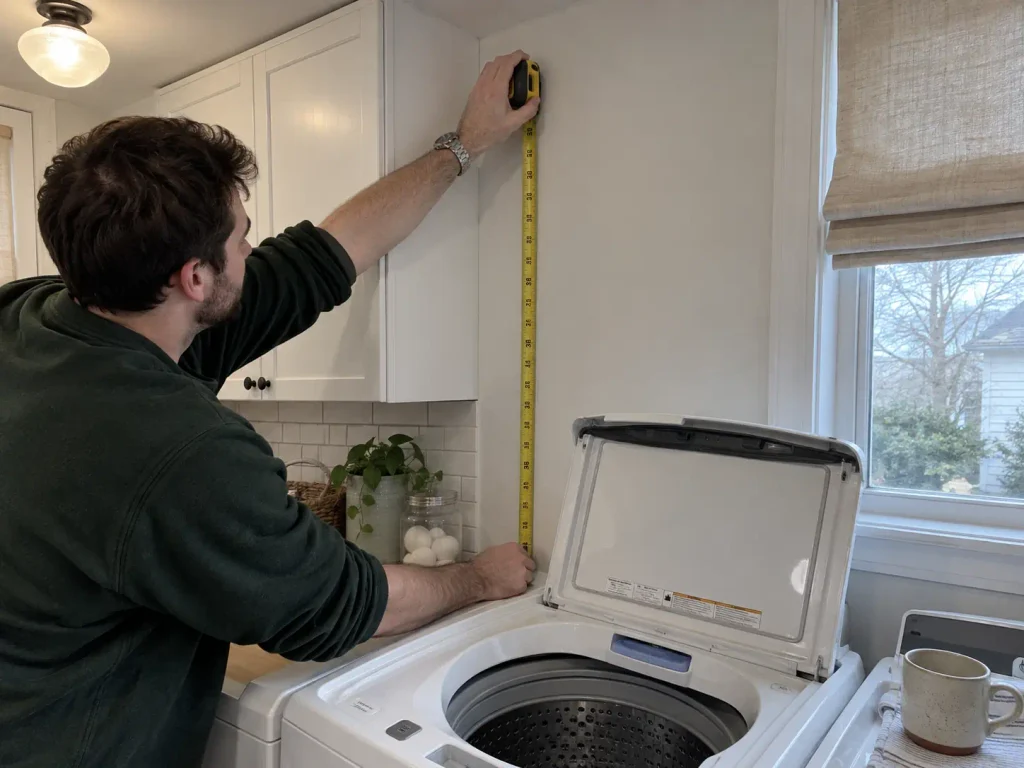
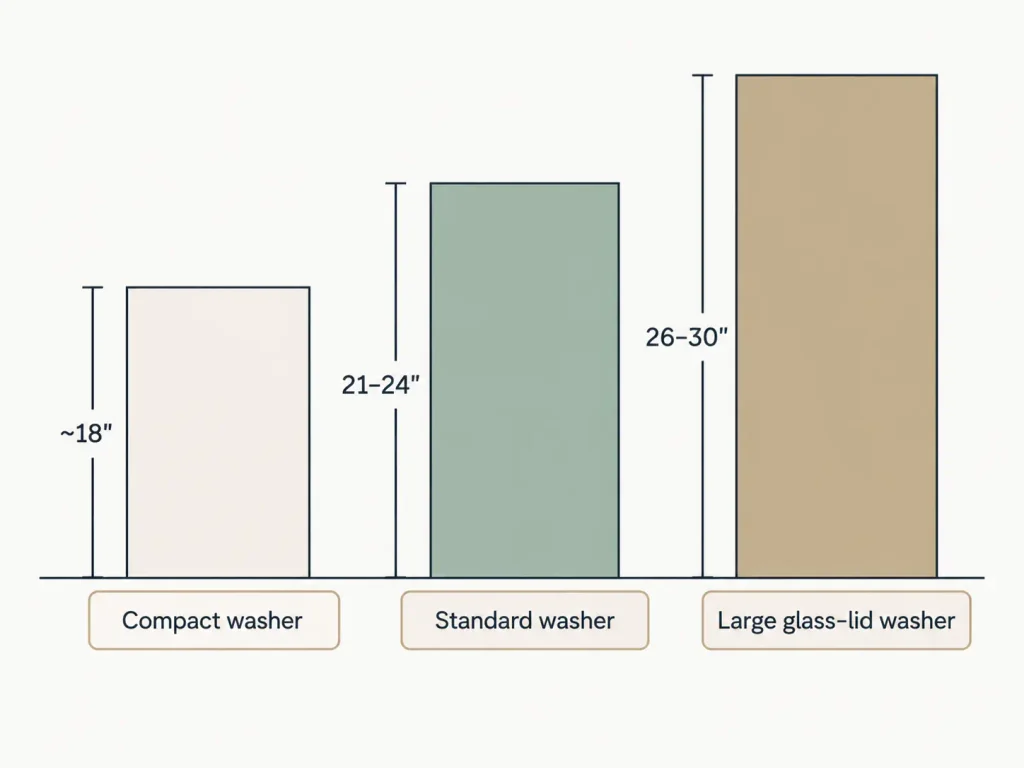
Open the lid all the way first, then measure. Most modern residential top-load washers need roughly 21 to 24 inches of clear vertical space between the top of the machine and whatever is above it. Compact models can work with about 18.
Large glass-lid and high-capacity machines want 26 to 30, because the lid is both longer and heavier and it wants a fuller arc. Under about 21 inches, a fixed wall shelf will contact the lid on every single load, and no amount of careful lifting changes that.
There is also a rule of thumb that turns the vague advice into a number you can generate yourself, and it works on any machine regardless of brand. Measure from the lid’s hinge pivot to the far edge of the lid.
For a lid that opens to roughly 90 degrees, that length is approximately the vertical lid clearance you need above the machine top. On most household top-loaders that lands somewhere around 11 to 16 inches, and you add a two to four inch margin on top of it so the lid is not scraping the shelf every time somebody is in a hurry. That margin is not politeness. It is the difference between a shelf that works and a shelf that slowly wears a mark into itself.
What to Measure, in the Right Order
The order matters more than the measurements, because measuring the wall first is how people end up with a shelf that fits the closet and not the machine.
- Lid swing. Open it fully, measure hinge pivot to far edge, add your margin. This is the ceiling on everything else.
- Height to the obstruction. Machine top to the underside of whatever is above: a wall cabinet, a window sill, the closet’s own ceiling.
- Usable depth. How far out from the wall you can come before the shelf overhangs the machine controls or your own forehead.
- Width between the closet walls. Measured at the height where the shelf will sit, not at the floor. Laundry closets are rarely square.
That is the whole sequence. Four numbers, ten minutes.
Top-Load vs. Front-Load, and Why the Number Changes
A front-load washer skips the lid problem completely and hands you a different one. The door swings out instead of up, so vertical clearance stops being the constraint and depth takes over. You still need reach to the hot and cold water valve access point and the outlet behind the machines, which is the thing people forget until a hose fails and the shutoff is behind a shelf full of detergent. Measure how much depth you can give up before the door stops clearing the wall opposite it, and leave the valves reachable without moving anything.
If Your Machines Are Stacked, the Answer Is Different
A side-by-side washer dryer pair and a stacked washer dryer pair want completely different answers, and the stacked one changes what you are shopping for entirely.
Front-load machines typically run 33 to 39 inches tall each, so stacked they commonly reach 66 to 78 inches before hardware and 70 to 80 once installed and leveled. In a standard closet that puts the top of the dryer near true ceiling height, and the airspace this whole article is about mostly disappears. If that is your setup, the storage conversation moves to the side walls and to one shallow cabinet at the very top, and the shelf ideas below are not for you. Worth knowing before you order anything.
The sequence that goes wrong is always the same shape: someone measures the closet, finds a shelf that looks about right in a photo, mounts it, and only then meets the lid. Measure the lid’s swing before you measure the wall. Once you have those four numbers, it is worth stepping back and looking at how the whole closet gets zoned, because sometimes the real constraint turns out to be the room rather than the shelf.
Wall-Mounted Shelves and Cabinets Over the Machines
A wall-mounted shelf over the washer looks like the obvious answer, and it is the one that fails in the most quietly expensive way. It holds beautifully for a few weeks. Then a few hundred spin cycles happen underneath it.
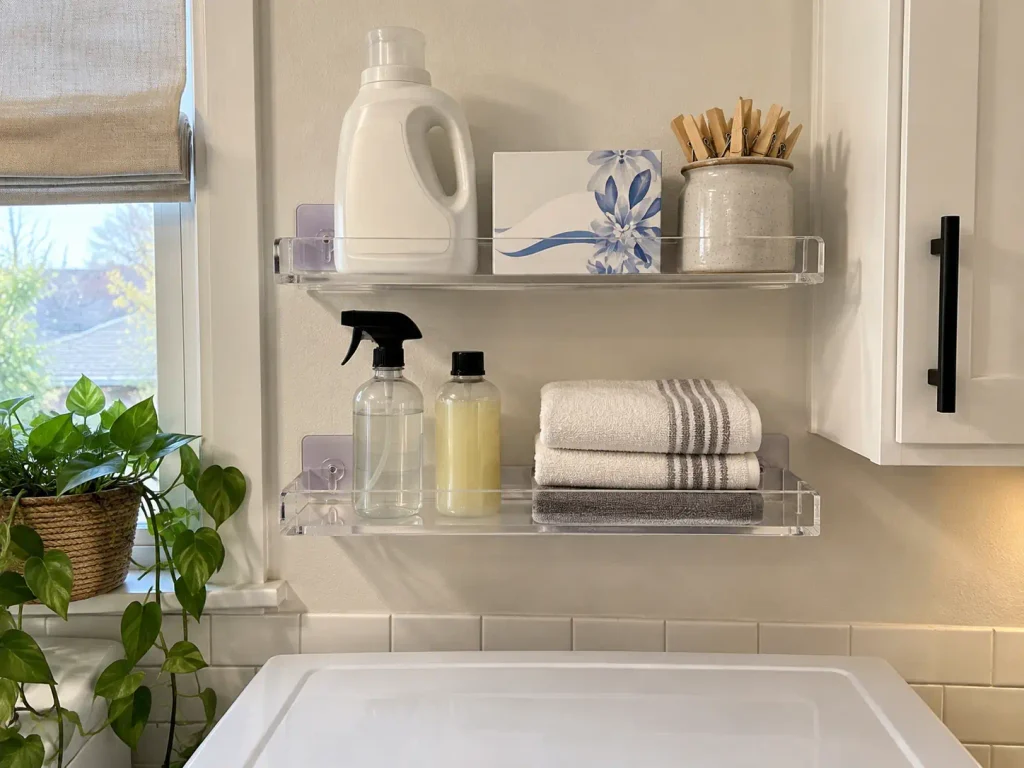
Open shelf or closed cabinet is a supplies question, not a taste question. Detergent jugs, dryer sheet boxes and stain sticks read as clutter on an open shelf, so a hanging cabinet earns its keep by hiding the ugly majority of what lives in a laundry room. But an open shelf is where you want the three or four things you reach for mid-load, because a door you have to open with one hand while holding a wet shirt is a door that stays open. Most laundry closets end up wanting one of each: the cabinet for backstock, the open shelf at grabbing height.
Open Shelf or Closed Cabinet — Pick by What You Store, Not by Looks
Sort your supplies into two piles before you shop. Pile one is what you touch during a load: detergent, the stain stick, the little mesh bag for delicates. Pile two is everything else, which is mostly backstock and seasonal items and that bottle of specialty cleaner you bought once. Pile one goes on the open surface.
Pile two goes behind a door, or into a bin where it does not have to look presentable. Build the shelf around pile one and it stays usable.
Materials That Survive a Humid Laundry Space
A laundry space runs humid in a way most rooms do not, and the moisture goes up. Steam off a warm load sits against the underside of whatever is above the machines, night after night.
Sealed or painted solid wood shelf stock holds up, and so does a reclaimed wood shelf once it carries a moisture-resistant finish.
The conventional wisdom is that any natural material is the safe bet in a damp room. In practice bamboo is the exception that ruins the rule. It looks like the safe natural choice and it delaminates in a steamy room, which is why humidity resistance matters more than grain here. An acrylic shelf shrugs the damp off entirely, but it flexes under weight.
Powder-coated metal and wire shelving hold up, though wire wants a liner if you are storing anything small enough to fall through. Bare MDF shelf stock is the one to avoid outright: it swells at the cut edges where the steam collects, the surface lifts, and it never goes back. If your only affordable option is MDF, seal the edges before it goes up, not after you notice.
For renters who want a shelf beside the machines rather than over them, the 2-Pack No-Drill Acrylic Wall Shelves mount with adhesive and stay out of the moisture path on a side wall. Be honest with yourself about scale, though.
These hold your everyday laundry supplies and nothing more: a detergent bottle, a fabric softener jug, a jar of dryer balls. Detergent storage is genuinely all they are for. They do not hold a laundry basket, and asking an adhesive shelf to do that is how adhesive shelves end up on the floor.
What the Spin Cycle Does to Your Brackets
This is the part nobody writes about, and it is the reason a shelf over a washer is a different job from a shelf over a desk. A spin cycle is a repeated mechanical stress test applied to everything bolted into the wall above it, hundreds of times a year. That means the wall brackets, the L-brackets under a wood top, and the concealed floating shelf hardware that makes a shelf look like it grows out of the plaster. Vibration travels through the floor and the wall studs, and hardware that was snug on day one can work its way loose over a few months.
We are stating that as our own installation guidance rather than quoting a study at you, because the practical version is what matters: recheck the bracket hardware seasonally with the same screwdriver you used to install it, and if you are mounting from scratch, run a stud finder across the wall first so at least one bracket lands in framing rather than in drywall alone, and keep anything that can walk off a shelf edge inside a bin rather than loose on the surface. Lock washers on the bracket screws cost almost nothing and buy you a lot of peace.
The same logic covers anti-tip safety for anything tall up there. According to the CPSC’s Anchor It! campaign, “Anchoring all furniture with drawers, doors, and shelves to the wall prevents tip-over injuries and deaths.” A cabinet with doors, mounted above two machines that shake, is squarely in that category.
Tie the bracket check to something you already do seasonally. When you swap the furnace filter or flip the mattress, put a hand on each shelf bracket and give it a real tug. Loose hardware announces itself instantly and takes thirty seconds to fix; it is only expensive if you find out about it mid-spin-cycle.
There is a renter reality check hiding behind all of this. A laundry closet wall is often hollow drywall with nothing behind it where you need the bracket to land, which means the shelf’s entire load goes into wall anchors rather than framing. That is a real limit, not a technicality, and it is the reason the next section exists. If you are working through the rest of the room and not just this one zone, the sibling guide to laundry room storage solutions sorted by what you’re actually allowed to drill takes the whole space apart the same way.
No-Drill Over Washer and Dryer Storage for Renters
Every listing in this category slaps renter-friendly storage on the label without explaining what makes it renter-friendly. The actual difference is one sentence long, and once you can see it you can judge any product in this space yourself without trusting anybody’s label. If your entire constraint is that you cannot make holes, the companion guide to organizing a laundry closet without putting a single hole in it runs the same logic across the rest of the closet.
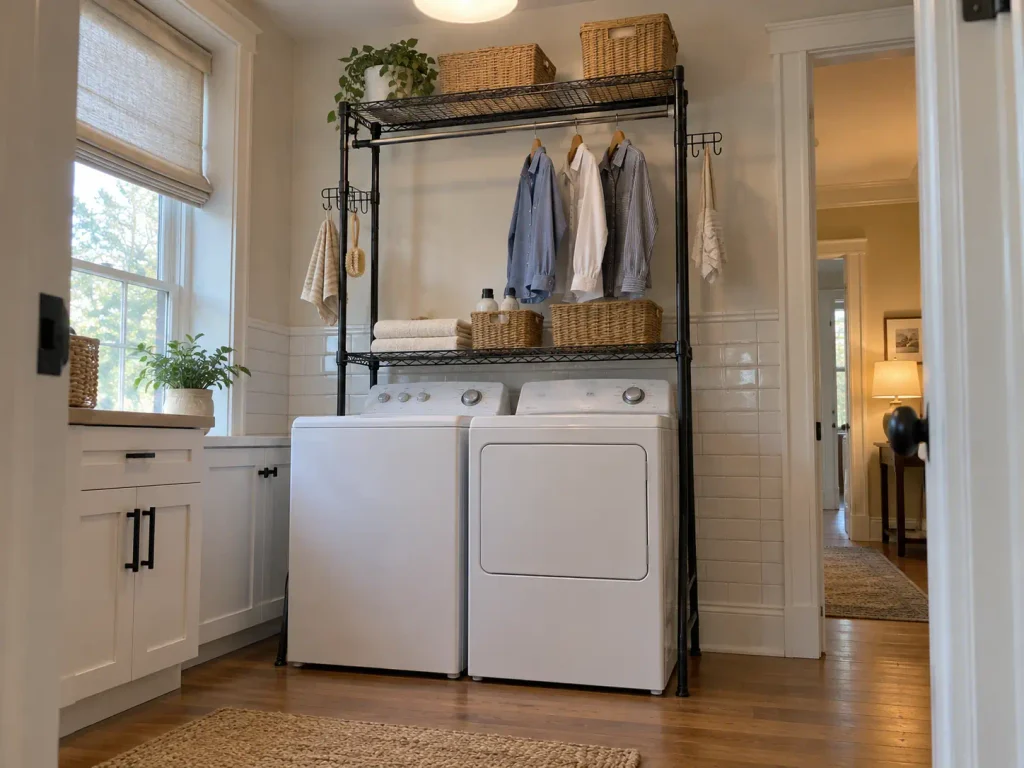
Where the Weight Actually Goes
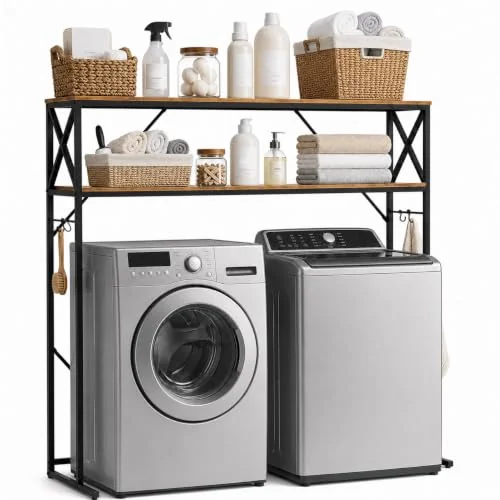
Here is the whole thing. A floor-standing straddle shelf unit sends its weight straight down through its own legs into the floor.
A wall-mounted shelf sends that same weight sideways into whatever happens to be inside the wall. The floor can take it; a drywall anchor is a small piece of plastic in a hollow cavity. That single difference in load capacity path is why one option survives a security-deposit inspection and the other risks it, and it is also why a freestanding unit does not care whether your closet has studs where you need them.
But no-drill for the shelf does not mean no anchor at all, and this is where the category gets sloppy. A tall, top-heavy unit standing next to a machine that vibrates is exactly the tip-over category federal safety rules target: ASTM F2057-23 became a mandatory federal standard for newly manufactured clothing storage furniture effective September 1, 2023.
One small anchor strap into the wall is a far smaller hole than mounting an entire shelf system, and in most rentals it is the difference between a unit that is technically freestanding and one that is actually safe. The No Drill Anti Tip Furniture Anchors solve it with adhesive rather than screws, which keeps the whole setup deposit-neutral. Six pairs is more than one unit needs, so the leftovers go on the bookshelf you have also been meaning to anchor.
Adhesive anchors need a clean, dry, fully cured surface and a full day before you trust them. In a laundry closet that means wiping the wall down, skipping the strap install right after a hot load has been steaming the room, and loading the top shelf tomorrow rather than tonight.
Freestanding Straddle Units — Measure the Machine, Then the Unit
Measure your machine width before you order anything that straddles. Appliance width is the number that rules a unit in or out: standard washers and dryers run roughly 24 to 30 inches each, and a unit rated to fit machines up to about 29.5 inches will not straddle a wider commercial-style machine no matter how you angle it. Measure at the widest point, which is usually the control panel or a door hinge rather than the cabinet sides.
One honest warning about this whole product category: it churns hard. Two of the adjustable straddle units that shoppers and idea posts commonly point to came back discontinued this month alone. Do not fall in love with a specific listing you saw in a photo somewhere, because by the time you go to buy it the listing may be gone. Judge by the spec pattern instead: legs on the floor, adjustable shelf heights, a width rating that covers your machines.
And the secondhand route is genuinely good here. A cabinet from a Habitat for Humanity ReStore repurposed over the appliances costs a fraction of a new unit and is usually built out of heavier material than anything shipping flat-packed.
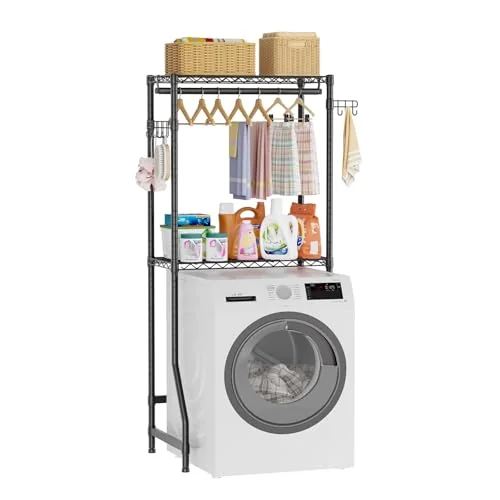
Tension-Rod Shelving and What It Can Honestly Hold
Tension rod shelf setups are the lighter no-drill tier, and the honesty problem here runs the other direction. They really do install with zero hardware and leave zero marks. They also have a real load ceiling, and the ceiling is set by the rod, not by the shelf surface sitting on it. Treat this as a supplies shelf: detergent pods, dryer sheets, a folded stack of mesh bags. Not a basket shelf, not a place for a gallon jug of liquid detergent that will pull the whole thing down the first time somebody bumps it.
The pre-made version saves you the improvising. Home in Bold Tension Rod Shelving expands to fit an opening and gives you an actual shelf surface on a rated rod, rather than a board balanced on a curtain rod and hope. What you are paying for is exactly that: a surface designed to sit on the rod and a rod designed to hold it. If the free version in the next section is going to annoy you every time you look at it, buy the made one.
A Countertop-Style Shelf That Spans Both Machines
This is the idea people save and stare at: one clean surface running across both machines, turning a laundry closet into a folding station. It is also the option where the enthusiasm and the practicality part ways fastest.
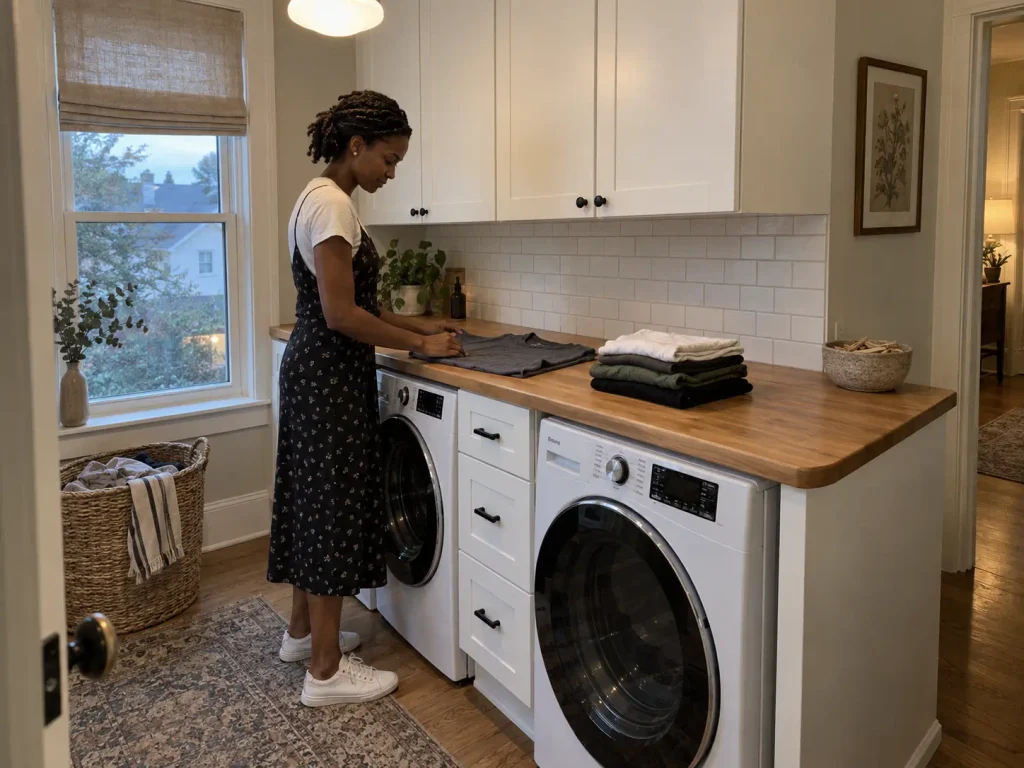
Why a Spanning Counter and a Top-Load Lid Can’t Both Win
A countertop over washer dryer setup only works on a side-by-side pair with flat tops. On a top-loader it does not reduce lid access, it removes it, because the surface sits exactly where the lid needs to travel. That is the actual reason the dryer-only shelf keeps showing up as a suggestion in this category, and now you know why rather than just seeing it listed: half the span clears the dryer’s flat top, and the washer keeps its airspace. If you have a top-loader and you want the folding surface anyway, the dryer-half version is the compromise that does not cost you a working washer.
Building One Versus Buying a Kit
The conventional pitch is that building it yourself is the budget move, and on a materials receipt that is true. A three-quarter-inch plywood shelf top with edge banding and a sealer costs a fraction of a pre-made unit, and it is roughly a one-day project for somebody who has done a few. Free shelf plans for a DIY shelf of exactly this span are all over the woodworking forums.
The catch sits in the parentheses of every tutorial: that figure assumes you already own a drill, a saw, and a pocket-hole jig for cutting pocket holes.
Rent or buy those for one shelf and the savings evaporate, and the tools outlive the project by about a decade of sitting in a closet.
The standard advice in this category is that everyone should build it. In practice the tool question decides it. If you own the tools, build it. If you do not, the kit is cheaper than the honest all-in number and you get your Saturday back.
Leave It Loose — Appliance Wobble Is the Thing That Breaks a Tight Build
Build it loose, not tight. The warning that comes up in renovation threads is blunt and worth repeating exactly as people say it: do not make it a super tight fit, leave some wiggle room for appliance wobble from unbalanced loads. A shelf or frame built to snug tolerances around the machines seems like good craftsmanship right up until a comforter bunches to one side mid-spin and the washer starts walking.
Then the frame binds, or it rattles, or it transmits every shake straight into whatever is sitting on top. A half inch of clearance on each side looks like sloppy work and behaves like good engineering.
Before you cut anything, run one deliberately unbalanced load and watch where the machines actually go. Most walk in one direction more than the other. Build your extra clearance on that side and you will never hear the frame again.
The spanning counter is one of those upgrades that only makes sense once the rest of the room is sorted, and the ideas that hold up in a small laundry room covers what to fix before you start cutting plywood.
Make the Shelf Actually Work Day to Day
A shelf over the washer is a surface, and a surface above a vibrating machine collects things and then slowly moves them toward the edge. What decides whether the whole project was worth it is what goes on that surface, and most of it you already own.
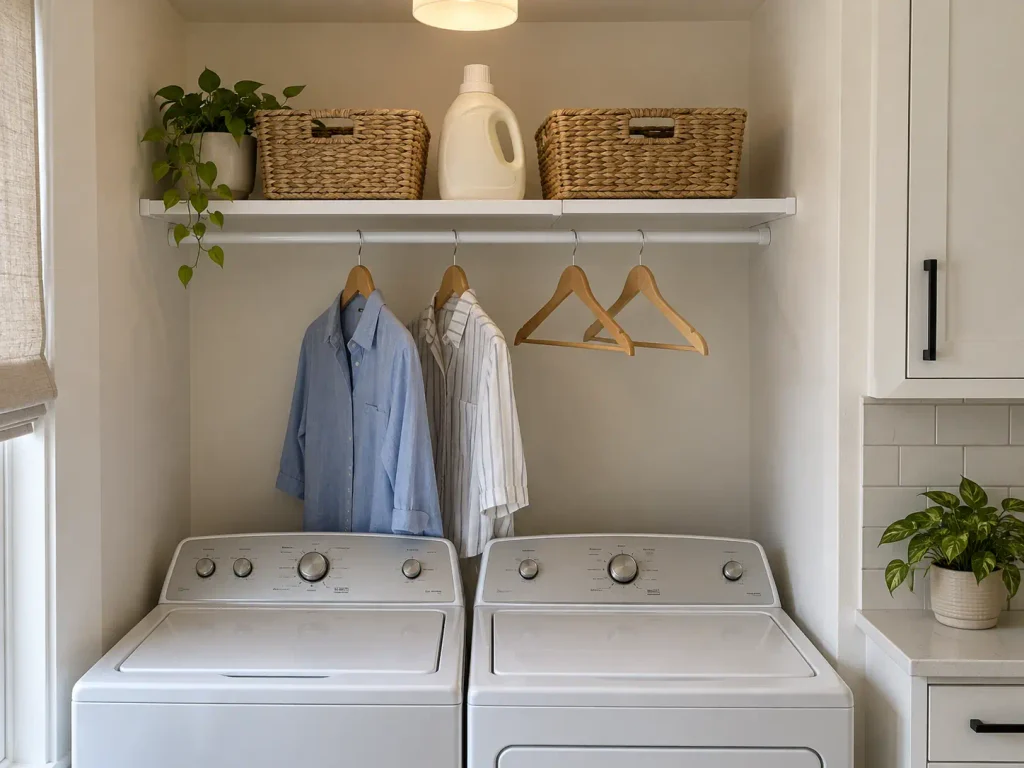
The Zero-Cost Version, and What It Can Hold
Start here before you buy anything. A spring tension rod you already have in a closet, plus a piece of scrap board, is a real shelf. Set the rod at your clearance height, rest the board on it, done.
The load ceiling comes from the rod’s rated capacity rather than the board’s strength, and most household spring rods top out well under twenty pounds, so this is a supplies shelf and nothing more. The one detail that makes it stop being annoying: keep the board from sliding by resting its ends in a lipped edge, a shallow groove, or against a strip of scrap glued along the underside. A board that shifts every time you reach for the detergent gets abandoned in a week.
If you do not already own a small spring rod, the TYRON Small Tension Curtain Rod comes in a four-pack sized for narrow gaps, adjustable from about seven to ten and a half inches, which is the range most laundry closet nooks actually land in. The free rod already in your closet is still the first answer, though. This is the fallback, not the plan. For the full picture on what tension rod shelving can genuinely hold, including where the category stops being a good idea, that deep-dive goes further than this section can.
Bins, a Rod, and Hooks — What Earns Its Place on the Shelf
Storage bins beat loose items over a washer, for the vibration reason from earlier: anything sitting loose on an open shelf above a spin cycle migrates toward the edge over weeks, and it does not announce that it is doing so. A bin with a flat bottom and a lip stops the migration and turns four scattered objects into one thing you can lift down with one hand. Nothing fancy required. What matters is flat and lipped.
A drying rod or a couple of S-hooks under the shelf is the highest-return addition in this entire article, and it is usually an afterthought. It converts dead air into hang-drying space for everything that cannot go in the dryer, which in most households is a surprising amount of what actually needs washing. Hang it where a dripping shirt drips onto the machine tops rather than onto the floor, and the drips stop mattering.
A label maker comes out only if more than one person uses the room. In a one-person laundry closet they are decoration, and you will stop reading them within a month. In a household they are the reason the system survives somebody else putting things away, which is the only real test any of this faces.
Then, seasonally, do the recheck. Tug the bracket hardware, look at whether anything has quietly walked to the shelf edge, and open the lid all the way one more time.
The One Number That Decides Everything Above Your Machines
Measure the lid’s swing before you measure the wall. That number decides which of the five categories you can physically buy, and every other decision on this page is downstream of it. Then choose by load path rather than by label: legs to the floor if you are renting, anchors in the wall only if you are allowed to make holes, and a small anchor strap on anything tall either way. And whatever goes up there goes up over a machine that shakes, so put loose items in bins with a lip and treat the hardware as something you maintain rather than something you install.
In three months, tug every bracket, see whether anything has crept toward the shelf edge, and open the lid fully one more time. Machines get moved, shimmed, and leveled, and the clearance you measured in week one may not be the clearance you have now.
Start with the tape measure and the lid. Everything else here is a decision you cannot make properly until you have that one number.
Frequently Asked Questions
01What can I put over my washer and dryer?
A wall-mounted shelf, a freestanding straddle unit that stands on its own legs, a no-drill tension-rod shelf, a hanging or built-in cabinet, or a countertop-style surface spanning both machines. Which of the five you can use comes down to two things: whether you are allowed to drill, and how much vertical room your washer lid needs to open.
02Are over-the-washer shelves safe?
A correctly mounted shelf is safe, but it needs more upkeep than a shelf anywhere else in the house, because it sits above two machines that vibrate hundreds of times a year. Recheck the bracket hardware seasonally, keep loose items in bins, and anchor any tall freestanding unit to the wall, as the CPSC’s Anchor It! campaign recommends for anything with shelves or doors.
03What’s the best material for over-washer storage?
Sealed or painted solid wood and powder-coated metal hold up best, because a laundry space runs humid and steam sits on whatever is above the machines. Bare MDF is the one to avoid: it swells at the edges and does not recover. Wire shelving sheds moisture well but wants a liner for small items.
04How much space do I need above a top-load washer?
Most modern residential top-loaders need roughly 21 to 24 inches of clear vertical space above the machine for the lid to open fully. Compact models can manage around 18, and large glass-lid machines want 26 to 30. Quick check: measure from the lid’s hinge pivot to its far edge, then add a couple of inches of margin.
05Can I put a shelf over a stacked washer and dryer?
Usually not in the way you are picturing. A stacked front-load pair commonly reaches 70 to 80 inches once installed, which puts the top of the machines near ceiling height and leaves no usable shelf zone above them. In a stacked closet the storage moves to the side walls and to a shallow cabinet at the very top.
Disclaimer: ClutterlessNest is a participant in the Amazon Services LLC Associates Program. As an Amazon Associate we earn from qualifying purchases. This article may contain affiliate links — if you buy through them, we may earn a small commission at no extra cost to you. We only recommend products we have tested or genuinely believe in.