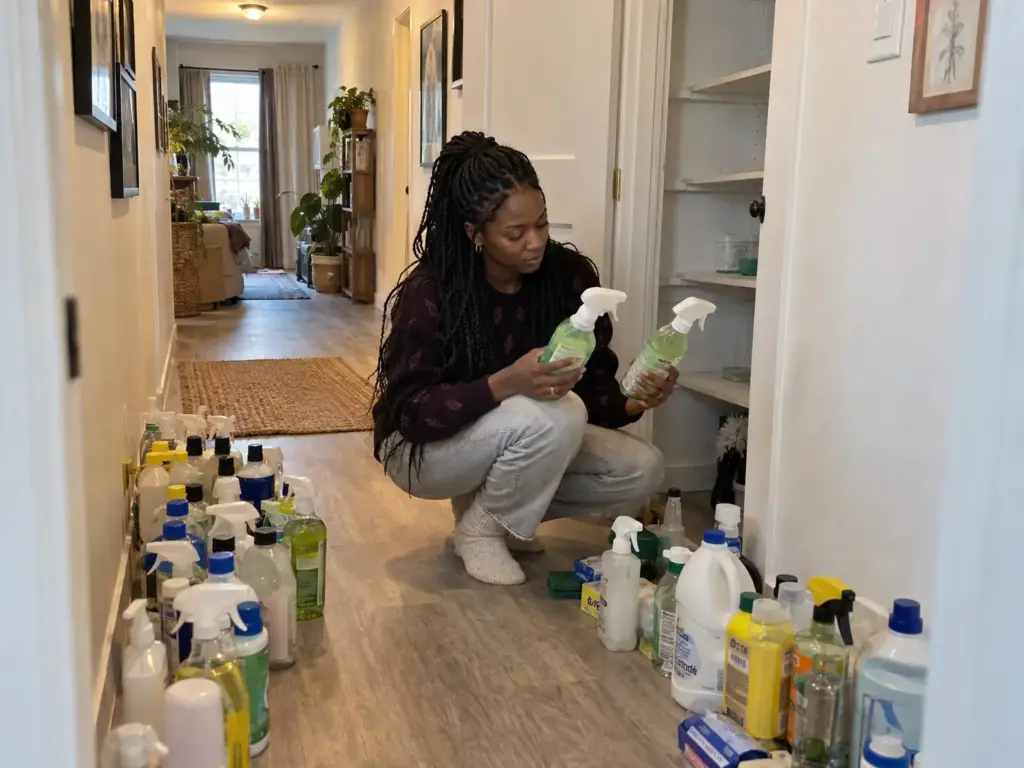
You reach for the all-purpose spray and find a second bottle of the same cleaner behind it, then a third behind that, all sitting in the dark half of the shelf. Most cleaning supply organization ideas start with a better shelf, but the shelf is not what sends you back to the store: the stock you cannot see is the stock you buy again. In the r/declutter thread where one poster asked where the “extras” and “bulk bottles” should go, commenters agreed that the big refills belong at the back because you reach for them less, which is also exactly where they get forgotten.
The six ideas below run in the order the work happens (sort, carry, group the small gear, label and refill, fit the bins, reset for the people you share the space with). They assume a utility closet that has already stopped failing, because this article is about what goes inside it, and the refill step follows poison-control and EPA label guidance, not taste.
Quick Answer
Six moves, in the order the work happens, keep every bottle visible so duplicates stop arriving.
- Sort every bottle by the job it does and pull out duplicates.
- Load the daily set into a caddy and send bulk to the back.
- Give cloths, gloves and small gear their own bin or pocket.
- Label bottle tops and copy the original label onto every refill bottle.
- Measure your tallest bottle with the trigger on before buying bins.
- Keep hazardous stock high or locked and run a five-minute reset.
Cleaning Supply Organization Starts With Sorting What You Already Own
Sorting comes first because every other idea here works on a stock you can count. You cannot fit, label or restock what you have never seen all at once.
Why Hidden Stock Gets Rebought
Picture two identical bottles of glass cleaner, bought on two different trips because neither one was visible when you stood in the aisle trying to remember what you had. A shelf packed two deep hides the back row, the back row gets forgotten, and the store happily sells you another. The original poster in that r/declutter thread asked exactly this, where the extras and bulk bottles should live, and one commenter answered that bulk belongs in the back because you need it less often. That answer is sound, and it only holds if something keeps the back row in your mind, which is what the rest of this article builds.
Pull It All Out and Group by Job
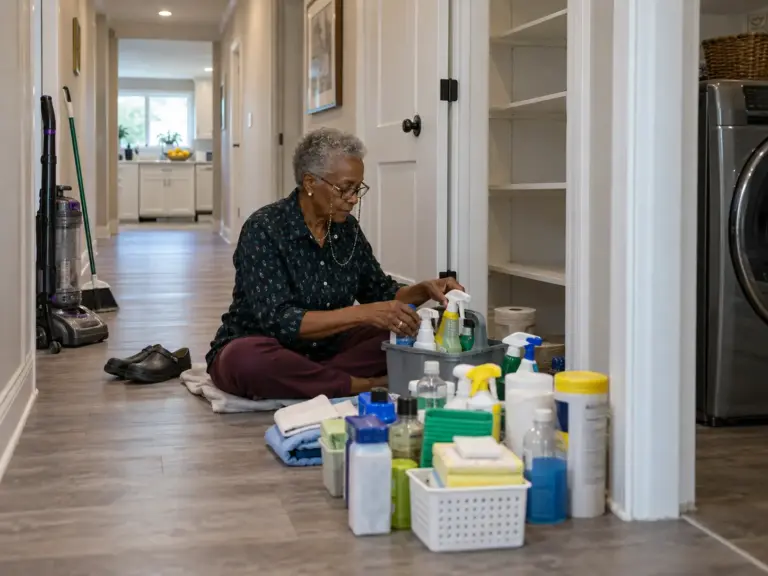
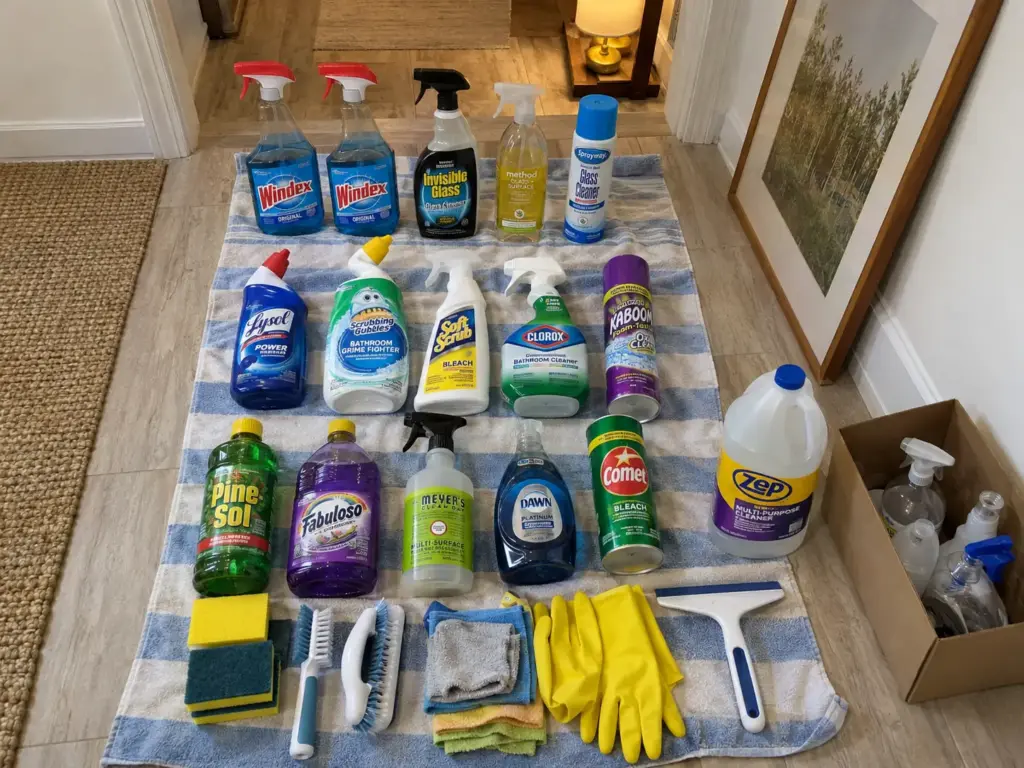
Everything comes out onto the floor or a towel: every bottle, every disinfecting spray, every stack of microfiber cloths, the scrub brush and the duster. Group it by the job it does (glass and mirrors, bathroom, floor cleaners, surface cleaners, dish soap and the kitchen) and not by brand, because a brand name tells you nothing when the mirror is streaked and you need the right bottle in one grab. Count the duplicates now, while the matching bottles sit side by side. The pile doubles as your stock check and makes the habit obvious.
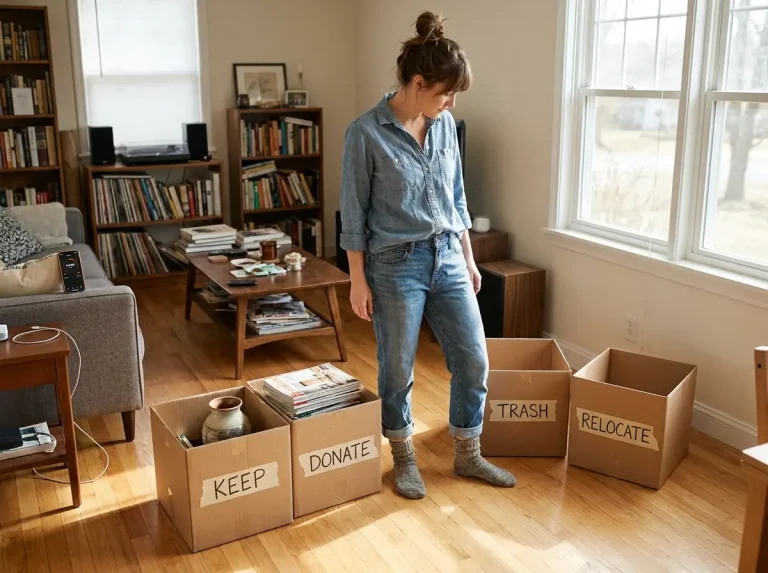
Stay on the big sort until it is finished. The thread has a word for fiddling with small sub-categories too early, “microorganizing,” and it is the reason a closet ends up with a half-sorted floor and nothing back on the shelf. Treat it as a purge before you store, the same order room-by-room decluttering uses. This step costs nothing, and it decides which of the products below you need at all.
Stick a note on every duplicate pair while the pile is still on the towel. The opened bottle goes back on the shelf, the sealed one goes to backstock, and the note means no third bottle gets bought until the opened one is empty.
What Leaves the Shelf
Four things go: empties that nobody refilled, expired products (anything past a date printed on its label), bottles with a cap that no longer seals, and any bottle whose label you cannot read. An unreadable label means you cannot check what the product is or how it should be stored, so it does not earn a place back. Duplicates are the quieter category. Keep the opened one in front, send the sealed one to backstock, and remember the advice from one extension leaflet to “buy only the products you need” in amounts you will actually use up.
Build One Caddy, Then Sort the Rest by How Often You Reach
Once the stock is sorted, the next question is what travels and what stays put. The answer splits on how often a hand reaches for it.
The Caddy Holds the Daily Set and Travels
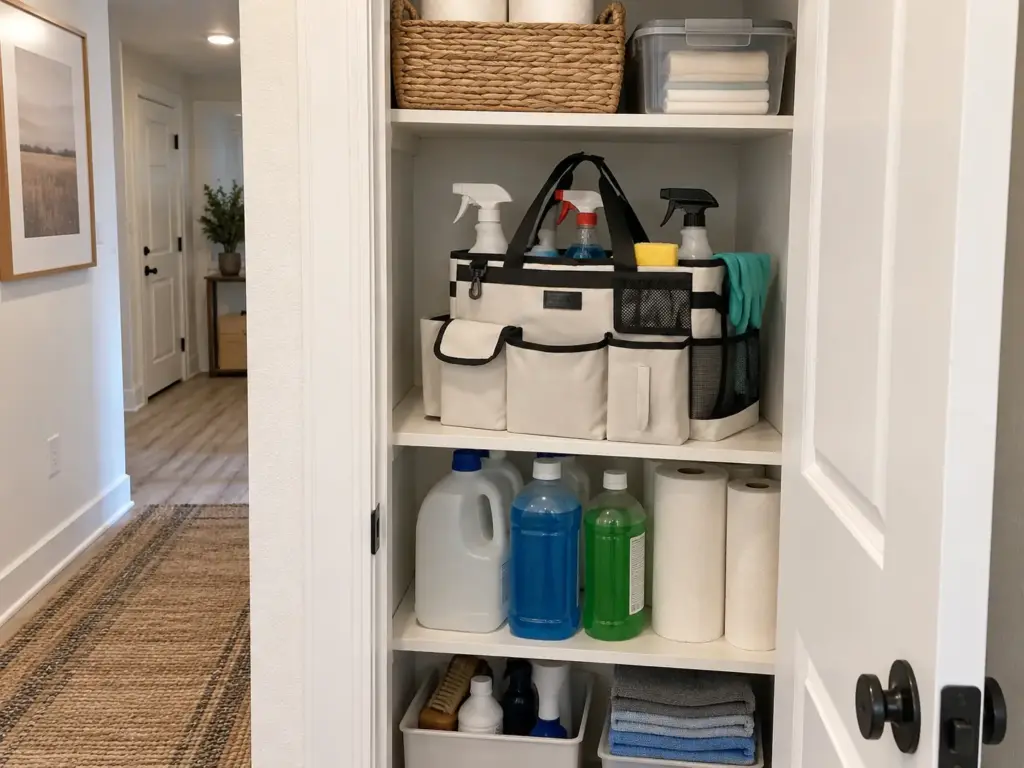
Carrying six loose bottles down the hall in your arms ends with one on the floor and the bathroom cleaning postponed. One commenter in the thread solved it by keeping the big bottles at the back of the closet and pulling out a caddy to take to whichever room needs cleaning, with a rag for each cleaner type tucked in beside its bottle. A bucket you already own does the same job, so use that first. A purpose-built portable caddy is the upgrade, not the entry fee.
Daily at Eye Level, Bulk at the Back
I would split the stock into two reach tiers, by frequency of use. Daily and weekly cleaners live at eye level or in the caddy, and rarely used stock goes to the back or the lowest shelf. The reasoning is mechanical: a hand finds the front row first, so the front gets used up first and the back works as the refill supply. Without that split, the back row is just a place where bottles disappear.
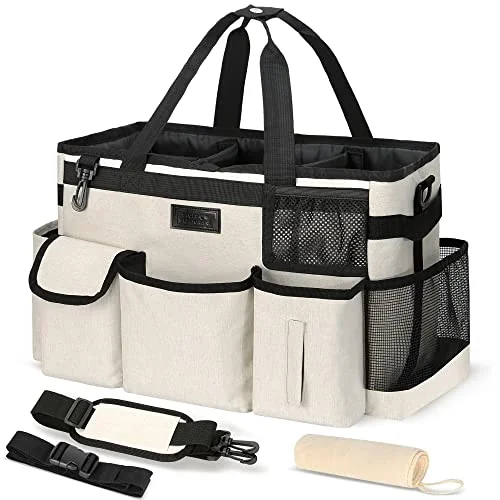
For the carrying part, the Cleaning Caddy Organizer with Handle is built for exactly this. The bottles stay on the shelf and the caddy is what comes out.
Per-Room Kit or One Central Caddy
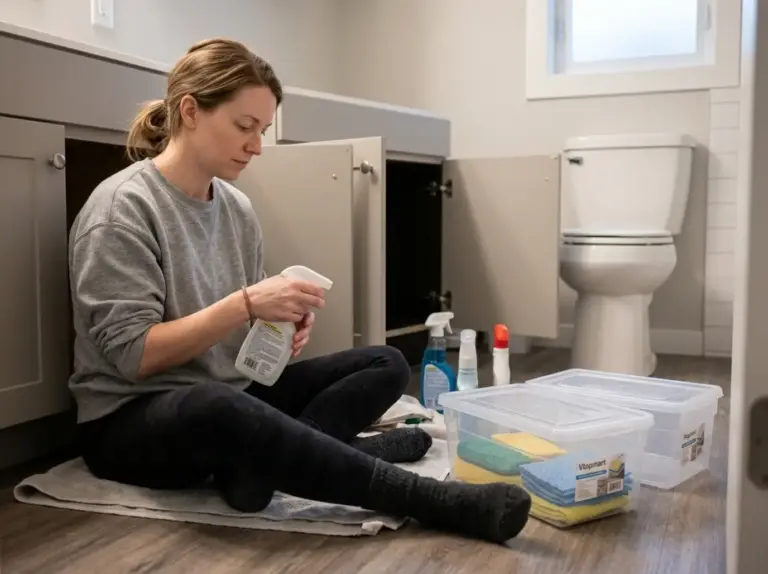
In a studio or small apartment, one commenter planned to clear out the space under the kitchen sink and get a caddy, and for one small kitchen and bath that is plenty. A larger home has the opposite problem: one caddy walks to every room, and a second small bathroom caddy saves the trip. If the caddy lives under a sink, storing it and the chemicals safely under a sink covers the pipes and the locks.
Give Cloths, Gloves and Small Gear Their Own Pocket or Bin
Bottles are only half of a cleaning stock. Cloths, gloves and sponges need a home of their own, or they drift onto the bottle shelf.
A Cloth Station: One Clean Bin, One Used Bin
Microfiber cloths migrate. They start in a drawer, end up on the bottle shelf, then in the caddy, and soon nobody knows which ones are clean. One commenter keeps a rag for each cleaner type beside its bottle and a bin of clean rags beside the caddy, which makes the rag bucket its own job instead of a shelf competing with the bottles.
Add a second bin or a rag basket for used cloths (one with a lid, if the household has a habit of tossing things in from across the room) and the clean ones stay clean. If cloths still get mixed up, color-coded cloths, one color per job, tell clean from used at a glance.
The Clear Pocket Layer on a Door
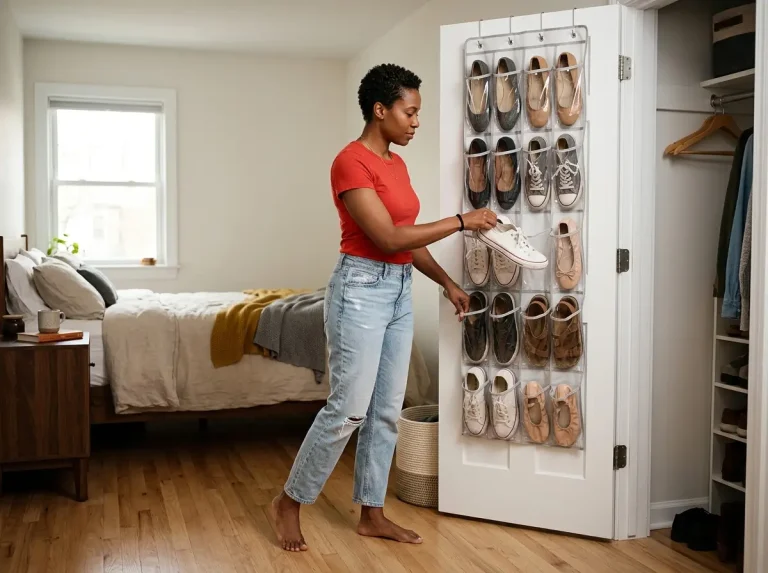
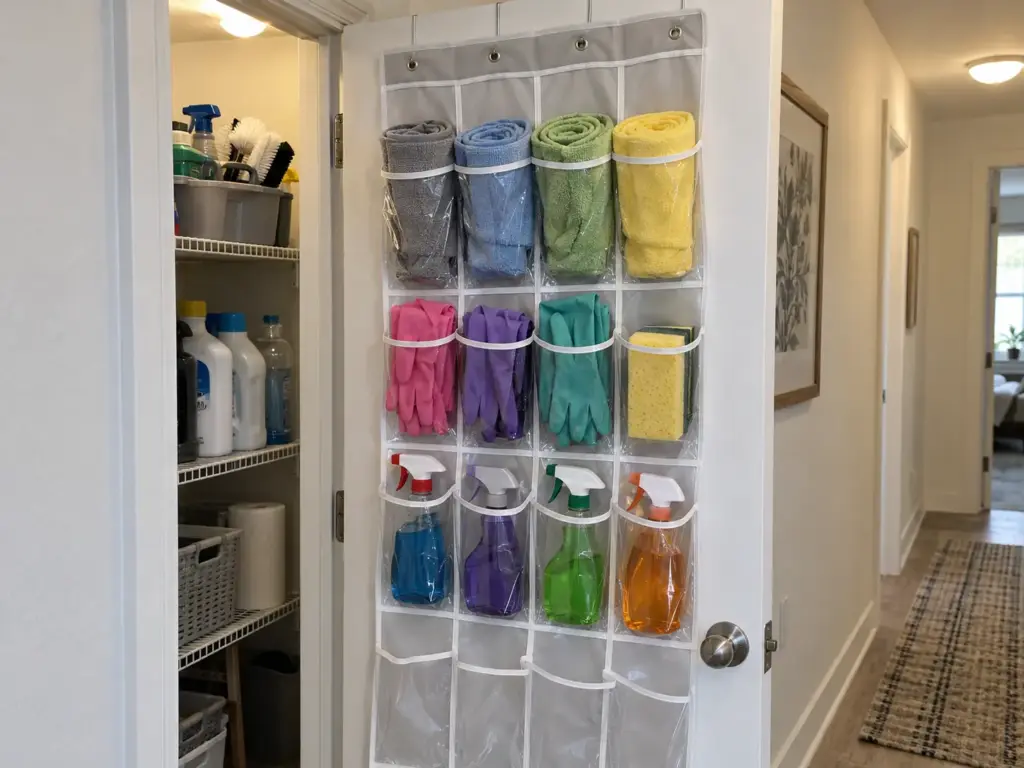
The original poster in the thread was weighing an over-the-door organizer and worried its shelves would squeeze the products when the door closed. A commenter answered that the idea does not have much going for it before it has been tested in that space. Another commenter used a clear shoe pocket organizer for cleaning supplies in their last home and said it worked quite well, so if you already own one, use it first.
If you do not, the SimpleHouseware Over-the-Door Shoe Organizer has 24 clear pockets and is an inexpensive no-drill over-the-door organizer for gloves, sponges, small bottles and folded cloths. The doubt from the thread applies to it: loaded shelves can squeeze what they hold when the door closes. It is usually the cheap answer for a no-drill closet, and in a door with no spare clearance it is the wrong call, so close the door on it, loaded, before you commit. For the wider picture of over-the-door storage that does not wreck the door, that guide covers what the door itself can take.
When the Door Cannot Take It
Then the pocket layer moves to a bin on a shelf, and the closet door gets left alone. Renters get the same result from this no-drill layer with nothing to patch afterwards, and an owner who wants something permanent should read how a closet is built to make the door still shut, because the swing and the load belong to that article, not this one.
Label the Bottle Tops and Set a Refill Loop You Will Actually Follow
A shelf of sorted bottles slides back into chaos the day the labels stop being readable. Labels and a refill rule are what hold the sort in place.
Label the Tops, Not the Fronts
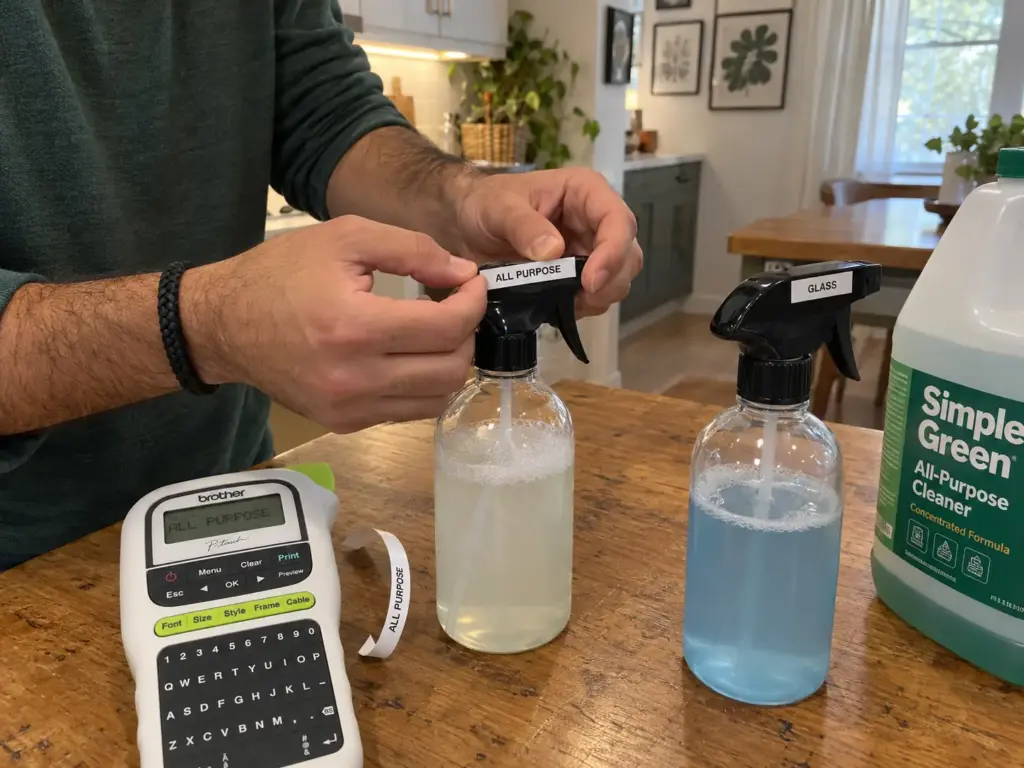
On a crammed shelf the front labels face the next bottle, and the only part of a bottle you still see is its cap. That is why one commenter labeled the tops of the bottles and lids with a Sharpie or a P-touch labeler. A Sharpie on the lid is free and does the job, so begin there.
When you want something that reads cleanly on every cap and on the refill bottles below, the Brother P-Touch PTH110BP is a handheld label maker that prints a legible strip. And a printed strip only helps if it stays on the container, so wipe the cap dry first.
Refill Bottles: Copy the Label and the Poison Center Number
According to the American Association of Poison Control Centers’ guidance on container transfers, “Keep cleaning products in original containers – always!” The original container is the rule and the refill is the exception, which is where the tension sits. If you do transfer a product to a smaller bottle, the same guidance says to put a copy of the original label on the new container along with the number for your poison center, 1-800-222-1222. A marker scribble that says “glass” does not meet that.
EPA’s ‘Read the Label First’ guidance, written for pet owners, adds two points that fit a refill bottle. If you cannot use all of a mixture, label the new container “for use in the future,” and a container without a tight-fitting lid can spill and give a pet access to the product. So a refill bottle carries a copied label, the poison center number and a lid that seals. Never decant a bleach product into a bottle that sits beside an ammonia product, because chlorine bleach mixed with ammonia or acids can release hazardous gas.
Put the date you mixed a diluted refill on the strip next to the copied label. A bottle you cannot finish in one visit needs to say what it is and how long it has been sitting.
A Restock Trigger That Is Not “When I Remember”
The loop has three parts: the bulk jug at the back, a labeled bottle in front, and a trigger that tells you when to refill. This is my recommendation, not a sourced rule, and the trigger is the part that makes it work. Restock when the front bottle is empty and the back is down to its last one. At that moment the refill happens and “buy one more” goes on the shopping list, so the list item is written the day you see the last backstock, not in the aisle trying to remember.
It works because the trigger is something you can see, so it never depends on memory. Two bottles at the front with nothing behind them means refill now. A full back row means skip the cleaner on the next trip. The shelf itself becomes the inventory.
Fit the Bins to Your Tallest Bottle and Send Backstock to the Back
Bins that do not fit the bottles are an easy purchase to get wrong. The fix is a measurement taken before the order, not after.
Measure the Bottle With Its Trigger On
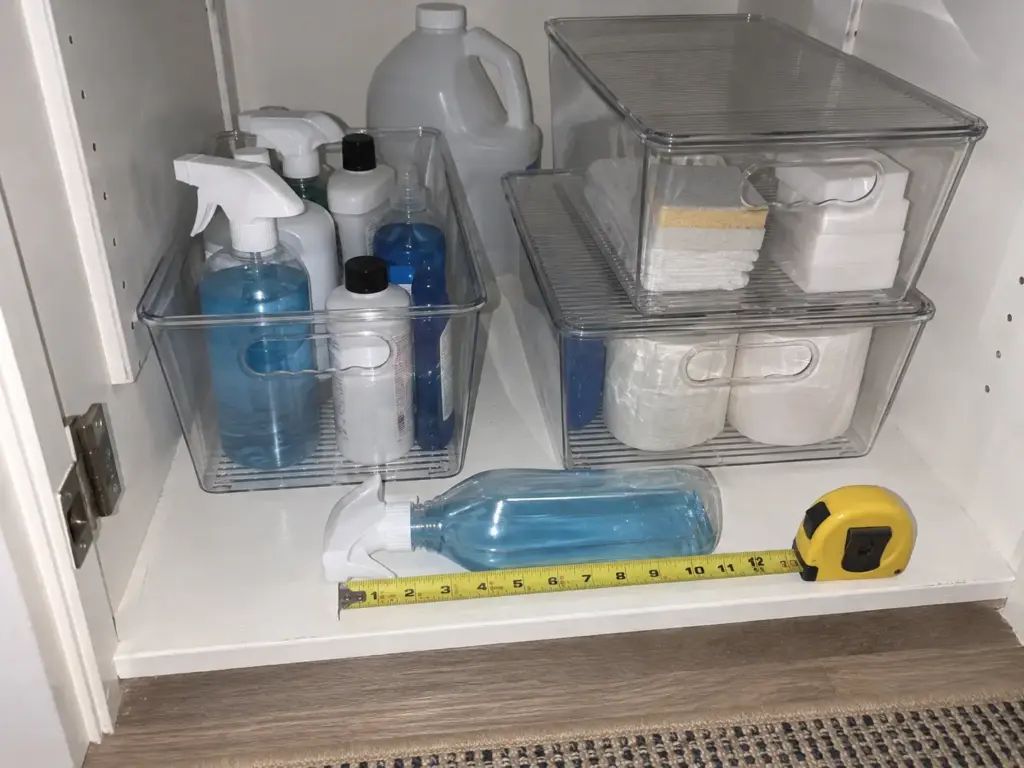
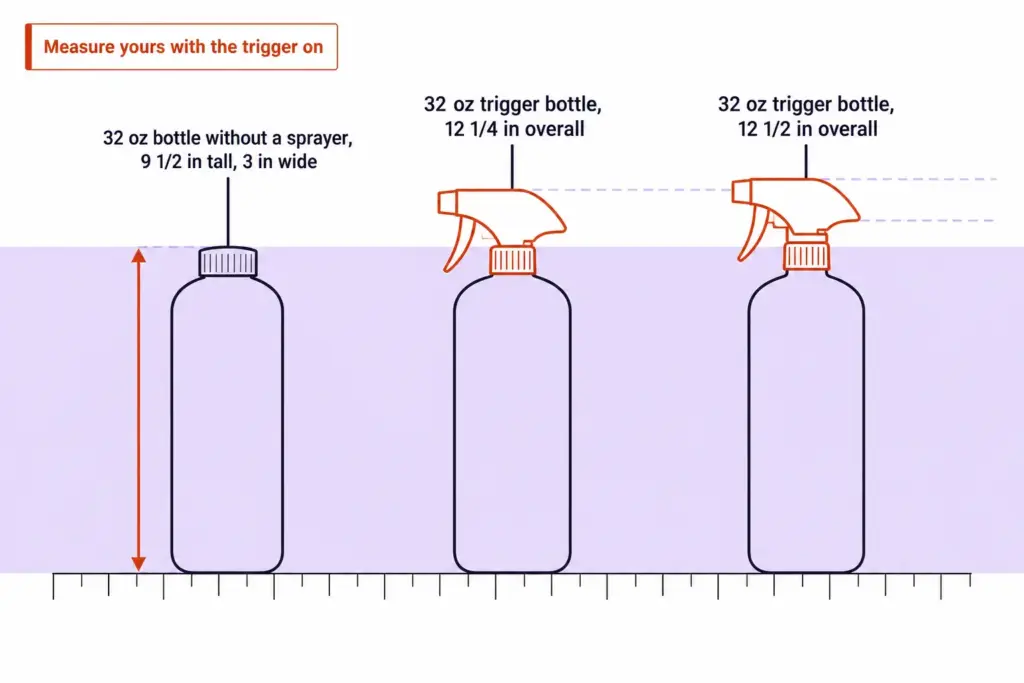
The bin that looked right in the listing turns out shorter than the sprayer, and the bottle will not stand upright with the lid on. In cleaning supply storage the size printed on the label is the number everyone quotes, and in a bin or under a shelf it is the wrong one. The sprayer sets the clearance, not the bottle, which makes bottle dimensions the first measurement to take.
One retailer listing gives a 32 oz trigger bottle as 12 1/2 in overall with the trigger on, and a second 32 oz model on the same page as 12 1/4 in. One commercial 32 oz bottle without a sprayer is 9 1/2 in tall and 3 in wide. Those are different bottles, so it is not an exact subtraction, but the gap shows the sprayer is what decides the shelf height. And two 32 oz bottles on that retailer page differ by a quarter inch, so measure the bottle you own.
For a bin, the inside height has to clear the trigger. Bottles either stand upright in a deep bin, or lie flat only if the product is made not to leak that way (read the label, and do not lay bottles down as a rule). The same math applies to a shelf, and matching shelves to what sits on them starts with the same tape measure.
Test with a container you already own. Stand your tallest bottle inside it with the lid on and the trigger up. If the lid will not close, the bin is too short for that bottle, and you find out before a whole set shows up.
Clear Bins for Backstock, a Cart for the Rarely Used
Any clear container in the house makes a good first test, so run one shelf through it before buying six.
Clear matters here because it is the rebuy fix from the first section, stock you can see is stock you do not buy twice. Once the test works, the Vtopmart 6 Pack Clear Stackable Bins with Lids are clear stacking bins, so backstock takes less shelf, and the lids keep it closed. As storage bins go, they earn their place by letting you see the stock. Check the inside height against your tallest bottle before you order, since the listing size is not the number that matters.
On very deep shelves in a closet, one commenter puts the big containers and extra supplies toward the back, and that works until the back is out of reach. If the closet floor allows it, a three-tier rolling cart keeps the rarely used stock out of the daily path and rolls out when you need it.
Where Bulk Should Not Live (Heat and Loose Lids)
A 2008 Cape Cod Cooperative Extension leaflet on household cleaning products says to store products in a cool, dry place and to close packages after each use. Products with chlorine compounds lose effectiveness with time, and their most desirable storage range is 50 F to 70 F. That makes a hot corner of the garage shelves or a sun-warmed closet the wrong back wall for bleach-type products, however much room it has. Bulk goes where it stays cool, with a lid that closes.
Reset for a Shared Home So the System Survives Other People
Everything above works for one careful person. A household of several needs the system to survive the least careful of them.
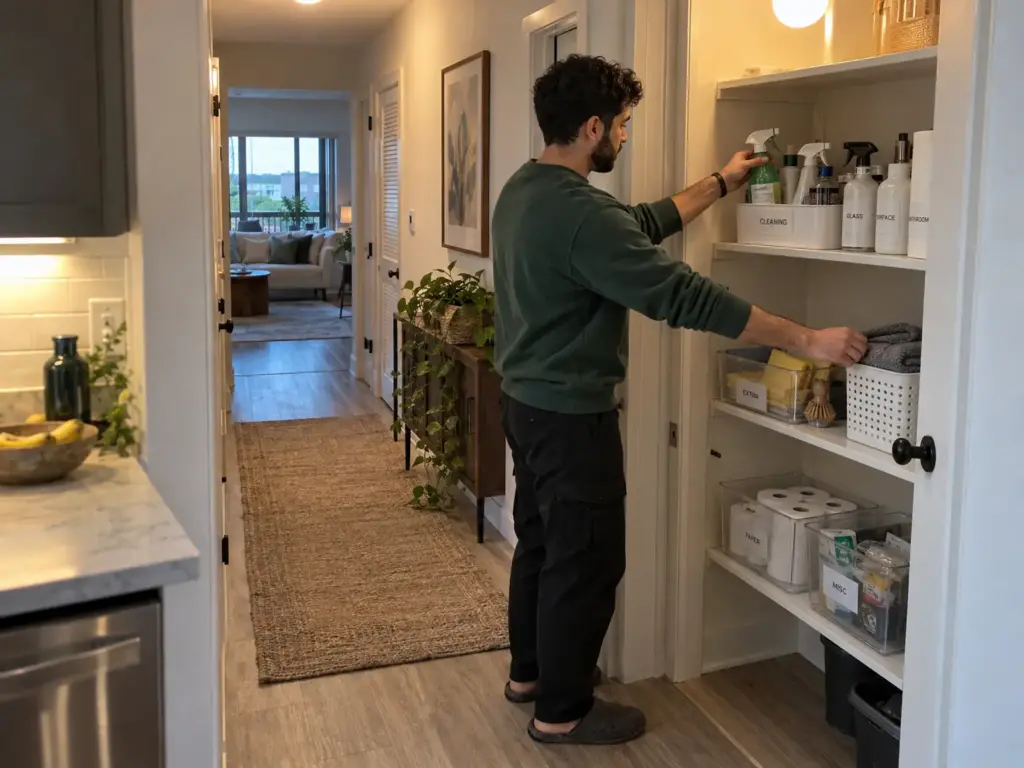
One Central Closet or a Kit Per Room
In a shared home the bottle goes back wherever there was room, so by Friday the labels and zones mean nothing.
One commenter stores cleaning supplies where they are used: the kitchen set under the kitchen sink, and a storage cube under each bathroom sink holding the bathroom set. The usual advice is one home for everything, and that gives you the fewest duplicates. A kit per room gives you the fewest trips.
In a home where everyone puts things back differently, the better answer is the one that survives the least careful user, and that is often the kit that lives at the point of use. For the sink version of the same split, separating toiletries from cleaning supplies under the sink sets up the daily-reach and backstock zones.
Who Can Reach What (Kids, Pets, Roommates)
The original poster in the thread has a toddler and wrote that the cupboard child locks in use are not the strong magnetic kind yet, so the child could get into a cupboard more easily than a door. That is the useful detail for toddler-safe storage: the lock decides more than the location does. Bulk and anything hazardous goes high or behind a lock, and the daily set sits in low cupboards only if the people who reach it are adults. Poison control also recommends cabinets with child-resistant latches for household cleaners.
The Five-Minute Reset
Once a week, face every bottle label-out, restock the front bottle from the back if it is empty, and send any duplicates to the one place for extras. Five minutes is enough, because the labels and the zones have already done the heavy lifting.
Label the shelf edge as well as the bottle top. Bottle labels get turned around, but a label on the shelf tells a roommate exactly where the cleaner goes back, and it works for renters with nothing to patch afterwards.
Keep Every Bottle Visible and the Rebuying Stops
Three things carry the system. Sort so you can see what you own, carry the daily set in a caddy and send the rest to the back, and label the tops and restock on a trigger instead of a feeling. Everything else in this article supports one of those.
In about three months, look at the front row and ask whether those are the bottles you actually use, whether duplicates have crept back behind them, and whether the bins still clear the sprayers. Any one of those tells you which step slipped.
Take everything off one shelf today, group it by job, and put the opened bottle of each in front. Then watch what you find twice. That pile of repeats is the stock you were about to rebuy.
Frequently Asked Questions
01What is the best way to organize my cleaning supplies?
Sort everything by the job it does, keep the daily set in a caddy, and put bulk at the back with labels on the bottle tops. Keep products in their original containers where you can, and copy the label onto any refill bottle.
02Where do most people keep their cleaning supplies?
People keep them wherever the job happens: under the kitchen sink, in a hall closet, or in a small kit under each bathroom sink. A kit per room saves trips, while one closet means fewer duplicates.
03Should bulk bottles go at the back of the shelf?
Yes, put the bulk bottles you reach for least at the back of the shelf and keep the daily bottle in front where you can see it. Keep bulk away from heat and close the lids tightly, since chlorine-based products lose strength over time and keep best between 50 F and 70 F.
04Is it safe to pour cleaner into a spray bottle?
Keep cleaners in their original containers, and if you must transfer one, copy the original label and the poison center number, 1-800-222-1222, onto the new bottle, as Poison.org advises. Never mix bleach with ammonia or acids, which can release hazardous gas.
05Is an over-the-door shoe organizer okay for cleaning supplies?
Yes for flat, light items like gloves and sponges, as one commenter found in their last home, but check that the door still closes with the organizer loaded. Squeezed bottles were the original poster’s own doubt.
Disclaimer: ClutterlessNest is a participant in the Amazon Services LLC Associates Program. As an Amazon Associate we earn from qualifying purchases. This article may contain affiliate links — if you buy through them, we may earn a small commission at no extra cost to you. We only recommend products we have tested or genuinely believe in.