
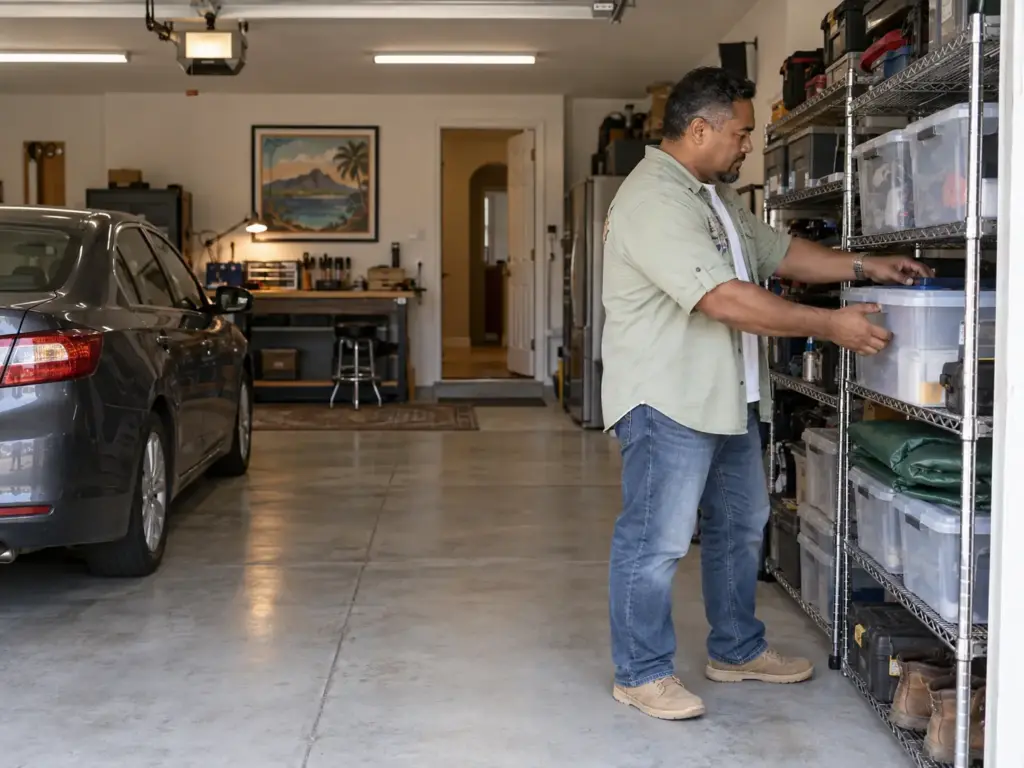
Your second bay stopped fitting a car a while back, and the last time you needed a drill bit you bought a new set because the old one was somewhere under the cartons. That is what garage organization really fixes: not a shortage of shelves, but a room where things go to be forgotten. One GarageJournal member described five years of letting the garage slide while he kept adding stock for “future projects,” until hunting for things and clearing space took more time than the work he came out to do. The order below is measure, sort by use, then floor, wall, ceiling, cabinets, tools and bulky gear, followed by the budget version, the reason garages slide back and the monthly reset that stops it.
Quick Answer
Measure the room and protect the car bay, then sort everything by how often you use it. Give each group a zone: floor shelving for bulk, wall space for weekly items, the ceiling for seasonal gear, cabinets for what must stay closed. Then put a monthly reset on the calendar, the step that stops the slide back.
Garage Organization Starts With Measuring the Space You Actually Have
Picture how a garage fills: from the back, one carton at a time, until the shelf you bought in a hurry blocks the side door and the ceiling slopes exactly where the overhead rack was going to hang. Each of those problems is a measurement nobody took. A garage has fixed things in it (the car bay, the doors, the electrical panel), and every later choice has to respect them, so the room comes before the shopping.
Walls, ceiling and the slope that changes what fits
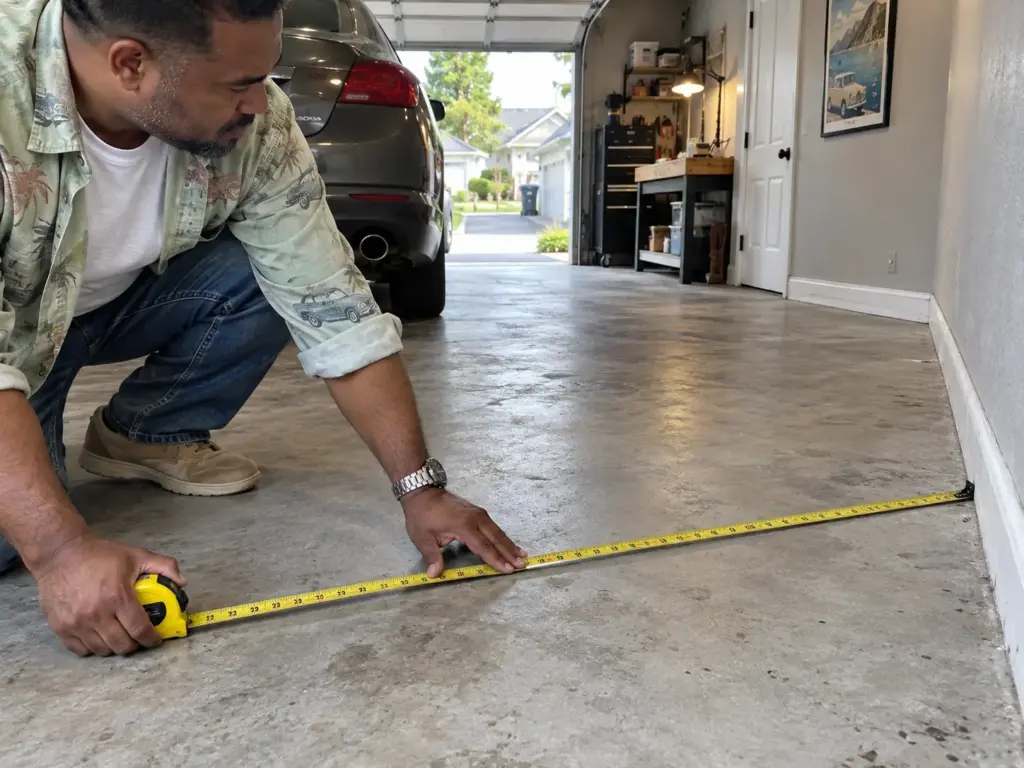
A Harbor Freight buying guide starts here too: measure garage dimensions, meaning the length, width and height, and note the corners and any sloped ceiling, since both limit what fits. The slope matters most overhead, where ceiling space is the one thing you cannot add. A rack or a tall cabinet that sits happily along the flat stretch of ceiling can run into the slant further along, so write the height down at the wall and again where the ceiling starts to drop. Sketch the room on paper with those numbers and mark what is staying put.
The car bay is the rectangle you protect
Decide how many cars live in the garage before you decide anything else. If both bays hold a car, the walls and ceiling carry nearly all the storage. If the second bay stopped hosting a car years ago, you have floor to plan with, but the bay you still park in is a rectangle that does not move.
Measure your own car with the doors open (the doors are the widest it ever gets) and mark that footprint with tape. No clearance figure works for every car and every door swing, so your tape line is the number.
The GarageJournal member quoted above put a name on what skipping this step costs. “Clearing space” was his phrase for the hunt that has to happen before any project can begin, and it was a job that kept coming back because the stock kept growing. Clearing space is work you do before the work, and a marked car bay shrinks it.
Doors, windows and the electrical panel stay clear
Plan around windows, doors and the electrical panel so nothing blocks them. A shelf that hides the breaker box is a shelf you will move later, usually in a hurry. Leave the side door’s swing clear as well, and keep a path to the panel you could walk with your arms full. Renters and shared garages get one adjustment: freestanding units and hooks that need no drilling leave the walls as they were, and a no-drill rack can come with you when you move.
Sort by How Often You Reach for It, Then Give Each Group a Zone
Say the camping bin sits at eye level beside the hose you use every week. You reach around one to get to the other, and within a month the bin has been shoved aside onto the floor. Category sorting (all the garden things here, all the sports things there) puts items together that you use at completely different speeds. Sorting by usage frequency puts the speed first, and the zone follows from it.
Three speeds: weekly, seasonal and rarely
Sorting by use only works once you declutter the room first, because a system built around things you no longer need is the first one to fail. With what is left, make three piles.
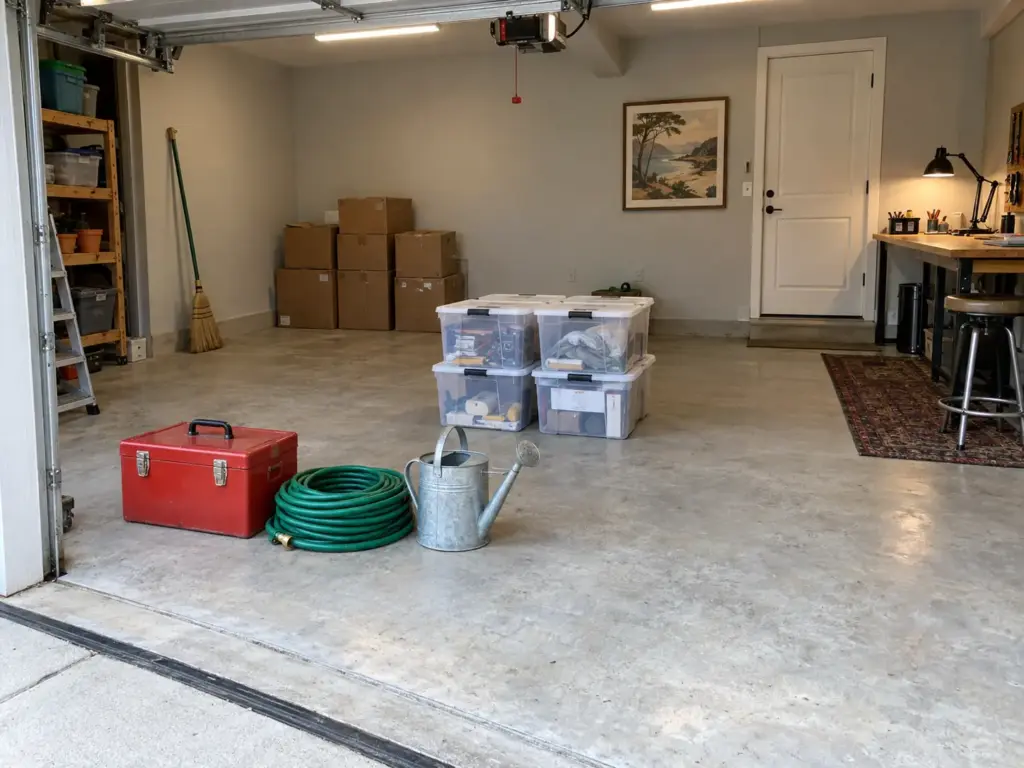
Weekly is the mower, the hose, the ball bag, the tools for the job in progress. Seasonal is the holiday boxes, the camping gear, the pool toys, the stuff that needs seasonal storage and not a front-row spot. Rarely is the paint for a room you repainted, the spare parts, the things you keep just in case. A Harbor Freight guide gives the same rule: most-used items at reach, seasonal items higher or further back.
The piles will not be equal, and they should not be. Weekly is the smallest and the one that decides the layout.
Bins, drawers and labels for the middle layer
Small things need containers, and the container should show what is inside. Clear storage bins with lids let you read the contents from the aisle, labeled drawers keep small parts from migrating, and lockable drawers hold what has to stay closed. Lowe’s also lists storage cubes and drawers for giving small items their own space.
Stackable bins save floor, with one drawback: the bottom bin is reached last, so it should hold the thing you reach for least. And a bin with no label is a bin that gets opened, shrugged at and put back in a different place.
Put the label on the narrow end of the bin, the face you actually see once it is slid onto a shelf. A label on the lid is readable only until the bin above it goes on.
Match each speed to a zone
The garage resolves into five zones: the car bay, a weekly wall, a seasonal ceiling band, floor shelving for bulk and a work zone for tools. Weekly items go on the wall at reach, seasonal items overhead, heavy and bulky items low on the floor shelving, and tools in the work zone where you stand when you use them. The car bay gets nothing.
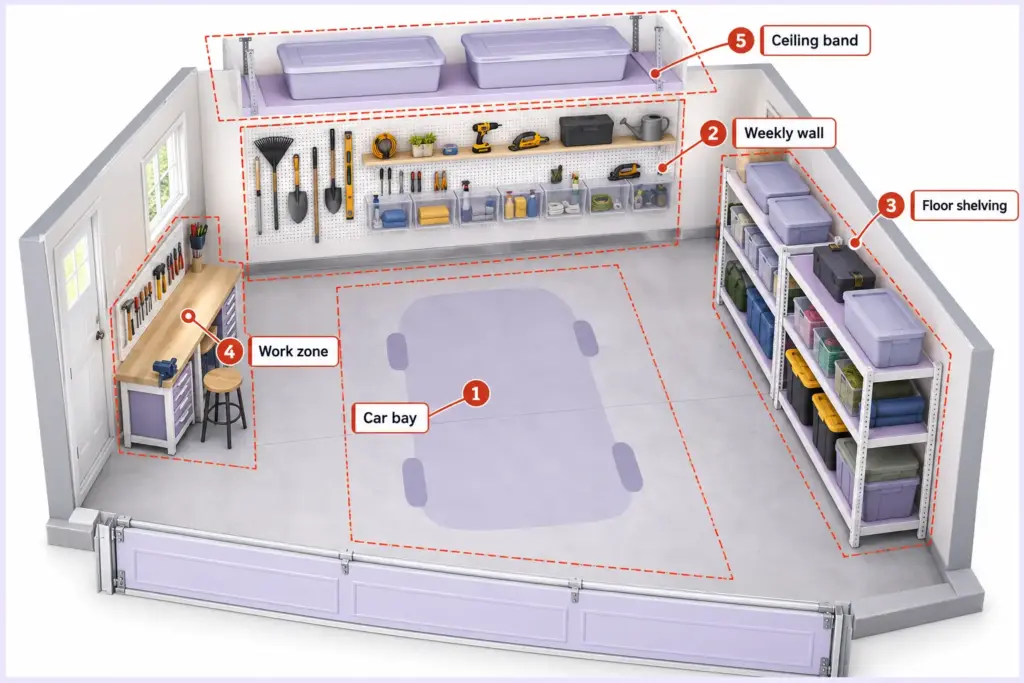
Zones also settle arguments. When a new item arrives and nobody knows where it goes, the question stops being “where is there space?” and becomes “how often will we use it?” That one question sends it to the right zone, or out of the garage.
Floor Shelving Takes the Bulk and the Weight
Your first shelf is probably not a purchase. A sturdy bookcase from the living room, a workbench with an open lower shelf or an old cabinet will carry paint cans and boxes just fine, and using what you have also tells you what kind of shelf you actually need. When it is time to buy, freestanding units are where the heavy and the bulky belong. A Harbor Freight guide makes the split plain: wall shelves suit lighter or frequently used items, and freestanding units suit larger ones.
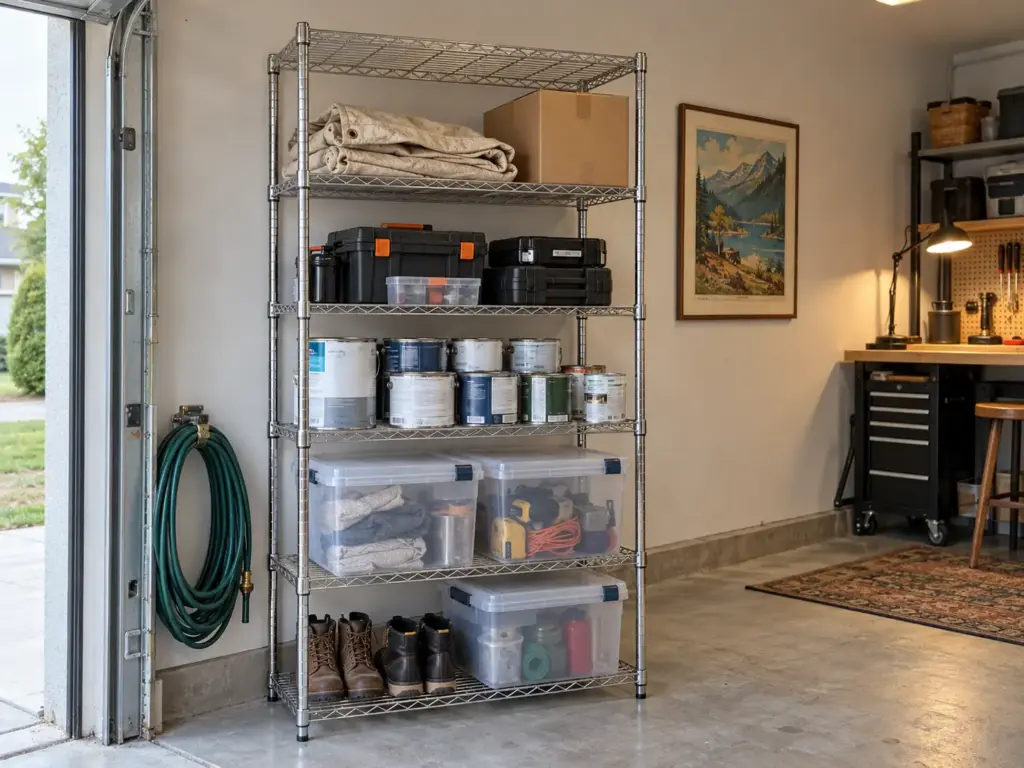
Steel, plastic or wood: what each one does well
Steel is the workhorse: Lowe’s describes steel shelving as long lasting and able to support a lot of weight, and welded steel and ready-to-assemble steel units are the two forms you will see. Plastic is lighter to move and easy to wipe down, which suits shelves that get rearranged often, but it is the material I would trust least with paint cans. Wood is fine for a bench or a repurposed bookcase and rarely worth buying new for a garage.
Harbor Freight also points to adjustable shelving for collections that keep growing, since the shelf heights follow whatever you store. At the budget end, a basic steel wire unit covers most households. At the boutique end, a welded steel rack or a cabinet-and-rail system buys a better finish and sturdier joints.
Heavy things low, light things high
Harbor Freight’s guide puts it plainly: do not exceed the weight capacity of your shelving units, because overloaded shelves can become unstable. The simple form of the rule is that paint cans, tool cases and full bins ride on the bottom shelves and the light, bulky things (a folded tarp, an empty cooler) go up high. It also keeps the unit from becoming top-heavy. Once the garage fills with “future projects” stock, this is the shelf that takes the strain, so buy for the load you have, not the load you hope to have.
Anchor the tall unit before the first load
A tall shelf is exactly the kind of furniture that can tip, so it belongs against the wall and attached to it. According to the U.S. Consumer Product Safety Commission’s Anchor It! campaign, “Anchoring all furniture with drawers, doors, and shelves to the wall prevents tip-over injuries and deaths.”
The same worry sits behind our roundup of freestanding shelving units that won’t tip. How to anchor a given unit is in the maker’s instructions.
Two steel units to start from
Both of these stand on the floor and need no drilling. The free option is still the first one to try, and a steel unit is the upgrade when what you own runs out of strength.
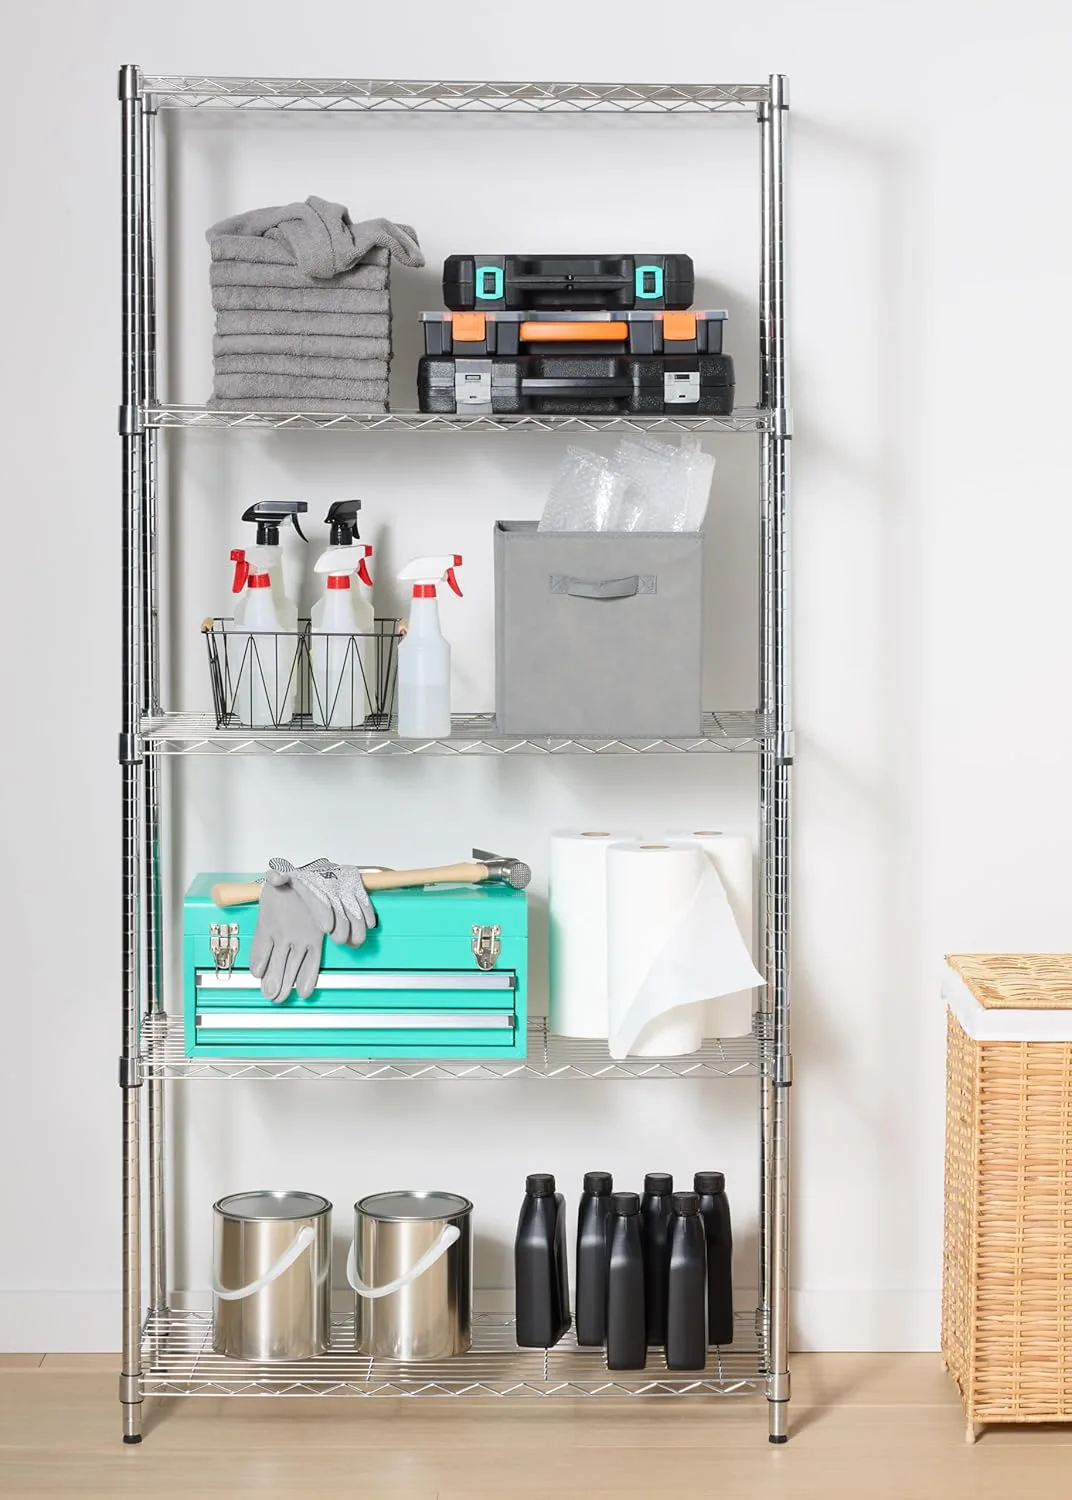
Deeper looks better, but depth has a cost. The roomier unit below holds more, yet on a deep shelf the back row disappears behind the front one, and you buy again what you cannot see. In a garage that happens fast.
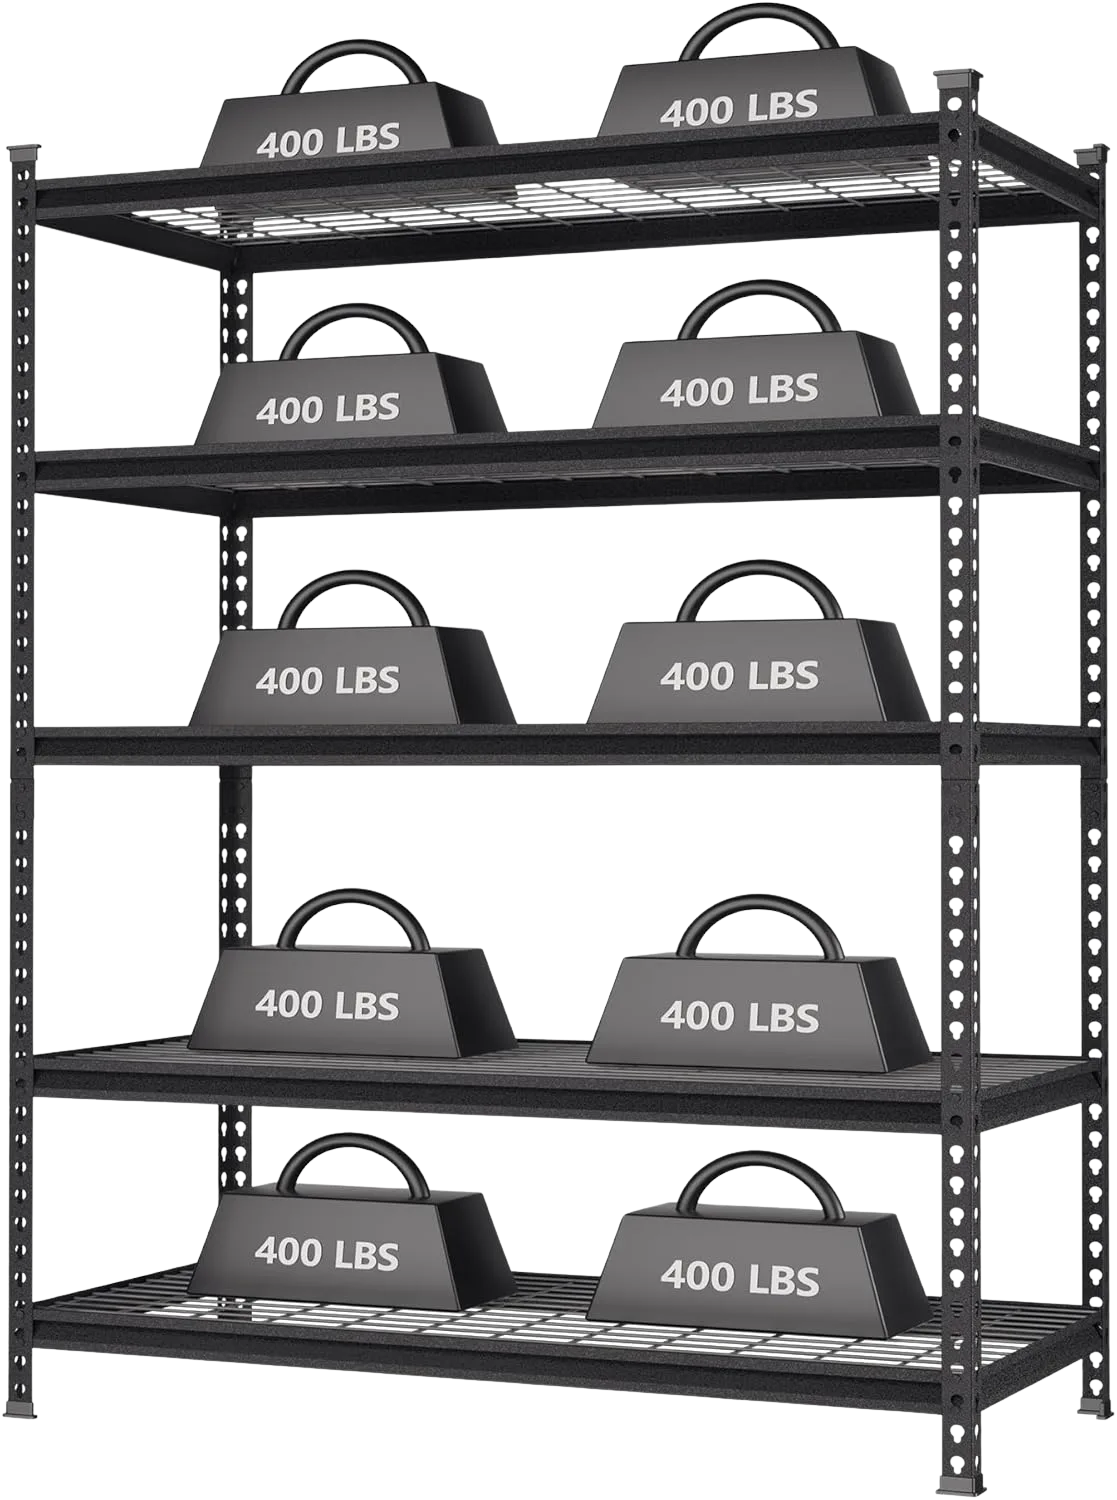
Wall Space Holds What You Use Every Week
The wall is the cheapest square footage in the garage. It keeps the floor free for the car and puts the weekly items at arm height, which is where weekly items belong. Think of the rake, hose and ball bag that lean in a corner and slide to the floor whenever the door opens. A row of wall hooks on a plain strip of wood is the cheapest fix and handles most of it, so try that before you shop for shelving.
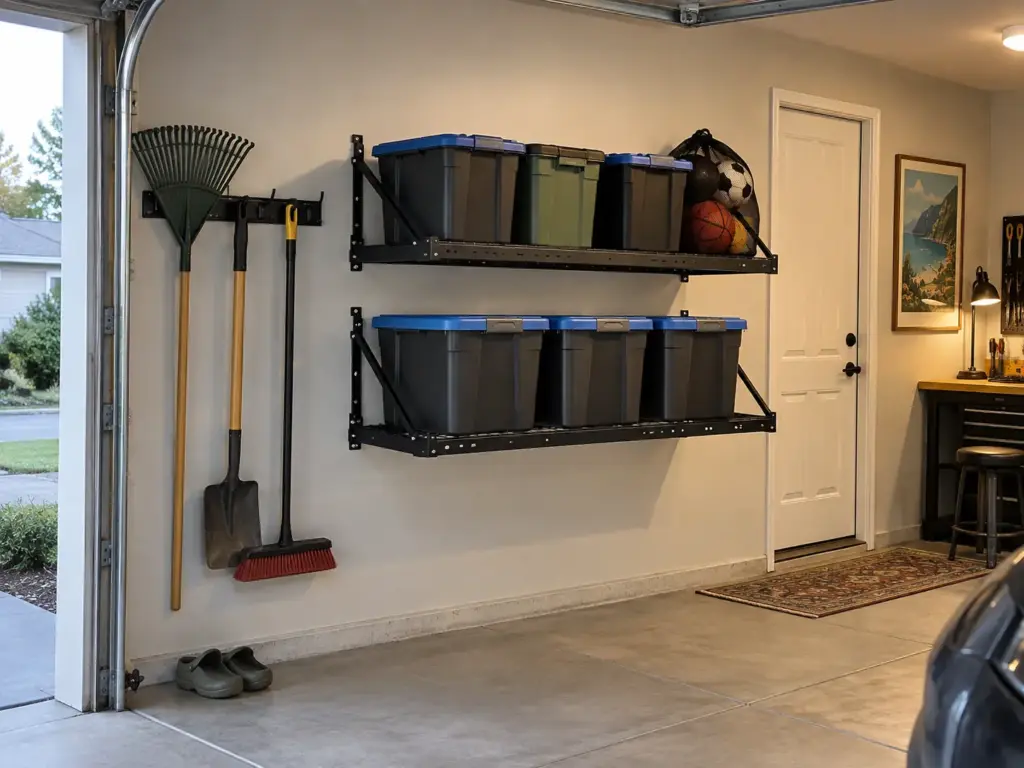
Wall shelves, rails and hooks
Harbor Freight’s guide lists shelves, pegboards and storage hooks as the wall basics, and Lowe’s notes that most of its garage shelving is wall-mounted and works well for larger objects such as boxes and tools. For the full comparison, see our guide to wall-mounted shelves that hold real weight.
The boutique end of the wall is a rail system or slatwall, where hooks, shelves and bins move along a track when the layout changes; the budget end is hooks and a simple rail.
For heavy garage items, the FLEXIMOUNTS 2-Pack 2×6 ft Heavy Duty Garage Storage Wall Shelving mounts to studs or load-rated anchors per the listing, so drilling is part of the deal. Next to it, the FLEXIMOUNTS 2-Pack 2×4 ft Garage Wall Shelving is the smaller unit, and its guardrail keeps bins from sliding while rakes and shovels have a place to lean.
What goes at reach and what stays off the wall
Wall-mounted shelves belong at chest height or below for anything heavy. The shelf you can reach without a step stool is the one that gets used, and the one that needs a step stool becomes a storage spot for things you forgot. Light, frequent items such as the gloves, the hose nozzle and the tape measure go on the wall. The heavy bins, the full paint cans and anything you would hesitate to lift overhead go on the floor shelving instead.
When you rent or share the garage
If drilling is not an option, the answer changes. No-drill garage storage means freestanding units and hooks that leave the wall intact, and they leave with you. Keep pegboard and wall shelves for a garage you own. For the full range of types, see shelving and racks that hold up.
Overhead Storage Frees the Floor, if the Ceiling Can Carry It
The seasonal totes sit on the floor of the second bay, and the ceiling above them is empty. The free option comes first: leave the ceiling empty and clear the floor by getting rid of what the totes hold. If the totes stay, a ceiling storage rack is the way to get them off the floor. Harbor Freight describes ceiling-mounted racks as the home for bulky or seasonal items you do not need often, and Lowe’s notes that overhead shelves free floor space when a car is parked inside.

The catch is that a rack hangs from the frame of your house, and that frame decides what is possible. The numbers below come from one maker’s manual, so they describe that maker’s rules, not a universal standard.
What one overhead-rack maker asks of your joists
The SafeRacks assembly manual says that in a wood-framed garage the joists should be at least 2 x 6 standard lumber and 24 inches or less apart, with at least 2 inches of lag-screw penetration. A truss ceiling can work if the bottom chord is a 2 x 4, and a steel-framed home is not an install target at all.
The manual also says, in effect, that the weakest point in this system is the frame of your house. That sentence is the most useful one in the document. A rack is only as strong as the wood it hangs from, so find out what is above the ceiling before you buy anything.
If you are not sure about your joists, an installer or the maker’s help line is the answer, and the manual says the same. Putting the rack up belongs to the maker’s instructions.
How much weight each frame size takes
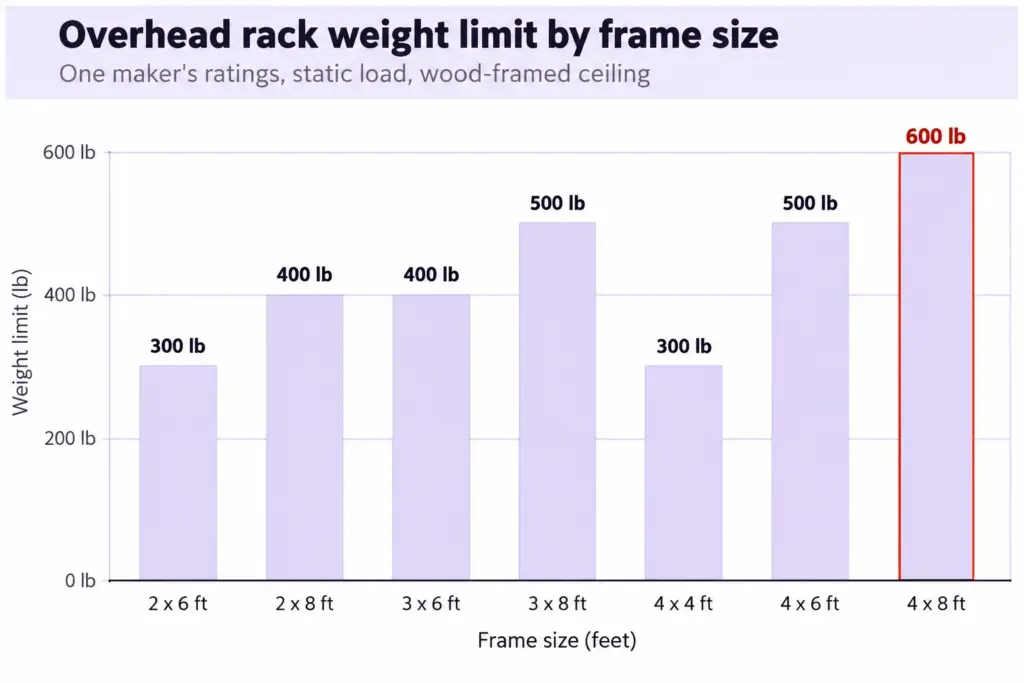
SafeRacks rates its racks by frame size for a static load. The range runs from 300 lb for a 2 x 6 ft or a 4 x 4 ft frame, through 400 lb for a 2 x 8 or a 3 x 6, to 500 lb for a 3 x 8 or a 4 x 6, up to 600 lb for the largest, a 4 x 8 ft frame. The manual also says some sag is expected near the limit. Other makers have their own ratings, so treat these as one maker’s rules and add up what you plan to store before you pick a size.
The biggest frame is not automatically the right one. A 600 lb rating means nothing when the joists above it cannot carry the load, and a smaller frame with an honest load is better than a big one filled to the edge. Your ceiling sets the real limit, not the rack.
How you load it matters as much as what it can hold. The manual says to put heavy objects nearest the vertical posts and lighter ones toward the center, spread evenly, and never to climb on the rack or hang from it. Inspect it now and then: rivets and wire decking seated, brackets and lag screws not pulling out, nuts tight. A backed-out rivet is an early warning, and a routine look catches it.
Choose the hang height around doors, lights and the car
Before deciding how far down the rack hangs, think about everything that moves in that space: the garage door and its track, the access door, the overhead lights and the car, including auto parts. The manual lists these specifically.
Measure the door swing and your car’s roof height before you pick a height, because a rack hung too low becomes a hazard. And one hung too high becomes a rack nobody uses. The best height is the one where you can reach the seasonal tote without stretching and the car passes underneath without a second thought.
Cabinets Close the Door on What Should Not Sit Out
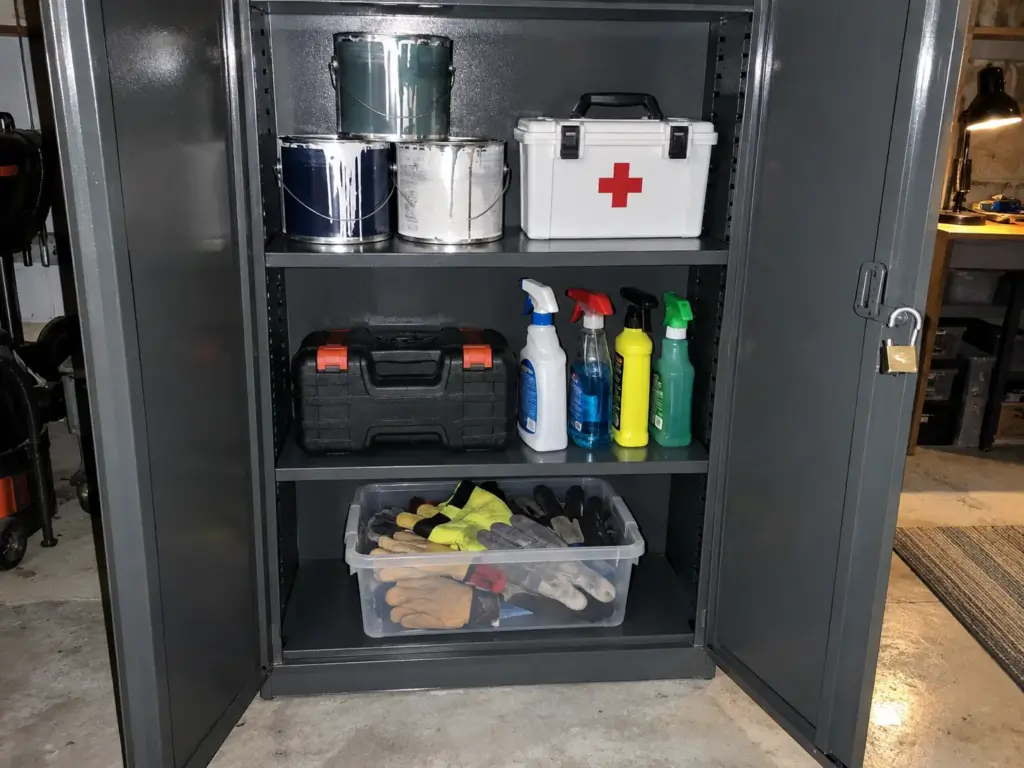
Say the paint cans and cleaning bottles sit on an open shelf at toddler height. That is a storage problem and a household one, and cabinets exist for exactly this. Cabinets are where the “rarely” group lives, and for chemicals, paint and sharp tools they are the right answer. Harbor Freight’s advice is to secure heavy items in lockable cabinets or with anchors.
Metal, wood composite or plastic
Metal is the usual choice for tools and paint: Harbor Freight calls metal cabinets durable and sturdy, suited to heavy items and the rough conditions of a garage, and they take magnetic hooks and tool holders as accessories. Wood composite cabinets and plastic cabinets exist too, and Lowe’s warns that they can be heavy as well.
The budget version is a basic steel cabinet with a lock. The boutique version is a garage-cabinet line from a big-box brand (Lowe’s lists Gladiator, Kobalt and CRAFTSMAN), with matching doors and a finished look.
Lockable doors and who they are for
A lock matters when children, a shared garage or a visiting crowd is involved. If the only people in the garage are adults who know what is on the shelves, a latch is enough. If there are toddlers, a lock on the cabinet that holds chemicals is a decision, not an upgrade. It is also the one place in the garage where hiding things is the goal.
Before you buy, check the door swing against whatever will stand beside the cabinet. A cabinet whose doors hit the shelf next to it ends up propped open or left unused.
Wall-mounted or freestanding: the weight catch
Lowe’s points out that most garage cabinets are freestanding, and that wall-mounted ones tend to be heavier because they are made with more material, steel especially. That makes the mount part of the purchase: it has to be up to the load, and a freestanding cabinet sidesteps the question.
The other thing to know about a cabinet is that you cannot see into it. A closed door hides what is inside, so a cabinet works best for the group you rarely need, and an item you forget is in there is an item you will buy twice.
A Work Zone and Tool Storage That Shows What Is Missing
Your screwdriver set lives in three places and the wrench is in the car. Tools are the first thing to scatter, and the cure is a place where each tool has a home and a gap shows when it is not there. A GarageJournal thread about a shared race-car garage describes the alternative: the garage became a huge mess whenever the two of them worked on something, and a weekend almost every month went to cleaning it. The work zone needs a place to put tools back, or the mess spreads.
The workbench with drawers
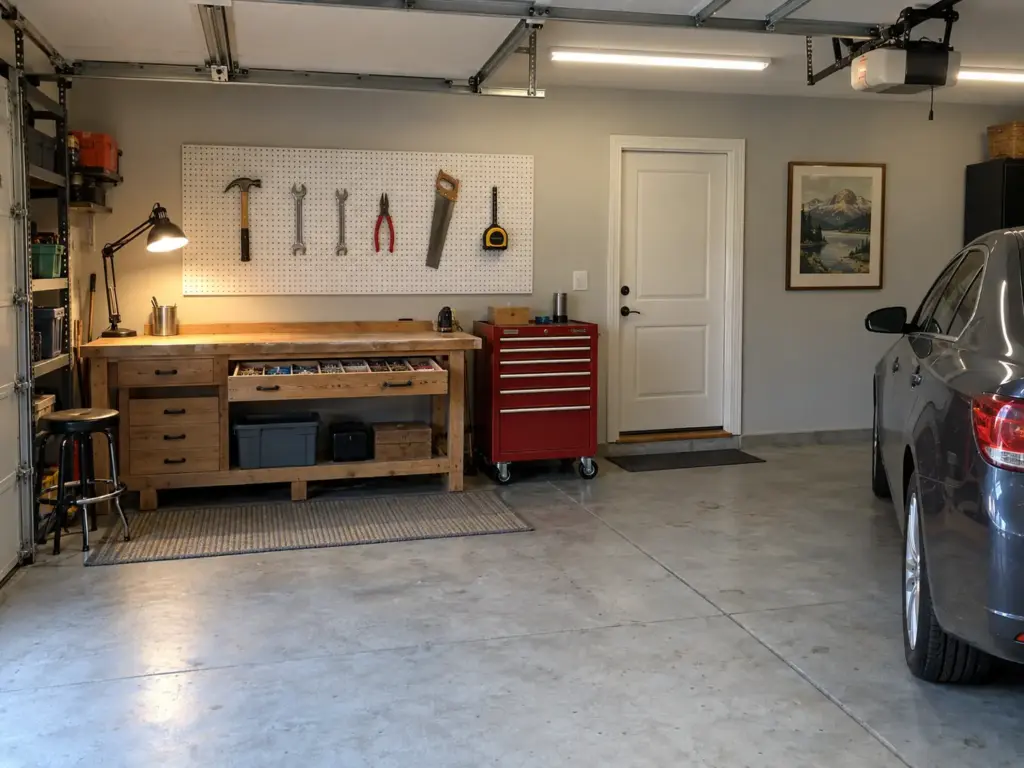
A workbench with drawers is the center of the zone. Put the screws, bits and small parts in labeled compartments in the top drawers, and keep the heavier tools lower. A bench is also a surface that attracts clutter, so the rule is that the top is for the project in progress and nothing else. Lockable drawers help if there are children around or if the garage is shared.
Roll cabinets and carts for the tools that travel
A roll cabinet or tool cart suits the tools that go to the project instead of the other way around: the drill, the level, the sockets. It parks beside the bench and rolls out to the car or the yard.
Modular toolboxes do the same job at the smaller end, and Harbor Freight notes that an end cabinet or locker lets the system grow later. A drill rack keeps the cordless tools in one findable place. The budget version is a plain cart, and the boutique version is a matching cabinet line.
A pegboard wall for the tools you reach for
Pegboard shows every tool at a glance, according to SlashGear’s piece on budget tool organization, and it takes little floor space. Slatwall suits heavier tools. A missing wrench shows up as a gap, which is the whole point. For the budget end of the garage, a pegboard and a hook kit make the cheapest tool wall.
An older Structure Tech how-to adds the practical wrinkle: on drywall, pegboard needs furring strips behind it so the pegs can protrude through the holes. Follow the board maker’s instructions for hanging it.
Bikes, Ladders and Yard Gear Need Their Own Place
The bikes lean on the car, the ladder is behind the shelves, and the kayak paddle is never where you left it. The bulky things take the most floor and get the least thought. Each one needs its own rail, hook or hoist, and each asks something different of the space.
Bikes off the floor
The free fix is a bike hook or a wall bike rack for the bikes ridden every week (Lowe’s lists both among its garage accessories). A bike hung by the wheel takes a small footprint. A hoist is for the bikes you do not ride every week, the ones that otherwise sit in the way.
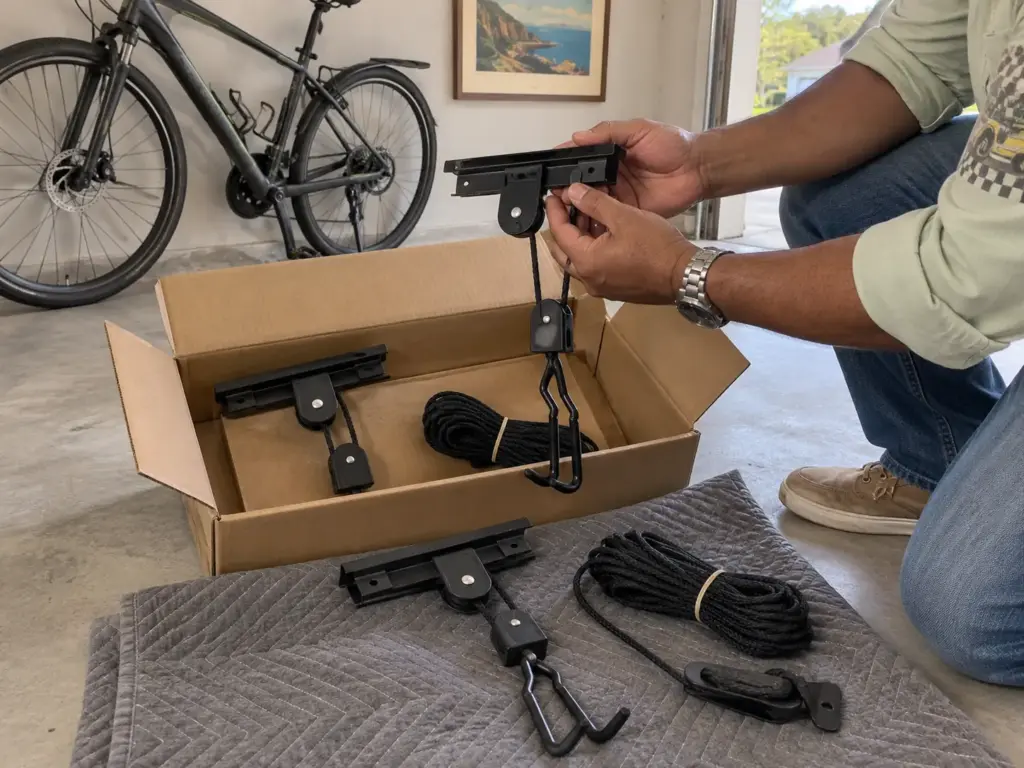
Harbor Freight notes that ceiling racks and pulley systems store bulky items such as bikes and kayaks overhead, and that a pulley makes retrieval easier and safer; a kayak hoist works on the same logic. That is the contradiction worth stating: the hoist is the obvious pick, and for the weekly bike it is the slower one.
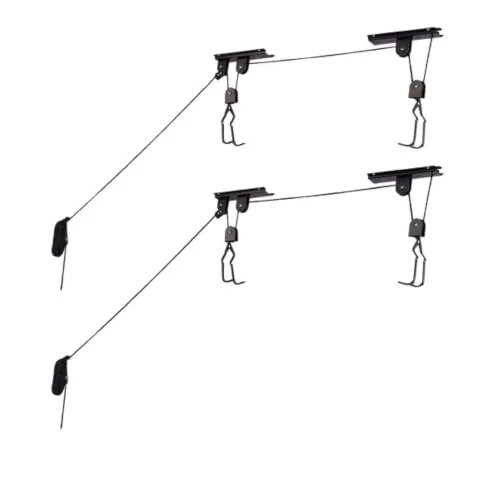
Because a hoist is a ceiling-mounted fixture, it is a decision for owners, not for a rented garage, and putting it up belongs to the maker’s instructions. The pulley is there so that nobody lifts a bike overhead by hand.
Ladders and long-handled tools
Ladder storage is the awkward one: a ladder is long, heavy and ends up behind the shelves because that is where it fits. Harbor Freight lists hooks as the way to keep bikes, ladders and garden tools off the floor, and the one rule is that the hooks must be rated for the ladder’s weight. Lowe’s recommends rail systems for hanging shovels, rakes and other yard tools, handles up so the heads do not tangle. The test is whether you can grab the one you want without moving three others.
Sports and seasonal gear
Balls, helmets, camping gear and pool toys belong in stackable storage bins, stacked by weight with the heaviest at the bottom and labeled on the narrow end. A bin per sport or per season means that when the season turns, one bin moves. Long items such as paddles and fishing rods get their own rail, since they never fit in a bin.
Budget Garage Storage Against the Boutique Version
You have seen the garage online with matching cabinets, a slatwall and a polished floor, and you assume anything less will fail. It will not. The first move is the free one: sturdy furniture you already own, shelving from the spare room, a table that can hold bins. The real question is what extra money buys, and where it is worth spending.
The cheap setup that does most of the job
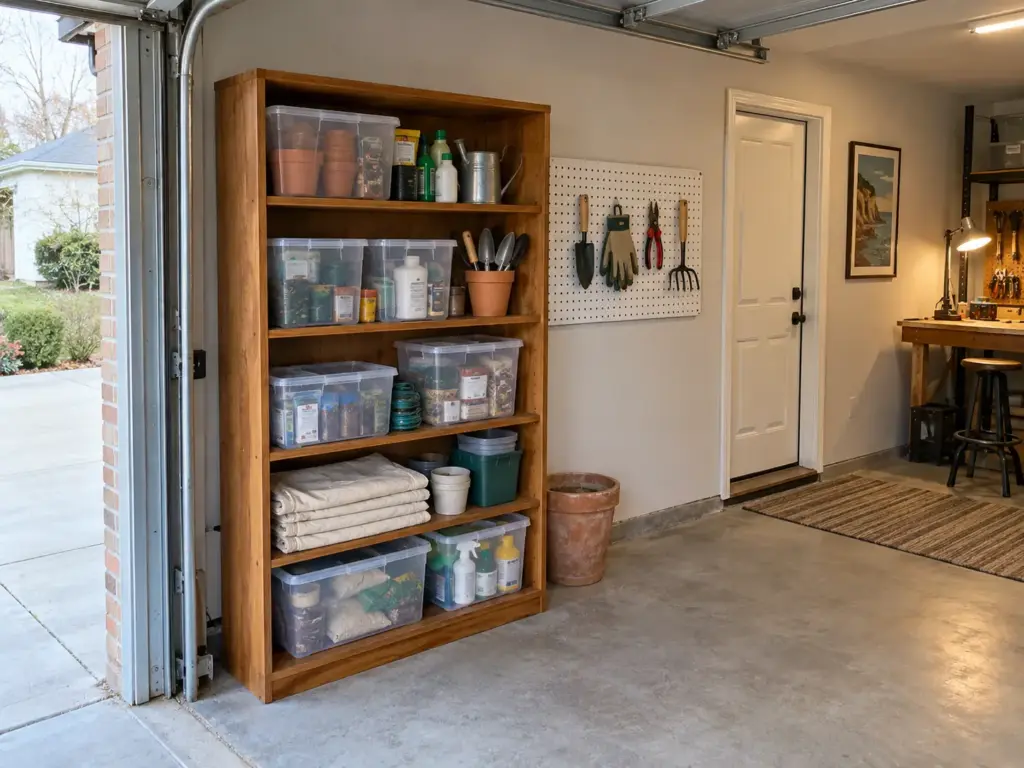
The cheap setup is a basic steel shelving unit, a pegboard with a hook kit, hooks on the wall and a set of lidded bins. That covers the weekly and seasonal groups, which are most of what a garage holds. A pegboard with a hook kit is the cheapest tool wall according to the SlashGear and Structure Tech pieces, and steel shelving is the cheapest way to carry weight. None of it needs a contractor, and none of it needs a matching set.
A cheap system that the household maintains beats a premium one it ignores. That is the point of the anti-sell: the right amount of money is the amount that gets used.
Buy in two rounds. Round one is the cheap version of every zone, lived with for a month. Round two upgrades only the zone that proved it gets daily use, because by then you know how heavy it is, how often it is opened and who opens it. Boutique spending before that month is spending on a guess.
What cabinet and rail systems add
The boutique end is a full garage storage system: Gladiator-style GearWall panels and StoreYourBoard rails, along with matching cabinets in a single finish. What they add is polish, modularity and a layout that can change without new holes. A rail system lets you move hooks and shelves along the track when the household’s needs shift.
A cabinet wall hides everything behind one set of doors, which is tidy and also hides the clutter you did not sort. These are real advantages. They are not a substitute for sorting, and none of them makes a garage tidy on its own.
The drawbacks of the boutique end are its selling points seen from the other side. Matching doors hide what you did not sort, and a layout built around today’s belongings has to be rebuilt when the belongings change. A basic steel unit has no layout to rebuild.
Where spending more is worth it
The money pays off where the household touches the system every day: the cabinet wall by the door, the rail system where the weekly tools hang, the mount that holds a wall unit. Spend on the zone the family uses most and keep the rest basic. For the reasoning behind that, see why budget makeovers revert, which covers the same trap in a closet: a cheap system fails when it has no owner, not because it is cheap.
The first budget move is also the quietest. A GarageJournal member bought things he already owned and then lost them. Sorting and finding what you have comes before any purchase, and it is the one step that never goes on sale.
Why Garage Systems Slide Back Into a Pile
Say you reorganize on a long weekend, and by the next month the second bay is boxes again. That reversion is not a character flaw, and it is not a failure of the shelves. It is a mechanism, and once you can see it, you can build against it. The pattern repeats in garage threads: the system works for a while, then something small breaks the rule and the rest follows.
The floor by the door is the first casualty
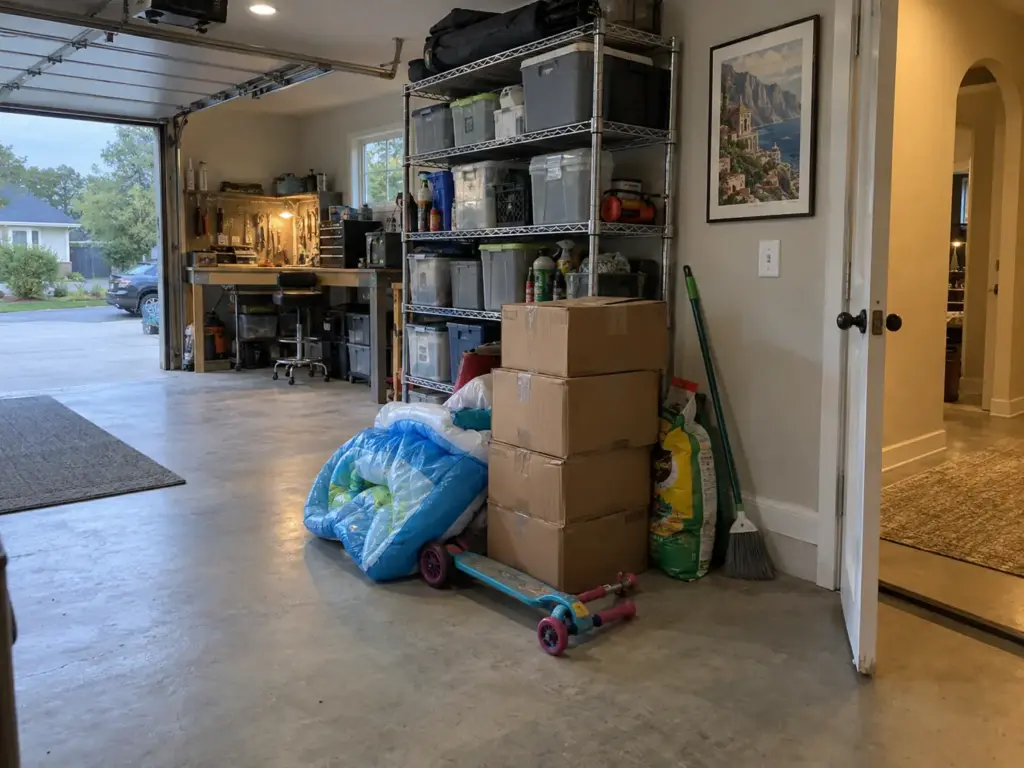
The floor by the entry door is where the unplaced item lands. A box comes in from the car, the hands are full and the door is right there, so it goes on the floor. Nothing is wrong with that box, but a system with no named spot for “I’ll deal with it later” always loses to the pile.
Within a few weeks the pile has a bag of soil on it, a pool float and a scooter, and the labeled shelf behind it is untouched. The fix is not more discipline. Give the pile a name and a spot, such as one bin or one taped rectangle, and empty it on a set date.
Distance decides where things land. Anything that takes more steps to put away than to drop gets dropped, so the named spot goes within a step or two of the door, and the labeled shelves further in stay reserved for things that are already sorted.
Make the “later” spot small on purpose. A single bin that fills up in a week forces the reset to happen. A whole corner never fills up, so it never forces anything.
Deep shelves and “future projects” stock
The GarageJournal member’s five years of “future projects” is the common version of this. He kept accumulating stock for projects that never started, and the garage became storage for intentions. Deep shelves make it worse, because the item pushed to the back is gone: you cannot see it, so you forget it, and the stock grows.
If you recognize the stock, it is worth reading why the one-in-one-out rule stops working, since the same month-three failure shows up on the decluttering side. A shelf that holds the stock you never use is also the first shelf to overload.
The pattern runs on a schedule, too. In a GarageJournal thread about a two-person race-car garage, the first setup, a workbench and shelves along the back wall, worked for about six months before the mess came back.
Buying it twice because you could not find it
The same member described buying something he already owned because he could not find it, and writing off the old one as lost “for all time.” Deep shelves and closed cabinets hide what is inside, so the item you cannot see is the item you buy again. The loop costs money and floor space, and it feels like a shopping problem when it is a visibility problem. Clear bins, labeled ends and a rule that every item has one spot break the loop.
The Monthly Reset That Keeps It Running
The household agrees on the system on Saturday, and by Wednesday nobody follows it. A garage is shared space, so it is nobody’s job, and that is the whole problem. The price of having no reset shows in that same race-car garage, where “a weekend almost every month” went to cleaning once the setup slid. A schedule is cheaper than that weekend.

Give each person a zone
Give every zone an owner. The car bay has a rule: nothing stays on the floor of the car bay overnight. The weekly wall belongs to whoever uses it most, the tool zone to whoever works there and the seasonal ceiling band to whoever hauls the boxes up and down. When a zone creeps, there is a name to ask, and that is easier than a household argument about the whole garage.
When two people disagree about where something goes, the use-frequency question from earlier settles it: whoever touches it weekly gets the reach-height spot.
A reset on the calendar, not in your head
Set the reset for the same date every month and keep it short. Pin it to a date that already exists, such as the first Saturday, so nobody has to remember a new one.
The pile by the door gets cleared, the car bay gets swept, anything that wandered gets returned to its zone, and one item that has not moved since the last reset gets a decision: keep it, donate it or move it to the rarely zone. If the reset takes a whole weekend, the system has more items than zones, and the answer is to remove items, not to schedule longer weekends. A short reset means the system is working; one that eats a whole day is telling you something.
What to check at three months
At three months, check which zone has crept, which bin nobody opens and which shelf the household stopped using. Each of those is an answer:
- A zone that crept needs a smaller footprint or a clearer rule.
- A bin nobody opens holds things you do not need, or sits in the wrong zone.
- A shelf nobody uses is in the wrong place or the wrong height.
Adjust the system to the household, not the household to the system, and the reset stays short.
Measure First, Sort Second, and Set the Reset Before Any Shelf
Three things carry this plan. Measure the room and protect the car bay, because every later choice depends on what is fixed. Sort by how often you use things and give each group a zone, because the zone decides the storage type. And set the monthly reset before you buy a shelf, because the system that survives is the one with an owner and a date.
Look again in three months at which zone crept back and why. That answer tells you more about your household than any layout does.
For today, clear one corner of the floor and put a name on it, using masking tape and a marker. Then watch what happens to that corner over the next week: whether things drift back onto it, and which things. That is the first honest data about your garage.
Frequently Asked Questions About Garage Organization
01What is the best garage organizing system for my garage?
The best system is a measured plan: floor shelving for bulk, wall space for weekly items, the ceiling for seasonal gear and cabinets for what should stay closed. Choose each piece by how often you use the items it holds.
02What is the most cost-effective way to organize a garage?
Steel shelving, a pegboard with hooks and lidded bins cover the weekly and seasonal items at the budget end, and sorting out what you no longer use costs nothing. Spend more only on the zone your household touches daily.
03How much does it cost to have your garage organized?
There is no single number, because it depends on the scope and on whether a system is installed for you or assembled yourself. A freestanding steel-shelving setup sits at the low end and an installed cabinet system at the high end, so get itemized quotes before you commit.
04How do I organize a garage where the car has to fit?
Protect the car bay first: measure your car with the doors open, then put storage on the walls and ceiling, and keep floor shelving out of the car’s space. Overhead shelves free the floor while a car is parked inside, according to Lowe’s garage storage page.
05How much weight can an overhead garage rack hold?
It depends on the rack and the ceiling: one overhead-rack maker, SafeRacks, rates its racks from 300 to 600 lb by frame size, for a static load. That rating assumes a wood-framed ceiling with joists at least 2 x 6 and no more than 24 inches apart, so check your own rack’s rating and your joists.
Disclaimer: ClutterlessNest is a participant in the Amazon Services LLC Associates Program. As an Amazon Associate we earn from qualifying purchases. This article may contain affiliate links — if you buy through them, we may earn a small commission at no extra cost to you. We only recommend products we have tested or genuinely believe in.