Two weeks after the hooks went up, the wall already looks tired. A rake leans in the corner because its hook sits too high to reach, one hook has tipped down at an angle, and a shelf bracket has started to sit a little proud of the paint. Reviews and home-improvement threads keep describing this same wall: a template that did not match, screws that stopped short, hardware that ran out before the last shelf.
Learning how to organize a garage wall means treating it as a surface to plan before it is a place to hang things, and the plan has six moves: map what the wall must leave free, back it so hardware has something to bite, set reach bands, pick the system by what hangs on it, deal with the awkward items, and run a pull check at one month. This guide assumes the floor is sorted, the step where you take everything out and decide what stays, so if it is still a pile, start with the whole-garage plan for zones, sorting and the monthly reset and come back.
Quick Answer
Plan the wall before you hang anything on it, in this order.
- Mark the keep-out zones: electrical panel, water shutoff, door track and car door swing.
- Find the studs and add a plywood backer where they fall short.
- Set reach bands from the people who use the wall, including a kid band.
- Pick rail, pegboard, shelf or cabinet by weight, then plan with the lowest rating.
- Give long tools, ladders and bikes their own spots, overhead if needed.
- Pull-check every hook and bracket at one month, then re-run the bands.
Map Your Garage Wall and Its Keep-Out Zones
An empty wall flatters every shelf. On paper, a long run of rail looks like free storage, and then the car pulls in, a door swings open, and the plan meets the parts of the wall that were never available. Draw those parts first. What is left over is the garage wall you can actually organize, and good garage wall storage starts from that remainder.
Mark what must stay reachable
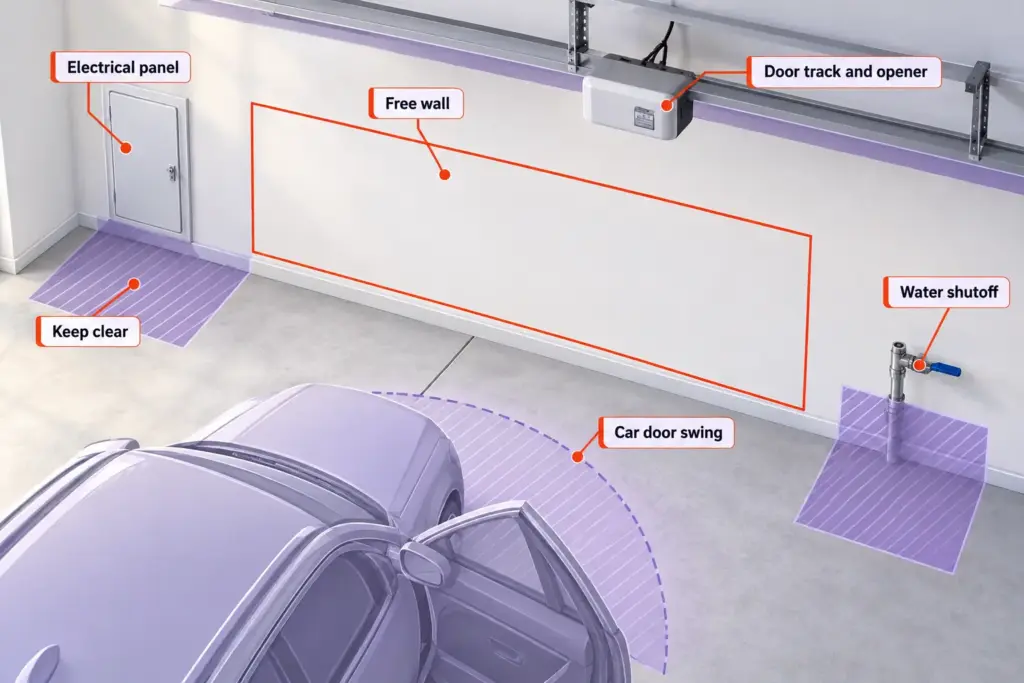
Start with anything you or a professional might need to get to in a hurry. The electrical panel is the big one. If your garage also holds the main water shutoff, or the valve that feeds the outdoor spigot, put that on the map too: a homeowner in a home-improvement thread raised the shutoff as the thing people forget to leave reachable. Add the garage door track and the opener, including the opener chain and the rail that runs along the ceiling, because anything hung near them has to clear moving parts.
The panel comes with numbers.
OSHA’s electrical working-space rule (29 CFR 1910.303) asks for 3 feet of clear depth in front of equipment up to 150 volts to ground, a clear width of 30 inches or the width of the equipment, whichever is greater, and 6.5 feet of headroom for installations built on or after 13 August 2007.
The line that matters for a storage plan is blunt. According to OSHA, “Working space required by this standard may not be used for storage.” That is a workplace standard, and homes follow whatever electrical code their area has adopted, so treat the figures as the safe minimum: keep that strip clear, and ask your local inspector or an electrician what your house is held to. The bins you meant to park low under the panel go somewhere else.
Measure the car and the door swing against the wall
Park the car where it really parks. Open the door the way you open it on a busy morning, all the way, not the polite crack, and mark the edge of the door and the mirror on the wall, because mirror clearance is usually what runs out first. A side wall next to a parked car is capped by that swing, so the depth of whatever stands there comes from the car, not from the catalog. Shelf depth is the number that depends: a deep unit that looks like better value is the worse buy if the door hits it, and a narrow wall unit that clears the door will hold more in practice because it actually gets used.
When the car wins, give up the wall and go up. A Garage Journal owner with a garage ten feet wide kept the side wall clear for head clearance and hung shelves from the ceiling instead, high enough that people walk under them without meeting a bracket. The trade is real (overhead storage is slower to reach), but it beats a wall everyone has to turn sideways to pass.
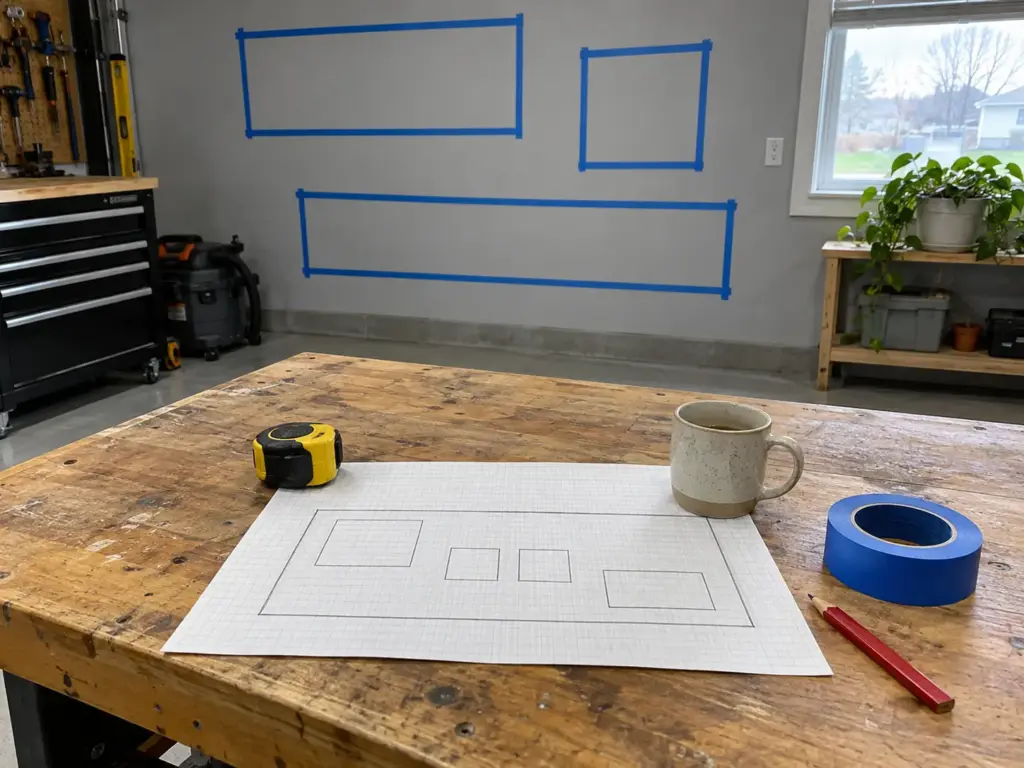
Mark the car door’s full swing and mirror line on the wall with painter’s tape and leave it up for a week of normal use. Whatever you keep brushing past, or stepping around with groceries, is telling you the real edge of your keep-out zone.
Draw the wall before you buy anything
Sketch the wall on grid paper: its width and height, windows, doors, outlets, pipes, and the keep-out blocks you just marked, shaded in. Mark the car’s footprint too. Once the shaded blocks are on the page, the free wall usually looks smaller than the empty one did, and that is useful, because it tells you how much of your gear has to go into a cabinet, up to the ceiling, or out of the garage.
Keep the sketch. Every later decision in this guide, from where the studs fall to where the kid band sits, goes onto it, and a shopping list built from a sketch rarely ends in a return trip.
Back the Wall: Studs or a Plywood Backer
Hooks that look fine for a fortnight and then lean were usually never fixed into anything. Drywall looks solid because it is flat and painted, but it is gypsum between two sheets of paper, and a screw in it only has that to hold. What you fix into decides how long the wall holds, so decide it before you pick a single hook. The workbench wall, where the heaviest tools live, is where it matters most.
Find the framing before you plan the layout
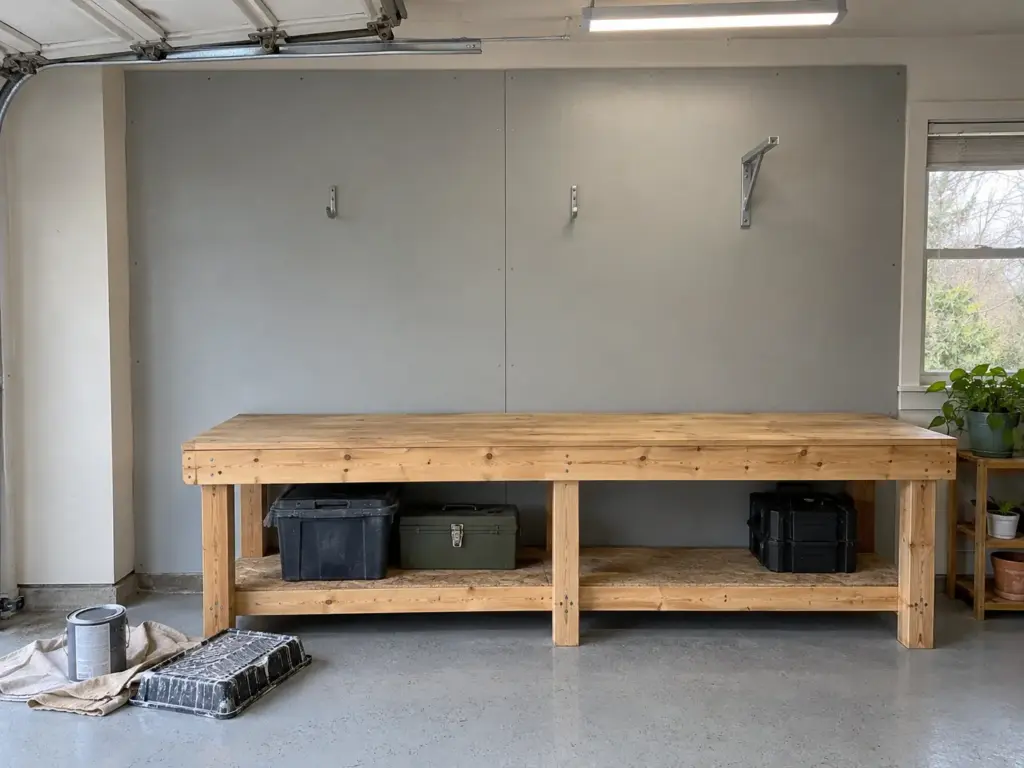
Locate and mark the studs before any wall-mounted storage goes up, because the plan is to fasten into studs wherever the load is real. In an unfinished garage this costs nothing, because the framing is visible, and one homeowner simply screwed hooks straight into the exposed studs to keep a leaf blower and broom within reach. That is the cheapest wall there is, and it works for exactly as long as the things you hang land where the studs are.
Behind finished drywall, use a stud finder and mark the line on the floor or on a strip of tape. Do it after the wall is cleaned and before the final coat of paint if the wall needs one, since you should paint before hanging anything. A homeowner in a home-improvement thread advised mapping the studs before that last coat, and a strip of tape or a mark on the floor survives a roller where pencil does not.
When a plywood backer beats single studs
Studs sit at set spacing, and your tools do not. A plywood backer fixes that, and it is an ordinary garage wall DIY job. Three-quarter-inch plywood is the common spec, screwed into several studs and then used as the surface everything else mounts to. The load of each hook spreads across the sheet instead of resting on the one stud it happens to meet, and you can put a hook anywhere on the sheet, not only where the framing falls.
The mechanism is worth knowing, because it explains the lean. A hook or bracket carrying weight pulls down and out. In bare drywall, that pull crumbles the soft core around the threads, and the fastener slowly works loose. In wood, the threads bite and stay.
A backer is more material and more work, but it is the difference in how the wall gives up: gradually with drywall, hardly at all with a sheet of plywood screwed across several studs.
Screw length matters more once a backer is in play. The fixing has to pass through the plywood and the drywall and still reach the stud, which is a longer screw than most brackets ship with. Washer-head screws are the usual pick for the sheet itself, because the wide head sits flat on the plywood.
The HOME MASTER HARDWARE 12×8 inch heavy-duty shelf brackets (10-pack) show the problem: the listing rates them at 600 pounds per pair, and one reviewer’s only complaint is that the screws are not long enough. Buy screws for the wall you have, not the ones in the bag.
Lay a bracket against the wall and add up what its screw has to cross: the bracket’s foot, the plywood, the drywall. Then pick a screw that is longer than that stack by enough to bite into the stud. If the bag screws are shorter, throw them in the spare-parts jar.
The drywall-only fallback and its limit
Sometimes there is no stud where the bracket has to go, and a backer is not an option. Toggle bolts are the fallback, not the first choice. They spread the load behind the drywall instead of in it, which is better than a plastic anchor and still weaker than wood.
The QUALIHOME spring toggle bolt anchors (quarter-inch by 4 inch, 15-pack) are an example of the type, with a reviewer note worth reading before you buy: the listing summary mentions buyers whose toggles fell into the wall cavity, and one reviewer wrote “Listed stainless steel. Not stainless steel.” In a garage with temperature and humidity swings, that second line is a rust question, not a footnote. And if the wall behind the paint is a concrete block wall, none of this applies: block takes masonry-rated hardware, and the wall-type tree linked below covers the decision.
If you rent, the only line worth keeping from this section is that holes can be patched.
The U.S. Consumer Product Safety Commission’s holiday anchoring release recommends tips for repairing a wall after removing a furniture anchor, for people who are moving or renting. The release is about furniture and TVs, not garage shelving, but the repair advice carries over.
For a wall with no drilling at all, and for the full decision about what is behind your paint, the wall-type tree and no-drill path in the garage storage systems guide is where to go.
Set Reach Bands, Kid Band Included
The rake is leaning behind the door because its hook was put where it looked tidy, not where the person who mows can reach it. A wall organized by looks fails the first time someone is carrying something with both hands. A wall organized by who reaches what, and how often, does not.
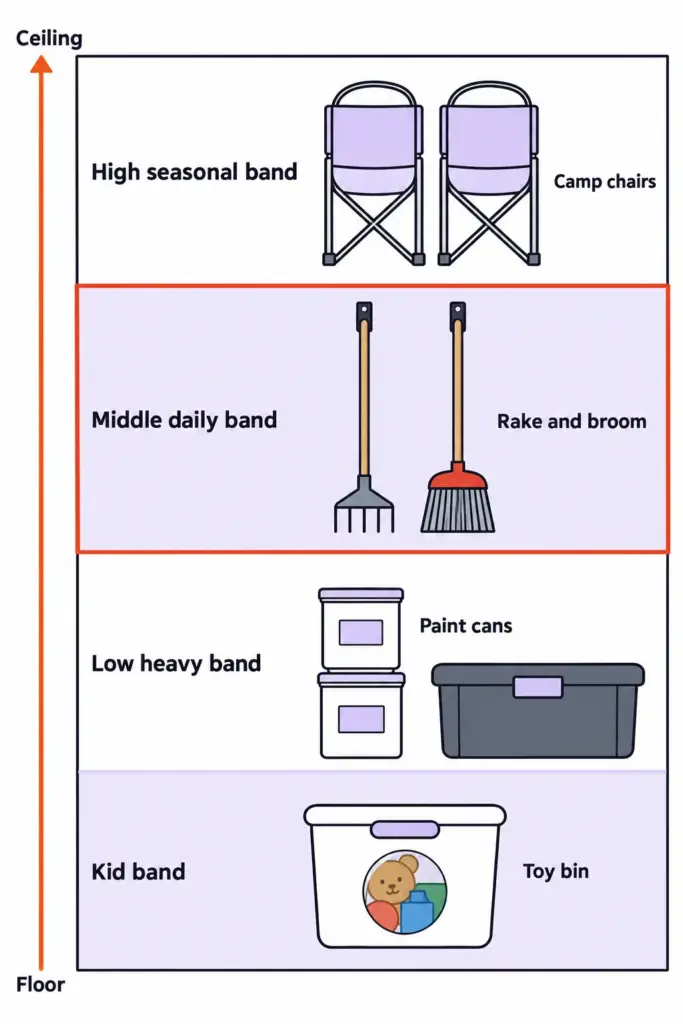
Daily things in the middle band
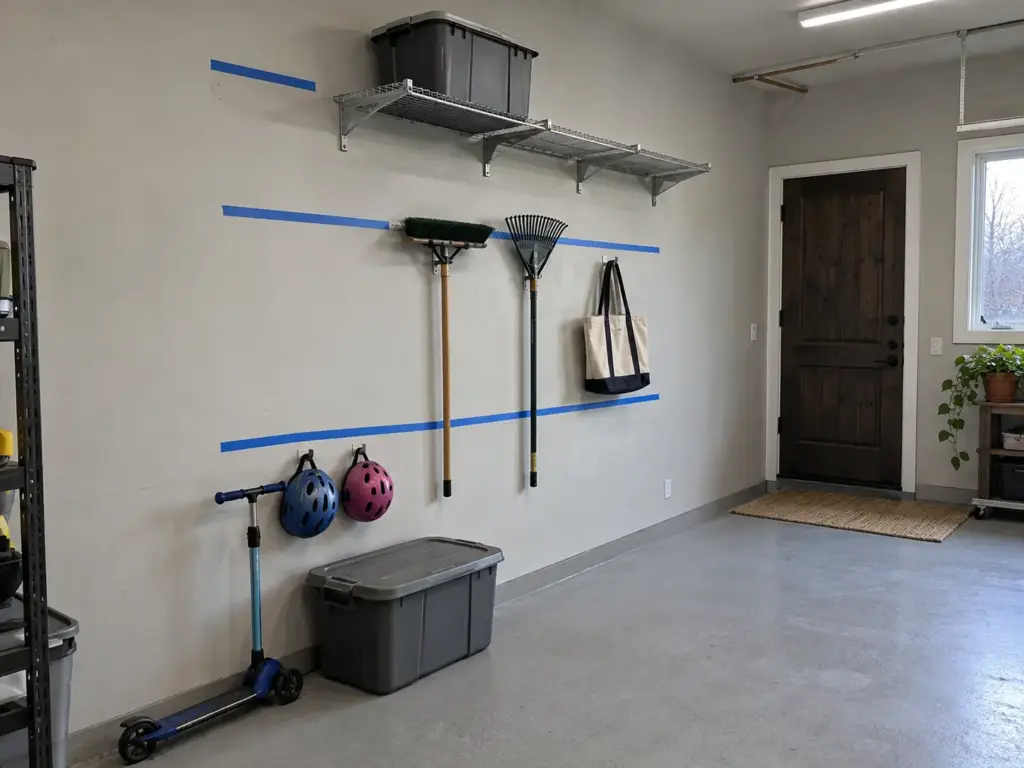
Measure the people, not the catalog. Stand the shortest regular user at the wall with a tape measure and mark a comfortable reach with painter’s tape: where a hand goes without a stretch, and where it goes without a stoop. Those marks set the edges of each height band for your household, and no height printed on a product page can do that for you.
Then sort by frequency. The daily band sits between waist height and eye level, and holds what you reach for most. Heavy things you use weekly go in a low band. Seasonal and rare things go in a high one.
The kid band sits below the daily band, at the height a child can reach, and gets its own rules, covered below.
Heavy things low, seasonal things high
A common rule says to save the highest and lowest sections of a shelving unit for the things you rarely use. For the top, that is right. For the bottom, it breaks the moment something heavy and frequently used has nowhere else to go, like a bag of soil or a power tool in a case. The better call is to sort the low band by weight: heavy and used goes low, light and rare goes high, and rare-but-heavy gets a cabinet or a floor spot rather than a wall.
Weight also decides how far an item hangs from the wall. The farther it sticks out, the harder it pulls on the fixing, so the heaviest tools hang closest to the surface and the lightest ones can take the awkward hooks. The budget route has a height trade of its own: hooks screwed straight into studs sit where the studs are, so the reach band follows the framing unless a backer moves it.
The kid band: what a child may reach and what stays out of reach
If kids use the garage, give them a band of their own and keep it deliberate. One garage guide advises keeping kid-friendly items and toys near the door, so the children can get at them without help. Put the same idea into the wall, as a kid zone with a ceiling on it: helmets, balls and a few low hooks at the height of the shortest child. Everything else, from chemicals to sharp tools, goes above that band or behind a lockable cabinet, and it matters more the younger the household is.
Anything freestanding that a child can climb needs anchoring, and the numbers explain why. Since 2000, the Consumer Product Safety Commission counts 581 tip-over fatalities involving furniture, TVs or appliances, and 472 of them involved children.
Those figures cover furniture and TVs, not garage shelving, but the lesson transfers: if a unit stands on its own and a child can pull on it or climb it, fix it to the wall. Anti-tip kits are inexpensive. The plan for freestanding shelving that does not tip over picks up where this paragraph stops.
Pick the Wall System by What Hangs on It, Then Check the Load
A rail rated for 1,750 pounds sounds like it could carry a car, and then you hang a rake on a 25-pound hook. The number that fits the wall is rarely the biggest number on the box, which is why the system comes after the backer and the bands, not before.
Rail, pegboard, shelf or cabinet: what each one holds
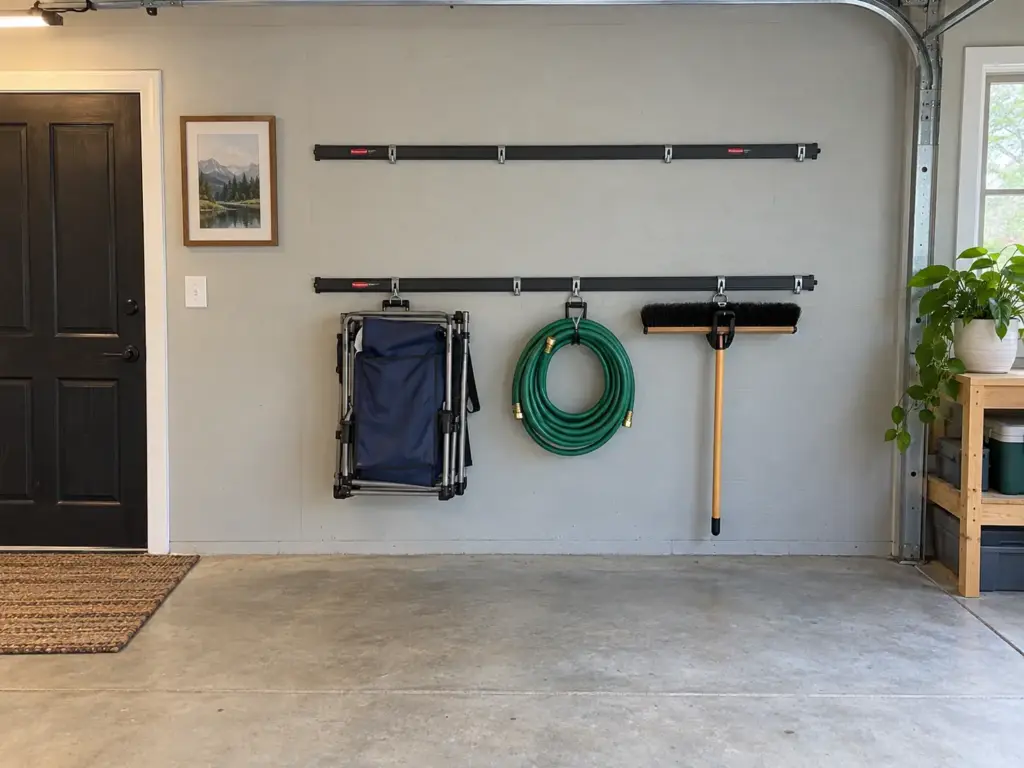
Rail and slatwall systems suit the long, awkward stuff: rakes, shovels, hoses, and the hooks that hold them, which slide along the track rail as your gear changes. A wall rail is also the easiest system to extend later.
A garage pegboard suits tools you want within easy reach, and on a pegboard wall, outlining each tool shows at a glance what is missing. A pegboard hook holds light hand tools well and heavy ones badly, so it is the wrong home for anything near the weight of a coiled hose. Wall cabinets are the answer where floor is short, because they keep things up and out of the way, and a lockable one handles anything you want out of small hands. Overhead racks take what you use rarely, as long as the rack is fixed to a ceiling joist.
A rail is not always the answer, though, and a garage wall on a budget rarely needs one. If the wall is bare studs and the load is a few hand tools, hooks straight into the framing do most of the job, and the build order and the cheapest hooks-into-studs start are laid out in the budget guide. Skip the rail until a second load shows up that hooks cannot carry.
The rating on the box is not the rating of the part that fails
The load rating that counts is the hook rating, not the rail rating. The Rubbermaid FastTrack listing gives the rail a rating of up to 1,750 pounds, then says locking hooks hold 50 pounds and non-locking hooks hold 25. Those are the manufacturer’s claims, not test results, but they tell you where the limit sits: the plan is the hook. A non-locking hook is rated at half a locking one, so the one on your heaviest item should be the locking kind.
Ratings also assume a sound fixing behind them. The box says what the part can hold if it is mounted correctly, and it has no way to know whether it was mounted into a stud, a backer or half an inch of drywall. Load pulls hooks down and out, and the pull grows the farther the item hangs from the wall. A heavy item hung close to the surface and fixed into wood is a safe design; the same item on a long arm in drywall is the lean waiting to happen.
A template is a suggestion; a level is not
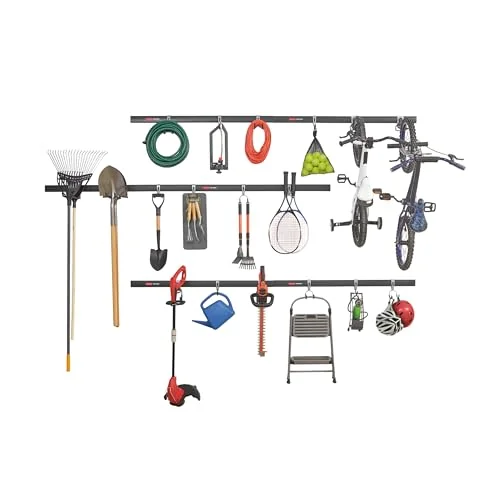
But a printed template is only as accurate as the wall it was drawn for. The FLEXIMOUNTS 2-pack of 2×4 ft garage wall shelving (Pro Series) works as a case study because its own page disagrees with itself. The listing says each shelf supports 330 pounds, 660 for the pair, while one customer review says 220 per shelf.
Per-shelf capacity is the figure to trust, since a total only holds if the weight is spread perfectly. I would plan with the lower number until the manual is in hand, and not load the shelf toward the higher one on a hunch.
The install reviews are just as instructive. One five-star reviewer wrote that the template was off, the hole distance a little short, and the level said the shelf was straight when it clearly was not, so they fell back on their own bubble levels, tape and a laser. A one-star review is titled “Don’t follow the template,” and a four-star reviewer found that mounting the shelves separately leaves you short of nuts and bolts.
The pattern is not a defect in one product. It is a reminder that holes drilled from a paper template are a guess until a level agrees.
The 600-pound figure on the brackets from the backer section follows the same logic: it is a rating for the bracket, and it does not say what wall it was rated for. For how the mount decides what a wall shelf can really carry, the wall-mounted shelves guide works through the load logic without repeating it here.
Hang the Awkward Stuff: Long Tools, Ladders and Bikes
Behind the door sits the pile nobody can pull one thing out of: rake, broom, shovel, a ladder, a folded chair, all leaning on each other. They end up there because nothing in a standard bin or shelf fits a long handle, and the floor is where whatever has no spot goes.
Long-handled tools: closer to the door, handles up
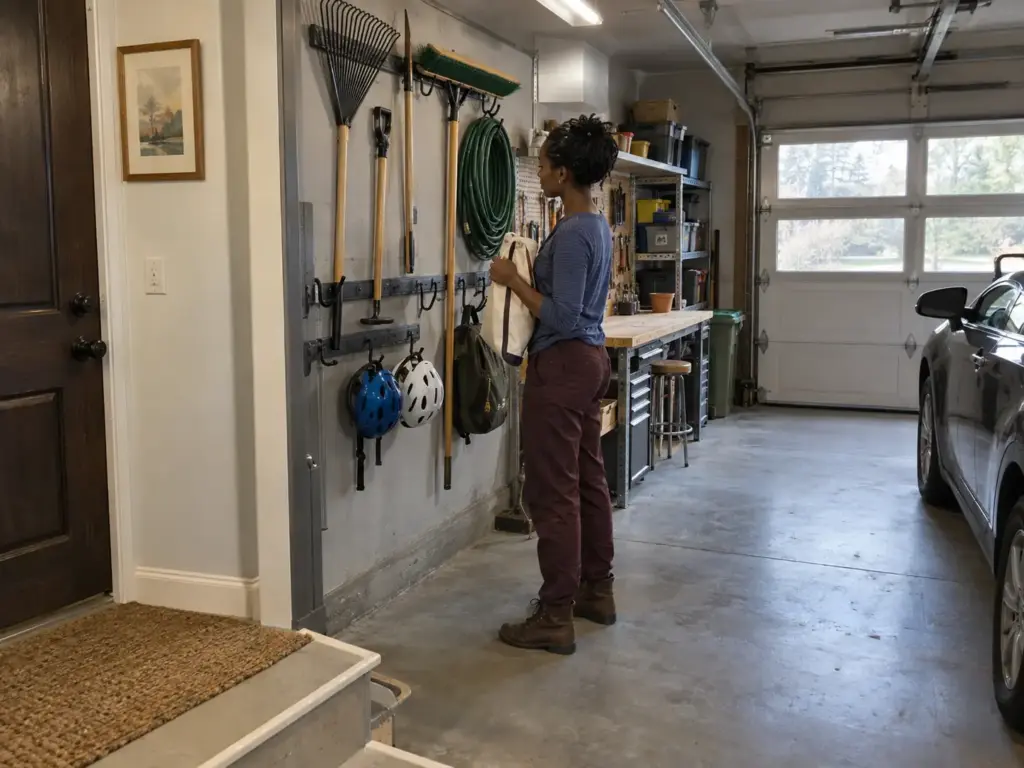
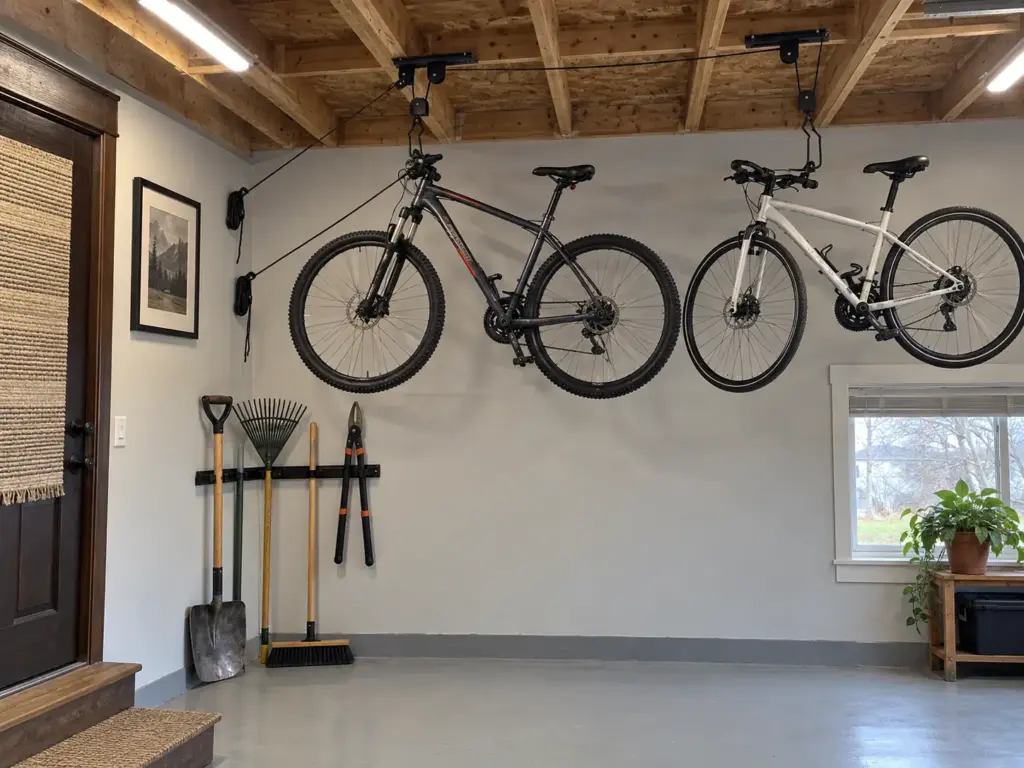
Garden tools work best near the door, since that is where they enter and leave the garage; a folded lawn chair can hang there too, from a pair of lawn chair brackets or one wide hook. Pair that with the bands from the previous section: the rake and shovel that get used most hang at the mower’s reach, and the long, light pole you reach for twice a year goes higher. Trash and recycling bins want a clear path to the outside and easy reach from the house, which also leaves the wall by the door free for the tools, and for a small drop zone for bags.
Rail hooks do this job well because they can slide and stay put. If you choose the budget route, a row of hooks into a backer or studs holds the same tools for far less, and the handles up, heads down position keeps the heavy end near the wall and away from toes.
Ladders and bikes: what goes on the wall and what goes overhead
The obvious pick for a bike is a bike hook for the wheel on the wall, and it works until the wall is short, the bike is heavy, or the household has more bikes than wall.
A ladder wants a ladder rack, or a pair of wide hooks fixed into the backer, so its weight is carried at two points instead of one. When the wall runs out, the second choice wins: lift it overhead. An overhead bike hoist mounts to a ceiling joist and uses a pulley and rope to raise the bike out of the way and lower it when it is time to ride. The RAD Sportz bicycle hoist (2-pack) is one example; the listing gives a capacity of 100 pounds and calls for a ceiling joist.
It is a ceiling piece, not a wall one, so check your bike’s weight against that number and find the joist before you buy. No repeated complaint turned up in the reviews checked, though that is a small sample, so skim the recent ones.
One safety rule keeps the whole section honest: heavy or awkward items go on a hook at person height, not up high. Lifting a bike overhead is a two-person job for most households, and a ladder is no easier to hoist alone. A system that needs a stretch and a strain to use is a system that ends up on the floor again.
Where the wall ends and the ceiling begins
Past a certain point the wall is full, and the ceiling is the next surface. Overhead racks and rails fix to ceiling joists (or the rafters, in an unfinished garage) and suit the things you use least, like seasonal decorations in clear bins, which keep dust out and show what is inside. In the narrow garage from earlier, the owner’s overhead shelves worked because they sat high enough to walk under. Keep the same test for your own: stand under it, and if you have to think about your head, it is too low.
Keep the Wall Working: The First-Month Pull Check
The hook that was fine on day one is angled by day twenty. Garage wall organization rarely fails at install. They fail in the weeks that follow, while the load settles and the fixing finds out what it is really in. A short pull-out check at the one-month mark is how you find the failures before they find your tools.
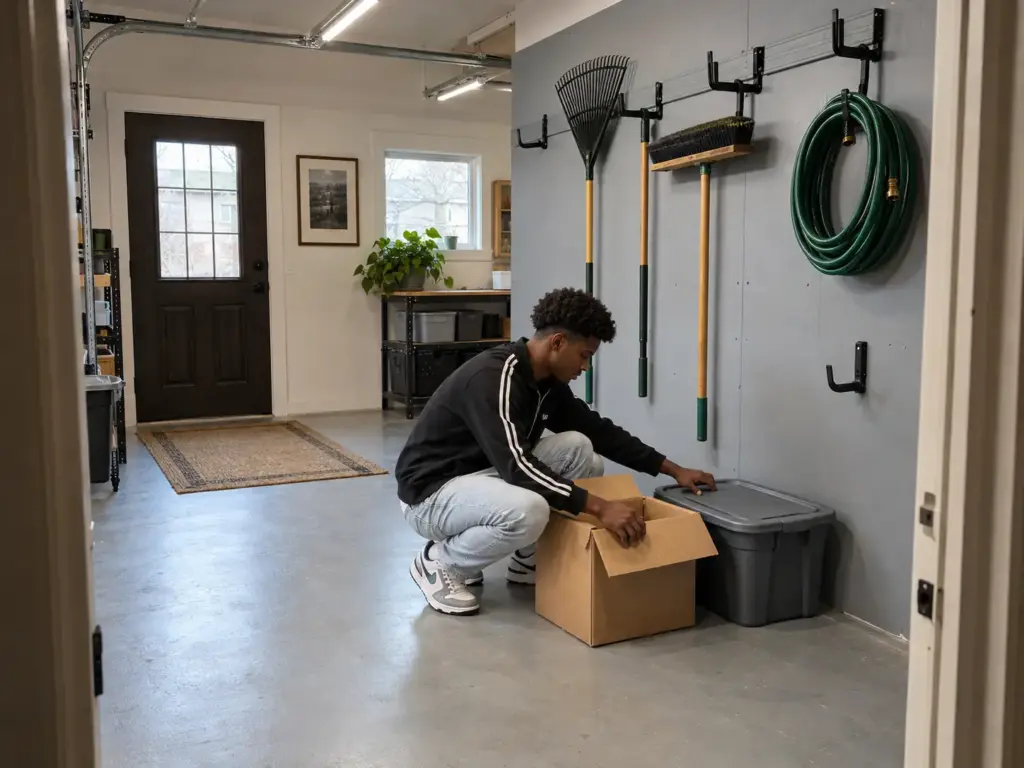
The first-month check: what to look at and what to move
The check is looking and touching, not testing. Walk the wall and look for any hook or bracket that has moved, any paint cracked at a fixing, and anything leaning. Short screws and missing hardware tend to announce themselves in the first weekend; a fixing that is slowly pulling out takes longer, which is why the check sits a month out. Move any heavy item lower or closer to the wall before you reach for new hardware, because that alone often settles it.
On day one, draw a thin pencil line along the top edge of each bracket and at the base of the heaviest hooks. At the one-month check, a gap between the line and the hardware tells you it has moved, without any tugging or guessing.
What to do when something is leaning
Fix the cause, not the symptom. A loose fixing means it sits in drywall or on a single stud, and a longer screw in the same hole will loosen again. The repair is the backer from earlier: take the item down, fix a plywood sheet across several studs, and rehang the hardware into it. If a hook has bent or an arm has sagged, check the rating and the weight, then check how far the load hangs from the wall.
The monthly reset, kept short
A wall stays organized when putting things back is easier than leaving them out. Put each item where it belongs after you use it, and keep a regular slot on the calendar for a quick pass through the garage. The monthly reset in the full garage guide covers how to run it so it takes minutes instead of a weekend.
Re-run the bands while you are there. A household’s reach changes: a child grows, a new bike arrives, someone swaps who does the mowing. When the kid band moves up, the whole stack moves with it.
Tape the Zones Today, Pull-Check the Wall in a Month
Three things carry the rest. Clear the keep-out zones before you buy anything, because the free wall is smaller than the empty one. Fix into framing or a backer, and plan around the lowest rating you can find, not the highest. And set the bands by who reaches what, with weight deciding the low band and a deliberate height for children.
In a month, walk the wall, look for movement or cracked paint at the fixings, and move or rehang whatever has started to lean. At three months, give the wall the three-month test: run the bands again against who actually uses the garage, because that is the point where the system either settled or drifted.
The small change to make today needs nothing from the store: tape the electrical panel’s clear strip, the shutoff and the car door’s swing onto the floor and wall, then leave the tape up through a normal week. Notice what you keep stepping around, and what the free wall looks like once those blocks are gone.
Frequently Asked Questions
01How do I organize my garage full of everything?
Sort everything into groups, toss or donate what you no longer use, clean the space, and zone the floor before you put anything on the wall. The wall comes last because it only works once you know what has to hang on it. The full garage plan covers the zones and the monthly reset.
02What are the 5 steps to organize a garage?
Sort and clean, plan the layout on paper, pick storage to match what you keep, put things back by how often you reach them, then schedule a reset. For the wall, the planning and picking steps decide whether it lasts.
03What is the best garage organizing system for my garage?
The best garage organizing system depends on what hangs on it: rail or slatwall for long tools, pegboard for hand tools, shelves or lockable cabinets for bins and chemicals. Match the system to the heaviest item, then check the hook rating. The garage storage systems guide goes deeper.
04How do you organize a garage wall if you rent?
If you rent, read your lease before drilling, because every stud or backer plan in this guide means screw holes you will need to patch. The Consumer Product Safety Commission offers tips for repairing a wall after removing an anchor. For the no-drill route, see the garage storage systems guide.
05Can you put shelves in front of a garage electrical panel?
No, leave the space in front of an electrical panel clear, because OSHA’s workplace rule says that working space may not be used for storage. Homes follow their local code, so ask your inspector or an electrician for your exact clearances.
Disclaimer: ClutterlessNest is a participant in the Amazon Services LLC Associates Program. As an Amazon Associate we earn from qualifying purchases. This article may contain affiliate links — if you buy through them, we may earn a small commission at no extra cost to you. We only recommend products we have tested or genuinely believe in.