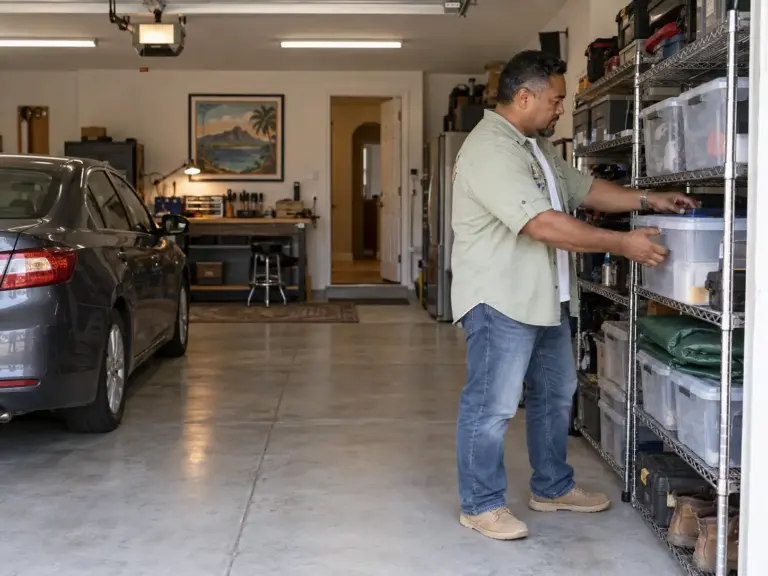
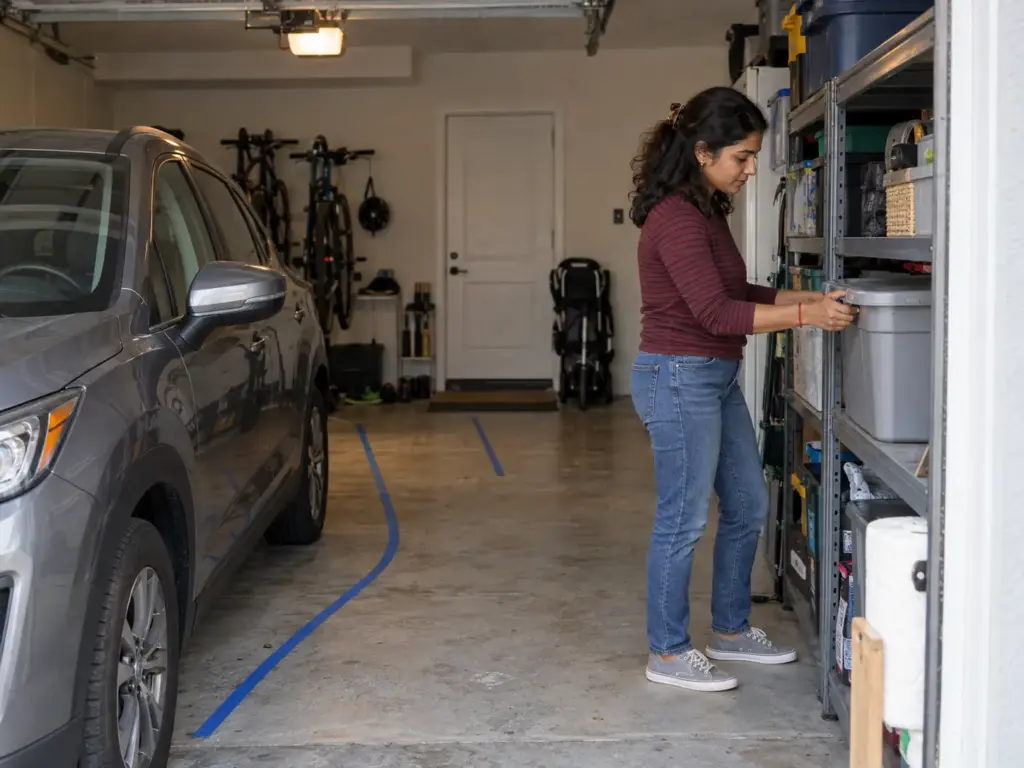
The car goes in only because the bins along the side wall got nudged a few inches over last month, and today a box sits right where the driver’s door swings. Turning sideways to get out with a bag of groceries tells you what most small garage organization tips skip: the garage was never short of storage, it was short of floor, and the car and the walk path need that floor before anything else does. Garage-forum threads keep landing on the same point, that the smaller the bay, the more careful you have to be with every addition. These garage tips are the small-bay version of organizing the whole garage, in an order that protects the car’s space first, then sorts, then puts things on the wall, the ceiling and one shallow shelf.
Quick Answer
Organize a small garage in this order, and the car keeps its space while everything else finds a home.
- Tape the car-door swing and the walk path to the house door.
- Empty the garage and sort into four piles by where each item will live.
- Find and mark the studs before any wall hardware goes up.
- Get everything off the floor that can leave it, wall and ceiling first.
- Give every item a home, with yard tools by the garage door and small gear by the house door.
- Name one drop spot and set a short reset so it never overflows.
Small Garage Organization Tips Start With the Car Door Path
Why storage fills the one floor you needed
A home-security vendor’s garage-size guide puts the most common single car garage interior at 12 feet wide by 20 feet deep, with 10 by 20 as the stated minimum for compact cars and 18 feet as the minimum depth. The same guide says a mid-size sedan needs about 12 feet of width, and SUVs and trucks more than 14. In plain English: with a mid-size sedan, the car and its two open doors use nearly the whole width of a typical bay, so anything fixed to a side wall competes with the door swing.
The same source lists the typical single-car door at 9 by 7 feet and the ceiling at about 8 feet, which means anything hung low near the door sits under a 7-foot head. (These are one vendor’s numbers, a picture of a typical bay and not a measurement of yours.)
Storage eats garage floor space because each addition looks harmless. A shelf goes in, a bin slides over, and the path nobody drew shrinks an inch at a time. One poster in a forum thread on garage space put the goal plainly: he wanted “plenty of space so that car doors are usable 100% of the time.” Notice that the goal is a door, not a shelf count.
How to mark the door swing and the walk path
There is no standard number for how far your doors swing, because it depends on the car and on how wide the driver actually opens the door. So this is a method, not a figure.
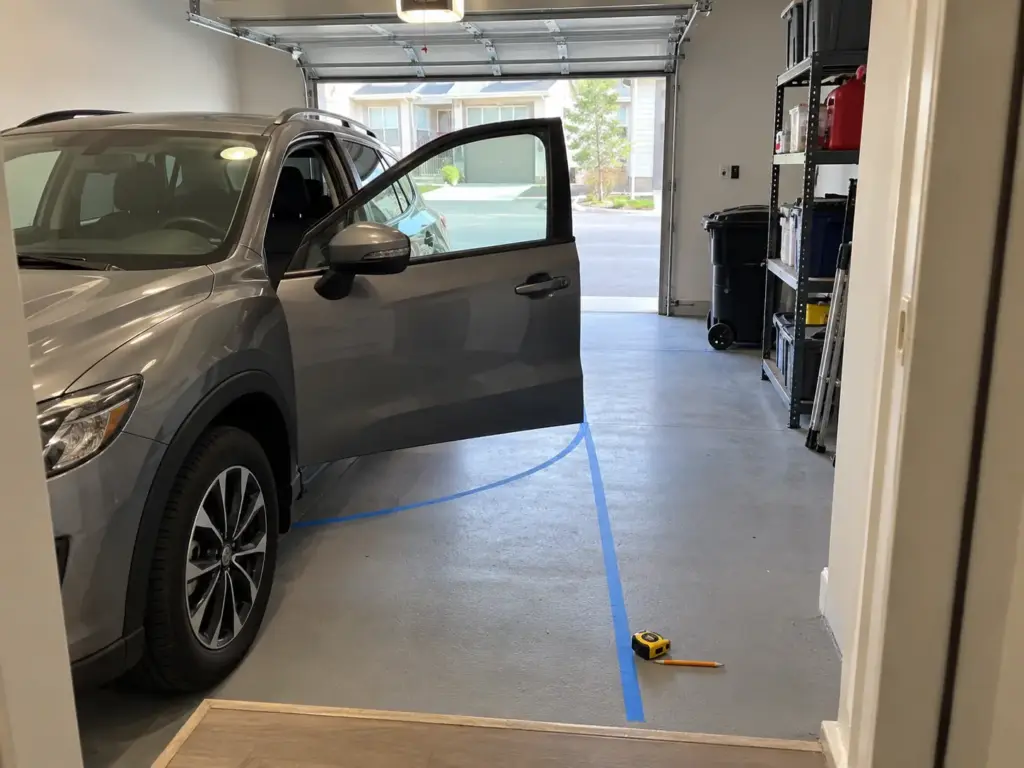
Park the car where it really lives, not where it is supposed to live. Open each door to the width you use on a normal day, with a bag in one hand. Then tape the floor at the door edges and along the path from the car to the house door.
That tape is the no-go zone. Nothing gets stored inside it, hung over it at head height, or parked on it “just for tonight.” Measure it with your own tape measure and write the width on the garage wall in marker, so the next shelf or rolling cart gets checked against a number instead of a hope.
Re-tape the zone after a few weeks of normal use. The car settles wherever the driver finds easiest, and the zone should follow where it ends up, not where you planned it.
It is the same habit that keeps under-bed bins from jamming against a bed frame: measure the clearance before you buy, then shop.
The opener track and chain: the part nobody measures
Check garage door clearance overhead before anything goes up. The opener’s track and chain run through the space above the car, and they rarely make it onto anyone’s plan until a rack is already half hung. One commenter on a single-car garage thread put a rack alongside the opener chain rather than across it, which is the right instinct. Note the track’s path now, because the overhead section below starts from it: racks and hoists go beside the opener, never in its way.
Empty the Garage, Sort Into Piles, and Give the Drop Zone a Name

Take everything out and sort by where it will live
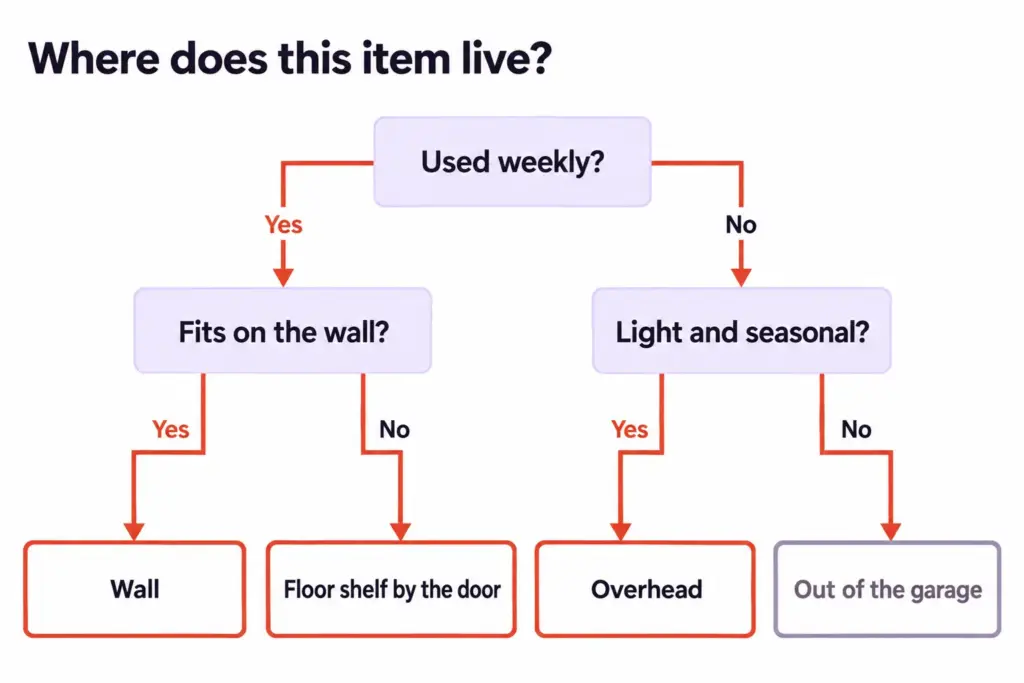
A small bay cannot be sorted from the inside, because there is no floor to sort on. Pick a dry day and carry everything out to the driveway, so the garage floor is empty while you decide. Then sort by destination, not by feeling (keep, donate or store comes second to where each item lives), into four piles: stays in the garage on the wall, stays in the garage overhead, goes elsewhere in the house, leaves the house.
That last pile is where a four-box sort earns its place. Each item gets one question, and the question is where it lives, not whether you love it. Anything that cannot answer goes in the leaves-the-house pile.
What does not belong in a garage at all
Some items belong to another room, and the garage has been holding them for a year or two. Readers commenting on a garage design post from 2020 had strong feelings about it: lampshades in a garage are “just asking” to be damaged, and holiday decorations kept there got hit by water, bees and mold, learned “the hard way.” One commenter moved the decorations to an attic after that. A garage swings between damp and hot and lets pests in, so anything soft, paper, fabric or edible is a poor tenant.
Work through the piles room by room and carry the in-house pile to its real room, even if that room is not ready for it yet. A temporary spot in the house beats a permanent spot in the garage that damages it.
Why the drop zone returns, and the one rule that stops it
You sorted last spring and found the same pile by the interior door by June. That pile is not laziness. It forms by the door because that is where unassigned items get set down: the thing has no home, so it waits at the last doorway it passed through.
Garage clutter is a placement problem before it is a discipline problem. One forum poster put the aim well: a garage “not a dumping ground where things just show up or are never put away.”
What stops it is a mechanism, not a moral. Give the drop zone a name and one container: a single bin or a single hook, labeled, on the wall by the house door. This is the same idea as a named landing spot by the door inside the house.
Then add a short garage reset: the spot is emptied to each item’s real home when the car goes in at night, or on one set day a week. Pick one rule and keep it. A reset that depends on remembering will fail by the second week.
Wall Storage That Finds the Studs Before It Hangs Anything
Map the studs and mark them where paint will not cover them
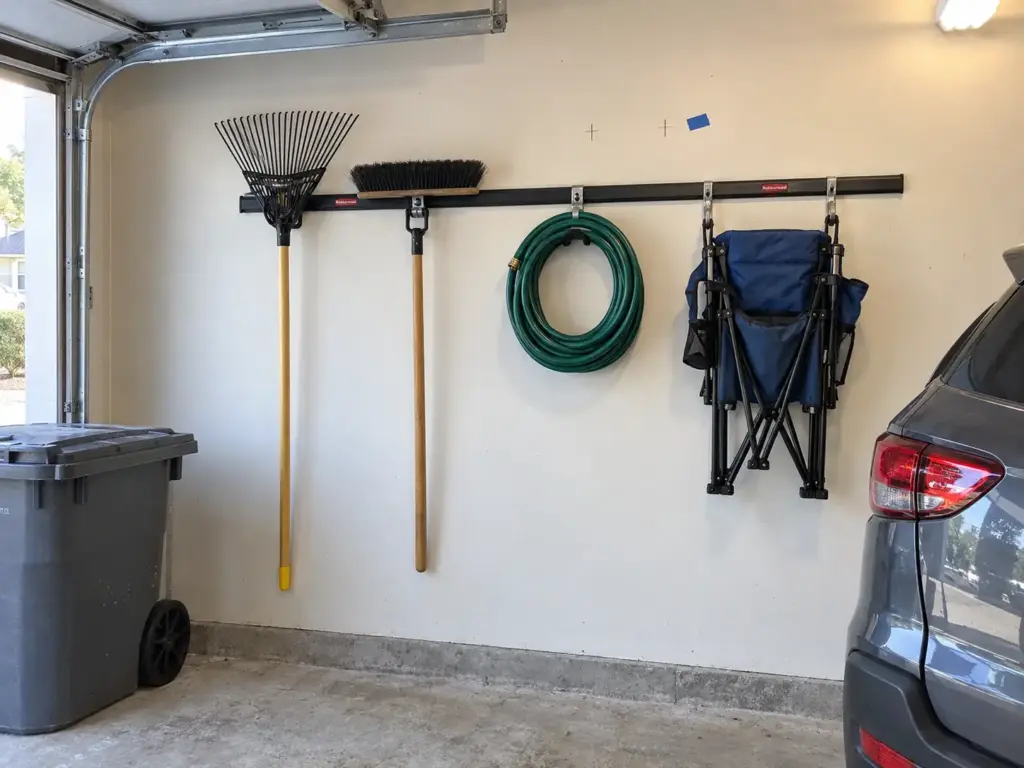
Garage wall storage fails in a predictable way. The owner who hangs garage hooks into drywall because the wall looks solid usually finds the hook on the floor a month later, and long-handled tools like a rake and a push broom are heavy enough to do it. Slatwall, pegboard and rails all share the same weak point: where the screw goes.
Stud mapping is a short method. Find both edges of each stud with your own stud finder, or by tapping and listening, and mark them in pencil on the wall. Then carry each mark down to the floor too, a commenter on a single-car garage thread advised, so the marks survive the paint.
And paint first, hang second, because the walls are about to be handled constantly and painting around hardware is how the finish gets ruined. (If the wall is a type other than plain drywall, the hardware changes, and the full wall-type breakdown lives in the wall guide linked below.)
A rail system or plain hooks: which one for whom
The cheapest route needs no system at all. A commenter on a garage design post screwed 2x2s into the studs and used finish nails to give each tool its own spot, and called the result flexible. Another staggers U-hooks so a rake hangs a foot higher than a broom and the heads overlap instead of colliding. If you own the wall and have a drill, either works well, and that is where to start.
A rail system is the next step when the tools keep changing. The Rubbermaid FastTrack Garage Wall-Mounted Storage System 24-Piece Kit comes with six rails (32 and 48 inches long) and 18 hooks. The rail is the part that carries the weight, so it goes into studs, and the hooks then slide anywhere along it, which suits a bay where the rake, the hose and the leaf blower swap places by season. Drilling is out for a renter, and the no-hole section near the end covers what to do instead.
Where the rail gets it wrong
One 3-star reviewer measured the rail’s hole pattern and reported that it does not land on 16-inch stud centers, so the rail ends up about half an inch off center on a 2×4. That is why you find both stud edges before you drill, instead of trusting the center of the rail. Another reviewer warned that newer hooks do not fit older rails, so measure your hooks if you are adding to an old set.
Tall tower-style floor holders for tools have a different failure: they tip when you pull a tool from one side. A commenter’s “ask me how I know” says the rest. A wall holds what a tower cannot. For deeper coverage of wall types and finishes, see a garage wall that holds up past month one.
Before drilling, hold the rail against the wall and mark each hole with a pencil, then check every mark against your stud edges. A rail that looks centered by eye can still miss the wood by a fraction.
What Stays on the Floor in a Small Garage, and What Gets Off It
The short list of things that earn floor space
A commenter on that same design post kept an outbuilding in order with one rule: “not to allow anything to sit on the floor.” Treat it as a ceiling, not a law.
Some items have no better place: the wheeled trash bin, the mower, the ladder (ladder storage on a wall is its own project). Moving them costs more than it saves. The move is to give them a corner against a wall, outside the taped zone, never the middle.
The question for each floor item is not “can this go up?” but “does anything have a better home?” If yes, it moves. If no, it gets a corner.
A forum thread on garage space explains why the list stays short, and why a floor clear enough to walk across matters: the more you have to move stuff out of the way to work on a project, the less time you spend in the garage.
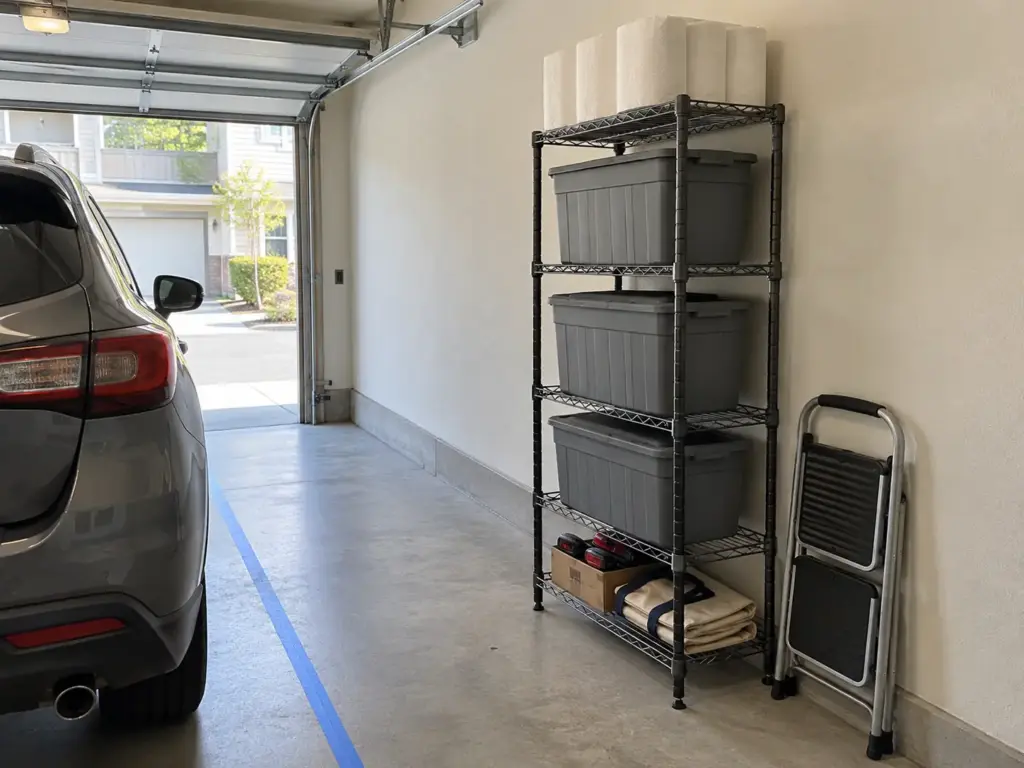
One shallow freestanding unit against the side wall
For the boxes and bags that would otherwise sit on the floor, one shallow shelf does the job. The Amazon Basics 4-Shelf Steel Wire Storage Shelves measure 23.2 by 13.4 by 48 inches per the listing and rate 200 pounds per shelf. At 13.4 inches deep, the unit hugs the wall and stays out of the car’s path. It needs no drill, so a renter can use it as is.
Treat the 200-pound figure as the listing’s claim: one 3-star reviewer pointed out the unit is not NSF certified, so the weight rating is untested. Others say the clips do not snap all the way, and one said it needs anchoring for best use even for light duty. How deep a shelf should be against the totes you store is its own question, covered in shelving units that actually fit your totes.
Anchor the tall ones
A tall shelf tips the same way a dresser does, and that is why the rule for dressers is worth knowing.
According to the Consumer Product Safety Commission’s Anchor It! campaign, “Dressers, armoires and other clothing storage furniture, must meet stability standards to avoid injury and deaths from furniture tip-overs and include anchor kits.” That rule covers clothing furniture, not garage shelving. But the tip-over mechanism is the same, so anchor any tall unit to a stud.
A loaded shelf in a small garage gets bumped by a car door, a handlebar or a hurried hand, so the anchor matters more here than in a roomy bay. For more on units that resist that, see freestanding shelves that won’t tip over.
Zones by Door Access: Yard Tools Out, Hand Tools In
Yard tools by the garage door, kids’ gear by the house door
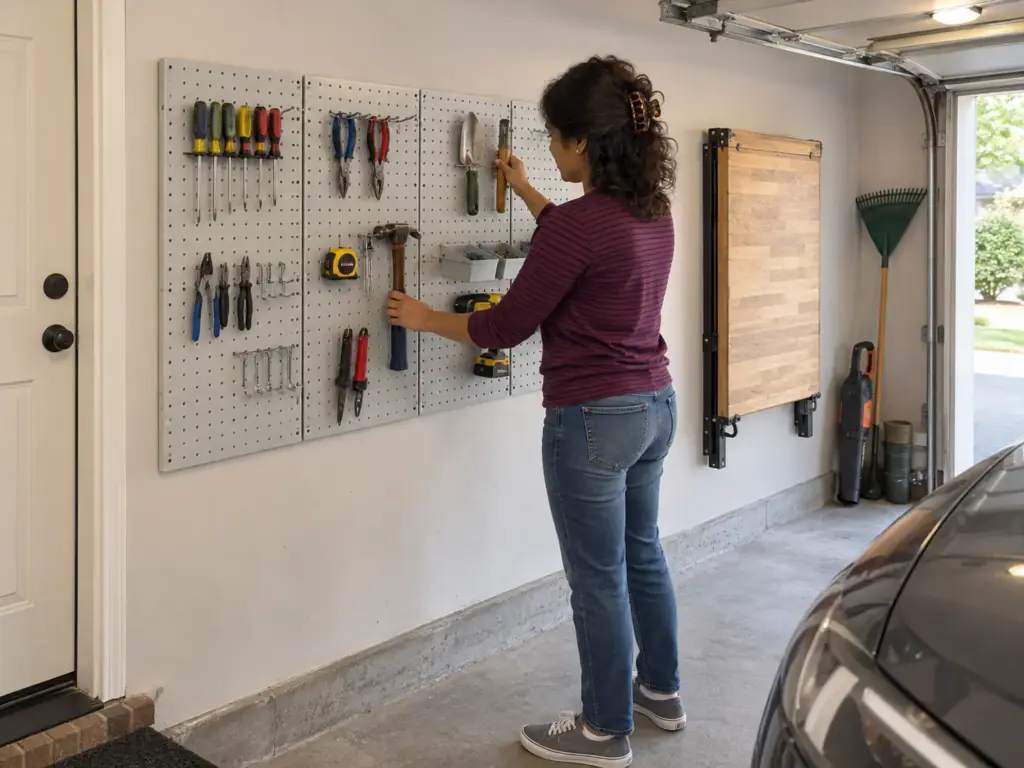
The walk to the back wall with a rake is the habit to break, and the zone method fixes it by who enters where. Yard tools (the leaf blower, the rake, the hose) go nearest the garage door, because that is the door they leave through. A kid-friendly garage zone sits nearest the house door, with bike and ball gear low enough to reach.
The workbench zone, if there is one, goes on the wall that does not meet the car’s door swing.
The back wall then holds what comes down twice a year, and the things used most sit a few steps from the door they travel through, which is why they actually get put back.
A hand-tool wall for a bench you may never build
Garage tool storage needs a wall even if the bench is a someday idea. Pegboard keeps hand tools in sight and off the floor. The Amazon Basics Rectangular Metal Pegboard Wall Organizer 48 Piece Kit has a metal board, so magnets work on it. Hang it on a wall the car does not use, on studs, using the mapping method above.
The details are where it slips. One reviewer reported that standard pegboard parts rely on the thickness of regular pegboard material for stability, so most (not all) parts will not be stable on this board. Another said the 1.5-inch screws in the kit are not long enough.
Check the hardware before the first tool goes up. For tool-by-tool storage, see tool-by-tool organization.
The folding workbench that cannot collect clutter
A bench that folds is a bench that cannot become a shelf. A reader on the design post said theirs gets used as needed and never collects clutter, because it has to fold away before the car goes in. Another mounted the bench where the cart parks, which forces the fold. A wheeled tool chest with labeled drawers followed the same logic.
Bike storage splits the same way. Readers on that post pushed back against wall mounts: they “aren’t sensible for little kids,” who need to reach the bike themselves. A floor stand for the kid-height bikes is the better pick, with the hoist saved for the off-season. It is a second place where “off the floor” gives way to “what can the person actually reach.”
Overhead Storage in a Garage With an 8-Foot Ceiling
What belongs overhead and what does not
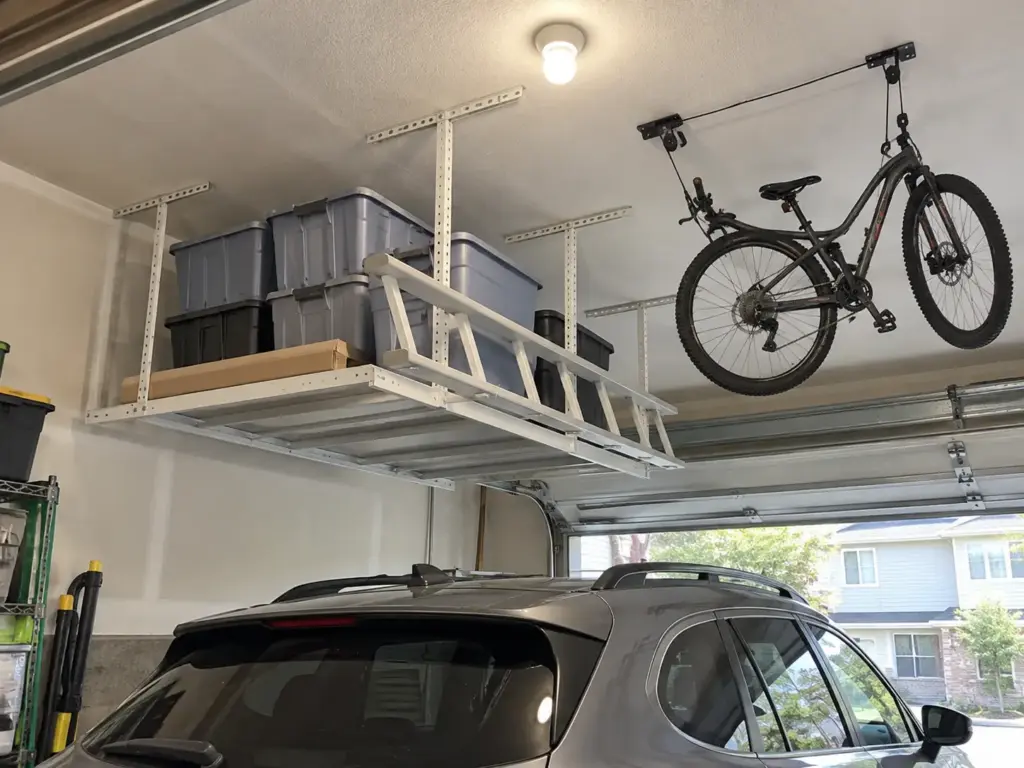
The air above the car is the biggest unused volume in a small bay, and vertical garage storage there comes with the strictest limits: ceiling height, the layout of the rafters, and what a person on a ladder can safely lift. Garage ceiling storage is for light things only.
A standard garage ceiling runs about 8 feet according to the same vendor guide, and taller vehicles need 9 or more. Seasonal bins go up. Heavy goes down.
That sorting rule had its own testimony: the commenter who lost holiday decorations to water, bees and mold moved them to an attic. Where there is no attic, sealed bins overhead are still a trade, so keep the overhead load to things that tolerate a garage. For how overhead compares with other systems, see overhead racks, cabinets and rails.
A 4×8 rack above the car: the drop, the load and the fit
The FLEXIMOUNTS 4×8 Overhead Garage Storage Rack Classic Series White is 4 by 8 feet, with an adjustable drop of 22 to 40 inches according to its listing. At the lowest setting the car’s roofline is the real limit. Measure the roof (with the roof rack on, if there is one) before choosing the drop. Or rather, measure first and read the drop range second, because the range means nothing until you have your number.
The listing says 750 pounds of capacity, while another listing of the same type of rack says 600. Treat it as a claim and confirm it on the box before loading.
There is no budget alternative here, and it is worth saying so rather than inventing one.
The install is where it goes wrong. A 3-star reviewer reported that it would not install in some roof-truss layouts and that the maker would not sell spare hangers. Another called the instructions “Absolutely awful,” and a third said the bolts stripped their threads.
So check your ceiling framing before buying, and take the install questions to the maker’s instructions, not to this page. The rack goes beside the opener, never across the track.
Bikes on a ceiling hoist
A hoist takes bikes off the floor, but remember the floor-stand argument above: kids’ bikes need floor access in season. Hoist for the off-season. The RAD Sportz Bicycle Hoist 2-Pack is rated 100 pounds per hoist per its listing title, so check your heaviest bike against it.
The hook is the weak spot. A reviewer wrote that “the hooks aren’t the most secure and it is possible for the bike to slip and fall,” and another said the cheap screws stripped four times. A 2021 reviewer called the newer set not as well made as the earlier one. Compare the hardware in the box with the maker’s instructions before you hang anything.
Weigh the heaviest bike or loaded bin on a bathroom scale before it goes up, and compare it with the rating on the box. Anything you would struggle to lift one-handed does not belong overhead.
Corners and Small Hardware That Stay Findable
One job per corner
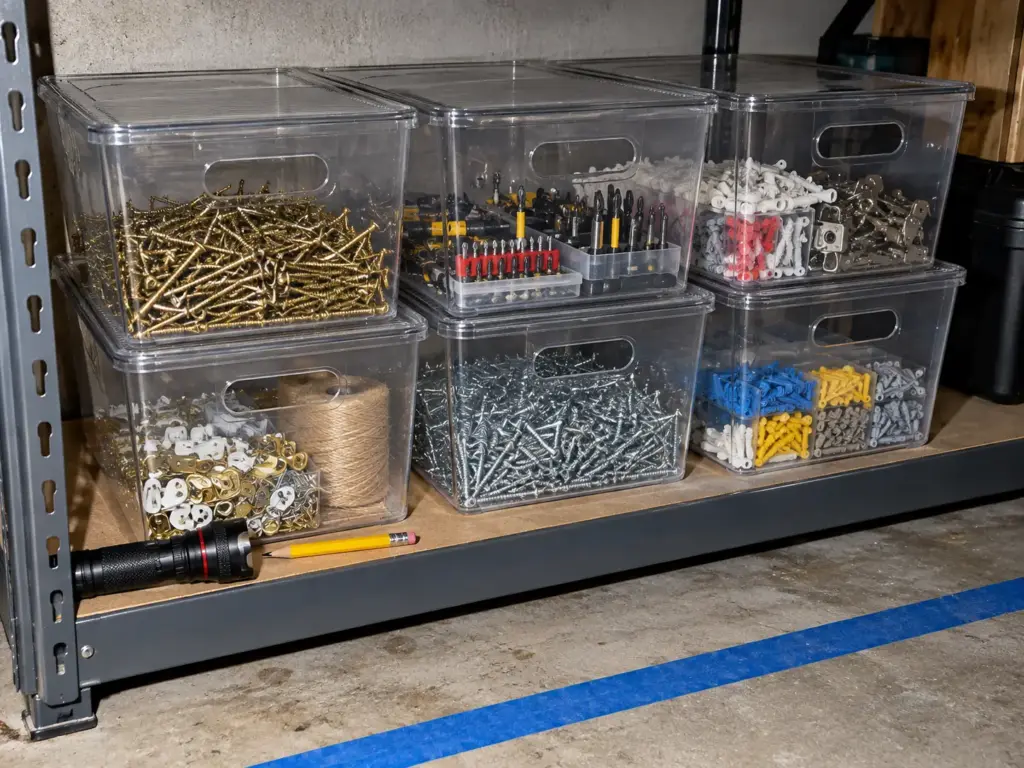
The can of mixed screws and the ten-minute search for the one that fits: that is what a corner with three jobs looks like. A corner with three jobs becomes the pile. A corner with one job becomes the place. Give each corner a single purpose (paint and tape here, car-care supplies there, sports gear in the third) and stuff that does not match the job gets sent to the sort piles instead of squeezed in.
A low corner shelf is enough for the first one.
Clear bins for small hardware
Readers on the design post said it flatly: “clear boxes only,” because nobody labels bins or reads the labels. Label-everything advice fails for the reason that the garage gets used in a hurry, and a clear lid lets the eye do what the label was supposed to. You need to see what is in there.
The Vtopmart 6 Pack Clear Stackable Bins with Lids (Large) run about 11 by 7.5 by 6 inches by a review’s measurement, and they stack. They fit screws, bits and fasteners by type. One reviewer of the 8-pack said the lids do not secure to the bin as they would like, and that they could not use them for high-shelf storage. So put them on a low or mid-height shelf, where a loose lid does not fall onto your head.
Placement matters as much as the bin. A commenter said bins you open often should sit on a shelf with enough clearance above to open them without taking them down, because a bin you must pull a ladder out for will not get put back. And a garage is dusty: another suggested open-grid shelving to cut the dust that settles on flat surfaces.
No-Drill and Budget Options When You Rent or Don’t Want Holes
What a renter or a no-hole owner can still do
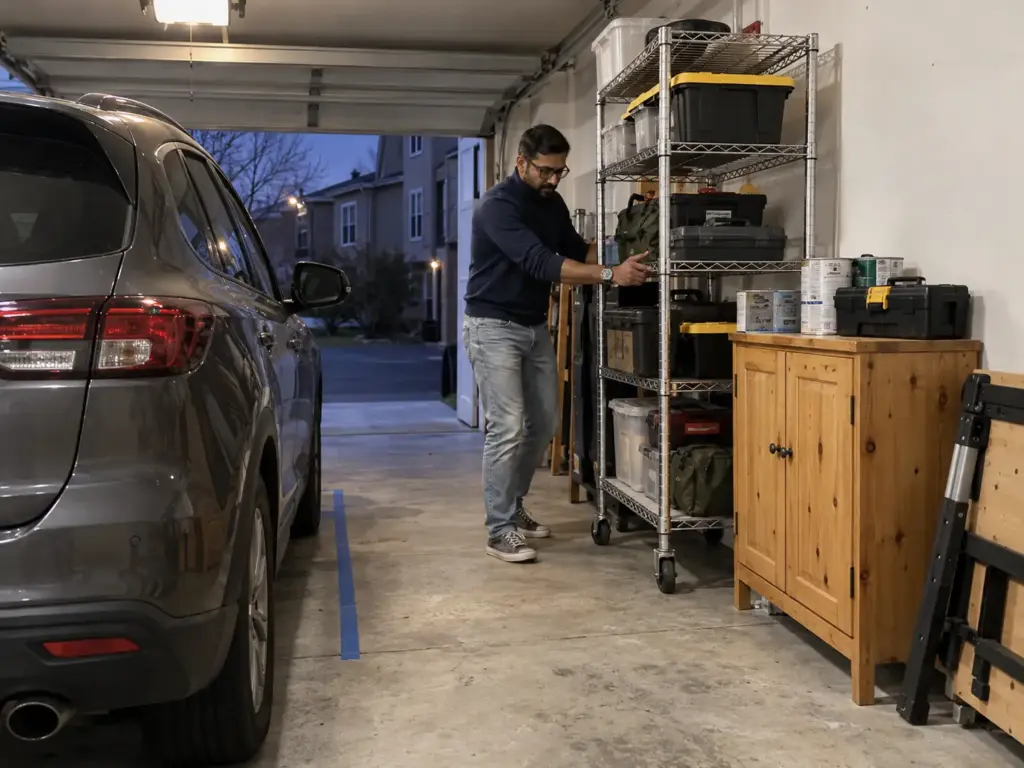
The reader who read “drill into studs” three times and stopped is not out of options. The split is simple. If you own the wall and have studs, the rail goes up. If you rent or will not make holes, use freestanding and rolling pieces.
No-drill garage storage starts with the shallow shelf from the floor section, and it does most of the job.
The honest limits: no-drill cannot give you an overhead rack, and it cannot give you a wall rail. What you get is floor and wheels. That is enough when the floor is the constraint, as long as every piece stays outside the taped zone.
Three cheap pieces from the threads: a wheeled rack, a used cabinet, a basic workbench
A commenter on a single-car garage thread named three cheap pieces. A wheeled garage rack costs you floor space but moves out of the way when the car needs the bay. ReStore cabinets, from Habitat for Humanity, add closed storage and hides the mess, at the cost of taking up the wall it stands against. A basic workbench gives you a surface, and one commenter said theirs locks and rolls outside.
Rolling pieces also solve the folds-away-before-the-car-goes-in problem without a hinge. If you can roll it out, it lives where the car is not. For the order to buy these in when money is tight, read the right order on a budget.
Lay the Tape Today, Then See What Lands on It
Three things carry this whole guide. Protect the car’s path before anything else, because the door swing and the walk path are the floor you actually need. Give every item a home before it goes in, so the pile by the house door has nowhere to start. And anchor what is tall, then set a reset so the system survives the second week.
In three months, open the car door where it opens and look at the drop spot. If the tape lines are blocked or the spot is overflowing, one group of items has no home, and that group is where to look first.
Today, with only what you already have, lay the tape for the door swing and the walk path. By the end of the week, notice what has landed inside it. Whatever is there is telling you which pile has no address yet.
Frequently Asked Questions
01How do you store things in a small garage?
Small garage organization tips follow one order: protect the car’s door and walk path first, then use the wall, the ceiling and one shallow freestanding shelf. Anything left on the floor sits against a wall, outside the taped zone.
02What should you not store in a garage?
Anything soft, paper, fabric or edible tolerates a garage poorly, because the space swings between damp and hot. Commenters on a garage design post named lampshades and holiday decorations, which were damaged by water, bees and mold.
03What do minimalists typically remove from a garage?
The first things to go are items that belong in another room of the house and items that can leave the house entirely. The sort piles show it: only what earns a wall, ceiling or floor spot stays.
04How do you organize a garage with too much stuff?
Empty the garage onto the driveway on a dry day, then sort every item into four piles: wall, overhead, elsewhere in the house, or out of the house. Only then buy any storage.
05Can you organize a small garage without drilling?
Yes, with a shallow freestanding shelf, a wheeled rack and a rolling workbench, all kept outside the taped car zone. What you cannot do without drilling is hang an overhead rack or a wall rail.
Disclaimer: ClutterlessNest is a participant in the Amazon Services LLC Associates Program. As an Amazon Associate we earn from qualifying purchases. This article may contain affiliate links — if you buy through them, we may earn a small commission at no extra cost to you. We only recommend products we have tested or genuinely believe in.