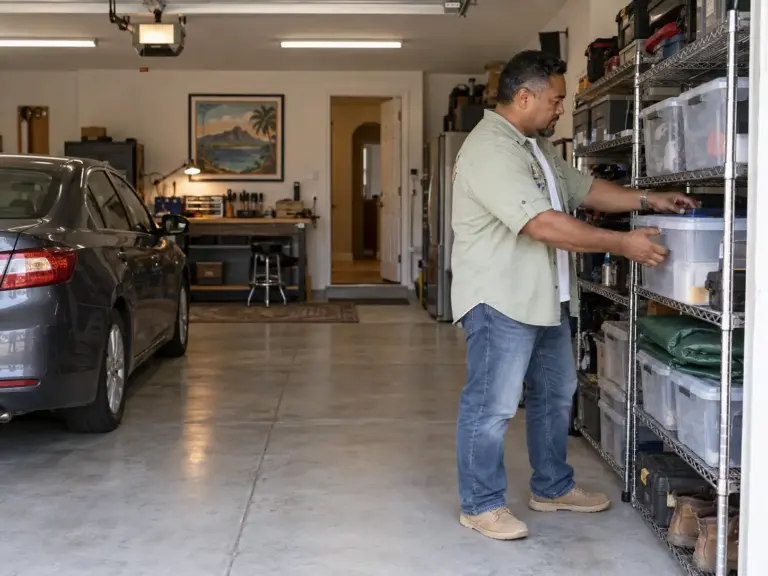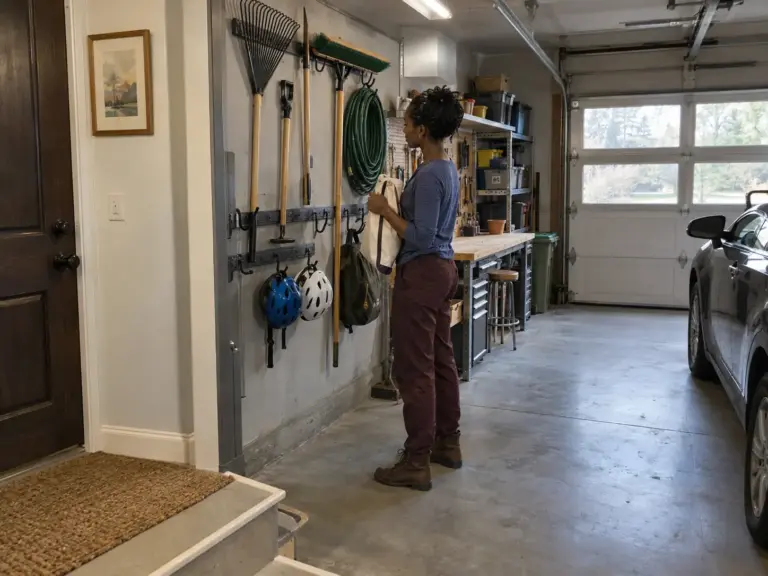
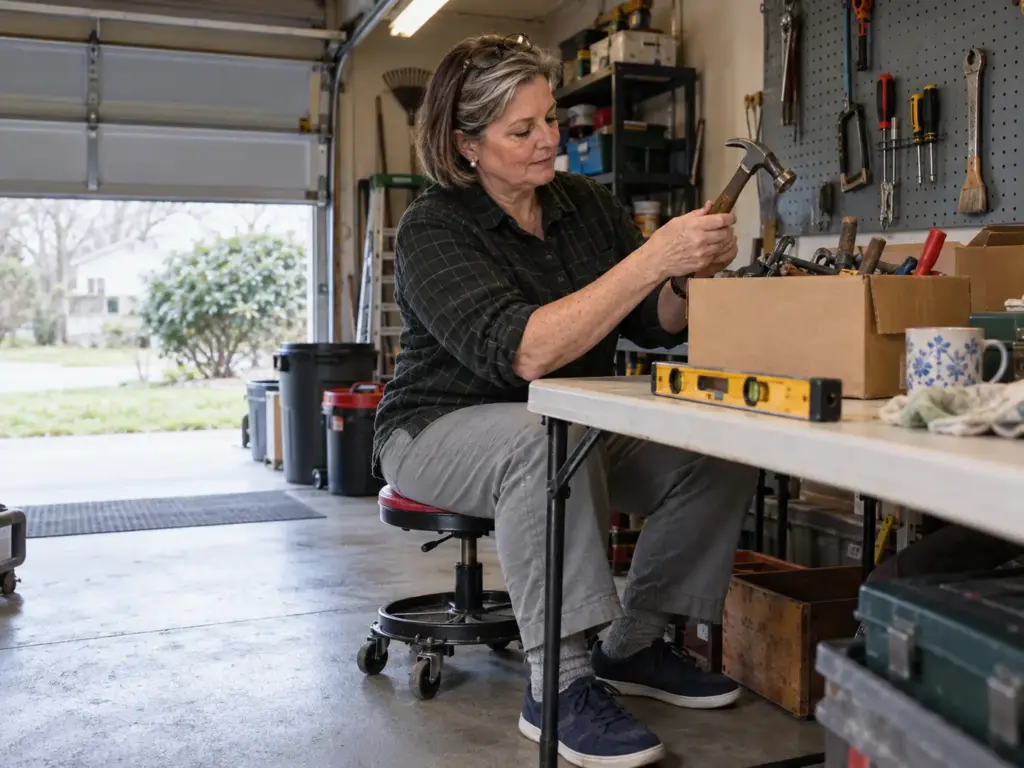
The tape measure is somewhere under the box of extension cords, the box is leaning on two paint cans, and the paint cans are blocking the shelf you need. Finding one tool means moving three other things, which is why the pile on the garage floor keeps winning.
A poster in an r/garageporn thread named the mechanism: if you have to move something else to get the thing you want, you also have to move something to put it away. “In practice that means that you won’t put it away.” These seven garage tool organization ideas settle the question one tool at a time, by use, weight and length, and if you are still sorting out organizing the whole garage first, that guide comes before this one.
Quick Answer
Organize garage tools by deciding where each one lives, in this order:
- Sort tools by how often you reach for them, weekly ones within one reach.
- Match the hardware to each tool’s weight and length before buying.
- Give every tool a spot you can reach without moving another.
- Lock up the hazardous tools and box the small parts that scatter.
- Give chargers and long stock their own homes, off the floor.
Start Garage Tool Organization With Use, Weight and Length
Before any hook goes up, each tool needs an answer to three questions. They take a minute per tool and settle everything that follows.
Frequency sets the height
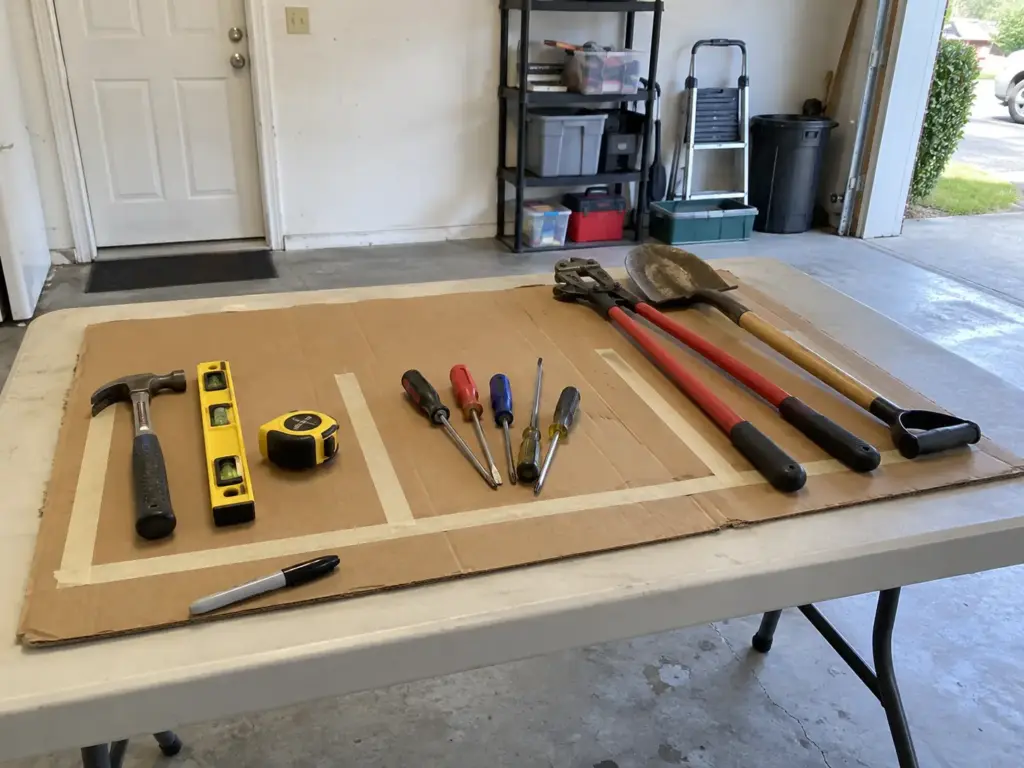
Begin with each tool’s frequency of use, not with the wall: how often does your hand go to it? The tools you reach for every week belong between knee and shoulder, within reach of where you stand to work. Seasonal tools and the ones that come out twice a year can live higher, lower or farther back, because a slower trip costs almost nothing. A garage where the weekly screwdriver sits on the top shelf and the holiday gear sits at hand height is a garage that is backwards, and no amount of labeling fixes it.
Weight and length set the hardware
Two more facts decide what a tool hangs on. A cordless drill and a screwdriver are different loads, and long tools like a six-foot level and a tape measure do not share a hook. So each tool gets three questions: how often do you reach for it, how heavy or long is it, and what does the storage itself do to it? Answer those and the choice among a wall board, a bench drawer, a rolling cart, a locked cabinet and a clear bin mostly makes itself.
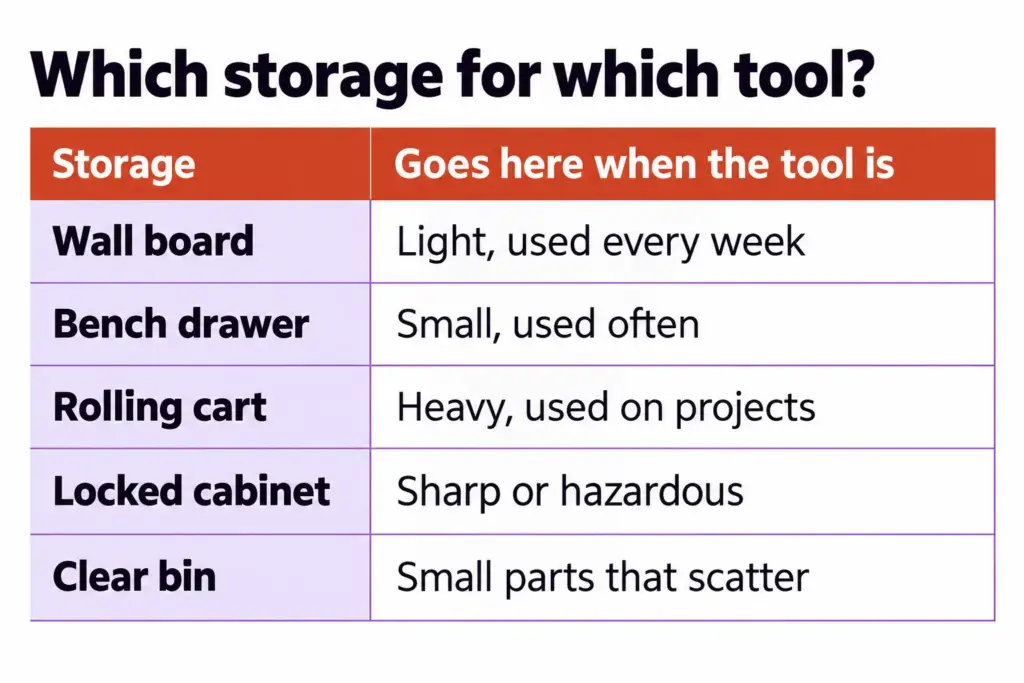
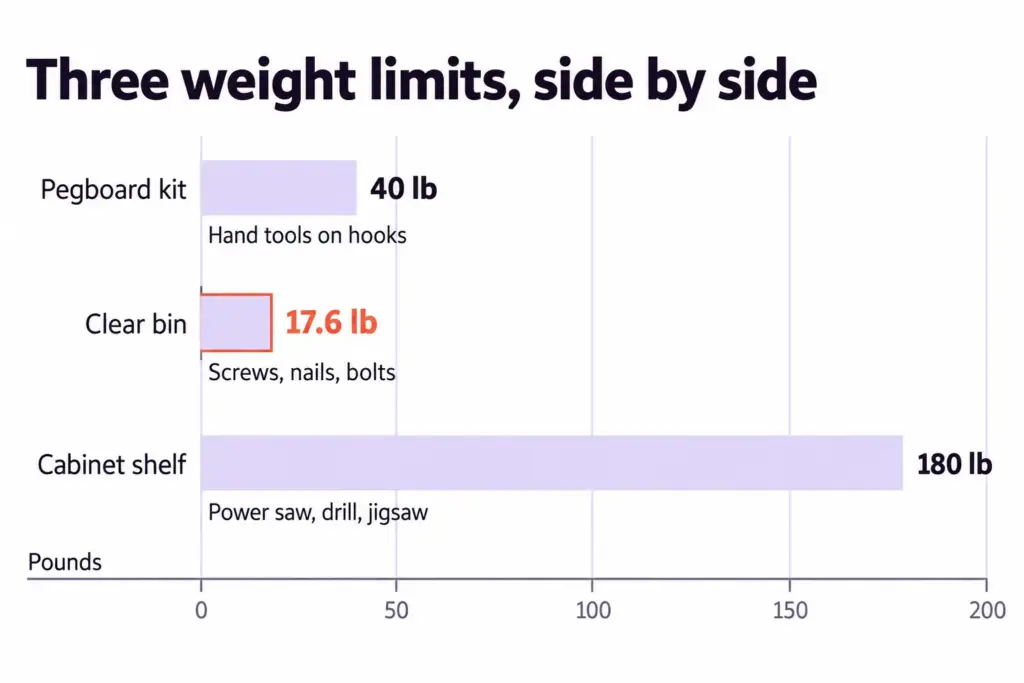
The two weight limits in this article already sketch the plan. The pegboard kit below is listed at 40 pounds for the whole board, and one clear bin bears about 17.6 pounds, so neither is a home for the heaviest tools you own. A steel cabinet shelf is listed far higher, which is why the cabinet shows up later. These are the listings’ own numbers, and the 40 is the load capacity of the entire board, not of each hook.
What the storage does to the tool
Storage works on a tool whether you meant it to or not. A blade rattling loose in an unlined drawer meets its neighbors every time the drawer opens. A hand tool hung on a damp wall sits in humid air all season.
A hook that carries a tool by its handle treats it differently from one that grips the head, and pressed hardboard softens in garage humidity, which matters most under the heaviest tools. Choose the spot for what it will do to the tool over a year, not over an afternoon.
The one-reach test
Stand where you work, take the tool, and put it back with one hand without touching anything else. If that works, the spot holds. If putting it back means moving the box beside it, the tool will be on the bench by Friday.
The same poster admitted the garage “goes through seasons,” immaculate one month and a mess spread along the west wall the next once a project gets going. That is the case for the test: a spot that passes it survives the messy weeks, and a spot that fails it only works while you are feeling tidy.
Put Hand Tools on a Wall Where You Can See Every One
Hand tools are the easy win on a wall, because they are light and you take them in at a glance. The mistake is hanging everything else beside them.
Which hand tools earn wall space
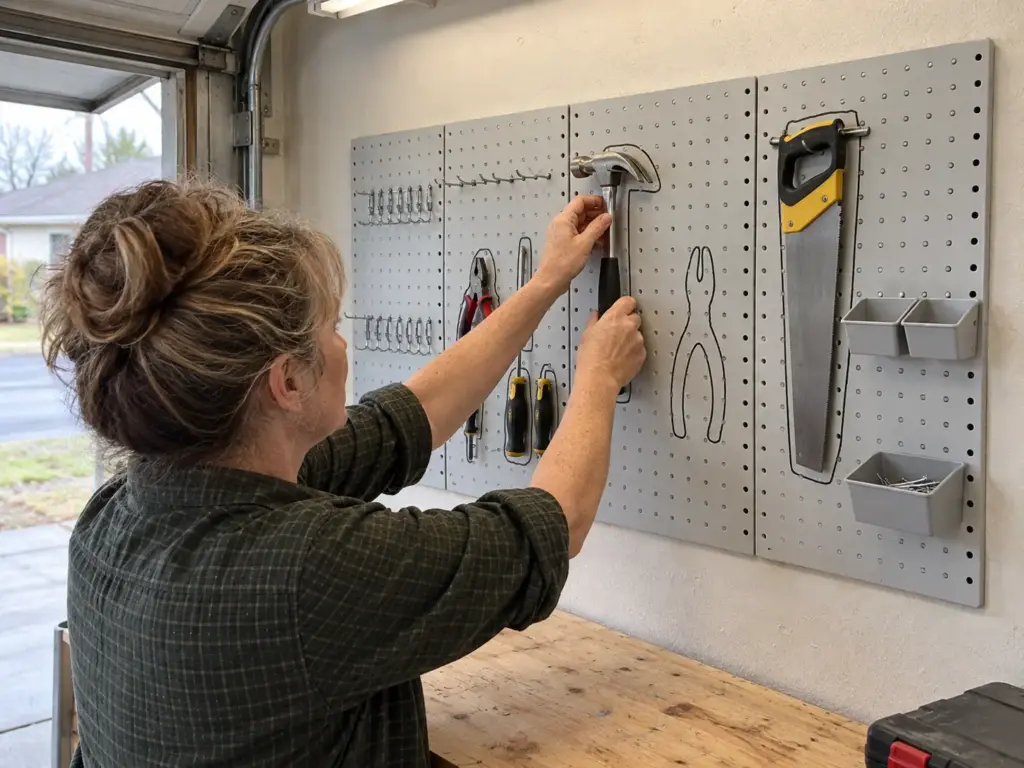
A poster in that thread called pegboard their favorite “for the tools which I use frequently or that have shapes not conducive for tub/shelf storage,” and it makes a clean rule. A tool earns wall space when you reach for it often or when its shape wastes a drawer. Hammers, pliers, screwdrivers, tape measures and hand saws qualify.
A cordless drill does not, and neither does a circular saw. For the panel layout, hook ratings and the choice between French cleat, rail system and slatwall, the guide to planning a garage wall layout that holds up covers all of it, so this section only decides which tools get pegboard hooks.
Outline each one so a missing tool shows
Trace each tool with a marker once it hangs where you want it. An empty tool outline announces what is missing before you start searching the floor, and it forces one hook for one tool, the arrangement that keeps the return friction problem off the wall. Outlined tools that hang over each other fail the one-reach test the moment you need the one underneath.
Hang the tools first and keep moving them until you stop adjusting, then trace. Outlines drawn before the layout settles turn into a board full of ghost shapes.
What a 40-pound board really holds
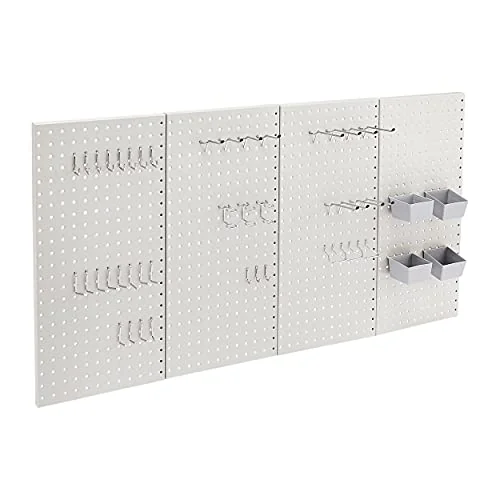
Pegboard gets named for every tool in the garage, and that is where it stops being the right answer. The Amazon Basics kit below is four steel panels, four bins and 40 hooks, about 47.3 by 23.5 inches assembled, and its listing caps the whole board at 40 pounds. A handful of power tools and a heavy hammer start using that up fast.
So treat it as a hand-tool board, and send the heavy tools to the next two sections. Whatever the board is made of, the heaviest items go lowest, because a low center of gravity is easier on the mounting, and the mounting wants studs where the wall has them. Check how any board attaches before you count on it.
Park Heavy Tools on Wheels or Under a Bench
What is too heavy for the wall belongs low, and what you use on every project belongs close to where you work. Wheels and drawers cover both.
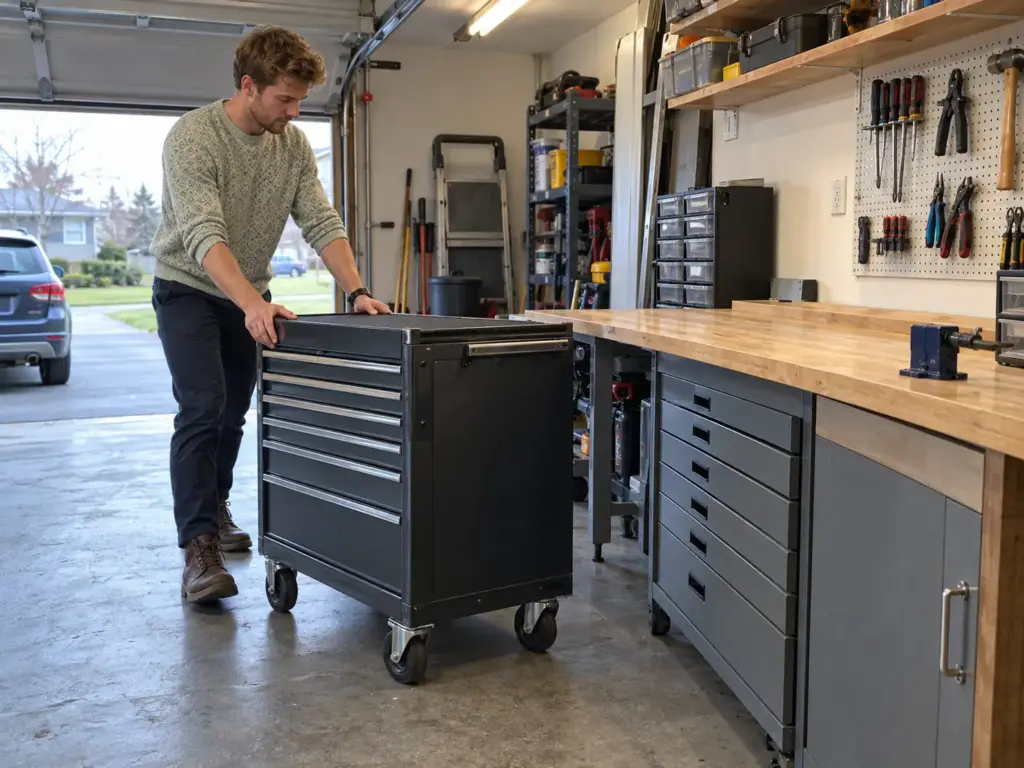
Roll cart or fixed bench
Heavy and frequently used goes low. The case that lives on the floor because no shelf is deep and low enough for it needs a cart that carries the tools to the project, instead of a project that keeps walking to the tools. A roll cabinet or rolling tool cart with drawers does that. A workbench with drawers underneath does the opposite and keeps everything at the one place you always work, so choose the cart if you work in more than one spot and the bench if you do not.
Closed drawers stop small tools sliding into each other, and drawer dividers plus a label on each front tell you what is inside before the drawer opens. A mobile workbench combines the two when the garage has room for it. A wheeled cart also needs no wall, which settles the question for anyone renting.
A bench top that doubles as storage
Low cabinets or a drawer unit with a top laid across them turn storage into a work surface, so the heavy tools sit directly beneath the place you use them. One poster described a step-down table area where the saw sits in the span and a cavity below holds the dust collection. It is the same idea taken one step further.
Tool chest or build your own
The thread shows two routes. One poster spent months dropping hints for a bigger tool chest, then decided to build their own solution instead. A bought chest suits tools that fit in drawers.
A built bench or shelf suits the ones that do not, like the saw and the long boards, which is what the next sections are for. Either way, the drawer is only as good as its same-spot labels, the ones that stay put when the tool moves.
Lock Up the Tools That Hurt and Box the Ones That Scatter
Some tools should be out of reach and some are only a nuisance when they scatter. Closed storage handles both, with different limits for each.
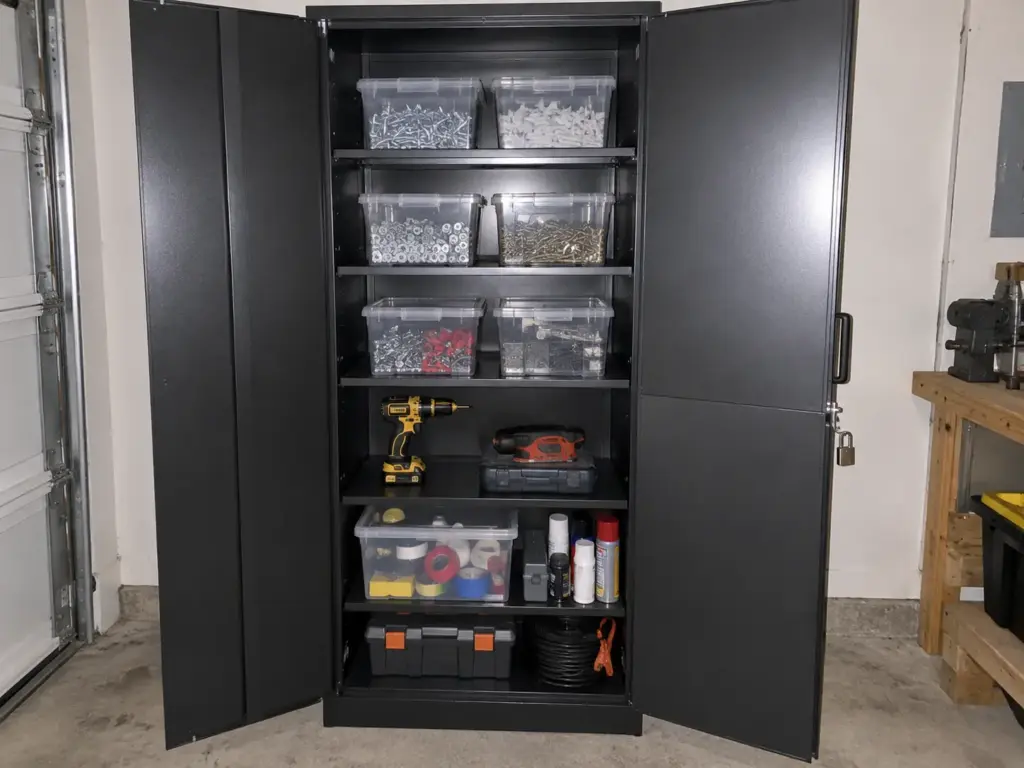
Lock up what hurts
Two jobs meet in closed storage, safety and sorting, and the sharp tool within a child’s reach is where the first one starts. A lockable cabinet keeps the sharp and hazardous tools away from children, and child safety is the plainest reason to own one. The SISESOL cabinet below is 72 by 36 by 18 inches, with five adjustable shelves listed at 180 pounds each and 900 pounds in total, and it weighs about 91 pounds empty.
At six feet tall it is also a tip-over risk. Federal guidance says to anchor furniture to the wall, and the cabinet’s height makes that step part of buying it, not an extra. The anchoring discussion is in the last section.
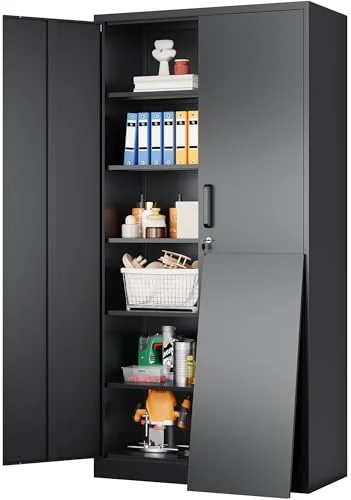
Clear bins for what scatters
Screws, nails, anchors and bits are the tools that scatter, and a clear bin is the fix for the drawer of loose hardware. The Vtopmart clear stackable bins (the large six-pack) measure about 11 by 8 by 6 inches, with lids and built-in handles, and you can read the contents from the door. The listing says one bin bears 8 kilograms, about 17.6 pounds.
A full bin of fasteners is fine on its own, but stack three high with a heavy bin on top and the bottom one sits at its limit. Reviewers also report that the lids do not snap in place and can fall off easily, so carry a bin flat.
Stacking is the selling point and also how these bins fail, so keep the heavy ones low. A poster’s real stack in the thread ran a rugged case on the bottom, organizer bins in the middle and totes up top. The same thread’s budget line was “modularity is king”, the buy-as-you-grow case for modular storage: better to buy ten organizer bins you can keep adding to than one odd or expensive organizer you cannot grow. That is the order that works for doing the garage on a budget in the right order, bins first and the fancy system never.
Know the limits before you load
Set the three limits side by side. The pegboard kit takes 40 pounds across the whole board, one clear bin takes about 17.6 pounds, and one cabinet shelf takes 180 pounds. The screwdrivers, pliers and a tape measure fit the board.
Screws, anchors and drill bits fit the bins. The corded saw, the sander and the case of bits go on the cabinet shelf, and a tool that outweighs its home goes to the next tier up.
Set Up Long Boards and the Saw So Cuts Come Out Level
Long boards and the saw end up in the same few feet of floor, and how the two line up decides whether a cut comes out square.
Why the level cut goes wrong
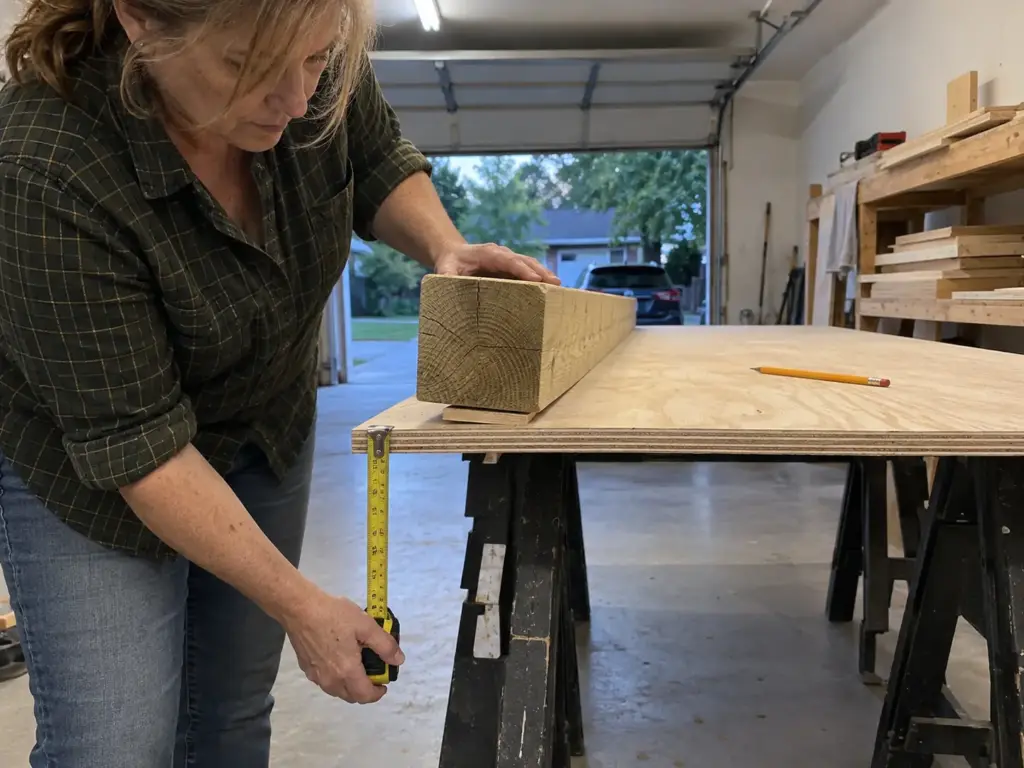
A square end cut needs the board to lie flat on the saw’s table for its whole length, and the shelf it came from decides whether it will. A poster in the thread put it plainly: “If I were to improve on this further, I’d measure the exact height of the table of my saw and ensure the offset between that and my shelf tops was more accurate.” They had been annoyed more than once hunting for shims to get heavier boards, like 4×4 pressure-treated posts, to lie level. A post that rocks on the way into the saw gives a crooked cut, and a shim only fixes it for that one post.
No standard height exists that every saw matches, so measure your own. Take the height of your saw’s table, then the height of the shelf top or the sawhorse plywood where the boards will sit, and compare the two.
Sawhorses with a plywood top
The set-up that avoids shims is a saw on sawhorses or on a bench, with a plywood top acting as the saw table, and the long stock stored beside it at the same height. The board slides off the shelf onto the table without being lifted over a step. The poster’s step-down table area, with the saw in the span and the dust collection in the cavity below, is a more permanent version of the same idea.
Either one has to pass the small test: lay a board from the shelf onto the saw table and look under it for a gap. A gap means a shim is coming. The same poster lines a wire shelf with cardboard for light stacking and quarter-inch plywood on top for heavy items, and that kind of cardboard shelf liner is what keeps a long board from rocking on the wires before it ever reaches the saw.
Test with the heaviest board you cut, not the lightest. A thin strip will flex into line and hide a gap that a 4×4 will not.
Where the long boards live
Long stock should live where it slides out without moving other stock, which is the return friction rule again. A low shelf at saw-table height does that. A vertical bundle in a corner does not: to pull the middle board you have to lift the rest.
Keep the longest and heaviest boards on the lowest tier, the offcuts above them, and leave a clear lane from the shelf to the saw so nothing has to be carried around a pile. And if the garage is too short for a full-length shelf, put the shelf on the wall nearest the saw, not in the far corner.
Give Cordless Tools a Charging Home Off the Floor
Cordless tools fail quietly: the battery is dead on the one day you need it. A fixed home with the charger beside it ends that.
The drill’s home while it charges
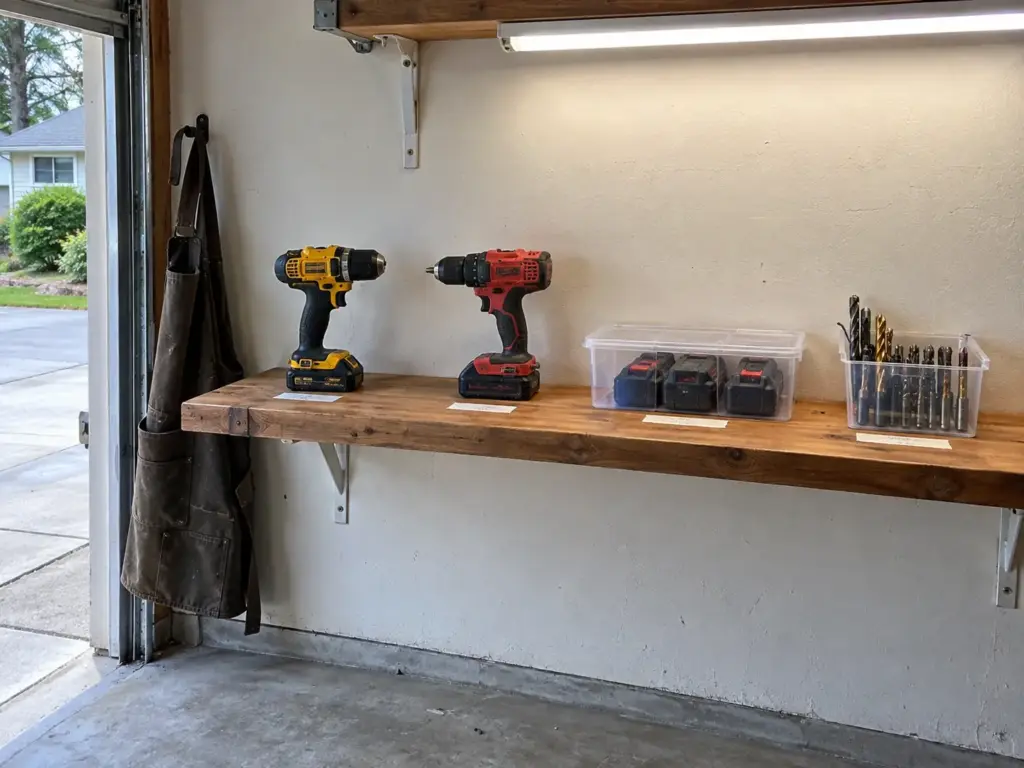
The cordless drill that is always dead usually lives wherever it was dropped, with its battery in a coat pocket and the charger on the floor beneath the bench. Fix the home before you fix the habit, and think of it as a drill station: one shelf, one rule. Choose the charging shelf by where the outlet already is, so no cord has to cross the floor, and work the layout from there.
This article does not describe electrical work: the wiring and the outlet follow the charger’s manual. One poster zip-tied the power outlet to the front leg of their bench so it sits where the hand reaches, which is their set-up and not an instruction.
A charging spot across the garage from where you work is a spot you walk to only when the battery is already flat. Put the drill’s home at the charger, and setting the tool down becomes the same motion as charging it. Waist height suits it, because a battery that has to be lifted off the floor is a battery that gets left on it.
One slot for every battery
Give each drill and each battery one marked slot on the shelf, a strip of masking tape, a label maker strip or a pencil outline. Count the batteries you own first, because the number that surprises people is how many are scattered: one in a coat pocket, one in the truck, one still in a tool nobody has touched. A slot for each makes a missing battery visible as a gap, the same trick as the outlines on the wall, and it lets you split the shelf into spent on the charger side and charged on the tool side.
The one-reach test applies here too: if reaching the charger means moving the drill beside it, the drill will end up somewhere else within the week. Spare batteries and bits live in a small clear bin on the same shelf, like the Vtopmart bins from the cabinet section, so the loose parts do not become the new floor pile. Keep the whole charging station off the floor and away from a damp wall, and the next section explains why the wall matters.
Mark the slot on the shelf edge, not on the tool. Tools get replaced and the label stays true, and an empty slot shows which battery is still in the house somewhere.
Rented Garage or Damp Basement? Change Three Things
The plan holds in a rented garage or a damp basement, with three decisions that move. Everything else stays as above.
What changes when you cannot drill
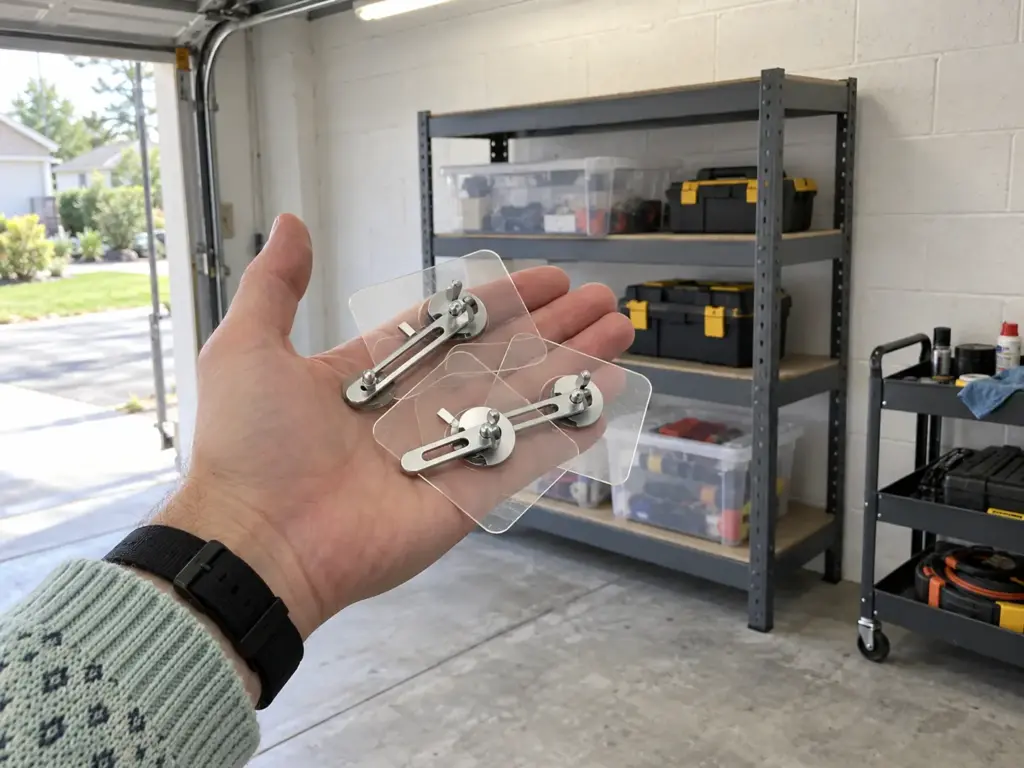
The same plan holds for a lease that rules out holes, and three decisions change. Wall storage becomes freestanding shelving plus the roll cart. The closed cabinet either stays low or gets anchored some other way.
And the pegboard needs a mount the kit does not describe, so check how the board attaches before you count on it. For ideas that skip the drill entirely, storage that does not depend on drilling is a good place to look next.
Freestanding first, adhesive second
A low freestanding unit and a roll cart need no wall at all, so start there. Freestanding shelving that does not tip over covers the units that stay put.
The tall cabinet is the one that needs anchoring. According to the U.S. Consumer Product Safety Commission’s guidance, “CPSC recommends that consumers anchor furniture, including dressers, securely to the wall.”
The standard behind that line covers dressers and clothing storage furniture, so a garage cabinet sits outside it, but the tip-over logic is the same. The federal tip-over tip card says to anchor other furniture with doors, drawers and shelves too.
The no-drill route for the tall cabinet is the No Drill Anti Tip Furniture Anchors (six pairs of adhesive wall anchors). Adhesive anchors look like the obvious answer for a renter, and they are only half of one. Reviews on adhesion are mixed: some say they do not stay adhered to painted walls, and one reviewer reports that after a month or so they peeled off the wall.
The listing itself says it is not suitable for a rough surface, a poor wall surface or a wet surface. Bare block or a wall that sweats is exactly what rules it out, so check the wall before you buy the anchor, and keep the cabinet low or leave it out if the wall fails.
Basement and shared-garage notes
A commenter in the thread asked whether basement tool storage counts, and it does, with the damp as the difference. In a basement, metal and plastic beat raw wood, everything sits off the concrete floor, and no adhesive goes on a wall that sweats. In a shared garage, the one-reach test needs a second pass: what is reachable for you has to be findable for the other person, which is why the outlines and labels matter more there.
Heavy Low, Sharp Locked and Every Tool One Reach Away
Three rules carry the whole article. Decide by use, weight and length, because those three answers pick the hardware. Run the one-reach test on every spot, because a tool you have to move something to reach is a tool that ends up on the bench. Put the heavy things low and the hazardous ones behind a lock, with the cabinet anchored.
In three months, look at where tools have drifted back to the floor and ask which spot failed the one-reach test; that spot, not the tool, is what needs changing. Today, take the tool you reached for most this week, give it a spot within one reach of where you stand to work, and outline it so you can see when it is missing. Then notice whether it is back in that spot the next time you finish a job, and whether you had to think about it.
Frequently Asked Questions About Garage Tool Storage
01What are some good ideas for organizing tools in my garage?
Sort tools by how often you use them, then match storage to weight and length: a wall for light hand tools, wheels or a bench for heavy ones, and a lock for hazardous ones. Every tool should be reachable without moving another.
02How do I organize garage hardware?
Put screws, nails and fasteners in clear, labeled bins on a shelf you can reach without moving anything else. Mind the weight limit: the bins above bear about 17.6 pounds each, so keep heavy bins low.
03What is the best garage organizing system for my garage?
The best system depends on what you store: hand tools suit a wall, heavy tools suit wheels or a bench, and small parts suit bins. See the guide on comparing garage storage systems by what you store.
04What are some DIY ideas for organizing a garage?
Low cabinets with a top added make a bench, and a hand-built shelf at saw-table height keeps long boards level. One poster lines wire shelves with cardboard for light stacking and quarter-inch plywood on top for heavy items.
05Do these tool storage ideas work in a basement?
Yes, with the damp changes from the last section: metal and plastic over raw wood, everything off the concrete floor, and no adhesive on a wall that sweats.
Disclaimer: ClutterlessNest is a participant in the Amazon Services LLC Associates Program. As an Amazon Associate we earn from qualifying purchases. This article may contain affiliate links — if you buy through them, we may earn a small commission at no extra cost to you. We only recommend products we have tested or genuinely believe in.