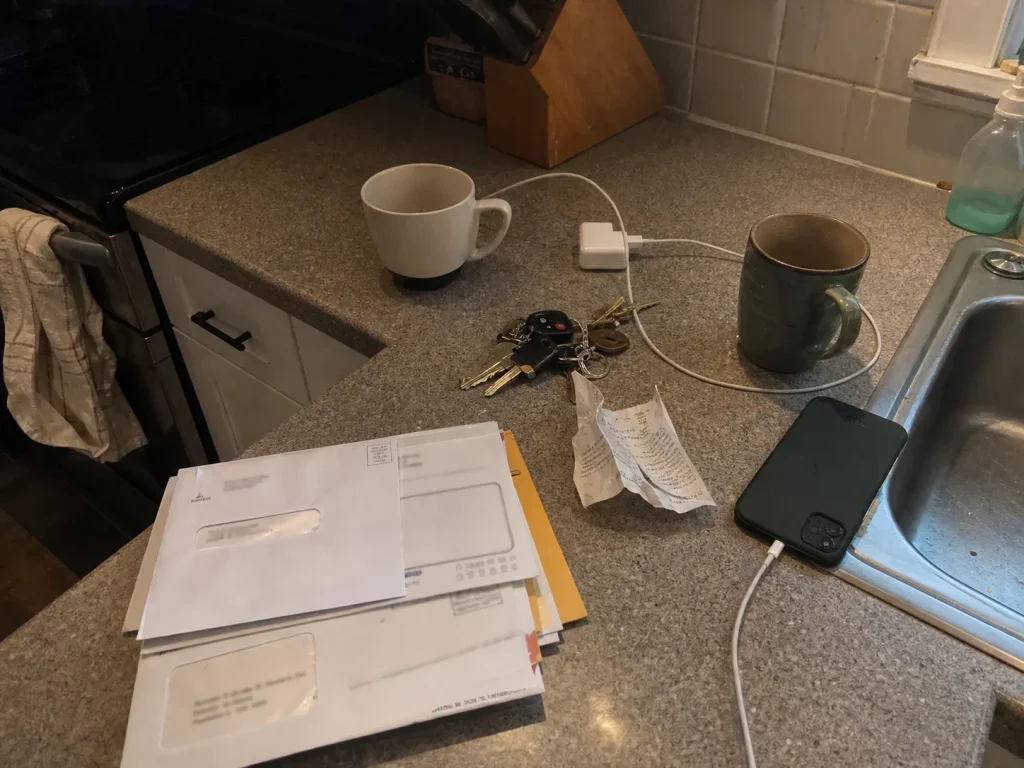
You wiped the counter clear on Sunday. By Thursday the mail is back, the phone charger is snaked across the prep zone, and two mugs have set up camp by the sink. The problem almost certainly is not that you need more storage. Half the kitchen counter organization ideas people try are aesthetic fixes that were never built to hold, and there is a spatial reason underneath the mess that nobody explains.
Below are 12 ideas to declutter your kitchen counter and actually keep it clear, each with the counter space it really costs, a budget-friendly version where one exists, and the renter caveat that saves your deposit. If you want the full clutter-budget method behind all of this, the systems-first framework for kitchen counter organization is the parent guide.
Quick Answer
A counter stays clear when every item that lands on it has a home and a rule. Start with these:
- Give mail, keys, and chargers a designated drop zone off the counter.
- Corral your daily grab-zone items onto one bounded tray.
- Go vertical with a corner turntable, a wall shelf, and a tiered fruit basket.
- Decant dry goods only if it replaces packaging already on the counter.
- Run a two-minute nightly reset so nothing drifts back.
Why Your Counter Keeps Filling Back Up
Before a single idea, the mechanism. You are not messy. What you have is a physics problem with a name.
Counter drift is real, and the counter always wins
An item with no assigned home drifts to the nearest open flat surface. In most homes the kitchen counter is the biggest, most central flat surface there is, so it wins by default. The mail lands there because it has nowhere else to go. The charger lands there because that outlet is convenient.
Organizing threads have a tidy phrase for it: counter drift, the slow migration of unassigned stuff onto open counter over the course of a week. Every idea below only works if the thing it holds gets a rule, not just a prettier container.
You are short on surface, not on discipline
Here is the part that reframes everything. Most kitchens fall short of the total counter frontage the trade considers workable, so you are already starting behind. According to the NKBA’s kitchen planning guidelines, a clear prep zone should run about 36 inches wide by 24 inches deep next to the sink. If your clear prep space is smaller than that, a tray or turntable feels like it is in the way because it literally is. Every organizer you add competes for a prep zone that was already under the recommended minimum.
And the cost is not just visual. Professional organizers point to zoning by use as the first real fix, partly because a busy counter measurably changes behavior. A cluttered kitchen nudges people toward more snack grazing, so the reason to bother is not a magazine photo. It is that a clear counter is a calmer kitchen.
If your kitchen has almost no usable counter to begin with, that is a different problem than this one. Start with the zero-counter playbook instead, because everything below assumes you have at least some surface to work with.
Idea 1: Corral the Daily Grab-Zone on One Tray

Some things are staying out no matter what you do. The olive oil, the salt and pepper, the daily vitamins. Stop fighting that and give them a border instead.
A tray turns six items into one thing
A tray creates a visual boundary, and once your daily items have an edge around them, your eye reads them as one intentional zone instead of six pieces of drift. This is the same one-tray rule that tames a bathroom counter, and it works because the boundary does the organizing, not the container. Pick a tray you can still slide aside when you actually need the full prep depth to cook, and cap what lives on it with a simple one-in-one-out rule.
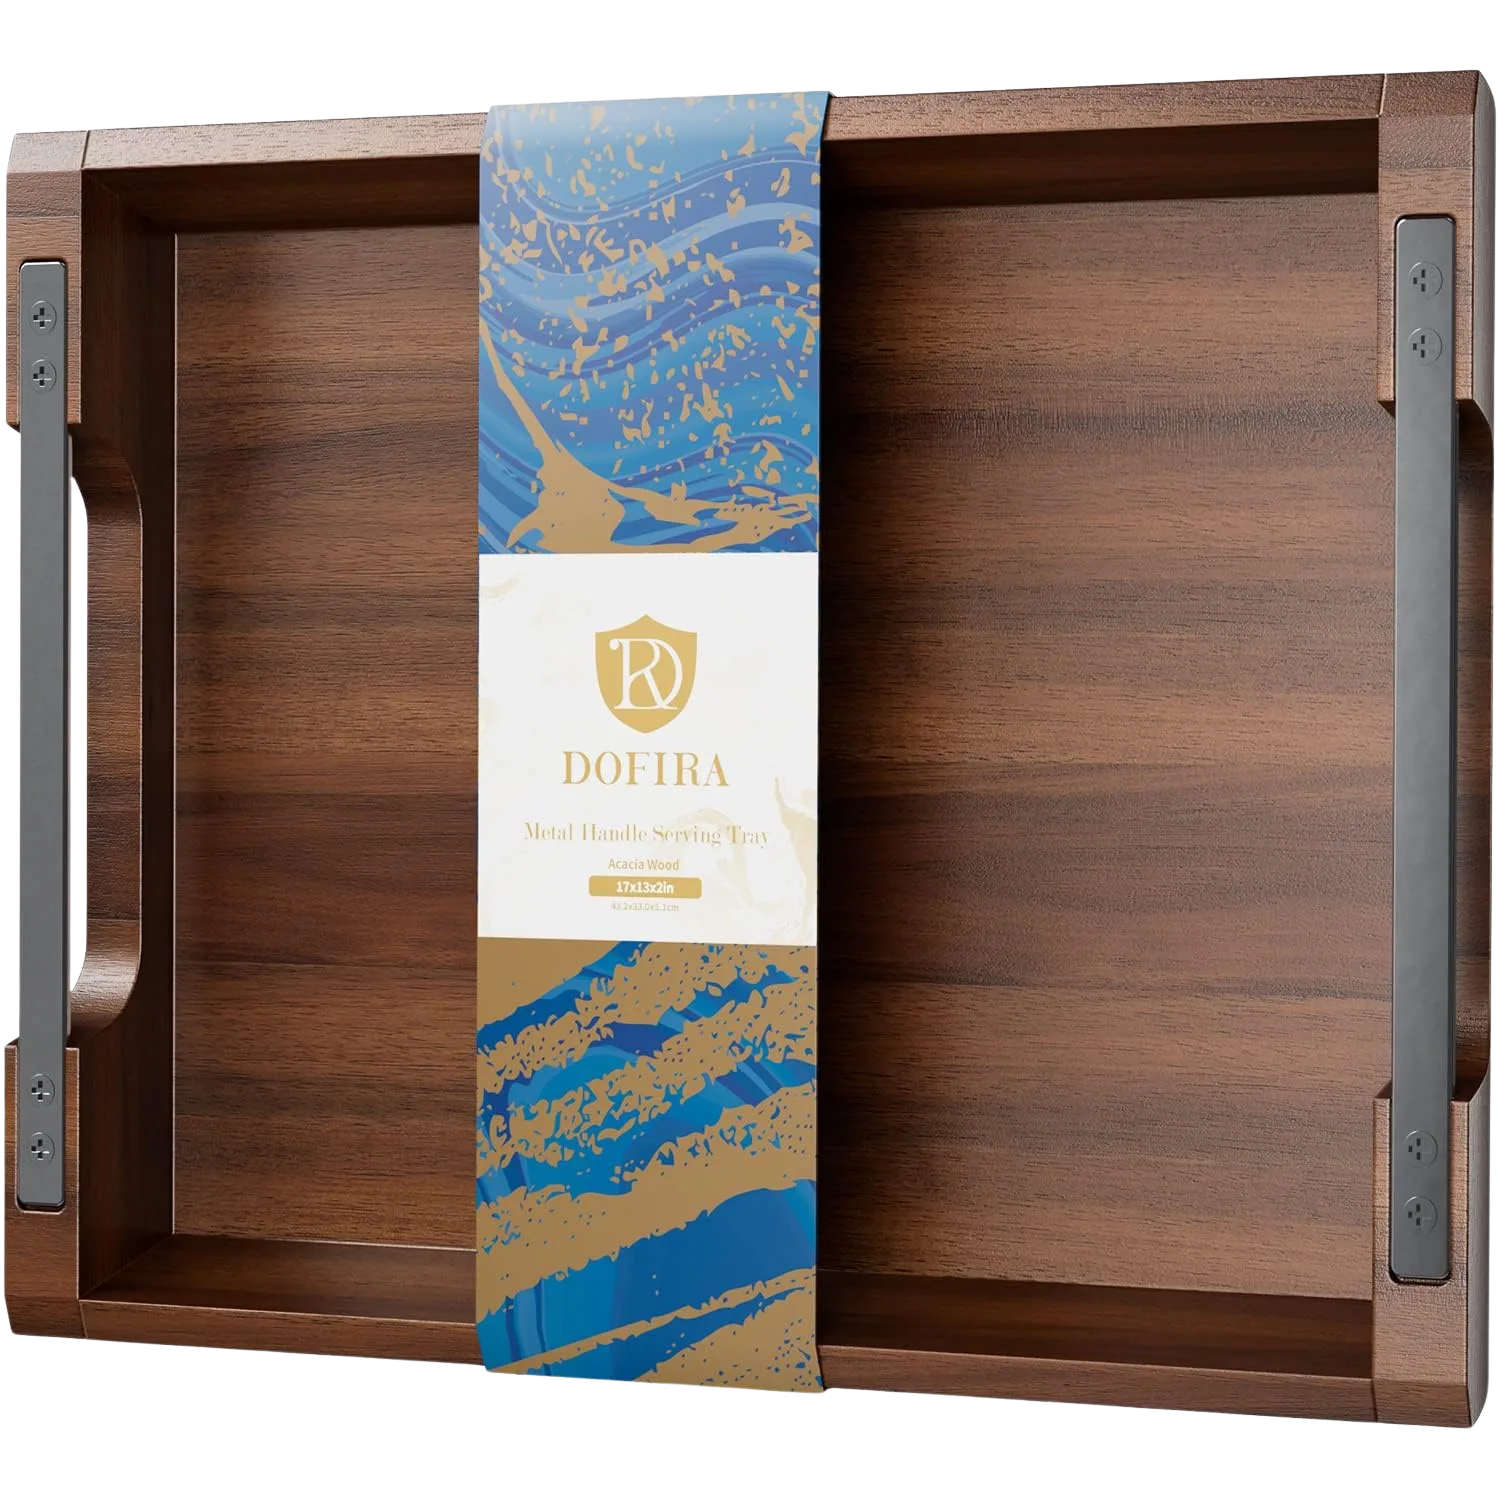
Before you buy anything, know that a flat baking sheet or a repurposed cutting board does the exact same bounding job for nothing. The tray is the upgrade, not the requirement. If you want it to look deliberate, a large wood serving tray is the move.
Idea 2: Put a Turntable in the Corner You Never Use
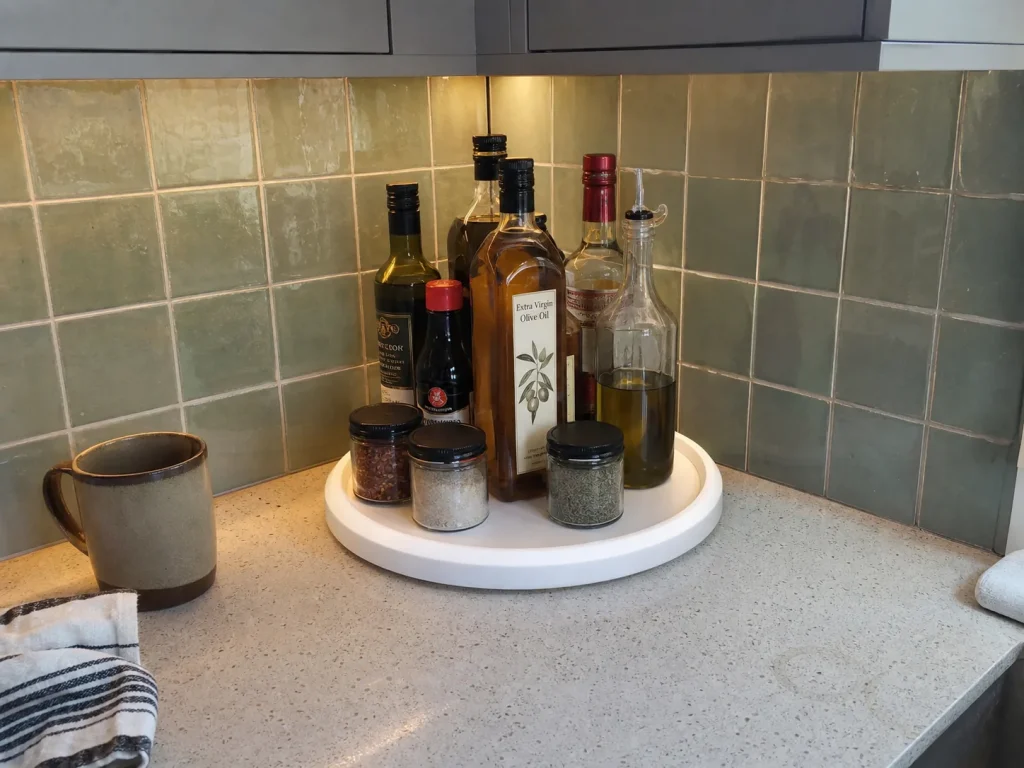
The back corner where the counter meets the backsplash is where bottles go to be forgotten. You buy a second bottle of something you already own because you cannot see the first one behind the blender. A turntable makes that corner spin, so the thing in the back comes to you.
Measure before you buy, because this is where people waste money. A 16-inch turntable needs a full 16 inches of clear diameter to rotate. Jam it against a backsplash or under the lip of an upper cabinet and it will not spin all the way, which defeats the entire point. This is the same size-first rule that governs lazy susans in the pantry, and it applies just as much on the counter.
I used to point people to the biggest turntable that would fit. After enough sticky-counter stories in organizing threads about oil pooling on flat trays, I switched to recommending the raised-lip versions, because that lip is what keeps a slow drip from turning into a ring you scrub every week. The OXO Good Grips Lazy Susan Turntable has that raised edge and a non-skid surface, so bottles do not walk off when you spin it. If your corner is shallow, a smaller turntable fits better than forcing the big one. A corner cabinet has this exact dead-space problem too, and the fix for a corner cabinet uses the same rotating logic.
Measure the clear diameter with a real tape measure before ordering any turntable, and check the height of the tallest bottle against the cabinet above. A turntable that clears the counter but hits the upper cabinet on every rotation is a return waiting to happen.
Idea 3: Take It Vertical With No-Drill Wall Shelves
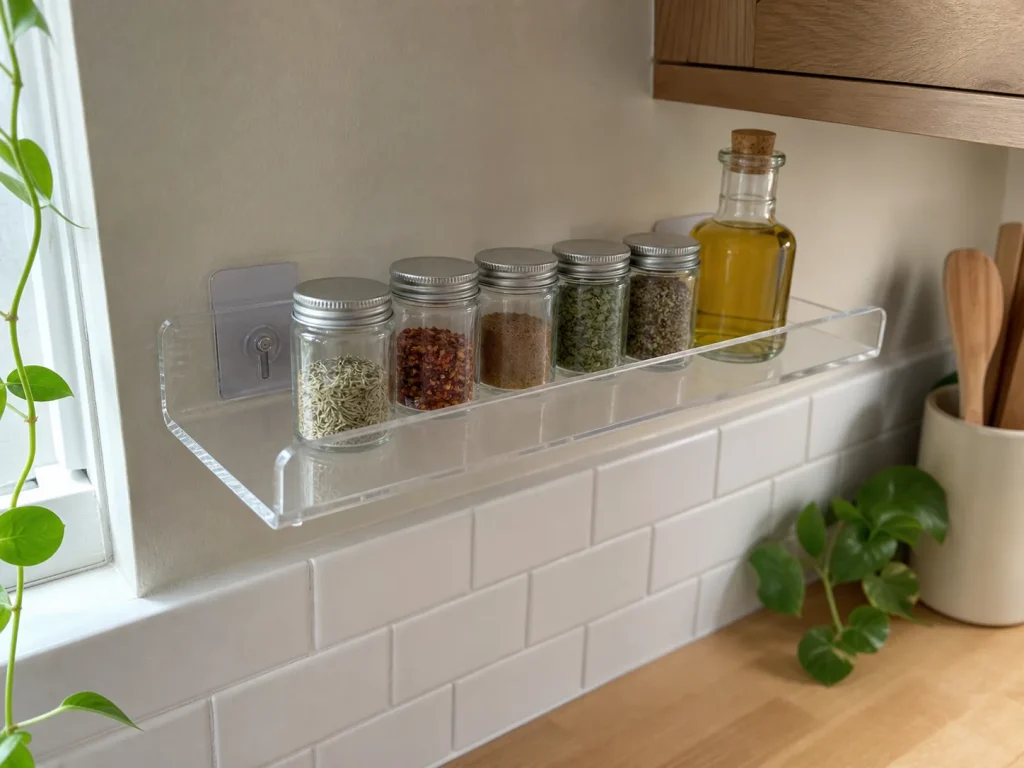
Your counter is horizontal. Your walls are mostly empty. Moving spice jars and small bottles up onto the wall is one of the few ideas here that reclaims actual counter square inches instead of just rearranging them. But no-drill has a catch nobody puts on the box.
Why vertical actually frees space
A wall shelf takes items off the surface entirely, so unlike shuffling things into a nicer bin, you genuinely get counter back. This is the whole logic of vertical storage on a tight counter: a floating shelf on the wall, a shelf riser that stacks a second level inside a cabinet or on the counter, anything that builds up instead of out. The freestanding countertop corner shelf is the zero-risk version, since it needs no mounting at all and sidesteps the whole adhesive question. Reach for that first if you rent and want nothing on your walls.
The no-drill catch nobody mentions
The conventional wisdom is that no-drill means worry-free. In practice, the adhesive is the part that fails first. Adhesive-only mounting holds far less than the marketing implies, realistically about what a couple of full olive oil bottles weigh, not a stack of dishes.
Command’s own weight-limit chart caps kitchen shelving well below a living-room load, and heat and moisture near a stove or sink weaken the strips faster than in any other room. Plan to re-stick every 6 to 12 months. This is a maintenance item, not a one-time install.
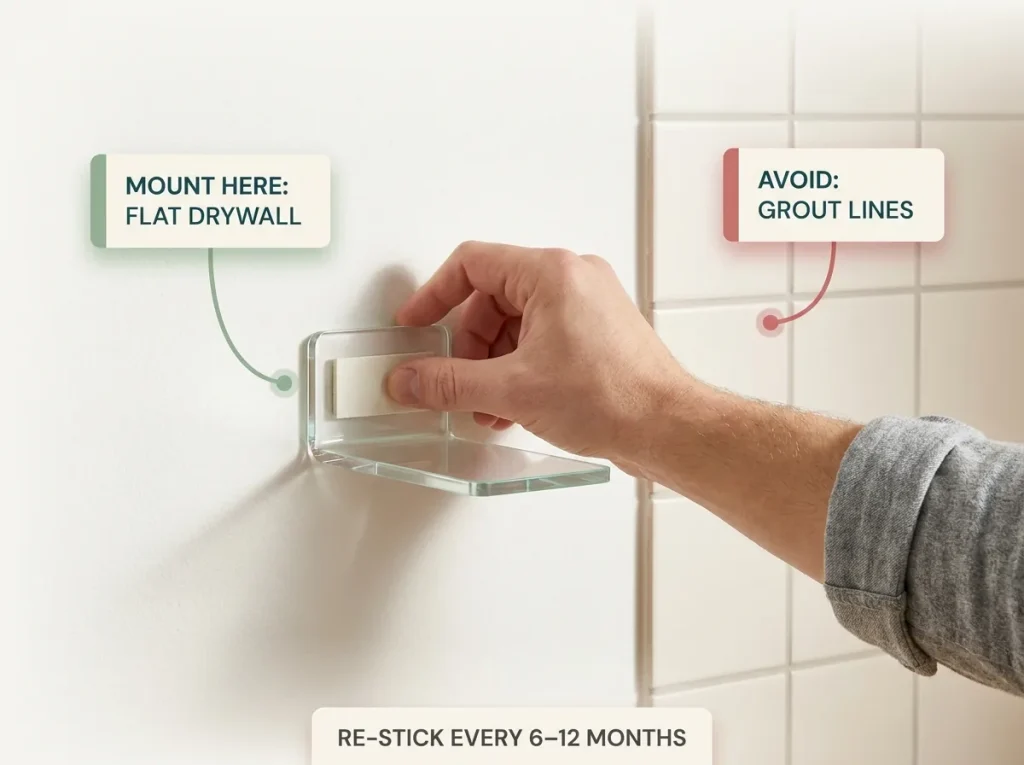
The “it held for months, then it just fell” complaint you see over and over tracks directly to that adhesive lifespan, not bad luck. The 2-Pack No-Drill Acrylic Wall Shelves do the job well if you respect the load and treat the re-stick as scheduled upkeep.
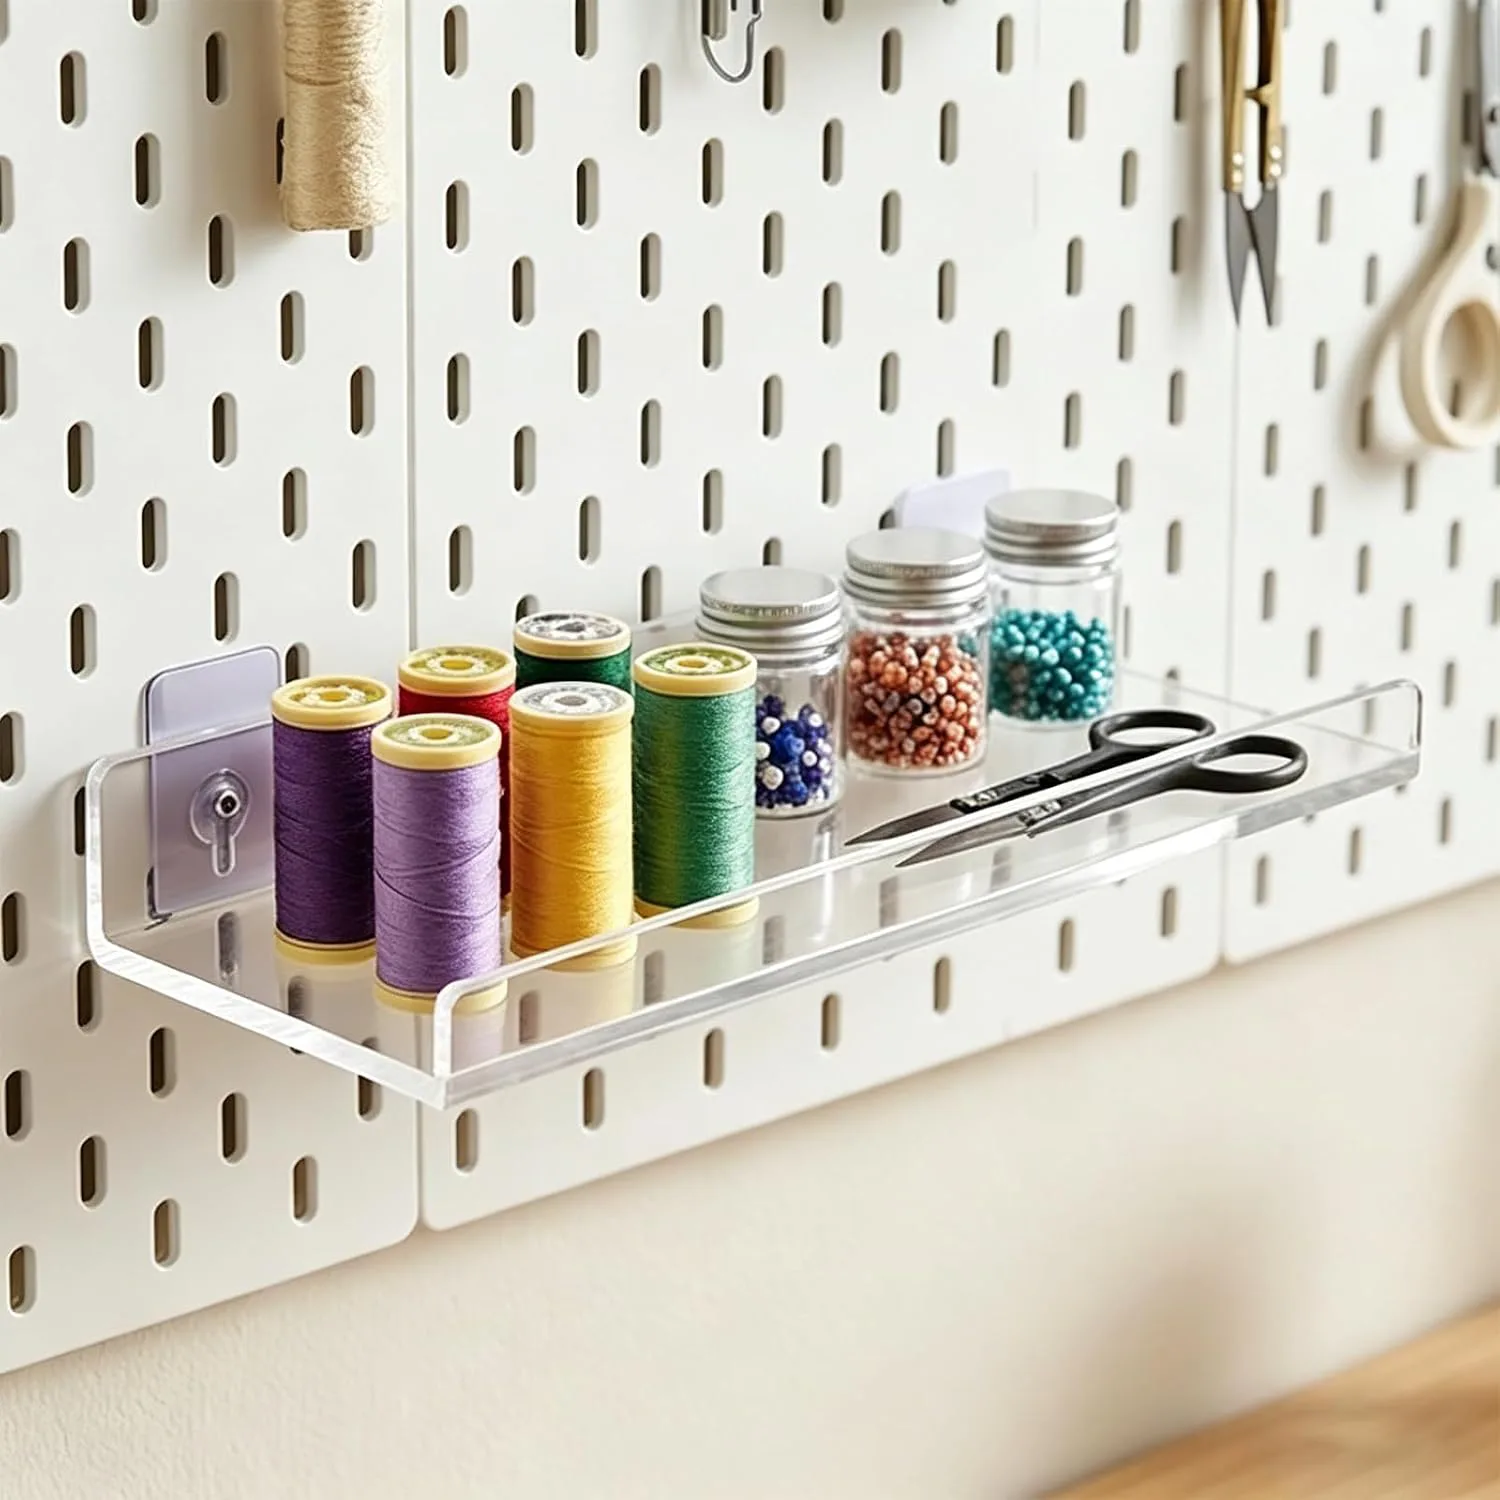
The same no-drill mounting rules that keep renters’ deposits intact in the cabinets apply on the wall too: adhesive over flat surfaces, light loads, and a re-stick on a schedule.
Idea 4: Keep Cooking Tools in a Crock by the Stove
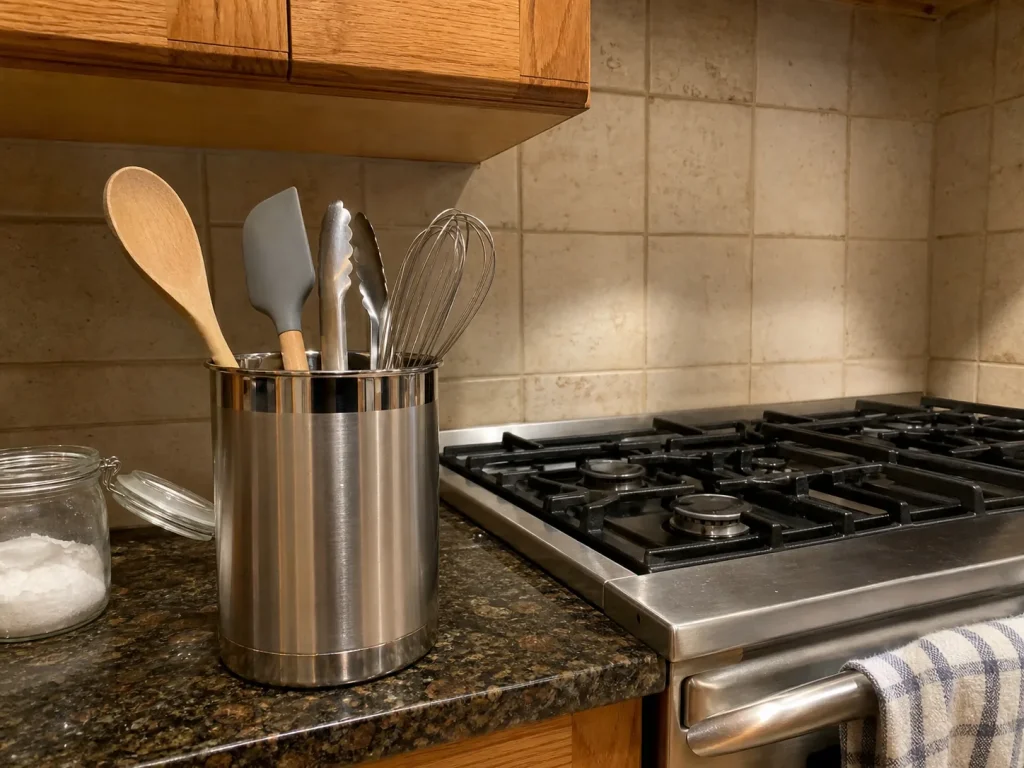
You reach for the same five tools every time you cook. The spatula, the big spoon, the tongs, the whisk. Bury them in a drawer and you are digging mid-sauté. Leave them loose on the counter and they are clutter. A crock by the stove splits the difference, but only if you are ruthless about what earns a spot.
Only the daily-use tools go in the crock. Everything else stays in the drawer. A crock holding 20 utensils is just a vertical junk drawer you have to paw through anyway. Place it within arm’s reach of the stove, not by the sink where it catches splashback.
And before you buy one, a tall mug or a repurposed jar does this identically for free. The Oggi Stainless Steel Utensil Holder is the buy-it version if you want brushed steel that wipes clean, and its 5-inch footprint keeps it from sprawling. The only real limitation is capacity, and that is the point.
Idea 5: Mount the Knives on a Magnetic Strip
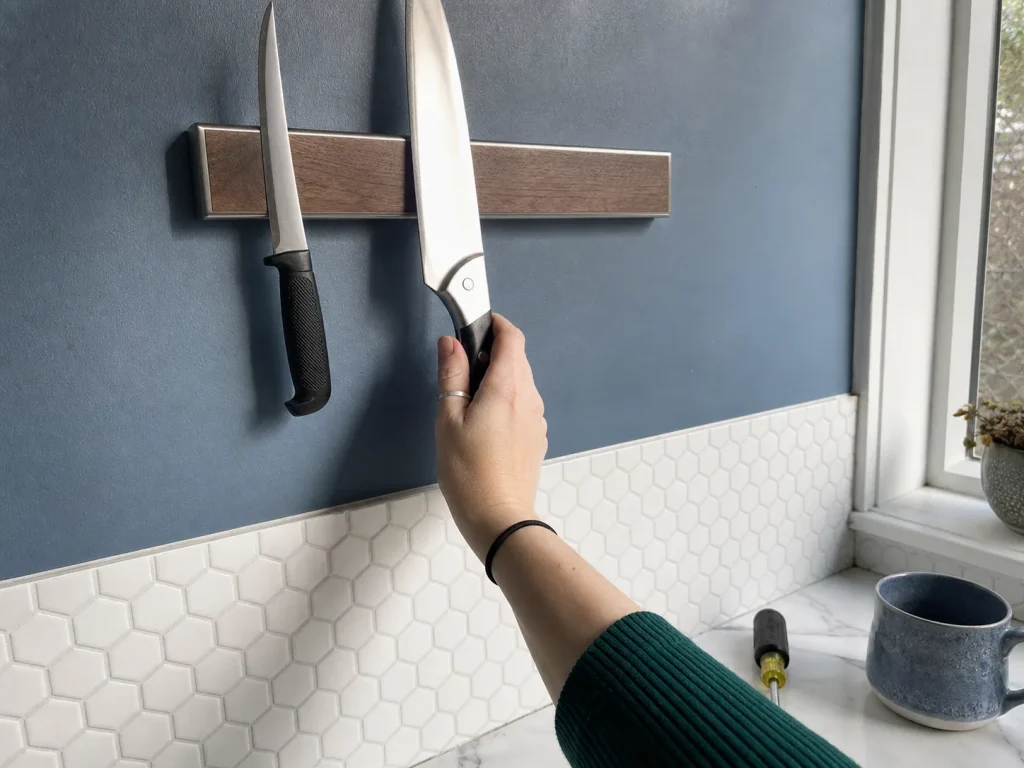
A knife block is a chunk of counter real estate holding air between the slots. A magnetic strip on the wall gives that whole footprint back and puts your knives in plain sight. It is a clean win, with one honest catch that makes it the trickiest idea here for renters.
This is the one idea that needs a real mounting point in the wall, usually drywall or a tile backsplash, and a security deposit may not forgive the holes. The honest renter fallback is a small in-drawer knife tray, which needs zero mounting and keeps blades organized without touching a wall. Wherever you mount the strip, offset it from directly above the prep zone, so a bumped knife does not land point-down where you stand. The Ninonly 12 Inch Magnetic Knife Strip holds a full set of chef and paring knives on a wood-faced bar, and the magnet is strong enough that blades do not slip once they are set.
Idea 6: Decant Dry Goods, Only If It Replaces the Boxes
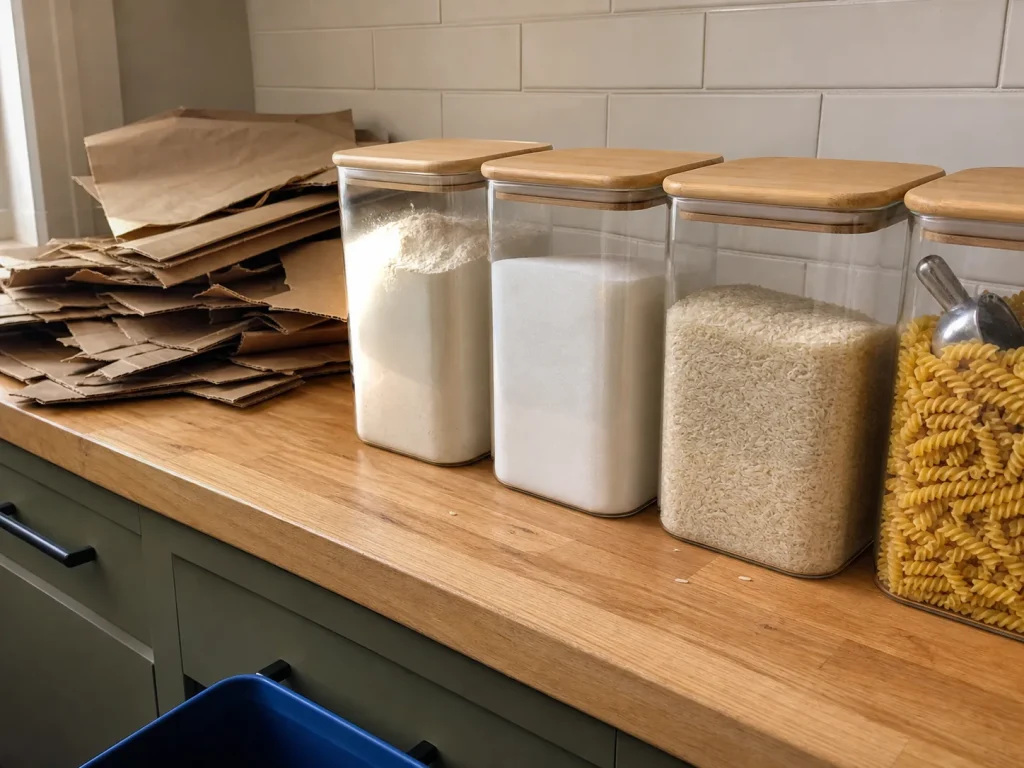
Matching canisters look great in photos. But here is the math nobody runs before buying the set.
A row of six canisters lined up single-file needs roughly 24 to 30 linear inches of counter or shelf. On a small counter, that is a meaningful chunk of the exact surface you were trying to clear. Decanting gets recommended everywhere. And it works, unless you are moving pantry staples onto a counter that was already tight, in which case you just added clutter with a nicer finish. This is the trap: decanting only helps if it replaces packaging you were already storing out here.
So run the test. If your flour and sugar currently live on the counter in torn bags and ugly boxes, swapping those for sealed canisters is net-neutral on footprint and a clear upgrade on looks and freshness. The ComSaf Airtight Glass Canister Set seals well and stacks the sizes sensibly for exactly that swap. But if those staples live happily in the pantry, do not move them to the counter for aesthetics. That is backwards, and it is the “aesthetic fix that doesn’t hold” pattern in one move. For a near-free version, repurposed sauce jars with painted lids get you most of the look for nothing.
Only decant what you actually reach for daily. Coffee, sugar, and flour earn a counter canister; the lentils you cook twice a year do not. Every canister you add is 4 to 5 inches of counter spoken for, so make each one pay rent.
Idea 7: Send Fruit Up, Not Out

A flat fruit bowl spreads across the counter and takes up a surprising amount of surface for a few apples. A tiered basket goes up instead, so you store the same fruit in roughly half the footprint. The lower tier also takes onions and potatoes off the counter and out of the fridge, where they do not belong anyway.
Going vertical here adds height, around 10 to 13 inches, without adding much base, so it is genuinely one of the few ideas that frees square inches rather than reorganizing them. Before you buy, stacking two flat bowls of different sizes recovers most of the same vertical win for nothing. If you want the built version, the RICCLE Fruit Basket gives you two wire tiers plus a banana hook, and the open weave keeps produce breathing so it lasts longer than fruit crammed in a bowl. It is freestanding, so renters have nothing to worry about.
Idea 8: Give Bread a Box That Doubles as a Shelf
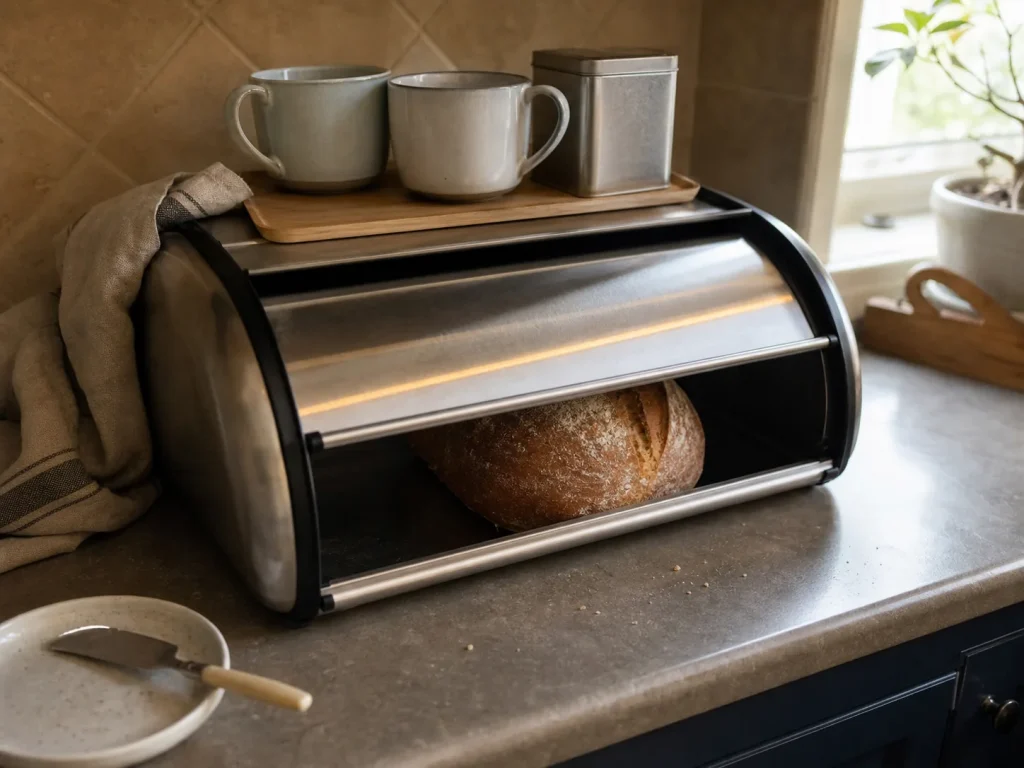
A bread box keeps loaves fresh and off the counter as loose, flopping bags. The bonus is that the flat top becomes a small shelf for a coffee setup. But be honest about the trade before you commit the space.
A 2-loaf box runs about 16 to 17 inches wide, which is close to a full sink landing zone by itself. It competes directly with other ideas for the same strip of counter, so it only earns that footprint if bread is genuinely a daily-out item in your house. If it is, the Hemoton Stainless Steel Bread Box has a roll-top that tucks away instead of swinging out, and the flat steel lid holds a small tray of mugs. For a free version, a repurposed cookie tin stores bread just as well. You lose the flat-top shelf, not the function.
Idea 9: Zone a Coffee or Beverage Station
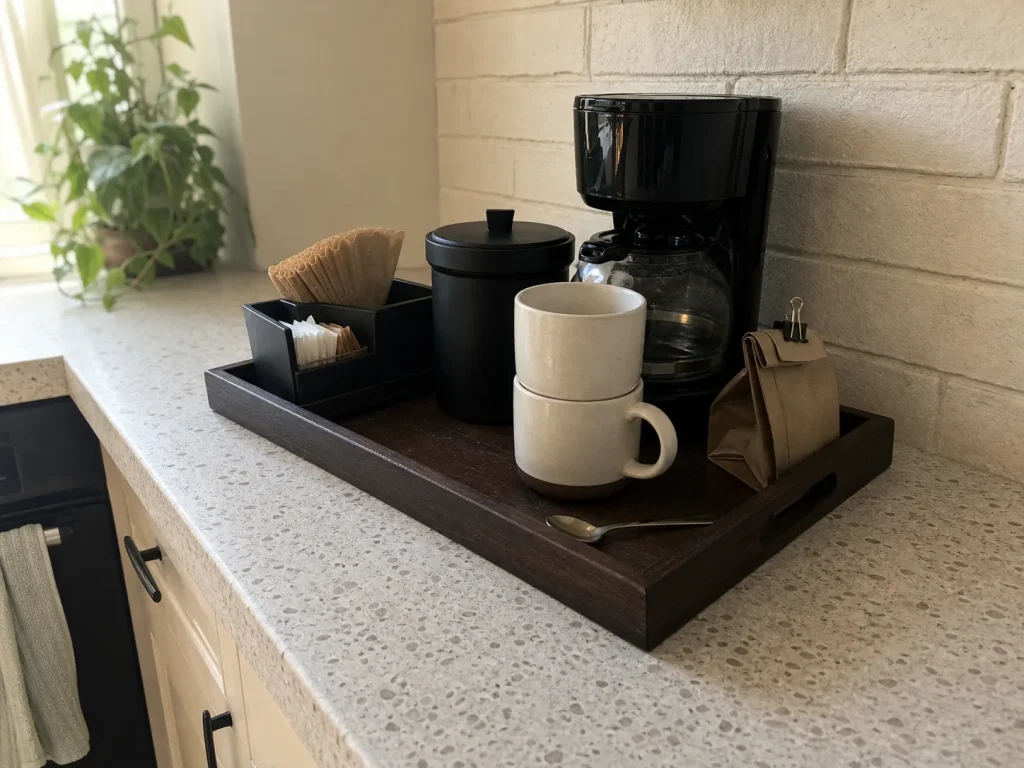
Coffee gear breeds. The maker, the beans, the mugs, the sugar, the little spoon. Left loose, they colonize a third of the counter within a week. Zoned onto one tray or one defined corner, the same gear reads as an intentional station instead of sprawl.
A coffee station is just a designated home for one activity’s tools, so bound it with a tray, the same trick from Idea 1, or claim one defined corner for it. Stack vertically where you can: mugs on a small stand or on the bread-box lid, beans and filters in a small caddy, the maker underneath. The best part is you almost certainly do not need to buy anything. Reuse a tray you already own, because the win is the boundary, not a purchase. The one condition is that the mugs actually come back to the station, which is where the nightly reset at the end of this list earns its keep.
Idea 10: Give Mail, Keys, and Chargers a Real Drop Zone
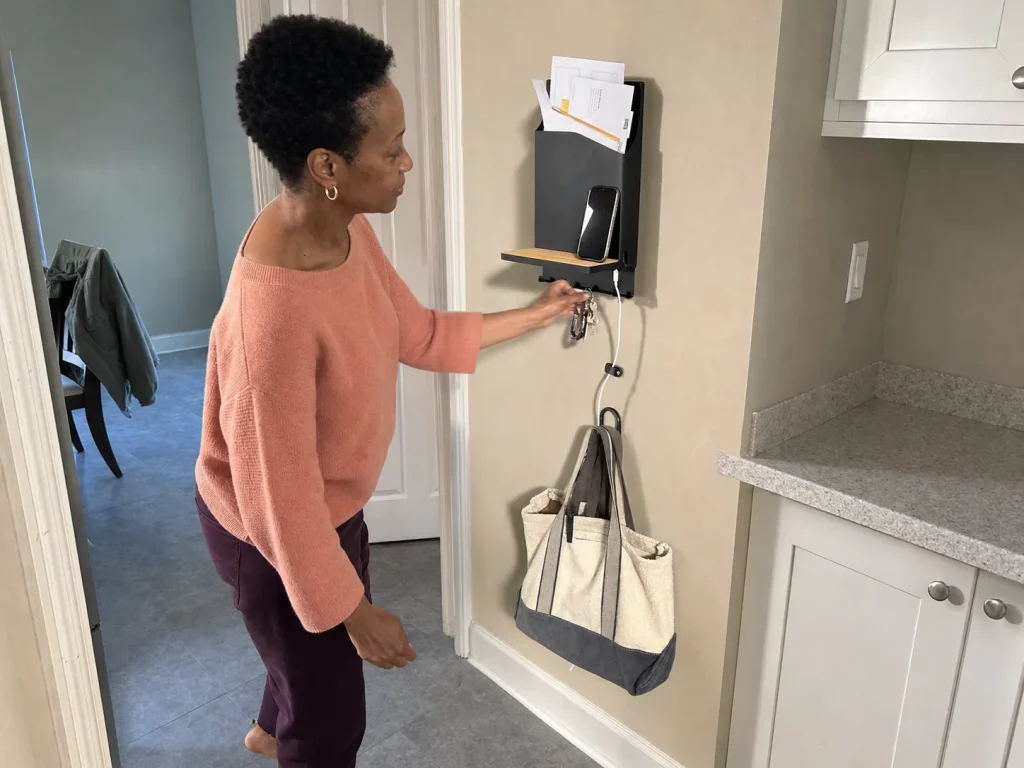
This is the idea that fixes the mechanism from the top of the article, and if you only do one thing on this list, do this one.
Assign the pile a home, ideally off the counter
Mail, keys, and the phone charger land on the counter because they have nowhere else to go. Remember counter drift: an unassigned item defaults to the nearest flat surface. So assigning it a home is the entire solution. Off-counter is best. A wall pocket, a small entry shelf, or a drawer near the door beats a counter tray every time, because the goal is to keep this pile off the prep surface, not to make it look tidy on the prep surface.
If it truly must live on the counter, bound it to the smallest tray that works and cap it hard, with no overflow allowed. For chargers, set up one charging station with the cable anchored, or the cables migrate and everything attached to them migrates too.
Why the drop zone survives or dies
A drop zone works only if everyone in the house actually uses the same one. An unlabeled or inconvenient spot gets abandoned within a week, and then the counter goes right back to being the default. This is the quiet reason counter systems revert, and it is the same durability problem behind why minimalist kitchen setups quietly slide back without a home for the daily-carry pile. Make the drop zone the easiest possible option and it sticks.
Put the drop zone on the path you already walk when you come in the door, not where you wish you would put your keys. People drop things where they stop moving, so build the system around the habit you have, not the one you want.
Idea 11: Stand a Cutting Board as a Working Prep Zone
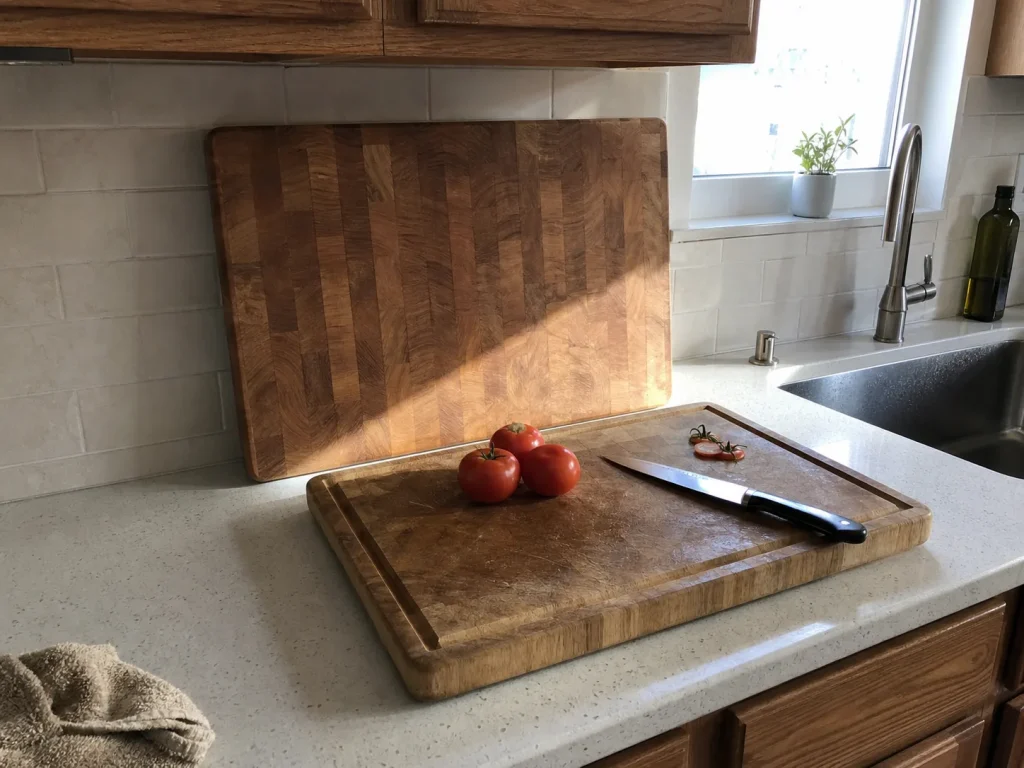
A big cutting board left standing or laid in one spot does two jobs at once. It is your prep surface, and it visually claims that stretch of counter as the working zone, which keeps drift from creeping into the space you actually cook in.
Position it over the prep zone near the sink, inside that landing-zone strip the NKBA guidelines mark out. A standing board acts as a soft placeholder, a physical reminder that this patch of counter has a purpose, so the mail and mugs are less likely to colonize it. And this is almost always a board you already own, so the idea is positioning, not buying. Zero cost, zero mounting, and it doubles as the surface you were going to use anyway.
Idea 12: Hang Mugs and Tools Under the Upper Cabinets
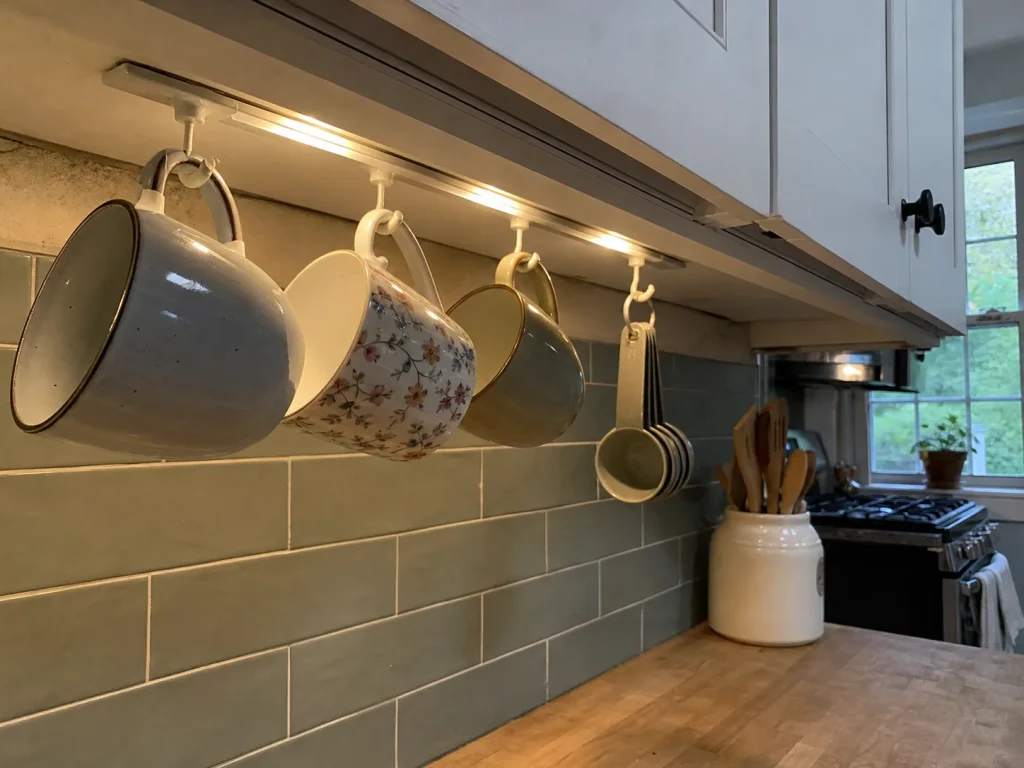
There is a whole plane of unused space under your upper cabinets. Adhesive hooks or a slim under-cabinet rail turn it into hanging storage for mugs and light tools, which frees counter without adding a footprint anywhere.
Keep it to light items only. Mugs and measuring cups, not cast iron, because the same adhesive limits from Idea 3 apply here and heat still weakens the stick near a cooktop, so the 6-to-12-month re-stick holds true. Adhesive hooks are already the cheap, renter-safe version, so only go with screw-in if you own the place and want permanence. One placement rule: keep the hooks off the space directly above the cooktop, where anything hanging catches grease and steam. Done right, you get a row of mugs off the counter and nothing lost.
The Nightly Reset That Keeps Any of This Working
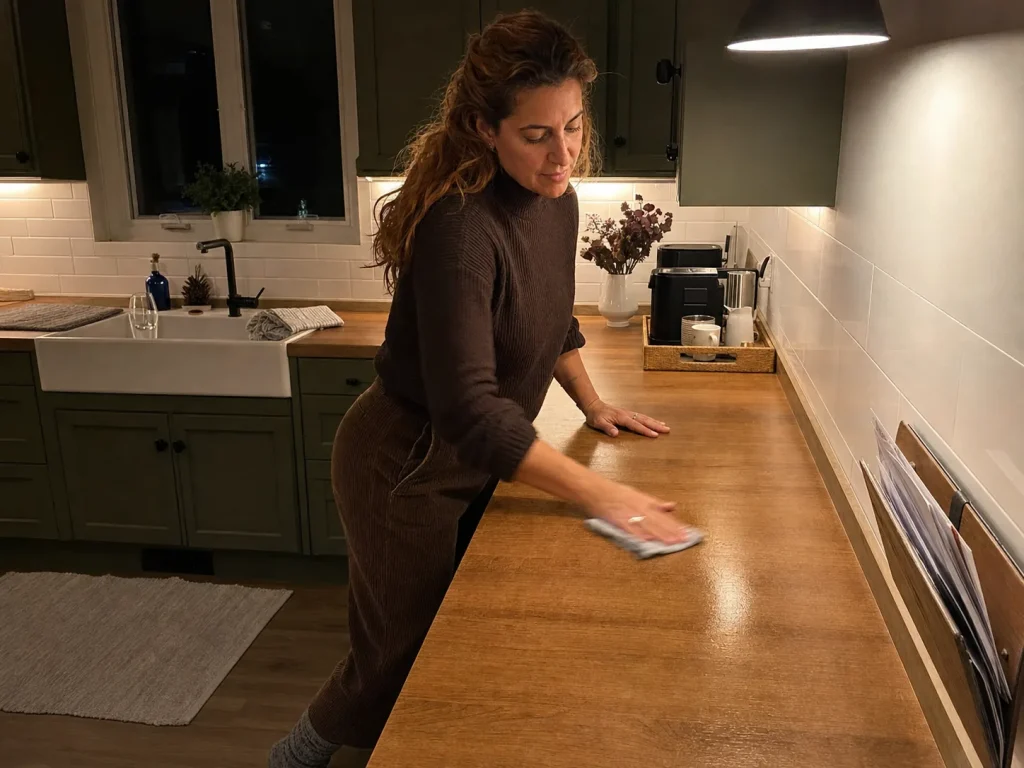
Here is the part the after photo never shows. Every idea above is a container. None of them return items to their home on their own. A two-minute reset at the end of the day is what turns a one-day clear counter into a permanently clear one.
The reset is simple. At day’s end, everything without a home tonight goes back to its assigned spot. Mail to the drop zone, mugs to the station, tools to the crock. Two minutes, not a deep clean. It matters because drift is continuous, so the counter needs a daily un-drift, not a weekly overhaul that you dread and skip. When the overflow really belongs behind a door rather than on the surface, route it into the right cabinet organizers instead of letting it pile back up.
Two honest notes to make this stick. First, the reset only works if it is a shared rule, not one person’s silent labor. Build it as a whole-house habit or it collapses into resentment fast.
Second, the conventional wisdom is that a good system maintains itself. In practice, nothing does. Any counter setup feels effortless for about three weeks on novelty alone, then reverts. The reset is what carries it past that drop-off, and it is what earns the word “clear” in the title.
Conclusion
Three things carry the whole list. Give every item a designated home, because the counter fills up when things have nowhere else to land. Choose ideas by the footprint they actually cost, not by how they photograph. And remember that a container without a nightly reset is just prettier clutter.
In three months, look at what drifted back. Whatever pile reformed is telling you that item still has no real home, so assign it one and the drift stops there.
Start with the drop zone. Give mail, keys, and the charger a home off the counter this week. That single fix stops more drift than any tray you could buy.
Frequently Asked Questions
01What should you not keep on a kitchen counter?
Anything that does not earn daily use out there: small appliances you use weekly, mail that has a drawer, and bulk pantry staples. The test is simple. If it is not used most days or has no assigned home on the counter, it is drift, not storage.
02How do I keep my kitchen counters from getting cluttered again?
Give every regular item a designated home and run a two-minute nightly reset that returns strays to it. Counters re-clutter because unassigned items default to the nearest flat surface, so assign them a spot and reset daily.
03How do I organize a small kitchen counter with limited space?
Prioritize ideas that go vertical, like a turntable, wall shelf, or tiered fruit basket, over ones that add footprint like a bread box or canister row. Keep just one bounded grab-zone tray on the surface, since every organizer competes for tight prep space.
04Does decanting into canisters actually save counter space?
Only if it replaces packaging you were already storing on the counter. Six canisters need roughly 24 to 30 linear inches, so decanting pantry staples onto a tight counter just for looks adds clutter instead of removing it.
05What is the most renter-friendly kitchen counter organization idea?
Freestanding, zero-mount ideas like a tray, turntable, tiered fruit basket, or utensil crock. The one to approach carefully is the magnetic knife strip, which needs a wall mount, so an in-drawer knife tray is the no-damage fallback.
Disclaimer: ClutterlessNest is a participant in the Amazon Services LLC Associates Program. As an Amazon Associate we earn from qualifying purchases. This article may contain affiliate links — if you buy through them, we may earn a small commission at no extra cost to you. We only recommend products we have tested or genuinely believe in.