







In this article
You spent Saturday pulling everything out of your closet. You sorted, folded, donated, and put it all back in some version of order. It looked great for about twelve days. Now there’s a growing pile on the floor and you can’t find the one shirt you actually want to wear. The problem isn’t you — it’s the system, or more likely, the lack of one.
I’ve reorganized closets in enough apartments and rental bedrooms to know that the “after” photo means nothing. What matters is whether the system holds up when you’re tired on a Wednesday night and just want to throw your jacket somewhere. This guide covers the seven things that actually keep a closet functional long-term — and why most organization attempts fail before the second month.
Quick Answer: To organize a closet that stays organized:
- Measure your closet depth, rod height, and shelf width before buying anything
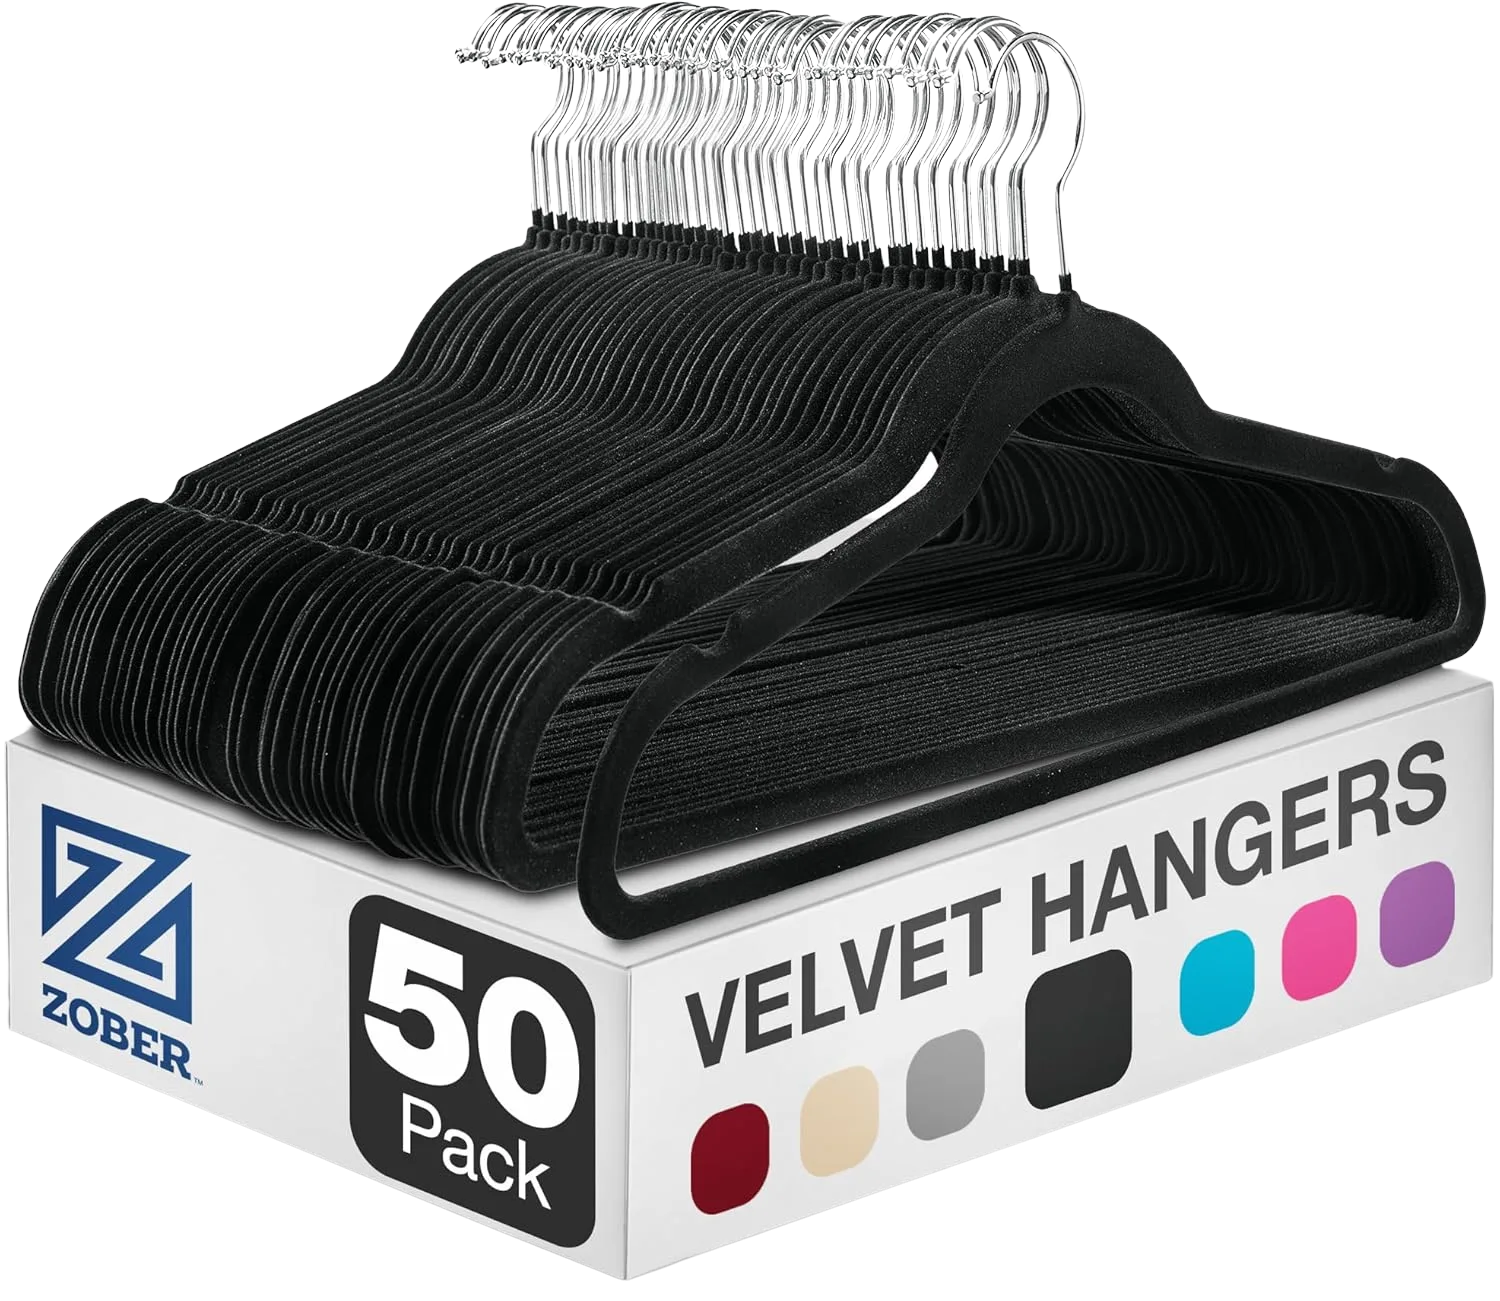
- Switch to slim velvet hangers to reclaim rod space
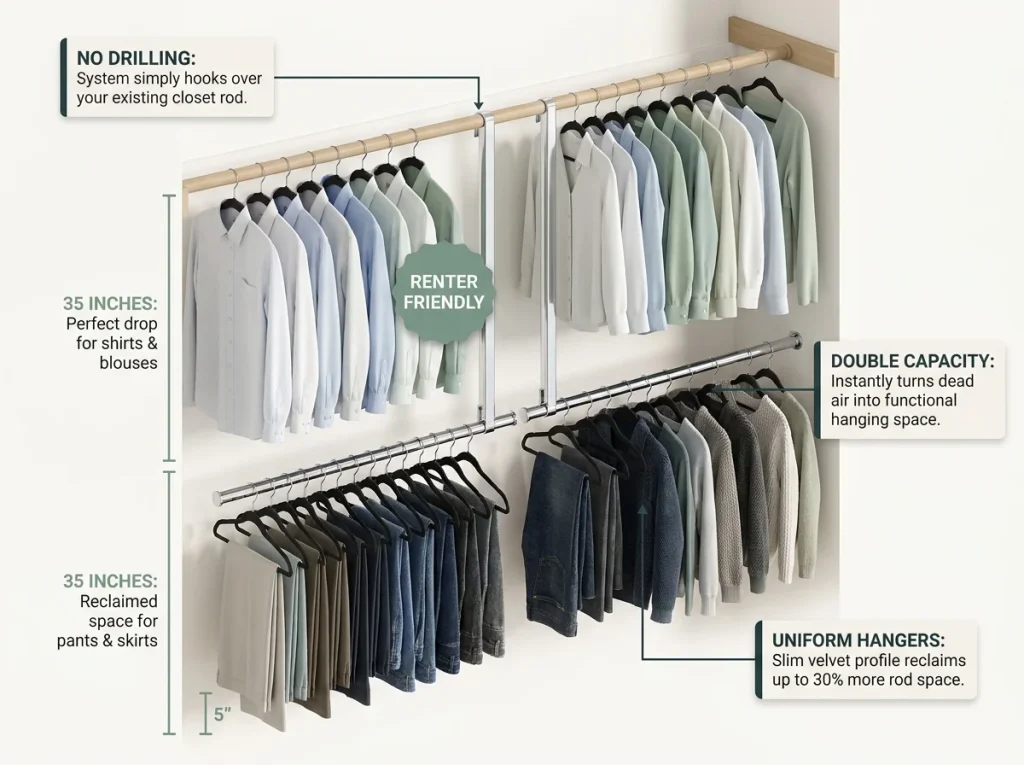
- Add a double rod for shorter garments — no drilling needed
- Use shelf dividers and liners to keep folded items stable
- Move shoes and bags to over-door organizers to clear floor space
- Run a ten-minute monthly reset to catch drift before it becomes chaos
Why Your Closet Gets Messy Again
The One-Time Event Trap
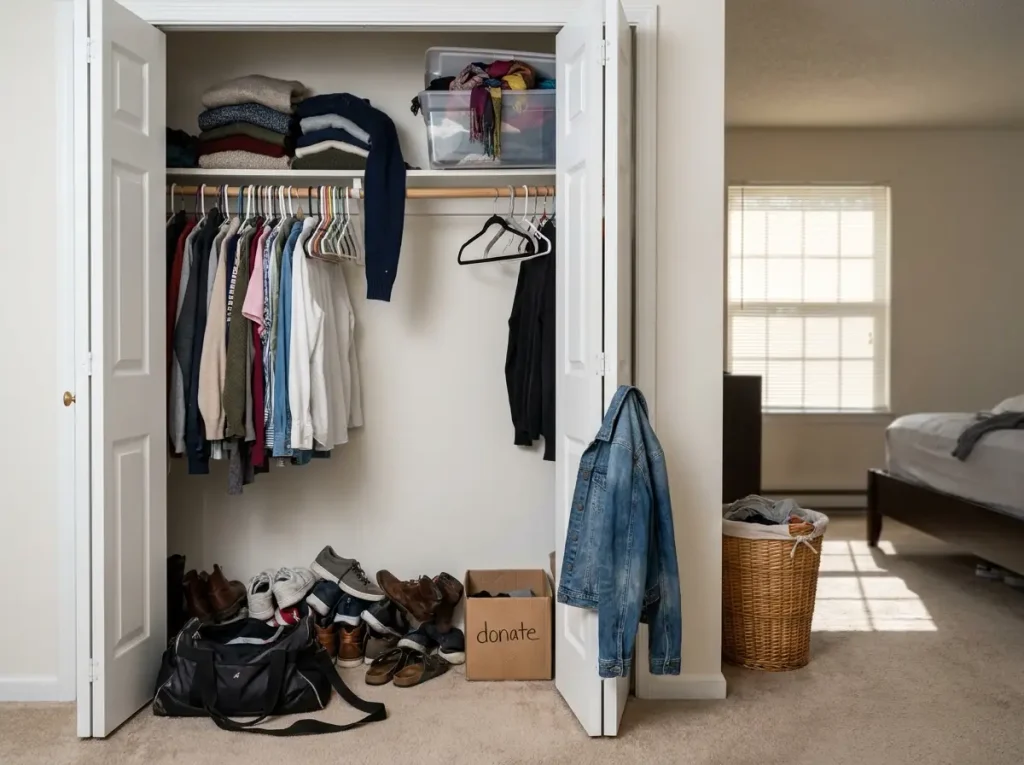
Here’s what most closet organization advice gets wrong: it treats the project like a weekend event. Clear everything out, buy matching bins, put it all back in color order, post the photo. Done. Except it’s never done, because nobody accounts for what happens when you live in the space every day.
The closet reverts because it doesn’t have a maintenance system built in. You didn’t fail at organizing — you organized without a plan for what happens when life gets busy and the “to be put away” pile starts growing on the closet floor. Professional organizers from the National Association of Productivity & Organizing Professionals recommend a regular reset routine, not just a one-time overhaul.
The Three Reasons It Falls Apart
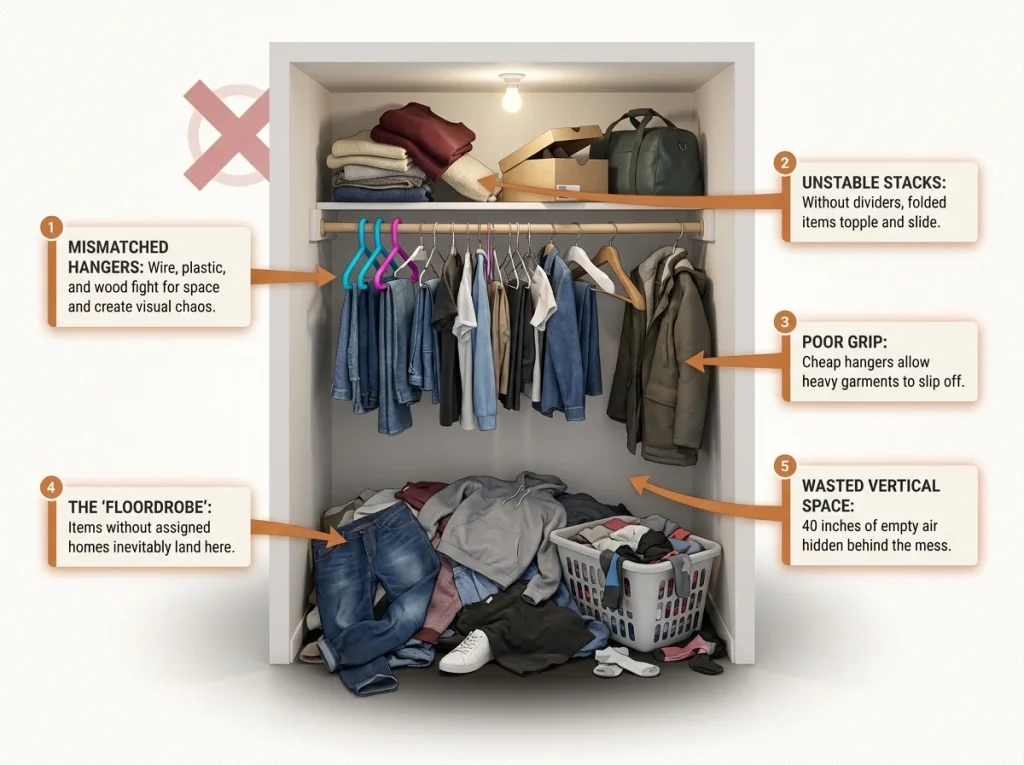
Your closet gets messy again for one of three predictable reasons, and usually a combination of all three. First, items don’t have assigned spots. When something doesn’t have a fixed home, it ends up wherever there’s space — which means the floor. Second, mismatched hangers create visual chaos even when clothes are technically in order. A mix of wire, plastic, and dry-cleaning hangers fights for rod space and makes everything look cluttered. Third, you bought organizers before measuring. That bin looked perfect online, but it sticks out past the door frame because your shelf is 22 inches deep, not 24.
The fix for each of these is specific and sequential. We’ll cover all three in the next sections.
The “Floordrobe” Problem
If you’ve ever shoved the closet door shut before a guest walked past your bedroom, you already know the feeling. The pattern is always the same — a few items land on the floor because you were too tired to hang them up, then more items follow because the floor already has stuff on it, and within two weeks the floor is the system. Organizing communities have a name for this: the floordrobe. Breaking the cycle requires a floor rule and a reset schedule, both of which we’ll set up below.
Measure Before You Buy a Single Bin
Your Closet’s Real Dimensions
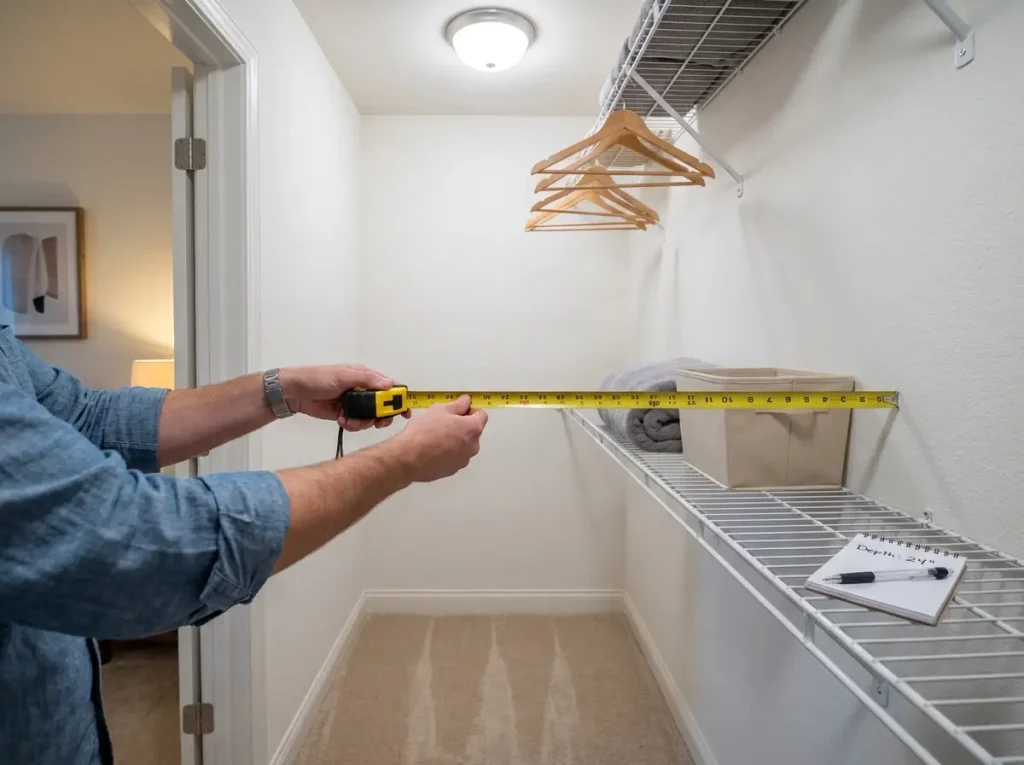
Every closet organization project should start with a tape measure, not a shopping cart. Standard reach-in closets run about 24 inches deep, 6 to 8 feet wide, with the rod set at roughly 72 inches and the shelf sitting at 84 to 87 inches above the floor. But “standard” is a generous word — rental closets are frequently shallower (22 inches is common), and that two-inch difference determines whether a bin fits flush or sticks out past the door.
Grab a tape measure and write down four numbers: shelf depth, shelf width, rod height from the floor, and the gap between the top shelf and the ceiling. That ceiling gap is dead space you’re probably ignoring right now — in most closets it’s 12 to 24 inches of vertical real estate where labeled fabric bins for seasonal items fit perfectly.
What to Measure and Why It Prevents Returns
The shelf above the rod is typically only 12 inches deep. Anything taller than about 10 inches placed on it will tip forward unless there’s a wall behind it or you use dividers. The rod itself has a usable length that determines how many hangers fit — and most people overestimate this by about 30 percent, which is why clothes end up crammed together so tightly you can’t pull one out without dragging three along with it.
Write your measurements on a sticky note and keep it in your wallet or phone case. You’ll need them every time you’re in a store staring at an organizer that looks like it might work. “Might” is how you end up returning bins. Measurements eliminate “might.” If you’ve applied this same measure-first approach to your kitchen cabinets, you already know how much frustration it prevents.
The Rental Closet Reality
Rental closets — the ones with one rod, one shelf, and builder-white wire shelving — are what most readers are working with. If your closet has wire shelving, the first thing to address is the shelf surface itself. Items tilt, slide, and fall through the gaps in wire shelves. A cut-to-fit Gorilla Grip Wire Shelf Liner turns that into a stable flat surface immediately, and it peels off clean when you move out.
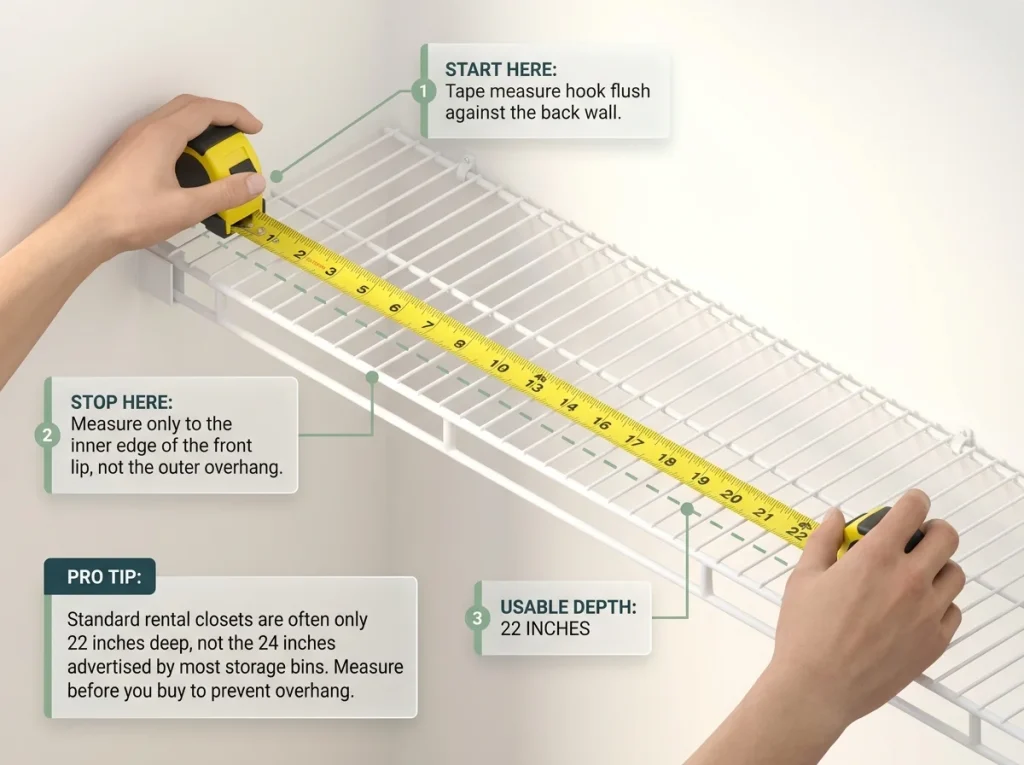
Pro tip: If your wire shelf has a front lip, measure from the back wall to the lip’s inner edge — that’s your actual usable depth. It’s usually an inch or two less than the total shelf.
The Hanger Fix That Reclaims Real Space

The Math Nobody Does
Hangers are the single cheapest upgrade you can make, and most people don’t realize how much space they’re wasting on them. Here’s the math: a standard wire or plastic hanger is roughly half an inch thick. A slim velvet hanger is about 0.2 inches thick. Across 50 items, that’s the difference between 25 inches of rod space and 10 inches. You just freed up 15 inches of rod — enough for another 10 to 12 garments — by swapping hangers.
That might sound like a small thing, but if your closet rod is packed tight and you can’t slide hangers without yanking, the hanger thickness is the reason. It’s not that you have too many clothes (though you might). It’s that your hangers are eating the rod.
Which Hangers Actually Hold Up
Not all velvet hangers are equal. The cheap ones shed velvet fuzz onto dark clothing and have hooks that bend under winter coats. The Zober Premium Velvet Hangers have held up across multiple tests — the 17.5-inch width fits standard rods, the 360-degree chrome hook doesn’t bend, and the velvet coating actually grips silk and satin. If budget is tight, the Amazon Basics version works for lighter garments but the hooks are thinner gauge and may not survive heavy sweaters long-term.
The One-Type Rule
A NAPO-certified organizer once pointed out something that surprised me: a third or more of what makes a closet look cluttered is actually the hangers themselves. Wire from the dry cleaner mixed with bulky plastic from the store mixed with a few wooden ones you bought optimistically five years ago. Standardizing to one hanger type is the visual equivalent of tidying half the closet without touching a single garment. This applies to any closet — if the same principle helps you see and access items faster in your pantry with matching containers, it works here too.
Double Your Hanging Space Without Drilling

The Vertical Space You’re Ignoring
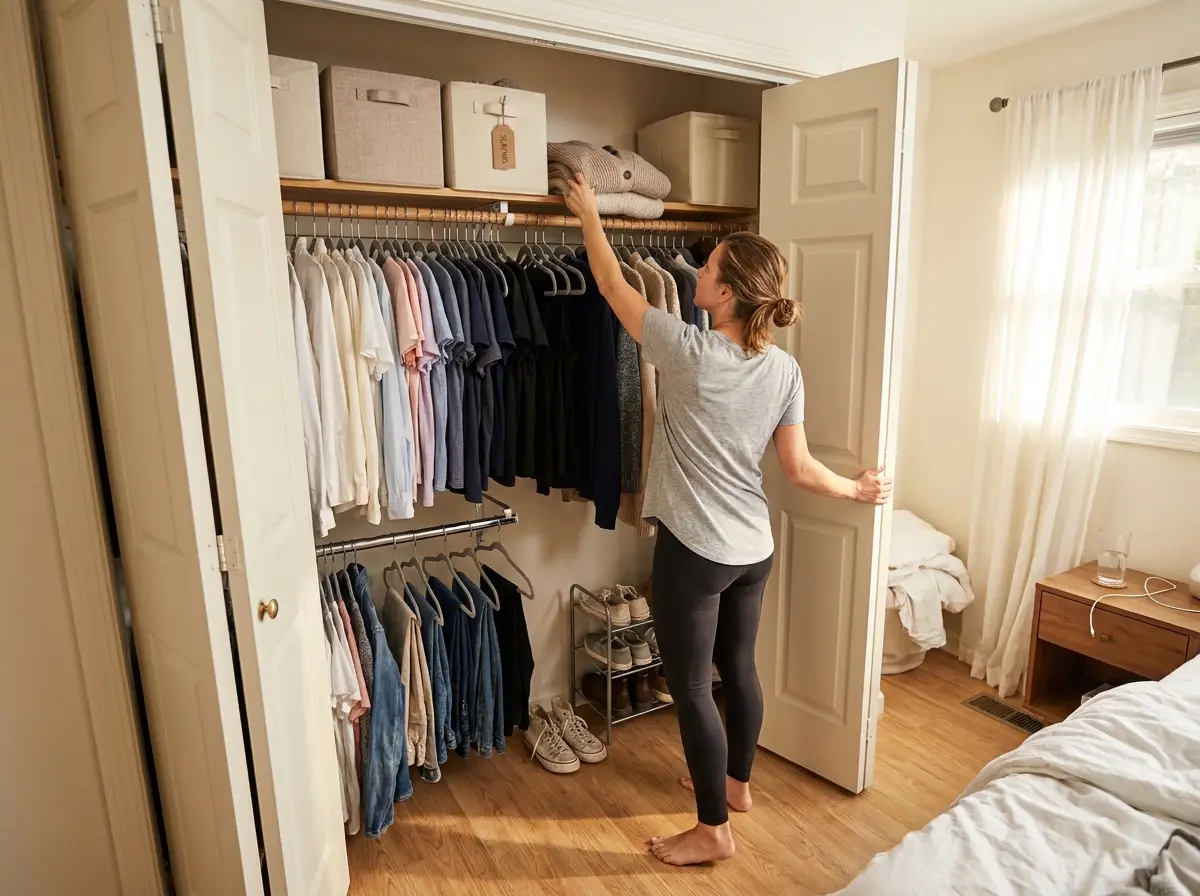
Look at your closet with the doors open. Everything hangs from one rod, usually set at about 72 inches. Below the shortest garments, there’s at least 30 to 40 inches of empty vertical space going to waste. For shirts, blouses, and folded pants, you don’t need 72 inches of drop. You need about 30 to 35 inches. That means a second rod below the first one turns dead air into usable storage — and you don’t need to drill, screw, or modify anything.
How the Double Rod Works
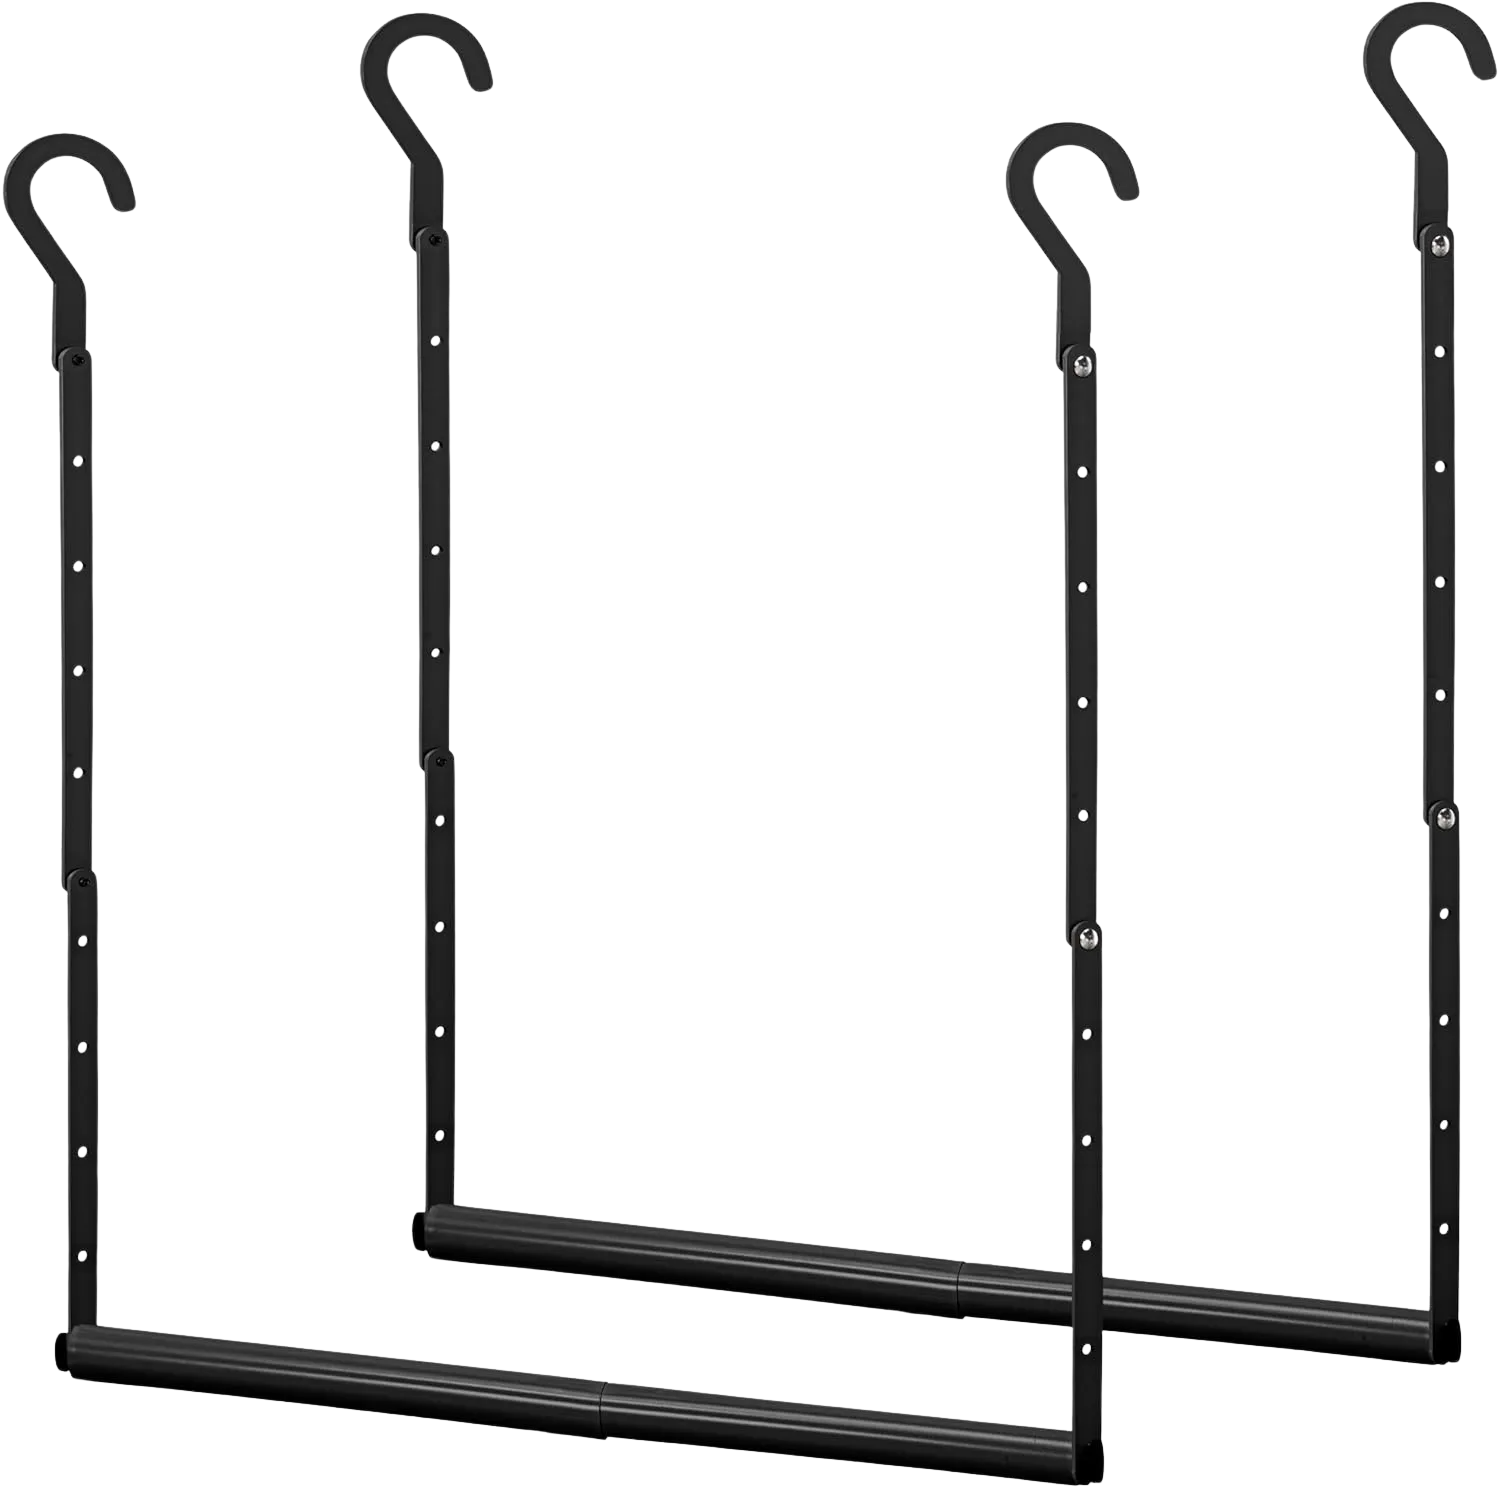
A double rod extender hooks directly over your existing closet rod and hangs a second bar below it. The STORAGE MANIAC Adjustable Closet Double Rod holds up to 110 pounds on chrome steel, adjusts to whatever height you need, and installs in about ten seconds. Hang longer items — dresses, blazers, long cardigans — on the top rod. Move shorter items — folded pants, button-downs, t-shirts — to the lower rod. You just doubled your hanging capacity without touching the wall.
The key is adjusting the height so the lower rod hangs at roughly 40 inches from the floor. This gives shorter garments enough clearance without dragging. If your longer items brush the floor when pushed to one side, slide them to the end of the rod where they have full vertical drop.
When This Doesn’t Work
This setup works best when at least half your wardrobe is short items — shirts, blouses, skirts. If you mostly wear long dresses, coats, or full-length garments, a double rod won’t help much because the top items need the full 72-inch drop. In that case, you’re better off with a single rod and reclaiming vertical space on the shelf and floor instead.
Pro tip: Before installing the double rod, do a quick sort: hang everything by length. You’ll immediately see how much rod space your short items occupy and whether doubling makes mathematical sense for your wardrobe.
Shelves, Dividers, and the Floor Rule
Why Stacks Topple and How to Stop Them
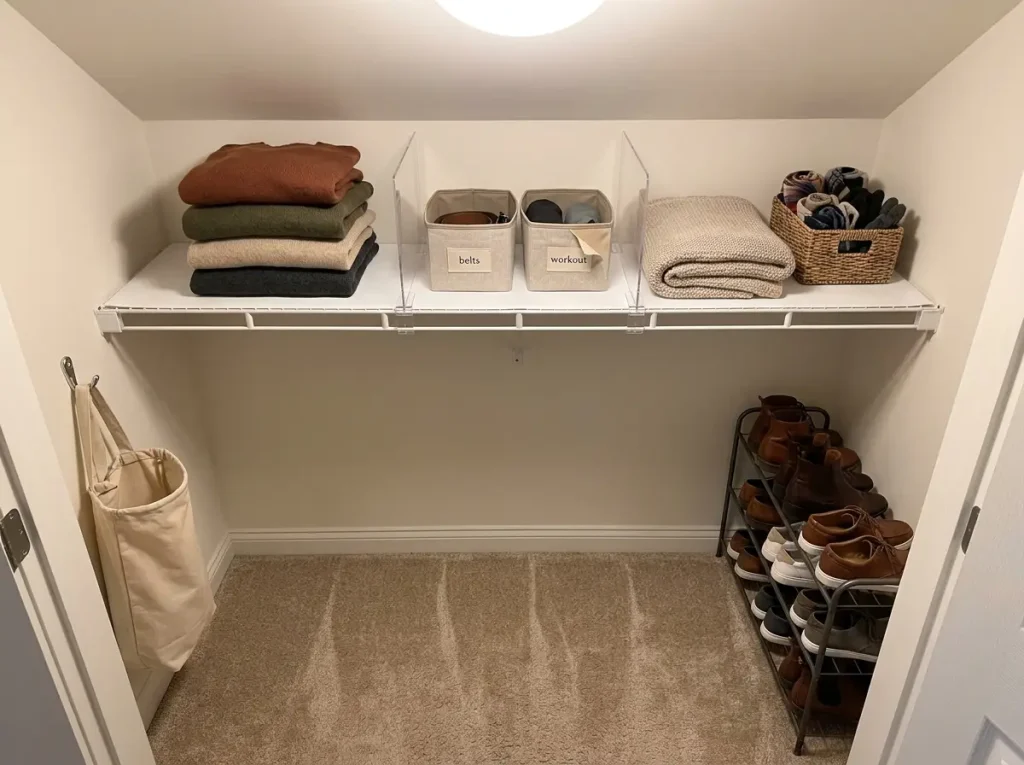
Folded sweaters on a closet shelf look tidy right up until you pull one from the middle and the whole stack slides sideways. This happens because there’s nothing holding the edges. Shelf dividers clip directly onto the shelf and create physical boundaries between stacks — no drilling, no adhesive, no tools. The HBlife Acrylic Shelf Dividers slide on and off in seconds, hold up to 15 pounds per divider, and are completely invisible from a distance because the acrylic is clear.
If you don’t want to spend money on dividers, bookends work. So does a rigid cardboard insert from a shipping box, cut to shelf height. The point isn’t the product — it’s creating a physical stop so gravity doesn’t undo your folding.
The Wire Shelf Problem
Most rental closets have wire shelving, and wire shelving is terrible at holding anything that isn’t perfectly flat. Shoes tilt into the gaps. Bins wobble. Stacked items lean. If you want your shelf system to work, the shelf surface needs to be flat. A shelf liner sits on top of the wire and gives you a stable, level platform. This is the same concept that makes wire kitchen cabinets functional — the fix is the liner, not the shelf.
Cut it to size, lay it down, and everything that goes on that shelf now sits flat. It’s the least exciting purchase you’ll make and probably the most impactful.
The Floor Rule
Your closet floor needs a rule, and the rule is simple: only two categories of items are allowed on the floor. Choose which two. Common choices are a shoe rack and a laundry hamper, or shoes and a small donation bag. Everything else — gym bags, backpacks, loose shoes, the cardboard box of things you’ve been meaning to sort — lives somewhere else.
The reason the floor needs a hard limit is that floor clutter is contagious. One item on the floor invites three more within a week. If you keep a clear center path from the closet door to the back wall, the closet reads as organized even when the shelves aren’t perfect. The same principle applies everywhere — if you’ve organized your deep kitchen cabinets, you know how quickly open space fills up without a boundary.
Pro tip: The “one in, one out” floor rule works when you enforce it at the end of the day, not in the moment. Trying to decide where to put your gym bag while you’re exhausted after a workout is how the floor pile starts.
Shoes, Bags, and the Stuff That Migrates
The Back-of-Door Solution
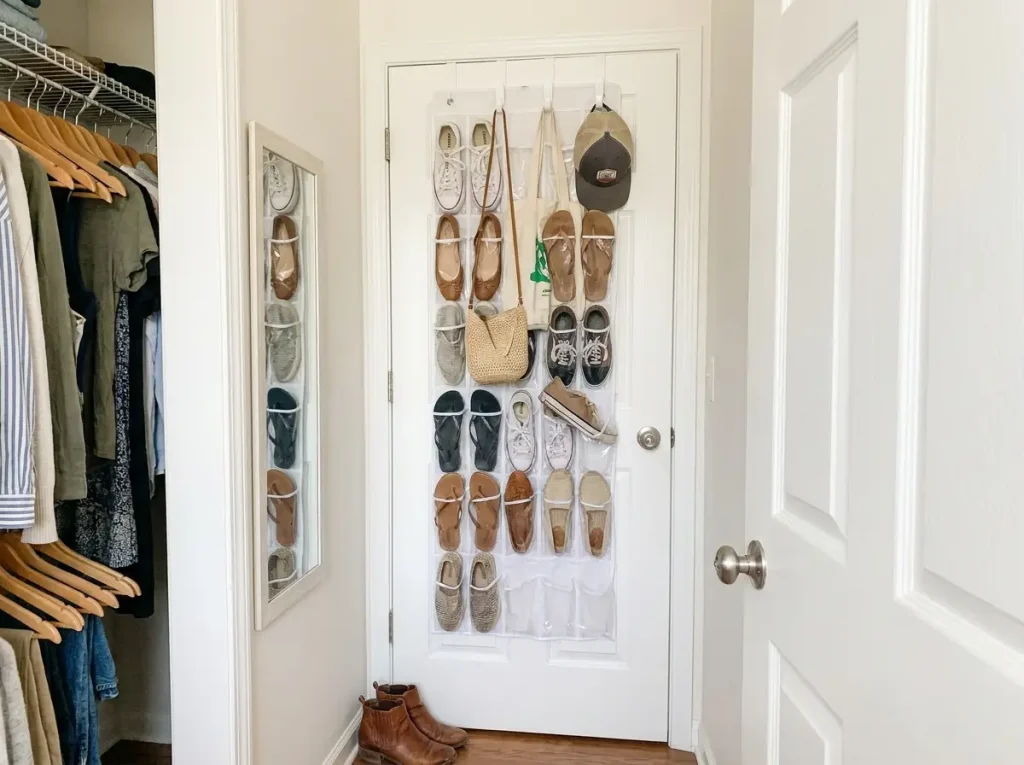
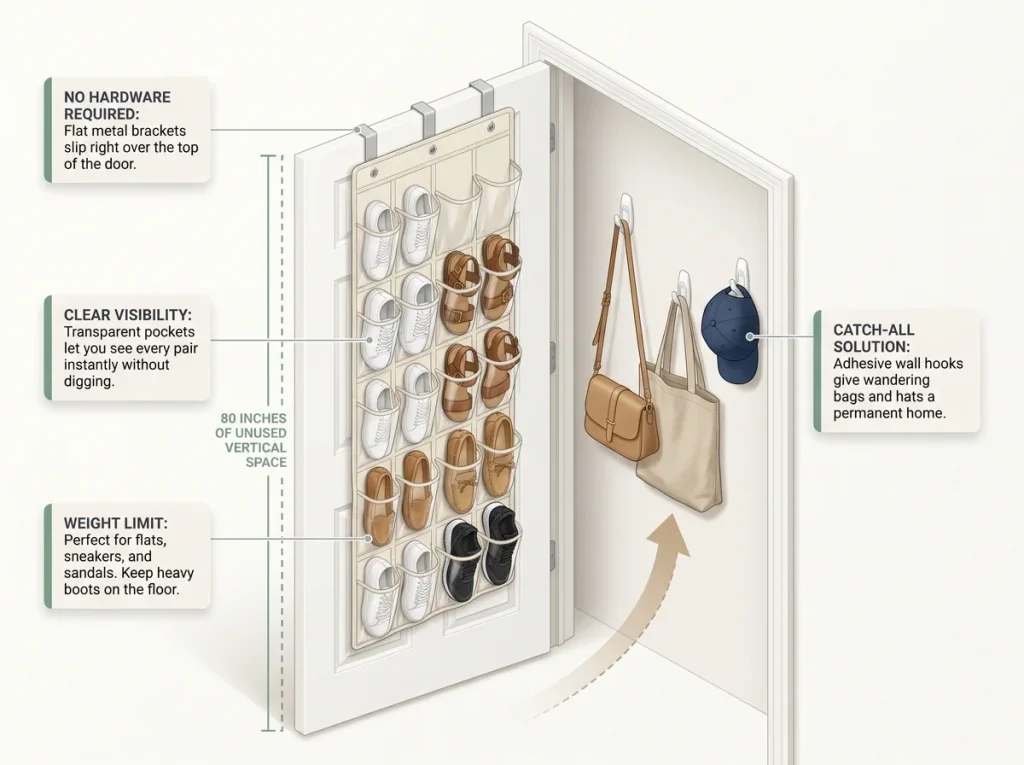
Your closet door has two sides, and you’re only using one. The back of a standard closet door is 80 inches of vertical space going completely unused. A SimpleHouseware Over-the-Door Shoe Organizer turns that space into 24 clear pockets that hold flats, sneakers, sandals, and flip-flops where you can see every pair at a glance. No hardware, no holes, lifts off clean when you move.
It won’t hold boots or chunky shoes — those need to live on the floor shelf or rack. But for lightweight footwear, this is the most efficient use of space in the entire closet because it adds storage capacity without taking a single inch of rod, shelf, or floor area.
Bags, Hats, and the “Catch-All” Problem
Bags and accessories are the items that migrate. They start on a hook, then end up on the bed, then the chair, then the closet floor. The fix is giving them a visible, reachable spot inside the closet. Adhesive Command hooks on the inside wall of the closet hold crossbody bags, tote bags, and baseball caps. The adhesive versions hold up to 5 pounds each and leave no marks when removed — the same no-drill approach that works for pantry door organizers.
If you have wire shelving, the shelf itself doubles as a hook point — S-hooks hang from the wire and hold bags by their straps. Free, instant, renter-safe.
The “Maybe” Basket
One of the smartest renter-organizer practices I’ve seen is keeping a small basket or shopping bag on the closet floor labeled “maybe.” When you’re not sure if you want to keep something — a jacket that doesn’t fit quite right, a scarf you never reach for — drop it in the basket instead of making a decision in the moment. If it sits there for a week without you thinking about it, it goes to donation. This removes the pressure of decluttering in real-time and prevents the closet from becoming a graveyard of items you feel guilty about getting rid of.
The Monthly Reset That Keeps It Working
Why Weekly Resets Fail
You’ll see recommendations for a weekly closet reset. Here’s why that rarely sticks: if your closet organization is built right — hangers matched, floor rule enforced, shelf dividers in place — it doesn’t need weekly attention. It needs a monthly check-in. Ten minutes, once a month. That’s it.
The monthly rhythm works because it matches how closets actually drift. Things don’t fall apart overnight. They shift slowly — a hanger gets crooked, a sweater migrates from its stack, a pair of shoes ends up facing the wrong way. A month is long enough for these small drifts to accumulate without becoming overwhelming, and short enough to fix them before the system breaks down entirely.
The Ten-Minute Reset Routine
Set a reminder on your phone for the first of every month. When it goes off, open the closet and spend ten minutes on these five checks: straighten hangers that shifted out of alignment, restack any folded items that toppled, return floor items that don’t belong to their actual home, check labels on bins for anything that’s been misfiled, and do a quick hanger count — if you have more empty hangers than last month, you might be accumulating laundry drift instead of putting things back.
That’s the whole system. Not a reorganization — just a tune-up. Like the weekly pantry reset that keeps food zones working, the monthly closet check prevents the slow slide back to chaos.
Seasonal Rotation as Your Quarterly Deep Check
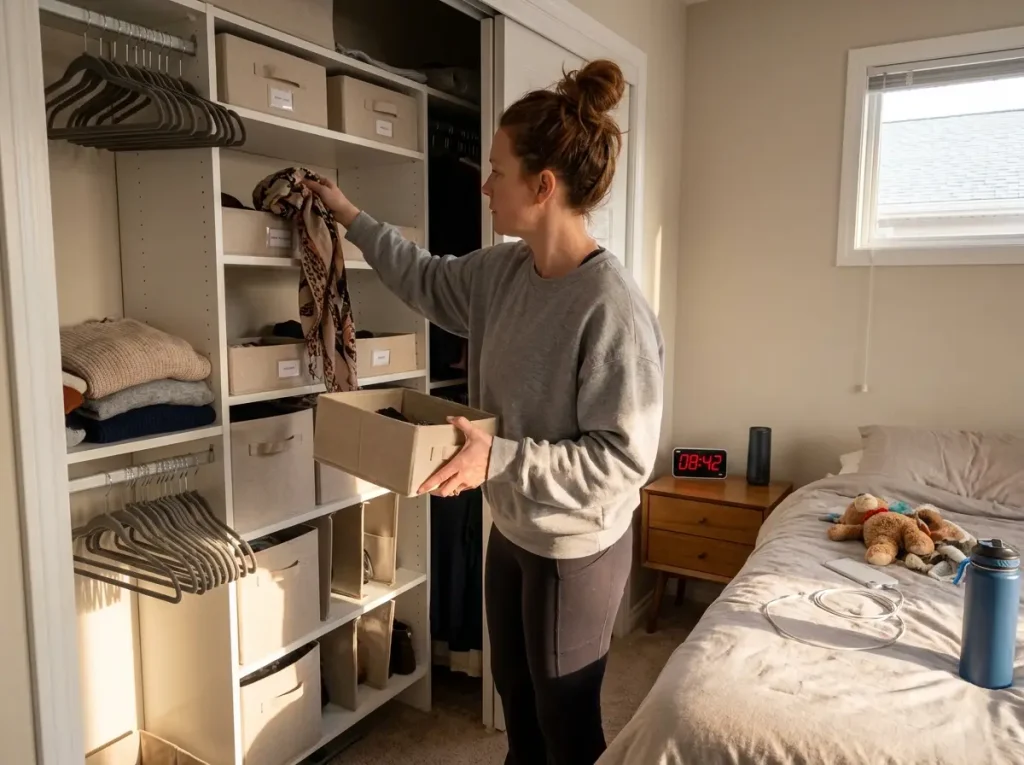
When the seasons change, you’re already pulling out different clothes. Use that moment to do a deeper version of the monthly reset. Pull out the fabric storage bins from the top shelf, swap summer for winter (or vice versa), and while you’re at it, evaluate what you didn’t wear all season. If a sweater sat in the bin from October to March and you never pulled it out, it probably doesn’t need to be in the bin next year. Label each bin clearly — “winter sweaters” is specific, “miscellaneous clothes” is how bins become black holes.
Pro tip: When labeling seasonal bins, write the date you packed them on the label. If you open the bin a year later and the date hasn’t changed, everything in it can probably go.
Conclusion
Three things determine whether your closet stays organized: every item has a fixed spot, the system accounts for how you actually use the space daily, and you run a ten-minute monthly reset to catch drift before it compounds.
Three-Month Check: At the three-month mark, open the closet and ask one question — is the floor still clear? If it is, the system is working. If items have started gathering on the floor again, the issue is almost always that something doesn’t have a designated home. Find the homeless item, assign it a spot, and reset.
Start with your hangers. It’s the fastest, cheapest fix with the most visible impact. Get one thing right, confirm it holds, then move to the next section.
Q1 How do I organize a closet with only one rod and one shelf?
Add a double rod extender below the existing rod for shorter items, use shelf dividers to keep folded stacks stable on the single shelf, and install an over-door organizer for shoes. These three additions triple your usable space without drilling or permanent modification.
Q2 What is the best way to organize a small closet on a budget?
Start with what costs nothing — match your hangers by removing wire and plastic ones, enforce a two-item floor rule, and use bookends as shelf dividers. If you have a small budget, a shelf liner and a set of velvet hangers make the biggest difference for the least money.
Q3 How often should I reorganize my closet?
You should not need a full reorganization if the system is built correctly. Run a ten-minute monthly reset to straighten hangers, restack folded items, and clear floor drift. Do a deeper seasonal rotation every three to four months when swapping warm and cold weather clothing.
Q4 How do I keep my closet organized when I share it with someone else?
Split the rod and shelf into clearly defined zones — your side, their side. Use shelf dividers as physical boundaries. Label shared bins so both people know where things go. The system works only if it’s simple enough for both people to follow without thinking about it.
Q5 Do I need to buy expensive closet organizer systems?
No. A custom closet system is worth the investment if you own the home and plan to stay for years. If you’re renting or on a budget, a set of matching hangers, a double rod extender, shelf dividers, and an over-door shoe organizer give you most of the same functionality at a fraction of the cost with zero permanent modification.