You have already priced the divider and picked out a sofa, and then you notice the window sits on the exact wall where the bed was supposed to go, or that the front door swings across the only clear stretch of floor. The best studio apartment layout ideas start from that moment, because the walls decided before any furniture did. Window and door placement can end a studio layout before it starts. This guide reads your walls first, then gives the arrangement for each common room shape with the clearances in inches, shows how the bed and sofa can do the dividing, and covers the dividers a renter can take down without a hole.
No layout is perfect for every studio, so match yours to the shape of the room and check the clearance column against your own floor.
| Studio shape | Where the bed and sofa go | What divides the room | Clearance to tape out | Where it breaks first |
|---|---|---|---|---|
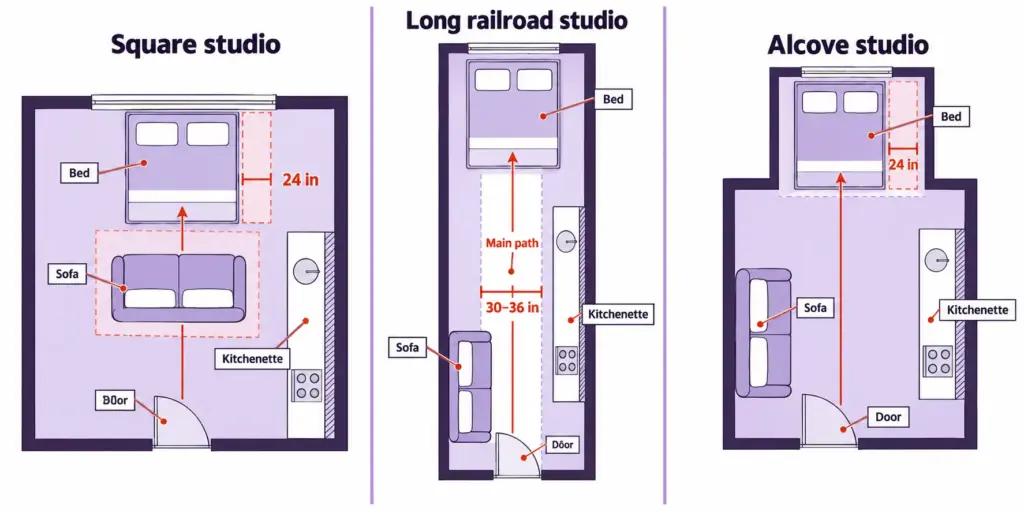
| Square | Bed on the free wall, sofa floated off the opposite one | Sofa back and a rug edge | 24 in past the open mattress side, 30 to 36 in for the main path | The sofa back turns into a shelf for bags and mail |
| Long and narrow (railroad) | Bed at the far end, sofa near the door end | A low or see-through piece at the bed’s edge, or a curtain line | A 36 in lane down the long side, 24 in beside the bed | The middle, where the two zones meet |
| Alcove or nook | Bed in the notch, sofa in the main room | The notch itself, with an optional curtain across it | Notch width equals bed width plus 24 in on the side you get out | The notch has no storage, so the nearest chair catches the clothes |
Studio Apartment Layout Starts With the Walls That Cannot Move
The plan that looks perfect on paper usually dies at the window. The windows sit on one wall, the entry door swings into the clear stretch, the kitchenette plumbing pins down a third wall, and what is left is a much smaller menu than the square footage suggests. Reading those fixed walls first takes ten minutes and a pencil, and it spares you the return trip with the divider.
What the plumbing wall, the windows and the door swing already decide
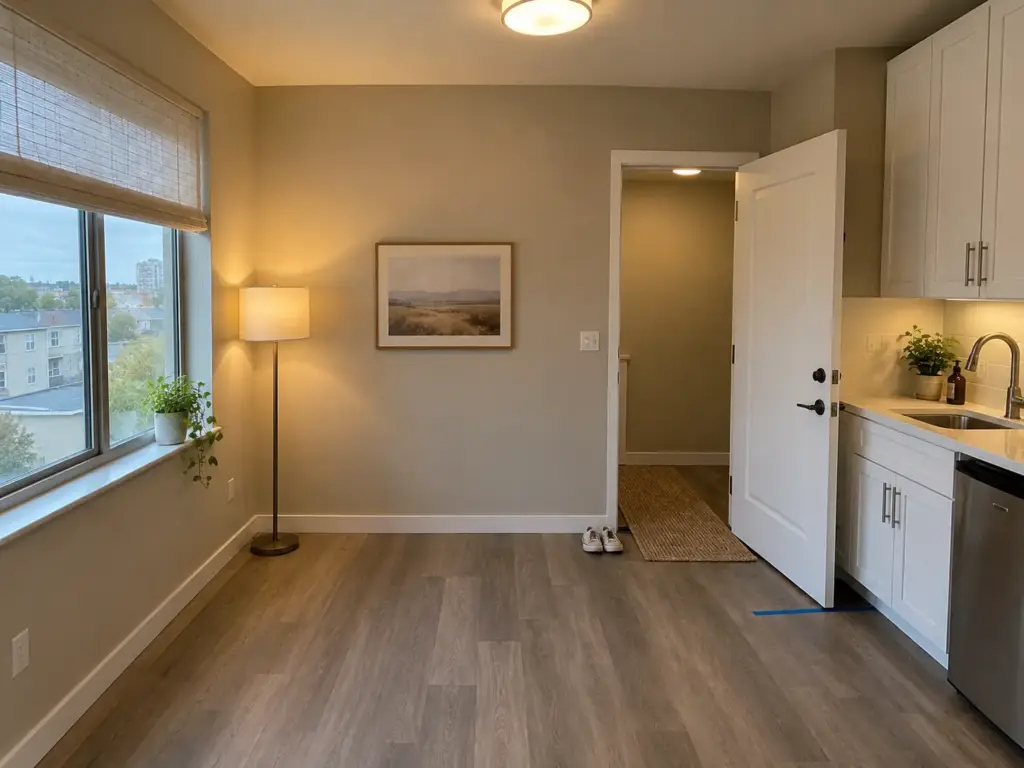
Three things in a studio do not move: the wall that carries the kitchenette and bathroom plumbing, the wall with the windows, and the quarter-circle the entry door sweeps when it opens. Walk the room and mark each one on a rough sketch. Whatever walls remain are your free walls, and the bed usually ends up on one of them because a bed against a bare wall leaves the windows clear and the kitchen reachable.
The door arc catches more people than the windows do. Any piece of furniture inside that quarter-circle either blocks the door or gets hit by it, and it is the kind of mistake you only notice on move-in day with a box in your arms.
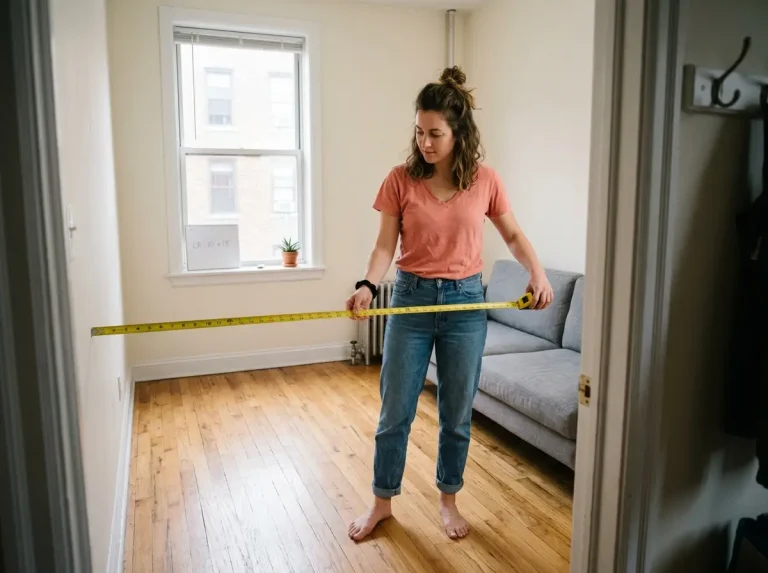
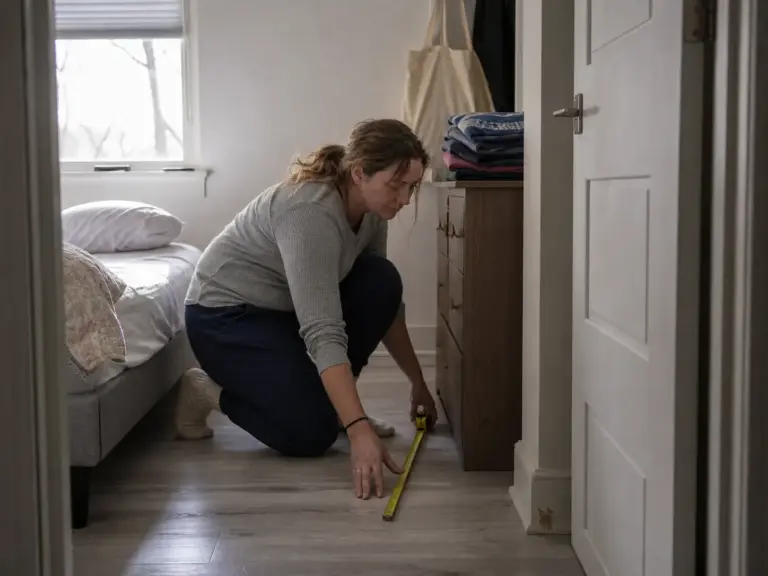
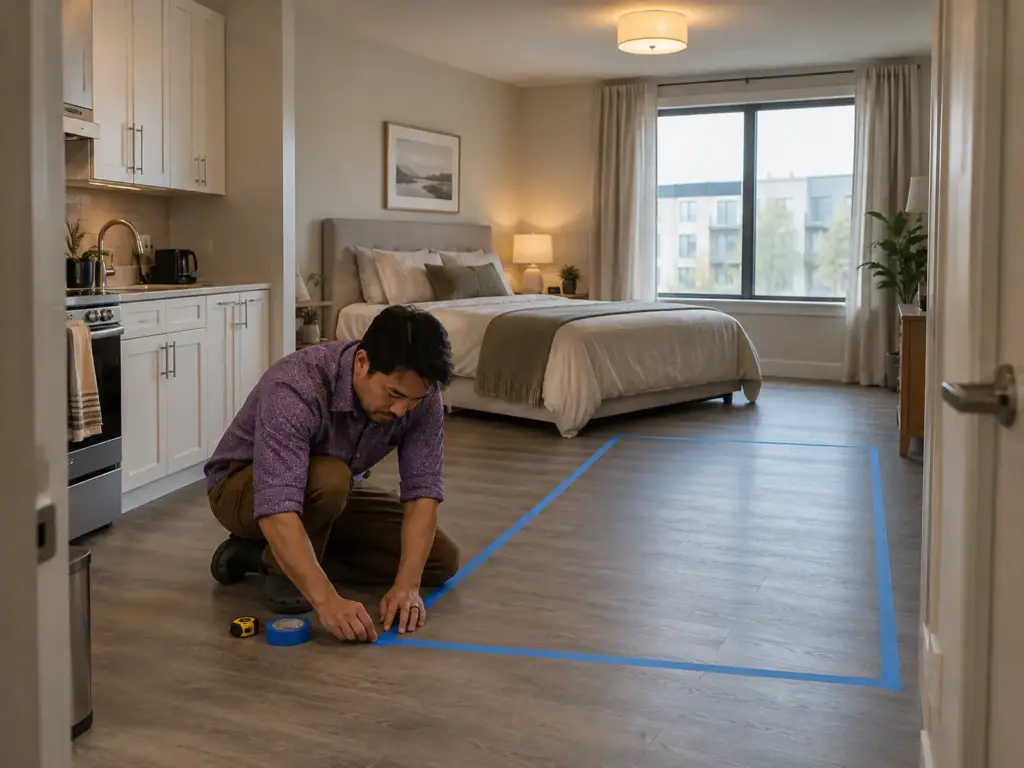
You do not need a program to find out. Put painter’s tape on the floor along the free wall and along the door’s swing before you draw a single plan. It costs nothing and comes up in a second.
Swing the door all the way open and mark where its outer edge touches the floor, then connect the marks with tape. The door is the compass, and the arc it draws is a no-furniture zone you can see with your own eyes.
Why the window can end a bedroom wall-off
On paper you can wall off a small bedroom from a small living room, but where the windows sit can prevent it. Many of the larger studios are studios only because of their light exposure or their fire escape, not because nobody thought to add a wall. Both comments point at the same mechanism. If every window is on one wall, a partition across the room leaves one side with daylight and the other side as a dark box, and a dark box with a bed in it is a sleeping room that needs its own way out.
That is why a wall-off belongs at the end of the planning, not the start. You will work out what the free wall can hold first, and only then decide whether a divider has to be a wall at all. Most of the time a curtain line or a shelf at the bed’s edge does the job and leaves the light where it was.
The egress rule to check before you build anything
Many places treat a separate sleeping area as a bedroom, and a bedroom needs an emergency way out. Local light and ventilation rules can apply to a sleeping room as well. As an example of how this reads, the residential code Lincoln, Nebraska has adopted says, “Every sleeping room shall have at least one operable emergency escape and rescue window or exterior door opening for emergency escape and rescue.” The same page applies the rule to rooms with a storage closet deeper than 18 inches or direct access to a bathroom, so a deep closet in a sleeping nook can bring the nook under the rule.
The opening has size minimums too. Plymouth, Minnesota’s building inspection sheet lists a sill no higher than 44 inches above the floor, an openable area of at least 5.7 square feet (5.0 at grade), an opening at least 24 inches high and 20 inches wide, and a window that works from inside without keys or tools.
Those numbers do not combine the way you would guess. The sheet’s own table puts a 24-by-20-inch opening at 3.3 square feet and a 36-by-20 at 5.0, so you need something closer to 36 by 24 inches to clear the 5.7 mark. Measure the area that actually opens, not the glass you see.
Jurisdictions differ, and a lease may add limits of its own, so treat both cities as examples and not as your rule. Ask your local building department, or your landlord if you rent, before you commit to a partition wall or any temporary wall. With the free wall and the door arc marked, the zone rules and the 36-inch walkway in the studio guide are the next thing to apply.
Layouts by Room Shape, With the Clearances in Inches
A room size tells you how much floor there is, and a 250 sq ft studio and a 300 sq ft studio can share a shape without sharing a layout. It does not tell you whether you can get past the foot of the bed with a laundry basket. For each of the three common shapes, here is where things go, what to tape, and where the layout gives out first.
The square studio: the sofa floats and the rug draws the line
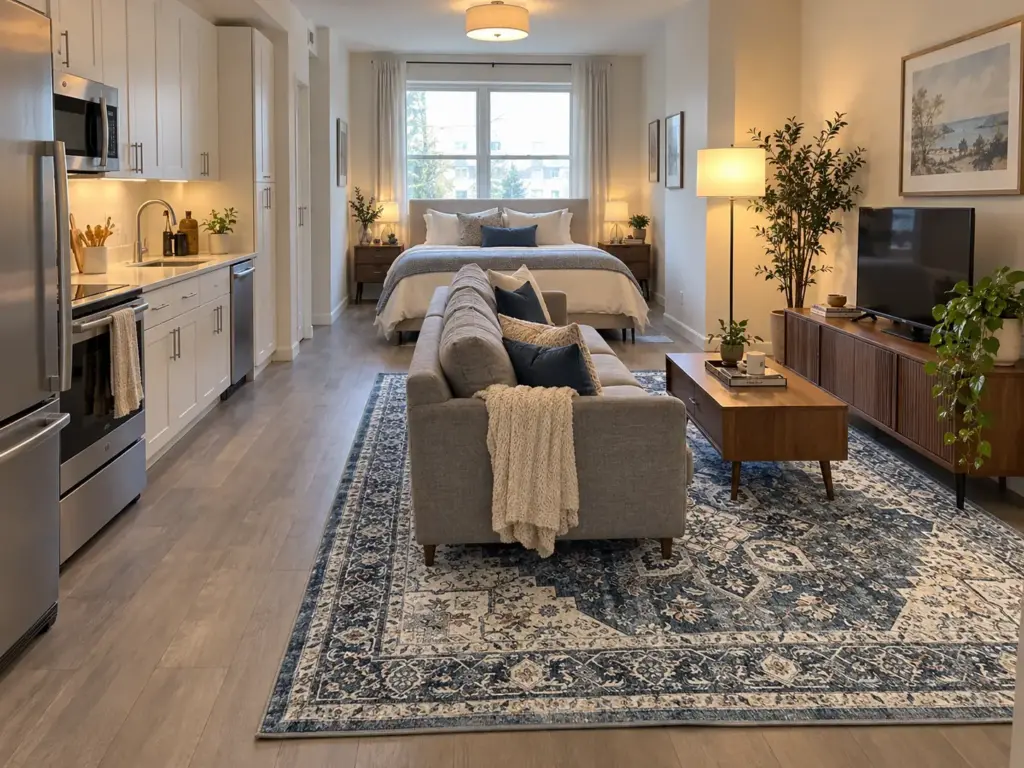
In a square room the bed goes on the free wall, and the sofa floats off the opposite wall, facing the window or the TV, with its back toward the sleeping side. The sofa back becomes the wall you did not build. Tape two numbers before you trust the arrangement: 24 inches beyond the side of the mattress you get out on, which is the figure Coddle’s sleeper-layout guide gives for getting around an open bed, and 30 to 36 inches for the path that runs through the room.
Floating the sofa is the standard answer, and it fails when the free wall is too short to leave 30 inches behind the sofa. If the tape says the lane behind it is tighter than that, push the sofa flat to the wall and let a rug and a floor lamp mark the living zone instead. A divider you cannot walk around is worse than no divider.
The line itself costs nothing if you tape it or use an area rug you already own. If you want a permanent edge, the AMADA 8×10 washable rug in a low-profile, non-slip build works as the boundary where the living zone ends, and its edge is the part you are paying for. Amazon’s review summary calls its thickness mixed, with some buyers happy and others saying it is too thin to vacuum comfortably. The method for floating a sofa and zoning with a rug is covered in the floating-sofa and rug-zoning method for a small living room, so it is not repeated here.
When you tape the bed, tape the whole mattress and then add a second rectangle 24 inches wide along the side you get out on. The second rectangle is the one that quietly fills up with furniture later.
The long railroad studio: two rooms in a row
A railroad apartment layout is long and narrow, so a long narrow studio turns into two small rooms lined up: the bed at the far end, the sofa near the entry end, and the kitchen running along one long side. The thing to protect is the path. Tape a 36-inch lane down the length of the room and keep it clear from the door to the bed, and keep 24 inches beside the bed on the side you use. At the far end that second number is often what decides whether the bed fits against the end wall or has to turn.
The common advice for a long room is to split it in the middle into two equal rooms. A midpoint divider is the wrong call here, because it blocks the sightline from the door and makes the whole apartment look like one short room and one cramped one. Give the far end only what the bed needs and keep the long middle open. When you do divide, use something low or see-through, or put it at the bed’s edge and not halfway down the room.
The middle is also where the walkway narrows first. The sofa wants to sit just before the divider, the divider wants a foot of space, and the lane you taped shrinks a few inches at a time. You will feel it long before you measure it.
The alcove or nook studio: use the notch for the bed
If your studio has a notch, put the bed in it: an alcove bed leaves the main room as one open space, and the nook bedroom it creates needs no wall at all. The thing to measure is the opening, not the room. The notch has to hold the bed’s width plus the 24 inches you need on the side you get out on, and if it cannot give both, the bed sticks out into the room or one side of it gets climbed over every night. The principles for arranging a small bedroom around the bed carry over almost unchanged, because an alcove is a small bedroom with one wall missing.
An alcove adds a curtain option the other shapes do not have. A single curtain across the notch gives you a sleeping area that closes in the evening and opens in the morning, and it needs a spot to mount that you can actually reach, which section 4 covers.
The nook has a flaw that does not show on the plan. It has no storage of its own, so the nearest chair, or the floor, catches the day’s clothes. Give the notch one flat surface or one hook before you move the bed in.
Where each shape breaks first
The square studio breaks at the sofa back, which becomes a shelf for bags and mail within days because it is the nearest flat surface to the door. The railroad studio breaks in the middle, where two zones meet and each one borrows a few inches from the lane. The alcove breaks at the foot of the bed, where the chair or the floor takes over because nothing in the notch is designed to hold clothes.
The break is predictable, so the fix is predictable too: a small flat surface placed on purpose where the pile will form anyway. Section 7 explains why this happens in every layout, and what to do about it.
Bed and Sofa Placement That Divides the Room Without Walls
The sofa that doubles as a wall works fine until somebody needs to get past it with a plate. Furniture-as-divider is the cheapest layout move there is, and it is the one most likely to cost you walkway, so each option below comes with what it takes away.
The sofa at the foot of the bed
Start here because it costs nothing. A sofa as a room divider needs no purchase and no hole, because its back already separates the sleep zone from the living zone. The walkway clearance to tape is the strip between the foot of the bed and the back of the sofa, and Coddle’s 30 to 36 inches for movement is a fair test of whether two people can pass without turning sideways. Keep the same lane in mind as you work through arranging furniture in a small living room, where the floating method gets more room to breathe.
The cost is the sofa back, which collects laundry and the day’s bag. And the arrangement stops working if the seat faces the bed and the back faces the kitchen. Put the seat toward the TV or the window and the back toward the sleeping side.
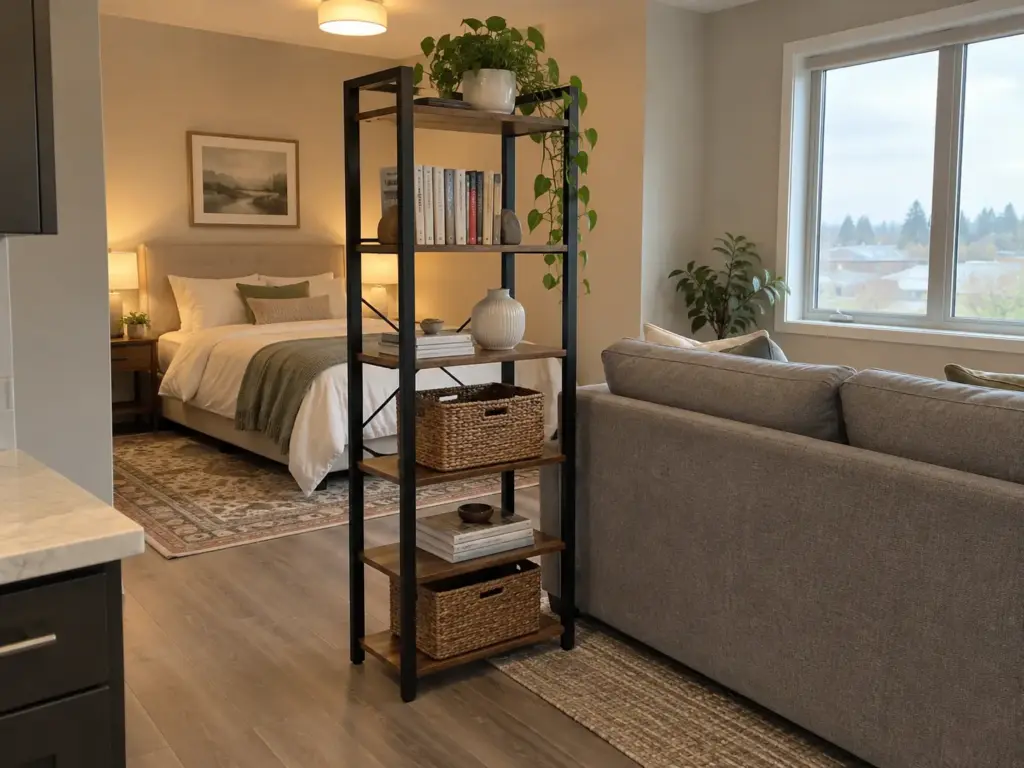
An open bookshelf as the divider, and the anchor it needs
A bookshelf divider splits the room while letting light and sightline through, and that is the reason it beats a solid panel in a one-window studio. A plant divider, a low shelf of plants along the bed’s edge, lets light through the same way. It is also furniture with shelves, and the Consumer Product Safety Commission’s Anchor It! campaign is blunt about that: “Anchoring all furniture with drawers, doors, and shelves to the wall prevents tip-over injuries and deaths,” and a divider shelf stands in a walkway where somebody will brush past it every day.
Once the sofa-back option is on the table and the tip-over risk is named, the VASAGLE 5-Tier Bookshelf is a workable stand-in at the edge of the sleep zone. It measures 11.8 inches deep, 15.7 inches wide and 60.2 inches tall, and VASAGLE’s listing rates each tier at 18.3 pounds and the unit at 91.5 pounds in total. The maker tells you to secure it to the wall and includes an anti-tip kit. At 15.7 inches wide a single unit is a post, not a wall, so a real divider takes two or three side by side, and each one has to be anchored.
But anchoring means holes, which makes the shelf an owner’s choice (or a renter’s, with permission), and everyone else should skip to section 4. The product has a flaw to plan around: Amazon’s review summary says several customers report hole alignment problems, with holes missing or in the wrong places, so check the hardware against the panels before you commit to the wall.
If the shelf sits at the end of the bed, keep it on the side where nobody gets out of bed. A divider you brush against every morning is a divider you eventually knock into.
Bed placement: corner, wall, alcove, loft or Murphy
Studio bed placement trades one cost for another, and it helps to know the cost before you pick. A bed in the corner uses two walls and wastes the least floor, but one side is blocked, so only one person can get out without climbing. A bed along the long wall frees the middle of the room and tends to leave you with two usable sides. The alcove, from the last section, keeps the main room open and leaves you with the notch’s storage problem.
A loft bed frees the floor underneath, and it only works in a room with enough ceiling height to live under and sleep on top of. Measure that height before you shop, and do not trust a rule of thumb about square footage. A Murphy bed gives the floor back by day, and its open footprint has to stay clear every night, so nothing can stand in its swing. Name the break first, then choose.
Dividers a Renter Can Take Down With No Hole to Patch
The lease says no holes, the room needs a sleeping area, and the divider listing rarely says how much weight it carries. A temporary wall is out of the question on most leases, so renter-friendly here means pressure-mounted, freestanding or removable. Both facts matter, and the load limit is the one that decides what you can hang.
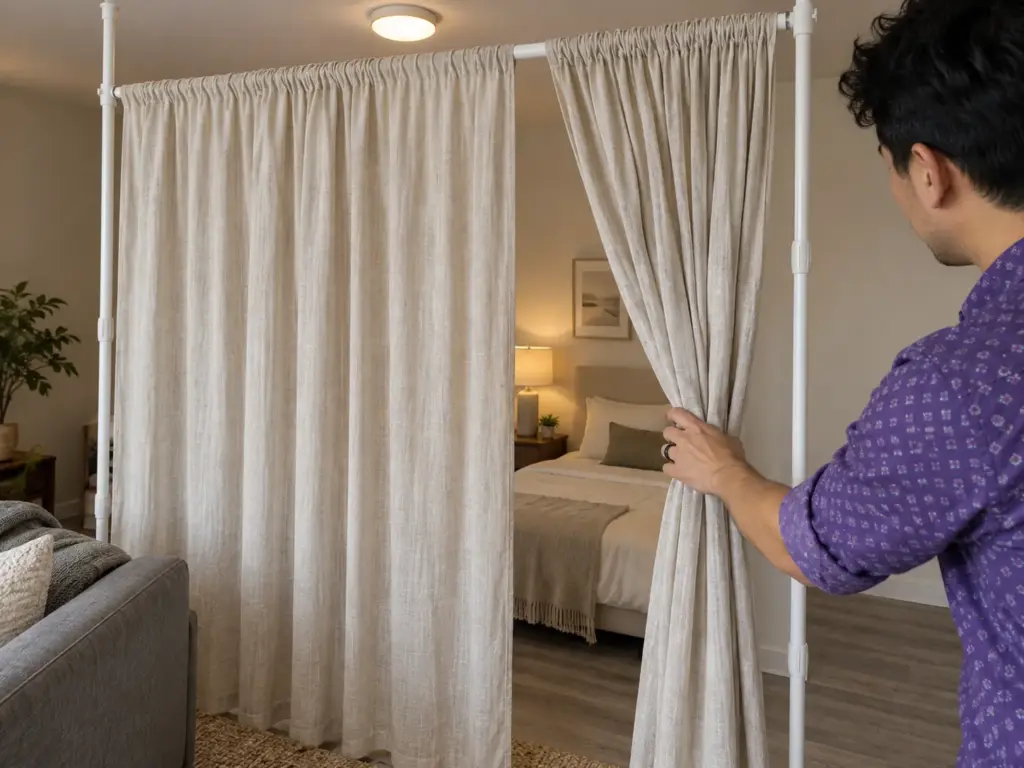
Tension-mounted dividers and curtain lines
The free no-drill version comes first: a curtain you already own on a tension rod you already own. If the opening is the right width, that is a complete divider and you have spent nothing. When it is not, there are two products worth knowing, and they suit different jobs.
The Umbra Anywhere Expandable Curtain Rod and Room Divider is the one whose own listing names studios and room division. Umbra says it mounts without holes or tools, spans 36 to 66 inches wide and runs 7 to 10 feet tall, and carries 15 pounds at most, with curtains sold separately. That width makes it a fit for a nook opening or a corner, not a twelve-foot room. The 15-pound limit is the part to respect: a heavy blackout curtain is the fabric most likely to push past it, so weigh the curtain before you hang it.
Amazon’s review summary on this listing is mixed. Multiple customers report it breaking within a few months, and stability is split, with some saying it does not stay up. The star-filtered reviews sit behind a sign-in, so treat the summary as a summary and not as the final word.
The budget way to build a curtain line across a room is the ALLZONE Tension Curtain Rod, which stretches from 83 to 123 inches at 1.26 inches in diameter, and whose listing also names room division. It carries whatever curtain you choose, so a lighter fabric means a lower load. The review summary shows tension is “very strong” for some buyers and “insufficient” for others, and the fit with standard curtain holes is mixed.
A tension rod holds by pressure against two surfaces, and the maker’s instructions are the place to learn how to set it. Both of these products need two facing surfaces within their range, which in a studio usually means a nook or an alcove, not the open middle of the room.
A ceiling-mounted curtain is the other renter option people reach for, and it comes in two kinds: tracks that screw into the ceiling and systems that hang from adhesive clips. Only the second kind is no-drill, so check which one a listing sells before you count it as removable.
Weigh the curtain before you buy the rod. Step on a bathroom scale holding it, then step on without it, and subtract. That one number tells you which rods are even in the running.
Freestanding screens and the tip-over problem
A freestanding screen is the opposite trade: no mount, no load limit, no ceiling to worry about, and a tip-over risk in exchange. A lightweight screen in a draft or in a walkway goes over the first time someone brushes it with a bag. As a layout effect, a screen in the middle of the room blocks the sightline from the door, so it earns its place at the bed’s edge, where it screens the sleeping side without chopping the room in half.
If a screen has to stand in a busy path, anchoring it is out because it is a renter’s setup, so the honest fix is a wider base or a different spot. Placing it where nobody walks past is almost always the better answer.
What a lease may still say about it
“No holes” describes how a divider mounts. It does not tell you what your landlord will say about condition at move-out, and no manufacturer detail here says what a tension rod leaves on a ceiling or a wall. Check your lease for the clause on walls and ceilings, and ask if you are unsure. A renter has one more reason for caution: expensive space-saving or custom furniture rarely makes financial sense if you rent, and a curtain line you can pack in a box is the version of that logic that works.
An owner thinking about a permanent partition has the opposite problem and goes back to the egress section first. A partition creates a sleeping room, and that is the moment a local escape rule starts to apply.
Convertible Furniture, a Dining Spot and a Work Corner
The room has no dining room and no office, and the table you want has to come from somewhere. Convertible pieces give one room several jobs, and each one costs you the space it needs when it opens.
The sleeper, the daybed and the Murphy bed, open
For a sleeper sofa or a Murphy, the number that matters is the open footprint, never the closed size. Povison’s size guide puts a queen sleeper’s open sleeping surface at 58 to 60 inches by 72 to 80 inches, and Coddle’s guide asks for at least 24 inches beyond an open mattress. If the bed pulls out toward the room, that is 72 to 80 inches plus 24 inches, which comes to 96 to 104 inches of floor, or roughly eight to nine feet, and those are seller’s figures for a queen, so check yours. Tape the open footprint on the floor, not the closed one, and see what you are standing next to.
A Murphy bed returns the floor by day and takes it back at night, and the footprint that opens has to be free of the chair or table you set up in the meantime. A sleeper stops opening once something sits in its swing, which is how a sleeper becomes a sofa nobody sleeps on. Both are categories to choose from and not products to buy blind.
The daybed is a third path: one piece that is a sofa by day and a bed at night, and it breaks when its back is against the wall and the bedding has to be stripped every time someone wants to sit. If you want under-bed storage to earn its floor space, the under-bed clearance math for a small apartment shows how much room that gives you.
When you are ready to pick a piece, multi-functional furniture for small apartments has the choices and the trade-offs.
Dining without a dining room
Many people cannot picture how a dining table would fit into a studio, and that is the question every studio layout has to answer. The usual answers are a dining island with bar stools, a console table used for dining, a fold-down table or a drop-leaf table, nesting tables that slide away between meals, and a lift-top coffee table. Each one has a break. The fold-down needs its swing clear, the console is too shallow for a plate and a laptop together, and the island eats floor that the lane was counting on.
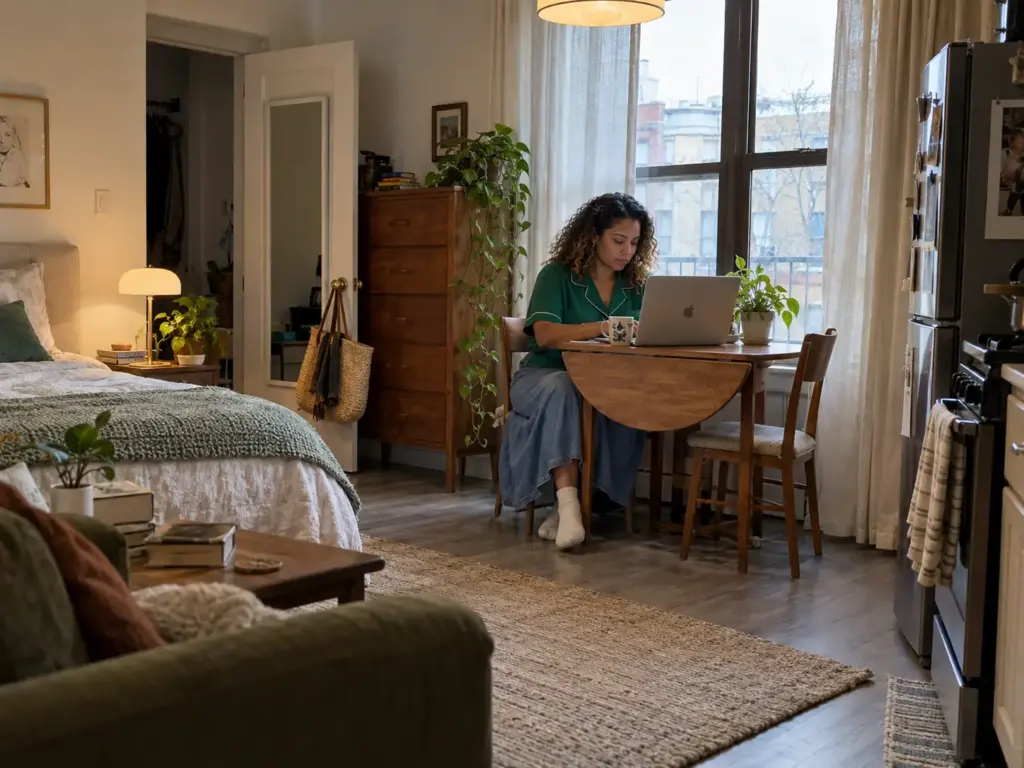
The best dining area is usually the one that shares a job. A drop-leaf by the window that is a table at dinner and a desk at noon uses the one piece of floor the room can spare, and it needs only that you decide which wall.
A work corner that is not the bed
If you work from home, give the home office a place that is not the bed. When the bed is the desk, the laptop goes on the duvet, and you are working in the place you are supposed to sleep. A drop-leaf by the window or a console along a free wall makes a workspace, and sharing it with the dining area is the common answer because a studio only has so many walls. Face the work zone away from the sleeping area if you can.
Light, Mirrors and a Studio That Two People Share
Two people, one window and one closet, and one of them goes to bed hours before the other. Light and a few clear rules make that survivable, and none of it needs a bigger room.

Light and a mirror wall make the room read bigger
Keep the window clear, put the tallest furniture on the wall away from it, and hang a mirror across from the window so it bounces the daylight back into the room. Light colors on the walls and on the biggest pieces do the same job, throwing daylight back instead of soaking it up. This is a layout effect, not decoration: a tall shelf on the window wall does the opposite of what a mirror does. For the method, see making a small bedroom look bigger.
A layout for two people
In a shared studio a couple needs each person to have one zone that is theirs, which means one side of the bed and one place to put the day’s things. Keep the entry path clear of the sleeping side so one person can leave early without crossing the bed. The back of the sofa is the privacy line, and a wall sconce or a lamp on the living side lets one person stay up without lighting the other’s pillow.
Roommates sharing one studio
Put the two bed zones at opposite ends of the shared studio, keep the kitchen and the living area in the middle where both can use them, and use a curtain line from section 4 for privacy. Splitting the rent is why people end up here at all, and it only works if the arrangement gives each person one corner of the room that is theirs.
Why Each Layout Slides Back, and the Floor-Tape Test Before You Buy
Three months later the layout is still there, but the chair at the foot of the bed holds a pile nobody decided on. Every layout drifts back, and the cause is the same each time.
The surface nobody planned for
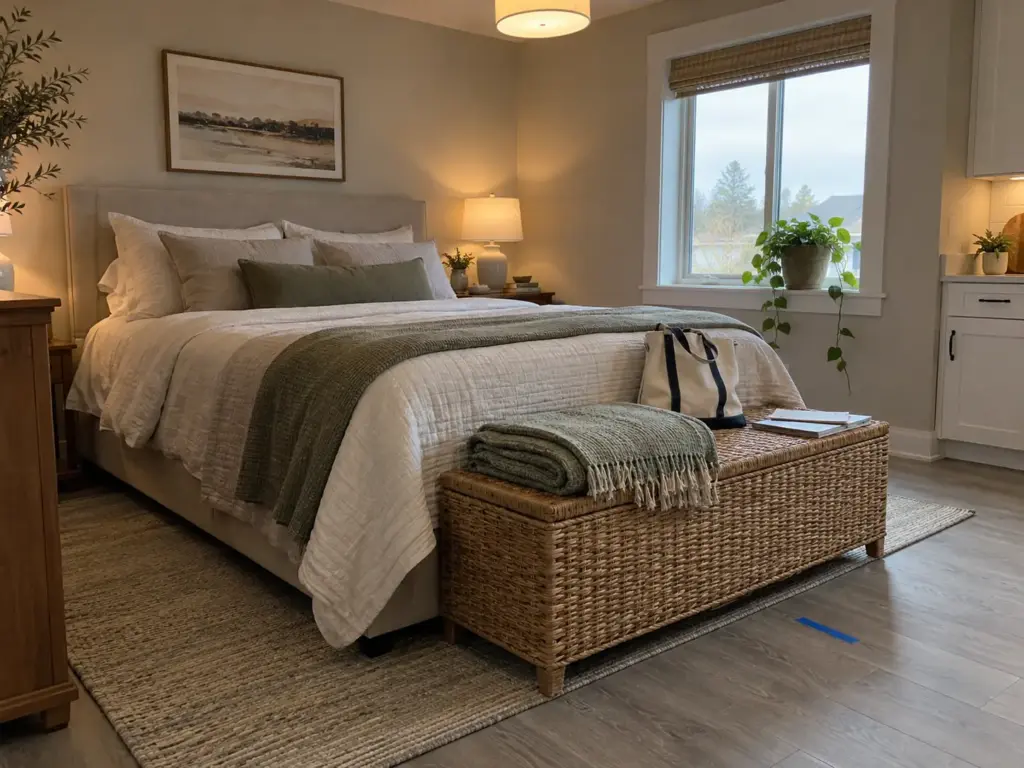
A layout with no landing spot for the day’s bag, mail and clothes gets one anyway, and it is whichever flat surface sits nearest the door or the bed.
In a square studio that is the sofa back. In a railroad it is whatever stands where the zones meet. In an alcove it is the chair. The zone you drew starts to dissolve because a surface you did not plan became the default drop point.
Plan one on purpose: a tray by the door for keys and mail, a bench or low shelf where the pile will form anyway, a hook where the bag lands. Put it where your hands already go. If a storage idea you are considering needs a spot to land, studio apartment storage ideas that fail by month three shows which ones survive.
The floor-tape test, step by step
The test costs nothing and undoes itself in a second. A layout planner app or a floor plan with dimensions drawn on graph paper gives you a first draft, and the tape is how you find out whether the draft is true. Here is the method.
- Measure the true footprint of each large piece, including the open footprint of a sleeper or Murphy bed and the arc of the door.
- Mark each footprint on the floor with painter’s tape at its real size. Try a hidden corner first, because tape can leave residue on some floors, and no tape is guaranteed to leave a floor clean.
- Tape the paths as well as the furniture: the 36-inch lane from the studio guide, and 24 inches beside the bed.
- Live with the tape for a week. Walk the path with your arms full, reach for the window, and take the route to the door in the dark.
- Move the tape, not the furniture, until the room works.
Coddle’s guide makes the same suggestion for a sleeper: mark the footprint on the floor and see how it fits before ordering, and the method works for every large piece in the room. A week with the tape down answers things a plan cannot, like whether you keep stepping over the outline of the sofa. When the plan holds, the right order to organize a studio apartment tells you what to do next.
What to check at the three-month mark
At the three-month point, look for the flat surface carrying a pile you did not choose. That surface is where the layout is quietly asking for a landing spot, so move one piece or add one. If a path has narrowed, the tape from the test is still the quickest way to measure how much.
The Free Wall, the Tape and One Landing Spot
Three things carry the plan. Read the walls first, because the window wall, the plumbing wall and the door arc decide what is possible before furniture does. Tape the real footprints in inches, including the open ones, because a layout that works closed can fail the moment the sleeper unfolds. And plan one landing spot, because the layout will grow a pile somewhere whether you choose the spot or not.
The thing to look at in three months is which surface is carrying the pile, and whether one piece of furniture needs to shift an inch or two to give the lane back.
Tonight, with painter’s tape and no purchase, mark the free wall and the swing of the door, then leave the tape down for a week. Notice which edge you keep walking around, because that edge is the part of the layout that is telling you where it does not fit.
Frequently Asked Questions
01What is the perfect layout for a studio apartment?
No single layout is perfect, because the walls, windows and door swing of your room decide what is possible. Start from the free wall and the door arc, then match the room to one of three shapes: square, long and narrow, or alcove.
02What is the best way to organize a studio apartment?
Settle the layout before you buy storage, then work in a set order so every step has room to land. The full sequence lives in the right order to organize a studio apartment.
03Can you wall off a bedroom in a studio?
Sometimes, but the new sleeping room usually needs its own operable window or exterior door that meets your local escape rule. Window placement can rule it out, so check with your building department and your lease first.
04How much space do you need around a bed in a studio?
Plan on 24 inches beyond the open side of the mattress you use, per Coddle’s sleeper guide, plus 30 to 36 inches for the main path. Tape both on the floor before you move the bed.
05What are good design ideas for a small studio apartment?
Match the layout to the room: float a sofa in a square studio, keep one clear lane down a railroad studio, and put the bed in the notch of an alcove. Add a divider that undoes at move-out, like a curtain on a tension rod.
Disclaimer: ClutterlessNest is a participant in the Amazon Services LLC Associates Program. As an Amazon Associate we earn from qualifying purchases. This article may contain affiliate links — if you buy through them, we may earn a small commission at no extra cost to you. We only recommend products we have tested or genuinely believe in.