











In this article
Your builder closet came with one rod, one shelf, and about 40% empty air. That’s not a storage problem — it’s a geometry problem. And you can’t fix geometry by buying more bins.
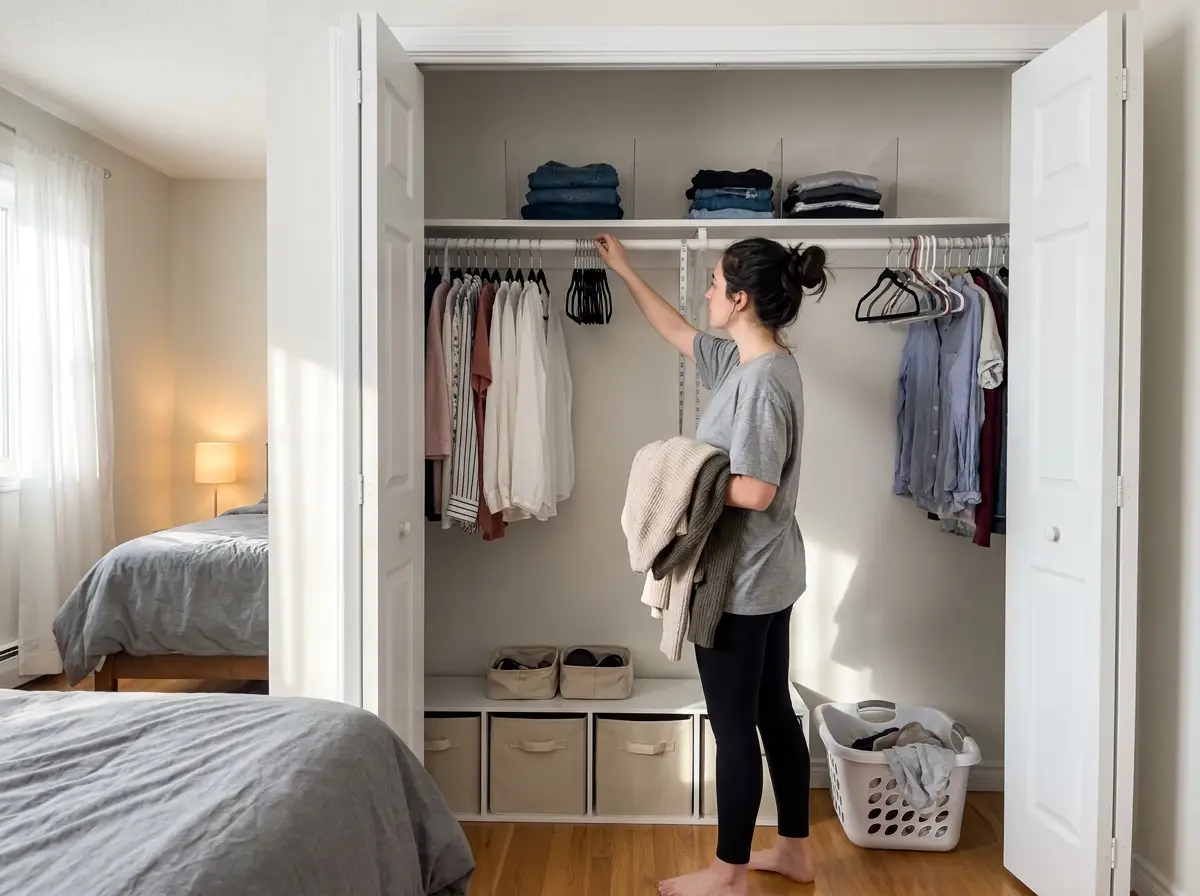
I’ve reorganized enough reach-in closets to know that the fix starts with four measurements and a plan, not a shopping cart. This guide walks you through why your closet wastes space, how to zone it by how you actually get dressed, and which rod and shelf fixes reclaim the most square footage — whether you rent or own.
Quick Answer: To organize a reach-in closet that stays functional:
- Measure width, height, depth, and door clearance before buying anything
- Map four zones: hang, fold, accessory, and floor
- Add a second rod to double hanging capacity (no-drill options exist for renters)
- Use the shelf above for folded items with dividers to prevent toppling
- Put the closet door to work with an over-door organizer
- Run a monthly backward-hanger audit to prevent reversion
Why Your Builder Closet Wastes Half Its Space

The Single-Rod Math
The standard reach-in closet is 6 feet wide, 8 feet tall, and 24 inches deep. Builders install one rod at 66 inches from the floor and one shelf above it. That setup stores hanging clothes and nothing else.
Here’s the math nobody shows you. A blouse on a hanger hangs about 34 inches from the hook to the hem. A pair of folded pants hangs 27 inches. At 66 inches, that leaves roughly 32 inches of empty air below your shortest hanging items — dead space where nothing lives.
Above the single shelf, another 16 inches stretches to the ceiling with nothing on it. Add the floor zone you’re probably ignoring, and you’re paying rent on a closet that’s more than half empty.
The rod height itself isn’t wrong for a single-rod setup. The problem is that a single rod is the wrong setup for most wardrobes. Few people own enough full-length items (floor-length dresses, long coats) to justify dedicating the entire rod to single-hang. A Knape & Vogt closet planning guide puts it plainly: dedicate 1 to 2 feet of rod space for full-length items and double-hang everything else.
Pro tip: Count your full-length hanging items right now. If the answer is under ten, you don’t need a full-length rod — you need a short section of high rod and a double-rod system for everything else.
Where the Dead Space Hides
Dead space in a reach-in closet hides in four spots: below the rod (that 26-32 inch gap), above the shelf (16+ inches to the ceiling), behind the door (the entire back surface you never use), and on the floor (where shoes pile up with no system). Each of those zones can hold organized storage once you measure them and assign a purpose. If you’ve ever organized a closet with too many clothes, you already know that hanging space alone can’t carry the whole wardrobe.
Most people see a closet as “the place with the rod.” That’s like seeing a kitchen as “the place with the stove.” There’s a shelf, a door, walls, and a floor — all usable, all usually wasted.
Door Type Changes Everything
Your closet door type determines where you can put storage inside the closet — and most organization guides skip this entirely.
Bifold doors fold to each side and give you full access to the closet opening. You can put baskets, shelves, or a cube organizer in the center of the closet because you can reach everything. Over-door organizers work, but they add weight to the folding panels — check your hinge hardware first.
Sliding bypass doors only let you access half the closet at a time. Put your most-used hanging items in the center (accessible from either side) and storage bins or shelving at the ends where the doors overlap. Over-door organizers won’t work here — the doors slide behind each other, so anything mounted on the back gets crushed.
This single detail — which door you have — should change your entire closet layout plan before you spend anything.
Measure Your Closet Before You Buy Anything
The Four Numbers You Need
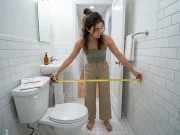
Grab a tape measure and write down four numbers:
- Width — wall to wall, inside the closet frame. Standard reach-in closets run 48 to 96 inches, but yours might not be standard.
- Height — floor to ceiling inside the closet. Most are 96 inches (8 feet), but older buildings and basement closets can be shorter.
- Depth — back wall to the inside face of the door frame. Standard is 24 inches, but rental apartments sometimes build closets at 22 inches. That two-inch difference means some organizer bins won’t fit.
- Door clearance — how far the door opens and what space it occupies. Bifold doors fold inward and eat 3-4 inches of depth on each side. Sliding doors don’t consume depth but block half the opening.
Write these on a piece of tape stuck to the inside of the door frame. You’ll need them every time you shop for closet organizers. The number of small pantry organization projects I’ve seen fail because someone skipped the tape measure applies to closets too — measure first, buy second.
What Your Measurements Tell You
Your depth determines which products fit. At 24 inches, most standard bins and organizers work. At 22 inches, you need to check every product’s depth dimension before buying — some 24-inch-deep bins will stick out past the door frame and prevent the door from closing. You’ll know this matters the first time a bin catches on the door and dumps your folded sweaters on the floor.
Your height tells you whether a double-rod system will work. You need at least 85 inches from floor to ceiling for a standard double rod (lower at 40 inches, upper at 80-82 inches). If your ceiling is under 85 inches, you can still do a modified double with the upper rod at 78 inches, but your upper hangers will sit closer to the shelf.
Your width determines how many zones you can create side by side. Under 48 inches, you’re working with a single section — prioritize a double rod and use the door and floor for everything else. At 60 inches or wider, you can split the closet into a double-rod section and a single-rod section for longer items.
Pro tip: If your rod span is over 48 inches, add a center support bracket. Without one, the rod sags in the middle after a few months of loaded hangers, and your clothes bunch toward the center.
Zone Your Closet by How You Get Dressed
The Four Zones
Stop thinking of your closet as one space. It’s four zones, and each one has a job:
Hang zone — the rod (or rods). This is where daily-wear clothes live: shirts, pants, dresses, jackets. Everything you reach for on a weekday morning.
Fold zone — the shelf above the rod, plus any additional shelving you add. Sweaters, jeans you prefer folded, t-shirts, workout clothes. Items that stretch on hangers or don’t need to be wrinkle-free.
Accessory zone — the door backs, wall hooks, and hanging organizers. Belts, scarves, bags, jewelry, hats. Small items that get lost when thrown in a pile on the shelf. A hanging closet organizer like the SimpleHouseware Crystal Clear 6-shelf version (12 inches wide, 12 inches deep, 44 inches tall) hooks right onto the rod and gives you six cubbies for accessories without drilling. Each shelf holds about 5 pounds — enough for folded scarves and small bags, but not for boots or heavy items.
Floor zone — the closet floor. Shoes, storage bins, a small dresser or cube organizer. This zone is the most wasted in most closets because people just throw shoes on the floor and call it storage.
Assign Zones by Daily Routine
Here’s where most guides fail: they tell you the zones exist but don’t tell you how to assign them based on how you actually live.
Think about how you get dressed on a weekday morning. You grab a shirt, pants, and shoes. Those three items should be reachable without bending, climbing, or moving anything. Shirts and pants go on the rods at arm height. Shoes go on a floor rack or the bottom of an over-door organizer where you can grab them on the way out.
Weekend clothes, workout gear, and seasonal items go higher or deeper — they can require a step stool because you access them less often.
The mistake is organizing by clothing type alone (all pants together, all shirts together). Organize by frequency of use first, then by type within each frequency group. Your five weekday outfits should be the most accessible items in the closet. Everything else works around them. If you’re following a broader closet organization system, this frequency-first principle applies to every closet type.
The Rod Fix That Doubles Your Hanging Space
Renters — The No-Drill Double Rod
The single highest-impact change in a reach-in closet is adding a second rod. It doubles your hanging capacity and eliminates the dead zone below your shirts.
If you rent, you can’t drill into the walls. The fix is a hanging double rod that hooks over your existing rod — no tools, no holes, no deposit risk. The STORAGE MANIAC Adjustable Closet Double Rod adjusts from 17 to 29 inches wide and hangs from the existing rod with sturdy hooks. The two-pack handles up to 110 pounds total. Hang shirts and blouses on the upper rod at the existing 66-inch height, and use the lower rod for folded pants and skirts.
The only catch: if you overload one side, the hanging rod can slide along the existing rod. Distribute weight evenly across both rods to prevent bunching. And make sure your existing rod is secured — if it’s already sagging, a hanging double rod will make it worse. Fix the main rod first. For more renter-specific solutions, no-drill closet organization covers the full toolkit.
Owners — The Full System Install
If you own the place, you have more options. A full closet system with adjustable shelves and double rods transforms a builder closet into actual functional storage.
The Rubbermaid Configurations Custom Metal Closet System covers 3 to 6 feet of closet width and includes adjustable shelves, double rods, and mounting hardware. It bolts directly into wall studs and holds serious weight. Installation takes 2 to 4 hours with a drill and a level.
For a less expensive option, the ClosetMaid ShelfTrack Adjustable Wire Closet System uses a horizontal rail system that lets you reposition shelves and rods as your needs change. Wire shelves need liners for small items (socks and accessories fall through the gaps), but the adjustability is worth the trade-off. Both systems are covered in depth in best closet organizer systems if you want a side-by-side comparison.
Free alternative first: before buying any system, try repositioning your existing rod. If you can move the single rod up to 80 inches and add a second rod at 40 inches using basic brackets from any hardware store, you get the double-rod benefit for minimal cost. Most stud-mounted closet rods require nothing more than a bracket, four screws, and a level.
The Hanger Switch
Once you have the rods sorted, swap your hangers. Mismatched plastic and wire hangers waste rod space because they’re different widths and shapes. Switching to slim velvet hangers reclaims roughly 30% of your rod space.
The Zober Premium Velvet Hangers are 17.5 inches wide and only 0.2 inches thick — about a third the thickness of a standard plastic hanger. The velvet surface keeps straps and slippery fabrics from sliding off. A 50-pack handles most closets.
One caveat: thick winter coat shoulders can catch on velvet and stretch. Keep 5 to 10 standard plastic hangers for heavy coats and structured blazers. Velvet works for everything else.
Pro tip: When you switch to velvet hangers, face all the hooks the same direction. In three months, flip every hanger backward. After another three months, anything still facing backward hasn’t been worn — it’s a candidate for donation. This is the backward-hanger audit, and it works better than any “does this spark joy” method.
Shelves, Doors, and the Floor Nobody Uses
The Shelf Above the Rod
The shelf that came with your closet is probably holding a disorganized pile of sweaters and random stuff shoved to the back. Fix this with two changes: shelf dividers and a stacking rule.
HBlife Acrylic Shelf Dividers clip onto the shelf edge and create vertical walls between your folded stacks. Each divider holds 15 pounds of pressure, and they slide on without tools. The acrylic is transparent so you can see everything from any angle. One limitation: they only fit shelves up to ¾ inch thick. If you have wire shelving, you need clip-on wire shelf dividers instead — the acrylic type won’t grip the wire.
The stacking rule: no more than 5 items per stack. More than that and the bottom items get crushed, and you’ll never pull them out without toppling everything above. If you have more folded items than 5-per-stack allows, you need another shelf. A tension shelf or a stacking shelf riser can create a second shelf layer without drilling. This is the same dead space principle that applies to deep kitchen cabinets — if you can’t see it and reach it, it doesn’t get used.
The Door You’re Ignoring
The back of your closet door is free wall space. Use it.
The SimpleHouseware Over-the-Door Shoe Organizer has 24 clear pockets and hangs over the top of the door with metal hooks. Each pocket fits one shoe, one rolled belt, or one pair of sunglasses. It gets shoes off the floor and frees up the floor zone for bins or a cube organizer.
Weight matters here. A fully loaded 24-pocket organizer with shoes in every pocket is heavy. Hollow-core doors (the standard in most apartments) can handle the weight initially, but the top edge can compress and the hinges can loosen over time. Check your door: knock on it. If it sounds hollow, keep lighter items in the organizer — socks, belts, accessories — and put heavier shoes on a floor rack instead.
The Floor Zone
The closet floor is not a shoe graveyard. It’s usable storage.
First, the free fix: if all you need is shoe storage, a simple shoe rack or even a repurposed wooden crate works. Line shoes toe-to-heel to fit more pairs. A tension rod mounted 6 inches off the floor creates a hanging spot for heeled shoes or sandals with straps.
For broader floor storage, the ClosetMaid Cubeicals 6-Cube Organizer is 35.9 inches wide, 11.6 inches deep, and 24 inches tall. It fits across the floor of most standard reach-in closets (measure your floor width first — if your closet is under 36 inches wide, this won’t fit). Each cube holds a fabric bin for socks, underwear, accessories, or seasonal items. The shallow 11.6-inch depth leaves clearance for the closet door to close even in tight setups.
Pro tip: If your closet has sliding bypass doors, put the cube organizer at one end, not in the center. You can only access half the closet at a time, so end placement guarantees you can always reach the bins without moving a door.
The Monthly Reset That Keeps It Working
The Backward-Hanger Audit
Every organized closet has a shelf life. Without a maintenance system, your reach-in closet will revert to chaos in about six weeks. That’s not a willpower problem — it’s entropy. Things accumulate, get shoved into the wrong spot, and pile up.
The backward-hanger audit is the simplest maintenance system that works. On the first day of every month, turn all your hangers backward (hook facing you instead of away). As you wear items and return them, hang them the normal way. At the end of the month, anything still facing backward hasn’t been worn in 30 days.
After three months, items that stayed backward through three cycles are candidates for donation or seasonal storage. This method catches the creep — the slow accumulation of clothes you don’t wear that gradually takes over rod space. You’ll be surprised how many items survive three rounds of the audit. Those are your real wardrobe. Everything else is taking up space.
Seasonal Rotation
The reach-in closet is too small to hold everything year-round. Seasonal rotation makes it work.
At the start of each season, pull out-of-season items from the rod and shelf. Fold them into vacuum storage bags or a lidded bin and store them on the high shelf, under the bed, or in another closet. The ZOBER Vacuum Storage Bags compress bulky winter sweaters and coats to a fraction of their size — a worthwhile option if your reach-in is under 6 feet wide.
The one-in-one-out rule prevents accumulation between rotations. Every new item that enters the closet means one item leaves. No exceptions, no “I’ll deal with it later.” The rule works because it keeps the total count flat. Without it, every shopping trip adds to the pile and your zone system slowly drowns.
Conclusion
Three things fix a reach-in closet: measuring before you buy, doubling your rods, and using every surface — the shelf, the door, and the floor.
The measure-first step prevents the most common mistake (buying organizers that don’t fit your specific closet dimensions). The double-rod fix reclaims the largest single chunk of dead space. And using the door and floor zone turns a one-dimensional closet into four functional zones.
Three-month check: revisit your zones after three months of daily use. Notice what shifted, what accumulated in the wrong spot, and which zone needs reassignment. Your Monday-morning routine may have changed — your closet layout should follow.
Pick the zone that annoys you most. Fix that one first. The rest will follow.
Q1 How do I organize a reach-in closet without drilling?
Use hanging double rods that hook over the existing rod, over-door organizers for shoes and accessories, and freestanding cube organizers on the floor. Tension rods, Command strip hooks (rated up to 7.5 pounds for large strips), and hanging shelf organizers cover most renter needs without touching the walls.
Q2 What is the standard size of a reach-in closet?
A standard reach-in closet is approximately 6 feet wide, 8 feet tall, and 24 inches deep with an 80-inch door opening. Rental apartments sometimes build narrower or shallower closets, so always measure your specific closet before buying organizers.
Q3 How do I maximize space in a small reach-in closet?
Add a second rod to double hanging capacity, use shelf dividers to keep folded stacks upright, mount an over-door organizer for shoes and accessories, and place a cube organizer on the floor. These four changes typically reclaim 40-60% of wasted space.
Q4 Should I use a double rod in a reach-in closet?
Yes, if your ceiling height is at least 85 inches. Mount the upper rod at 80-82 inches and the lower at 40 inches. Reserve 1-2 feet of single rod for full-length items like dresses and coats. Everything else fits the double-rod setup.
Q5 How often should I reorganize my closet?
Run a monthly backward-hanger audit (5 minutes) and do a full seasonal rotation four times a year. The monthly check catches creep before it becomes chaos. The seasonal swap keeps the closet sized to what you actually wear right now.