









In this article
You opened the cabinet to grab a mug and three things fell out. The travel cup you forgot you owned, a box of crackers wedged sideways, and the lid to a container that doesn’t exist anymore. You shoved everything back in and closed the door fast. Sound familiar?
I’ve reorganized kitchen cabinets in over a dozen apartments and houses — mine, my family’s, my friends’. The pattern is always the same: people organize once, it looks great, and three weeks later everything has reverted. The problem isn’t effort or products. It’s that most cabinet organization advice treats every cabinet the same way when they’re completely different spaces with different dimensions, different contents, and different failure modes.
Here’s how to organize each cabinet zone so the system actually holds up past the first week.
Quick Answer: To organize kitchen cabinets that stay neat:
- Measure each cabinet’s depth before buying any organizer
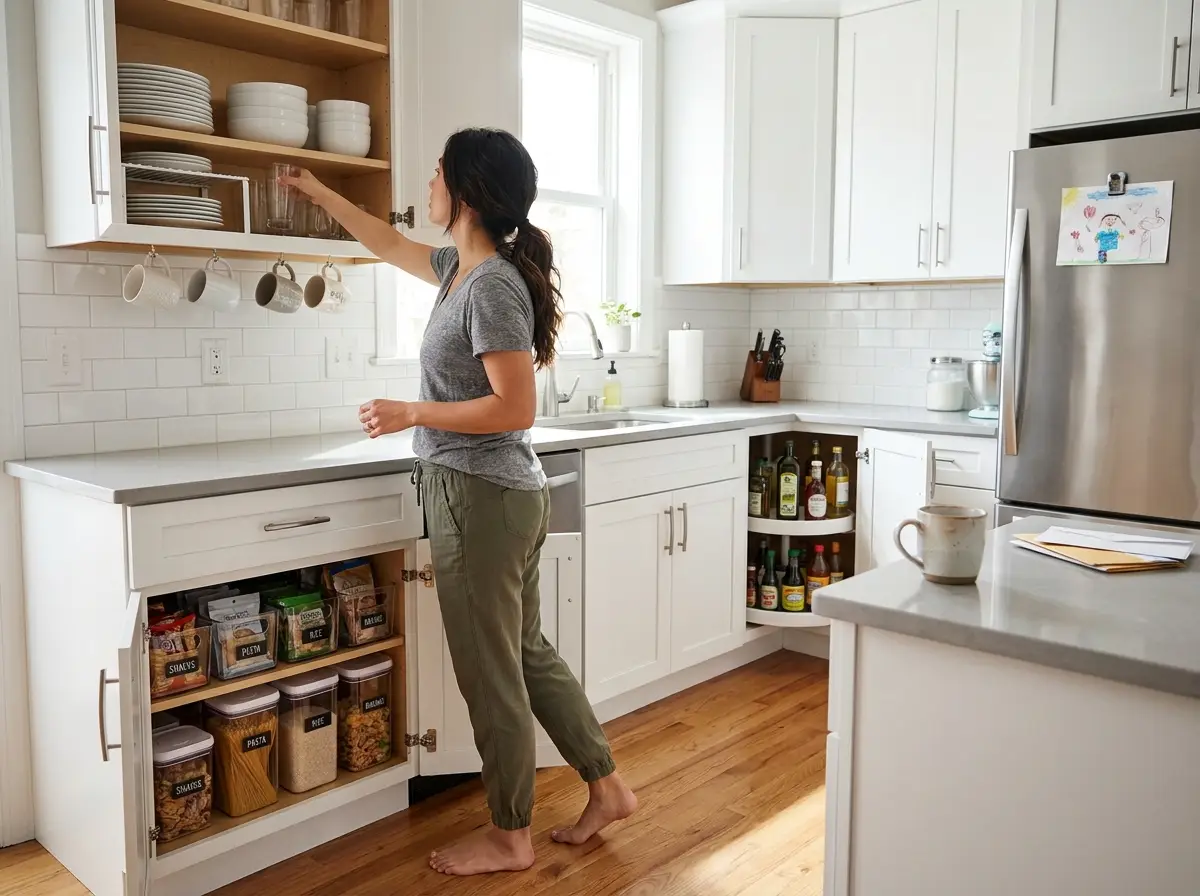
- Organize by cabinet zone — upper, lower, corner, under-sink, and doors each need different solutions
- Place items by frequency — daily-use items at eye level, rarely-used items up high
- Use one product per problem — shelf risers for plates, turntables for deep corners, bins for under-sink
- Run a 10-minute weekly reset every Sunday to prevent reversion
Why Kitchen Cabinets Get Messy Again

The Incoming Problem
Your cabinets didn’t get messy because you organized them wrong. They got messy because stuff comes in faster than it goes out. You bought a new set of glasses but kept the old ones. You received three reusable water bottles as gifts.
The snack variety pack broke apart into twelve individual bags and nobody put them in the same spot twice. This is the fundamental cause of cabinet chaos — it’s not a one-time organizing problem, it’s an ongoing accumulation problem. Any system that doesn’t account for this will fail within a month.
The “No Fixed Spot” Trap
The second reason cabinets revert: items don’t have a defined home. When you “organize” by just neatening things up without assigning every item a specific zone, the system has no rules. Your partner puts the cereal above the plates because there was space.
Your kid shoves a snack box wherever it fits. Within two weeks, you’re back to digging.
The Wrong-Product Problem
Here’s what nobody mentions: half the organizers people buy don’t fit their actual cabinets. They buy a turntable that’s 14 inches wide for a shelf that’s 12 inches deep. They get a shelf riser that’s too tall for the space between shelves. The product sits unused in the cabinet taking up space — making things worse, not better.
Pro tip: Before you spend a single dollar on organizers, measure every cabinet you plan to tackle. Write the numbers down. Shelf width, shelf depth, distance between shelves. This takes five minutes and saves you from returning products that looked perfect online.
Know Your Cabinets Before You Organize Them
Upper Cabinets (12 Inches Deep)
Standard upper kitchen cabinets are 12 inches deep and 30-42 inches tall. That 12-inch depth is the most important number you’ll use when buying organizers. Anything deeper than 11.5 inches won’t fit on the shelf without hanging over the edge.
Upper cabinets hold your lightest, most frequently grabbed items: glasses, mugs, plates, bowls, spices, and everyday dry goods. The mistake most people make is stacking too many items on one shelf and wasting the vertical space between shelves.
Lower and Base Cabinets (24 Inches Deep)
Base cabinets are 24 inches deep and 34.5 inches tall (36 with countertop). These are NKBA standard planning dimensions used by kitchen designers nationwide. That’s twice the depth of your uppers — which means items get lost in the back constantly. Everything you can’t see past the front 8 inches might as well not exist.
Lower cabinets hold heavy items: pots, pans, baking sheets, small appliances, food storage containers. The key challenge here is using the full 24-inch depth without losing items in the dark back half.
Corner Cabinets (The Dead Zone)
Corner cabinets have 24+ inches of depth but the angled interior creates triangular dead space that’s almost impossible to reach. Standard shelving doesn’t solve this because items in the back corners are blocked by items in front.
Under-Sink Cabinets (Plumbing Obstacle Course)
The space under your kitchen sink is awkward by design. A P-trap pipe runs through the center, cutting your usable area into two narrow sections. Most people throw cleaning supplies in there loose, and everything slides around each time the door opens.
Pro tip: Measure the usable space on each side of the pipe separately. In most standard vanity-style sink cabinets, you get two sections of about 10-12 inches wide. Buy organizers sized for those individual sections, not for the full cabinet width.
The same measurement-first principle applies when organizing a small pantry with limited shelf depth — know your numbers before you buy anything.
Upper Cabinet Organization
Shelf Risers Double Your Plate Space
The space between your cabinet shelf and the one above it is probably 10-12 inches. Your dinner plates are 1.5 inches tall when stacked. That means you’re using 3-4 inches of a 12-inch vertical space for a stack of plates — and wasting 8 inches above them.
A shelf riser fixes this instantly. The SimpleHouseware Expandable Shelf Organizer Rack ($16-20) expands from 15.5 to 27 inches wide and gives you a second level for smaller plates, bowls, or mugs underneath. It’s freestanding — nothing to mount, nothing to drill, remove it when you move out.
If budget is tight, Dollar Tree carries wire shelf risers for $1.25 that do the same job in a fixed width.
Under-Shelf Baskets for Dead Space
Look at your upper cabinets right now. See the gap between the bottom of a shelf and the tops of the items on the shelf below? That’s 4-6 inches of wasted vertical space in every single cabinet.
An under-shelf wire basket ($8-12) clips onto the shelf edge and hangs down into that dead space. Use it for snack bars, tea bags, coffee pods, or packet seasonings — small items that otherwise get buried behind larger boxes.
The Frequency Rule for Upper Cabinets
Organize your uppers by how often you reach for things:
- Eye level (most accessible shelf): Daily-use glasses, mugs, plates
- One shelf up: Weekly-use items — serving bowls, extra glasses
- Top shelf: Rarely-used items — holiday dishes, special occasion glasses, backup supplies
This sounds obvious. Most people don’t actually do it. They put things wherever there’s space at the moment, and within a week the system collapses because nothing has a rule.
Pro tip: If you share the kitchen with someone, agree on the zone rules together. The system fails when one person assigns a spot and the other person doesn’t know about it. Write the zones on a sticky note inside the cabinet door for the first month until the habit forms.
Lower and Base Cabinet Solutions
The Pan Avalanche Problem
If you store pots and pans stacked horizontally, you know the avalanche. You need the skillet at the bottom, so you lift five other pans, grab it, and shove everything back in a different order. The next person who opens that cabinet faces a worse version of the same problem.
The fix is vertical storage. Stand pans upright in individual slots instead of stacking them flat. The SimpleHouseware Adjustable Pan Organizer Rack ($18-22) holds 5 pans or lids in their own adjustable slots — pull one out without touching the others. It fits inside standard 24-inch deep base cabinets and works both vertically and horizontally depending on your cabinet height.

SimpleHouseware Adjustable Pan Organizer Rack (5-Tier)
$18-22 · 12.5″ x 9″ x 11.5″ · Fits standard 24″ deep base cabinets
Holds 5 pans, lids, or baking sheets in individual adjustable slots. Works vertical or horizontal. Freestanding — no drilling, no mounting, renter-safe. The dividers adjust to fit everything from a 7-inch sauté pan to a full-size cookie sheet.
Budget alternative: A wire cooling rack stood on its side separates pans for free — not as adjustable, but it works if you only have 2-3 pans.
Check Price on AmazonUsing the Full 24-Inch Depth
Your base cabinets are twice as deep as your uppers, but most people only use the front half. Items in the back 12 inches become invisible — you forget they exist and buy duplicates.
Two fixes that work:
For food and supplies: Use clear bins that you can pull forward like a drawer. The mDesign bins work here too — line them front-to-back so you pull the whole bin out to see everything in it.
For pans and baking sheets: The vertical rack above solves this completely. Every pan is visible from the front regardless of depth.
The Appliance Cabinet
If you store a stand mixer, blender, or slow cooker in a base cabinet, wrap the cord with an adhesive cord organizer before putting it away. Loose cords tangle with other items, make it harder to pull the appliance out, and create the visual mess that makes a cabinet look chaotic even when it’s technically organized.
Corner Cabinet Fixes
Why Corner Cabinets Are the Worst
Corner cabinets have more cubic space than any other cabinet in your kitchen, and most people use about 30% of it. The problem is geometry: the L-shaped or diagonal access point means you can see and reach the front, but the triangular back corners are a no-man’s-land where items go to be forgotten.
Standard rectangular bins don’t solve this because they leave wedge-shaped gaps in the corners. You need round solutions — specifically, turntables.
The Turntable Fix (Size Matters)
A Copco Non-Skid Turntable ($10-13) in the 12-inch diameter size fits most corner cabinet shelves and gives you spin-to-access for oils, vinegars, sauces, and condiments. One spin and you see everything. No reaching into dark corners.
The sizing rule: measure your shelf depth, subtract 2-4 inches, and that’s your maximum turntable diameter. A shelf that’s 14 inches deep fits a 12-inch turntable perfectly. A shelf that’s 18 inches deep can handle a 14 or 16-inch turntable.
For items that don’t fit on a turntable — packets, small boxes, snack bars — use a wedge-shaped bin designed for corner cabinets. These triangular containers fit into the corners that round turntables can’t reach.
The One-Item-Deep Rule
Whatever organization system you use for your corner cabinet, enforce one rule: nothing goes behind anything else. If you can’t see an item from the front of the cabinet, it’s in the wrong spot. Turntables enforce this naturally (everything faces outward). For non-turntable shelves, use a single row of items from front to back.
The same turntable sizing method works for pantry corners too — measure first, buy second.
Pro tip: Put a small piece of non-slip shelf liner under your turntable even if it has non-skid feet. This prevents it from walking forward on the shelf over time, which happens when you spin it aggressively while cooking.
Under-Sink Cabinet Organization
Working Around the Pipes
The cabinet under your kitchen sink has a pipe running through the middle that you can’t move. Accept this constraint and organize around it instead of fighting it.
Measure the usable space on each side of the P-trap. In standard kitchen sink cabinets, you’ll get two sections of roughly 10-12 inches wide by 20-24 inches deep. That’s enough for two mDesign stackable bins ($22 for a 4-pack) per side — stack two high and you’ve just organized the entire under-sink space for about $22.
Left side: cleaning supplies (dish soap refill, sponges, dishwasher pods). Right side: trash bags, extra hand soap, scrub brushes. Or whatever split makes sense for your household. The point is that bins keep items from sliding around when you open the door, and the clear material lets you see contents without pulling anything out.
The Tension Rod Trick
A spring tension rod ($4-6) spanning the width of the cabinet just below the underside of the sink creates a hanging bar for spray bottles. Hook the trigger handles over the rod and your cleaning sprays hang at eye level when you open the door — no bending, no digging.
This works in cabinets 15-30 inches wide. Measure the interior width (not the door opening — the inside measurement between the cabinet walls) and buy a tension rod rated for that range.
The Shelf Liner You Need
Put a waterproof rubber shelf liner on the floor of your under-sink cabinet. Leaks happen — a slow drip from a connection, a garbage disposal that sweats, a soap bottle that tips. Without a liner, the cabinet floor warps and stains. With one, you catch the moisture, wipe it up during your weekly reset, and the cabinet stays intact.
If you’re renting, this protects you from losing your security deposit over water damage to the cabinet floor.
Cabinet Door Storage
The Hidden Real Estate Most People Waste
The back of every cabinet door is usable storage space — typically 12-18 inches wide and 20-30 inches tall. That’s enough room for wraps, spice jars, cleaning supplies, or small tools. Most people never use it.
The SimpleHouseware Wall/Door Mount Kitchen Wrap Organizer ($15-18) holds rolls of aluminum foil, plastic wrap, and parchment paper horizontally in slots, with a small basket below for spice packets or clips. It mounts with Command strips — fully renter-friendly, no drilling, no screws, removes cleanly when you move.
The Weight Warning
According to the National Kitchen and Bath Association (NKBA), professional organizers consistently recommend keeping door-mounted weight under 5 pounds to prevent long-term hinge fatigue. The physics are real: every time you open the door, the weight swings and stresses the hinge attachment points.
The rule: keep door-mounted items under 3-5 pounds total. Wraps, spice packets, clips, measuring spoons — fine. Heavy glass jars, full spray bottles, ceramic containers — not fine. If you want to hang spray bottles, mount the rod inside the cabinet (tension rod across the interior) rather than on the door itself.
What Works on Doors vs. What Doesn’t
Good for cabinet doors: wrap organizers, Command clip strips for recipes or lists, small magnetic spice jars (on metal doors only), lightweight pocket organizers for snack bars.
Bad for cabinet doors: over-door racks loaded with cans (too heavy), heavy bottles on hooks, anything that prevents the door from closing flush.
The same weight-limit principle applies to pantry doors — measure the clearance between the door and the front shelf before buying any over-door organizer.
Pro tip: Before mounting anything on a cabinet door, close the door and check clearance. The items on the door need to fit between the closed door and the front edge of the cabinet shelf. If there’s less than 3 inches of clearance, a flat organizer is your only option — skip the deep pocket racks.
The Weekly Reset That Keeps It All Working
Why 10 Minutes Every Sunday Prevents Full Reorganization
Every system in this article will fail within 6-8 weeks without maintenance. Not because the products break or the zones don’t work — because life happens. Someone puts the cereal in the wrong cabinet. A new product arrives and gets shoved wherever.
A container lid migrates three cabinets away from its base. The fix is a 10-minute weekly reset. Pick a day — Sunday evening works for most people because you’re restocking groceries anyway. Set a timer. Here’s the routine:
- Open each organized cabinet — scan for anything that’s migrated from its zone
- Return displaced items to their correct spots
- Wipe shelves that have crumbs or spills (takes 30 seconds per shelf)
- Check under the sink for any leaks on the shelf liner
- Toss expired items from upper cabinets (check one section per week on rotation)
That’s it. Ten minutes prevents the gradual drift that turns organized cabinets into chaos over a month.
The Three-Month Deep Reset
Once per quarter, do a slightly deeper pass:
Pull out turntables and wipe them. Check that tension rods are still tight. Verify that adhesive products (Command strips, hooks) haven’t loosened. Look for items you haven’t used in three months — those are candidates for donation, a higher cabinet, or the donation box.
This takes 20-30 minutes and keeps the system functioning long-term. Think of it like an oil change for your kitchen — boring, quick, prevents expensive problems later.
Getting Other People On Board
The number one reason kitchen cabinet organization fails in multi-person households: one person sets up the system and nobody else knows the rules. Your partner opens the cabinet, sees bins, and puts the new groceries wherever there’s space because they don’t know that the left bin is snacks and the right bin is baking supplies.
Two things fix this. First, label the bins for the first month — even if it feels silly. Labeling removes the guessing. Second, do the initial organization together. When someone helps create the system, they remember it. When they come home to a reorganized kitchen, they don’t.
For a complete pantry organization system with a built-in weekly reset, see our kitchen pantry guide — the same maintenance principles apply.
Conclusion
Three Key Takeaways
Kitchen cabinet organization that lasts comes down to three things: measure before you buy (your cabinets have specific dimensions and every organizer needs to fit them), organize by zone (upper, lower, corner, under-sink, and doors each need different solutions), and maintain weekly (10 minutes on Sunday prevents full-scale reorganization every few months).
Three-Month Check
After three months, open each cabinet and ask: is the system still working? If one zone has reverted, identify what failed — was it a frequency problem (items moved because they’re used more often than expected), a volume problem (more stuff came in without anything going out), or a household problem (nobody else knows the rule). Fix the root cause, not the symptom.
Your First Move
Start with the cabinet that annoys you most — the one where things fall out, or the one you avoid opening. Measure it. Apply the right fix for its zone type.
Get that one cabinet working perfectly before you touch another. One cabinet done right teaches you more than ten cabinets done quickly.
Q1 How should I organize kitchen cabinets?
Organize kitchen cabinets by zone — upper cabinets (12-inch deep) get shelf risers and daily-use items at eye level, lower cabinets (24-inch deep) get vertical pan racks and pull-forward bins, corner cabinets get turntables, and under-sink cabinets get stackable bins around the plumbing. Measure each cabinet before buying organizers.
Q2 What should go in upper cabinets vs lower cabinets?
Upper cabinets hold lightweight daily-use items — plates, glasses, mugs, spices, dry goods. Lower base cabinets hold heavy items — pots, pans, baking sheets, small appliances, food storage containers. The rule is frequency plus weight: heavy and daily goes in lower cabinets at waist height, light and daily goes in uppers at eye level.
Q3 How do I organize kitchen cabinets on a budget?
Start with free fixes — measure cabinets, purge expired items, assign zones, and enforce the everything has one home rule. Then add budget tools: Dollar Tree shelf risers ($1.25), tension rods for under-sink ($4-6), and one set of stackable bins for the worst cabinet ($6-12). You can organize an entire kitchen for under $30.
Q4 How often should you reorganize kitchen cabinets?
You shouldn’t need to fully reorganize if you maintain weekly. A 10-minute Sunday reset — return displaced items to zones, wipe one shelf, toss expired items — prevents reversion. Do a deeper 20-minute check once per quarter to tighten loose hooks, clean turntables, and remove items unused for three months.
Q5 What is the best way to organize pots and pans in cabinets?
Store pots and pans vertically in a rack with individual adjustable slots, so you can pull one out without moving the others. The rack goes in a base cabinet (24-inch deep provides enough room). Lids store in the same rack or in a separate lid organizer mounted to the cabinet door. Never stack pans horizontally — it guarantees the avalanche problem.