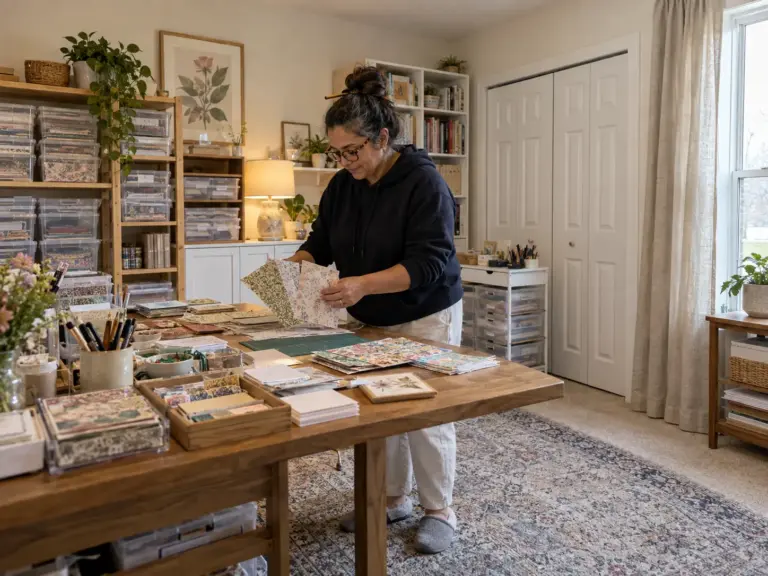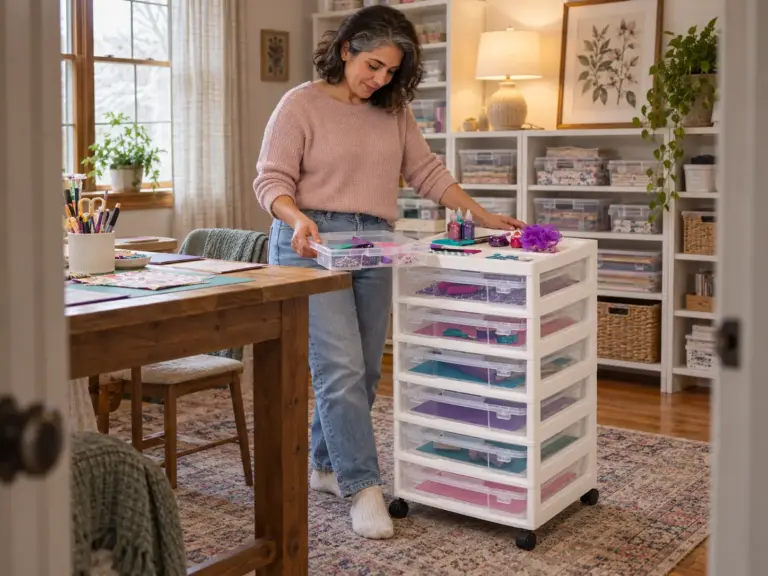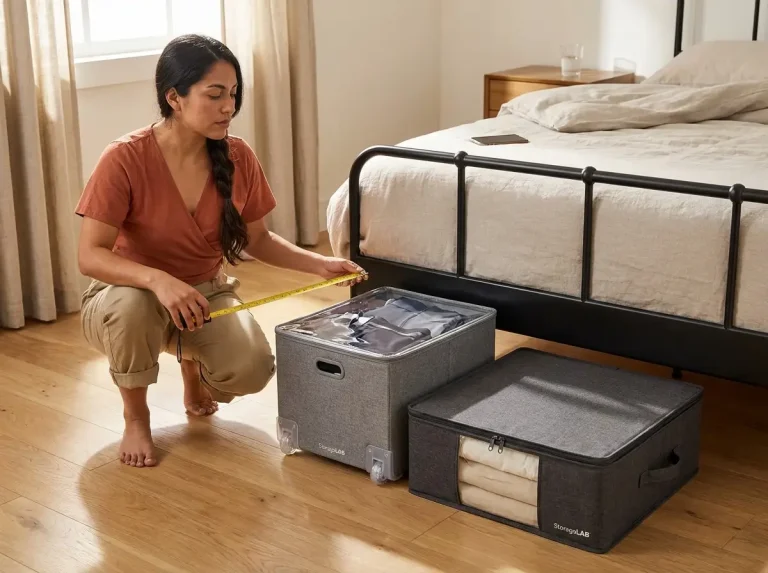

Paint tubes piled in a drawer, brushes bunched in a mug, a sketchbook leaning against the wet-paint tray: the setup looks organized for exactly one afternoon. Then you pull out one tube and three others come with it, your finest brush has bent against the rim, and the tray has left a ring on the sketchbook cover. Art supply organization fails because every medium breaks in its own way, and a container picked for looks ignores all of them. What follows comes from where art guides and artist forums keep reporting that each medium gives out, so the order here is the failure rule first, then paint, brushes, drawing media, sketchbooks and panels, the wall, and a mobile station for a shared home, all of it sized for one corner of a wider craft room.
Quick Answer
Choose each container by how its medium fails, not by how it looks.
- Paint tubes and bottles: one shallow layer in a drawer, bottles upright on a riser so the back row shows.
- Brushes: upright in a jar tall enough for the handle, never tipped bristles-down in liquid.
- Pencils, markers and pastels: a divided tray, one layer deep, with nothing stacked on top.
- Sketchbooks and panels: a container sized to the art, measured before you buy.
- Solvent and oily rags: a closed metal can with a self-closing lid, out of a child’s reach.
Art Supply Organization Starts With How Each Medium Fails
Most storage advice starts with the container. This section starts with the way a medium goes wrong, because that decides which container is worth having.
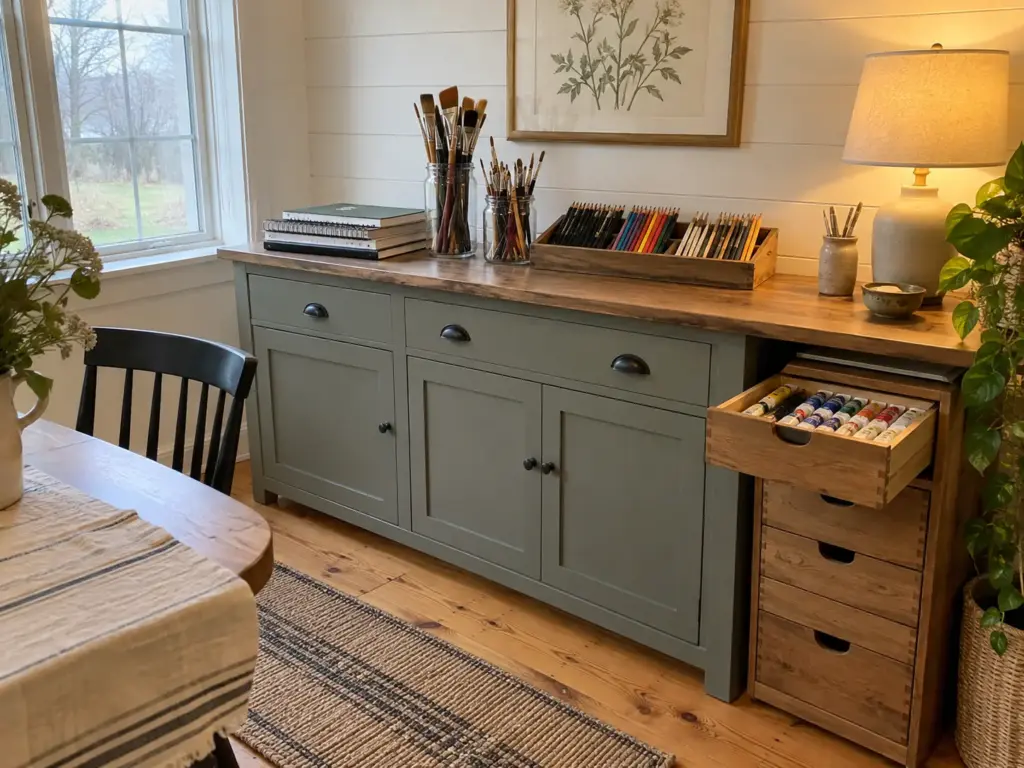
Why sorting by medium alone is not enough
Sorting paint from brushes from paper is the right first cut, and it still leaves you with a drawer of things that break differently. Two items in the same category can need opposite treatment: a brush wants to stand upright with air around its bristles, while a pastel wants to lie flat and be left alone. A container that suits one of them quietly wrecks the other.
So the useful question for art supply storage is not “what goes where” but “how does this thing go wrong in a container?” Brushes are the clearest case. A guide from an art retailer, art2life, puts it plainly: too shallow a container and the brushes tip over constantly, too narrow and the bristles get crowded and bent, too wide and everything slides around.
Oil paint is stranger. A moderator in a 2015 WetCanvas thread called oil separating at the cap normal, even in tubes nobody has touched for months, and said a few taps of the closed tube against the palm usually sorts it out.
There is also the storage that lives and dies with one piece of furniture. An r/ArtistLounge poster wrote that they used to keep everything in a hardwood dresser, then moved and did not take it along. A setup that depends on a single fixed piece of furniture leaves when the furniture does, while a labeled box or a crate travels as one unit.
The one failure to design against for each medium
Pick one failure per medium and build around it. Tubes separate and pile up, so they get a single shallow layer. Brushes tip, bend and splay, so they get an upright jar sized to the handle.
Pencils, markers and pastels get lost in a heap, and brittle sticks do not like weight on top of them, so they get a divided tray with nothing stacked above. Flat work warps or tips over, so it gets a container cut to its format. Rags that have soaked up drying oil hold heat, so they get a closed metal can.
I would not trust a blanket rule like “put everything in clear bins” over this list. Clear bins solve visibility, which is one failure out of five, and they do nothing for a brush that has bent against a rim or a rag that has trapped its own heat.
Put the rule on the label, not only the name. A strip of painter’s tape reading “one layer” on the tube drawer or “handle up” on the brush jar tells the next person in the house why the container exists, which is what stops someone from stacking a second layer on top.
Where the budget containers beat the boutique ones
For most of these media the cheap container is the better one, because the job is fit, not finish. Shoeboxes, drinking glasses, tins and dollar-store bins all do it, and a label maker or a strip of tape turns them into labeled bins. In the r/ArtistLounge thread, a student described labeled shoeboxes as “cheap and efficient,” another poster keeps the things they use most in two drinking glasses at the work table, and a third sorts a drawer with small bins from a dollar store.
A boutique matching set earns its price in photographs. In a drawer it earns very little, because the boxes are sized to look good together rather than to hold a sketchbook, a long brush or a row of pastels.
My own call: the pretty matching set is the first thing to cut, and the plain container that fits the medium is the first thing to keep. Nothing in this section needs a wall, so owners and renters get the same answer here. The sections on the wall and the mobile station are where that changes.
Where Paint Tubes and Bottles Should Live
Paint is the part of an art setup that gets bought one color at a time, which is exactly how a tidy drawer becomes a pile. The fix is a place that stops growing upward.
Tubes: one shallow layer beats a deep pile
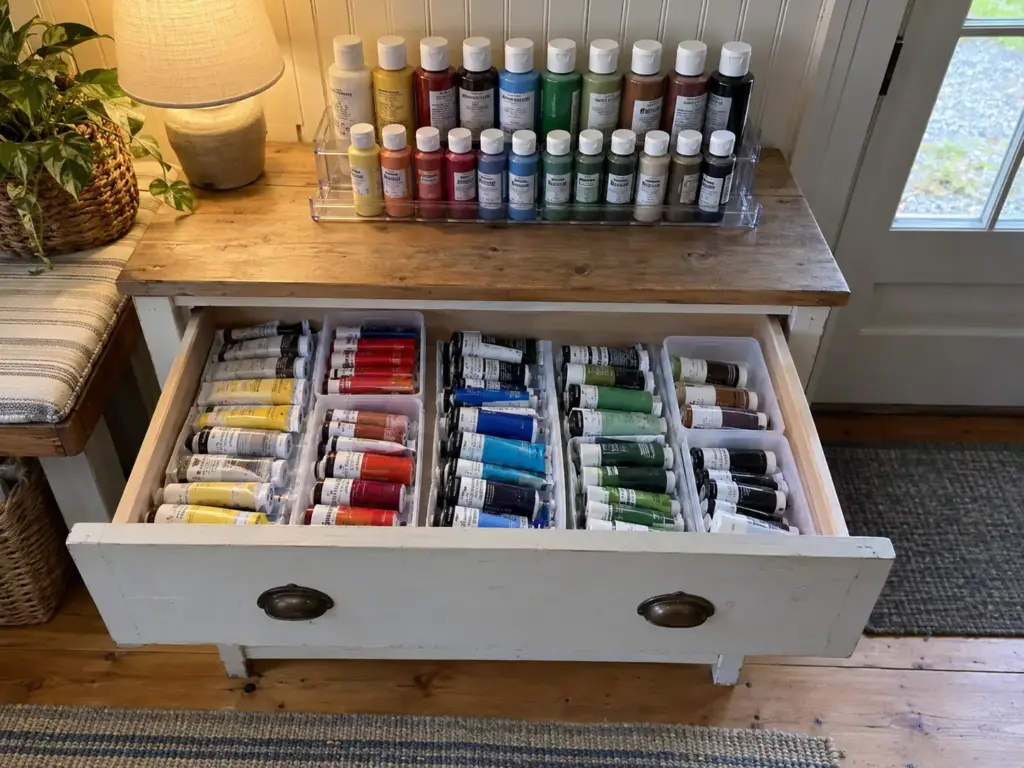
Paint storage tends to fail at the drawer. Picture it on the day you build it. It slides open easily with a dozen tubes lying in it, so you add a few more, then a second layer on top. Now you pull out the cadmium red you want and three other tubes come up with it, and the colors underneath have disappeared from view entirely.
That is the editor’s judgment rather than a measured rule, and it holds up: a tube you cannot see is a tube you will buy again. For paint tube storage, keep tubes in one layer, side by side, caps all facing the same way, with shallow bins or drawer dividers inside the drawer to separate groups.
Sort them the way you actually paint. Sort by color while the collection is small, then sort by frequency of use once it grows, because by then you reach for the same handful of tubes all the time and the rest are archive. If the drawer gets crowded, the second layer is a sign you need a second drawer, not a deeper pile. A small drawer unit, or a metal tool chest on wheels if the floor has room for one, gives you that second drawer without building anything.
Bottles: risers and tiers so the back row stays reachable
Acrylic and craft paint bottles stand upright, which means the back row hides behind the front one on any shelf deeper than a bottle is tall. A stepped shelf riser, the kind sold for spice jars and pantry cans, lifts each row above the one in front so every label faces out, and it works as an acrylic paint organizer without being sold as one. Cheaper still, a shoebox lid propped on a book does a worse version of the same job. Watercolor storage is the small-scale version of the same problem: pans and gouache tubes fit a shallow lidded tin, which also travels better than a drawer.
Nothing here depends on the wall, so a rental changes nothing. If you are weighing what the container itself should be made of, the sibling guide on how to choose the paint container, not the brand already compares the options.
The oil-tube question: cap down, flat or upright
Oil paint storage has one open question, and it is worth knowing before you cut a cardboard grid: whether to store tubes cap down is disputed. One user in the WetCanvas thread keeps tubes upside down in a cut-up tube box and reports no separation since. Another replies that they do not think the separation is due to gravity at all. A third says storing a tube upside down makes the oil rise away from the cap, which is the logic behind the first user’s cardboard grid.
The one concrete brand detail from that thread: Winsor & Newton caps are not flat, so they do not sit well upside down, while Gamblin, Talens, Holbein and Blick caps do. So the common advice to store tubes cap down is fine for some brands and a wobbling hazard for others. Check the cap on the brand you actually own before you commit, and if a tube spits oil anyway, close it and tap it against your palm.
Brushes Need an Upright Jar Sized to the Handle
Brushes are the cheapest thing in the kit to ruin and the easiest to protect. What they need is a container that fits them, and that rarely costs anything.
Match the jar height to the brush length
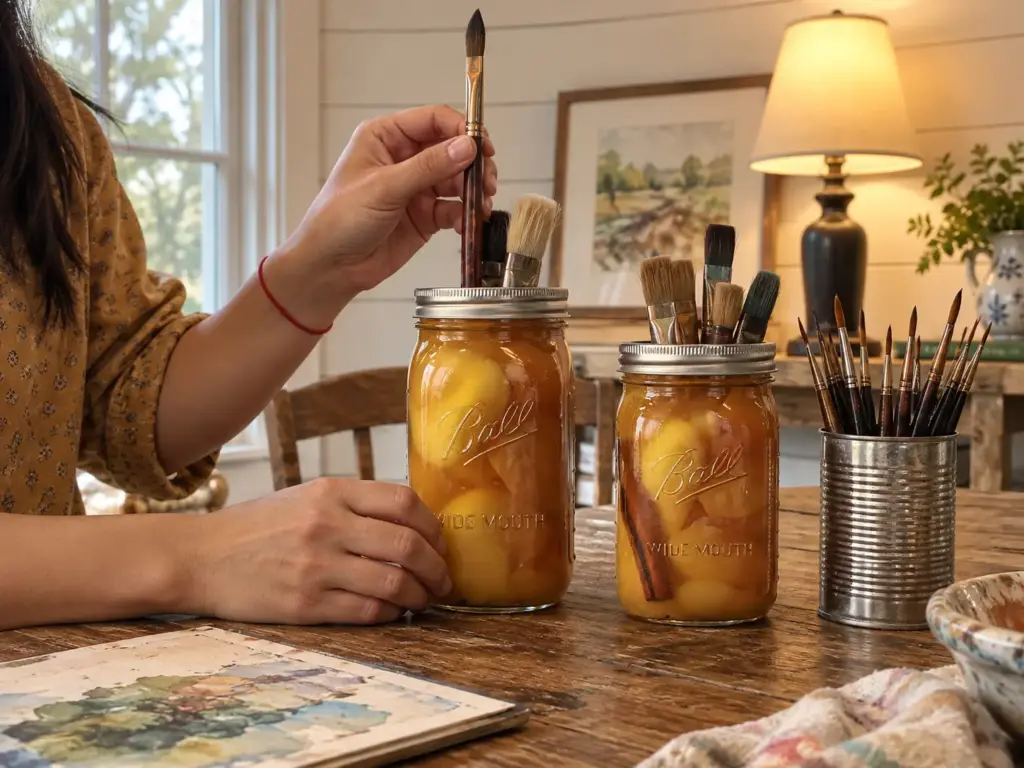
Brush storage usually starts as a mug. The tallest brush tips the whole thing over, and the finest bends against the rim every time you pull another one out. That is the container-fit problem, and every brush holder has it, whether you call it a brush cup, a jar or a paintbrush organizer: not the brand, but how tall and how wide it is against what stands in it.
One retailer’s guide gives starting numbers. An 8-inch brush sits well in a container about 5 inches tall, a 10-inch brush in about 6, an 11 to 12-inch brush in about 7.5 to 8, and pencils in about 4.5. That is one author’s rule of thumb, so treat it as a starting point and check it with a tape measure against your own longest brush before you buy anything.
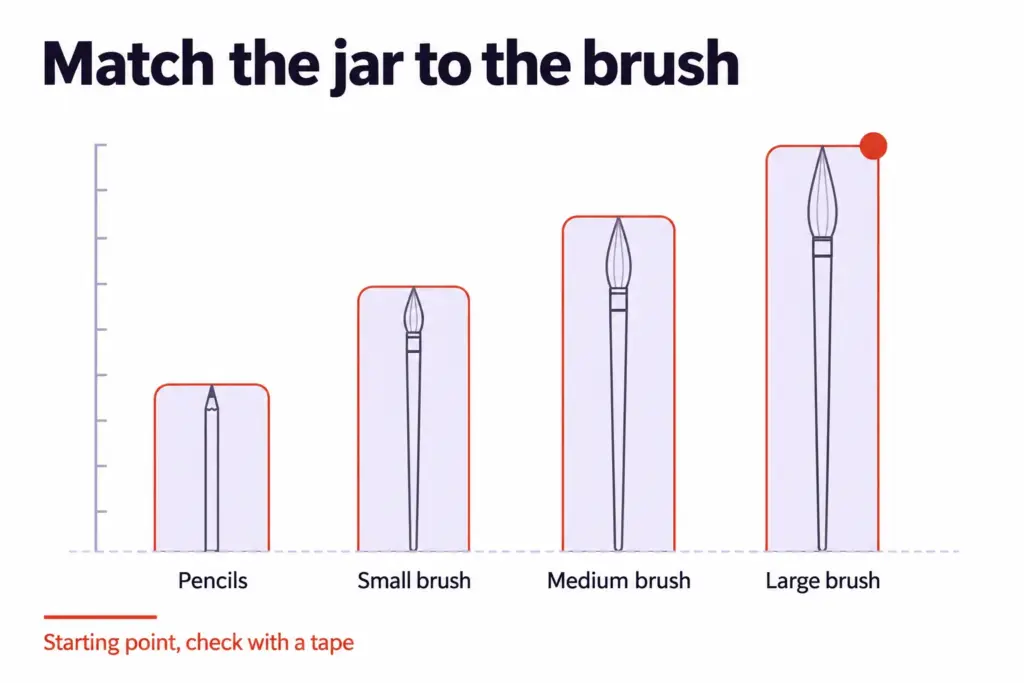
A tall jar also solves a problem you may not have thought about: brushes of different lengths. Long-handled brushes and fine detail brushes should not share a container, because the long ones crush the fine tips. A second, shorter vessel for the detail brushes costs nothing and saves the hairs you care about most.
Jars, cans and flower pots: the budget path
Metal cans, mason jars, flower pots and plain drinking glasses all work, and the free ones should come first. A kitchen glass already holds your daily brushes, and the r/ArtistLounge poster who keeps the things they use most in two drinking glasses is making the same point. A can or a flower pot covers the longer handles, and for a brush that travels, a fabric roll-up case protects the tips in a bag.
If you want something more uniform, the Ball wide-mouth quart mason jars come in a pack of eight with lids and bands, which is far more than one table needs. The quart size is the one to try against your longest handle, and a short jar is the failure the retailer guide describes, so measure its height before you commit. One jar and one kitchen glass will do the same job for most people.
Drying and resting: why a jar of solvent is not storage
There is a difference between a jar that holds brushes and a jar that holds liquid, and mixing them up ruins brushes. Fine Art Tutorials warns that leaving brushes bristles-down in water or solvent for too long can make them splay. A rinse jar is a rinse jar. When you are done, lay the brushes flat to dry, then stand them handle-down in the dry jar.
Keep two jars on the table and give them different jobs. One holds water or solvent and never holds brushes overnight. The other stays dry and is where brushes go once they have been wiped and laid flat to finish drying. Use different jars so nobody mixes them up.
Pencils, Markers and Pastels Belong in Trays, Not Piles
Drawing media are small, numerous and easy to lose in a heap. A tray that shows every piece at once does more than any amount of labeling.
Pencils and markers: dividers by type
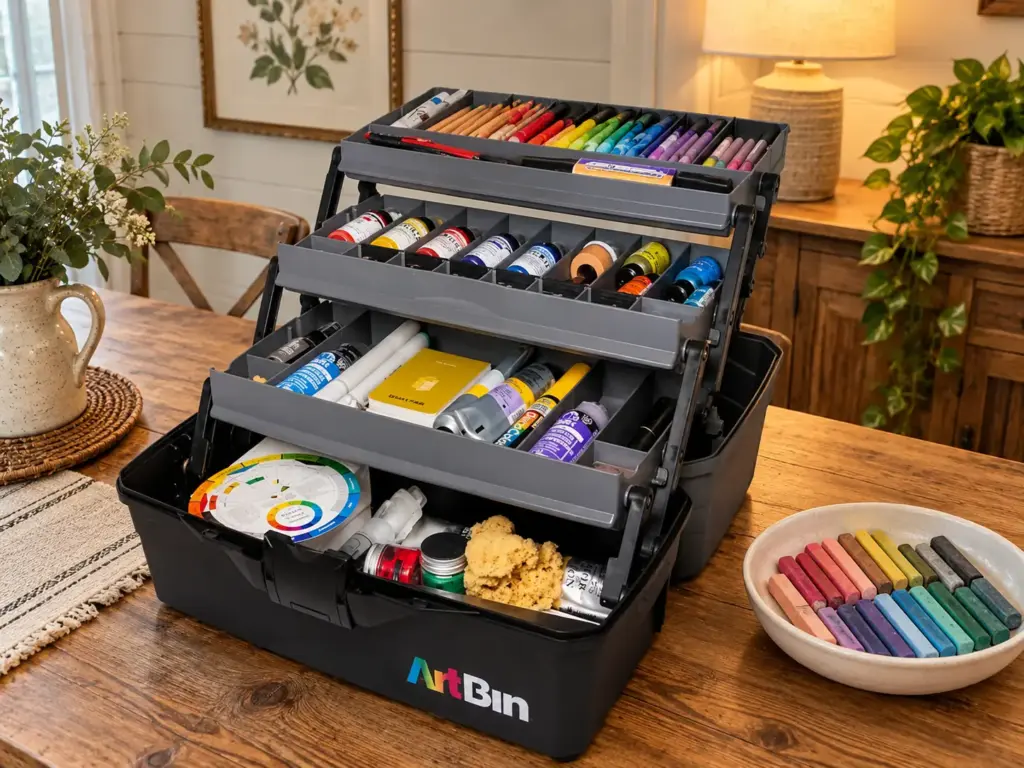
Think of the drawer of loose markers. The color you want is always at the bottom, so you dig, and the digging is what breaks the system, because nobody puts the marker back where it started. A tray with dividers fixes that by giving each type a fixed lane, and it works as a pencil organizer and a marker organizer at once.
Pencils go in one section, markers in rows in another, and the pens you actually reach for sit at the front. Colored pencil storage follows the same rule: sort the tin by hue so the gap shows when one goes missing.
Keep markers in their original casing when they came in one. The r/ArtistLounge thread has a poster whose open-stock markers just go in whatever container is at hand, which works because the markers do not care. What matters is that you can see them all at once. Sorting markers by color has a side benefit: the gap where the missing one belongs is obvious, so you stop buying a second copy of the one you already own.
Pastels and charcoal: a shallow tray, one layer
Pastel storage and charcoal storage share one rule. Both are brittle and shed dust, which is my reason, not a measured one, for giving them a shallow tray in a single layer with nothing stacked on top. A deep bin turns the bottom layer into a pile of crumbs. A shallow dish, a baking tray or a lidded flat box keeps each stick visible and out of the weight of its neighbors.
Treat that as the editor’s opinion rather than a tested result. It is also the easiest of these fixes to try for nothing: a baking sheet lined with a cloth does the job until you decide you want something lidded.
The tray you can carry to another room
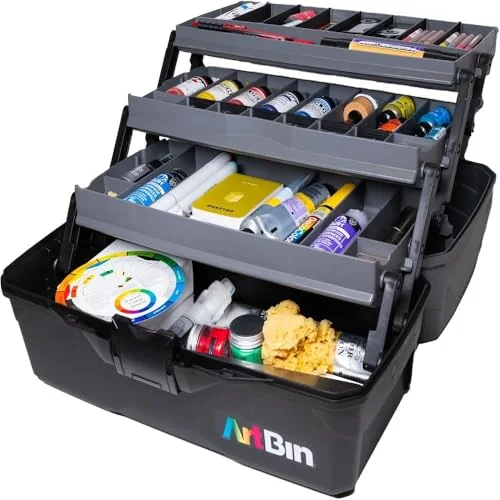
If your supplies have to move between rooms, a lift-up tray box is the tool, a portable art supply organizer with a handle. The top tray is long enough for brushes, pencils and markers, and the lower section takes bottles. A tote or an art caddy is the softer version, and a zipper pouch is the smallest one for a handful of pencils. Before buying any of them, check whether a labeled shoebox does the same thing, because for a stationary corner it usually does.
Sketchbooks and Panels Need a Container Sized to the Format
Flat work does not care how a bin looks. It cares whether the bin is the right size, and the only way to know that is to measure the work first.
Measure the sketchbook before you buy the bin
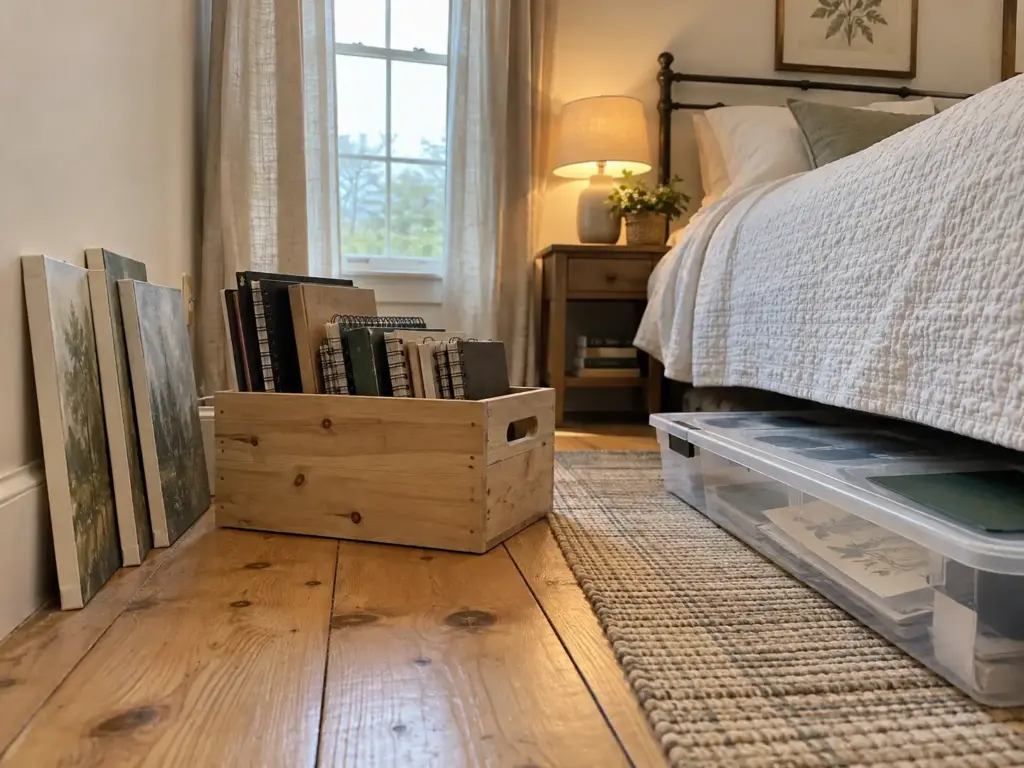
Sketchbook storage fails on size before anything else. Bins come in box sizes, sketchbooks and panels come in art sizes, and the two rarely line up. A sketchbook that is a little too wide for its bin ends up leaning, its corners crushed against the lid.
Measure your own sketchbook size, add a small margin so you can lift the book out, and shop for that. Your sketchbook might be one of the common hardbound sizes or something odder, which is exactly why a tape measure beats a size chart, and why the right sketchbook organizer is whichever crate, bin or drawer clears that number.
Measuring comes before the container for a reason that applies to every flat thing in your house. If you have not yet measured your shelf, measure the shelf depth first, because a shelf too shallow for the book is a problem no bin will repair.
Upright, flat or under the bed
People in the r/ArtistLounge thread store these in ways that suit how they live. One keeps sketchbooks and other book-type items in milk crates and calls it practical when moving, since the whole stack travels as a unit. Another keeps paper in a bottom drawer, and a third stacks drawing pads on a shelf.
Art paper storage and general paper storage come out the same way: flat, shallow and not under anything heavy. A woven basket works for sketchbooks and dry supplies too, as long as nothing in it can leak.
My own rule of thumb for canvas storage and panel storage is to put the heavier container on the bottom and stand panels upright on their long edge, away from the wet-paint tray. A panel leaning in a corner with nothing on it is fine. A panel with a stack of sketchbooks on top of it can warp.
Finished work: the folder and the flat file alternative
Finished pieces need something flat and shallow so they do not curl or crease. A real flat file is the best answer and the most expensive, so the budget alternative is a long, shallow container for under-bed storage. That keeps work flat, dry and out of the way, and it suits a rental, since nothing is installed.
For a small batch, a vertical file, an accordion folder or a portfolio case does the job of portfolio storage without taking floor space. The sibling article on flat under-bed containers compares rolling and flat options for a low frame. For big paper and rolls, the craft room guides already cover that format, so this section stops here.
Wall Storage for Palette Knives and Daily Tools
The wall is where the tools you use every session belong, because it frees the one surface you cannot spare. It is also the part of this setup that depends on your lease.
A magnetic bar for palette knives
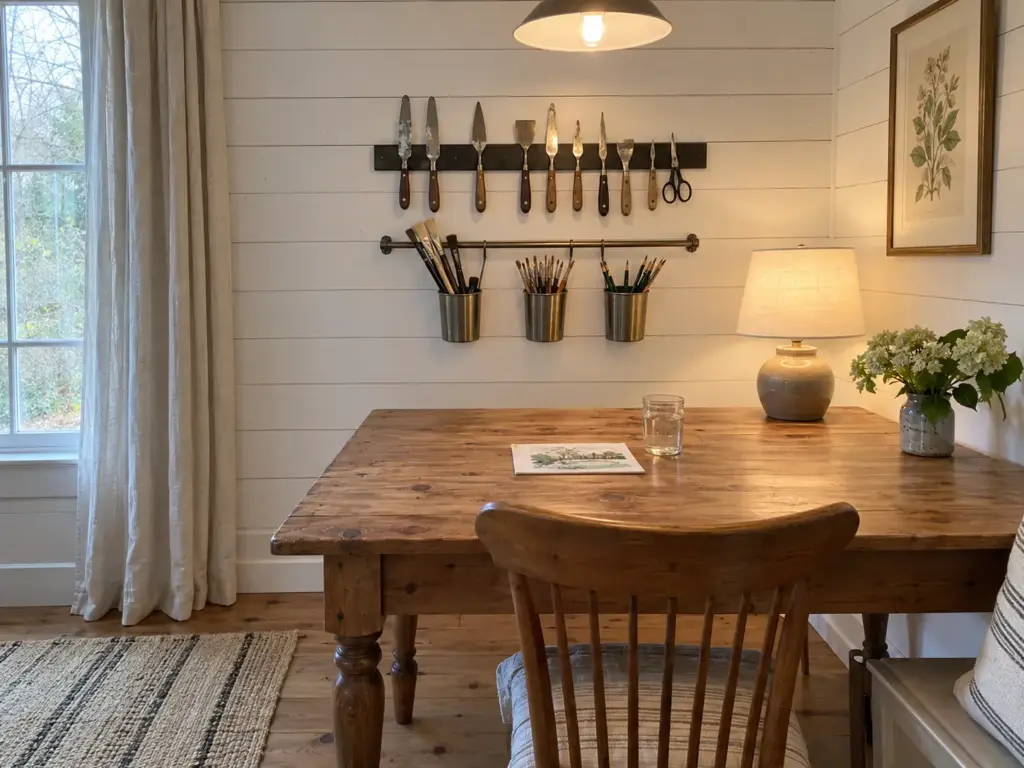
The art table is the only flat surface in the room, so everything lands on it. The fastest way to clear it is to take the tools you use every session and move them up. Palette knife storage is the cleanest case for a magnetic knife bar: it holds metal knives visible and off the table, the same way it holds kitchen knives. Any magnetic strip does the job, and scissors and small metal tools can join the knives.
Hanging containers on a rod for daily tools
A slim rod with small hanging metal cups holds the brushes, pencils and tools you reach for during a session. The wall is the right place for the daily set because those are the things you pick up again and again during a session, and a reach of one arm’s length beats a reach into a drawer.
Keep the wall to the tools you use every session and leave the rest in drawers. A wall of everything looks organized for a week and turns into a dusty display. In the r/ArtistLounge thread, one poster wants pegboards in the next place “to hang up my pretty paints,” which is a decorative reason, and the daily-use reason is the stronger of the two.
The renter version
A bar and a rod can go up only if your lease allows them. If it does not, the freestanding version is a jar or a can on the table or a shelf, which does the same job at the same height. Renter-friendly art storage on a wall usually means a no-drill wall system, and the sibling guide covers the no-drill pegboard approach in full, so use that if you want a wall system that leaves the paint alone.
A Mobile Art Station for a Shared Home, With a Solvent Shelf of Its Own
A shared home asks two things of an art setup: that it can leave the table, and that nothing hazardous sits where a child can reach it. A cart and a closed can cover both.
The cart that carries the daily kit
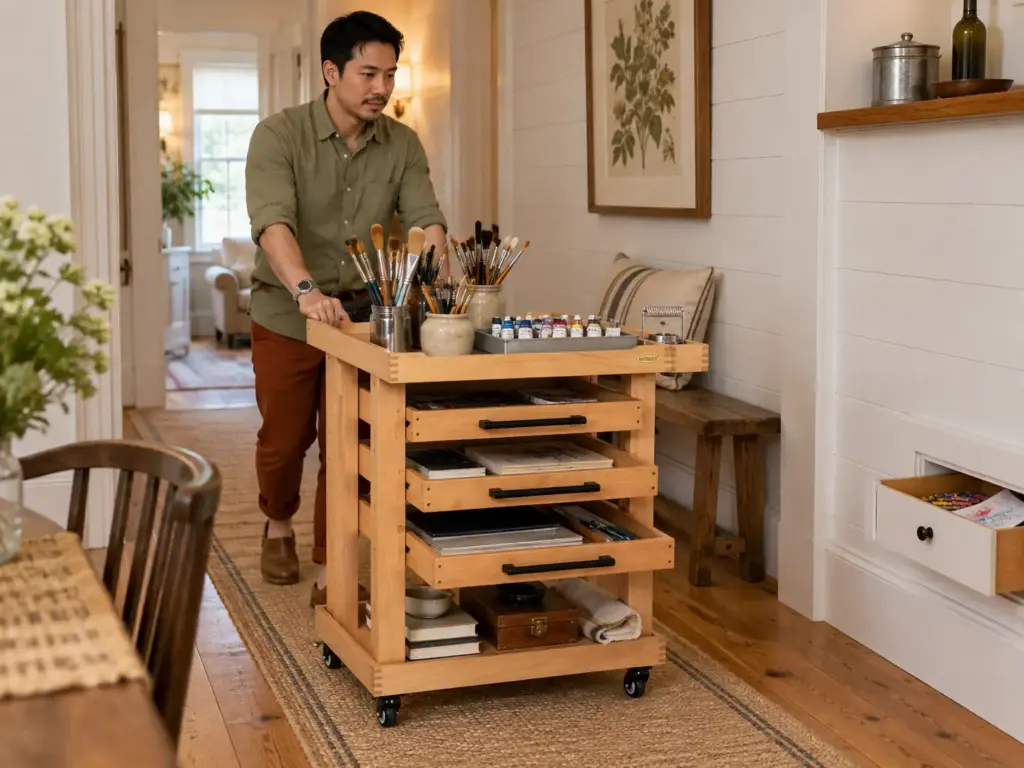
Picture a dining table, a folding table or a corner workstation that doubles as the studio. Before dinner, the station has to roll out of sight. That is the case for putting the daily kit on wheels: brushes, a tray of tubes, the sketchbook in use, all of it moves as one unit, and the table is a table again in a minute.
Start with the free option. A rolling cart from the kitchen, a tiered cart or a bar cart does the same job as a rolling art cart, and many homes already own one. If you want an art cart built for the purpose, the MEEDEN 5-tier cart is solid beech with three drawers deep enough to lay long brushes down, a removable pallet top and four casters that lock.
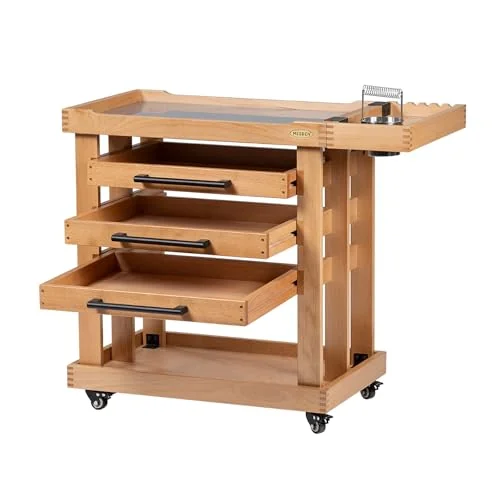
An r/ArtistLounge poster who bought a three-drawer rolling cabinet put the downside in one line: the only drawback was the four hours it took to assemble alone. If you do not need five tiers, the rolling utility cart with three drawers, a DIY divider and lockable wheels is the simpler route, listed for brushes, paints and small parts. No complaint could be sourced for it, so there is no flaw to report, and the honest advice is to check the listing’s dimensions against your longest brush.
What a child can reach and what stays closed away
In a home with a small child, split the kit into two zones. This is the editor’s judgment, not a sourced safety rule: kids art supplies like crayons, washable paint and paper go in a low drawer a child can open on their own, while solvents, thinners and the rag can live on a high or closed shelf, or in lockable storage if you would rather add a latch.
The point of the split is that the child never has to be told no, because the hazardous things are simply not in reach. For a sense of what else belongs within a small child’s reach, the guide to storage in a child’s room covers it.
Lock the cart’s casters before you load the top tier, and put the heaviest items in the lowest drawer. A top-heavy cart that rolls an inch when you lean on it is how a jar of water ends up on the floor.
Rags and thinner: the closed metal can
Solvent storage and oily rags are the one part of this setup with a real hazard attached, and the mechanism is simple. Great American Insurance Group’s loss-control guidance explains that drying oil gives off heat, and the heat is trapped in the folds or balled-up portions of a rag. A rag dropped in a pile or a bag keeps that heat in, which is why the answer is a metal can with a self-closing lid, not a bin.
The Southern Marin Fire Protection District recommends exactly that: a metal, UL-listed rag container with a self-closing lid. The wider rule has a rough edge, so know it.
According to OSHA’s construction standard on oily rags, “All solvent waste, oily rags, and flammable liquids shall be kept in fire resistant covered containers until removed from worksite.” That rule is written for construction sites, not homes. The logic still carries over to a house, and it points at the same closed metal can with a lid, kept on the high shelf from the previous section.
What to Check Before the Setup Slips Back
Three habits keep the whole thing working. Choose each container by the failure of its medium, not by its looks. Measure the brush and the sketchbook before buying the jar or the bin. And keep solvent and oily rags in a closed metal can, out of a child’s reach.
That is the three-month test: in three months, look at which container you stopped using and ask why, because that is the one you chose for looks and the failure rule would have caught. A short daily reset keeps it from happening, and the reset rule is small: brushes back in the dry jar, lids on, rags in the can. The same pattern drives why budget makeovers revert: the setup that survives is the one built for how things get used, not how they get photographed.
Today, take the kitchen glass nearest the sink and stand the brushes you used most recently in it, handle down. Over the next few days, notice whether you reach for that glass without thinking, and whether the longest brush tips it over. If it does, you have just measured the one number the rest of this article depends on.
Frequently Asked Questions
01What is the best way to organize art supplies?
Sort by medium, then choose each container by how that medium fails: tubes in one shallow layer, brushes upright in a jar taller than the handle, drawing media in a divided tray, flat work in a container sized to the format. A labeled shoebox is the free place to start.
02How can I make a DIY art supply organizer?
Use what is already in the kitchen: a mason jar or metal can for brushes, a labeled shoebox for tubes and pencils, a baking tray for pastels. The one fit rule is that the jar must stand taller than the base of the handle, or it tips.
03What are some good categories for organizing art supplies?
Paint, brushes, drawing media, paper and sketchbooks, and tools cover most collections. Keep solvents and oily rags as their own closed category, on a high shelf in a metal can, never mixed in with the rest.
04What are some good ideas for organizing a small art studio?
For art studio storage, keep the daily kit on a cart that rolls away, hang metal tools on the wall if your lease allows, and store flat work on its long edge or in a shallow container under the bed. A kitchen glass handles the brushes in use, and the same logic carries any art studio organization plan.
05Should oil paint tubes be stored cap down?
It is disputed. One forum user reports no separation since storing tubes upside down, while another says the separation is not caused by gravity, and brand caps differ. Check your brand’s cap, and tap a separated tube against your palm.
Disclaimer: ClutterlessNest is a participant in the Amazon Services LLC Associates Program. As an Amazon Associate we earn from qualifying purchases. This article may contain affiliate links — if you buy through them, we may earn a small commission at no extra cost to you. We only recommend products we have tested or genuinely believe in.