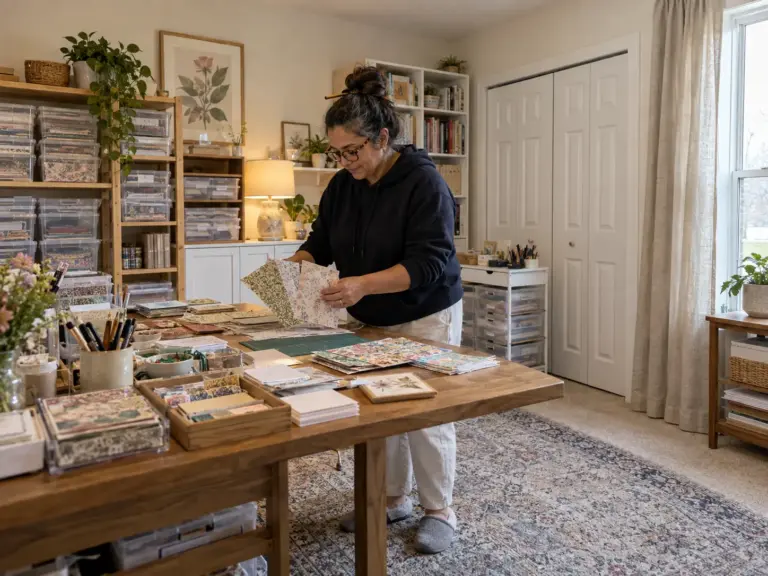
You set the craft knife down half a minute ago, and now it is somewhere between a tote of fabric scraps, a shoebox of loose beads and a roll of vinyl that keeps unspooling across the table. Crafters on r/crafts describe that same hunt for a tool they “literally just set down,” and it almost never means they own too little storage: it means the storage was bought before anyone asked what had to fit inside it. Most craft room organization ideas stumble on that fit, with a drawer too deep for beads, a paper case an inch too wide for the cube and a roll of material with no home at all. Below are seven ideas, each matched to the headache it fixes, and if you want the step-by-step setup instead, the full process for setting up a craft room walks through it.
Quick Answer
The craft room organization ideas that hold up match each supply to a container that fits it:
- Sort by medium, and let each container set the limit for its craft.
- Keep weekly and pick-by-color supplies visible; close and label the rest.
- Store beads and tiny parts in shallow cases, with a small bag inside each slot.
- Size paper boxes to the shelf you have and stand rolls upright.
- Add a wall zone (drilled or no-drill) and a rolling cart whose top works as a bench.
Craft Room Organization Ideas Start With Sorting by Medium
Picture the stash of a serial crafting-medium experimenter: acrylic paint, a sewing kit, three bead mixes and a block of polymer clay from a spring experiment, all spread across the same three plastic totes. Each new project begins with a dig through all three, and half of what comes up belongs to a different craft. No container purchase ends that dig on its own.
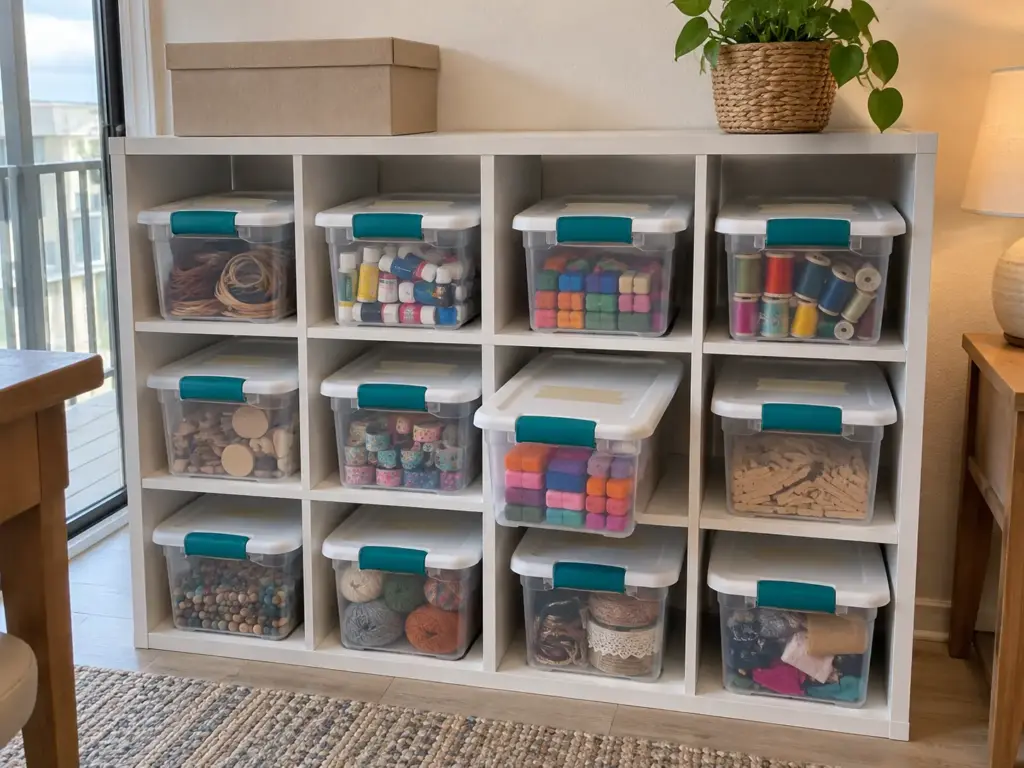
Why one big stash bin fails
A tote labeled “misc” or “craft stuff” reverts because nothing inside it has a fixed spot. When you finish with the heat tool, the question of where it goes has no answer, so it goes wherever the lid is open. The bin was sorted by whatever was lying around the day it was filled, and that sorting expires with the next project.
Sorting by medium gives the question a one-word answer. Paint goes with paint, beading with beading, paper with paper, and anything you cannot place lands in a single catch-all you empty on a schedule. If you have to think about where something lives, the categories are too clever.
One labeled box per craft, even the ones you only dabble in
One r/crafts dabbler solved the spread with furniture: a dresser for painting, three for sewing, one for beading and one for everything else. Every trial craft gets a single labeled box. A candle phase, a resin experiment and a week of clay each live inside one lid, so a new hobby cannot leak into the drawers of the old ones.
The first box for a trial craft should cost nothing. A shoe box with a lid holds a beginner clay kit without complaint, and if it is still in use after a few weeks, the craft has earned a real container. Buying a matching set of bins the week a new hobby starts is the usual move; waiting is the better one, because the bins outlive most experiments.
When it does earn one, the Sterilite See Latching Box is clear enough to show which craft is inside, and the latches keep a dropped box from scattering clay tools across the floor. It closes with latches only, though: the moisture protection crafters praise belongs to Sterilite’s gasket version, a different box with a rubber seal. Indoors, the latch is plenty. In a garage, it is not.
Let the container be the limit
The most useful rule in craft storage came from a single r/crafts comment: “When a container fills up, it’s time to use up what you have or purge.” It is a craft-sized version of the one-in-one-out rule, with one advantage: you do not have to remember anything. The lid stops closing, and the decision arrives by itself.
It works because the limit is physical. Willpower fades by the second month of any system, and a lid that will not latch does not care how motivated you feel. The failure looks the same in most craft spaces: a bag of yarn or beads sits on top of a full box “for now,” and within weeks the overflow is a new pile with no container at all. That bag on the lid is the signal.
Then one of three things happens. You use it up, planning a project whose only job is to empty the box. You purge, usually to a school art room, a library maker space or a buy-nothing group that will take half-used skeins happily.
Or you promote the craft: if the trial box has become your main medium, it earns a drawer, once, and that drawer becomes the new limit. What you skip is a second box for the same craft, because two boxes for one medium is the stash bin coming back with better labels.
Write the date on a strip of tape on each trial-craft box when you fill it. If the tape is six months old and the box has not been opened, that craft is a purge candidate, no matter how good the supplies looked in the store.
Visible or Closed: Deciding Where Each Supply Lives
The open shelf full of supplies looks like a working studio until you sit across from it every evening. Then it reads as a to-do list. Meanwhile the closed drawer next to it holds the washi tape you bought twice because you forgot the first roll existed.
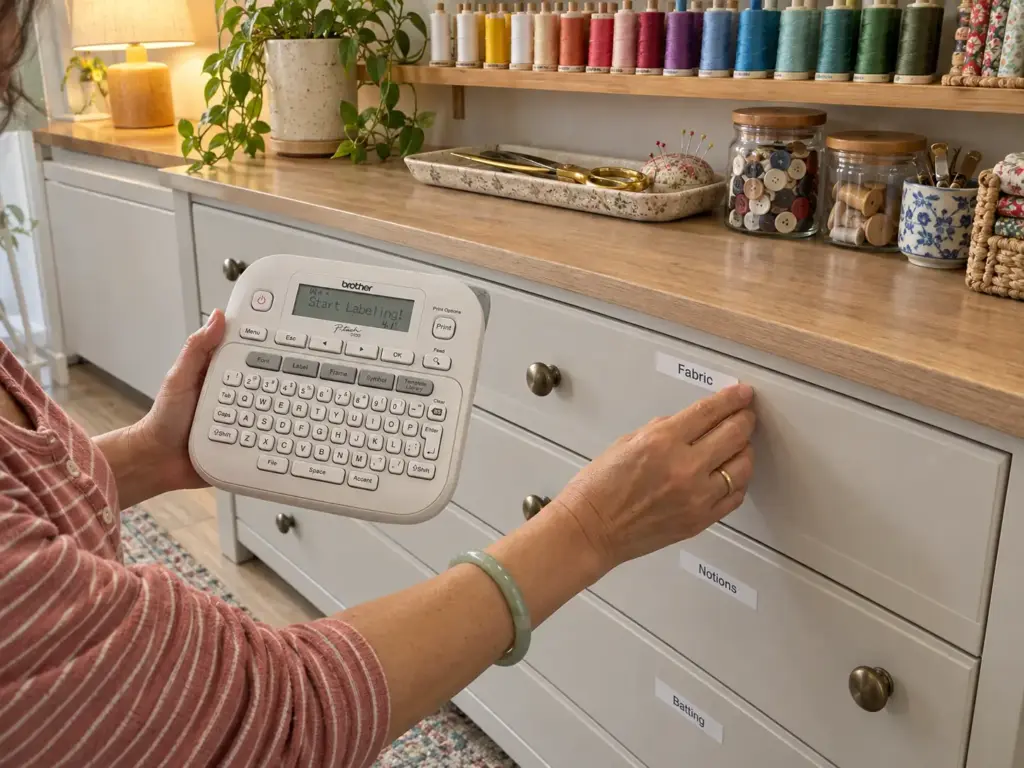
Why open shelves stress some crafters and hide things from others
The r/crafts discussion splits cleanly on this. One commenter says the visibility of the mess stresses them out, so everything goes into drawers they can close. Others say the opposite: once a supply is out of sight, they forget they own it and buy it again.
Both groups are right, which is why a blanket rule (“everything in clear bins” or “hide it all”) fails half the people who try it. The split is less about personality than about the supply: paint you reach for every session behaves differently from the embossing kit you use twice a year.
The rule: what you use often and match by color stays visible
My rule of thumb has two questions. Do you reach for it most weeks? Do you choose it by color?
If either answer is yes (acrylic paint bottles, thread, embroidery floss, ribbon you pick by shade, the markers on the table), it stays in sight. If both answers are no, it goes behind a door or into a closed box with a label: the seasonal stamps, the trial crafts, the bulk refills, the tools for a technique you use twice a year.
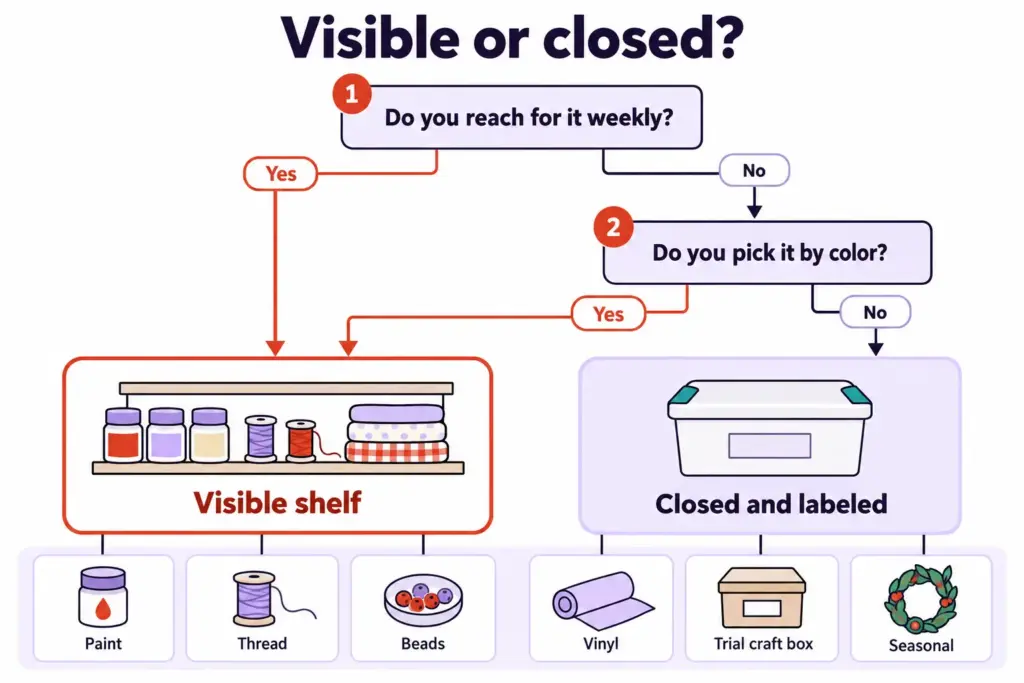
The same supply lands in different places for different people. Beads you use every weekend belong on the visible shelf; beads you touch once a season go in a closed box with the other occasional crafts.
Container material follows the same logic. Clear containers let you read the level of a supply without opening anything; opaque bins calm a shelf you look at all day. Mix them on purpose, clear for the frequent half and solid fronts for the rest, just as you would choose clear storage bins anywhere else in the house. If your craft corner sits in a living room or a shared bedroom, a tension-rod curtain or a closed cabinet front keeps the visible supplies handy while you work and gives you a quiet wall when you do not.
Labels for everything behind a door
The closed half only works if you can find things without opening every box. Put a label where your eyes land when the box sits in its spot: the short end facing out on a shelf, the front of a drawer, never only the lid of a box that lives in a stack.
For a first pass, masking tape and a marker do the job for almost nothing, and printable labels on sticker paper are the next step up. Once you have more than a handful of closed containers, a Brother P-Touch PTD220 label maker prints clear, uniform labels, which matters for boxes you will not open for months. The surface prep behind labels that survive past the first month in a pantry carries over to craft bins: clean, dry and flat, never a curved corner.
Shallow Drawers for Beads, Ribbon and Other Tiny Parts
A drawer of seed beads sorted by color is a lovely thing for about a week. Then someone shuts it a little too hard, and the drawer becomes bead soup. If you were told to “just buy a hardware drawer set,” this section is the part of that advice that got left out.
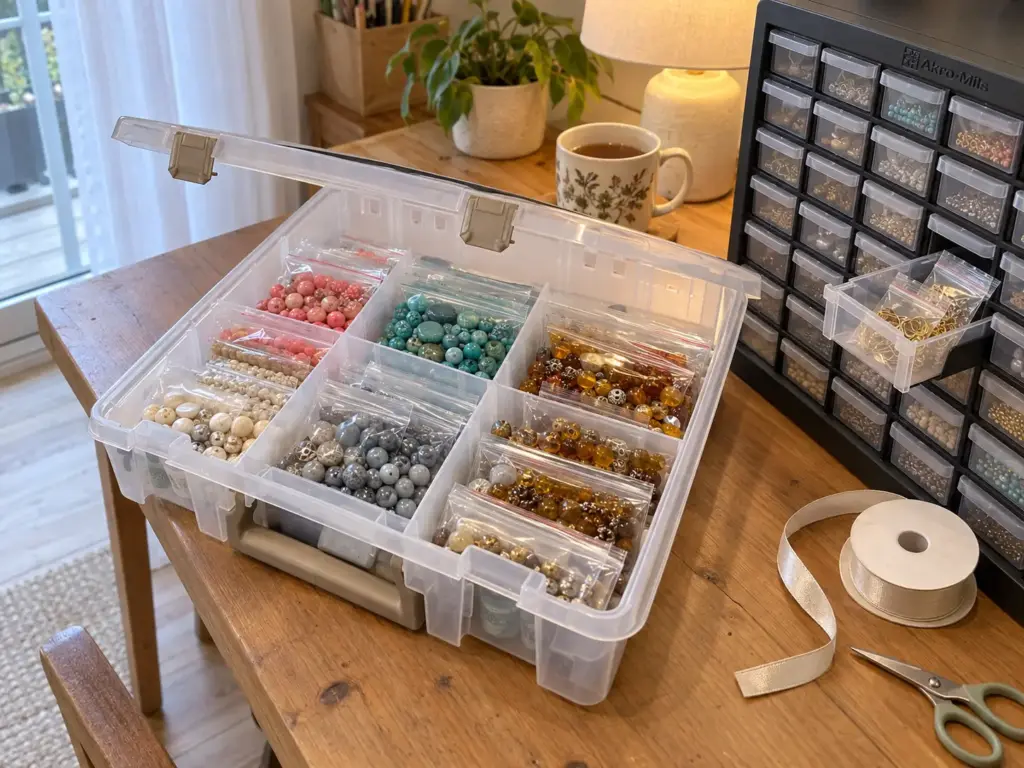
Match the drawer to the thing in it
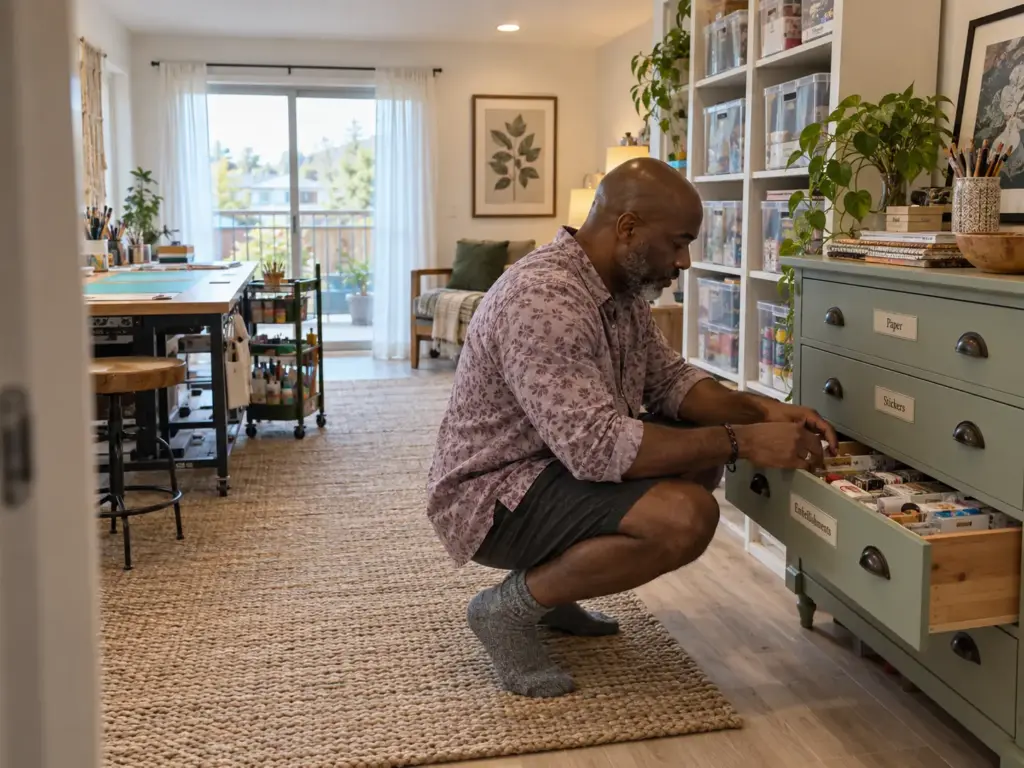
Drawer depth is the first decision. Flat and tiny things (stickers, needles, beads, ribbon, sequins) want shallow drawers, because anything deeper turns into layers and the bottom layer disappears. Yarn skeins and glue bottles want depth. Match the depth to the tallest thing that goes in, and a set of shallow stackable drawers usually beats one deep drawer that crushes whatever sits at the bottom.
For beads and ribbon storage, a shallow carry case beats a drawer. The ArtBin Super Satchel with removable dividers measures about 15.25 x 14 x 3.5 inches, with six fixed compartments and twelve removable dividers, so nothing gets buried and the whole case comes to the table. One r/crafts user who keeps beads in ArtBin’s dividered drawers reports the weak point of that design: loose beads bounce over the dividers and gather dust. Their fix is a bag for each color inside every compartment, and the case stays sorted.
Those bags are also the free version of the idea. Pill-size zip bags from Dollar Tree, inside any lidded shoe box, give you a sorted bead stash without buying a case at all.
Write the color name or number on each bead bag with a fine marker before it goes into the case. When you are matching a pattern, you can pull the right bag without opening five similar shades under a dim lamp.
Why beads escape: the hole at the back and the jumping dividers
The many-small-drawers cabinet, sometimes sold as a hardware drawer unit, is the standard answer for tiny parts, and for screws and buttons it works. For beads it needs a second look. A crafter on r/crafts described a hardware-store drawer set with “a little hole far in the back” of each drawer, which they found only after their beads had migrated through it: “I’ll be sorting beads until I die of old age now.” The thread did not name the brand, but the complaint applies to this whole style of cabinet.
The Akro-Mils 64-Drawer Parts Cabinet is that shape: 20 inches wide, 6 deep and 16 tall, with sixty-four small drawers that sit on a shelf or a desk without drilling anything. It is a good home for findings, clasps and jump rings.
For seed beads, pull a drawer all the way out and hold it up to the light before loading it. Better yet, bag the beads first and put the bags in the drawers. Then neither the hole nor the bounce matters.
When a dresser beats a parts cabinet
In a dedicated craft room you own, a dresser is often the better tiny-parts home: its drawers hold several small trays side by side, and drawer organizer inserts that fit real dressers or plain drawer dividers turn one deep drawer into a grid of shallow compartments so nothing stacks. A thrifted dresser works as well as a new one (anchored to the wall, as the last idea explains).
For a renter or a craft corner in a shared room, the logic flips. A dresser is heavy to move, while a carry case and a parts cabinet sit on any shelf and leave with you at the end of the lease.
Paper, Rolls and the Big Flat Stuff No Bin Fits
The roll of vinyl on the craft room floor has gone under the table twice this week, and the 12×12 cardstock is curling at the corners on top of the printer. These two supplies share one problem: no ordinary bin fits them, so they end up on flat surfaces, which is exactly where you need the space.
Paper: boxes sized to the shelf, not to the label
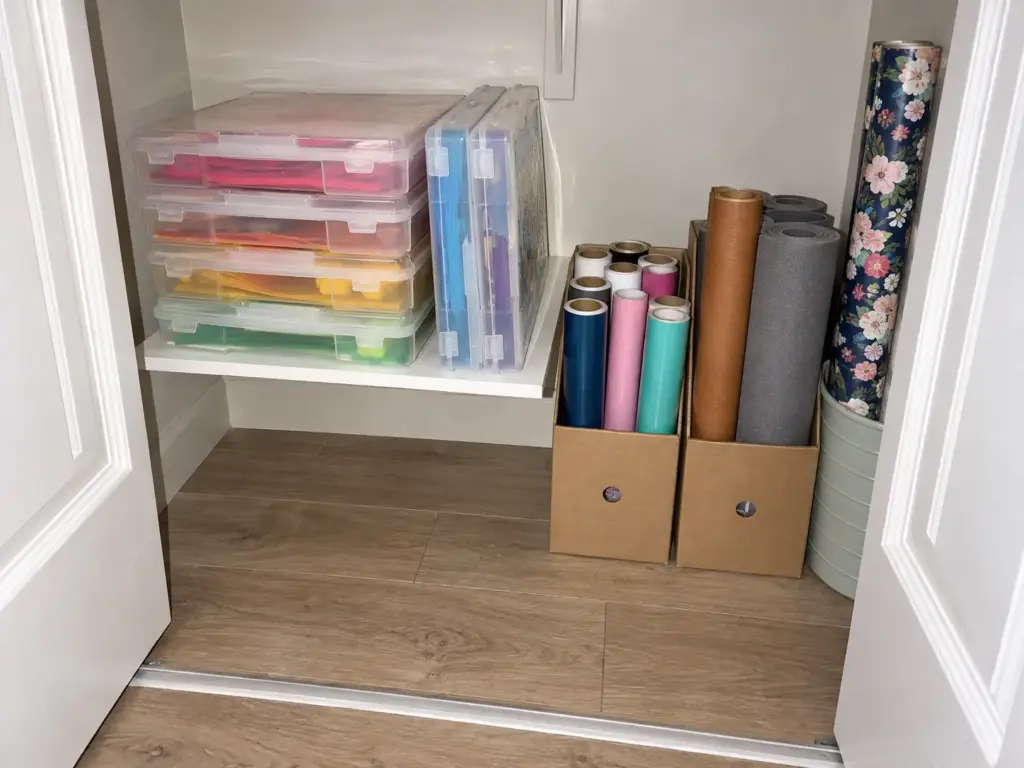
Scrapbook paper and cardstock live best flat or upright in cases built for them, and the IRIS USA 12 x 12 Scrapbook Case 6-pack is the one crafters keep naming. But a crafter on r/crafts described them as “12×12 (well more like 13×13),” and that extra inch matters. The name describes the paper inside, not the box: a case for 12-inch paper needs walls, a lid and some clearance, so the outside runs bigger than the label.
The number that decides the fit is the inside of your shelf or cube opening. Cubbies only a hair wider than the label leave no clearance for a case that runs roughly 13 inches outside, while a deeper bookshelf takes them easily. Measure width and height with the tape held inside the frame, then compare with the outside dimensions on the product page.
If the fit is close, stack the cases flat on a shelf instead of sliding them into cubes, following the same logic as stackable bins that actually stack: lids that seat into each other, heaviest paper at the bottom. On a tight budget, cardboard magazine files hold letter-size paper upright on any shelf.
Rolls stand up: vinyl, leather, foam and wrapping paper
Rolls need a contained, upright home, or they roll off every surface and you lose track of which ones are opened. One craft blogger stands vinyl rolls in interlocking magazine bins and clips each roll shut so it cannot unspool.
Bigger material needs bigger containment. One crafter on r/crafts stands leather, foam sheets and large paper “in rows by type” in the room’s closet, and another commenter stands wrapping paper in a trash can, a budget fix that costs nothing. Anything longer than it is wide goes vertical, with something on all sides holding it up.
The closet as the stash’s second home
With no spare bedroom, a closet becomes a closet craft room, and the strategy behind turning a closet into a work zone applies: work surface at the front, storage up the sides. Even with a dedicated craft room, the closet is where rolls and oversized flat material belong. Keep the rolls to one side so they do not block the shelves, and label the front of every container, because a dark closet hides anything you cannot read from the door. Without a closet to spare, a rolling file cart or a freestanding cube shelf handles paper cases and a bin of rolls.
Wall Storage for Owners, and the No-Drill Version for Renters
You have the pegboard wall planned down to the hook spacing. Then you reread the lease, and it says no holes. The wall is still usable; the route is different.
Pegboard and wall boxes if you can drill
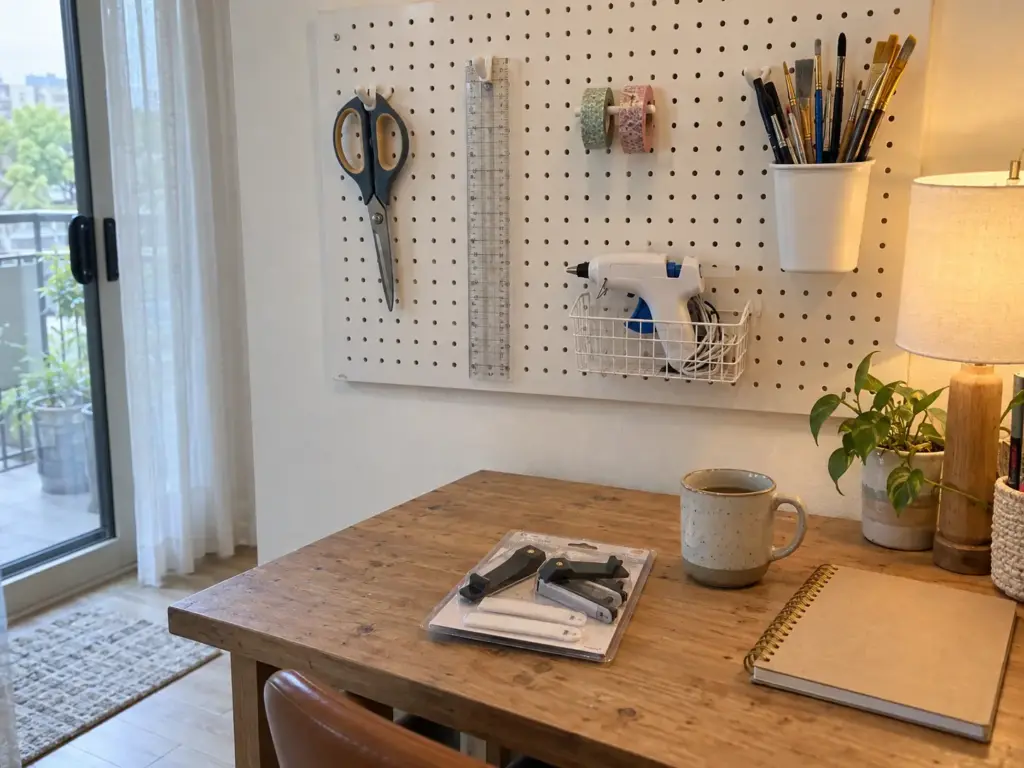
For an owner, a pegboard above the work table is the most efficient storage in the room: it takes tools off the table and puts them at eye level, and wall boxes extend the same idea to small supplies. As with any of the vertical storage ideas for small rooms, the wall is the cheapest vertical space you have.
The instinct is to fill the whole board. A pegboard works better half-empty, loaded only with what you use every session and spaced so a tool goes back to its hook in one motion. A full board becomes the same visual mess as an open shelf, and nothing comes off cleanly.
The no-drill route for renters
Just Hanging Pegboard Wall Mounting Hardware lets a pegboard hang on adhesive strips instead of screws, which is the renter-friendly way to the same wall. Treat it as a home for light tools only: scissors, rulers, tape and a small caddy, with heavier supplies kept in drawers. For storage that leaves no marks in the closet as well, the closet systems for renters follow the same no-hole principle.
Two other options skip the wall entirely: a clear over-door shoe organizer on the back of the craft room door, its pockets holding spools and glue sticks, and a freestanding stand one craft blogger builds from two pegboards joined back to back, which sits on the table and holds tools on both faces.
What belongs on the wall and what does not
The wall is for light tools you use every session: scissors, rulers, a rotary cutter, tape, a cup of pens. A craft caddy that lifts off the wall as a unit works well, because the whole set travels to the table.
Heavy supplies, loose beads and anything that can spill stay off it. A jar of beads on a pegboard shelf is one bumped elbow away from the floor, so those go in drawers or shallow cases.
Trace the outline of each tool on the pegboard with a paint pen once it has a hook. The empty outline tells you at a glance which tool is still on the table, and anyone else in the house can put it back without asking.
A Work-in-Progress Cart That Doubles as a Bench
The quilt blocks have been on the dining table for a week. Not because you are messy, but because nothing in the house has a place between “out” and “put away.”
Why finished storage still leaves the table a mess
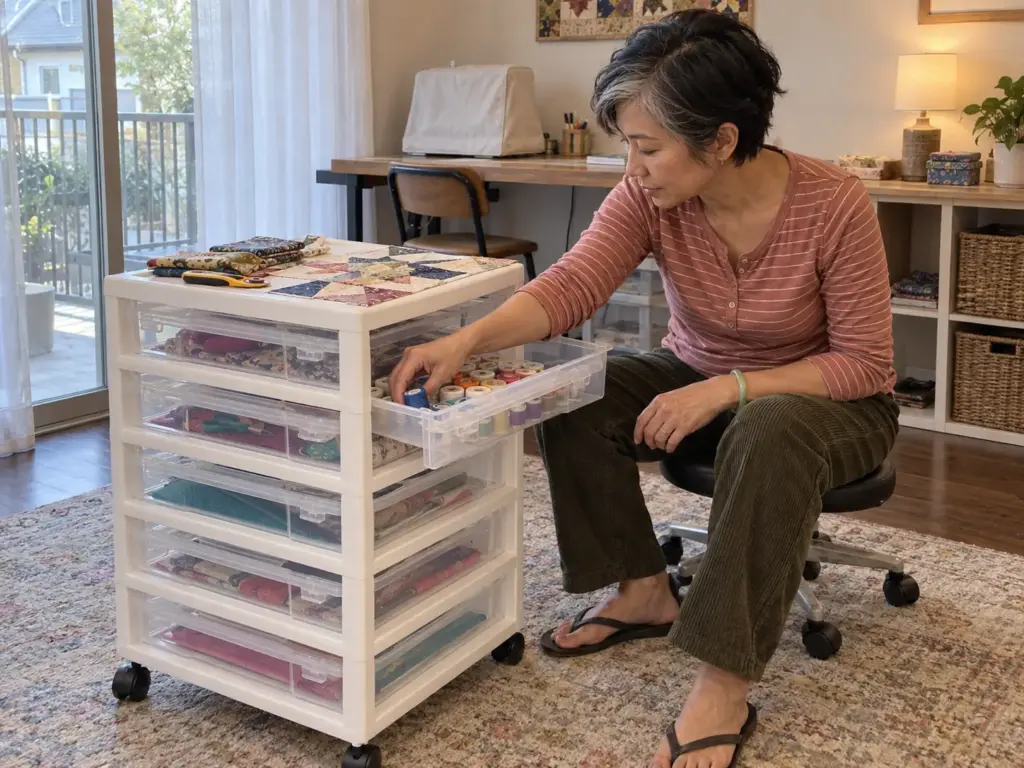
Craft storage is usually planned for two states: stored and in use. Real projects have a third state: in progress, paused overnight or for a week, and in-progress projects are the ones that colonize a table. A bead pattern mid-layout or fabric pieces cut but not sewn cannot go back into their boxes without undoing the work, so they stay where they were made, and the table becomes storage.
Give the project in progress its own home, separate from the stash (a cart drawer or a flat project tray does the job), and run it as a cycle: roll it to the table, work off it, roll it back. The table ends each session clear and the project keeps its layout. Without that third home, a craft room drifts back to a covered table within a month, however good the shelves are.
A rolling cart whose top works as a bench
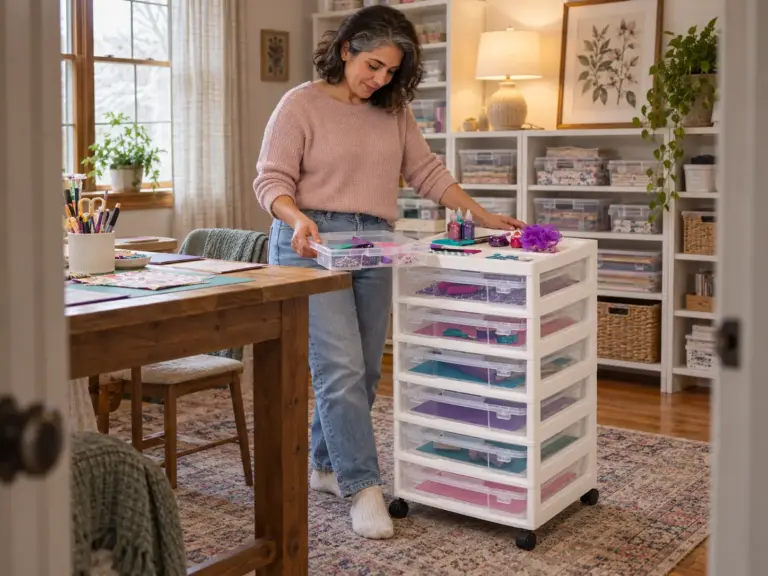
Crafters on r/crafts keep recommending carts with drawers on wheels for exactly this reason, and one pointed out that the flat top doubles as extra workspace. The cart becomes a second small bench next to the main table: a tool tray on top, current project in the drawers.
The IRIS USA Rolling Cart with 6 Cases fits that job. Use one drawer per active project, and when a project is finished, the drawer empties back into the stash before the next one moves in. It suits projects that fit in a drawer (cards, beading, embroidery, small sewing), not quilting yardage or large canvases, which need a flat shelf.
The free version is a repurposed kitchen trolley or a small thrifted dresser on casters (a dresser without wheels gets anchored to the wall, like any thrifted furniture here).
A craft zone in a closet or a shared room
In a small space with no craft room at all, the cart is the craft room. Load it with one medium’s supplies and the current project, roll it to the dining table to work and back into a closet when done, and the craft never takes over the shared space. Flat-pack carts can even come apart if you need the floor back for a while. At the table, the zoning behind desk organization ideas carries over: what you touch every minute stays within arm’s reach, and everything else waits in the cart.
Free and Thrifted First: Budget Storage That Holds Up
Someone tells you to grab a thrifted TV armoire and paint it for craft storage. Good advice. What usually goes unsaid is that the armoire can tip over, and that a few other free and cheap fixes come before any purchase.
What to grab before you buy anything
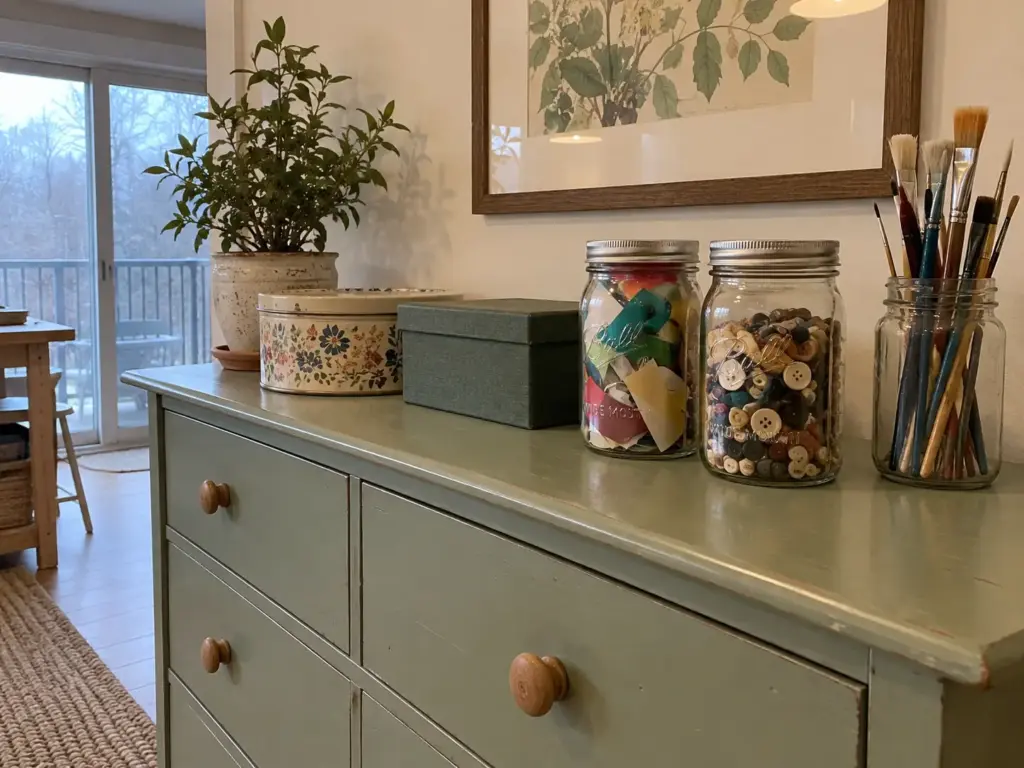
Saved jars, mint tins, cigar boxes, lidded shoe boxes and pill-size zip bags cover most small-parts storage before any money changes hands. Crafters on r/crafts also hang clear shoe-pocket organizers on a hanger inside a cupboard, so each pocket shows its contents; the same idea works with hanging closet organizers built to carry weight. They suit small items only, since bulky supplies stretch the pockets out.
When the saved jars run out, Ball Wide Mouth Quart Mason Jars are the cheap glass step up: wide enough to reach into for vinyl scraps and buttons, and clear enough to read from across the room. One craft blogger keeps vinyl scraps in a canning jar with a hanging lid, so the jar doubles as wall storage.
Thrifted armoires and dressers: anchor them
TV armoires, clothing armoires and dressers are some of the best craft storage available, and one r/crafts commenter noted that TV armoires are “really cheap now that people have switched to flatscreens.” Painting them is a common community move, and an armoire with doors gives you the closed-storage half of the visible-or-closed rule in one piece of furniture.
But the tipping problem is real. The CPSC’s Anchor It! campaign recommends anchoring all furniture with drawers, doors and shelves to the wall to prevent tip-overs.
A tall armoire full of supplies is top-heavy, and a dresser with several drawers pulled open at once (which is how you use it when hunting for one bead color) shifts its weight forward. Follow the anchor kit’s own instructions for your wall type, and if you rent, ask the landlord before drilling.
A stash in the garage or basement needs a humidity check
When the craft room overflows, the stash often moves to the garage or basement. That works only if the air there stays dry. According to the EPA’s guide to mold and moisture, “The key to mold control is moisture control.” The EPA advises keeping indoor humidity below 60 percent, ideally between 30 and 50 percent, and an inexpensive humidity meter on the shelf tells you where your garage actually stands.
Paper, fabric and natural fibers are the supplies most at risk. Cardstock tends to absorb moisture and warp, so the sheet that will not feed through a cutting machine after a summer in the garage may have a humidity problem rather than a machine problem, and fabric and yarn can mildew in damp air. If anything gets wet, the EPA says to dry it within 24 to 48 hours.
For the garage, a crafter on r/crafts recommends gasket boxes, clear boxes with a rubber seal around the lid, because they keep air and moisture out. The latching Sterilite from the first idea lacks that seal, so it stays indoors. This is also where fabric versus plastic bins stops being a style choice: fabric breathes, which is fine in a dry closet and a problem in a damp basement.
Boutique craft storage comes last for a reason. A matching craft cabinet adds a nicer front and drawers sized for supplies; a thrifted dresser with inserts does most of the same work for far less, and the gap shows up mainly in photos.
One Medium, One Box, One Label to Begin
Three things carry this whole system:
- Sort by medium first, and let each container set the limit for its craft; when the lid stops closing, use it up or let it go.
- Match every container to the thing inside it and the shelf it sits on, with shallow cases for beads, measured openings for paper cases and upright homes for rolls.
- Give the project in progress a rolling home of its own, so the table clears at the end of each session.
Three months from now, check two things: whether any container has overflowed into a bag on its lid, which means that medium needs a decision, and whether anything stored in the garage or a closet smells musty or feels damp.
Today, with what you already have, pick the craft whose supplies are most scattered, gather all of it into one lidded shoe box, and write the craft’s name on the end. After a week, notice whether you went straight to that box when you needed something, or whether you still checked three places first.
Frequently Asked Questions
01What’s the best way to organize a craft room?
The best way to organize a craft room is to sort supplies by medium, give each medium one container that sets its limit, then fit each container to its shelf. Most craft room organization ideas fail on fit, so measure openings before buying cases or drawers.
02What are some good DIY craft organizers?
Good DIY craft organizers include lidded shoe boxes, saved glass jars, mint tins and small zip bags for beads inside any box. A thrifted dresser or armoire makes strong closed storage once it is painted and anchored to the wall.
03What does every craft room need?
Every craft room needs a clear work surface, a labeled home for each medium and a separate home for projects in progress. A rolling cart handles that last part, so unfinished work leaves the table at the end of each session.
04Should craft supplies be stored in the open or in closed storage?
Store supplies you use weekly or choose by color in the open, and keep rarely used ones in closed, labeled storage. Paint and thread usually stay visible; seasonal tools and trial crafts go behind a door with a label you can read from across the room.
05Is it safe to store craft supplies in the garage?
Storing craft supplies in the garage works only if humidity stays below 60 percent and paper, fabric and leather sit in sealed gasket boxes. Check the space with an inexpensive humidity meter first, because damp air warps paper and mildews fabric.
Disclaimer: ClutterlessNest is a participant in the Amazon Services LLC Associates Program. As an Amazon Associate we earn from qualifying purchases. This article may contain affiliate links — if you buy through them, we may earn a small commission at no extra cost to you. We only recommend products we have tested or genuinely believe in.