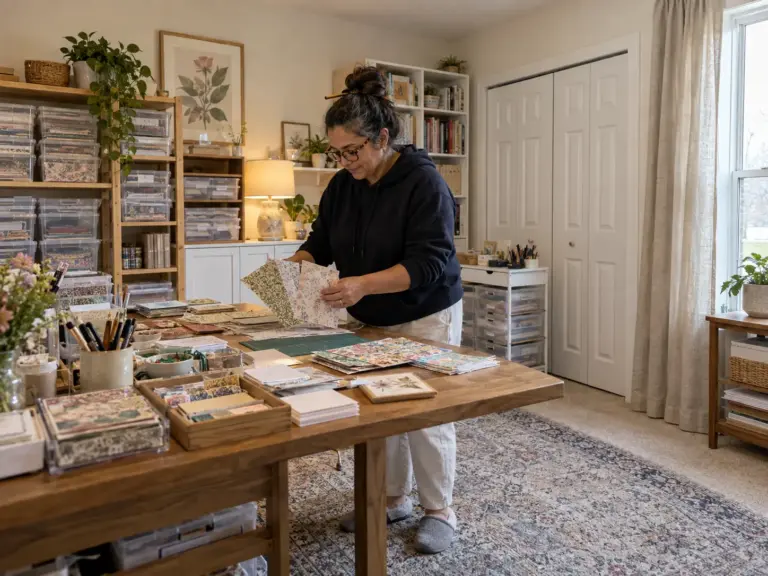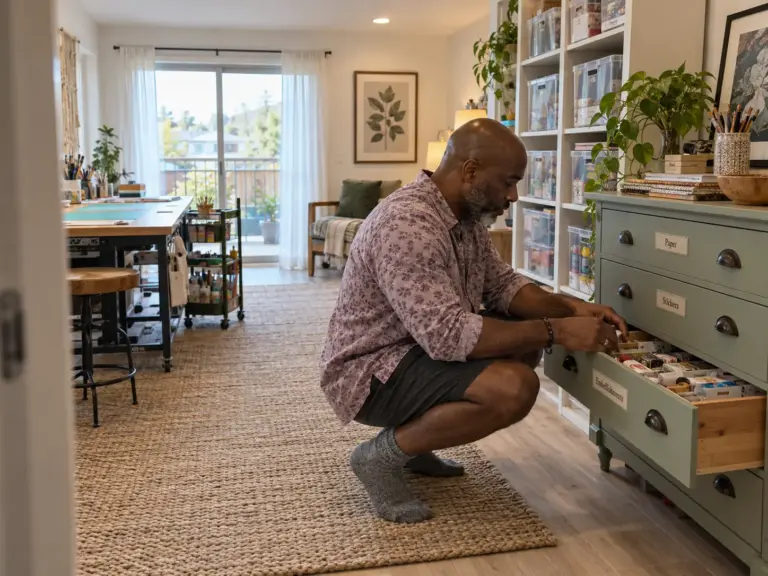
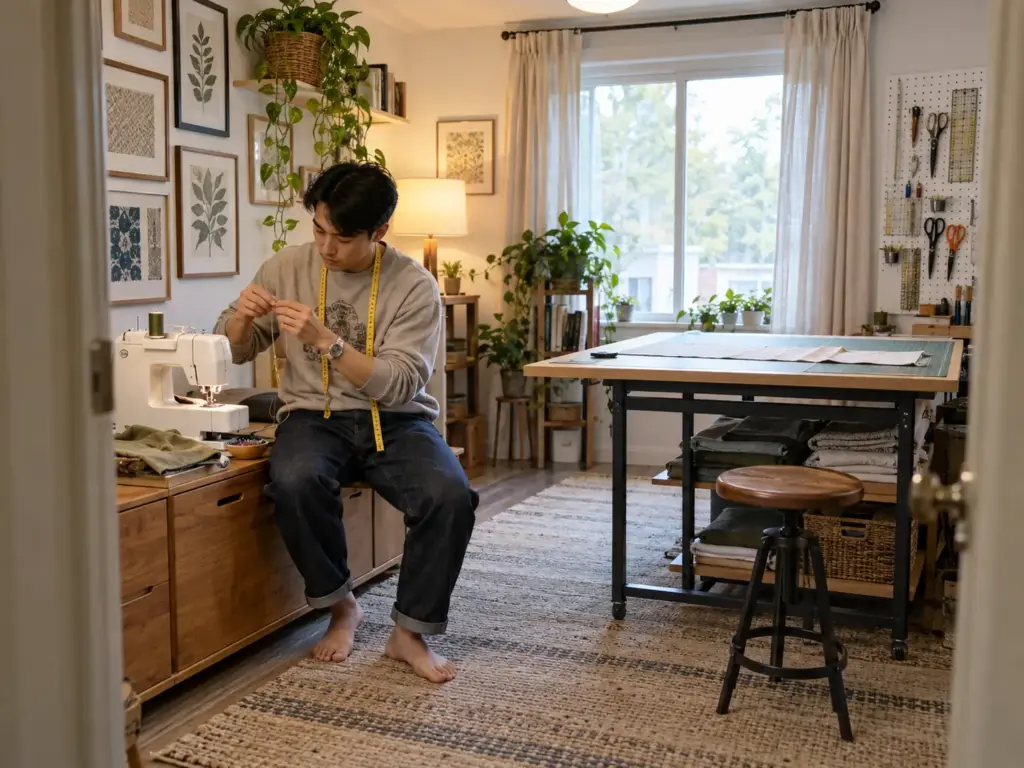
Your sewing table stopped being a table somewhere around the second project. Now it holds pattern tissue, a half-cut sleeve, the printouts you taped together last week, and a seam ripper hiding under a mug. Sewists in r/sewing describe the same slide: a guest bed “covered in print outs, patterns, old post its, fabric,” and a tissue draft that goes missing between uses.
Most sewing room ideas start with shelves, but good sewing room organization fixes the path from pattern to cut to finished seam, whether you have a full sewing studio or one corner. This guide follows that path in order, from where the machine sleeps to the fold-away and budget versions, and it sits inside the wider craft room system if your sewing shares space with other crafts.
Quick Answer
Organize a sewing room in five moves, in this order:
- Give the machine a place to sleep that is not the table.
- Set and test the cutting height against your own elbow.
- Give each pattern format, tissue, printout and copy-shop sheet, its own home.
- Sort thread and notions by type in clear containers.
- Build the reset: one project out, everything else put away.
Sewing Room Organization Starts With Where the Machine Sleeps
A machine that never leaves the table is the reason the table never clears. It is the one object that stays put, so everything else (fabric, patterns, scissors, a cold coffee) gets set down around it. Machine storage is the first decision in sewing room storage for a reason: a surface with no “off” position collects whatever is nearest.
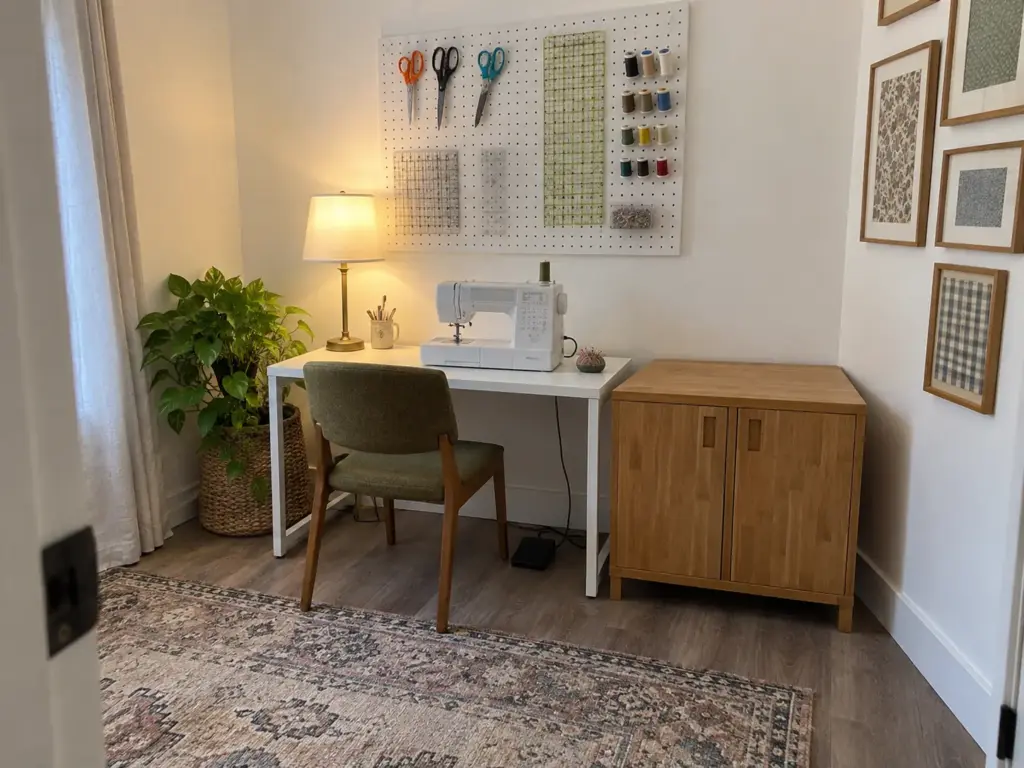
Zone the room by what each task needs
Think in six sewing room zones, each tied to a task: machine, cutting, pressing, stash, project and wall. A zone system works only if each zone holds what that task uses, and the cutting zone and the machine zone never share a surface. In a small sewing room, one corner will do double duty, so name which task owns the surface at any given moment.
Where the machine lives between sessions
Sewists in the r/sewing organization thread report three places that work. One keeps the machine on top of a low locker and carries it to the table only when sewing. Another parks it on the floor beside the bin it belongs to. A third built a pull-out desk inside a wardrobe, so closing the doors hides the whole setup.
Different rooms, same logic: the machine has a home that is not the work surface, so putting it away is one lift, not a negotiation.
A dedicated sewing cabinet is the obvious purchase, and it makes sense in a room only you use. In a guest room or a rented spare bedroom, a cabinet is a second piece of furniture you cannot fold away, and the locker-top or wardrobe version gives the room back faster.
Wherever it sleeps, cover it. A sewing machine cover, or a locker door that closes, keeps dust, lint and pet hair off the machine between projects.
What stays within arm’s reach of the needle
Only per-session tools live at the machine: a pincushion, snips, a seam ripper, a marker. Everything else gets a home somewhere else, because anything that sits beside the needle for a month turns into clutter you stop seeing. If the seam ripper keeps wandering, give it a fixed spot on the machine side of the table and put it back there before you stand up.
The wall is the cheapest place to move the rest. A string line with clothespins holds patterns and templates for nothing, and an over-the-door organizer or a few hang-up hooks add storage without touching the wall. If you want a pegboard for scissors, rulers and spools but cannot drill, the Just Hanging Pegboard Wall Mounting Hardware mounts a board with Command-strip compatible adhesive, no holes in the wall.
No repeated complaint about it turned up, so the check is the usual one for adhesive mounts: compare the weight rating on the listing with a board full of scissors and rulers before you load it. For more wall layouts, the pegboard and wall storage ideas for the wider craft room cover them without repeating this.
Pressing gets its own corner, kept short here: an iron, a board and a small pressing mat within one step of the machine, plus a mini iron, a tailor’s ham and a clapper if you sew garments. For the full ironing station, here is how to set up the pressing station without drilling.
Test your machine’s home before you commit to it. Put the machine away and bring it out three times in a row. If the third trip feels like a chore, the home is too far or too high, and the machine will drift back to the table within a week.
A Cutting Table You Can Clear in a Minute
A table that is too low for your back gets abandoned for the floor, and a surface that never clears gets buried. Both problems start at the same place: the table was never fitted to the person using it.
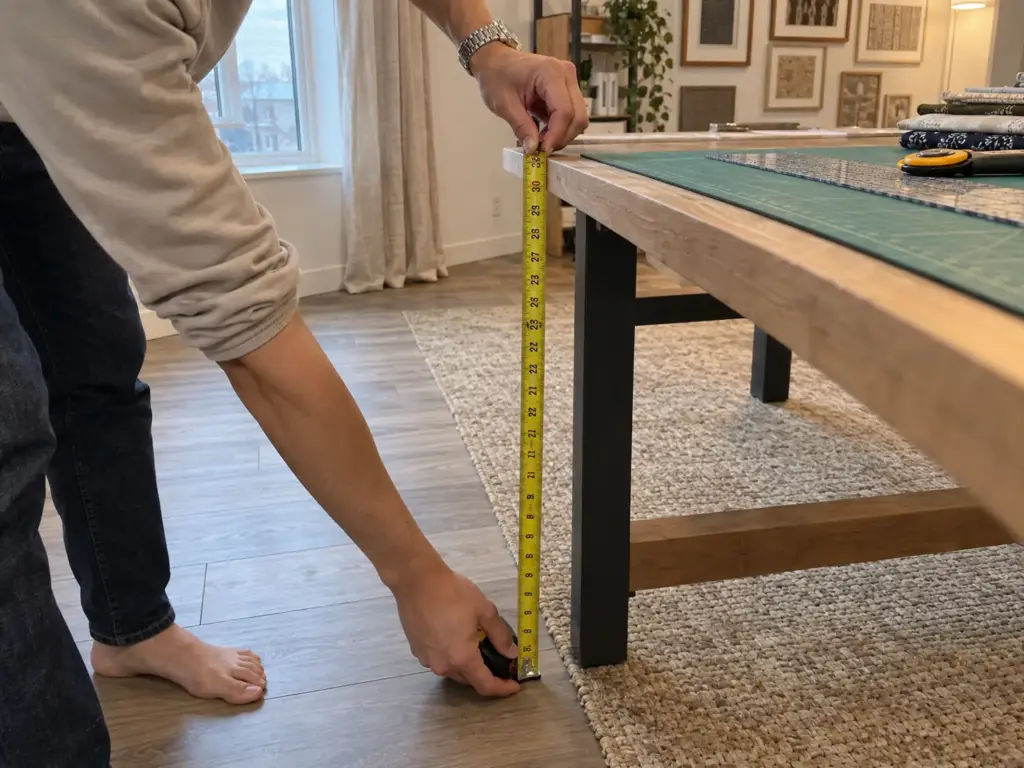
Test the height before you build or buy
Two sewing references give different ranges, which is the best argument for testing instead of trusting a number. Threads Magazine puts the cutting table height at about 33 to 35 inches for someone around 5’4″ to 5’5″, about 30 inches under 5’4″, and about 37 inches at 6 feet. Hunker’s range is 36 to 40 inches, waist height or slightly below. Neither comes from a published standard, so treat both as starting points.
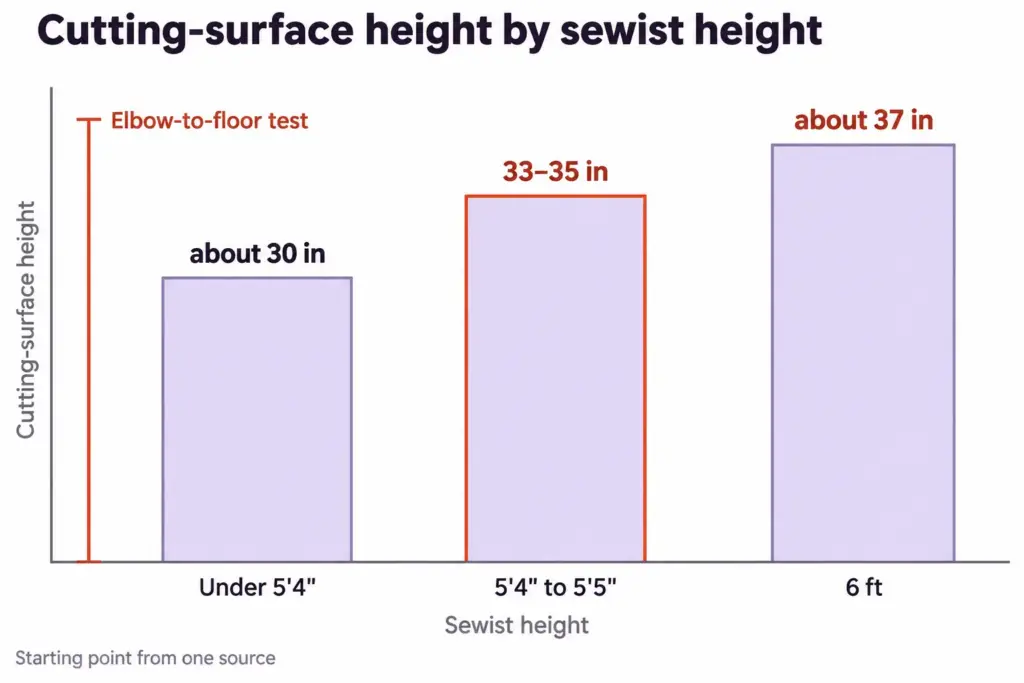
The test beats either number. Measure from your elbow to the floor and subtract a few inches, then raise a kitchen or folding table on stacked books or cans under the legs and cut at that height for an afternoon. Your back will tell you within a few cuts whether it is right.
Size the surface to the cutting mat
Aim for about 30 inches of width and 4 to 8 feet of length. The one hard rule is the mat: the table should run at least 6 inches longer than your roller mat, because a mat that overhangs the edge gets bumped, and a bumped mat shifts mid-cut. If the room only allows a short table, buy the mat to fit the table, not the other way around. Cutting mat storage follows the same logic: a mat that lives flat under a couch or a bed is ready for the table in one slide.
The clear-it rule before and after cutting
The community phrase for the reset is “don’t put it down, put it away.” Apply it to the cutting table first, because it is the biggest flat surface in the room and the one everything lands on. Before cutting, the table is empty. After cutting, cut pieces go into their project bag, the pattern goes back to its pattern envelope, and the pattern weights, rulers, scissors and rotary cutter each return to a named spot.
A named spot, in practice, is a scissor stand for the shears, a ruler rack or a pegboard hook for the clear rulers, and a rotary cutter case so the blade is covered between cuts. A cutting table that doubles as the landing spot always loses to the pile.
Put the lamp over the cutting surface, not over the machine. The machine usually has its own light, and a cut line you cannot see well is a more expensive mistake than a seam you cannot see well.
Patterns Need One Home for Every Format
The pattern that lives loose on the table is the one that goes missing between uses. B-Sew Inn, a sewing shop, says patterns “quickly overwhelm a small sewing space,” so every format needs a fixed home before the stack builds up. Good pattern organization starts by naming the formats you own: a tissue pattern in its envelope, PDF pattern printouts taped into tiles, and a copy-shop pattern on one big sheet.
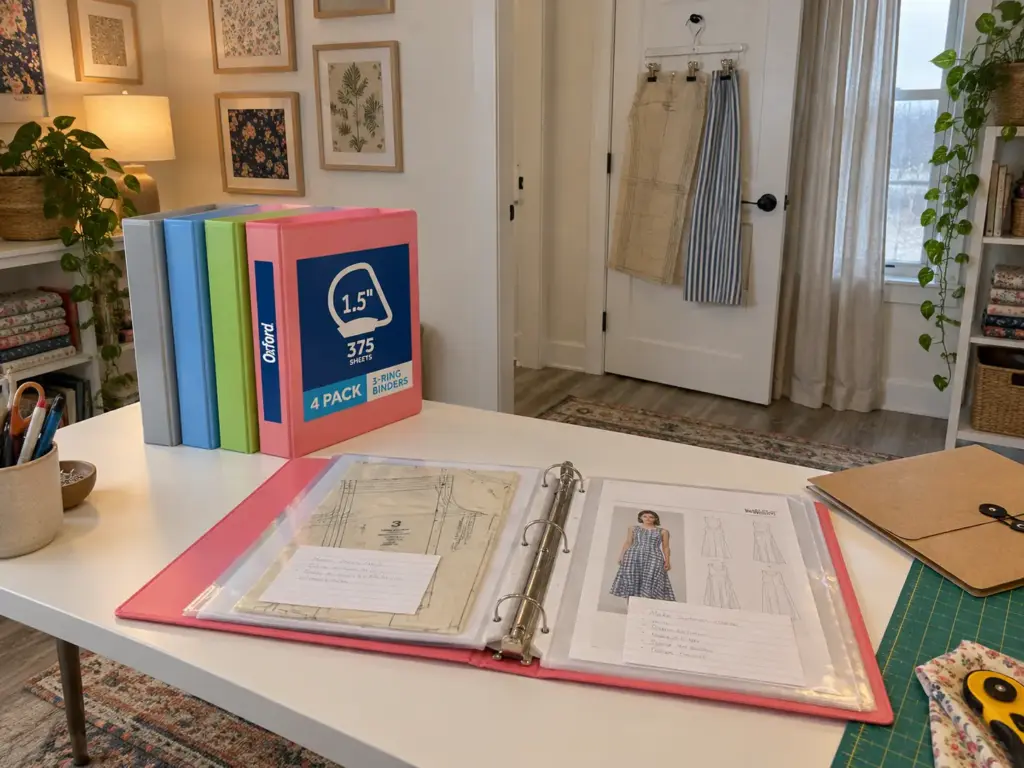
Tissue and printed patterns that fit a binder
Start with what costs nothing. A file folder per pattern, with a snap closure, keeps the tissue and the instructions together. A zip bag with a note in marker does the same job. Sewists in the thread also use clear sheet protectors in a three-ring binder, one sleeve per pattern.
If you print a lot of PDF pattern printouts, the binder earns its keep. Taja Sheet Protectors (a 200-pack, so you will not run out) hold one pattern per sleeve with the notes on the sleeve, and an Oxford 1.5 inch 3-ring binder (sold as a 4-pack in assorted colors) takes them, one color per project type if you like. No repeated complaint about either turned up.
A mini binder with page protectors, or a magazine file with one slot per project, works for a small collection. Printed PDF patterns are paperwork, and the paper and file organization guide covers the broader system, with best filing systems for home if you want to compare binder against folder.
Copy-shop sheets and patterns that will not fold
The one problem the community has not solved cleanly is the large copy-shop sheet. One commenter has the A0 prints “rolled up against the wall” and wants a better answer. Say it plainly: a rolled A0 sheet is still a compromise. What sewists in the thread do for patterns that will not fold is hang them flat.
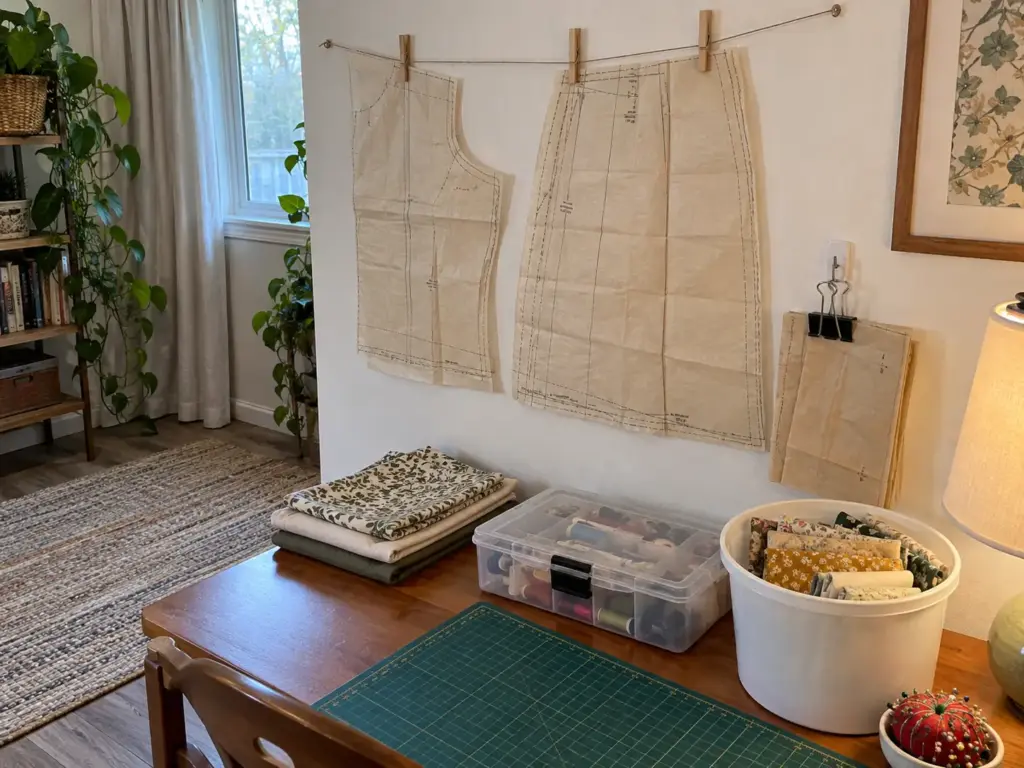
One approach is a clothespin line: a string pinned up like a clothesline, with small clothespins holding the patterns that do not fold well or are too large. Another is a clip hanger, since sewists describe trouser-style hangers with clips as a way to hang a pattern and its fabric together. The Volnamal multi-clip hanger does that job, but know what you are buying: the listing is a 2-pack of metal legging hangers, so it is a borrowed use, not a hanger designed for patterns, and two hangers cover two pattern-and-fabric pairs at a time. Binder clips on a hook are the free version.
The note that stays with the pattern
The adjustment you made last time vanishes when the pattern goes back into its envelope unless the note travels with it. Sewists attribute a few habits here: a file folder labeled with the pattern name, the size cut and a difficulty and time rating; an index card per project; and what one commenter calls a “lab notebook” of adjustments and machine settings. A digital note that links the fabric note to the pattern note does the same thing without paper. Pick one and write on it before the pattern gets filed.
Thread, Bobbins and Notions Without the Rummage Box
Clear bins fail in a particular way. Sort everything into transparent containers by category and the room looks finished, but the moment a bin holds more than one job, you are back to rummaging.
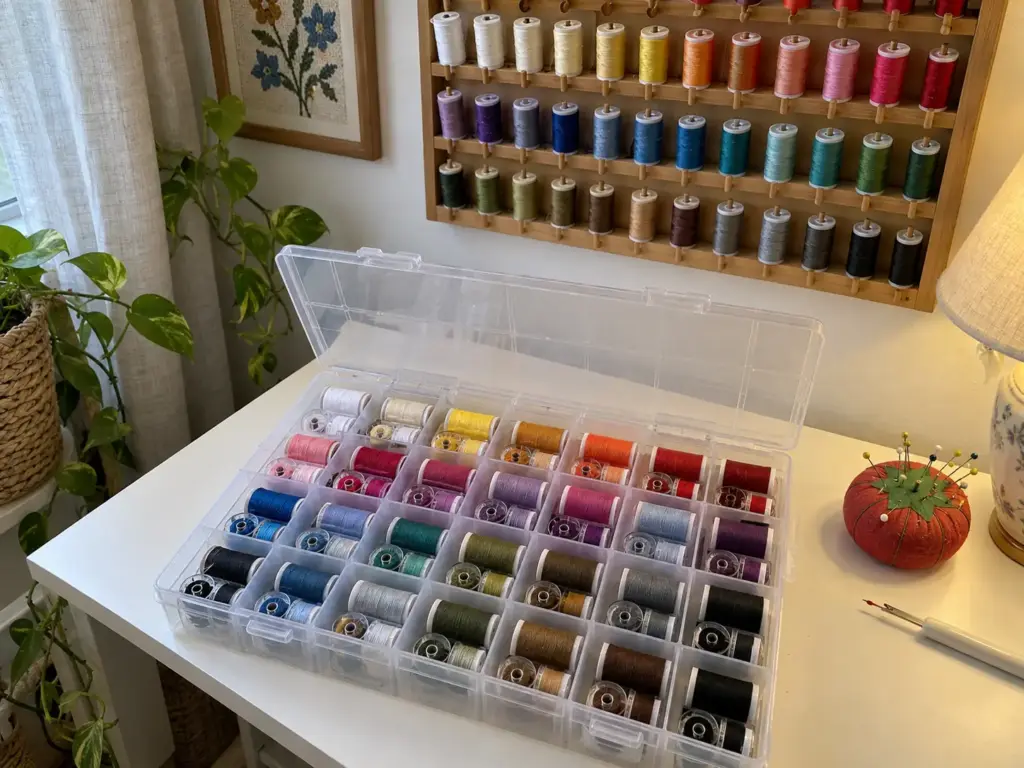
Thread you can see
The color you can see is the color you use. Thread organization works best on a visible thread rack or a wall line, not in a drawer. Serger thread cones go on long hooks, and sewing guides suggest 6-inch hooks for them.
Bobbins that stay with their spools
An orphan bobbin is a bobbin you will wind again. Spool and bobbin pairing is the fix: clip each bobbin to its spool or keep the two in one small bag, so the match is never a guess. For the cheapest bobbin storage, a clear tackle box does the work for both, and a clear bobbin box sold for the purpose is the tidier version if you want to spend. The person who started the thread called a cheap tackle box the biggest improvement they made for thread and bobbins, and decorative tins do the same for people who want something to leave out.
Notions sorted by type, not by size
Notions organization comes down to separate clear containers by type: pins and needles in one, seam rippers and markers in another. The trap is a bin that mixes types because they are the same size. A shallow notions drawer, divided by type, beats a deep box where the smallest things sink. The fixed spot for the per-session few (pincushion, seam ripper) sits at the machine, and the rest stay in sorted containers.
A label maker is optional. Size labels for the drawer, not the photo. If you want other containers beyond a tackle box, the craft storage organizers worth buying list covers them without repeating its picks here.
Count your containers against your habits, not your supplies. If you reach for the same eight things every session, those eight belong in one open tray at the machine, and the other forty can live in a box you only open on purpose.
Fabric Stash and Project Bags That Do Not Take Over
A stash sorted beautifully by color still buries the one piece you need if it is out of sight. The sort rule matters less than whether it matches how you actually reach for fabric.
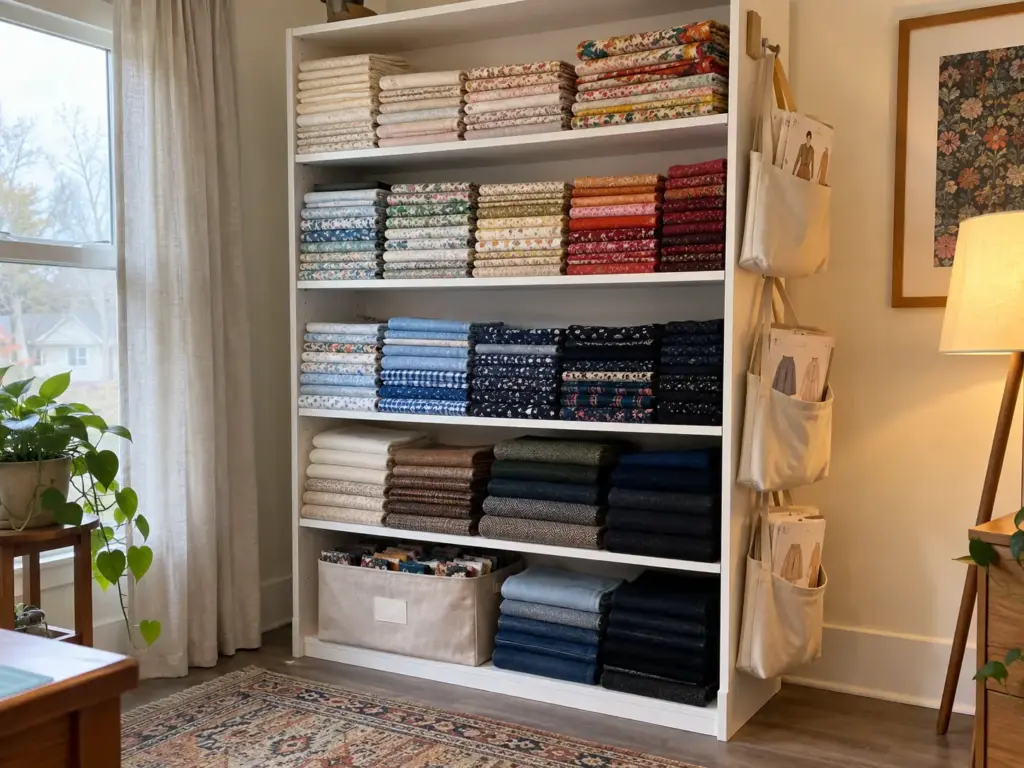
Sort the stash by how you reach for it
Sort by color, fiber or cut size, whichever matches how you pull fabric when a project starts. Fabric storage by color suits a sewist who builds a project from a palette, and fabric storage by fiber suits one who sews knits one month and wovens the next. Pick one rule and keep it. Mixed rules produce stash storage that only the person who sorted it can read, and even they lose the thread by the third reorganization.
Protect large pieces and cut pieces
For cut pieces and scraps, the free option comes first: dollar-store popcorn buckets, which sewists in the thread use for cut pieces, or a plain scrap bin by the cutting table. When you want labeled bins that hold pieces in a state of “cut, not yet sewn,” the fabric storage bin with labels is a single labeled cube bin (the listing resolves to a DECOMOMO cube, not a set of six and not a collapsible design), so buy as many as you have projects in flight. No repeated complaint about it turned up.
For the bigger question of whether cloth or hard plastic fits your shelf, see fabric versus plastic bins. Large finished pieces are a different job: a quilt storage bag keeps one big piece clean, and some sewists wrap yardage around comic book boards so folded fabric stands upright like files.
One bag per project, two projects at most
Limit work in progress (WIP) to one bag per project. The thread’s rule is “only work on 1 or 2 projects at a time,” which means one or two projects at a time on the table and the rest in their bags. The cost of ignoring it is specific: one sewist describes pausing an existing project to make two Halloween costumes as the point where it “finally broke” them. A pile of half-finished projects shares a table with the one you are actually sewing.
Keep a stash inventory on an index card per project, or a digital note that links the fabric to the pattern; a short fabric catalog with a photo of each piece does the same job for the full stash. And if a corner of the stash is fabric you will never sew, destash it: the decluttering checklist is the place for that decision.
A Sewing Room That Folds Away for Guests
The guest room has to turn back over by Friday. A sewing setup that cannot fold away loses to the guests every time. A guest room craft room is really two rooms taking turns, and a dual-use room works only if the flip is one move.
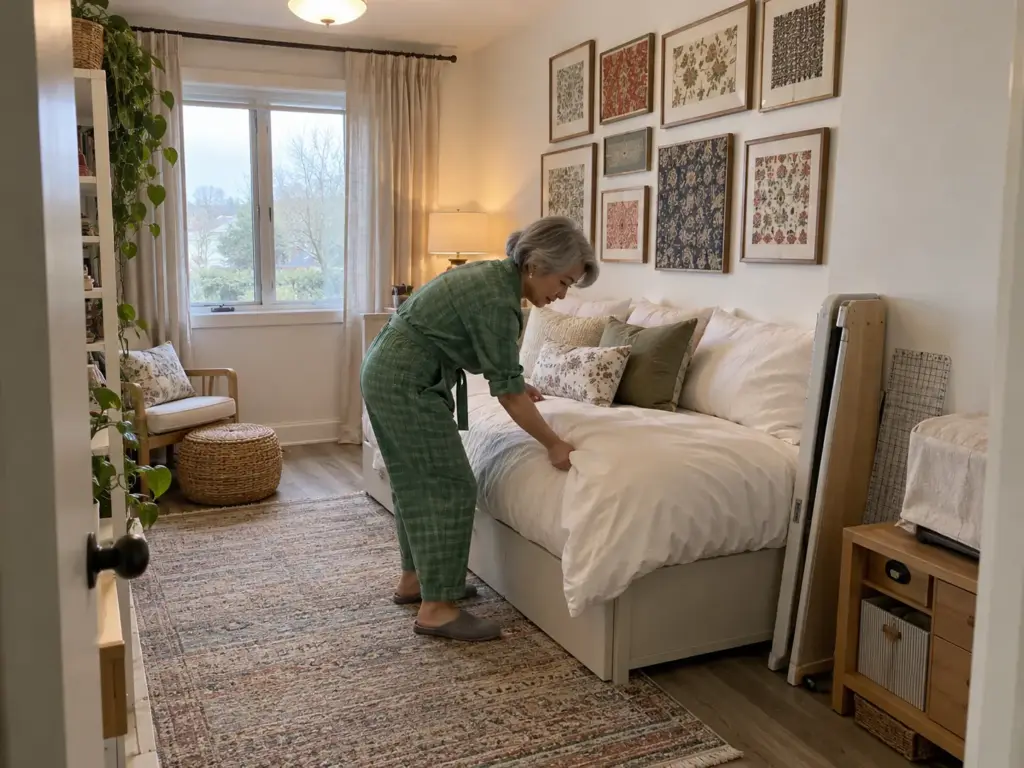
The table over the bed
One commenter built a table from two interior doors that sits over a guest bed, about 3 inches above the mattress. That gap leaves room for a cutting mat to slide in and out beneath it. The table comes off when the bed is needed, which is the point: it is removable, not a fixed piece of furniture.
A folding table that closes to a strip
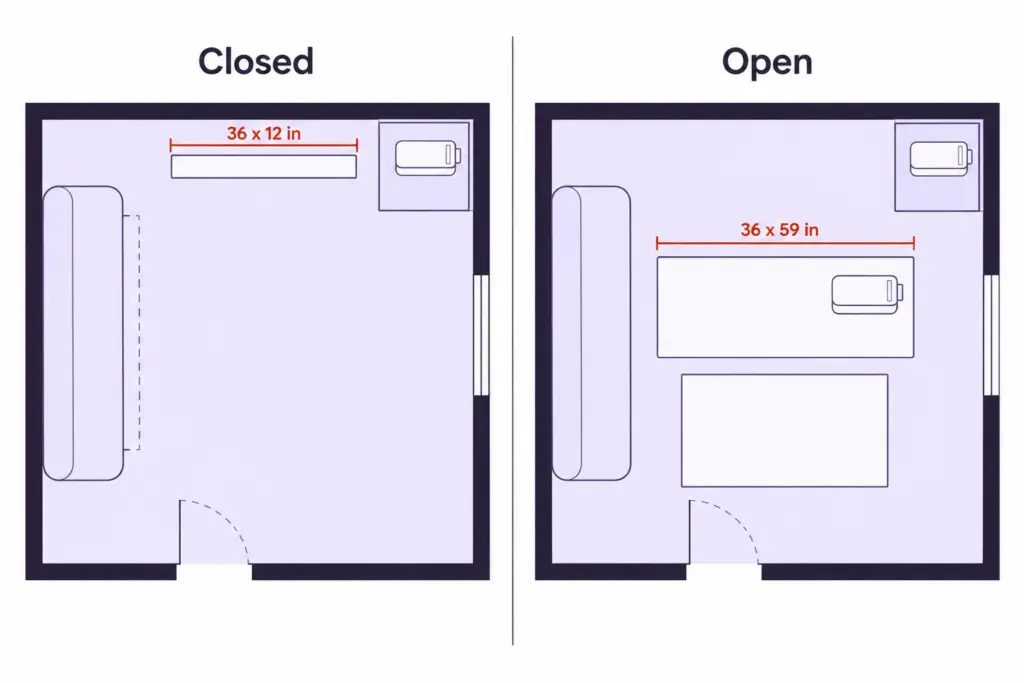
Another sewist reports a fold-away table that measures 36 inches by 12 inches closed and 36 inches by 59 inches open. Closed, it is a strip against the wall. Open, it is a full work surface. That 12-inch footprint is the number to hold up against your own wall when you measure.
Mats under the couch and the dining-table reset
Cutting mats slide under a couch. A rolling drawer unit on wheels, or a locker the machine sits on, makes the flip one move, not five. The reset is the same routine every time: clear the surface in one session, put each cut piece in its bag, and return the machine to its locker. For a shared sewing space, where nobody wants to see the project at dinner, that routine is the whole system.
If the dining table is your sewing table, the portable setup that clears off the dinner table works on the same principle. Dining table sewing comes down to the same three moves: clear, bag, shelve.
Time the flip once with a kitchen timer. If clearing the room takes longer than you will tolerate on a busy evening, find the slowest step and shorten that one, usually the machine, before you buy anything.
Budget and No-Drill Versions of All of It
A budget sewing room is mostly habits plus a few cheap containers. The setups that survive are often the cheap ones that fit the habit. A system you can rebuild for nothing is a system you will actually rebuild.
What the community uses before it buys anything
The budget list from sewists is short and specific: clip hangers that hold a pattern and its fabric together, binder clips on a hook, patterns on a string with clothespins, a tackle box for bobbins, dollar-store popcorn buckets for cut pieces, and zip bags with a note in marker. Every item on that list replaces one of the purchases above, and every one of them costs close to nothing.
Where a rental wall still works
A renter sewing room has one rule: nothing that needs a hole. The clothespin string is the zero-cost version of a wall, and the no-drill pegboard mount covered earlier is the upgrade when you want hooks for tools, which makes it the no-drill sewing storage for scissors and rulers. In a single corner, where the whole sewing zone is one small footprint, the small-space craft supply storage approach covers clearing a shared table.
The few things worth paying for
Two things are worth the money: a cutting table at the right height for your back, and a lamp that lights the cutting surface. Most other purchases in this article have a free equivalent. Those two do not, because a table at the wrong height or a cut line in shadow costs you every session.
The One-Session Reset That Keeps the Room Working
Three habits hold the whole system together. The machine gets a place to sleep that is not the table. The cutting table is tested to your height and cleared before and after every cut. Every pattern and every project lives in a container with a name on it.
The end-of-session reset is what ties them together: a short clear-and-return at the end of each sitting, not a weekend of sorting. In three months, check two things: which pattern format keeps landing loose, and whether the cutting height still suits your back. If a format keeps drifting, it needs a bigger home. If your back complains, raise or lower the table before you blame the room.
Today, take the pattern nearest your machine and put it in the first sleeve, folder or bag you own. Then notice, the next time you sit down, whether you are looking for it or whether it is already where you expected.
Frequently Asked Questions
01What are some ideas for organizing a sewing room?
Zone the room by task, give the machine a place to sleep away from the table, and clear the table after every session. Then give each pattern format its own home and keep thread and notions sorted by type.
02What are some ideas for a budget-friendly sewing room?
Most of the budget fixes cost close to nothing: a clear tackle box for bobbins, patterns on a clothespin string, binder clips on a hook, popcorn buckets for cut pieces and zip bags with a marker note.
03What is the best sewing supplies organizer for my sewing room?
The best organizer depends on the format: sleeves in a binder for printed patterns, a clear tackle box for thread and bobbins, and labeled bins for cut pieces. No single organizer covers all three well.
04What are the must-haves in a sewing room?
A cutting surface at the right height, a clear table, a home for the machine, pattern storage and good light. Everything else is optional and has a cheaper stand-in.
05Where do you store a sewing machine when you are not using it?
Store it off the table: on top of a low locker beside the table, on the floor next to a bin, or in a pull-out desk inside a wardrobe. Move it to the table only when you sew.
Disclaimer: ClutterlessNest is a participant in the Amazon Services LLC Associates Program. As an Amazon Associate we earn from qualifying purchases. This article may contain affiliate links — if you buy through them, we may earn a small commission at no extra cost to you. We only recommend products we have tested or genuinely believe in.