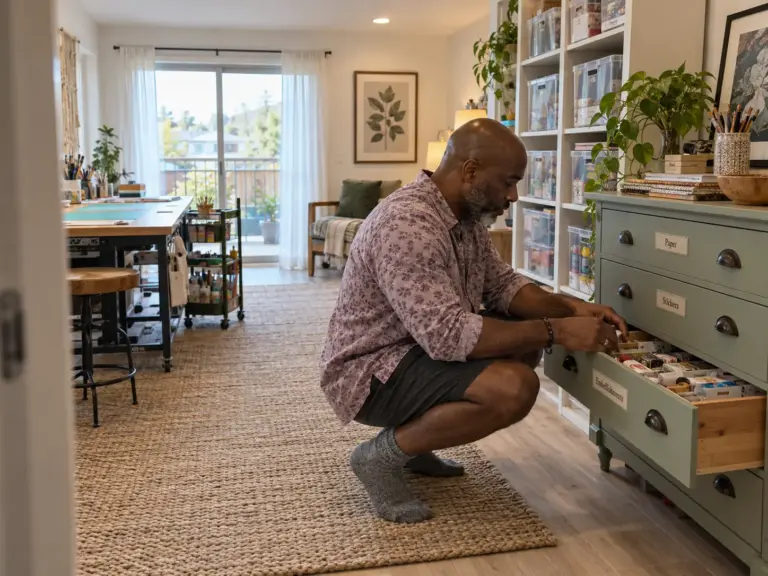
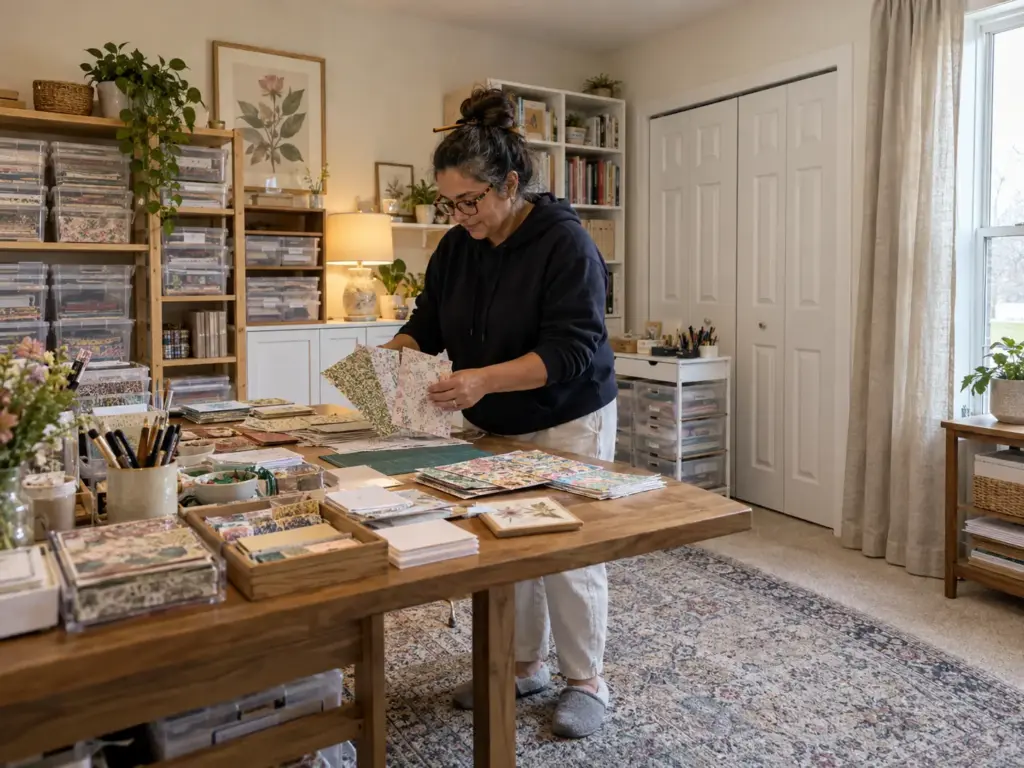
You finish the last card of the batch, the glue is still tacky, and the scraps go into whatever bag is open, right on top of the paper you bought for the next project. Crafters in r/crafts describe that exact moment as the point where the room starts slipping: one admits she throws the whole project into a ziplock bag or onto a shelf and hopes her future self will take care of it, then adds that “she hasn’t showed up yet.” That bag is a reset with no home, and craft room organization fails right there, long before it looks like a shelf problem.
What follows is built from what crafters report actually working, with the real measurements of the containers they buy, and it spends money in a fixed order: what you already own, then the hardware store or thrift shop, then boutique furniture last. To organize a craft room so the stash stays put, sort it by how you use it, cap it, zone it around your chair, and give each material one labeled home.
Quick Answer
The order that keeps a craft room organized after the first big tidy:
- Sort supplies into stash, active projects and tools.
- Purge, then cap each category at one container.
- Keep tools closest to your chair and the stash farthest away.
- Give each material one container shaped for it and one home.
- Label every container in one consistent style.
- Reset the project zone after each session and check the caps monthly.
Why Craft Room Organization Falls Apart (and the Stash, Active, Tools Frame)
Most craft rooms don’t fail on the day they get organized. They fail at the end of the first real project, when the creative energy is spent and the system asks for a dozen small decisions you have no patience left to make.
Where does the leftover ribbon go? The half sheet of cardstock? The hot glue that’s still warm? If the answer isn’t obvious in two seconds, it goes wherever there’s room, and two weeks later you’re buying glue you already own.
Where the end-of-project dump comes from
The ziplock bag from that r/crafts thread is the clearest picture of the problem. Nothing about it is lazy. The bag exists because the project’s leftovers have no address, so the only option at the end of a session is “together, somewhere, for later.” Repeat that across five projects and you get a shelf of bags, each holding a mix of stash, tools and half-finished work, and none of them labeled.
The second cause is building the system around container types instead of around use. A drawer for “paper,” a drawer for “ribbon” and a drawer for “misc” looks tidy on day one. But the misc drawer has no rule, so it takes everything that doesn’t fit the other rules, and within a month it’s the fullest drawer in the room. A system reverts when items don’t have a fixed spot, and “miscellaneous” is the opposite of a fixed spot.
The third cause is the dabbler problem. One r/crafts poster listed embroidery, a cutting machine, painting, scrapbooking, candles and soap, and a layout built around one craft can’t absorb six. Any system for this room has to survive a craft being picked up, dropped for three months and picked up again.
Stash, active project and tools: three kinds of supplies, three rules
Crafters already have the vocabulary for this. Stash is the supply that isn’t tied to a current project: the fabric bought on sale, the paper pad saved for a someday card, the yarn from a destash. A WIP is a work in progress, the project that’s actually on the go. Tools are the things you reach for in every session regardless of the project: scissors, glue, rulers, the cutting mat, pens.
Each kind gets its own rule, and the rules are different on purpose:
- Stash is long-term. It can live behind doors, on high or far shelves, in closed boxes, and it gets a capacity limit (more on that in the next section).
- Active projects need a grab-and-go caddy or home within reach: one tray, one bin or one cart drawer per project, holding everything that project needs and nothing else.
- Tools live at the table. If you use it every session, it should be reachable without standing up.
The same material can sit in different categories depending on what you’re doing with it. The skein for the sweater on your needles is active; the six skeins you bought because they were on clearance are stash. For a dabbler, a whole craft can move from active to stash when it goes quiet for a season, and that’s fine. The point of the frame is that every item answers one question before it gets a spot: am I using this now, every time, or someday?
That question also fixes the ziplock bag: tools go back to the table, the active project goes back into its tray, and only the true leftovers go to the stash. None of the three moves needs a decision about where something belongs, because the category already decided it.
Hide it or show it: how the same shelf can be right and wrong
The longest argument in the r/crafts shelving thread wasn’t about brands. It was about doors.
Some crafters want everything visible because what they can’t see, they forget they own; others want everything closed because open shelves of supplies look messy by design. One commenter’s solution on a set of bookcases: solid doors for the messy stuff, glass doors if what’s inside stays tidy. Another went half and half.
That answer works because it’s a rule per material, not a rule per room. Rolls of washi tape lined up by color look fine on an open shelf and get used more because you can see them. A pile of fabric remnants on the same open shelf looks like a mess in a week and collects dust and cat hair on top of that. So the same shelf can be the right home for one thing and the wrong home for another.
The working version: show what’s tidy by nature and used weekly, hide what’s messy by nature or touched rarely. Stash is usually the second kind, which is why it goes behind doors or into solid boxes. Tools and active projects are usually the first kind. And if you’re someone who forgets what you can’t see, a clear lid or a good label gets you visibility without an open shelf of chaos.
Purge and Cap Before You Buy Containers
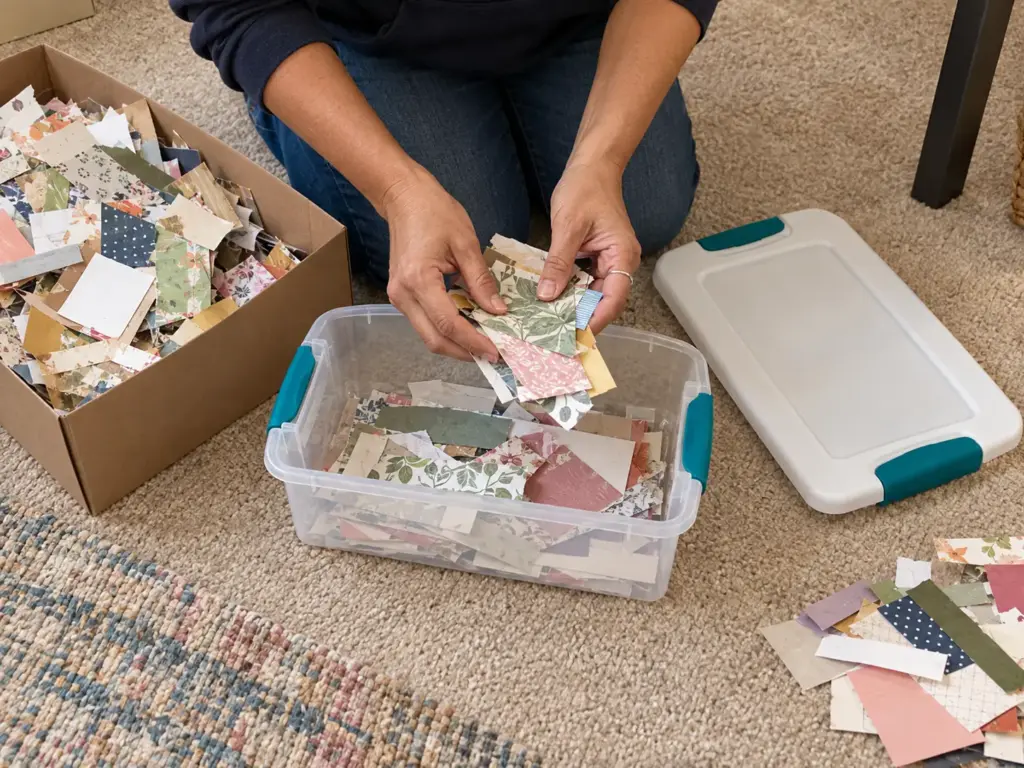
The classic mistake is ordering twenty matching boxes for a stash you haven’t counted. The boxes arrive, they’re the wrong size for half of what you own, and the extras become a new kind of clutter. Decide how much stays before you decide what holds it, using whichever of these decluttering methods that work past the first week suits how you make decisions.
Free first: what you already own that can hold things
There’s an order to spending in a craft room, and it runs from cheapest to most expensive for a reason: what you own first, then the hardware store or a thrift shop, then cube furniture, then craft-brand furniture last. Each step only happens if the one before it ran out.
The free tier is better than it sounds, and repurposing is the budget-friendly way to start. One r/crafts crafter runs her whole room on it: shoe boxes, magazine holders for scrapbook paper, pizza boxes for junk-journal supplies sorted by theme (never-used-for-food boxes, to be clear) and office bankers boxes slid under the work surface. Her one warning about all of it: “Paper is heavy.” Cardboard holds paper fine on a low shelf, but a stack of filled boxes on a high one is a different matter.
Free containers also do something a new set can’t: they tell you how much you actually have. If the scrapbook paper fills three magazine holders, that’s your real number, and anything you buy later gets sized to it.
The one-container cap: when it is full, you use it up or let it go
The rule crafters in the threads keep repeating: when a container fills up, you use from it or you purge it, and you don’t buy a second one. That’s the capacity cap, and it’s what keeps a stash from outgrowing any system you build. One container per category. When the ribbon box is full, the ribbon category is full.
It’s a craft-sized version of the one-in, one-out rule, with one advantage: the limit is physical, so you can see it. A rule in your head slips; a lid that won’t close doesn’t.
For the first container, buy a set of six. Actually, buy one. A single Sterilite See Latching Box is sold on its own, clear and with a latching lid, so you can run the cap on one category for a month before committing to a matching set.
Check the listed inside dimensions against what you plan to put in it first. If the cap holds for that category, you know the system works for you, and you know the exact size to buy more of.
Write the cap on the label itself, as in “Ribbon: this box only.” It turns the rule into something you see on the shelf instead of something you have to remember mid-project.
Sentimental and inherited stash
Inherited supplies are their own category. A grandmother’s button tin or a box of a friend’s yarn doesn’t behave like stash you bought, because using it up feels like losing it. Mixed into the main stash, it’s untouchable, so it blocks the cap from working.
Give it a separate box with its own limit, and let it be the one box that holds things for a reason other than crafting. The decision about what stays is the same one you’d make with any sentimental items: keep the pieces that carry the memory, and let the box size decide how many.
Zone the Room Around Where You Sit
The cutting mat lives at one end of the room and the scissors at the other, so every cut is a walk. Most craft rooms get arranged by where furniture fits rather than by what gets reached, and the walking adds up to more than steps: it’s how tools end up on the wrong side of the room and stay there.
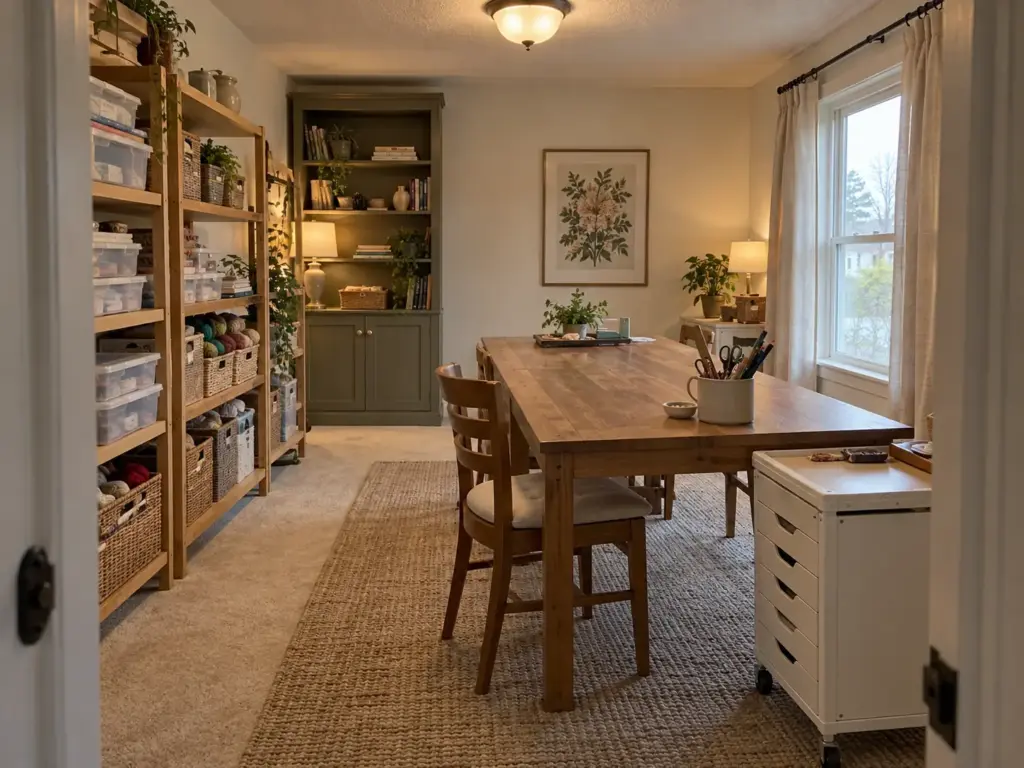
The closest-to-where-you-work rule
One r/crafts commenter put the layout rule in workshop terms: the things you use most go closest to where you work, and the things you use less go farther away. In practice that gives the room three rings around the chair. The closest ring holds tools and the active project; the middle ring holds shelving and carts with supplies you reach for weekly; the farthest ring holds the closed stash.
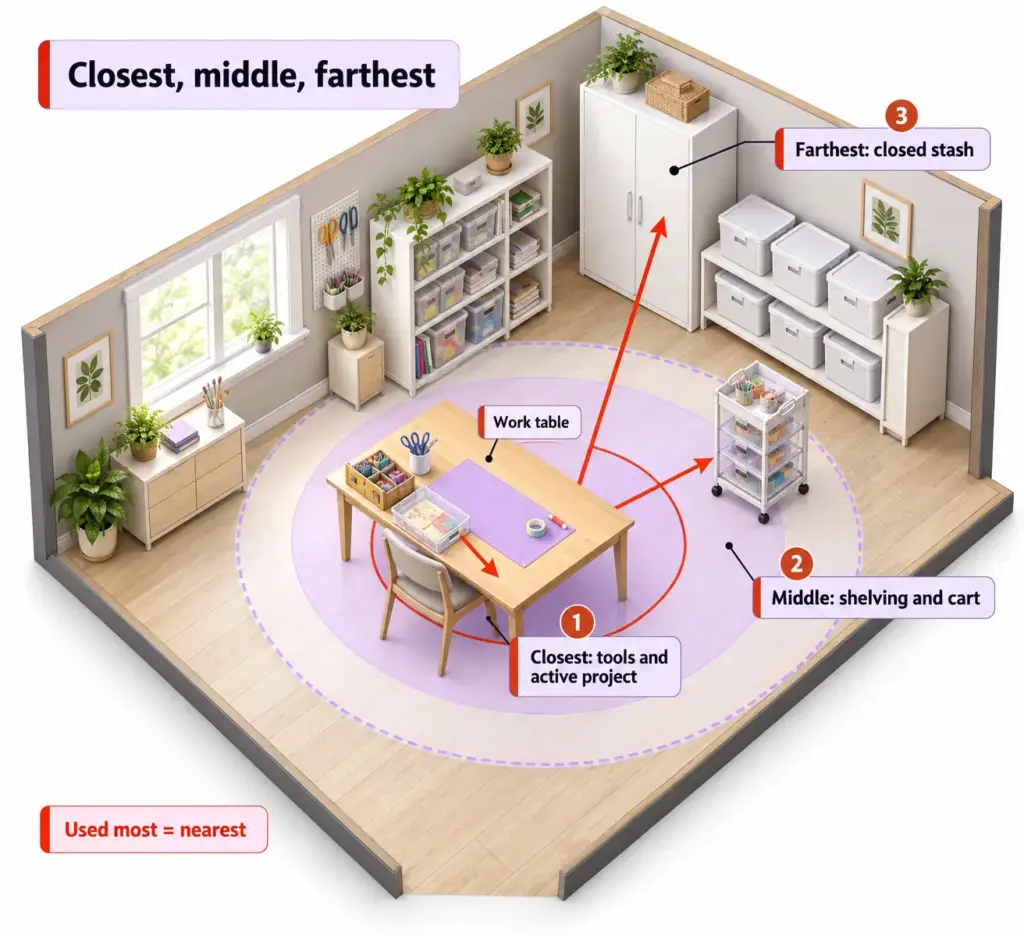
The closest ring is the one worth spending effort on. One crafter upcycled an old CD storage unit into cubbies for tape, glue, clips and markers, right at the table, which is exactly the right scale: small open slots, one item type each, reachable without looking. Active projects went into their own bins nearby, and the stash lived in boxes on a cube shelf farther back.
One zone per craft, or one zone per stage
If you do one craft, zone by stage: cutting, assembling, finishing. If you do six, that won’t work, because there isn’t room for six corners. Crafters in the dabbler thread kept recommending the same thing: a rolling cart per craft, parked against a wall, that rolls to the table when that craft is active and back when it isn’t.
Shelving can split the room too. One crafter working in a 12 x 12 foot area shared with a playroom used cube shelves as room dividers, with rolling carts per craft and a pegboard above the work surface. The shelves define the craft zone without a wall, and the carts mean the zone can shrink or grow with whatever’s active.
Work surface height, chair clearance and the cart that has to roll under
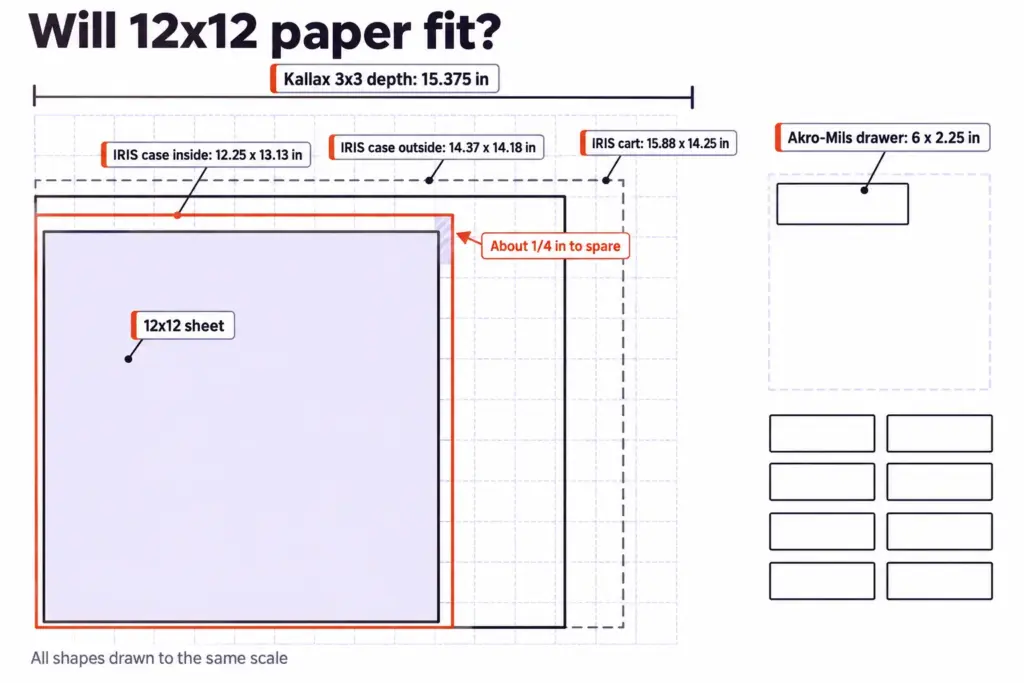
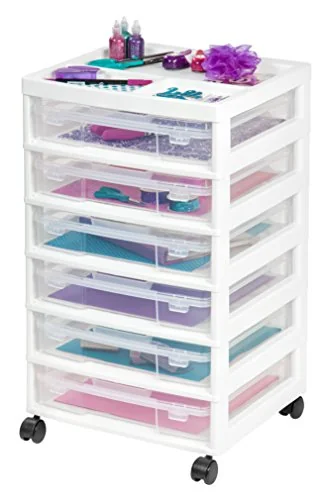
A cart only helps if it fits where you need it. The IRIS USA 6-drawer rolling cart has a footprint of 15.88 x 14.25 inches and stands 26.44 inches tall. Measure the gap under your table, including any apron or crossbar under the top, and the floor space beside your chair before ordering any cart, because a cart that can’t tuck under the table ends up blocking the chair (and gets parked somewhere less useful within a week).
The same logic applies to the table itself. The craft caddy of tools and the active tray need to sit where your hands already are on the cutting table or work table, the way they would in good desk organization, not at the far edge of a big table. Check the table for wobble too: one crafter noted that even a heavy-duty table “will rock a bit” after a while, especially with clay work. A table that rocks under pressure is a table you’ll stop cutting on.
Storage by Material Type: Paper, Vinyl and Tiny Bits
The shelf looks fine until the 12 x 12 paper starts to curl, because the box it lives in isn’t actually a 12 x 12 box. Every material has a shape, and containers that ignore the shape waste space or damage what’s inside.
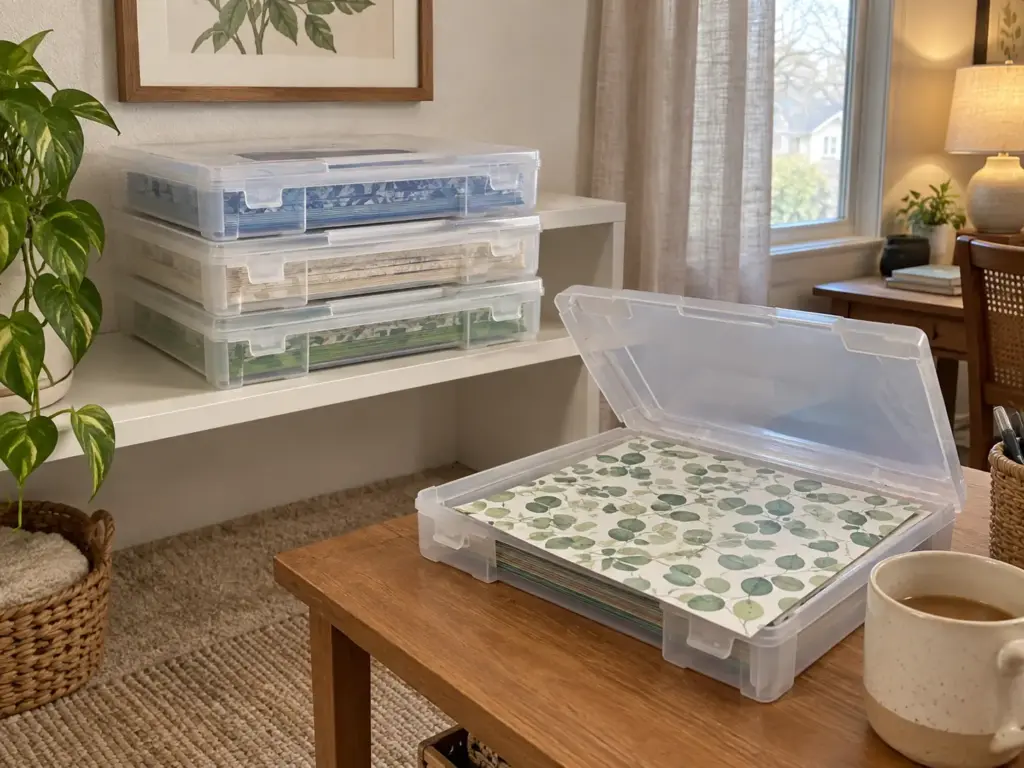
Paper and cardstock: flat, labeled, and lighter than you think it is
Scrapbook paper and cardstock need to lie flat, stay dry and be visible enough that you remember what you have. Stored upright in a too-big bin, sheets slump and bend at the corners. Stacked loose on a shelf, they get dusty and the ones at the bottom are forgotten. It’s the same sorting problem as household paper clutter, just with prettier paper.
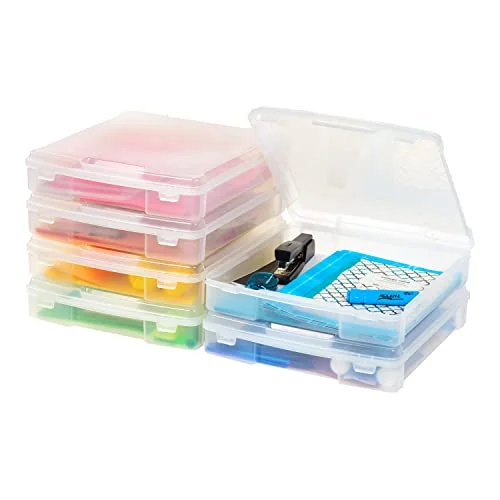
A purpose-made 12 x 12 case solves the shape problem. The IRIS scrapbook case measures 12.25 x 13.13 x 2.63 inches inside and 14.37 x 14.18 x 3.13 inches outside, so a 12 x 12 sheet fits with about a quarter inch to spare on the short side. The outside matters as much as the inside: at more than 14 inches across, it’s wider than the paper suggests, so get a tape measure on the opening of any cube shelf or drawer before you order cases to go in it.
The free version works too. Magazine holders act as a vertical file for paper, upright and sorted, and shoe boxes hold smaller sizes and scraps. The portable craft case most people picture, the ArtBin kind with a handle, is the category these cases come from; the IRIS cases cover the same job and stack. If you’d rather see everything at once, clear lids win, which is the same reasoning behind choosing clear storage bins anywhere else in the house.
Vinyl, fabric, yarn and the long or rolled things
Rolled materials fail on shelves because rolls are long and shelves are shallow. A cube shelf is about 15 inches deep, so a roll longer than that either sticks out or gets laid sideways across the front, where it blocks everything behind it. Stand vinyl rolls upright in a tall bin or basket instead, sorted by type, so you see the ends and pull one without unstacking the rest.
Yarn storage and fabric storage are softer problems with the same logic. One crafter keeps yarn in acrylic shoe display bins, which stack, close and show the colors. Fabric folds well on a shelf, but on an open one it collects dust and pet hair, which is why fabric stash usually belongs behind a door. For anything you’re actively working on, clear zipper project bags do two jobs at once: they keep the WIP together, and, as that same crafter put it, they keep the cats away from it.
Beads, sequins and findings: the tiny-parts problem
Jars look like the obvious answer for tiny parts, and they’re cheap. But one crafter who went the jar route said that while it worked okay, it was still “kind of a cluster,” and the containers can break. Glass jars of beads on a shelf are a shattered mess waiting for an elbow, and a row of mismatched lids doesn’t tell you what’s inside.
A unit of small hardware drawers works better, because each drawer is one address. The Akro-Mils 64-Drawer Parts Cabinet is 20 x 6 x 16 inches outside with drawers about 6 x 2.25 x 1.625 inches, and it can stand on a table or hang on a wall from keyhole slots. Those drawers fit beads, sequins and findings; a standard ruler or an embossing folder won’t go in. The usable depth is also less than the label says, because full-width stop tabs at the back take up room, and one buyer found only eight small dividers for 64 drawers.
Tiny means tiny. Plan on one bead type per drawer rather than relying on dividers, and keep the larger tools somewhere else.
Vertical and Wall Storage, Including the No-Drill Version
The table is the only flat surface in the room, and half of it is scissors. Getting tools off the table and onto the wall uses vertical space to give the work surface back without taking any floor space, which is the same thinking behind vertical storage ideas for small apartments.
Pegboard for the tools you use every session
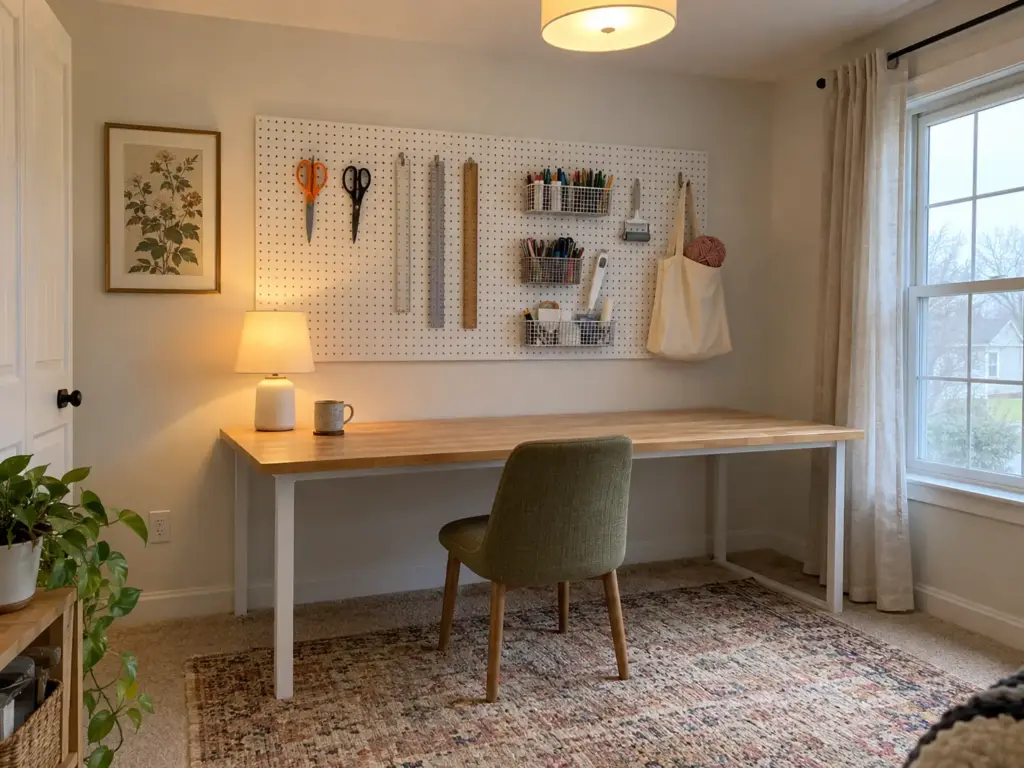
A pegboard above the work surface (or a slatwall, if you already have one) shows up again and again in the craft threads, and for good reason: everything hangs where you can see it, and rearranging takes seconds. One crafter uses little hanging baskets on hers for pens and cutting-machine tools, so the small things that would roll off a hook still get a spot on the wall.
If the wall itself is off limits, the side of a bookcase works. One crafter bolted pegboards to the exposed side of a bookcase for scissors and rulers, which turns furniture you already have into wall storage without touching the wall. Owners fixing a pegboard directly to the wall should follow the manufacturer’s instructions for the board and hardware they buy.
The no-drill version for renters
Renters have three routes: no-drill mounting hardware, a freestanding pegboard, or hooks. The Just Hanging Pegboard Wall Mounting Hardware is built to work with Command strips, so a pegboard goes up without drilling and comes down at move-out. Keep what hangs on an adhesive-mounted board light: tools, not supply stock.
For the back of the door, over-door organizers add hanging pockets for ribbon storage, markers and small packs, using the dead space behind the door without touching a wall at all. For single items, Command hooks and other adhesive hooks fill the gaps. Command Large Wire Hooks come in a multi-pack and hold a tote bag, a hanging pouch of WIPs or a pair of scissors by the table, as long as what hangs on them stays light.
Before you hang anything, lay the pegboard flat on the floor and arrange your real tools on it. Tracing each one with a pencil shows you the layout that fits, and the outline tells everyone in the house exactly where the scissors go back.
What the wall should never hold
“Paper is heavy” applies to walls even more than to shelves. A wall is for tools and light items, not for paper stock, full scrapbook cases or bins of fabric. If you want wall shelves for anything heavier, they need to be wall-mounted shelves that hold weight, fixed into studs, and rated for the load.
The test is simple: if dropping it would hurt or break something, it doesn’t go on adhesive. Keep heavy supplies low, on the floor or the bottom shelf, and use the wall for what you pick up and put down a dozen times a session.
Drawers, Carts and Furniture Worth the Floor Space
The branded craft cabinet the threads call the Dream Box is the piece people try to copy, and the copies keep missing what made it appealing. Meanwhile, the furniture that does the most work in most craft rooms is a cart, a bookcase and whatever stackable drawers already exist.
Rolling carts: one per craft or one per project
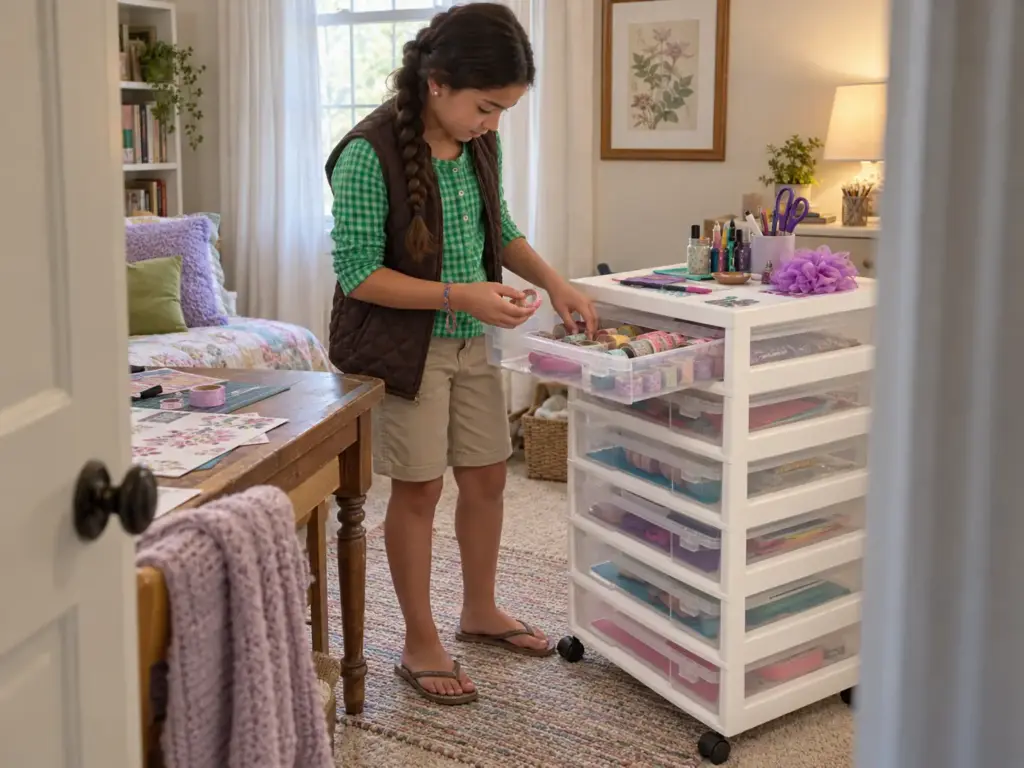
A cart is the best home for an active project or a single craft, because it moves. It rolls to the table when you’re working and back to the wall or into a closet when you’re not. Before buying new, check thrift stores: one crafter picked up past-season three-tier carts at a discount for stamps and dies.
If you want drawers, shallow ones beat deep ones. A crafter in the shelving thread pointed out that the thing most copies of the expensive cabinets miss is shallow storage, like a pantry door, where small things stay findable instead of sinking to the bottom. The IRIS USA Rolling Cart with 6 Cases has drawers about 3 inches high and 14.25 inches wide, so a 12 x 12 paper pad lies flat in one. For loose bits inside a drawer, drawer organizer inserts work as drawer dividers and keep them from sliding into one pile.
Cube shelving and bookcases as dividers and storage
Cube shelving turns up in a lot of craft room setups, and the numbers explain both its appeal and its limit. The published Kallax dimensions for a 3×3 unit are 44.125 x 44.125 inches and 15.375 inches deep, with a maximum load of 29 pounds per shelf.
Twenty-nine pounds sounds like plenty for yarn, which is light and bulky. For paper, it isn’t: a few filled cases of cardstock stacked in one cube take a real share of that limit, and a cube packed solid with paper pads can pass it. So the capacity of a cube shelf depends on what goes in it, and paper belongs in the bottom row.
Tall bookcases and cube units also need anchoring, especially with paper loaded high or kids in the house. According to the CPSC’s Anchor It! guidance, “Anchor TVs and furniture, such as bookcases and dressers, securely to the wall.” The same guidance says to store heavier items on lower shelves, which in a craft room means paper pads and full cases go low.
If you’re choosing new shelving, look at freestanding shelving units that won’t tip, and anchor them anyway.
Boutique craft furniture versus what you can assemble
The Dream Box is the cautionary tale of the threads. One commenter said it was flimsy for its price, and that people loved the versions they built themselves from bookcases with castor wheels and hinges. The appeal of those homemade versions is the one the copies miss: a closable cabinet with shallow storage, so everything is visible when it’s open.
That’s the end of the spending order, and most rooms never need to reach it. Furniture is the last purchase, after the purge, the cap and the zones have shown you what you really store.
When you load a cart or a bookcase, put the densest material in the bottom drawer or on the bottom shelf first and fill upward from there. Paper pads in the top drawer make the whole unit top-heavy.
Labels and Visibility Decide What Gets Used
A box you can’t identify from across the room is a box you stop opening. A craft room can be perfectly sorted and still fail if finding something means opening six containers, because after the third one you’ll just buy the thing again.
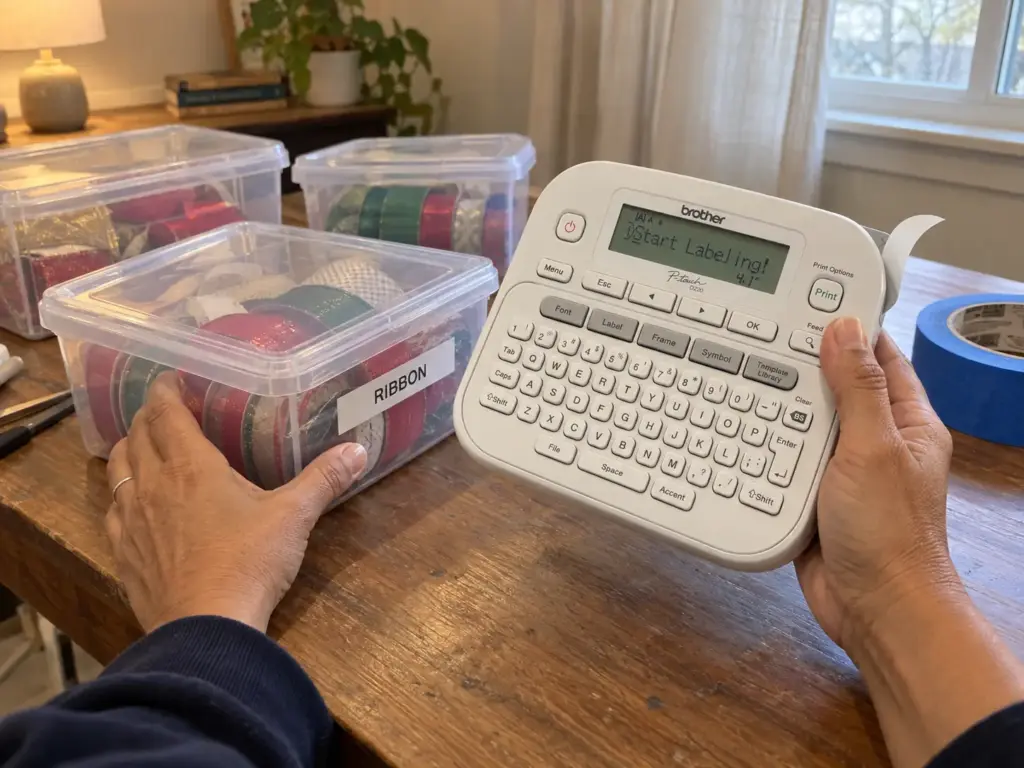
Label everything, in one style
The number one tip from the crafter with the shoe-box system was written in capitals: “LABEL EVERYTHING.” Her point went beyond finding things. Shoe boxes, pizza boxes and magazine holders don’t match, but labeled in one consistent style, they look like a system rather than a pile of boxes.
Consistency matters more than the method. Same size, same position on each box, same wording style, so your eye learns where to look. If your labels have a habit of curling off, the same tricks behind labels that actually stay on in a pantry apply to craft boxes.
Clear, solid or glass: what to show
The visibility rule from earlier carries into containers: clear for what you use weekly, closed for the stash. A clear case of paper on the active shelf reminds you it exists; a clear bin of stash in plain sight just adds visual noise to the room.
For active projects, clear zipper bags work well because you see the project at a glance and the bag keeps the pieces together (and, per one crafter, keeps the cats out of the WIP). Solid boxes are fine for the stash as long as the label does the job the clear wall would have done.
Painter’s tape, label maker or printed labels
Start with painter’s tape labels and a marker. They’re free, they peel off cleanly, and it lets you test the categories before committing to them. Most systems shift in the first month as you learn what you really reach for, so a label you can rewrite in seconds is the right tool for that stage.
Once the categories stop changing, a label maker earns its place when the same style has to repeat across dozens of boxes. The Brother P-Touch PTD220 Label Maker prints uniform labels, and one reviewer of the IRIS scrapbook cases labels them with a Brother label maker. It’s worth it for the uniform look across a whole wall of boxes; for five boxes, the tape is fine.
Craft Closet, Corner or Big Room Changes the Rules
Plenty of craft rooms are also the office, the guest room and the place the vacuum lives. The system above still works in those rooms, but the constraints change what goes where, and a big room has a problem of its own that extra space creates.
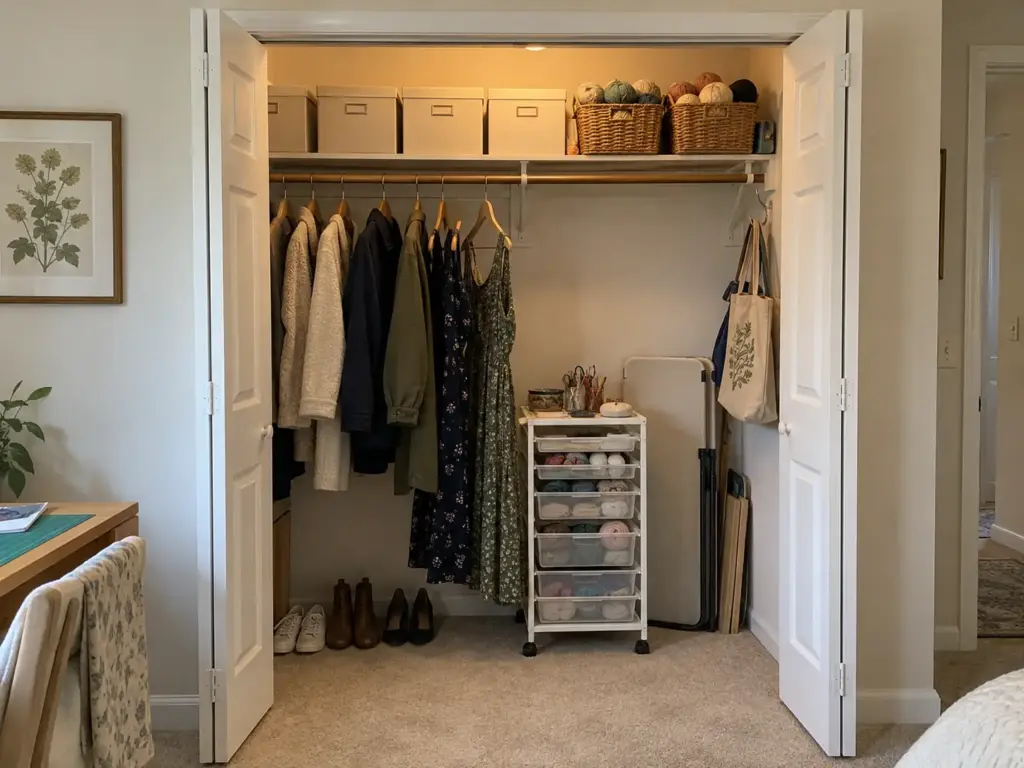
The craft closet: keep it able to go back to a closet
One crafter set up her supplies in a closet while keeping it configured for clothes: one shelf over the rail, lightweight items only, so it can go back to being a closet whenever it needs to. That’s the smart version of a craft closet for a renter, or for anyone who might sell, host guests or need the space back.
The rule is to add, not rebuild. Boxes on the shelf above the rail, a small cart on the floor, a hook on the side wall. The thinking is the same as setting up a home office in a closet: the closet does a second job without losing its first one.
The craft corner or shared room
One crafter’s room is also an office, a guest room and storage, with a Murphy bed. Another works in a 12 x 12 foot area of a room shared with a playroom, using shelves as dividers. In a small craft room like either one, the craft zone has to pack down when the room is needed for something else, which is where carts and closable storage pay for themselves.
The furniture has to work harder in these rooms, which is why multi-functional furniture like a table that folds or a bench that stores comes up so often. For more layouts, the same thinking applies to these places for a home office in small spaces. If your crafts include candle or soap making, put that station near a window for ventilation, as one crafter with a shared room did.
The big room or garage: when the space swallows the stash
You’d think a bigger room would make organizing easier. In practice, more room means the cap matters more, not less, because a big room has space for everything to pile up out of sight.
One crafter’s reply to a thread about craft rooms says it in one line: “Hahaha, craft room. My pool table in the dining room is buried.” Space without limits fills, then spills.
The environment matters too. Paper, fabric and yarn don’t like moisture, and the EPA’s indoor humidity guidance sets indoor relative humidity below 60 percent, ideally between 30 and 50 percent. An inexpensive temperature and humidity gauge in a closet or spare room tells you whether your stash is at risk. A garage gives you no such control, so if any stash has to live there, put the gauge in first and keep paper and fabric in closed containers.
Keep It Working With a Project Zone and a Monthly Reset
The first project in progress after the reorganization is the real test. Everything looks great until the scraps start piling up, and then the question is whether the system tells you where they go.
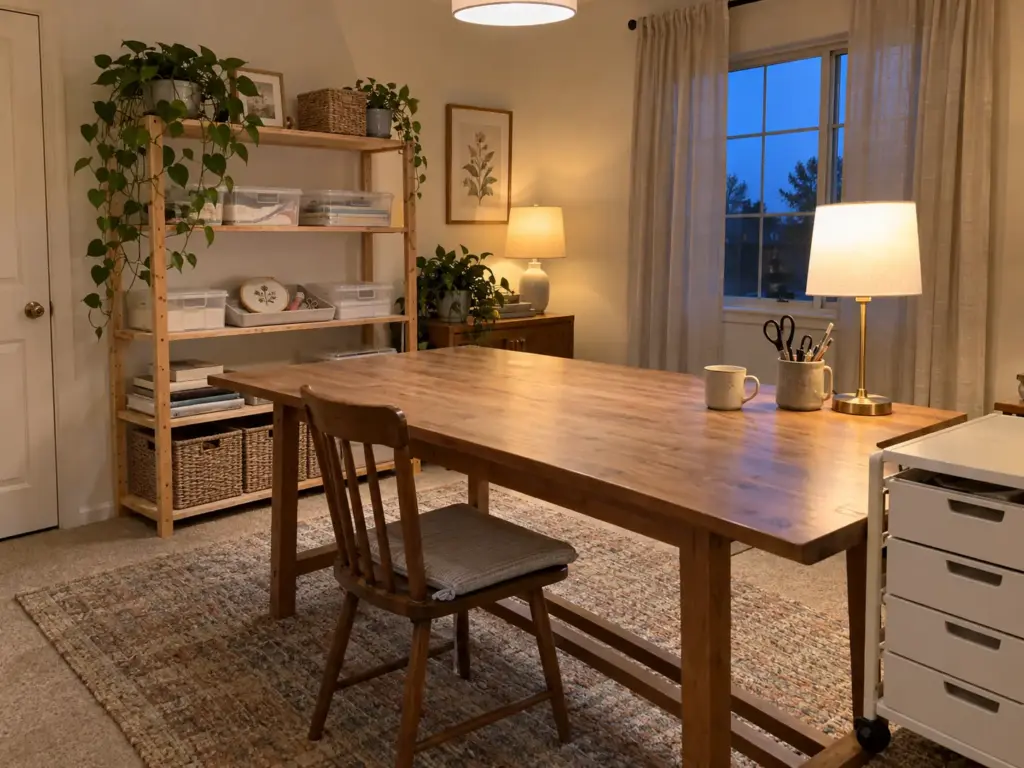
The project zone and the end-of-session reset
Give every active project one tray or one cart drawer. At the end of a session, the reset is a five-minute return: tools to the table spots, the project’s pieces back into its tray, the tray back to its home. It isn’t a clean-up of the whole room. It’s the ziplock bag from the intro, given an address.
If a session ends and something doesn’t fit in the tray, that’s information. Either the project has grown and needs a bigger container, or something from the stash wandered over and needs to go back.
Leave the next project’s first step set up in its tray before you walk away: the paper chosen, the hoop threaded. Coming back to a ready tray makes it far more likely you’ll use the system instead of pulling everything out again.
The monthly cap check
Once a month, look for the container that overflowed. Then use from it or trim it until the lid closes again. Don’t buy a second box; that’s the cap from the purge section doing its job.
This takes ten minutes if you do it monthly and an afternoon if you skip three months. Pick a regular day, like the first weekend of the month, so it doesn’t depend on remembering.
When something stops working
Systems drift. The jars that looked tidy become “kind of a cluster,” the drawers fill with things that don’t belong, the cart turns into a second stash. Treat that as the signal to simplify, not as a reason to buy more containers. Usually one category has outgrown its cap or lost its rule, and fixing that one category fixes the room.
For dabblers, rotate which craft owns the main zone: the active craft gets the table and the closest cart; the others roll back to the wall until their season comes around. Separate guides on craft room organization ideas and craft room storage ideas, craft supplies in small spaces, craft storage organizers, sewing rooms and art supplies are coming to this section, each going deeper on its own corner of the room.
Give Every Material a Home, a Limit and a Distance From Your Chair
The craft rooms that stay organized share three habits. Every supply is sorted by how you use it (stash, active project or tool) before it gets a spot. Every category gets one container, and when it’s full, you use it or trim it instead of buying another. And everything sits at a distance from your chair that matches how often you reach for it.
Three months from now, open the fullest container in the room and look at what’s inside: if it’s mostly things you’ve used, the cap is working; if it’s mostly things you forgot you had, that category needs a smaller box.
Today, pick one material that’s currently loose, maybe the scrapbook paper or the washi tape, and put it in a shoe box or a magazine holder you already own, with a strip of painter’s tape as the label. Over the next week, notice whether you put it back without thinking. If you do, that’s the system working, and the rest of the room can follow the same pattern.
Frequently Asked Questions
01What is the best way to organize a craft room?
Sort supplies by how you use them, as stash, active projects and tools, then purge and cap each category at one container before buying anything. Place tools closest to your chair, the stash farthest away, and label every container in one style.
02What does every craft room need?
Every craft room needs a steady work surface, a spot for tools within arm’s reach, one home per active project and closed, labeled storage for the stash. A rolling cart and a pegboard cover most of the rest, and both work without drilling if you rent.
03What is the best closet organizer for a craft room?
The best setup keeps the closet able to work as a closet: light boxes above the rail, a small cart on the floor and hooks on the side wall. Keep heavy paper low and skip anything you would have to rebuild later.
04How do I organize craft supplies when I do more than one craft?
Give each craft its own rolling cart or bin so it can roll to the table when it is active and back to the wall when it is not. Rotate which craft owns the main work zone, and keep shared tools at the table.
05How do I keep craft supplies from taking over again?
Cap every category at one container and check the caps once a month, using up or trimming anything that overflows instead of buying another box. A five-minute reset of the project tray after each session stops the end-of-project pile from forming.
Disclaimer: ClutterlessNest is a participant in the Amazon Services LLC Associates Program. As an Amazon Associate we earn from qualifying purchases. This article may contain affiliate links — if you buy through them, we may earn a small commission at no extra cost to you. We only recommend products we have tested or genuinely believe in.