







In this article
You unplug the TV to rearrange the room — or maybe just to vacuum behind it — and two hours later you’re sitting on the floor surrounded by a pile of black cables. None of them are labeled. None of them are obviously connected to anything you can identify. That’s the moment everyone decides to finally deal with cable management.
The problem is that most guides stop at “buy some velcro ties.” That gets you a tidy setup that falls apart the moment a new gaming console arrives. Here’s what actually works, based on organizing dozens of entertainment setups: the system that lasts doesn’t start with a product. It starts with an audit.
This guide walks you through how to organize TV cables and cords in the right order — audit first, then bundle, then route — plus a separate approach for wall-mounted TVs, a renter safety map, and the fix for why cable setups always go back to chaos. If you’re also rethinking your living room layout and storage decisions, start with the cables — they affect where furniture can go and how clean the room actually looks.
Quick Answer: Here’s the right order for organizing TV cables that stay organized:
- Audit every cable and remove dead cords before buying anything
- Bundle cables by destination, not by type, using velcro ties
- Set up three zones for TV stand cable routing
- Use furniture positioning or adhesive raceways for wall-mounted TVs
- Follow the renter deposit safety map for zero-risk methods
- Prevent cable creep with a one-in-one-out rule and quarterly checks
Step One: Do the Cable Audit Before Buying Anything

Everyone jumps straight to the velcro ties and the cable boxes. The real move is to unplug everything first — and confront the fact that there are almost certainly three to five cords back there from devices that no longer exist in your life. This is the step every competitor skips, and it’s the one that makes the biggest difference. Removing dead cords costs nothing, takes twenty minutes, and typically cuts your cable count by 25 to 40 percent before a single product gets purchased.
Unplug Everything and Lay It on the Floor
The best time to do a cable audit is when the TV is already unplugged — you’re moving furniture, deep cleaning, or setting up a new TV. Pull every single cable from the back of the TV and the power strip. Lay them all on the floor, preferably on a light-colored surface where you can actually see what you’re dealing with.
Keep your phone nearby so you can search what a mystery cable connects to. Most entertainment setups have between six and fourteen cables total: a TV power cord, one to four HDMI cables (streaming sticks, gaming consoles, soundbar, cable box), a power cord for each external device, and occasionally an ethernet or optical audio cable. You’ll know within five minutes whether you have a mild tangle or a full cord archaeology project.
The Dead Cord Test
Here’s the rule: every cable must connect to a device you currently own and actively use. If you can’t name the device within five seconds, that cable is dead. Common culprits include the power brick from a streaming stick you replaced two years ago, the HDMI cable from a DVD player you donated, charging cables for gaming controllers you no longer own, and the coaxial cable from when you had cable TV.
Most people find two to five dead cords in a typical entertainment setup. One person described pulling four cables that belonged to a gaming console they’d sold two years earlier — the cables had been sitting behind the TV contributing to the mess the entire time. This is a near-universal experience, and it’s the reason the audit step matters more than any product you can buy.
Pro tip: Check for duplicate power bricks. If you’ve upgraded a streaming device or soundbar, the old power adapter often stays plugged in to the power strip, taking up an outlet and adding one more cord to the tangle.
Right-Sizing Cable Lengths
A six-foot HDMI cable connecting a device that sits one foot away from the TV creates five feet of excess cord. That slack has to go somewhere, and it ends up looped, tangled, and taking up space in your cable box or raceway. Excess cable length is one of the biggest drivers of messy cable systems, and it’s one of the easiest to fix.
Measure the actual distance from the device to the TV before buying replacement cables. A streaming stick mounted on the back of the TV needs a one-foot HDMI cable at most. A gaming console sitting on the shelf below the TV needs three feet, not six.
If you have a cable that needs to stay long — maybe you occasionally move the console to a different room — coil the excess neatly and secure it with a velcro tie. But for permanent installations, the right-length cable removes the problem entirely.
Bundle Cables by Destination, Not by Type
Most people group cables the wrong way. They bundle all the HDMI cables together, all the power cords together. That’s logical but wrong. The system that actually works is destination bundling: everything that goes to the TV in one bundle, everything that goes to the gaming console in another.
Why destination bundling works: each bundle runs as a single unit. When you add a new device, you add one new bundle. When you remove a device, you pull one bundle.
The system stays readable because the question is never “what type of cable is this?” — it’s “where does this go?” That’s the question you actually need answered at 10 PM when you’re troubleshooting a blank screen.
One thing to keep in mind: keep power cords and signal cables (HDMI, optical, ethernet) in separate bundles, or at minimum on separate sides of a raceway. Running power cables tightly alongside HDMI cables can cause electromagnetic interference — picture stuttering or audio drop-outs, especially on longer runs. This isn’t theoretical. It’s the first thing AV forum users troubleshoot when they get intermittent signal issues after a cable reorganization.
For the ties themselves, velcro wins over zip ties every time for home use. Zip ties can’t be undone without cutting, which means the next time you add a cable, you destroy the system and start over. Worse, over-tightening zip ties compresses power cord insulation — a real fire risk outlined in electrical cord safety guidelines from HVCC Environmental Health and Safety.
The VELCRO Brand ONE-WRAP Cable Ties are 8 inches by half an inch per tie, and one tie handles four to six standard cables. The ONE-WRAP design means the same side is hook and loop — it wraps around itself and physically cannot be over-tightened enough to damage insulation. A 100-pack lasts years across every cable project in your home.
Pro tip: Use different-colored velcro ties or color-coded washi tape flags for different destination bundles — black for power bundles, yellow for gaming, blue for AV. When you need to trace a cable later, you can follow the color instead of crawling behind the TV stand with a flashlight.
The same destination bundling approach works well for desk cable management — once you learn the method for your TV setup, applying it to your desk takes about fifteen minutes.
TV on a Stand: The Three-Zone System
A TV stand setup has three separate cable problems happening at once. There’s the spaghetti at the back of the TV, the power strip buried in a cave at the back of the shelf, and the cable that runs from the stand to the outlet across the floor or baseboard. Solving only one of those three solves about 30 percent of the mess. You need to address all three.
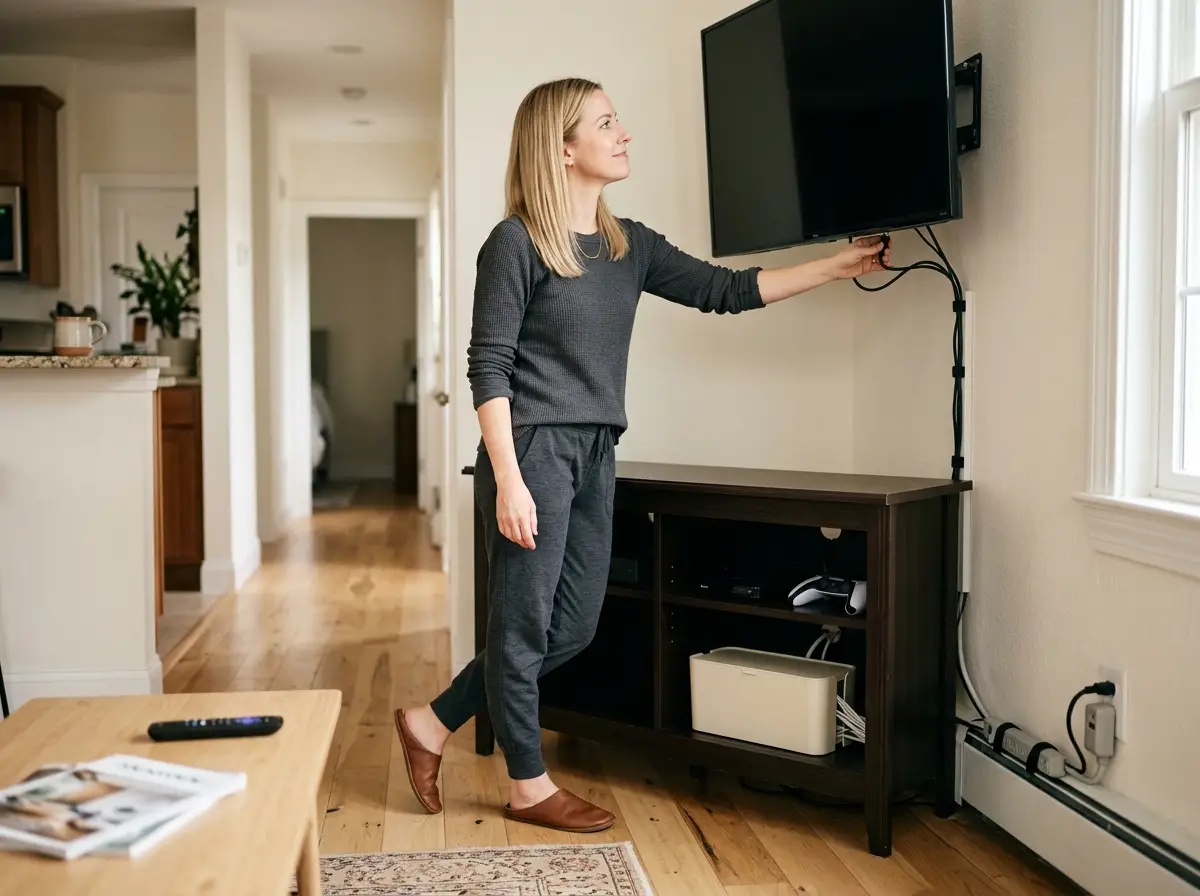
Zone 1 — The back panel. Cables from your devices plug into the TV and run down the back of the stand. Group them into destination bundles (as described above) and route each bundle down the back spine of the TV stand using adhesive cord clips spaced six to eight inches apart. The clips keep bundles from sagging into a hammock of cables between the shelf and the floor.
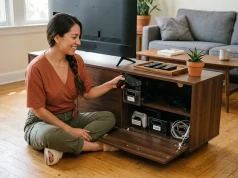
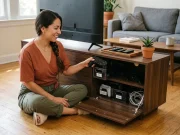
Zone 2 — The cable box. Your power strip and all the excess cord slack live inside a cable management box on the bottom shelf. This is the single upgrade that makes the biggest visual difference — instead of seeing a tangle of power bricks and coiled cords, you see a clean box with a lid. The catch: measure your power strip first.
The D-Line Cable Management Box at 12.75 inches long by 5 inches wide fits power strips up to about 8 inches — a standard six-outlet strip. If your setup doubles as a charging station, the NTONPOWER Cable Management Box at 12.2 by 5.4 by 5.1 inches has a built-in phone and tablet stand on the lid, which keeps one more cable off the floor. If you already have a TV stand with built-in cable management, you might not need a separate box at all.
Before you buy any cable box, measure your power strip. A six-outlet strip is typically eight to ten inches long. A twelve-outlet strip won’t fit in most cable boxes — check the spec. “Bought a cable management box but the power strip didn’t fit” is one of the most common one-star reviews across every cable box on Amazon.
Zone 3 — The baseboard run. One cord exits the cable box and runs to the wall outlet. This single cord goes through an adhesive raceway along the baseboard. The D-Line Cord Hider Kit covers 13.12 feet in a half-round profile that sits flush against the baseboard, and it’s paintable so it can match your wall. The snap-on lid means you can add a cable later without peeling up the adhesive — just pop the cover, drop in the cable, and snap it shut.
Measure the actual run from your cable box to the outlet before ordering. A typical TV stand to outlet distance is six to eight feet along the baseboard. If your outlet is directly behind the TV stand — within three feet — you might not need a raceway at all. A cable management box on its own handles the problem.
The result: instead of twelve cables coming out from behind the stand in all directions, one cord exits the box and disappears into the baseboard. That’s it.
Wall-Mounted TV: Two Options, One Decision
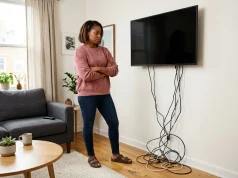
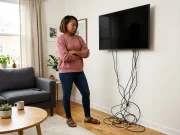
A wall-mounted TV is the single biggest source of cable anxiety in home organization. Without a TV stand, cables have nowhere to route. They just drape from the back of the TV to the outlet below — four to six feet of hanging black cable against a clean wall. The fix depends on how permanent you want to go and whether you rent or own.
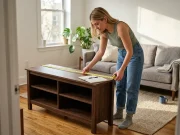
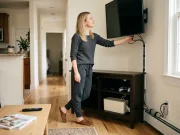
Option 1 — The furniture trick (zero installation). Push a narrow bookshelf, console table, or media cabinet flush against the wall directly under the wall-mounted TV. Route all cables straight down behind the furniture piece. The cables disappear completely — no tools, no adhesive, no deposit risk. This is the approach most professional stagers use for listing photos, and it works just as well for daily life.
The catch: the furniture must sit flush against the wall, and it needs to be tall enough that the gap between the TV and the top of the furniture doesn’t expose too much cable. If the furniture-under-the-TV approach appeals to you, there are living room storage ideas that work for renters that serve double duty as cable concealers and display surfaces.
Option 2 — Adhesive wall raceway (renter-safe with proper removal). A paintable cord channel runs vertically from the TV down to the outlet. The channel mounts with adhesive — no screws, no holes. The D-Line Cord Hider Kit mentioned in the TV stand section includes vertical-run capability, and the half-round profile holds two to three standard cables per channel. Paint it to match your wall and it nearly disappears.
For routing individual cables along the back edge of furniture or along a wall corner, Command Cord Clips by 3M hold lightweight cords with removable adhesive. Space them six to eight inches apart to prevent cable sag.
Option 3 — In-wall cable routing (homeowners only). An in-wall cable kit installs two wall plates — one behind the TV, one at outlet level — with a power-safe channel running through the wall. Clean, professional, invisible. It also requires cutting drywall, which means this option is for homeowners only.
If you rent, do not do this. Drywall patching that passes a move-out inspection is harder than it looks, and the cost of a botched repair easily exceeds what you’d spend on adhesive raceways.
Pro tip: The most common wall-mount cable mistake is picking Option 3 in a rental because “I’ll patch it when I leave.” You might patch it well enough to fool yourself. You probably won’t patch it well enough to fool a landlord doing a walkthrough with a flashlight.
The Renter’s Deposit Safety Map
The most common renter cable management mistake isn’t damage — it’s pulling cold adhesive off the wall at move-out and taking paint with it. The method was deposit-safe. The removal technique was wrong. This section maps every cable management method by actual deposit risk so you know exactly what you can do without landlord permission.
Zero risk (no adhesive, no mounting, no contact with walls): Velcro cable ties, cable management boxes, cable sleeves, open-weave baskets behind furniture, and furniture repositioning. These methods leave zero trace. Use them freely in any rental without a second thought.
Safe with correct removal: Adhesive raceways (D-Line, similar brands) and adhesive cord clips. These work well for years — the problem comes at move-out when the adhesive needs to come off. The heat-release technique is what separates a full deposit refund from a paint damage charge.
Here’s the step-by-step: aim a hairdryer on low heat at the adhesive section for 30 to 60 seconds, keeping the nozzle about three inches from the wall surface. The heat softens the adhesive bond without affecting the paint underneath. Then peel the raceway slowly at a shallow 30-degree angle — the key word is slowly. Never yank straight out from the wall.
Work in small sections, reheating as you go. After the raceway is off, clean any remaining adhesive residue with rubbing alcohol or Goo Gone and a soft cloth. Done correctly, the wall looks exactly like it did before installation.
Cold-pulling — peeling adhesive without heat — is the mistake that causes damage. The adhesive is stronger than the paint bond when it’s cold. You pull the raceway off and a strip of paint comes with it. Every renter who has described “adhesive damage” from cable raceways made this exact mistake.
The same no-drill cable management approach applies to desk setups in rental spaces.
Requires landlord permission: Wall anchors for heavier cable organizers, wall plates, anything that involves screws going into drywall. Some landlords allow this if you agree to patch and paint at move-out. Get it in writing before you pick up the drill.
Never in a rental: In-wall cable routing (cutting drywall), hardwired power outlets, any permanent modification that requires professional patching. The security deposit math never works in your favor.
Pro tip: If your apartment has cheap builder-grade paint (common in newer complexes), test one adhesive strip in an inconspicuous spot first — behind a piece of furniture or inside a closet door. Wait 48 hours, then do the heat-release removal. If the paint lifts even with heat, stick to zero-risk methods only.
One more renter detail worth knowing: command strips marketed as “damage-free” are rated for specific wall surfaces. They perform differently on matte vs. semi-gloss finishes, and freshly painted walls (less than 30 days old) don’t hold adhesive well regardless of brand. If the previous tenants’ touch-up paint job is still tacky, give it time before mounting anything with adhesive backing.
The practical renter workflow: a cable management box on the shelf, velcro ties on the bundles, and an adhesive raceway along the baseboard with the heat-release technique in your back pocket. That combination handles every cable behind your TV at zero deposit risk.
Why TV Cables Get Messy Again (and the Fix)
Six months after the perfect cable setup, the gaming console gets an upgrade. Then a new streaming device arrives. Then a soundbar. Each device brings two new cables — a power cord and a signal cable — and removes nothing. This is cable creep, and it’s the real reason organized cable systems fail. Not poor organization. No intake protocol.
Cable creep follows a predictable pattern. You organize everything on a Saturday afternoon. It looks perfect. Three months later, a new device arrives. You add its cables in a rush because the game needs to be played tonight, not after a cable reorganization session.
Six months later, you’ve added three devices and removed nothing. The organized setup now has twice the cable count and no one remembers which cord goes where. Every person who has ever described their cable management system “falling apart” is actually describing cable creep — not a failed system, but a system without an intake rule.
The one-in-one-out rule for electronics: When a new device arrives, the old device AND its cables leave at the same time. New gaming console means the old console’s power brick, HDMI cable, and controller charger go into a donation bag or the recycling — not into a drawer “just in case.” If you keep the old cables, you’ll never use them, and they’ll migrate back behind the TV during the next cable-adjacent activity.
Label both ends of every cable. This is the single most underrated cable management step. Use washi tape and a permanent marker (free) or dedicated cable ID tags (more durable). Label the device end AND the power strip end of every cable.
The test: if you had to unplug everything and move tomorrow, could you reassemble the setup without guessing? If the answer is no, your cables need labels. The new gaming console arrives and you’re looking at four unlabeled cables at the back of the TV, all the same black color, all running to the same power strip — that’s what labeling prevents.
The quarterly five-minute check. Once every three months, pull the TV stand a few inches from the wall (or peek behind a wall-mounted TV with your phone flashlight) and look for any cable that doesn’t belong to a current, actively used device. Remove it. This takes five minutes. It’s the maintenance cadence that prevents cable creep from rebuilding the mess you spent a Saturday afternoon fixing.
Assign a small labeled bag or hook at the back of your TV stand as a cable staging zone — a temporary holding spot for cables that are between devices. The old streaming stick went to the donation box but the new one hasn’t arrived yet. Its cable sits in the staging zone instead of floating loose behind the TV. At the next quarterly check, anything still in staging either gets assigned a permanent route or gets removed.
The same quarterly check works for keeping your desk organization system that holds up the same way — cable creep doesn’t just happen behind the TV.
Conclusion
Three things matter for a TV cable system that actually lasts:
- Start with the audit, not the product. Removing dead cords is the most effective step and it costs nothing.
- Bundle by destination, not by type, and keep power cords separate from signal cables. This prevents interference and makes future device changes easy — you add or remove one bundle at a time.
- The system only lasts if you have an intake protocol. One-in-one-out for devices and a quarterly five-minute check prevent cable creep from undoing everything.
In three months, spend five minutes checking for new cables that arrived without a home. Pull the old device out, pull its cables out, and your system resets itself.
Start by unplugging everything and counting what’s back there. The number is almost always higher than you think. That’s the moment the system begins.
Q1 How do I hide TV cables without drilling?
Push a narrow console table or bookshelf flush against the wall directly under the TV — all cables route behind the furniture and disappear completely. For exposed baseboard runs, an adhesive cord raceway mounts without screws and can be painted to match the wall. Both methods are fully renter-safe and removable.
Q2 What is the best way to organize cables behind a TV stand?
Use the three-zone system: velcro-tie cable bundles grouped by destination along the back panel, a cable management box on the bottom shelf for the power strip and excess cord, and a single cord running through a baseboard raceway to the outlet. The goal is one visible cord, not twelve.
Q3 How do I stop my TV cables from getting tangled again?
Cable creep — adding new device cables without removing old ones — is the main cause of reversion. Apply a one-in-one-out rule for every new device and do a five-minute quarterly check behind the TV stand to remove dead cords. Label both ends of every cable so you always know what connects where.
Q4 Can I run TV cables through the wall myself?
If you own your home, an in-wall cable kit with two wall plates is a clean permanent solution, though it requires cutting drywall. If you rent, never cut into walls — adhesive raceways and the furniture positioning trick give you the same clean look without risking your security deposit.
Q5 What are the best no-drill cable management products for renters?
Velcro cable ties for bundling, a cable management box for hiding the power strip, adhesive cord clips for routing individual cables, and a paintable adhesive raceway for baseboard runs. All mount without tools and remove cleanly with the heat-release technique at move-out.