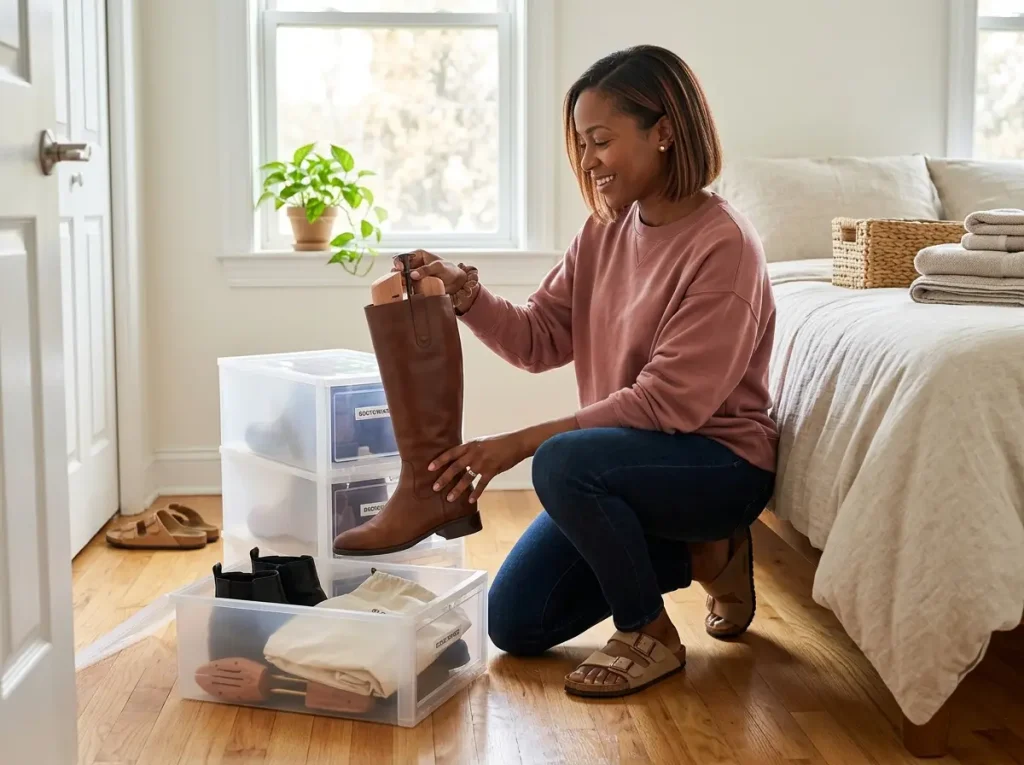
You reach into the bin in October, pull out the winter boots you packed away in spring, and they smell like a basement. There’s a faint gray bloom in the lining, and they felt bone-dry the day you sealed them. The fix here is almost never a fancier bin; off-season footwear fails in storage for two reasons people rarely name, packed a little too wet and sealed a little too tight, and both are easy to get right once you know what you’re solving for. This is how to store seasonal shoes so they hold their shape, stay mold-free, and are easy to find when the season flips back, even in a rental with no spare closet and no permission to drill. It’s the dormant half of the broader shoe-organization system, the bin you won’t open for six months rather than the everyday rack.
Quick Answer
Off-season shoes survive storage when they go in dry and keep breathing while they wait. The short version:
- Rotate on a real temperature trigger, not the calendar.
- Clean each pair and air-dry a full 48 hours.
- Hold the shape with shoe trees, boot shapers, or rolled paper.
- Use breathable boxes or vented bins, never sealed plastic.
- Add two silica packets inside each shoe, cedar in the bin.
- Label by season and store somewhere cool, dry, and visible.
When to Rotate Your Seasonal Shoes (Not by the Calendar)
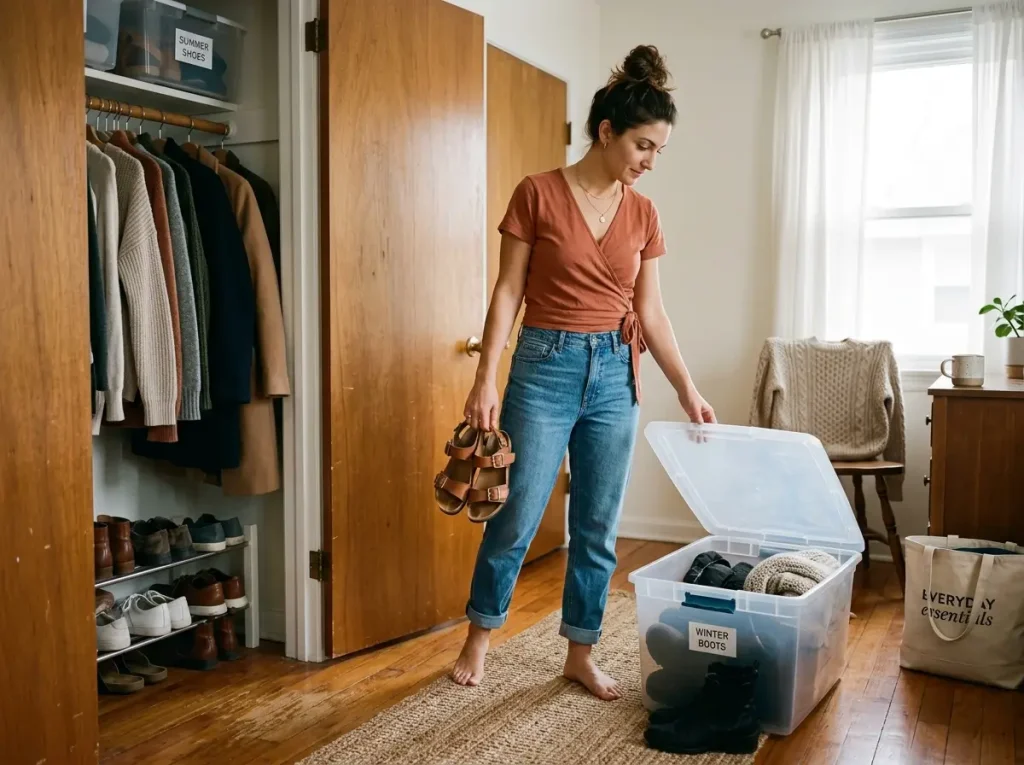
Conventional wisdom says rotate when the weather changes. That’s too vague to act on, especially in a city where it’s 72 degrees one week and 45 the next. So people split into two camps. Some swap too early and spend the next month digging back into a sealed bin for the boots they just packed, and some never swap at all, which is how a closet floor ends up holding both snow boots and flip-flops in July. The trigger matters more than the date.
The temperature trigger that actually works
Stop watching the calendar and start watching the thermostat. The practical rule that comes up again and again is to rotate when the off-season temperature is consistently crossing the mid-50s to around 60 degrees, which lands most people in March or April for the spring-forward swap and September or October for the fall one. That’s the window where your daily footwear genuinely changes, not the day the season technically turns. It’s the same trigger that drives a good seasonal closet rotation, and pairing the two means you’re hauling out the storage bins once instead of twice.
The three-day test
If the thermometer feels like overkill, use your own behavior. When you’ve reached past your everyday pairs for the off-season ones three days in a row, it’s swap day (your feet track the season better than the calendar does). And for sorting what’s truly off-season from what stays out year-round, ask whether you’ve worn it in the last six weeks. If a pair has sat untouched through six weeks of normal life, it belongs in the bin, not on the rack eating space.
Why a half-swap beats one big purge
Here’s the part nobody mentions about seasonal shoe rotation. A clean, total swap feels satisfying, but it sets you up to reopen the bin the first warm October afternoon. Keep a small year-round overlap instead, one versatile pair and one rain pair that bridge the seasons, so a single off-temperature day doesn’t send you unpacking everything you just stored. This is the opposite problem from your everyday closet rotation, where access is the whole point. With the dormant bin, the goal is to open it as rarely as possible.
Clean and Fully Dry Every Pair First (This Is Where Mold Starts)
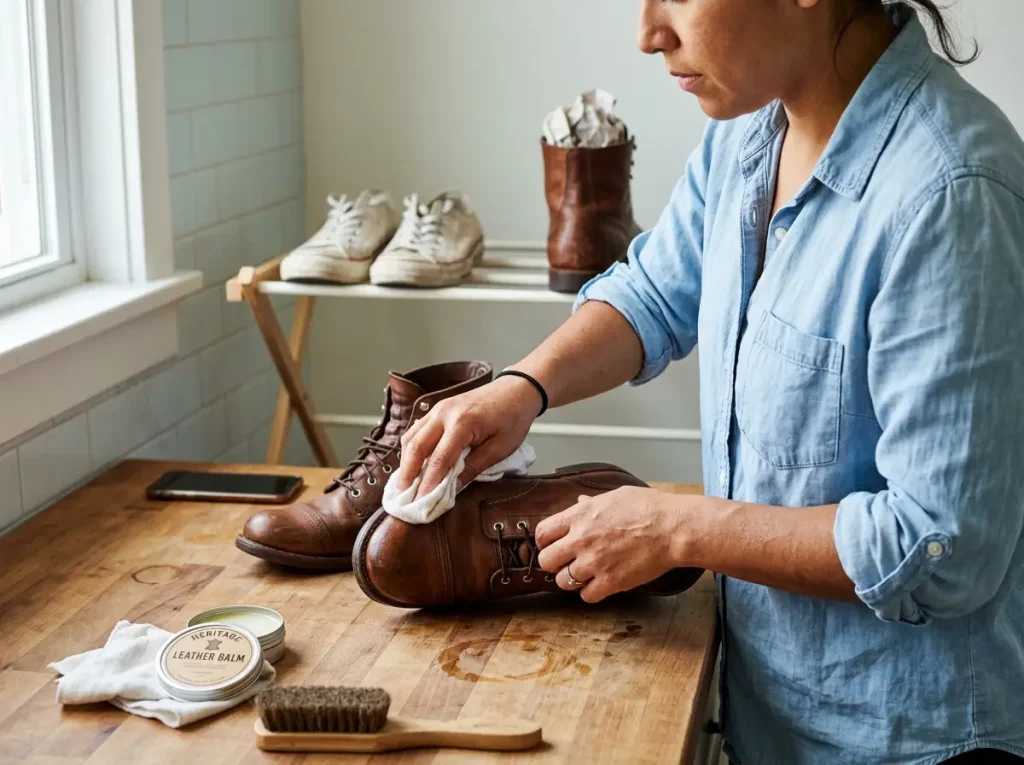
This is the step that decides whether you open a fresh bin or a musty one in six months, and it’s the step everyone rushes. The musty smell and the gray bloom aren’t really about the bin. They’re about moisture you sealed inside with the shoes. Get this right and the rest is easy. Get it wrong and no container on earth will save you.
Clean by material
Clean each pair according to what it’s made of. Leather wants a wipe with a dedicated leather cleaner and, critically, a coat of leather conditioner before it goes away, because six dry months in a bin is exactly when leather cracks. Suede needs a suede brush and a suede eraser for scuffs, never water. Canvas sneakers spot-clean with a little soap, and anything washable should be fully dry before it’s anywhere near the bin. Conditioning leather first is the move people skip and regret, and it’s the best way to prevent leather cracking over a long, dry storage stretch. Replacing the oils now is far cheaper than replacing the boots later.
The 48-hour dry-down
Here’s the mechanism behind the musty bin, because once you understand it you’ll never rush this part again. The insoles and linings of a shoe hold what people call wear-moisture, the days of foot sweat soaked into the footbed. The surface of a boot can feel completely dry while the lining is still damp underneath. Seal that into a warm, still container and you’ve built a small mildew incubator, and you’ll smell the result by month two. So air every pair out a full 48 hours away from direct heat before storing. Heat seems faster, but it cracks leather and loosens glue, so a fan or an open window does the job better.
Pull the insole out and dry it separately. It’s the single dampest part of the shoe and the slowest to dry, and leaving it in is how a pair that “felt dry” still molds in storage.
A quick readiness check
Before a pair goes in, do a ten-second test. Pull the insole and press the back of your hand to the footbed. If it feels even slightly cool or damp, it isn’t ready, because cool usually means moisture still evaporating. Stuff a sheet of newspaper inside overnight if you’re not sure. Dry shoes feel room temperature all the way through, not just on the outside.
Hold the Shape So Boots and Shoes Don’t Crease
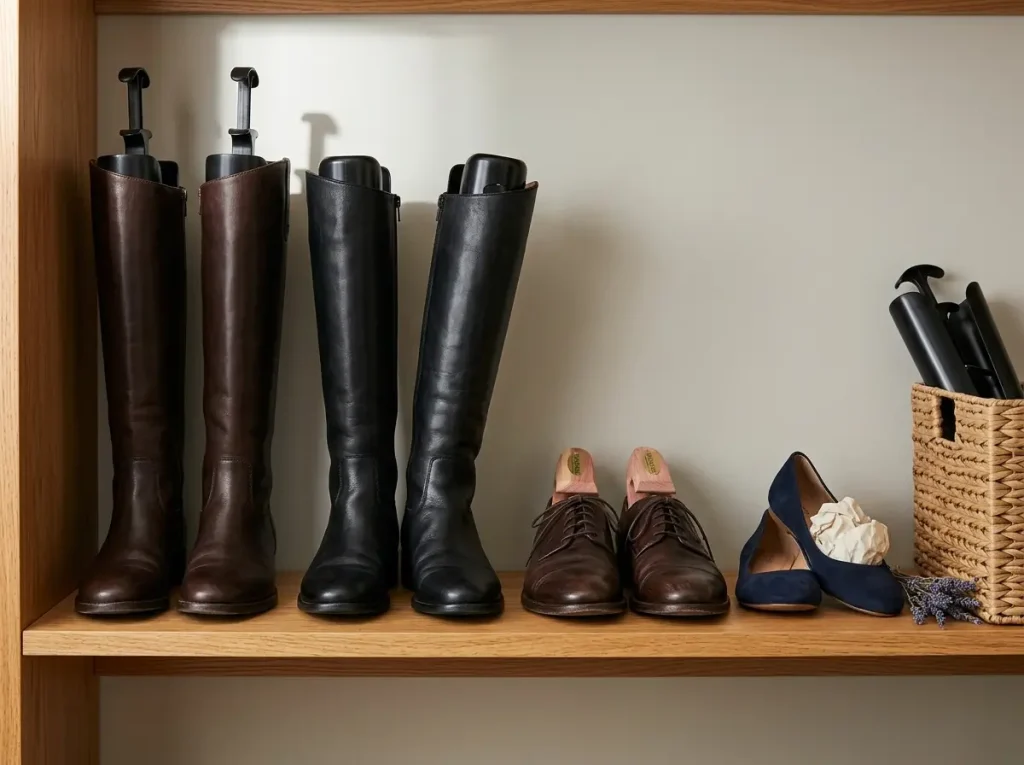
A tall boot folded over in a bin develops a permanent crease at the ankle within a couple of months, and a soft loafer left empty slowly collapses. Holding the structure is simple, and most of what you need you already own. The point is to keep every pair shaped like a foot is still in it.
Shoe trees for leather and dress pairs
For flats, loafers, and leather dress shoes, something in the toe keeps the shape and pulls a little residual moisture out at the same time. The free version is a sheet of acid-free tissue or even a rolled section of newspaper stuffed firmly into the toe box. If you want the upgrade, Woodlore Cedar Shoe Trees are the rare buy that does triple duty, holding the shape while the aromatic cedar absorbs lining moisture and quietly deters moths in a closed bin. The Woodlore Cedar Shoe Trees are sized by foot rather than one-size-fits-all, so check the sizing before ordering, and they’re worth it mainly for leather pairs you actually care about keeping for years.
Boot shapers for tall boots (or the free version)
Tall boots are where shape really suffers, so store boots upright with the shaft supported, never folded over. Boot shapers, sometimes sold as boot trees, get recommended everywhere, and they work. But organizing threads are full of people who swear a cut length of pool noodle or a tightly rolled magazine does the same job for nothing, and honestly, for most boots they’re right.
If your boots are expensive or the leather is thin and prone to creasing, Boot Shapers are the safer call. The Boot Shapers slip into the shaft and hold it vertical through six dormant months, though very wide calf boots may need the rolled-towel method instead since the inserts are a fixed width. If you have spare rod space, boot hangers or boot clips that grip the top of the shaft let you hang boots vertically and skip the floor entirely.
Tissue and rolled paper for the rest
Everything else, the canvas sneakers and the casual flats, just needs the toe filled so it doesn’t fold. Acid-free tissue is gentlest on light-colored linings, but plain paper is fine for most pairs. Don’t overthink this one. The goal is shape, not perfection.
Pick the Right Containers (and Why Sealed Bins Grow Mold)
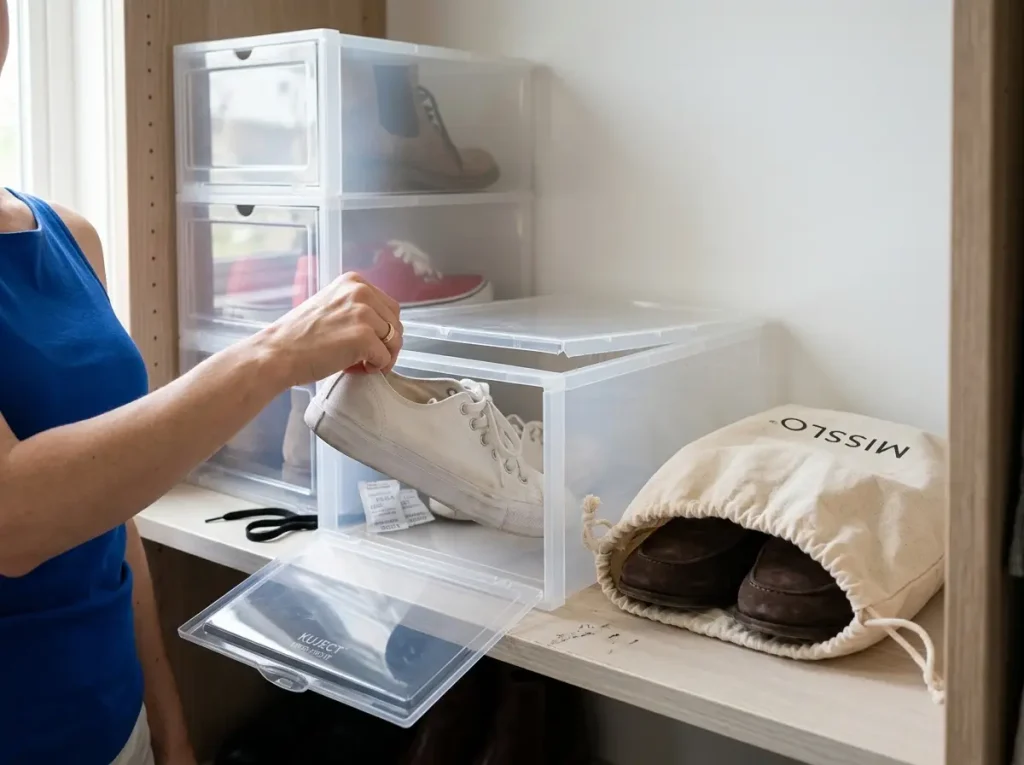
This is the reframe that changes everything about storing seasonal shoes. The container most people reach for, a tidy airtight tote with a snapping lid, is the worst possible choice. Breathability beats a tight seal every single time, and once you see why, the rest of your storage logic flips.
Why sealed plastic is the trap
The same sealed bin that keeps dust out also keeps the shoe’s own moisture in, and that’s the whole problem. You pack clean-feeling shoes, snap the airtight lid, and the residual lining moisture has nowhere to go. Add a little warmth and stillness and you get mildew by month two. It’s the same reason vacuum storage bags backfire under a low bed, trapping moisture against fabric instead of letting it escape.
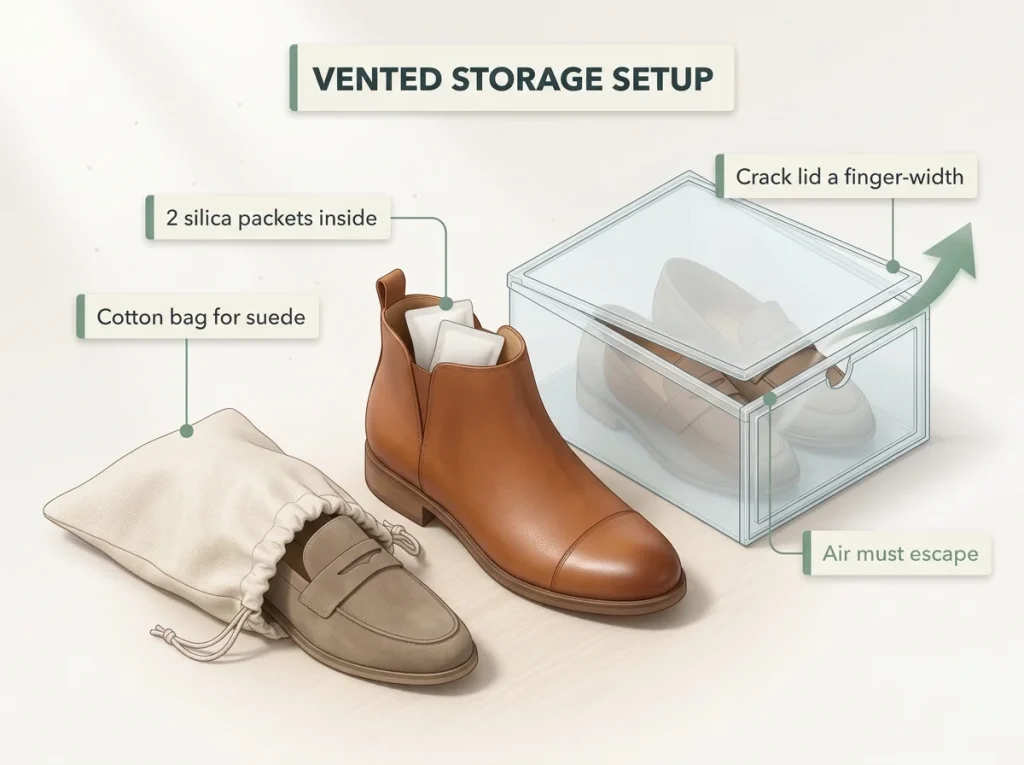
The fix is a short chain you can’t skip: cure the shoes 48 hours, tuck silica inside, then store in something that breathes, either ventilated bins with a cracked lid, a bin with a few holes drilled in the back, or a breathable box, and keep the storage spot’s humidity in a comfortable middle range rather than damp. The EPA puts the mold threshold at 60 percent indoor humidity, so the goal is just to stay comfortably under that. That chain is what actually prevents mold, not the brand of container.
Clear, vented boxes for most pairs
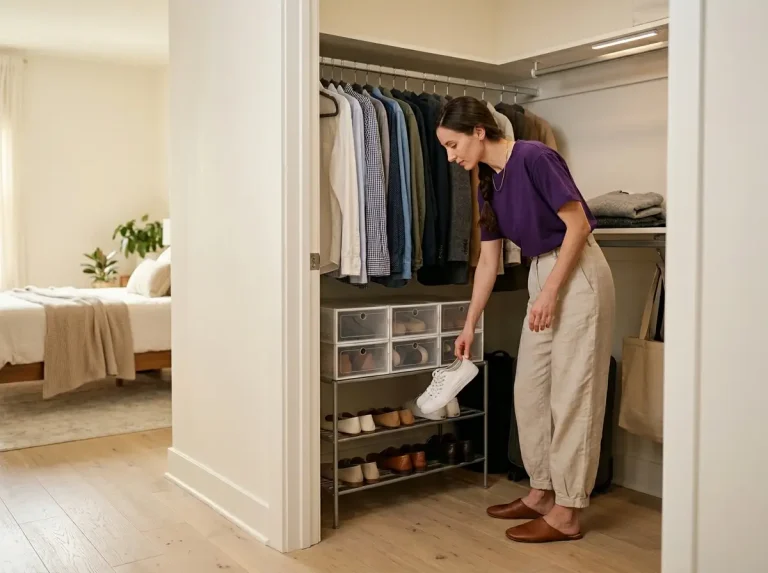
For the bulk of your pairs, clear and stackable wins for one unglamorous reason. An opaque bin shoved to the back of a shelf becomes a forgotten bin, and a forgotten bin is how you re-buy sandals in June that you already own. Clear sides let you see what’s inside without unstacking the whole tower. The Kuject Clear Drop-Front Stackable Shoe Boxes are a solid pick here because the drop-front means you can grab a pair from the bottom of the stack without dismantling it. Just remember the caveat that applies to any plastic, including the Kuject Clear Drop-Front boxes: crack the lid or add a few ventilation holes so they don’t become the sealed-bin trap. Free liquor-store or shipping boxes with the flaps left loose work too, as long as the cardboard stays somewhere dry.
Breathable bags for leather and suede
Leather and suede get their own rule. Never seal them in plastic, because plastic traps the exact moisture that mildews the nap and dulls the finish. They need to breathe. The free solution most people already have is a clean cotton pillowcase, one pair per case, loosely tied. If you’d rather have something sized for the job, MISSLO Cotton Breathable Dust Bags are inexpensive drawstring cotton dust bags that protect from dust while letting air move. The MISSLO Cotton Breathable Dust Bags come in a few sizes, so size up for tall boots, and the only real limit is that they guard against dust, not crushing, so the bagged pairs still need a rigid bin around them.
Where to Actually Put the Bins (Under-Bed, Top Shelf, Dead Space)
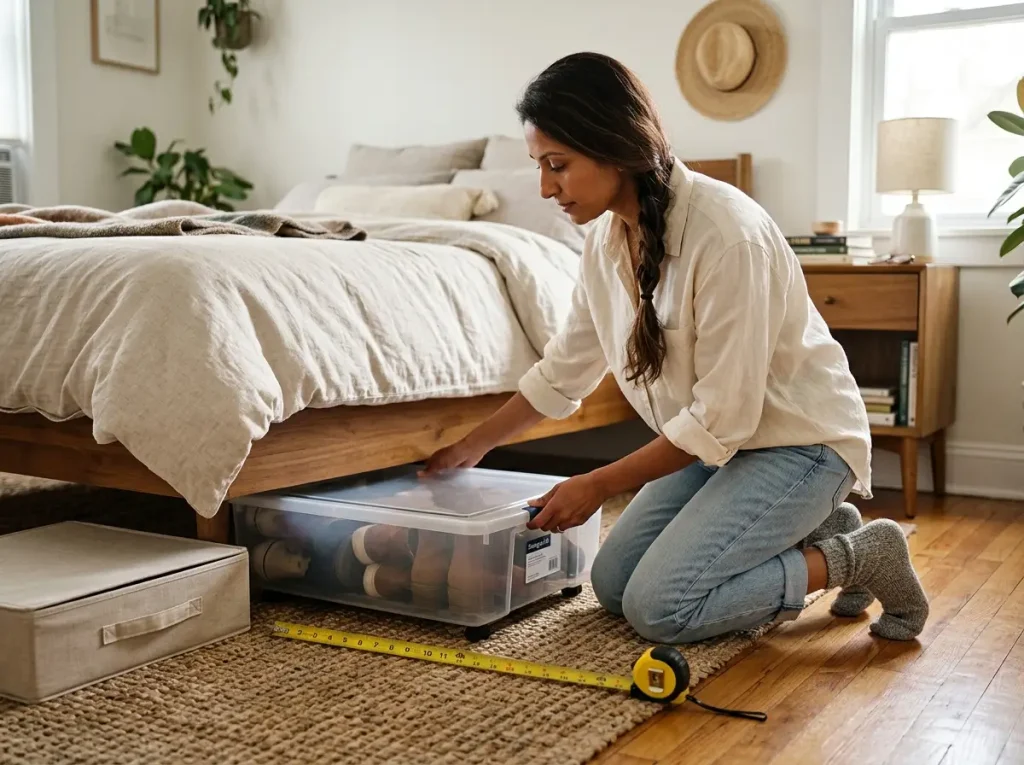
“Store it under the bed or on the top shelf” assumes both spots fit, and in a small space they often don’t. A rolling bin needs more clearance than a flat one, a tall-boot box won’t slide under a low platform bed, and a rental top shelf is shallower than you’d guess. The trick is to measure before you buy, not after.
Under the bed — measure clearance first
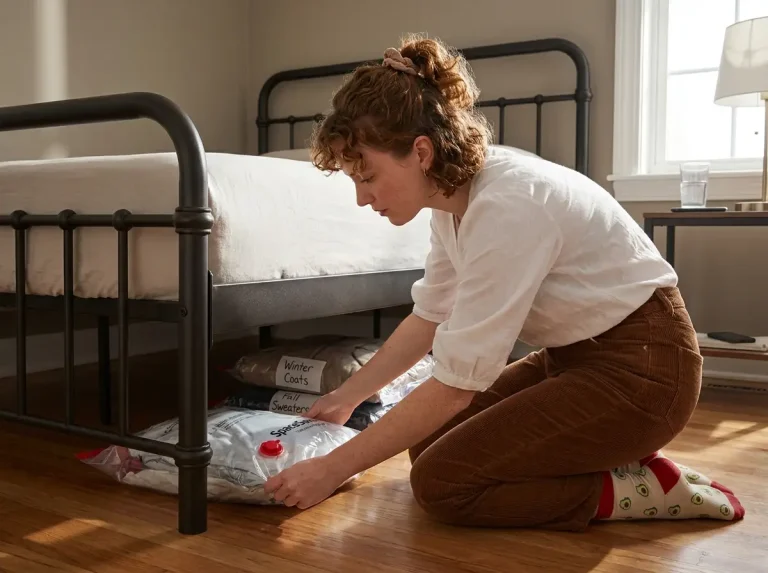
Under-bed space is the best dead space most renters have, but it punishes guessing. Rolling bins ride higher than flat ones because of the wheels, so a bin that rolls needs noticeably more floor-to-frame clearance than a low flat box, and whether a rolling or flat bin fits usually comes down to that gap. Platform beds tend to run low while metal frames sit higher, so measure your actual gap before ordering anything.
The StorageLAB Under Bed Storage Containers with Wheels are a good rolling option with a clear top so you can see the pairs inside, and the StorageLAB rolling set slides out one-handed, though the wheels mean you must confirm your clearance first. If your bed sits too low for wheels, the flat IRIS USA Under Bed Storage Box needs less height, and if you want to keep a platform bed but buy back some clearance, a set of EclatBain Bed Risers lifts the frame a few inches without any permanent change, a no-drill, renter-friendly fix that matters when you’re renting.
The closet top shelf (and its real depth)
The top shelf is the other classic spot, with one catch nobody warns you about. Rental closet top shelves are often shallower than a standard shelf, which means a tall-boot box stood upright may hang off the front edge or refuse to fit at all. Lay those boxes flat instead, or send the boots elsewhere and reserve the top shelf for flatter pairs. Keep the bins up there clear or labeled, because the top shelf is the single easiest place to forget a bin exists.
Dead space and original boxes
Look for the space you’re not using. The original shoe boxes that pairs came in are free, stackable, and easy to vent with a few holes, and they’re perfect for the closet floor or a high shelf. Storage furniture, an ottoman that opens or a bench with a hollow base, hides a surprising number of pairs. And for tall boots that won’t fit under a low bed, stand them upright on the closet floor against the back wall rather than forcing them flat where they’ll crease. Use the awkward corners first.
Stop Mold and Odor While the Shoes Are Stored
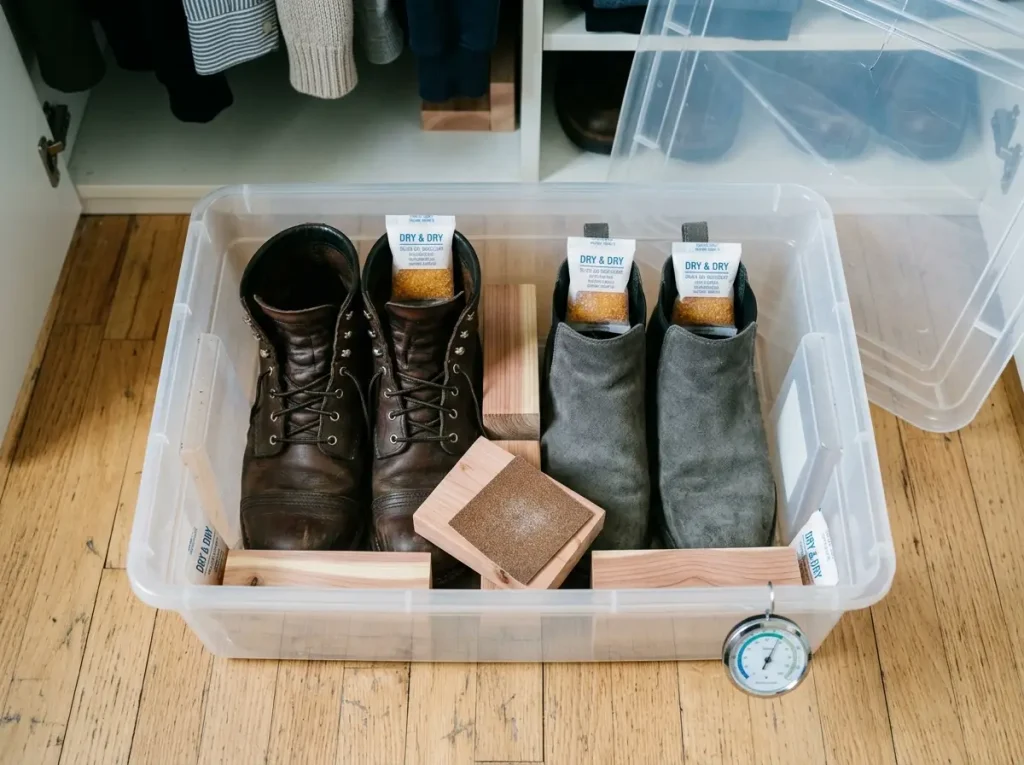
Even a dry, breathable setup benefits from a little insurance, because storage spaces drift damp in spring and humid in summer. Two cheap things do almost all the work of moisture and odor control, and both are reusable for years. The catch is putting them where the moisture actually is.
Silica gel — inside the shoe, not just the bin
The usual advice is to toss a silica packet in the bin and call it done. In practice that does almost nothing, because the damp is inside the shoe, not floating around the bin. Put two packets inside each shoe, right in the footbed area, and scatter a few more loose in the corners of the bin. If you’ve saved the little packets that come with shoes, vitamins, and electronics, dry them in a low oven and reuse them for free. For a dedicated supply, Dry & Dry Rechargeable Silica Gel Packets use indicating beads that change color when saturated, so you can see when they’re spent. The Dry & Dry packets bake back to dry in a low oven and last for years, which makes them a buy-once item rather than a seasonal repurchase, though the indicating beads do fade over many cycles.
Two packets inside each shoe beats a handful loose in the bin. The moisture you’re fighting lives in the lining, so the desiccant has to sit where the lining is, not three pairs away.
Cedar for moisture and moths
Cedar earns its place in a closed bin because it does two jobs at once, pulling residual damp out of the air and keeping moths off anything wool-lined, like shearling boots. Homode Cedar Blocks are an easy way to add it, and the Homode Cedar Blocks come with a small sheet of sandpaper, which matters more than it sounds. Cedar stops working when the surface oxidizes, so a light sanding once a season brings the scent and the absorbency back. Cedar offcuts or cedar chips from a hardware store, or a few lavender sachets, do a similar job if you’d rather not buy a set. Activated charcoal pouches are another option when a pair tends to hold odor, since charcoal absorbs smells that cedar leaves behind.
Airflow and a humidity check
Where you put the bin matters as much as what’s in it. Keep it somewhere cool, dry, and ventilated, and avoid the three worst spots, basements, attics, and garages, where humidity and temperature swings are highest. A heated, air-conditioned closet interior is almost always the safer choice. If you want to be sure, a cheap hygrometer tells you whether your storage spot sits in a comfortable mid-range or runs damp enough to need attention. It’s the difference between guessing and knowing.
The Budget Version and Labeling So You Find Them Again
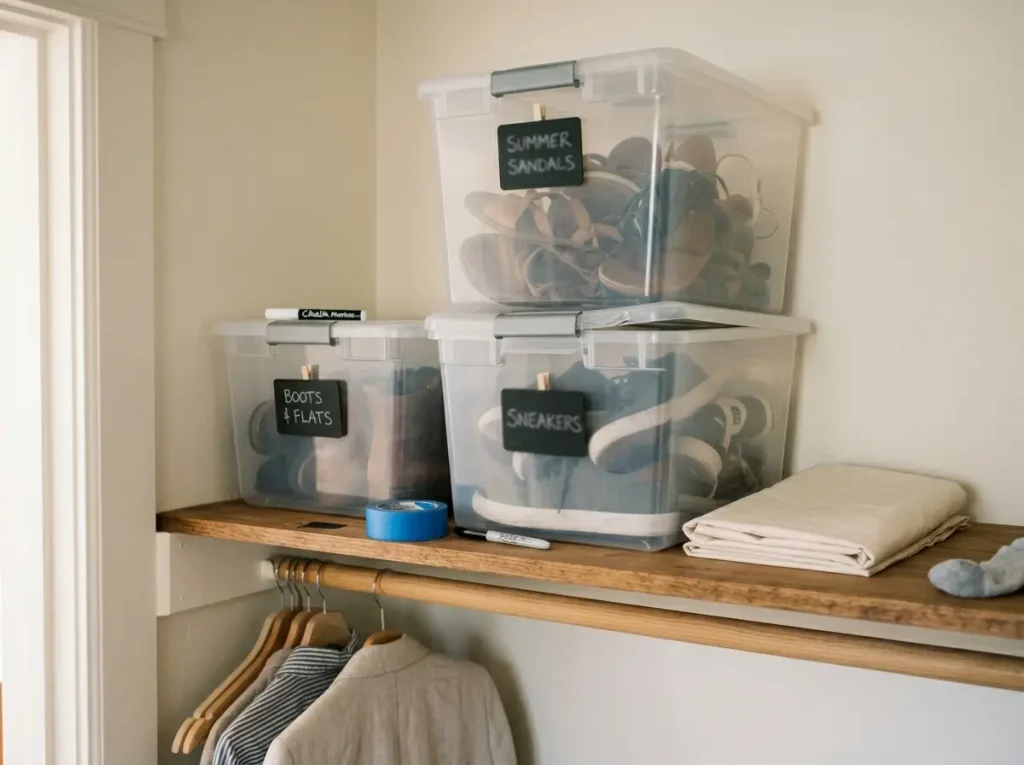
Here’s the honest truth about off-season shoe storage. The most common failure isn’t mold, it’s forgetting where the bin went and re-buying things you already own. You can do this entire system with stuff already in your apartment, and the part that actually saves you money is making the bin easy to find again.
The no-buy version
Strip it all the way down and almost nothing on this list is mandatory. Clean cotton pillowcases are your dust bags, rolled magazines or cut pool noodles are your boot shapers, salvaged and oven-dried packets are your silica, and free boxes from a shipping run are your bins (liquor stores hand out the sturdiest ones, cardboard dividers included). So what’s genuinely worth buying? For what it’s worth, two things earn it: a set of cedar shoe trees if you own leather pairs you want to last, and one under-bed bin sized correctly to your clearance. Everything else you can improvise.
Label by season so future-you finds them
Store your shoes by season. Label every bin cold-weather, warm-weather, or year-round, and keep the clearest bins where you’ll actually see them. The free version is a strip of painter’s tape and a marker, which peels off cleanly when the contents change. If you rotate often and want something rewritable, Chalkboard Label Stickers wipe clean and relabel for the next swap. The Chalkboard Label Stickers usually come with a chalk pen and stick to plastic bins fine, though on textured surfaces you’ll want to press them down hard or they lift at the corners.
Put the label on the end of the bin that faces out, not the top. Once bins are stacked, you can read the ends but never the tops, and a label you can’t see is a label that doesn’t work.
A 60-second maintenance check
Once in the middle of the storage stretch, give it a minute. Glance at the silica indicator to see if it needs a bake, and confirm the bin is still somewhere visible rather than buried behind a suitcase. That single check is what prevents the classic reverse-rotation failure, the June sandal re-buy, and it costs you about a minute of attention in exchange for not spending money on shoes you already have.
Pack Dry, Store Vented, Label It
Three things carry the whole system. Rotate on a real trigger instead of a date, pack every pair fully dry and let it breathe, because wet plus sealed is the only combination that actually molds, and label and place the bin so the swap back takes minutes instead of an afternoon of digging. Do those and the off-season bin stops being a gamble.
A quick check partway through storage keeps it honest. Around the three-month mark, look at the silica indicator and make sure the bin is still in a spot you’ll see, five minutes that saves you the musty surprise and the duplicate purchase.
Start with the pairs you’ve already stopped reaching for this week. Clean them, dry them properly, and box them right. The rest of the closet can wait its turn.
Frequently Asked Questions
01How do you store seasonal shoes so they don’t get moldy?
Clean each pair, air-dry it a full 48 hours, then store in breathable boxes or vented bins, never sealed plastic, with two silica packets tucked inside each shoe. Keep the bin somewhere cool and dry, not a basement or garage.
02Is it OK to store shoes in plastic bins or containers?
Clear plastic bins are fine as long as they’re vented. Crack the lid or drill a few holes in the back. A fully airtight bin traps the shoe’s own moisture and grows mildew, so leather and suede do better in a breathable cotton bag.
03How do you store boots so they keep their shape over the off-season?
Store boots standing upright and fill the shafts with boot shapers, rolled paper, or a cut pool noodle. A folded-over tall boot develops a permanent crease at the ankle within a couple of months, and the support prevents it.
04Where should you store off-season shoes in a small apartment?
Under the bed works well if you measure floor-to-frame clearance first, since rolling bins need more height than flat ones. The closet top shelf and vented original shoe boxes also work. Use clear, labeled bins so the dormant bin isn’t forgotten.
05When should you rotate your seasonal shoes?
Swap when off-season temperatures consistently cross the mid-50s to about 60 degrees, roughly March to April and September to October. A simpler cue: when you’ve reached for off-season pairs three days in a row, it’s time to rotate.
Disclaimer: ClutterlessNest is a participant in the Amazon Services LLC Associates Program. As an Amazon Associate we earn from qualifying purchases. This article may contain affiliate links — if you buy through them, we may earn a small commission at no extra cost to you. We only recommend products we have tested or genuinely believe in.