
The ring of measuring cups you hung on the cabinet door held for a week, and then one morning it was lying on the cabinet floor with the strip still stuck to the back of the hook. Or you dug out last year’s box of hooks and found the adhesive wouldn’t grab anything. Strips rarely fail on the idea. They fail on the wall, the wait and the load, and 3M’s own instructions on the pack cover all three, which is what keeps damage-free hanging damage-free.
These 12 command strip organization ideas sit in four places (cabinet doors, the cleaning cabinet, cords, and the entry and bathroom doors), followed by the rules that make them hold and a plan for the spare strips.
Quick Answer
Almost any of these spots will hold if the strip is pressed on, left alone, and matched to its load.
- Press the strip on, then wait one hour before hanging anything on it.
- Stick to smooth painted walls, tile, glass or smooth wood, the surfaces 3M lists.
- Match each hook to the weight limit printed on its pack.
- Pull the tab straight down, slowly, to take a strip off.
- Keep spare strips in their original packs inside one labeled bin.
Command Strip Organization Ideas for Cabinet Doors and Kitchen Tools
The cabinet door interior is the best free wall in a kitchen. It is flat, smooth, out of sight, and nobody leans a shoulder on it. That smooth, finished face also suits a removable hook: paint is where strip damage shows, and a cabinet door is a safer first test than a bedroom wall with unknown paint underneath.
Measuring cups and spoons on the inside of the door
In a drawer, measuring cups turn into a tangle, and the one you need is always under the other three. Threaded on a ring and hung from a single Command Medium White Hook, they stay in a row on the door. The 20-hook pack covers several doors, and a ring of cups is among the lightest loads a hook will ever see, though the limit printed on the pack is the number to confirm.
Before you press the strip down for good, hold the hook in place and close the door with the cups hanging there. A hook set level with a shelf edge is how a door ends up refusing to shut.
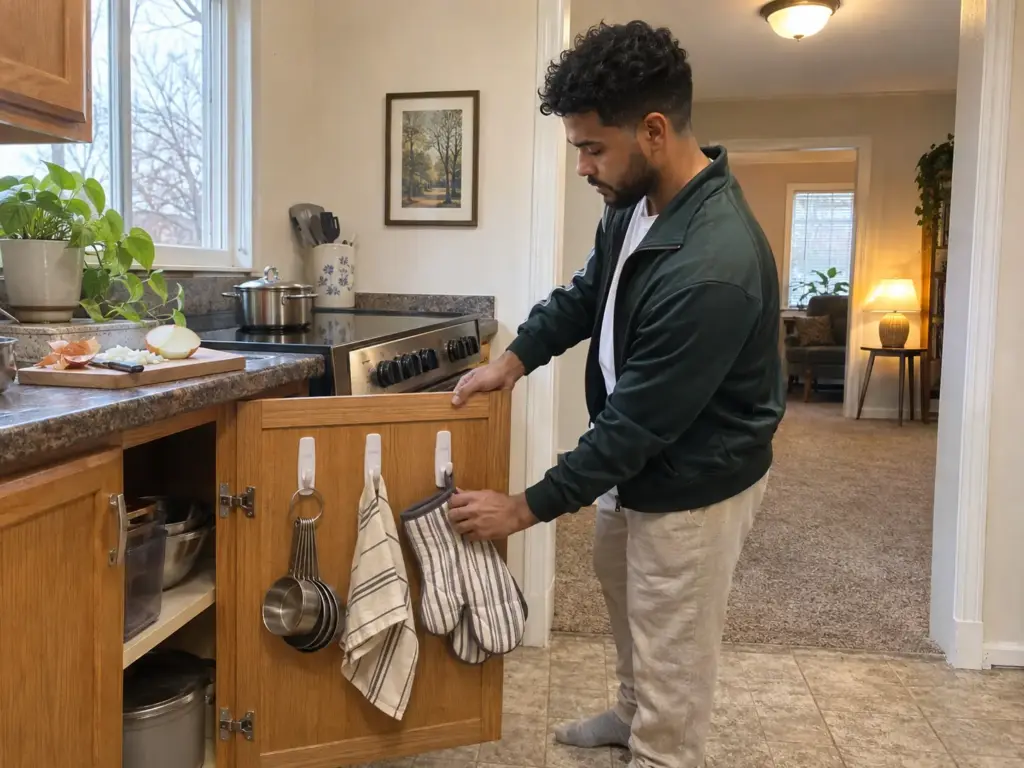
Oven mitts and pot holders within reach of the stove
Mitts pile up on the counter, collect splatter, and get shoved aside whenever the cutting board comes out. The base cabinet nearest the stove turns them into a one-step reach. Give each mitt its own hook so the pair doesn’t bunch against the door’s edge, and let them cool and dry before they go behind the door. A hook at the height your hand lands when you step away from the burner beats a neater spot that costs you a walk across the kitchen.
A light pot lid with a loop handle can hang beside the mitts, while a heavy cast-iron lid belongs on the shelf. Light kitchen utensils with a hang hole, a ladle or a spatula, can share the next hook if the pack’s limit covers the pair.
Foil, wrap and parchment boxes off the shelf
A full wrap box or foil box is the heaviest thing in this section, and the bulkiest. Two hooks side by side, set a box-width apart, carry it better than one, and the pack’s limit decides whether two are enough. If the box sits on the shelf without crowding the pots, leave it there and save the door for the things that have no shelf. Depth is the check: whatever hangs on the door pushes into the cabinet, so hold the box against the door and close it before committing.
Test a hook position with a loop of masking tape before the real strip goes on. Tape the hook where you think it belongs, hang the load, and swing the door open and shut twice. Moving a tape loop costs nothing; moving a pressed strip costs paint.
A second brand is worth one test on a single door before it goes anywhere else: FrogTape reMOVEables Medium Damage-Free Adhesive Hooks come as a clear six-pack, and they give you a comparison on your own paint. Choosing between hook types gets its own breakdown in how to pick a hook by what hangs on it, which this article leaves alone. And once a door is full, organizers that sit on the shelf instead of the door take the overflow.
Under-Sink and Cleaning-Tool Ideas That Free the Floor
The cleaning cabinet is where spray bottles lie on their sides and a broom leans until it slides. A basket on the cabinet floor with the bottles standing upright is the free fix and handles half of it. Strips handle the other half by lifting things off the floor altogether.
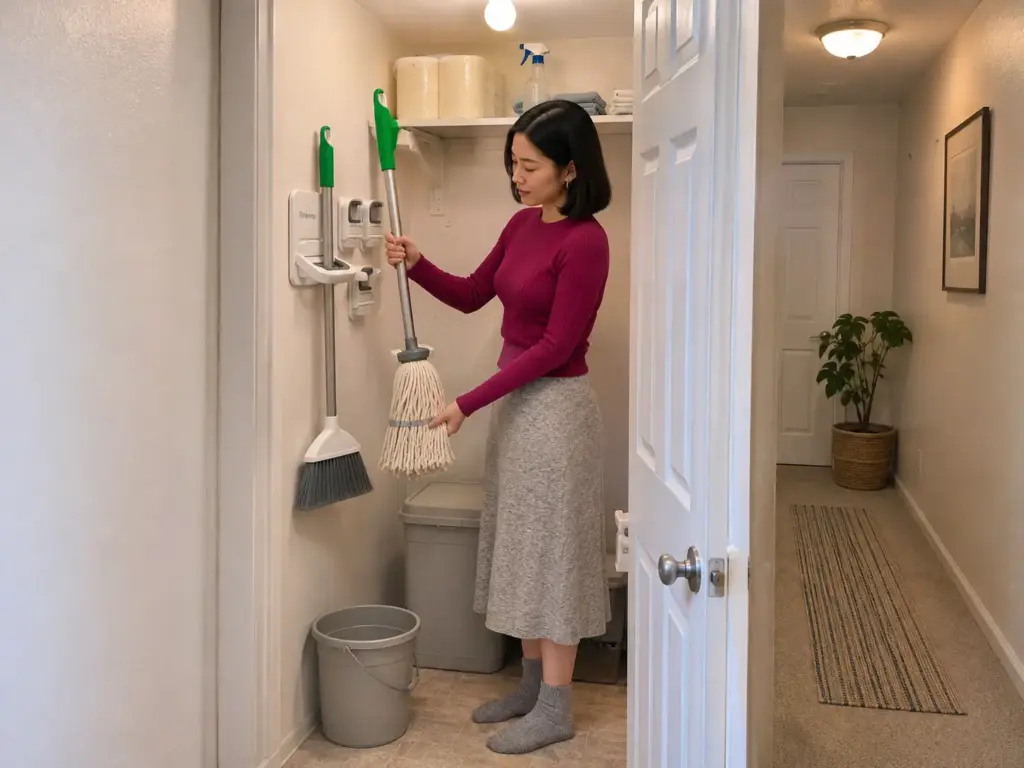
A broom and mop holder on the closet wall
A leaning broom needs only one bump to hit the floor, and a mop head left on the ground stays wet and smells. The Tinkeep 3pack Broom and Mop Holder grips the handles on a closet wall with no drilling, but it does go on with adhesive, so every wall rule in this article applies to it. The mop is the heavy end, and a damp one weighs more, so let it drain before it goes up. A mop with a full bucket is a different load entirely, and for that case there is what to do when the load is too heavy for adhesive.
Spray bottles hung off the cabinet door
A bottle hung by its trigger swings when the door opens, so the hook goes low on the door, where the swing stays small and the bottle stays clear of the shelf edge. Check the bottle’s weight against the number on the hook’s pack before it goes up, because a full one is heavier than it looks. Under sink cabinets stay damp, and a strip made for dry walls is the weak link there. The water-resistant strips in the bathroom section below are the better match for this spot.
Gloves and a sponge holder where the cabinet door shuts over them
Rubber gloves hung by the cuff, fingers down, drain instead of pooling on the cabinet floor. A small sponge holder with a tray keeps the sponge off the wet shelf and gives it air, and a second small hook on the same door can serve as a dish towel hook. The thing to watch is closure: wet gloves and a damp sponge shut inside a cabinet stay wet, so wring them out first and leave the door open for a minute. If a door never closes cleanly over them, the idea moves to the wall of the closet next to it.
Cord and Small-Appliance Ideas That Stop the Tangle
The corner behind the sofa or the desk is where five cables share one knot, and the slow cooker cord drapes off the counter like a trip wire. A few clips handle the cord management that shows.

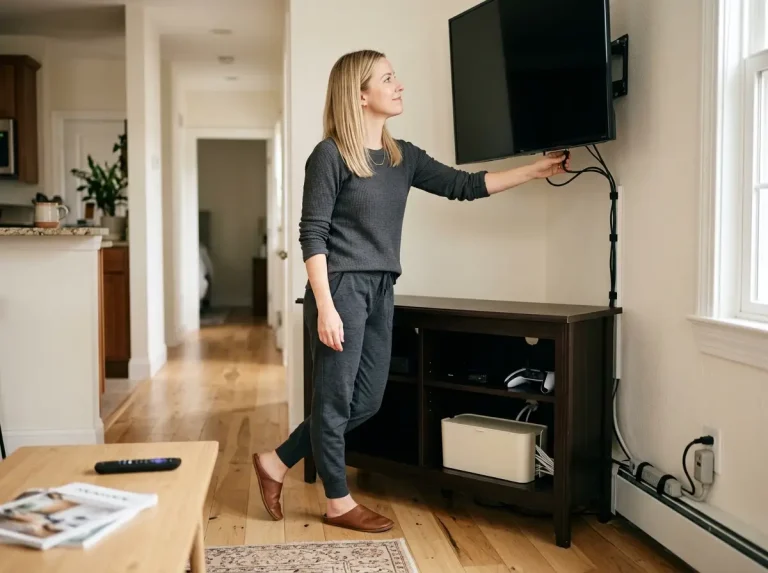
Cord clips along the back edge of a desk or media stand
A clip holds the cord’s weight, not the plug’s pull. Lay the cord in with a little slack, never stretched taut, because a taut cord tugs the strip off the surface a little more with every nudge of the furniture. Command Clear Cord Clips come as 13 clips with 16 strips, enough to run the back edge of a desk and still have strips left for a second spot. Clear clips disappear against pale wood and dark laminate alike.
For a media wall with a dozen cables, the clips only start the job, and the full cable plan for a TV wall shows the rest.
Lay a cord into its clip in a gentle curve, not a straight pull. The curve is the slack, and slack is what keeps the clip from peeling when the cord gets moved. Give each stretch of a long run its own clip, so no single strip carries the whole run.
The appliance cord held up off the counter
A cord that hangs off the counter edge gets snagged by a sleeve and yanked. A clip on the side of the cabinet next to the outlet holds the extra length up and out of the way. The rule for anything that heats: a cord clip is a holder, not a heat shield, so keep a hot appliance’s cord away from the heating part and away from the clip’s adhesive. If the cord can’t reach the clip without touching the hot surface, the appliance moves, not the cord.
Charging cables that stay at the bedside
The cable that falls behind the nightstand every night is the one worth taming. A clip on the back edge of the nightstand holds the end of the cable where your hand finds it in the dark. The free version is a binder clip from the drawer, clamped on the table edge with the cable threaded through the wire loops. Choose by what you see every day: the desk and the bedside cords deserve clips, and the tangle behind the TV that nobody opens can wait.
Entry, Bag and Bathroom Door Ideas That Carry More Than Keys
These are the heaviest everyday loads a strip is asked to hold: bags on the entry wall, coats on a door, a wet towel on the bathroom door. Weight and damp both matter here, and the pack’s printed limit stops being a suggestion.

Bags and hats on hooks beside the front door
The pile of bags on the floor by the front door gets built one drop at a time. The Command Large Utility Hooks 3-pack, with 21 hooks and 36 strips, is rated for 5 lb per hook, and a single full tote with a laptop in it can pass that. The heavy bag goes split across two hooks, one strap on each, or it stays off the wall. A strap puts the load straight down, which is the direction a strip is built for, so lift the strap up and off the hook instead of yanking the bag out sideways, which peels the strip.
Before a bag hook goes into daily use, hang the real bag on it and leave it for an evening where you can see it. A strip that is going to slip tends to do it slowly, and it is far better to watch it happen than to find the bag on the floor the next morning.
Towels and robes on the back of the bathroom door
A bathroom is the damp room: a wet towel adds water weight, and steam sits in the room after every shower. The strips sold for damp rooms are made for exactly this spot. The Command Water-Resistant Refill Strips come in a pack of 16 for hooks that live in a damp spot, so check that the strip size matches your hook before you order. A shower caddy hung from a hook is a heavier job than a towel, and the pack’s limit is the check.
Hang the towel flat and spread, not bunched, so it dries and doesn’t hold water against the strip. For the rest of the room, more bathroom ideas that leave the walls alone are in their own guide.
Keys and light hooks at eye level
Keys, a dog leash, a pair of sunglasses: none of these need the big hook. A light hook at eye level beside the door is enough, and a different brand works fine for it. The Black Metal Adhesive Wall Hooks six-pack is one option for that job, and the load rating on its listing is the number to read before you hang a leash on it. Mail and keys often share the same wall, and a key and mail spot that needs no holes sorts out what the hook can’t.
What a Strip Needs Before You Hang Anything on It
The hook that held for a day and then dropped the curtain, the rod and a flake of paint together did not fail on strength. It failed on one of three things: it was loaded too soon, it was on a surface the maker doesn’t list, or it carried more than one hook is rated for. All three are in 3M’s instructions, and they apply to every idea above.

The one-hour wait that decides whether it holds
3M’s rule is to press the strip, then wait one hour before hanging anything. The adhesive needs that hour to bond with the surface. A hook loaded early lets go, and when it lets go it takes the paint with it, which is the damage most renters worry about and the one the wait prevents.
The wait is easy to skip because the hook looks stuck. A strip that has been pressed for a few minutes feels firm to the touch and still has no business holding a tote. The practical way to live with this rule: press every strip for the whole project in one sitting, do something else for an hour, then come back and hang everything.
Press all the strips in the evening, hang the loads the next morning. The overnight gap turns the one-hour rule into something you never have to remember, and a strip that sat undisturbed is the one that holds.
Which surfaces the maker lists, and which walls to skip
3M lists smooth surfaces: solid and hollow painted walls, tiles, glass and wood. A textured wall isn’t on that list, and neither is wallpaper, so a rough surface gets a single test strip somewhere hidden, and a rental covered in wallpaper gets the landlord’s yes before anything is pressed on.
Freshly painted walls and flaking paint are the other trouble spots. A strip pulls on the weakest layer under it, so if the paint already lifts at a corner, the strip takes that layer with it. Check the paint with a fingernail in a hidden spot, not after the hook has dropped.
Matching the load to the number on the pack
The load limit is printed on the pack, and it applies per hook. One Command Large Utility Hook is rated at 5 lb; a different pack carries a different number, and numbers from different packs don’t add up.
A curtain rod with a lined curtain is a different load from a single bag, and the rod and curtain together can easily outweigh what one hook is rated for. The 7.2 kg figure on 3M’s page belongs to its picture-hanging strips and the frame size listed there, not to a hook under a rod. If a rod is the plan, a tension rod holds a curtain without a strip and takes the question off the wall.
Direction counts as much as weight. A load that pulls straight down is what a strip is built for, and levering a hook sideways peels it from the edge. Anything that gets pulled out and away from the wall, a heavy coat yanked off in a rush, takes the strip with it a little at a time.
The last check for a renter-friendly setup sits outside the pack: the lease. Some rentals allow strips and some don’t, and the lease has the last word on a row of hooks along the entry wall. Comparing which adhesive options cause the least damage at move-out is worth the few minutes before a whole wall gets hooks.
Where to Keep Spare Strips and How to Take One Down
The plastic bag of hooks from two moves ago, the box in the junk drawer, last year’s strips that no longer stick: spare strips are a small organization problem that goes unnoticed until a hook falls. And when it is time to take a strip off the wall, one wrong direction costs paint.

One labeled bin for every spare strip and hook
This is an organization fix, not a chemistry one. Leftover hooks and strips thrown loose into a bag get lost, mixed with other hardware, and found when they are needed and don’t work. Keep each pack in its own original packaging, put all the packs in one clear bin with a label from a label maker or a strip of tape, and store the bin in the closet where repairs happen. Seasonal hooks, the holiday set, live with the seasonal box so they turn up at the right time.
Strips that were stored loose are the first suspects when a hook fails. So test one on a hidden spot, or buy a fresh pack for the heavy hooks near the door. A labeled shoebox or a food-storage tub does the job of a storage bin.
Pulling the tab straight down
3M’s rule for how to remove a strip is to pull the tab straight down, slowly. Down means along the wall; out and away is how paint comes off in a flake. Hold the hook steady with your other hand and let the strip stretch as it comes. A hook that feels stuck gets the same slow downward pull, not a yank, and not a lever from underneath.
Re-hanging a hook with a fresh strip
The hook itself can be reused. What can’t be reused is a used strip, so don’t press one back on and trust it. Peel the old strip off the hook’s back, wipe the surface, and fit a fresh one.
This is where the bin pays off, since the fresh strip is already in the labeled pack, not lost in a bag. When the whole kit is sorted, more ways to reclaim wasted wall and corner space pick up what strips can’t.
The Hour You Wait Is What Makes It Hold
What carries these twelve ideas is a short list of habits: press, wait, match the hook to the pack’s number, pull down and slowly, and keep the spares where you can find them. The ideas change from room to room, but those habits stay the same. A strip on a smooth painted wall that waited its hour and carries less than its limit will outlast the one that skipped any of them.
Look at the heavy hooks again after the first month, especially the ones on a door that opens every day. A hook that has shifted, or an edge that has started to lift, is the early signal, and a fresh strip then costs far less than a floor of fallen bags.
Tonight, tip the loose strips into a labeled shoebox, press one hook on the inside of a cabinet door, and leave it alone for an hour. Hang the lightest thing you own on it, and notice whether it holds a full week of opening and closing before you add anything heavier.
Frequently Asked Questions
01How long do you have to wait before hanging something on a Command hook?
Wait one hour after pressing the strip, which is the maker’s rule. The adhesive needs that time to bond. Hanging a load earlier is how a hook lets go and takes paint with it.
02Can you use Command strips on painted walls?
Yes, painted walls are on the smooth surfaces 3M lists, along with tile, glass and wood. Textured walls and wallpaper are not on that list, so test one strip in a hidden spot first.
03How do you take a Command strip off without damaging the wall?
Pull the tab straight down, slowly, along the wall. Pulling out and away from the wall is how paint comes off. A stuck hook gets the same slow downward pull, never a yank.
04How do you store leftover Command hooks so they still stick?
Keep each pack in its original packaging and put every pack in one clear, labeled bin. A loose bag is where strips get lost and mixed up. If a stored strip is in doubt, test it on a hidden spot.
05How much weight can a Command hook hold?
Read the limit printed on that pack, because it differs by hook. The Command Large Utility Hooks are rated at 5 lb per hook. Picture-hanging strips are a separate system with their own limits.
Disclaimer: ClutterlessNest is a participant in the Amazon Services LLC Associates Program. As an Amazon Associate we earn from qualifying purchases. This article may contain affiliate links — if you buy through them, we may earn a small commission at no extra cost to you. We only recommend products we have tested or genuinely believe in.